I decided to understitch all the elements, and then concentrate on the rose, stem and leaves.
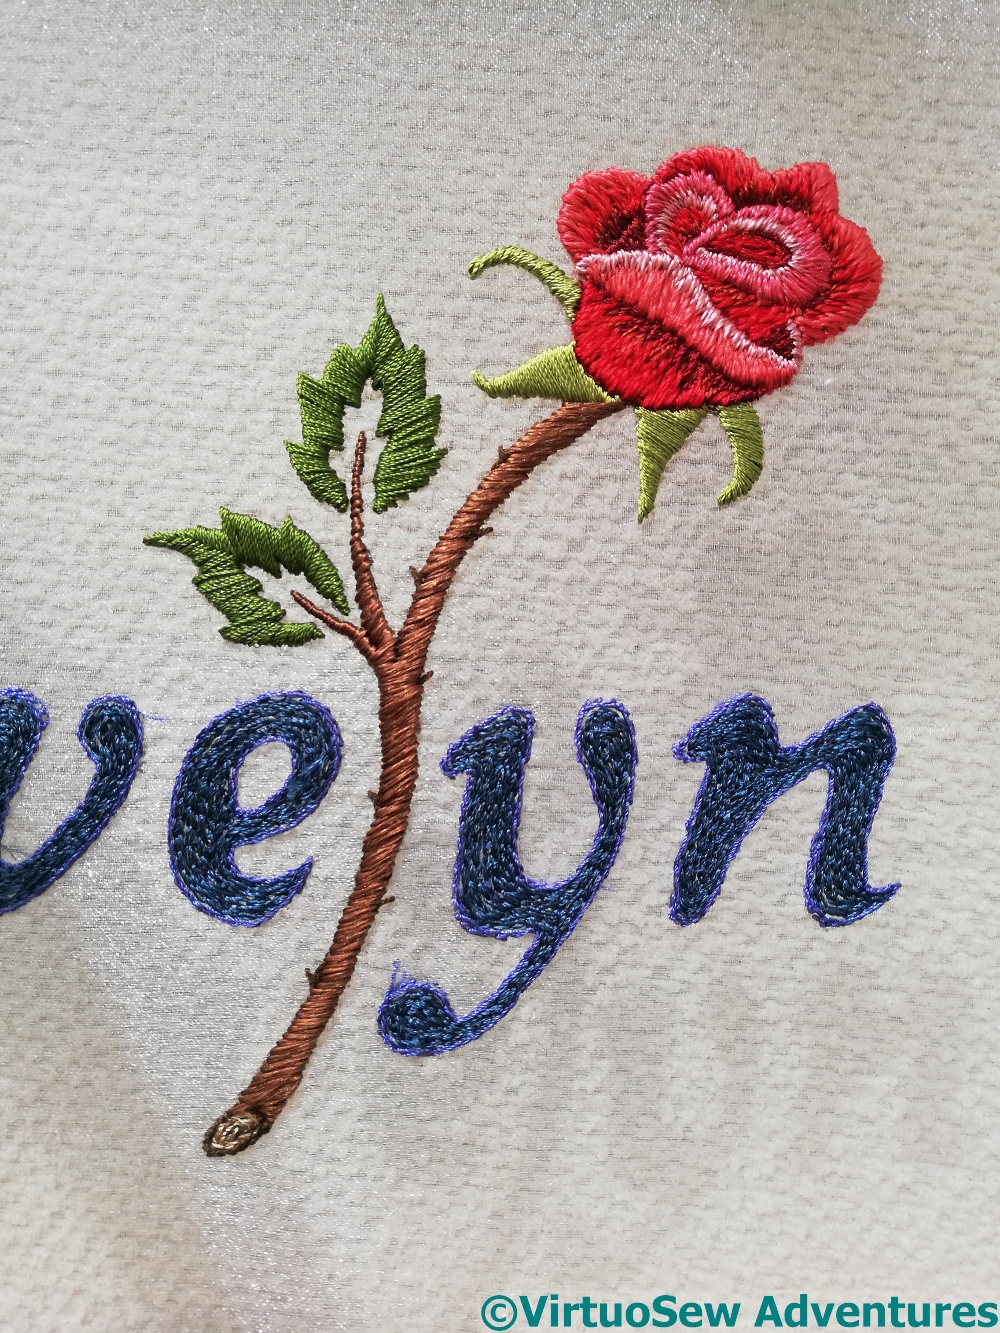
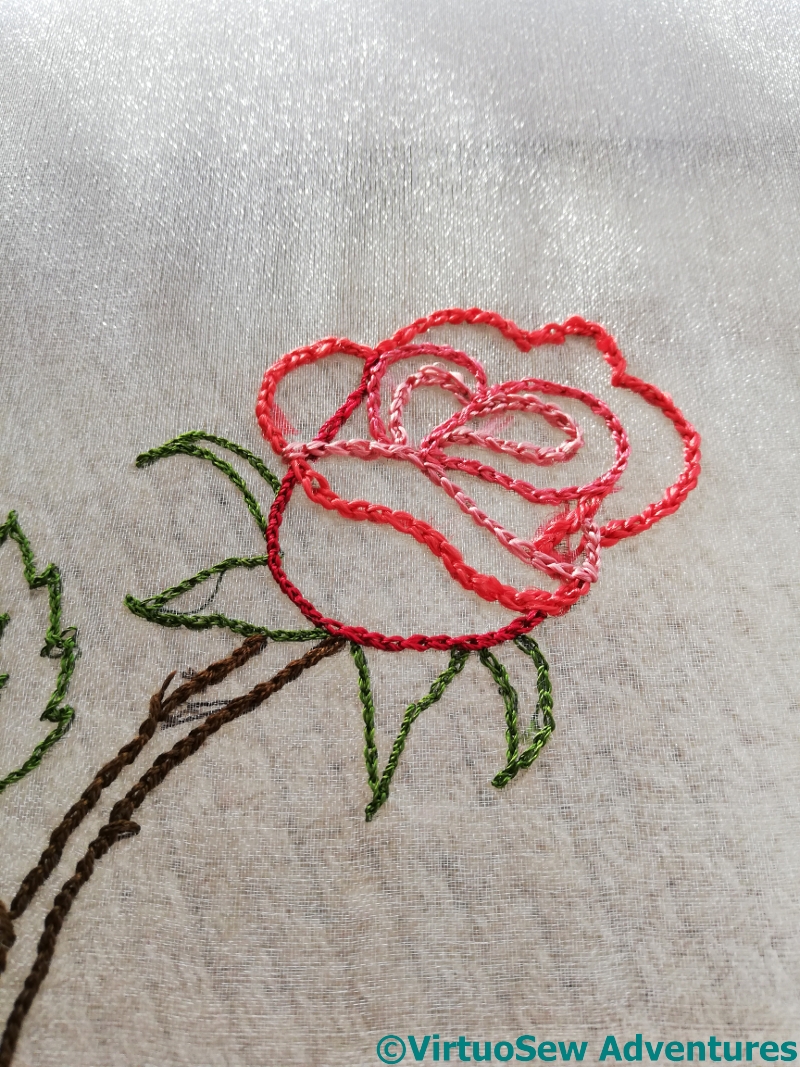
However, in this photo, you can see not only the finished rose on its stem, but also the understitched lettering, and the beginning of the effect I want, with the sunlight casting a shadow through the gauze to the surface beneath.
Then I had to decide how to stitch the top layer of the lettering.
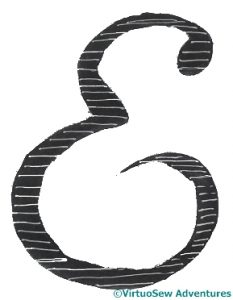
Horizontal Trial
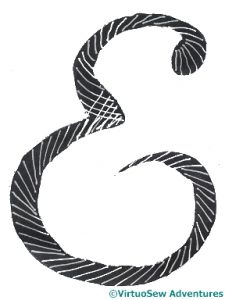
Slanting Trial
I took a photocopy of my painted design in black and white, printed it out twice, fished out a white gel pen, and began to experiment with stitch direction. I decided that the constantly changing angles of the slanting version would end up terribly “busy”.
So, horizontal it is, then. And I’m using Japanese Flat Silk, which at least makes the satin stitch easier to make work!
And while you think about how that is going to go – Episode Nine of SlowTVStitchery is now up, in which the first edge is reached, and it is agreed that the sight of colours against gold is worth getting up for!! Happy watching, happy stitching, and stay safe.
More progress on SlowTVStitchery – Episode Eight is now up. It contains intimations of dilemmas to come… Enjoy!
View Of Lining
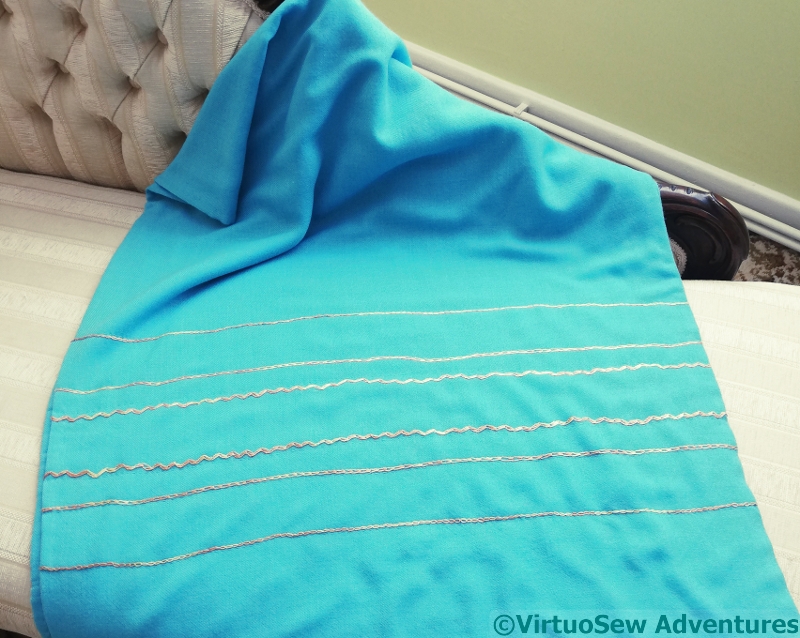
After washing the pashmina for the lining several times (it dyed the water bright turquoise the first three times at least, with no discernible fading in the fabric), ironing both of them, and pinning them together with safety pins, I settled down with my turquoise silk thread and ran simple running stitch quilting along all the gold lines of the design. This was easiest to do, I found, by cutting the thread to a little over the width of the pashmina and starting in the middle of both the thread and the shawl. Once the main lines were in place, I went back to the polychrome band and added the extra lines of stitching to delineate the frame.
Gold Stitch Band
It’s not easy to see, although I’ve done my best with this photo, but I’ve worked several rows of variegated golden lines across the pashmina on the otherwise undecorated end. I felt, when I finished the polychrome band that the whole thing looked a little unbalanced, and needed something to prevent the impression of something just fading out. I used Wavy Chain, Shell Chain, and Cable Chain, which are used on the other end, too.
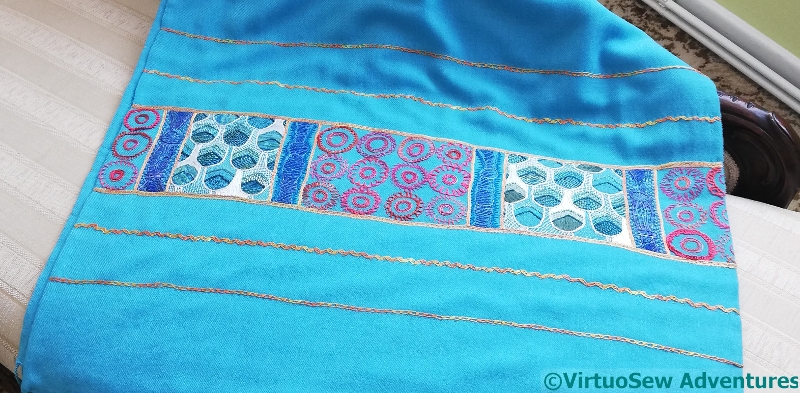
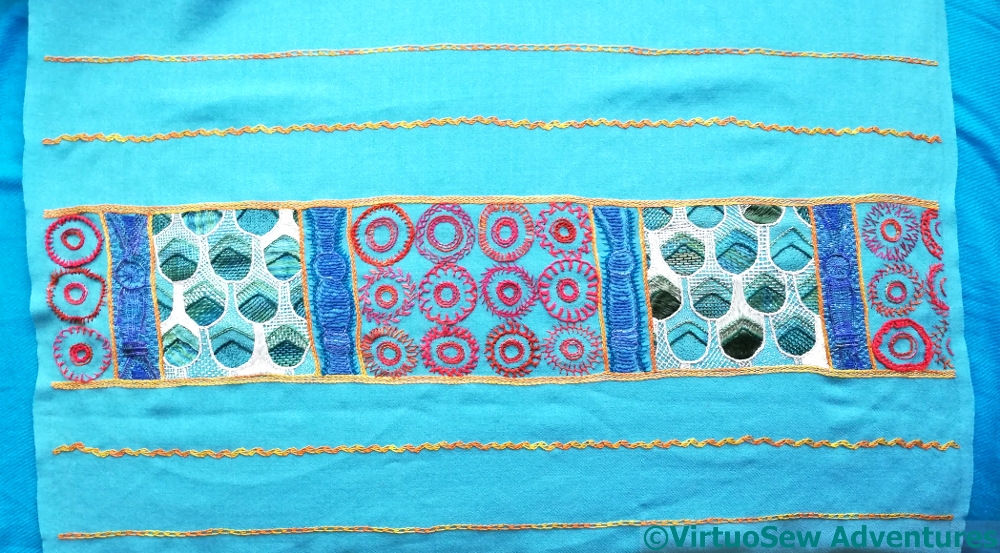
Polychrome Band Laid Out
And here is the polychrome band. You can see that the proportions aren’t quite perfect, but it is very much in the spirit of the StitchOff that the pashmina was originally bought for, in that it is intended to be worn and enjoyed, not stuck up on a wall. It wasn’t quick to do, but that is the fault of my own talent for over complication!
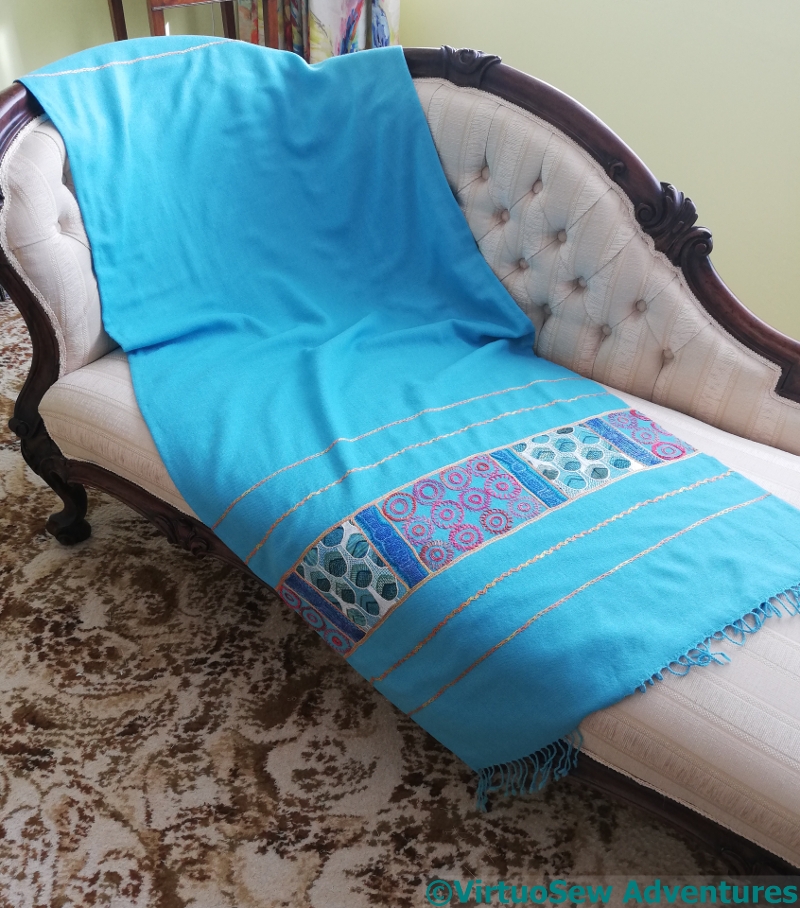
Nefertiti Shawl Finished
At long last, the Nefertiti Shawl is finished and lined, the lining has been controlled with lines of stitching, and the whole thing has been pressed. It should be seriously cosy – the lining is another cashmere pashmina, and it clings slightly as I wrap it around myself. It’s not an easy piece to photograph, hence the languorous drape over the sofa!
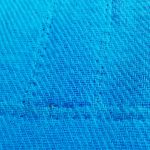
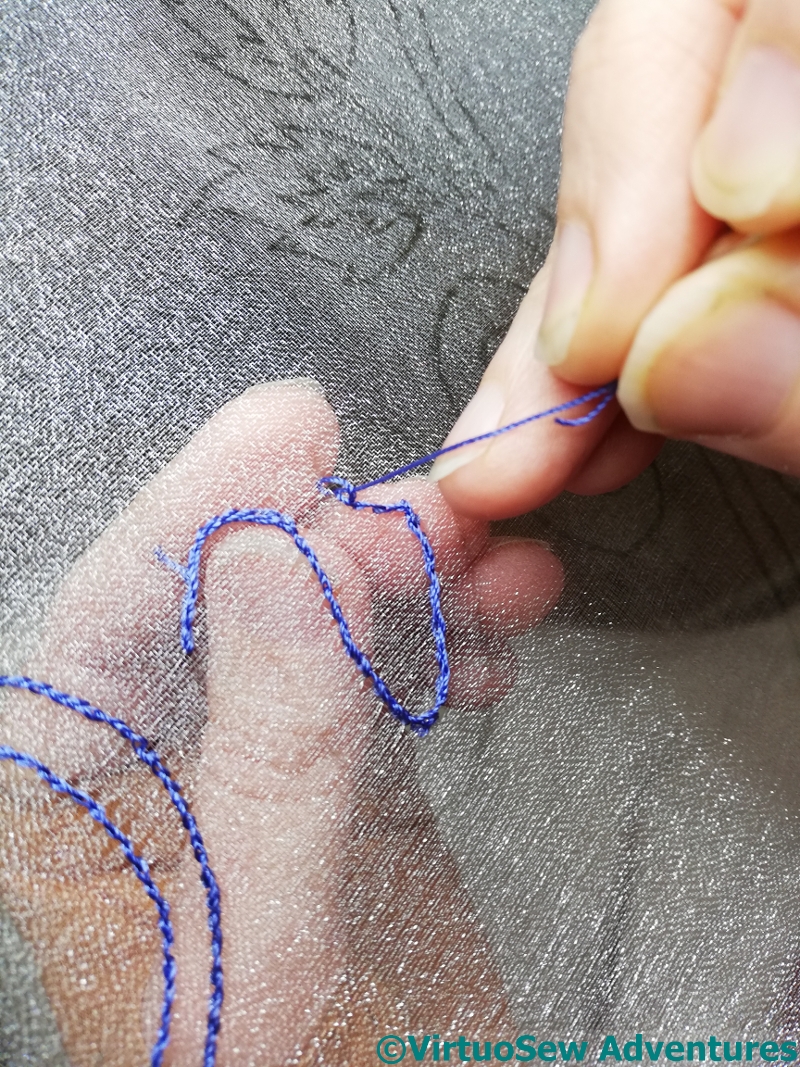
I found a gauze with a slight glint to it, stretched it on my frame and drew the design on to it. And at this point, the primary challenge I was going to face made itself felt – finding the angle from which to see the lines on the fabric, so that I could do the stitching. Add in the glint on the fabric, and sometimes I could see the lines, sometimes I could see the fabric, and sometimes I wasn’t sure I could see either… I knew it would be this difficult, by the way, but I thought the end result would be worth it!
Glint On Fabric
The stitching is going to be very simple, mainly satin stitch (yes, I know!) because the main characteristic I want here is the magical effect of the embroidery floating above the backing surface.
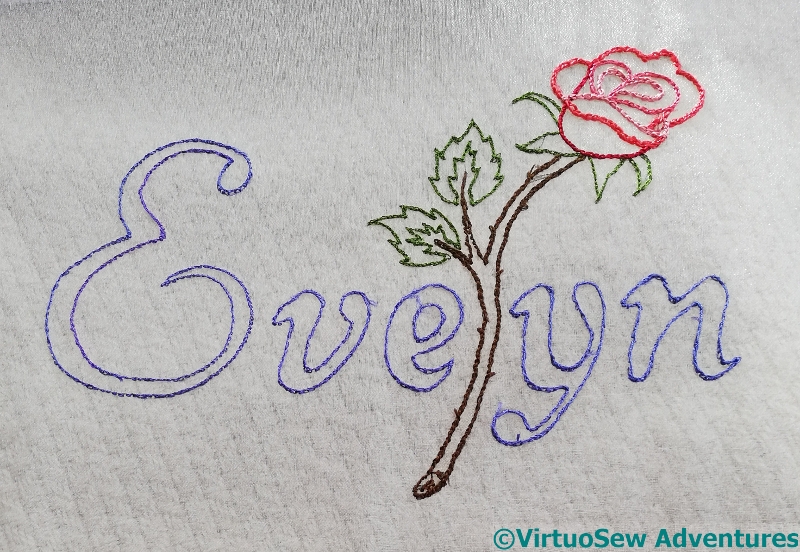
Obviously, the first thing to do was to outline every element. I’m using a mixture of silk thread, some vintage, and some from Thistle Threads courses.
Evelyn Outlined
So here you are – all outlined, and the thorns already in place on the stem. You can see the fabric I have over my worktable through the gauze in this picture, and you can see that glint in the sunshine as well.
The next episode of SlowTV Stitchery – Episode Seven – is now up. It explains why “Slow TV Stitchery” and offers memories of an astronaut. I hope you enjoy it.
Earlier this year a dear friend and his wife produced a baby girl, who they’ve named Evelyn Rose. We were, of course, thrilled for them, and sent many congratulations, and even managed to speak to them (they’re in a different time zone). During that conversation, they said, “We love what you do, and we’d love you to do something for Evelyn!”.
Design Sketch
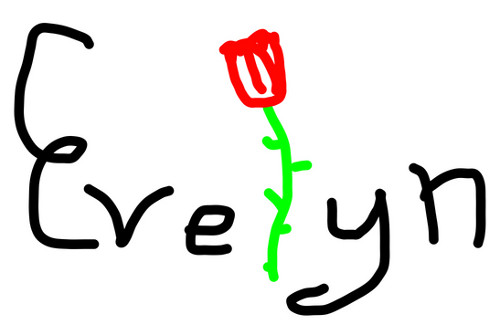
Well, I didn’t have another commission looming, and the Faience Necklace wasn’t framed up ready to go yet, so that fell very pat. I asked what they had in mind, and this is the sketch that came back.
Painted Roses
That gave us a lot to think and talk about. I played with a variety of typefaces, and finally settled on a cursive style. Then I thought about roses. My first thought was stylised canal art roses, but they never have stems, so I thought some more. Unusually for me, at this point I got out my paints, found some photos of roses, and started experimenting with simplifying them and really understanding the forms of them and the way the petals fold.
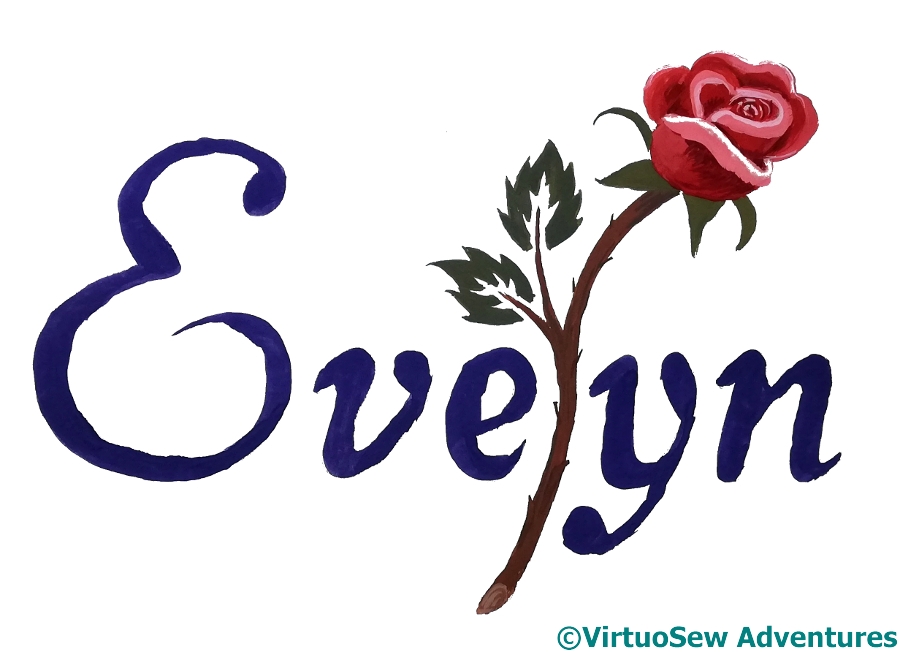
Design for Evelyn Rose
I ended up with this basic design – the name in an elegant cursive font, and the “l” replaced by a single stemmed half-open rose. Then I thought of the embroidery on gauze I experimented with a few years ago. It seemed to me that this was a perfect opportunity to play with this technique, and it has the advantage of producing something sufficiently grown up that in 20 years time, Evelyn probably won’t be embarrassed to have it on show…
Episode Six of “Slow TV Stitchery” is now up. Please take a look, and ask me any questions that occur to you…
As you can see, I didn’t perfectly centre my sketch of the design when I put it on the pashmina, but once it’s swept around my shoulders, I doubt very much whether anyone will notice!
I’ve also put a narrower set of gold lines on the other end. I didn’t want to work the whole thing again, but I felt that a little extra colour would nevertheless help to make the whole this look a bit more thought-out. Or at least, more completely evolved!
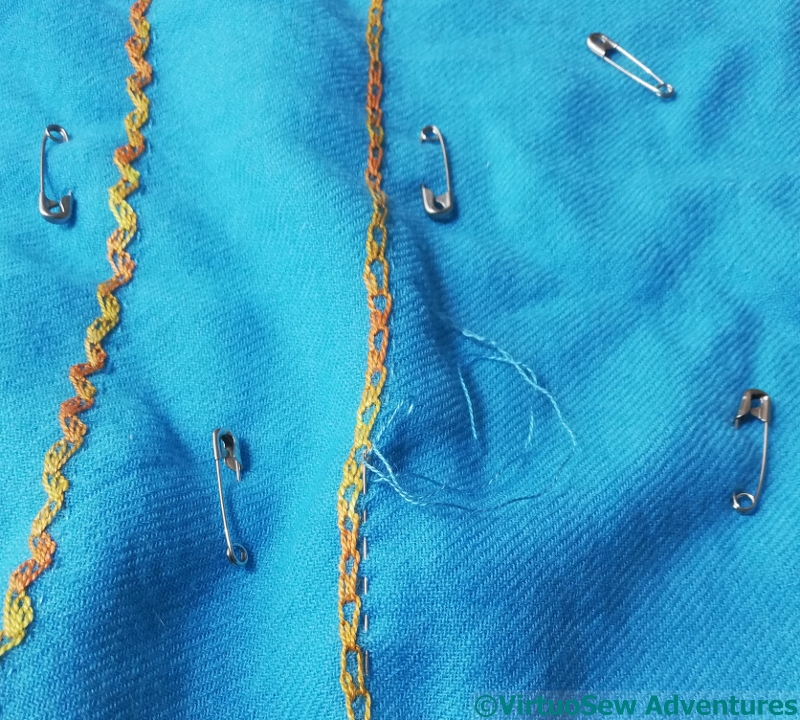
Copy The Quilters
However, I did decide that in the interests of not spending all my time on maintenance, I was going to line it, and I found another turquoise blue pashmina with which to do so. It is slightly narrower (so I turned in the selvedges of the embroidered one to meet it), slightly longer, and doesn’t have a fringe. So I could line just the fabric length, and cut off the excess.
How to control the fabrics while I was doing so gave me a little trouble, until I remembered seeing quilters use safety pins to “tack” fabrics together. That worked beautifully!
I spent a couple of evenings working running lines beside each of the gold lines. Just straight running stitch – in the case of Wavy Chain, I simply offset the line a little, rather than trying to follow the zigzags.
There is another episode of SlowTV Stitchery up – Episode Three. I’ve also done two shorts, one introducing the Dreams of Amarna project as a whole, and one, for the Amarna Family Group in particular. Please ask me any questions you like, either here in the comments, or by email, and I will try to answer them in one of the later episodes. It might take a while, though, because people have been stacking up questions like cordwood!
Now, back to the Faience Necklace, which I’ve neglected… The first elements I decided to do were among the simplest – the three palm leaves.
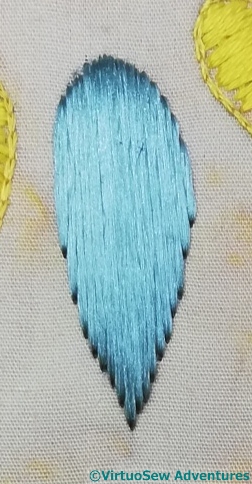
Palm Leaf Stage One
First layer, as I said, is plain satin stitch in flat silk. Satin stitch makes me nervous, but flat silk spreads and blends together, which makes it about as easy as it can be for me.
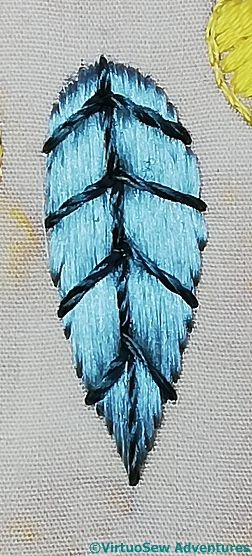
Palm Leaf Stage Two
The next stage was to hand-twist a two ply perlé -type thread to stitch the veins, using straight stitches. In this case, I used two of the strands of filaments for each ply, and I tried not to over-twist the final assembly.
That made for a lovely thread, with a bit of body and “lift”. A pleasure to use!
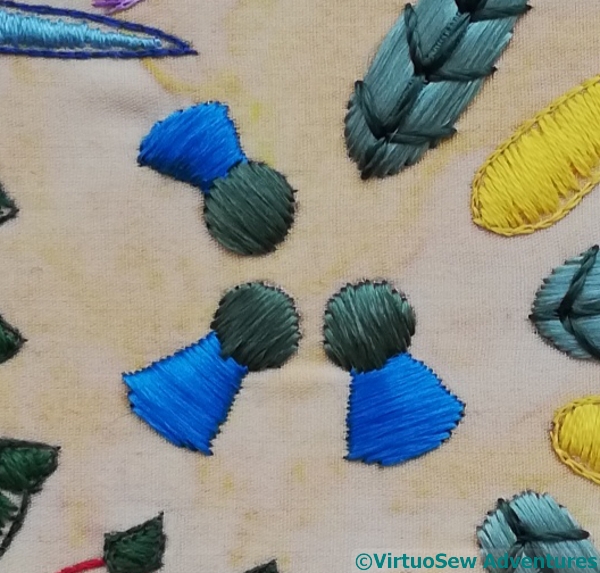
Cornflowers – first stage
If I have correctly interpreted the description that Mary Chubb typed out on that first afternoon, when she came back from her epiphany in the cellar, this shape was described as a cornflower, so I went with my brightest blue, and the middle greyish-green shade for the calyx.
You will notice that the stitching on the two sections is at right angles one to the other. I realise that the stitching on the “petals” is not going in the obvious correct direction, but wait – there’s more…!
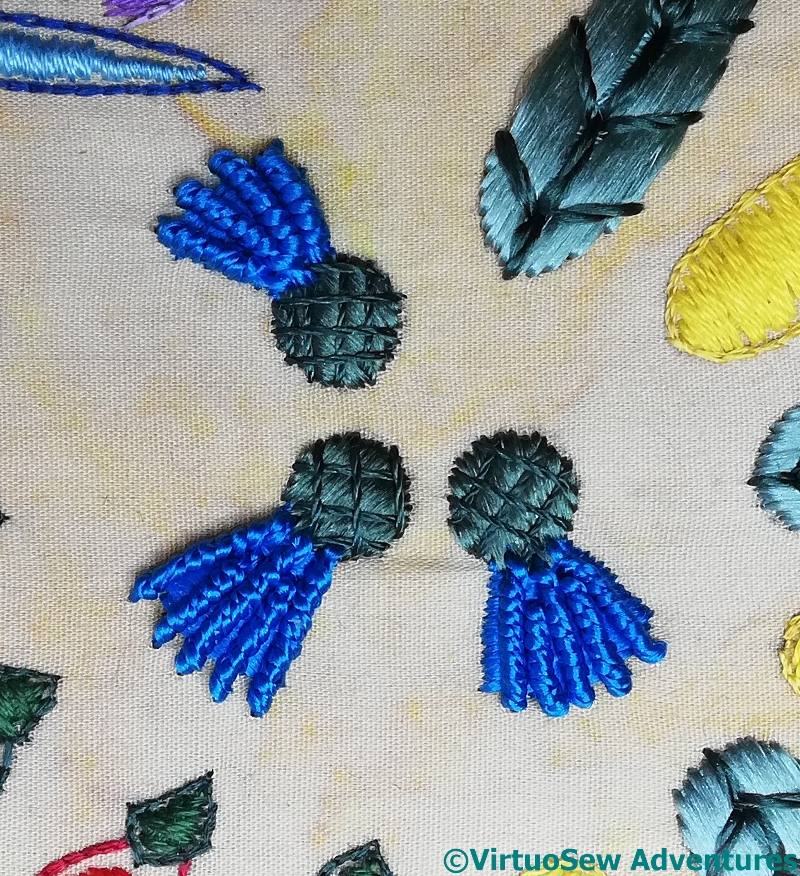
Cornflowers – Second Stage
Quite a lot more, in fact.
First, trellis couching on the calyx, using a fine 2-ply thread twisted using a half-strand of flat silk for each ply, and twisted as tightly as I could manage without snarls or tangles.
Then, using the bright blue, I twisted another 2-ply thread, this time using three strands for each ply, and again, trying not to over-twist. Then I could use it to work some long bullion knots, creating the slightly fluffy effect of an opening flower.
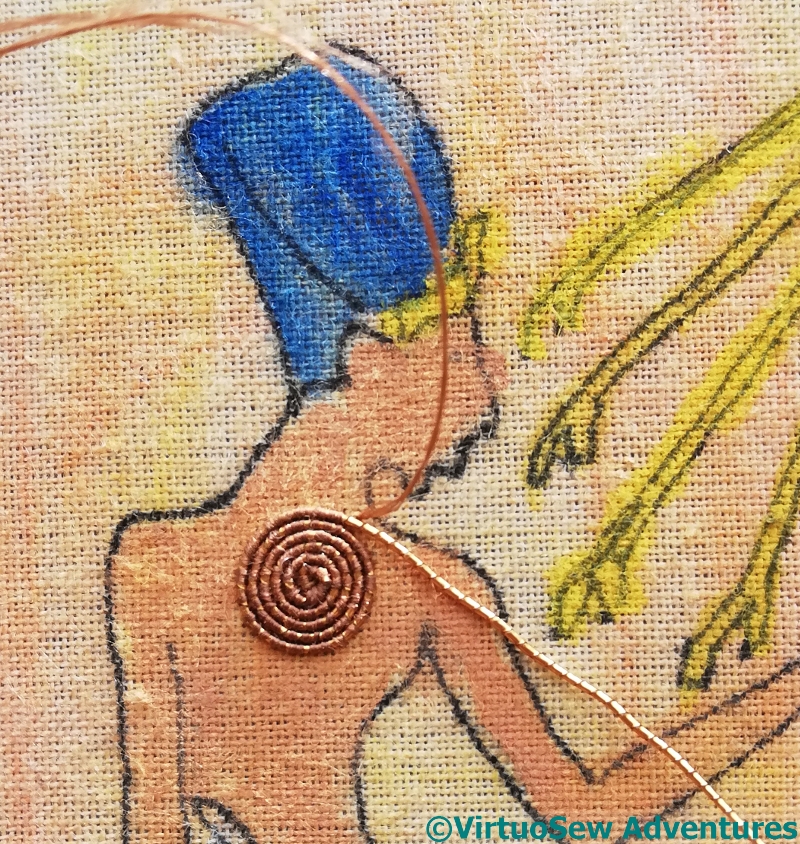
I’ve decided to work spiral Or Nué, as I did for Christus Natus Est, rather than the straight version I used for the Hittite Amulet. It creates more of a sense of movement, and that is very much in keeping with Amarna period art.
That, however, meant that I had to work out where to start the spiral, and as I mentioned on the first video, I had several options. The first was simply to start in the middle of the piece, but I felt that would either look very static, or, almost worse, create a rather 70s psychedelic vibe, not at all appropriate! The next three options could all be taken as emphasizing interpretations of the story of Akhenaten and Amarna. One of these was to centre the spiral in the centre of the Aten – but to be honest, for all Atenism is seen as one of the very earliest adventures in monotheism, that didn’t seem to me to reflect the stories that filter through Mary Chubb’s book.
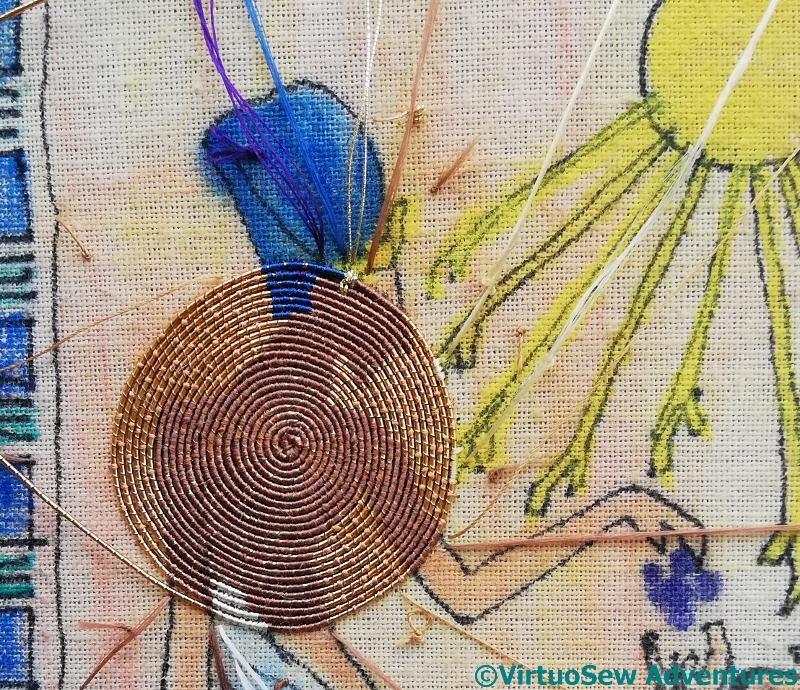
Progress in Week 2
So then I had a choice between centring the spiral on Akhenaten’s head, to reflect the idea that he espoused Atenism as a political ploy to break the power of the priests of Amun at Thebes, or centring it on his heart, to suggest that he believed he’d received a genuine religious revelation. You can see which I chose!
The second video is here, and will show you some of the progress to this point, as well as my musings as I stitch. I have a few more quandaries to sort out, but you’ll hear about those in the next episode, as I tackle them. As before, if you have any questions about what I’ve said in the video, or what I’ve done, please ask, and I will do my best to give you a sensible and useful response!
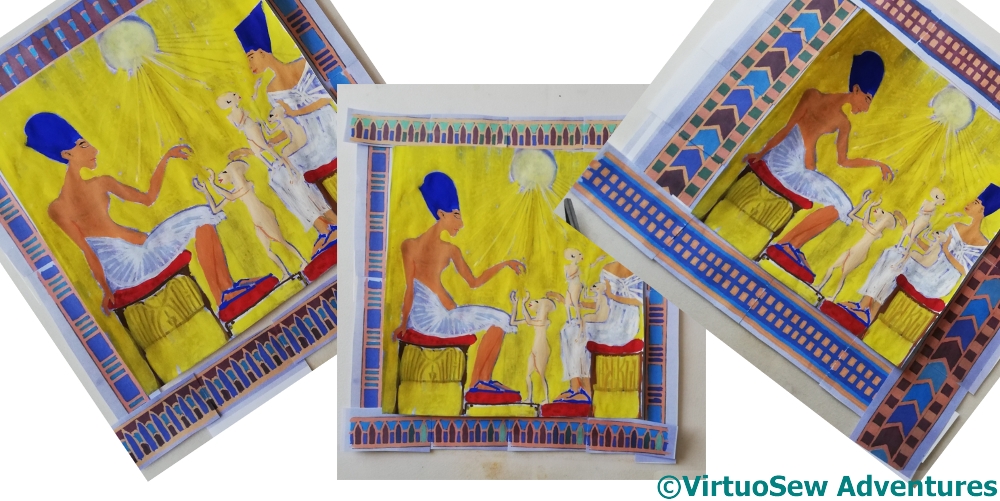
We left the design in a sort of semi-developed stage, and the next stage was to work out which border I was going to use…
Trying Borders
So, the one on the right – no, the borders are too wide, and given the size I’m going to do it, they’ll take away too much of the design area from the family group. I do like that arrowhead design, though. I wonder where else I could put it?
Amarna Family
I started playing around with the widths of the borders a bit more (computers are very useful for scaling fiddly things like this – more new tricks learned!), and ended up with something I think will work. You can see that there are some details I’ve not quite settled yet, and indeed, I think I’ve decided to reverse the colours in the vertical borders. The blocky colours come from having used the computer to produce a line drawing, and then coloured it in by computer as well.
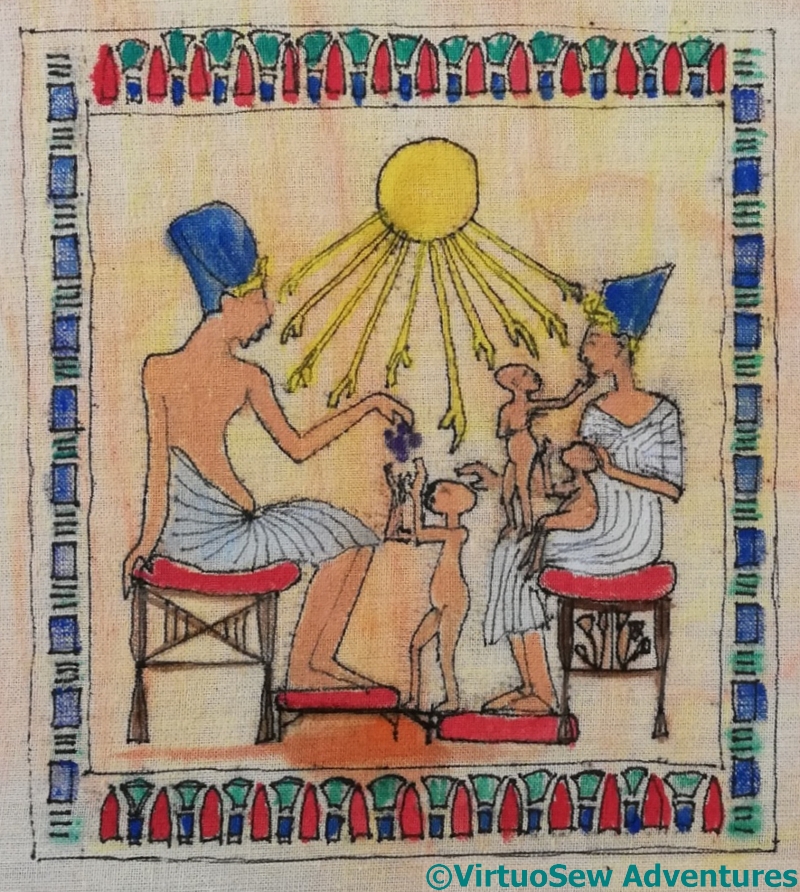
Fabric with design in place
The design is now transferred onto the calico, and coloured in with inktense blocks. Rather sloppily, I know, but none of this will be visible, and I will be tweaking the design as I go, in any case. This is just to give me a a better chance to keep track of which colour I’m intending to use where – that small section with Nefertiti and the two little girls on her lap was dismally confusing before I painted it!
I have begun to stitch, and just as I promised (threatened?), I’ve been recording my progress, and uploaded the first video to: https://vimeo.com/402311907. It’s about twenty minutes long, spliced together from several files, because my camera kept switching off. I did say it would be a learning experience!
I hope it will be interesting, and maybe entertaining, for you all!
The eagle-eyed will have noticed that I now have a Ko-fi account. I’ve been meaning to do that for a while, but the current situation has given me plenty of time in which to do so. At the moment, the hope is that any “coffees” will help with the costs of running this blog, but in the next couple of years, I hope they could also help with venue costs to hold an exhibition of “Dreams of Amarna” embroidery.
I’m going to try to learn a few new tricks while we all need to keep safe at home, trying to slow the spread of the coronavirus, and one of them relates to this project. It occurred to me that people may need something gentle to watch, so I’m going to try to work out how to do little videos of the stitching. So, health permitting, watch this space…!
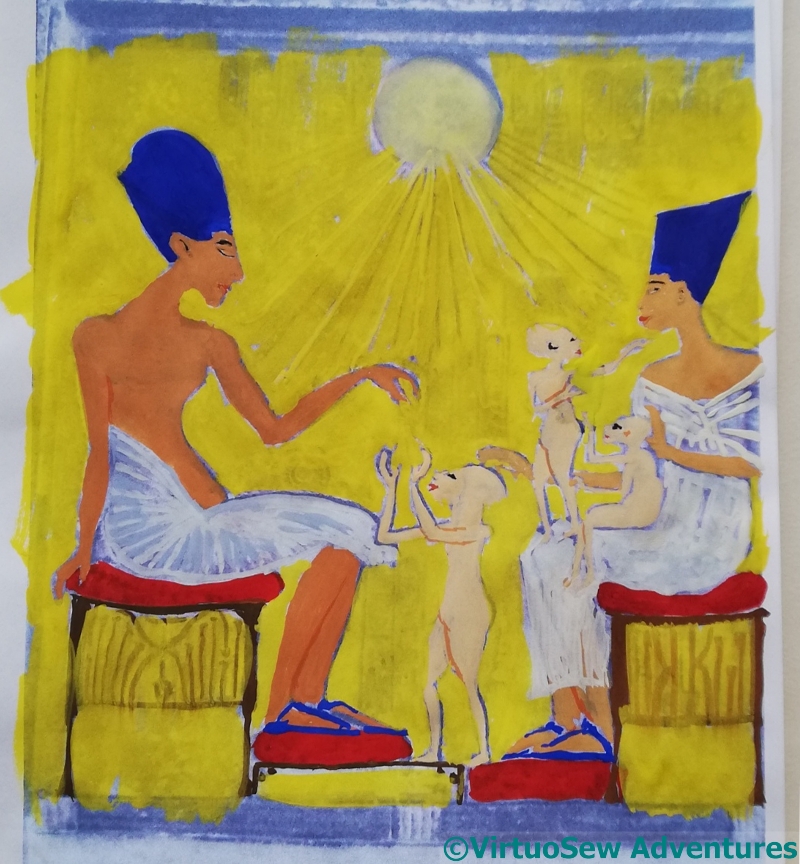
Version 1
Version 2
Version 3
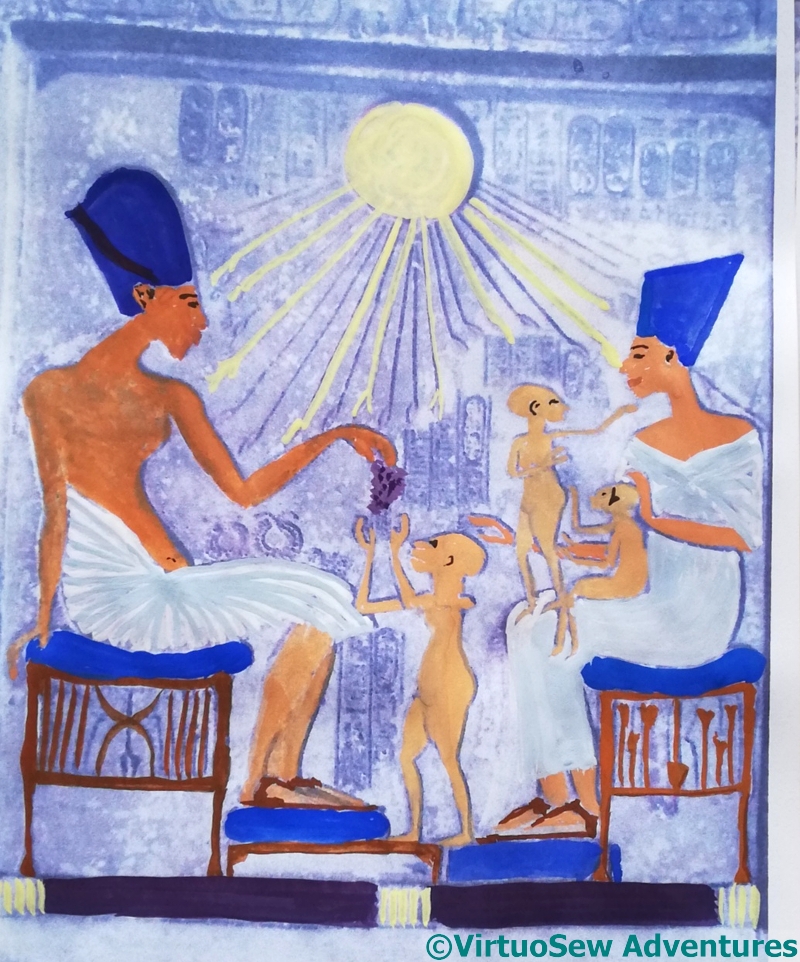
Colour experiments for the Amarna Family Group
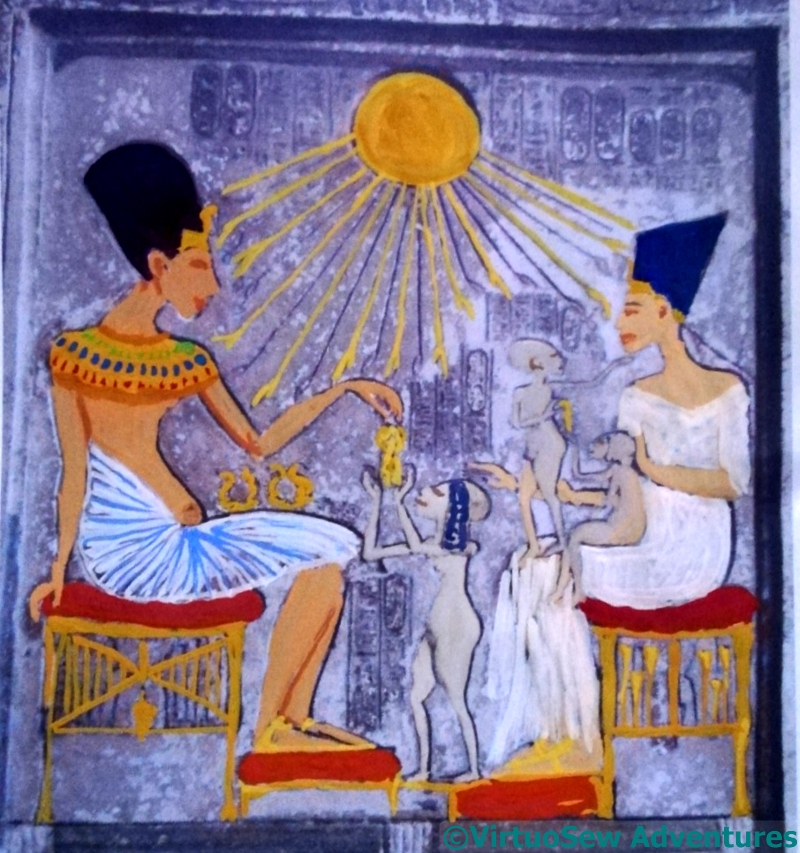
I had thought that once I’d done the Faience Necklace, and finished the Hunting Cat Fresco, that would be all for Dreams of Amarna, but then it occurred to me that the informality and intimacy of the depictions of the Royal Family in Amarna-period art was one of the reasons it has caught and held our attention. Mary Chubb describes the scene depicted on this stele in her book (there are several broadly similar scenes), and it came to my mind in conjunction with the bejewelled golden chair in Tutankhamun’s tomb which shows him with his wife in a similarly informal pose.
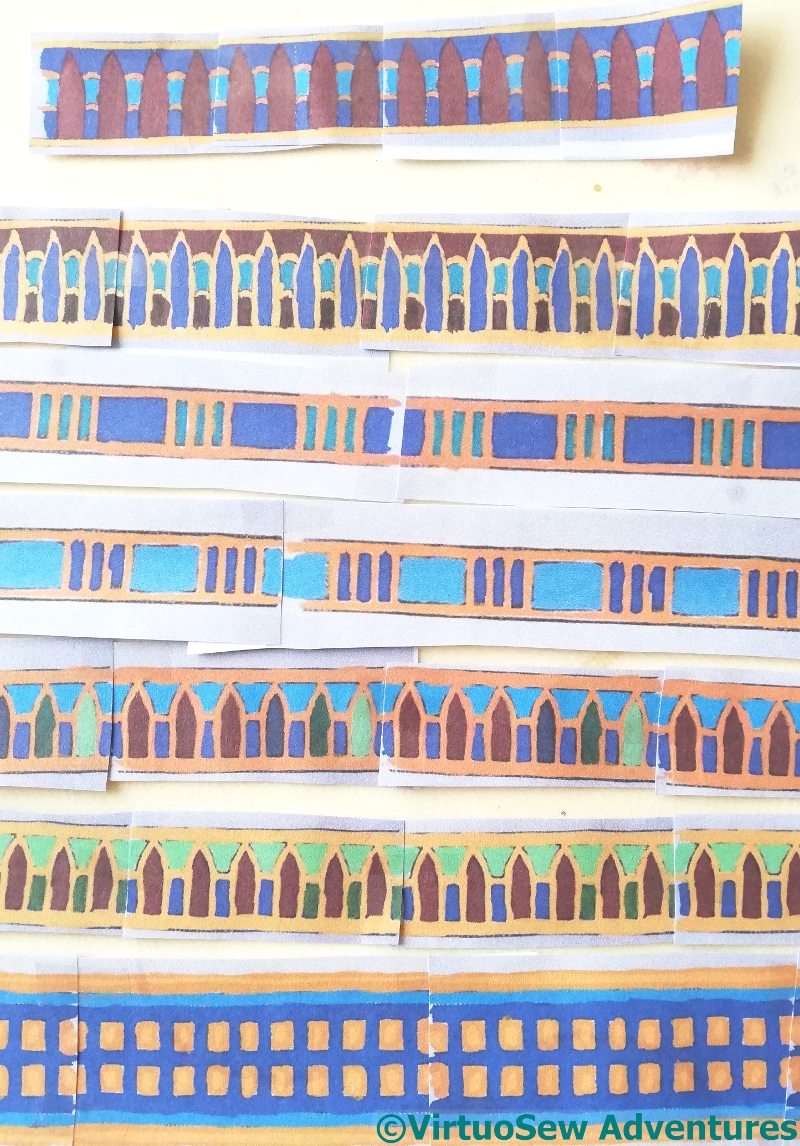
A variety of Egyptian border patterns being experimented with..
So I’m going to work it in or nué. I’ve been playing with my paints and some prints of the stele, trying to find a satisfying arrangement of colours, and work out what I’m not going to include – for instance, the hieroglyphs, at least half the rays of the Aten sun disc, and the gold torques in Akhenaten’s lap. I’m struggling a little with colourings, because the grey background of the print rewards the use of yellow (/gold) whereas on the background of gold used for or nué that colour becomes insignificant.
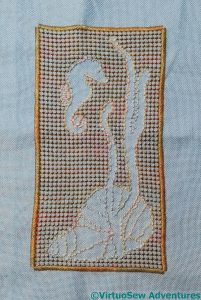
I started this traycloth years ago, largely to experiment with the pulled work stitch I used as the background of the decorative panel.
The idea was to have a sandy background against which the shells, seaweed, and seahorse would be set, and although I enjoyed doing it, it isn’t the most successful of my embroidered experiments. It feels a bit lacklustre, but at the same time, I can’t say I’ve been filled with enthusiasm by the idea of doing anything substantial with it.
While I thought about the details, to see whether I could find something that would work, I hemstitched around the edge, so I will have a useable, if not enchanting, traycloth.
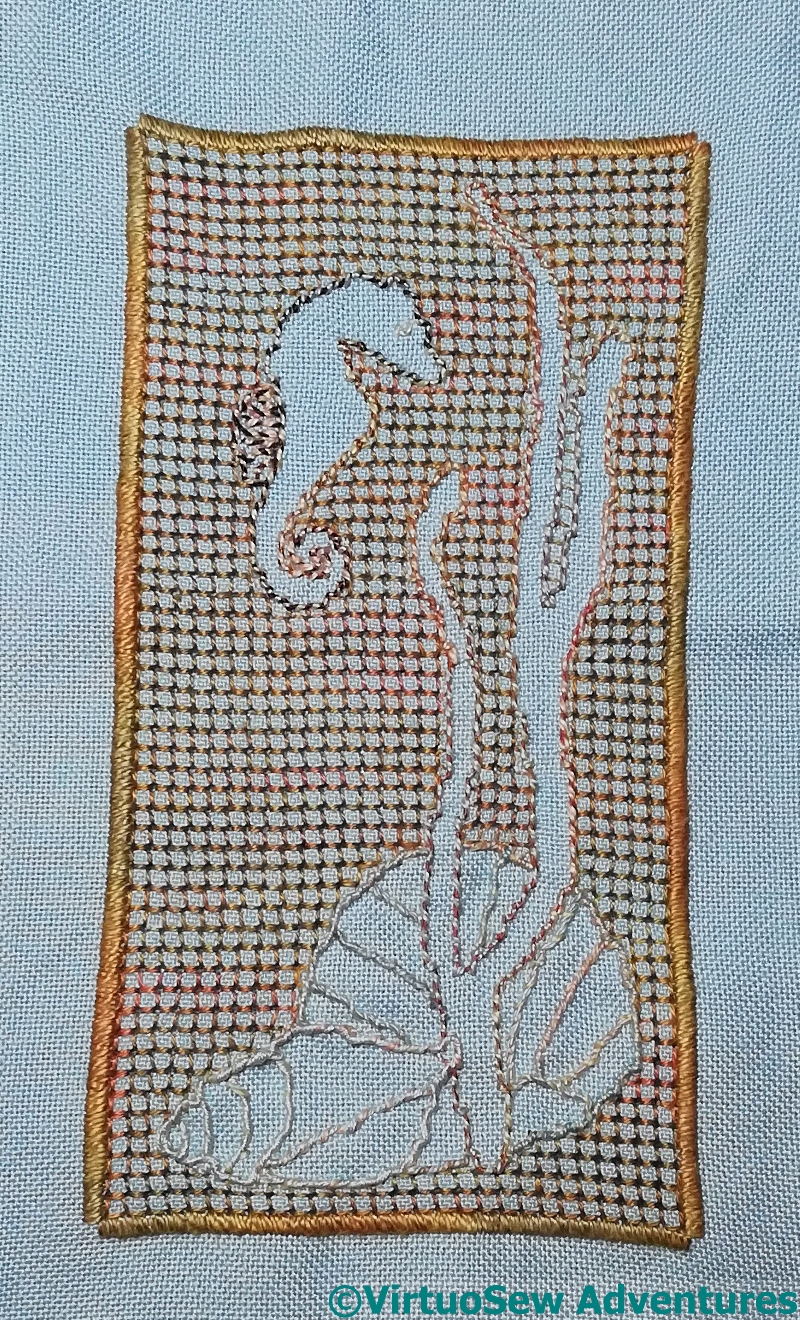
Whipped Back Stitch Outline
Then I thought hard. Maybe something could be done to differentiate the various elements without actually unpicking them all. The upshot is that the backstitched outlines have been whipped with a different colour of thread in each case, to pull out the differences a little more.
It still isn’t wholly successful, but it is now a usable traycloth and out of my welter of Unfinished Objects which occasionally leap, unanticipated, out of boxes I thought contained something else, to hit me in the face.