
Tag: Stuart Silk Purl Flower
Stuart Silk Purl Flower – Month 3
The small leaf was rather “meta”, in a way, because long “stitches” of silk purl were couched down with shorter ones. I’ve likened it to Burden Stitch, or even the couching form used in some opus anglicanum, and it includes colour changes as well.
All of these techniques have been simple enough in concept, but the execution isn’t simple at all. Spacing, angles, and cutting the lengths are all, as The Australian would say, non-trivial (mathematician-speak for “quite tricky”) and practice may make perfect in the end, but it hasn’t done so yet!
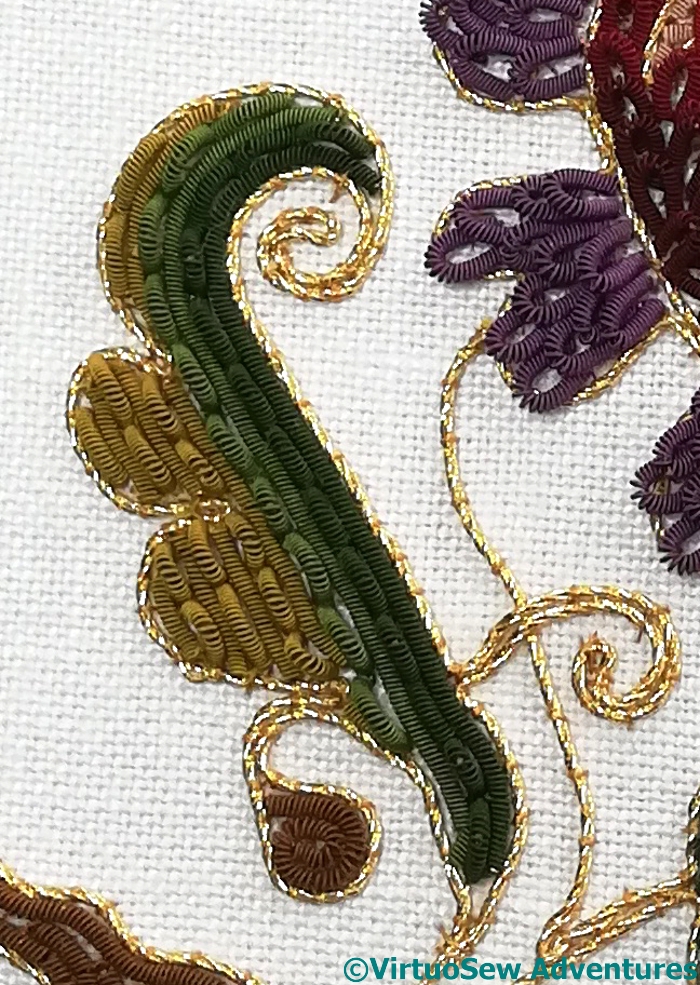
The final leaf was worked by alternating the hummocks and simple couched techniques of earlier months. In a way this shows that it is possible to create new textures by “layering” or “overlaying” techniques, so the only limits are in the stitcher’s imagination.
It creates an interesting ribbed effect, although with all my care, the raised hummocks aren’t all raised to the same degree. That said, I defy anyone looking casually at the real thing to notice the fact – at only about three inches by five, that would be a lot of detail to be able to distinguish!
And there are other dazzlements in store…

The final detail is to add spangles, which are reliably confusing and dazzling to the eye.
Just imagine all that flickering in the candlelight and shadows of the silk purl textures casting mysteries over each other!
I’ve thoroughly enjoyed this Online University course. Now I only need the time to sit down and read the extra information and watch the videos!
Stuart Silk Purl Flower – Month 2

There was quite a lot to do in the second month, learning new ways to wrangle silk-wrapped purl.
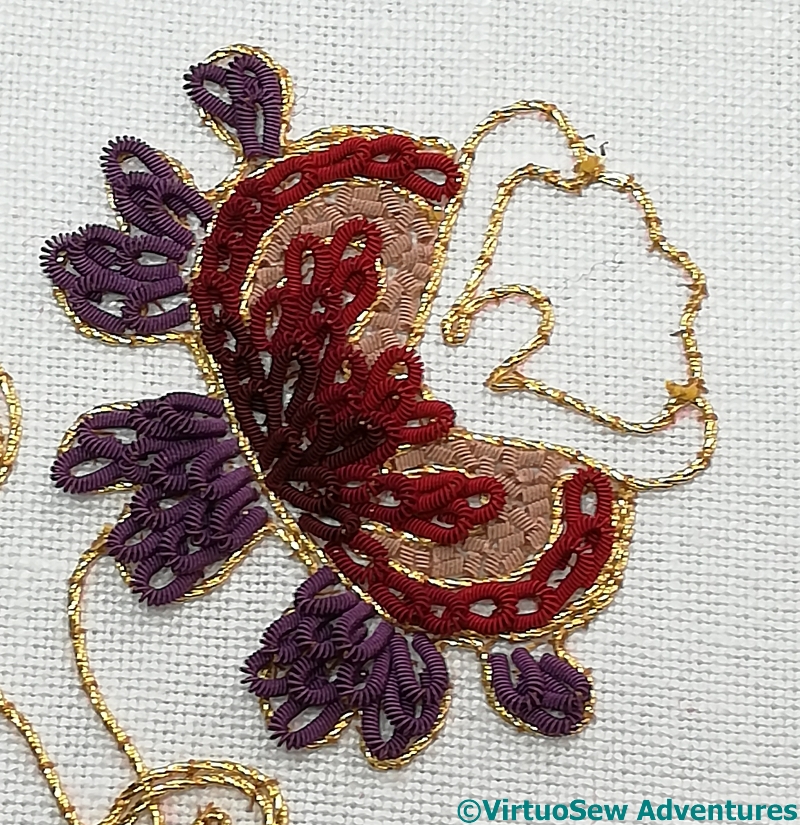
The first element was composed of the loops of purple, short lengths bent in two and controlled by an extra small couching stitch to hold them in place.
This is a technique I’m sure I’ve seen before, and I must say I rather like the effect, although I found it rather worrying to do. The purl is small and fragile, and I think that at the moment I still don’t quite have the headspace to do as well as I would like.
I do think, however, that the time for just not doing it is passed. If I want my skill to come back to me, I will have to use it! Who was it who said, “the more I practise, the luckier I get”? I would like my embroidery to be good because I have worked at it, not because I “just got lucky”!
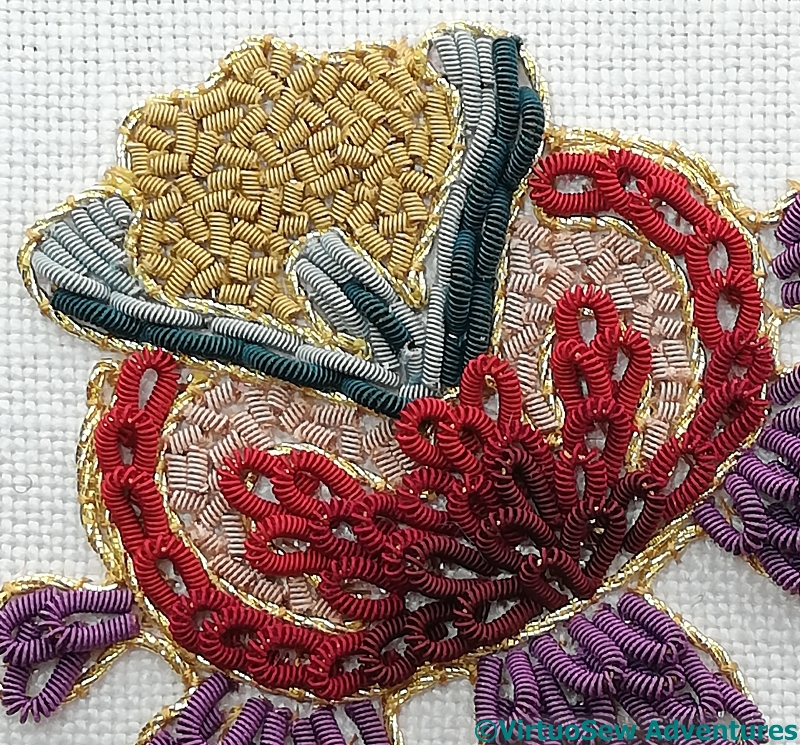
The next was chipwork, which is just like chipwork in ordinary purl except for the added terror in case the silk wrapping comes off..
And then I got more practice with those nested loops, with the added adventure of adding shading as I went along.
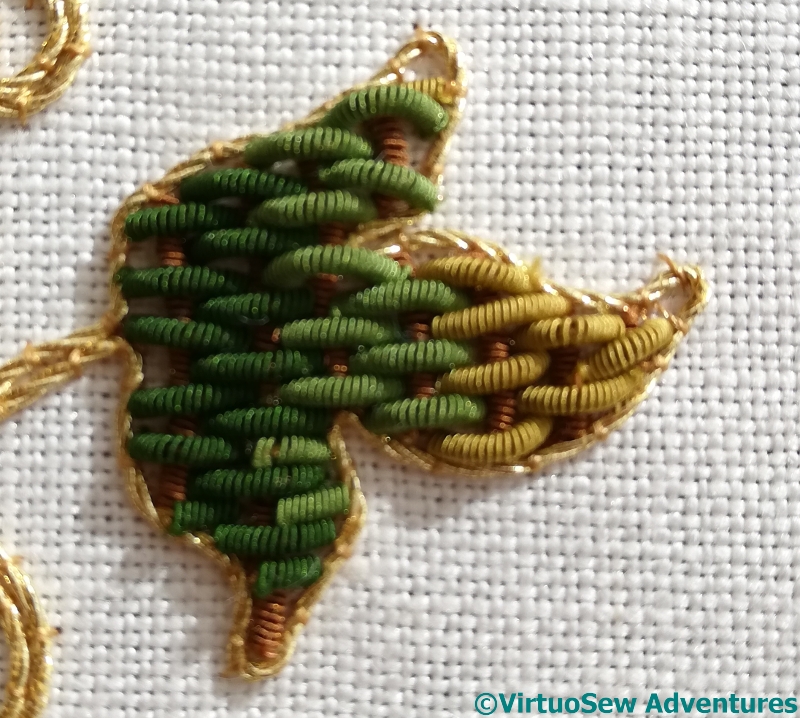
Finally, there was more chipwork, and some little raised humps. These are made of purls stitched on like beads, but with a stitch slightly shorter than the length of purl chosen.
Again, these are not quite as consistent as I would like them to be, although I carefully used the ruler provided in the instructions to cut the lengths.
More practice needed!
Stuart Silk Purl Flower – Month 1

There’s a new course from Thistle Threads, concentrating on the use of silk-wrapped purl threads. It looked like fun, and it includes the bonus of some extra samples of different sizes and colours.
I’m always trying to learn more about the more obscure and interesting corners of embroidery, and the reconstructions of no-longer-current threads and materials play directly into my fascination with early technologies.
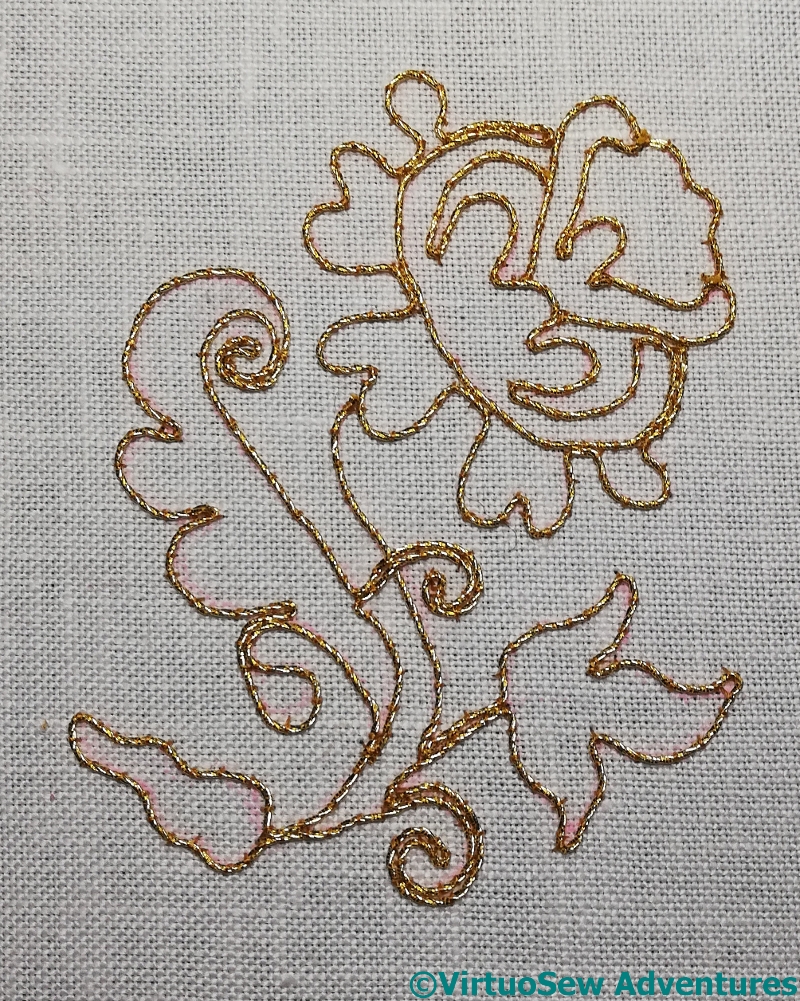
The first stage in this case is to work outlines in gold, and on this occasion I deviated slightly from the instructions.
Normal practice these days is to plunge the ends of the gold thread and sew them down at the back, but it used to be more common simply to cut the thread and oversew it firmly on the front. So I’ve done that. It saves a bit of the expensive gold thread, and as this is a small decorative panel and not for a garment or other item which will move a lot, I think it will be successful.
It’s still important to run the thread in the right way over the design to minimise the number of cuts, of course!
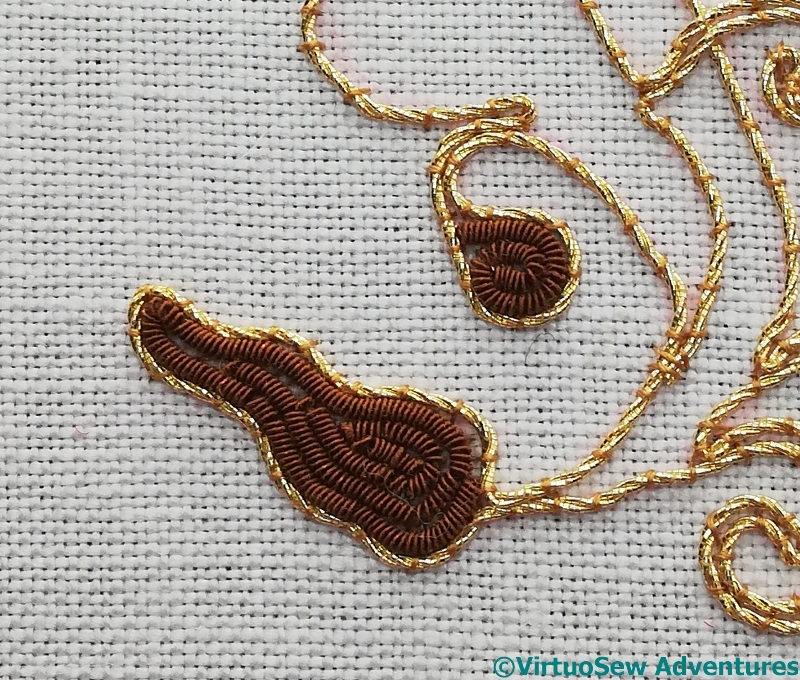
The final part of the first month’s instructions is the first element of the silk purl, couched in a spiral to fill a pair of leaf shapes.
You can see that I have rather crushed the silk purl into place, which is a pity as it has introduced breaks or cracks into the purl, but then, this is an extreme close up. Without a magnifier, it is simply an impression of colour and texture.
The spiral is worked inwards from the gold outline, which is probably the only way it could be done – imagine the difficulties of finding the right central point to start from!