I’m using a lot of variagated threads, of course, and leaving stranded threads un-separated. Furthermore, since all washability is clearly lost here, I’m picking thread for colour and texture, rathere than paying attention to the fibre or considering colourfastness. I can, after all, replace the stitching with something else if I need to!
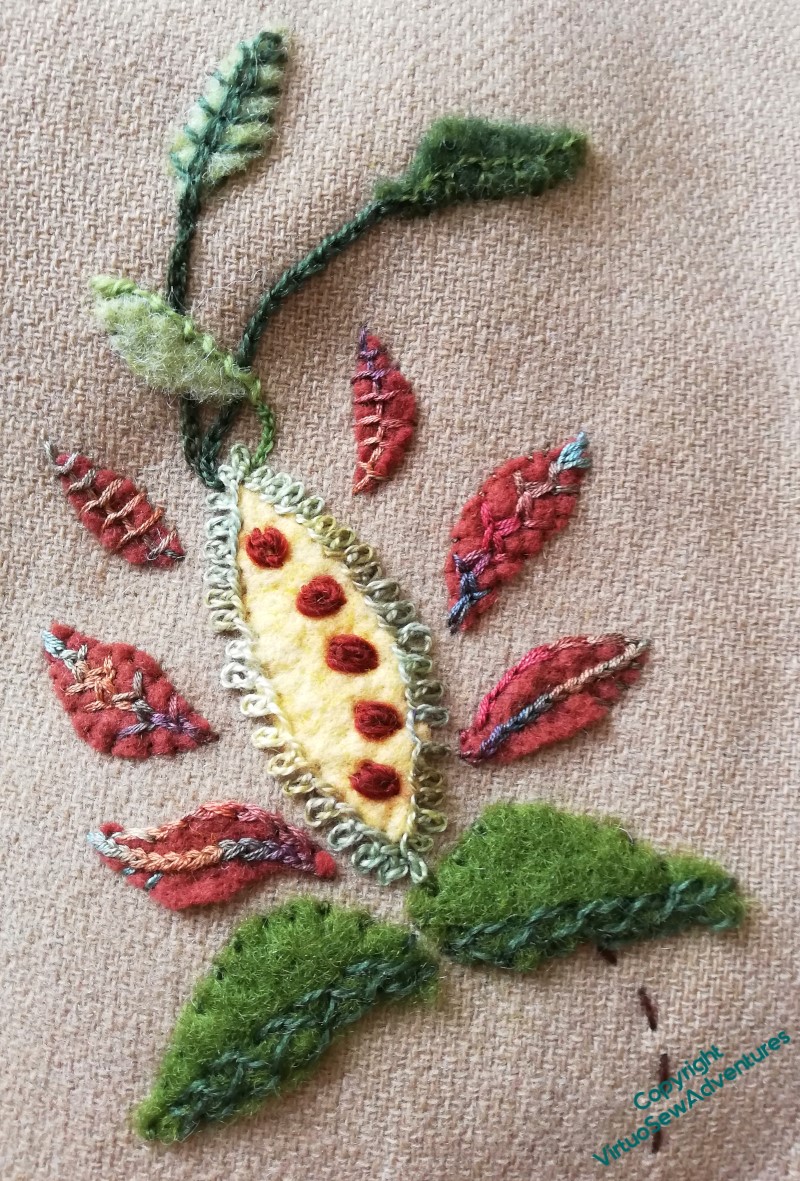
Basque Stitch edges the brown petals here, and triple chain stitch forms the spine of the yellow one. If you click on the picture to enlarge it, you will see that the green calyx is held around the edge with coral stitch and then a blanket stitch which is highlighted with detached buttonhole in a pearl cotton.
I’m really very pleased with how this element has turned out, although I may choose to lighten the stems on the leaves at the top, once I have everything in place and know what I have to balance of the overall impression.
I’ve looked quickly through the posts for the Coat of Many Flowers, and I was much more definite about stitching all around almost every shape for that, except the small teal leaves. For this one, I seem to be stitching a lot more veins and spines, or edging only one side of a piece. If I become anxious about pieces coming away, I can always add some stitches!
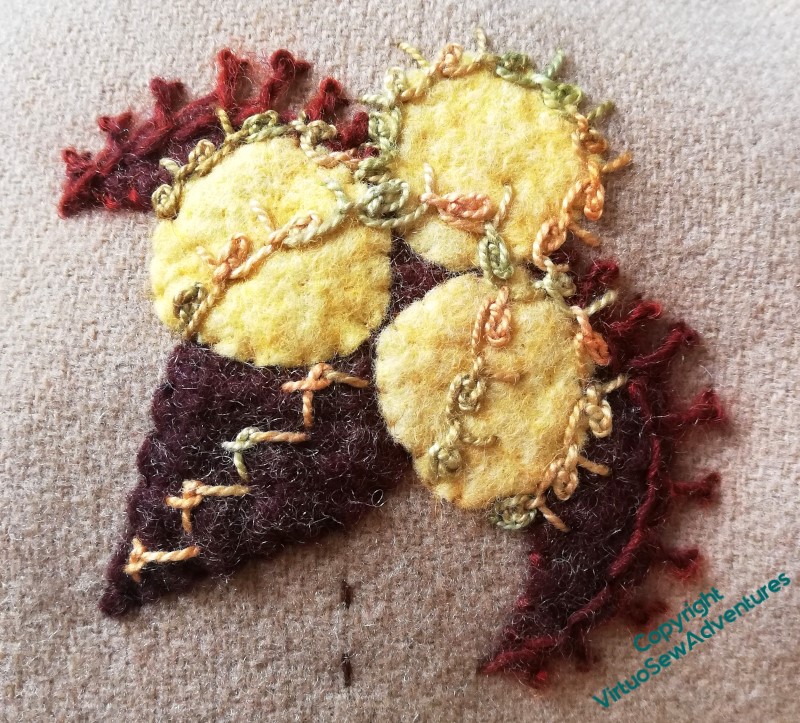
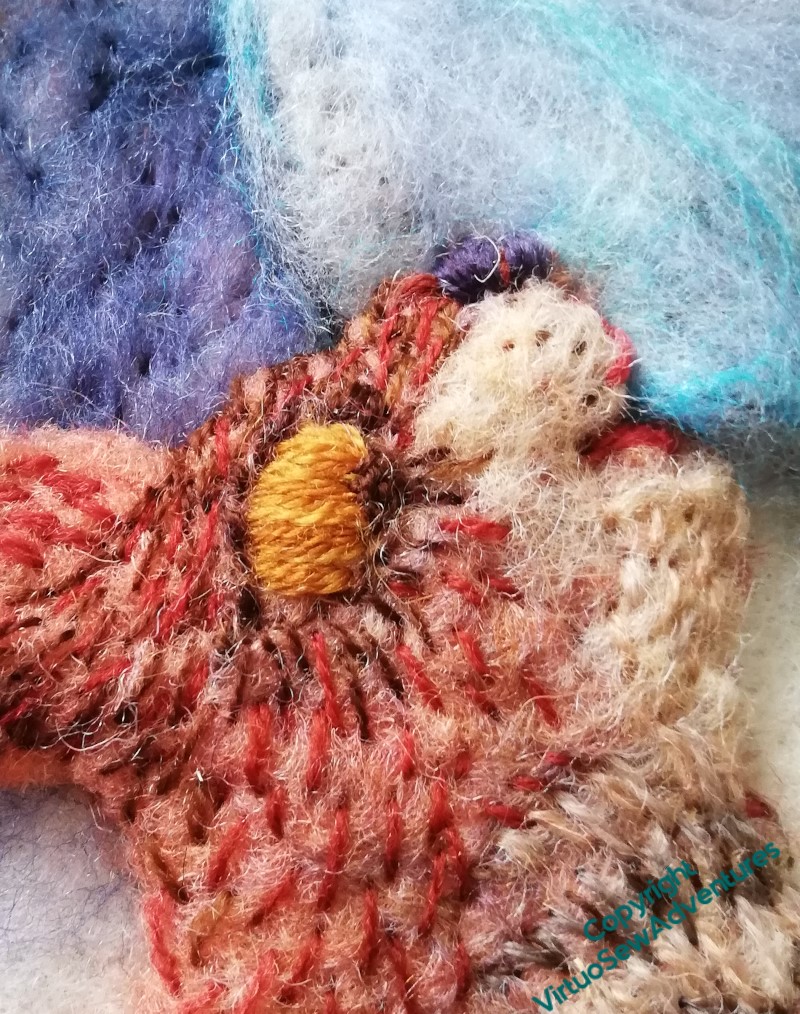
This element was more floral in previous incarnations, but here, I think it has drifted more in the direction of a seedhead. The “seeds” are isolated oyster stitches in sock yarn!
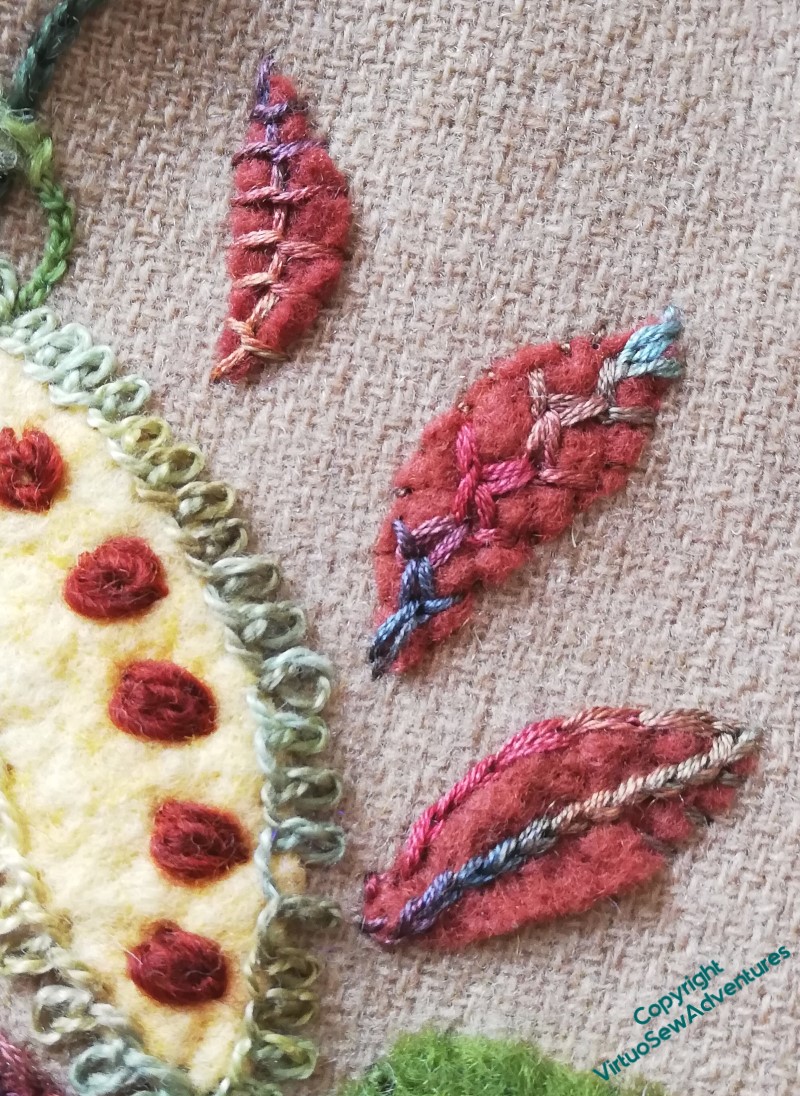
I unified the brown petals by using the same thread to embellish each, but made them more interesting by using different sitches. I’m particularly taken with the feathered zigzag chain on the middle one. The other change, compared with the Coat of Many Flowers, is to have turned some of the edging stitches around: last time, when I used rosette chain stitch, it was more like blanket stitch, with the “vertical” stitches pointing in to the centre of the shape.
And now, Episode 68 of SlowTV Stitchery is live. In which I discuss the alarming adventure of a Watermill Stitchery, remind myself to include the slips when I finally assess the success of Swirl Stitch (not yet, alas), and note that the skill of choosing the order in which to experiment is unheralded and undervalued.
I mentioned that I had more experiments to perform on the leaves, and several people hastened to tell me that I should be sure to Test To Destruction. They are right, of course, and having plenty of samples in the pack that Caroline Hack sent me to play with, I was able to do just that.
One of them, I pulled and twisted, trying to snap the plastic. That turned out to be much harder than I had expected it to be, considering how flimsy it felt when I was nervously working needlelace over the leaf shapes.
Then I fished out the heat gun that I still have left over from some experiments with paper crafting, covered a drinking glass with a bit of greaseproof paper, and tried to soften the plastic so it would match the curve of the glass. The plastic certainly moved, but not in a very controlled fashion, so I tried again, this time using one of my needlelace experiments. It was still an undercontrolled shift, but it did produce the sort of twisted look of a drying leaf. I tried hard to photograph it so that the curves really showed!
I worked a series of experimental needlelace sections in some of the other pieces. Knotted stitches in slubby linen (really don’t do this – friction becomes a real problem!), cloth stitch in silk (the yellow that in due course was melted and twisted) and a variety of others.
I think, in the end, the difficulty of covering the borders, and the slippy plastic which makes it hard to keep the threads in place, mean that this won’t be the best way to do the oak leaf wreath. I may still have thoughts about this as I begin to plan, and in particular, I need first of all to work out how big my oak leaves need to be in order to be in proportion with the mirror.
You can now watch Episode 67 of SlowTV Stitchery, which is entirely concerned with my battles with Swirl Stitch!
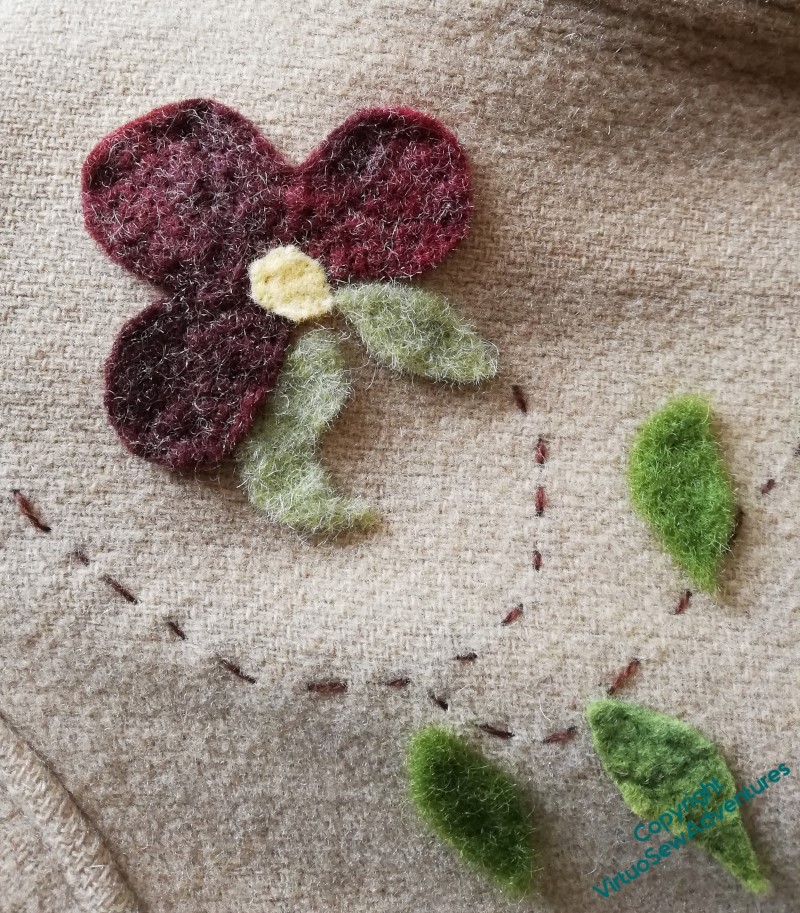
The basic technique I’m using for the Little Jacket is the same as I used for the Coat of Many Flowers, so the block colour comes from pieces of felt cut to shape. Most of them are the light and lofty felts I use with my embellisher, but this dark brown is slightly denser and more variable in colour. The variations aren’t as clear in photos as they are in real life, and I have a faint hope that if I wear it enough some of the lighter colours will fade a little more than the dark ones, and pull out the contrast a bit more.
This is the first of the motifs I worked on. A long-legged variation on chain stitch on the central petal is set off by neat paired blanket stitch edgings on the outer petals. I’ve decided that the yellow is to be an accent colour, and I’ve ensured that I have small bits of it it scattered across the whole jacket. In this case I’ve not used contrast colours to stitch it down. I’m not sure about the whipped blanket stitch on the lower half, but I needed something to contrast with the single twisted chain stitches on the uper half, and I don’t think I will continue unhappy with it once the whole jacket is finished.
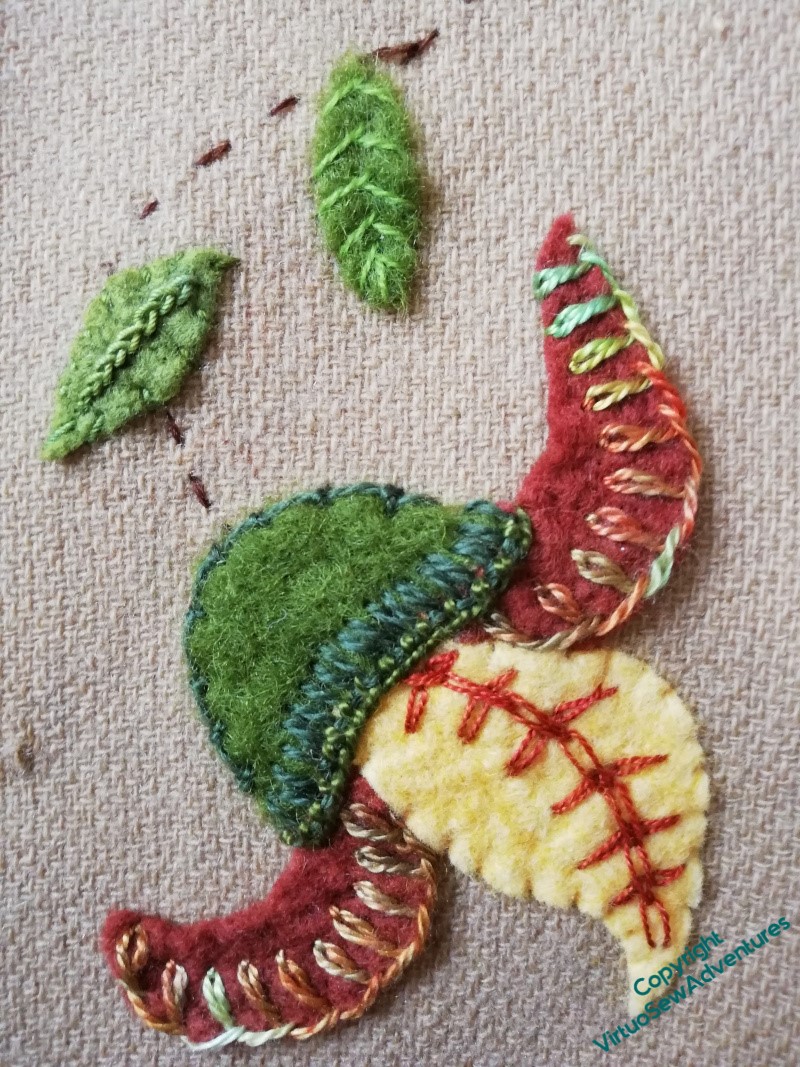
By contrast, I’m not at all happy with this one, and I don’t know what to do with it.
I like the crested chain edging on the brown petals, and I like the odd combination of rosette chain and blanket stitch in the yellow-green pearl cotton, but not how I’ve placed it or the effect it is creating. The stitch running in a spine down the lower brown petal is called “Wing Stitch” in the book I found it in, and again, I like it, but not what it is doing here.
I can see some unpicking in my future!
However, episode 66 of SlowTV Stitchery is now live, in which we consider the state of progress on Tynemouth Priory and plans for the sea, learn from Granny Weatherwax, and start planning more Watermill Stitcheries.
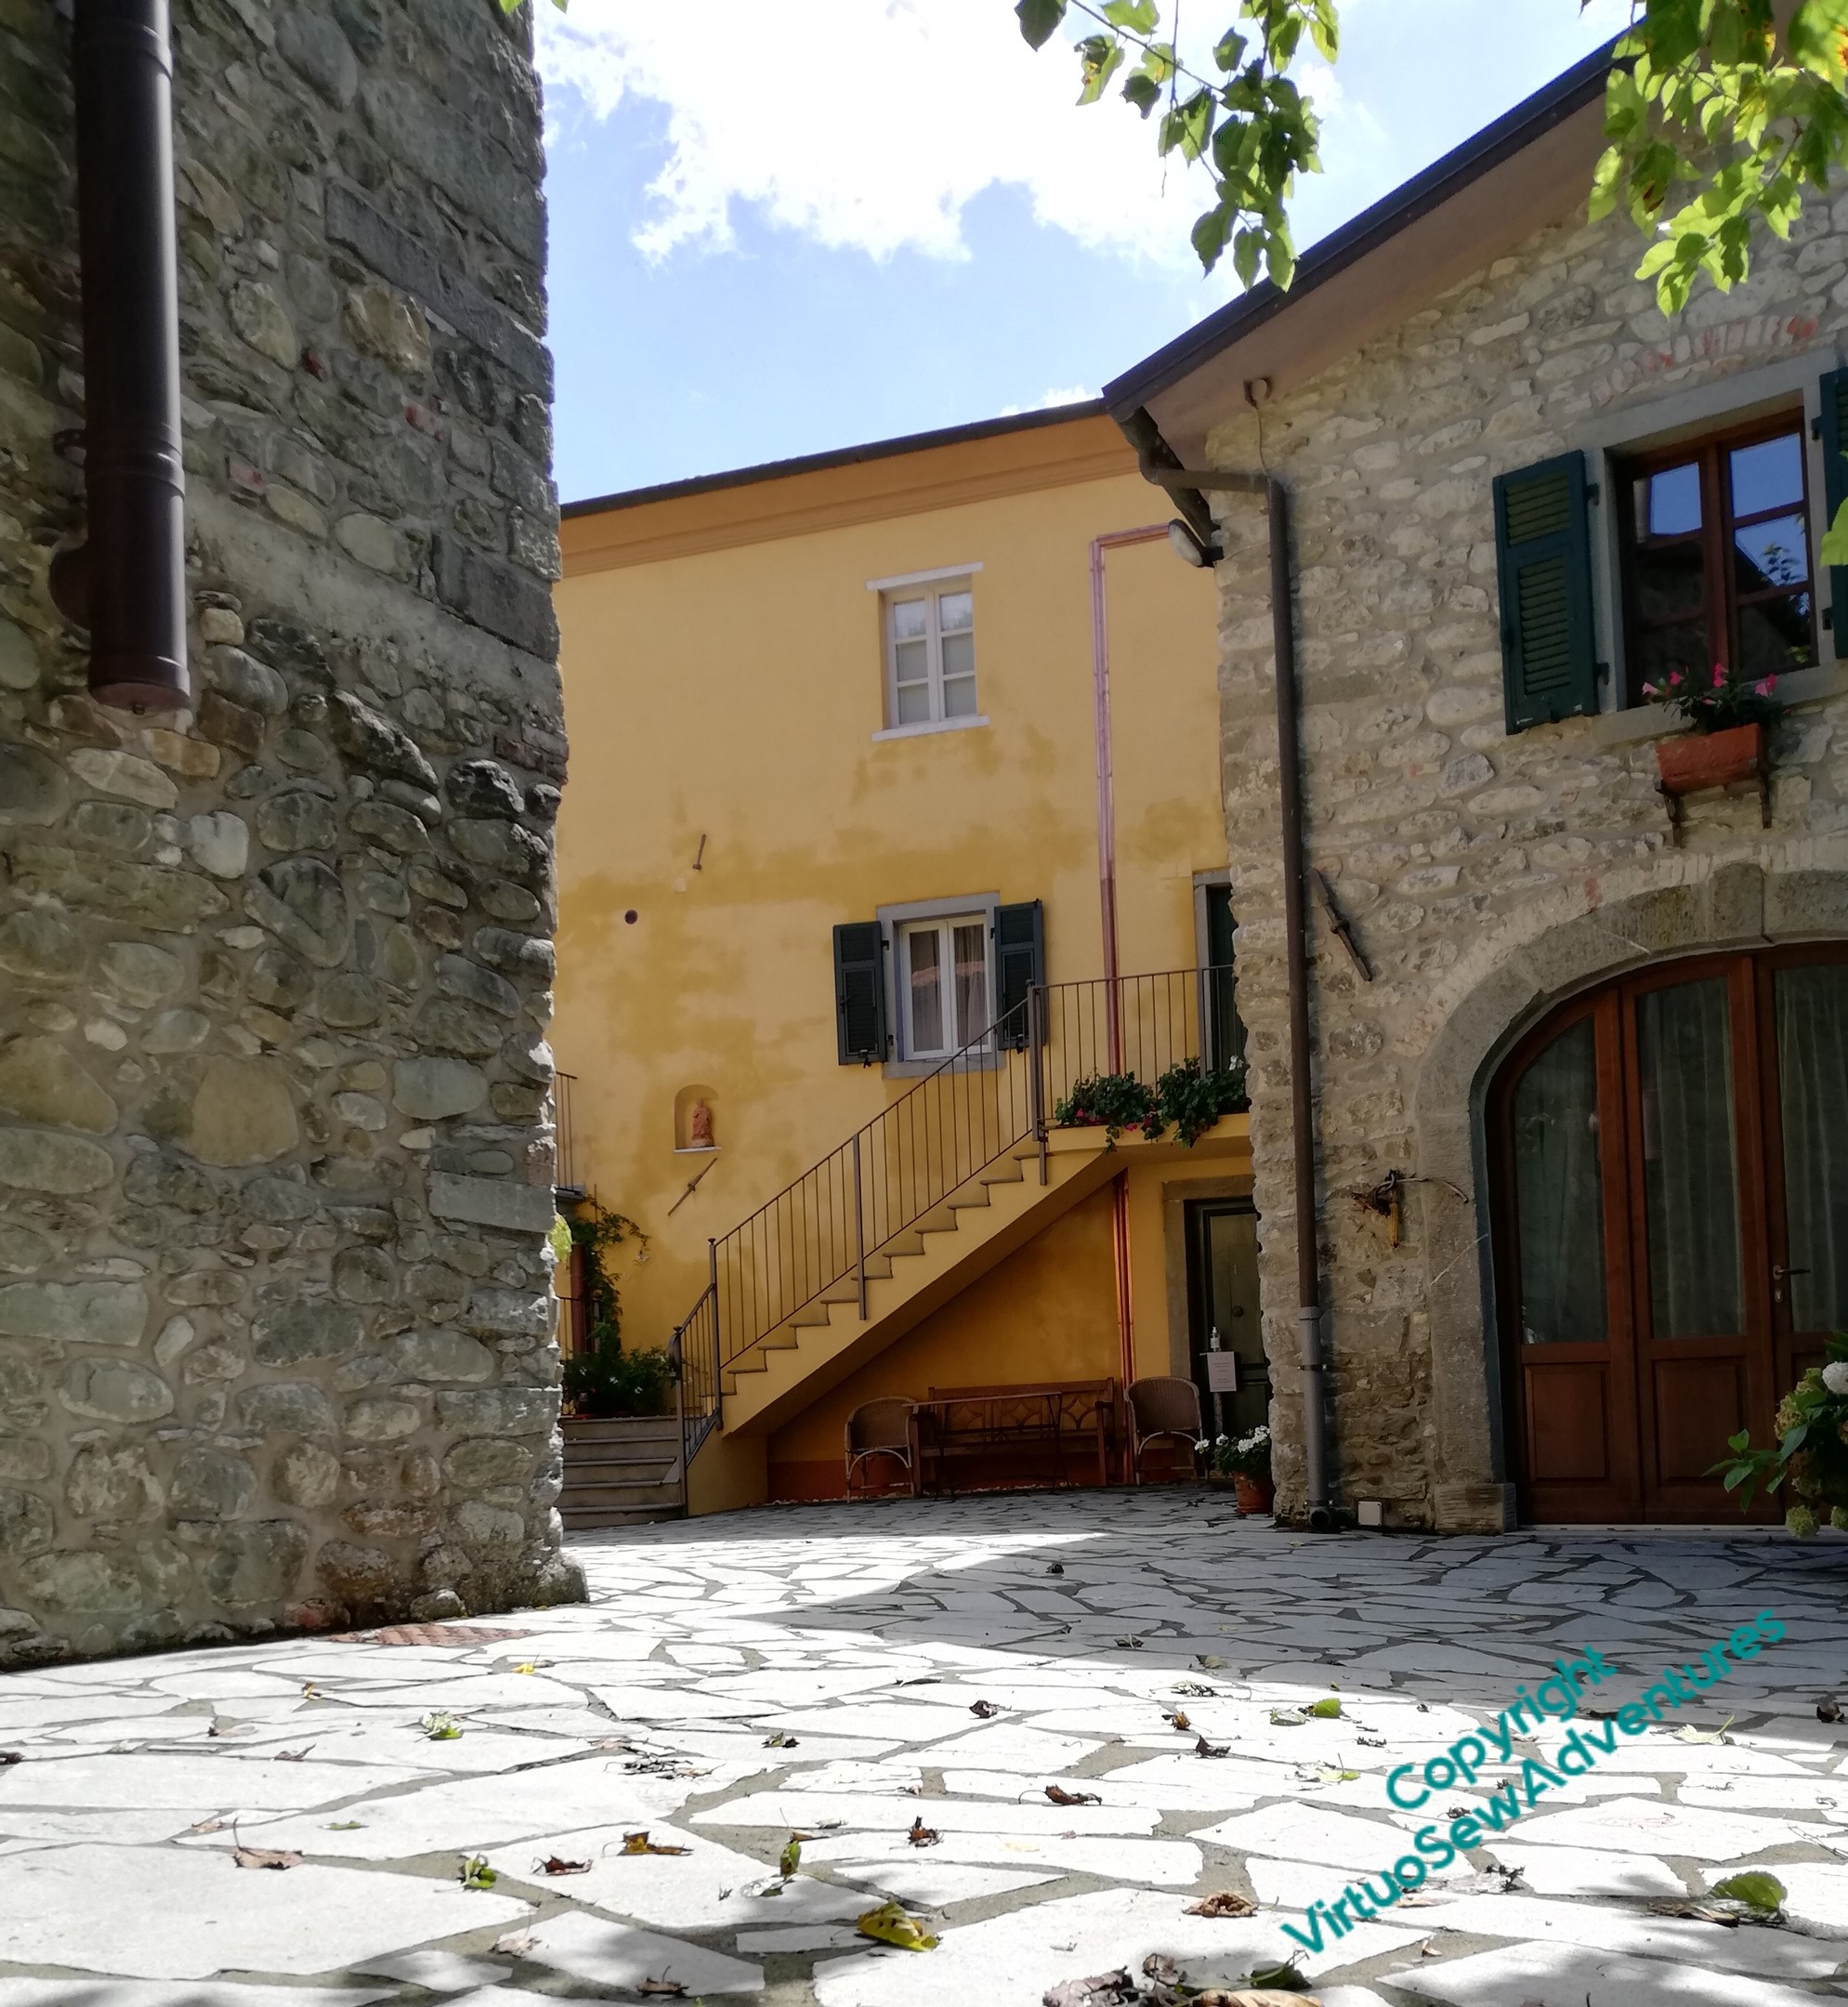
I have been asked to plan a week of embroidery next July for The Watermill, Posara, a rather wonderful place in Tuscany that hosts painting and knitting holidays among other things. Bill and Lois Breckon, who run The Watermill, have been gradually restoring and improving it over the past thirty years or so, and they have a gift for unobtrusive excellence of organisation I’ve never seen bettered.
At the moment, we are thinking of running an embroidery week along the lines of the knitting courses, with studio time alternating with the excursions and fabulous lunches, and I have been thinking quite hard about what might make for an interesting week.
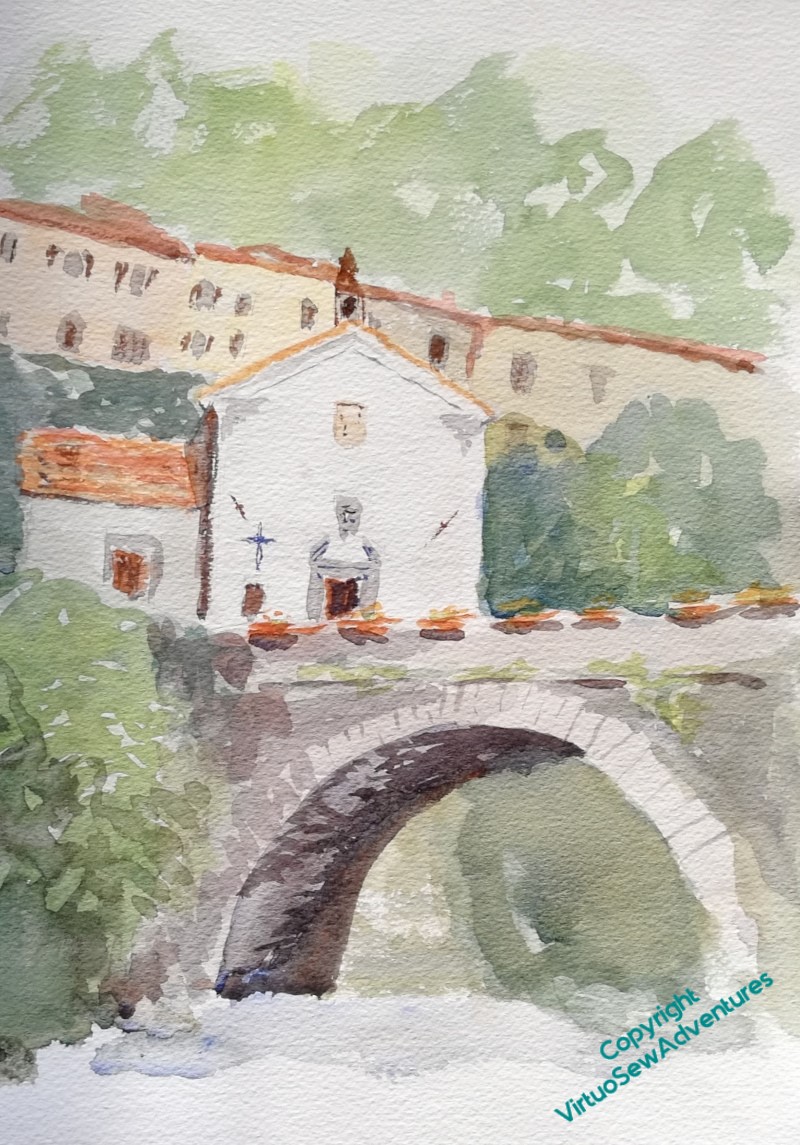
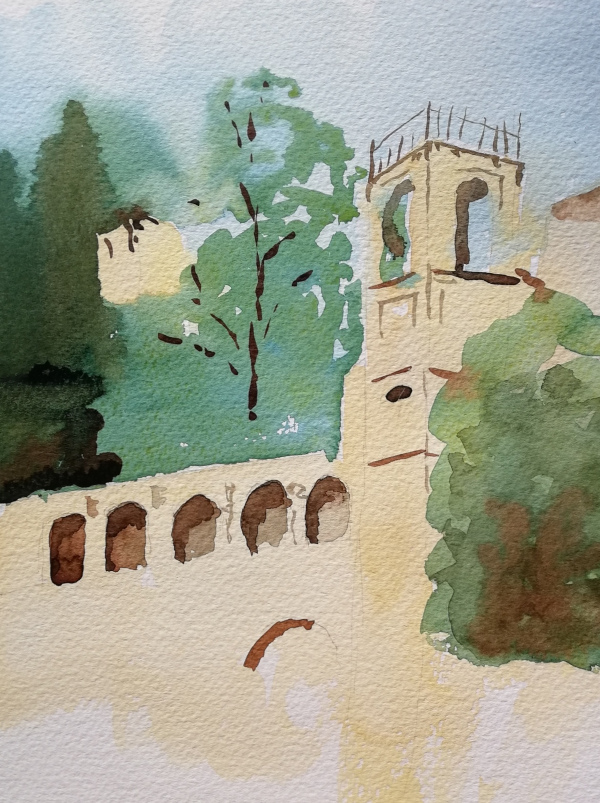
The painting classes are “plein air”, so involve setting up somewhere and painting all morning, followed by a delicious lunch (when I painted this watercolour I had my back to the trattoria where we had lunch) and painting some more in the afternoon. Apparently the knitters sometimes set themselves up somewhere and Knit In Public as well – the locals in all the destinations being so accustomed to artists and tourists that they barely even notice.
My idea for the embroidery week is to go adventuring Beyond Long And Short Stitch, to play with the ideas that are my first love in embroidery, the use of the ornamental stitches and varied threads to recall texture and pattern, to bring pictures to life without too much detail: “Impressionism in stitches”, if you will.
So I’ve started to plan Impressionistic stitcheries inspired by The Watermill and the excursions, which can be put together into a Watermill Sampler. The first (this is a detail) is inspired by the stands of bamboo which are merrily naturalising themselves up and down the valley, and by a recent post on Queenie’s Needlework blog about a stitch she calls “Danish Knotted Cross Stitch” (since the book she found it in didn’t give it a name at all!). When the stitch appeared I was already thinking about the Bambouserie, as they call it, and it occurred to me that it might make an effective stitch for the joint in the bamboo stalks – and sure enough, it does!
The long, rustling leaves of the bamboo are worked as clusters of long Detached Twisted Chain stitches, which I think are somehow much more evocative of the rustle than straight stitches would be. “Bambouserie” has set quite a high bar for my next “Watermill Stitchery”!
Episode 65 of SlowTV Stitchery is now live, in which we make an early start to avoid Noises Off, and thoughts of the sky as a sampler of graduating colour lead to a reconsideration of the idea for canvaswork cushions inspired by the Ironbridge and “Coalbrookdale by Night”.
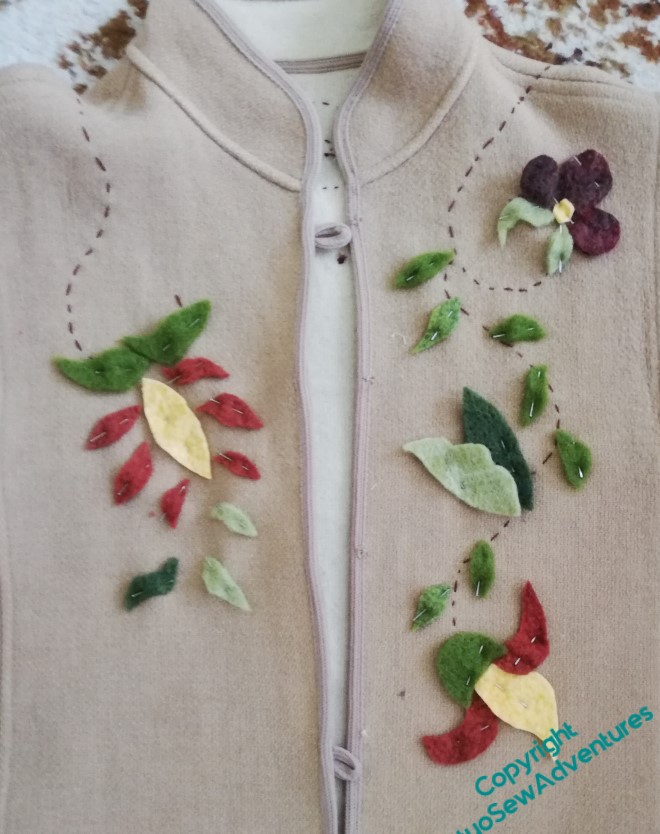
This little edge-to-edge woollen jacket was inherited from a great aunt. She was much smaller than me (I’m not tall, but my great aunts were all tiny!) so, among other things, she’d turned up the sleeves to create cuffs, which has resulted in rather unattractive, and potential life-limiting (for the garment) wear patterns. Naturally, I’m not in favour of that. Nor do I especially cherish the look of me in unadorned beige, especially since the arrival of my “corona wings”, which otherwise I rather like. So the jacket is going to be jazzed up.
In fact, it probably won’t know what’s hit it, by the time I’ve finished!
I am returning to the motifs from Grandmama’s tablecloth, which I also used on the Coat of Many Colours and the Jacobean Firescreen, so at least some of what you see over the next few posts will be familiar, but whereas the design for the Coat of Many Colours stretched across the skirt of the coat, the design here trails over the shoulders and down the arms.
And whereas the design for the Coat of Many Flowers was planned in advance, with some care, the design for this one was put together in a series of adventures. First, my mother put the jacket on and I drew trailing stems around and over the jacket. Then I tacked them in with a single strand of Appletons Crewel Wool (then I won’t need to take them out!) and pinned cut out paper patterns of the motifs in their place.
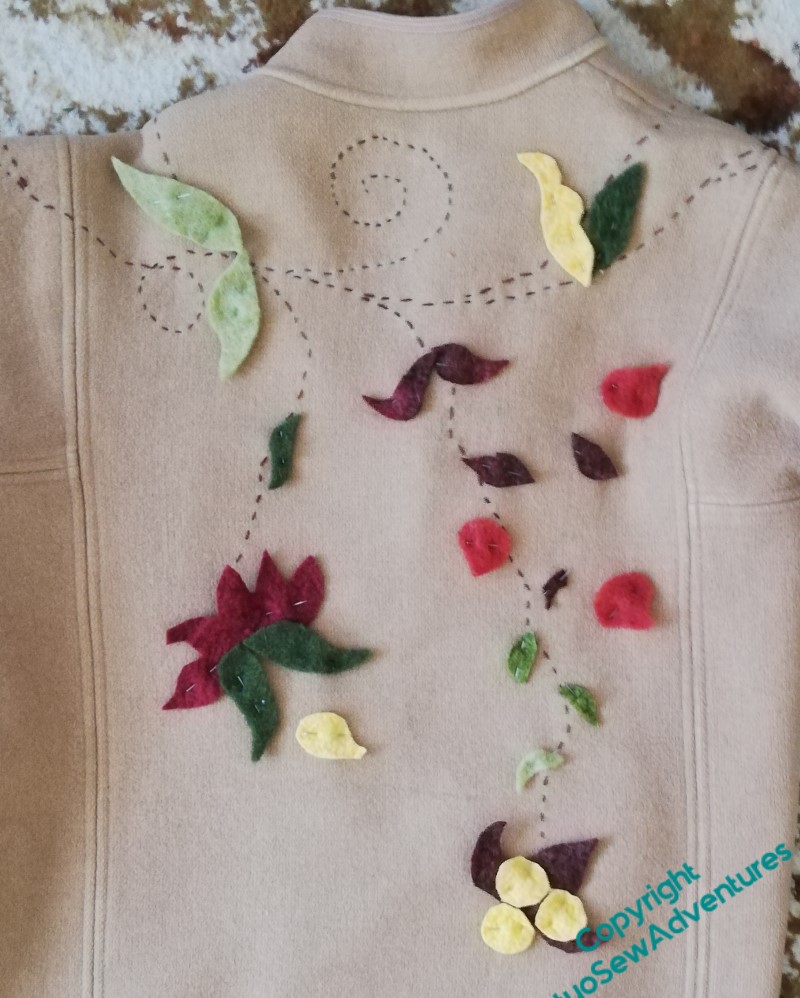
Then the paper cutouts were replaced with felt cut outs. You can see from this picture of the back that I missed out some necessary stems here..
I wonder whether it’s luxuriant enough?
Meanwhile, in other news – Episode 64 of Slow TV Stitchery is now live, in which we discuss Impressionism in stitches and an Announcement is made..
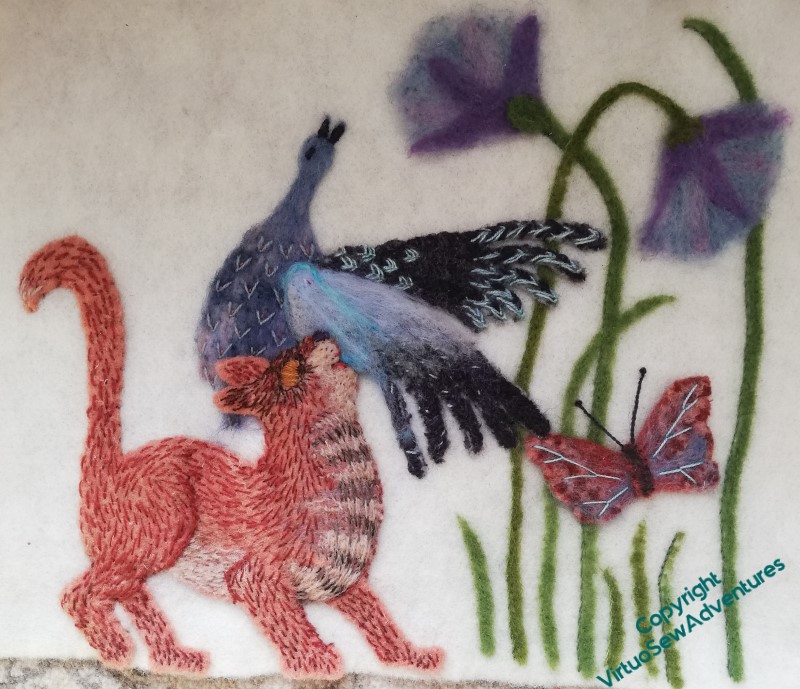
I mixed needlefelting and stitching in attaching the various motifs to the background. You can see the characteristic marks of a needlefelting needle on the blue of the bird’s body behind the cat’s head, but I’ve tried to bury the stitches in the depth of the fabric so that they disappear.
I’ve added a couple of tiny blue-black stitches for the cat’s nose, and some tiny pink stitches to the inside of his mouth. It’s amazing how much difference those few stitches make. Those characteristic needlefelting marks also suggest the cat’s whiskers, which is just as well, because I’m not sure I would attempt to put them in as stitches!
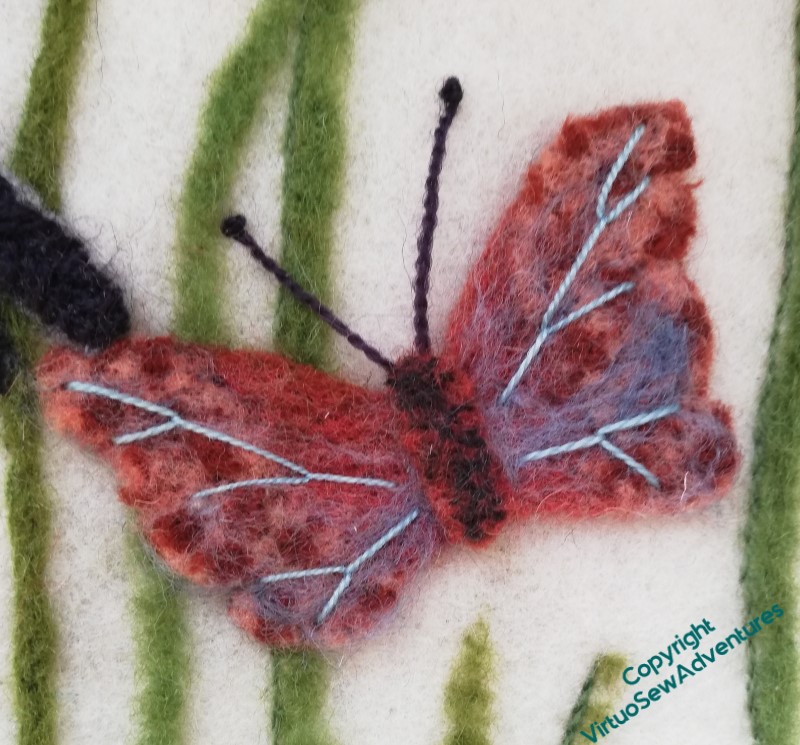
The butterfly in the fresco was entirely in browns, like the cat, and the wings were much longer. I’ve folded up the body so that the extra length of the wings is underneath, raising the body from the surface. I’ve also needlefelted some wisps of blue over the wings and added the blue veins to lighten the impression still more.
I’ve stitched on one side of some of the stems, and begun to narrow and round them with needlefelting, breaking one of my needles in the process. Again, I don’t want to overdo this: the wispy, matte surface of the needlefelt helps to recall the fresco, and too much stitchery unbalances the effect.
I think that’s all now. I’ve added some rough fly stitches to the bird’s body, opened his beak to shout his alarm, and stitched the eye. The stand of stems and lotus flowers gives some reason for the butterfly to be there, and it pulls together the blues of the bird and the browns of the cat. The heavy stitching on the cat is echoed in the back wing, and the front wing echoes the wispy lotus flowers.
All in all, there’s a reasonable sense of lightness and activity, which I think is what I needed to achieve here. Thank goodness for that!
And, on another subject entirely, Episode 63 of SlowTV Stitchery is now live. In which thoughts of pony trekking in Northumberland lead to musings on the architecture of justifiable caution, and, by way of a complete change of direction, to planning the embroidery of stems on a jacket.
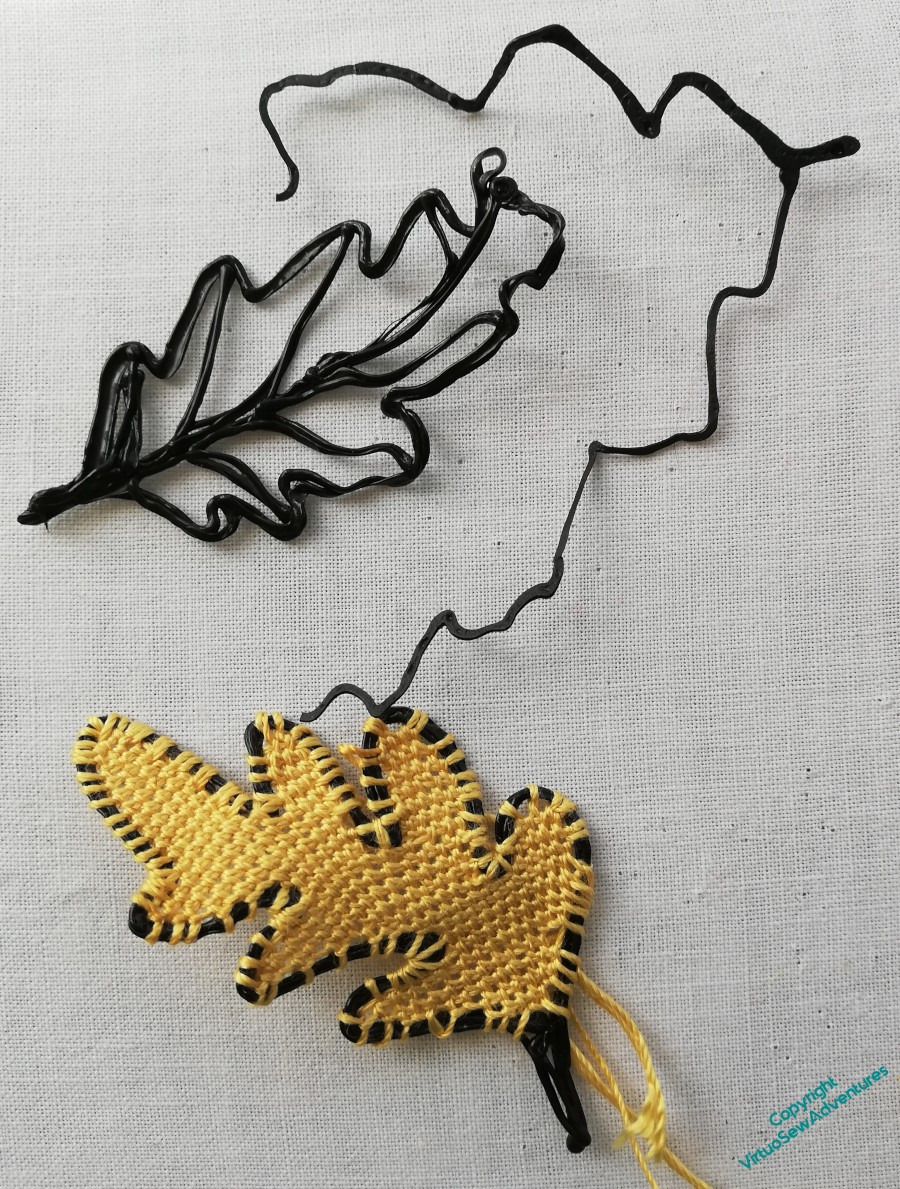
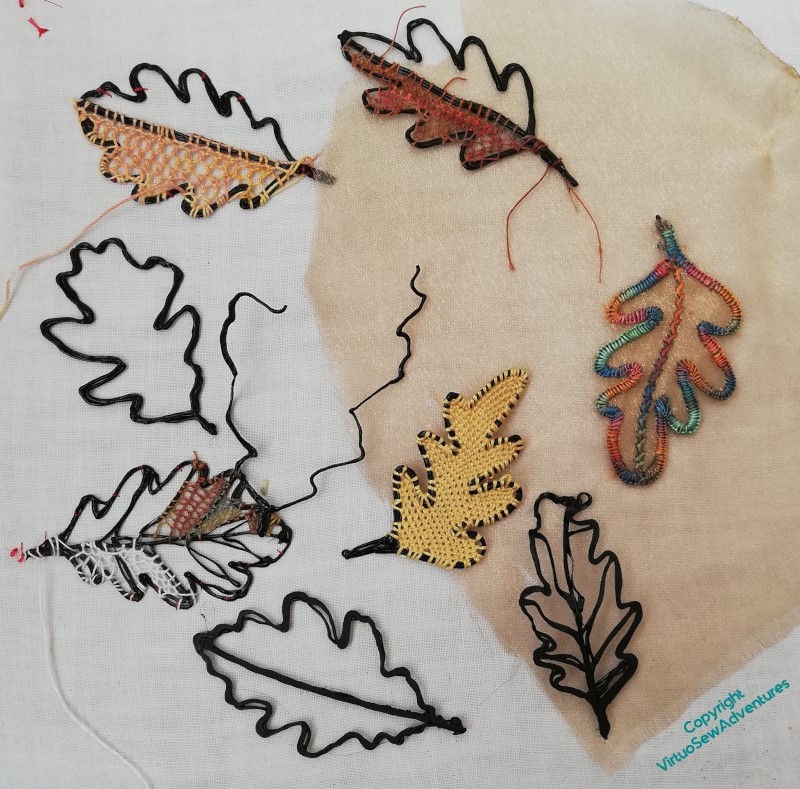
I wasn’t at all sure how to tackle the Oak Leaf Wreath Experiments, but as always, charging in head over heels is the most enlivening strategy!
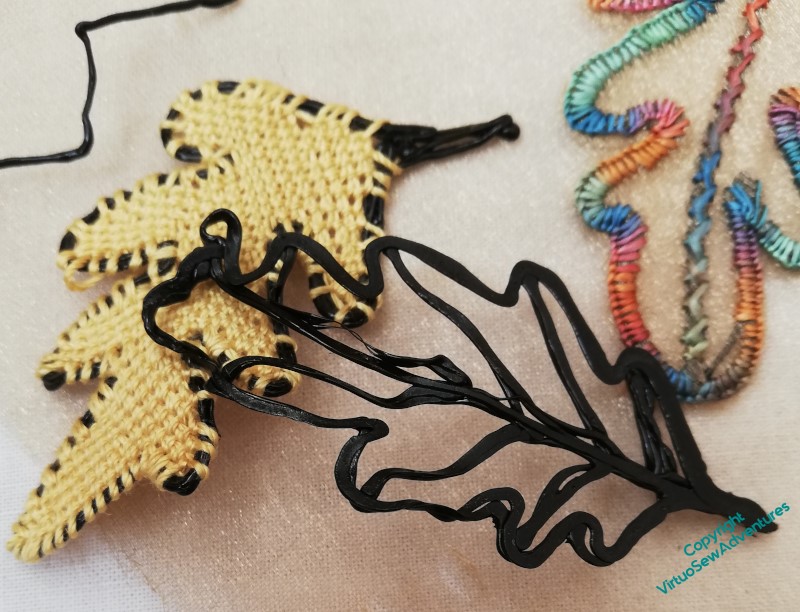
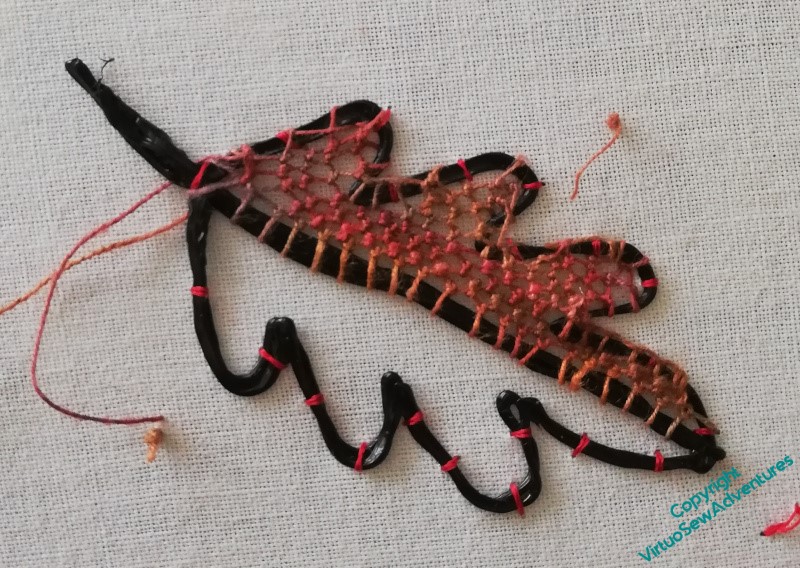
Having toyed with the idea of these drawn plastic oak leaves as the support for fabric leaves, I thought the next thing to play with would be needlelace, using different types of thread and different stitches. I want to get some sense of how to tackle a very difficult shape, and I think that even if I choose not to use the plastic pen, I will have learnt a great deal from the different combinations I’ve experimented with.
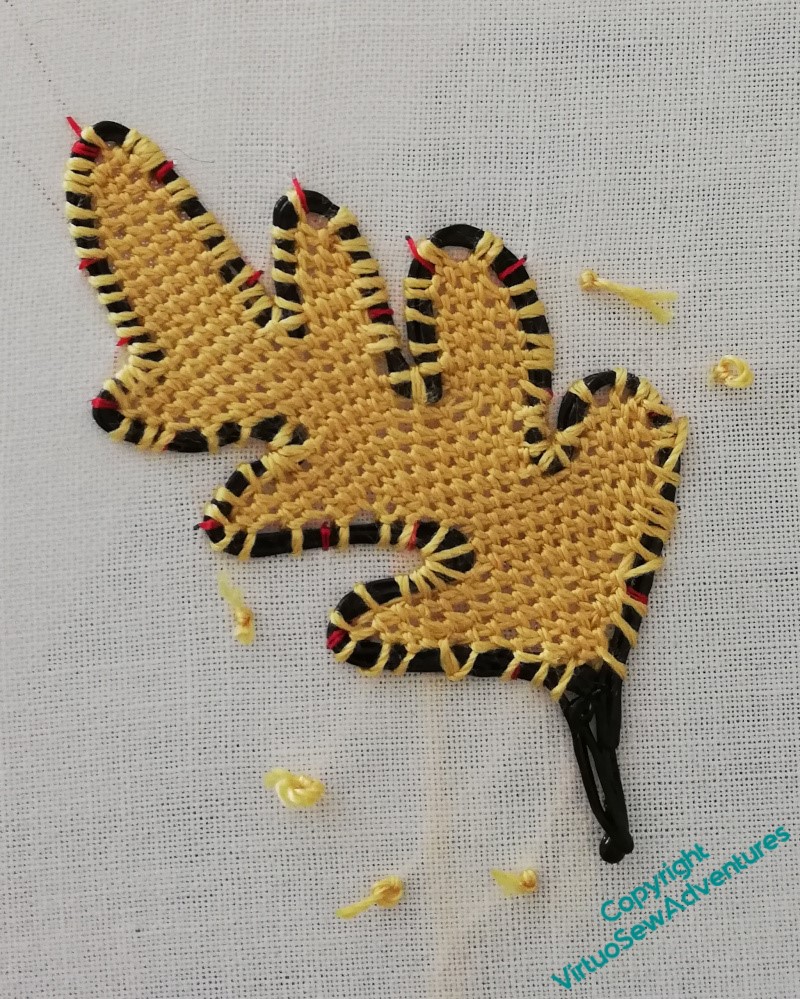
The first one uses a fairly heavy silk thread, not quite a perlé, but definitely not stranded. The stitch is the classic Corded Brussels Stitch.
I don’t think that this combination of thread and stitch leaves space to cover the plastic easily or neatly, and I can’t think of another way to tidy up all the ends I needed to use because of the uneven shape.
Also, my goodness, the plastic is slippery. Placement of rows might prove to be a bit of a challenge.
The next one is a rather finer linen thread, and I started from the extra line of plastic down the middle, which may have slightly simplified the stitching. There is probably enough space for a buttonhole stitch covering for the edge, but it was very hard to fit the needle around the more confined areas. Maybe I could devise some way to cover the edges once the leaf was off the backing?
The linen is a hard thread to work with, because the friction of the thread against itself it quite high, and since I chose a knotted stitch for this experiment, there was a lot of friction!
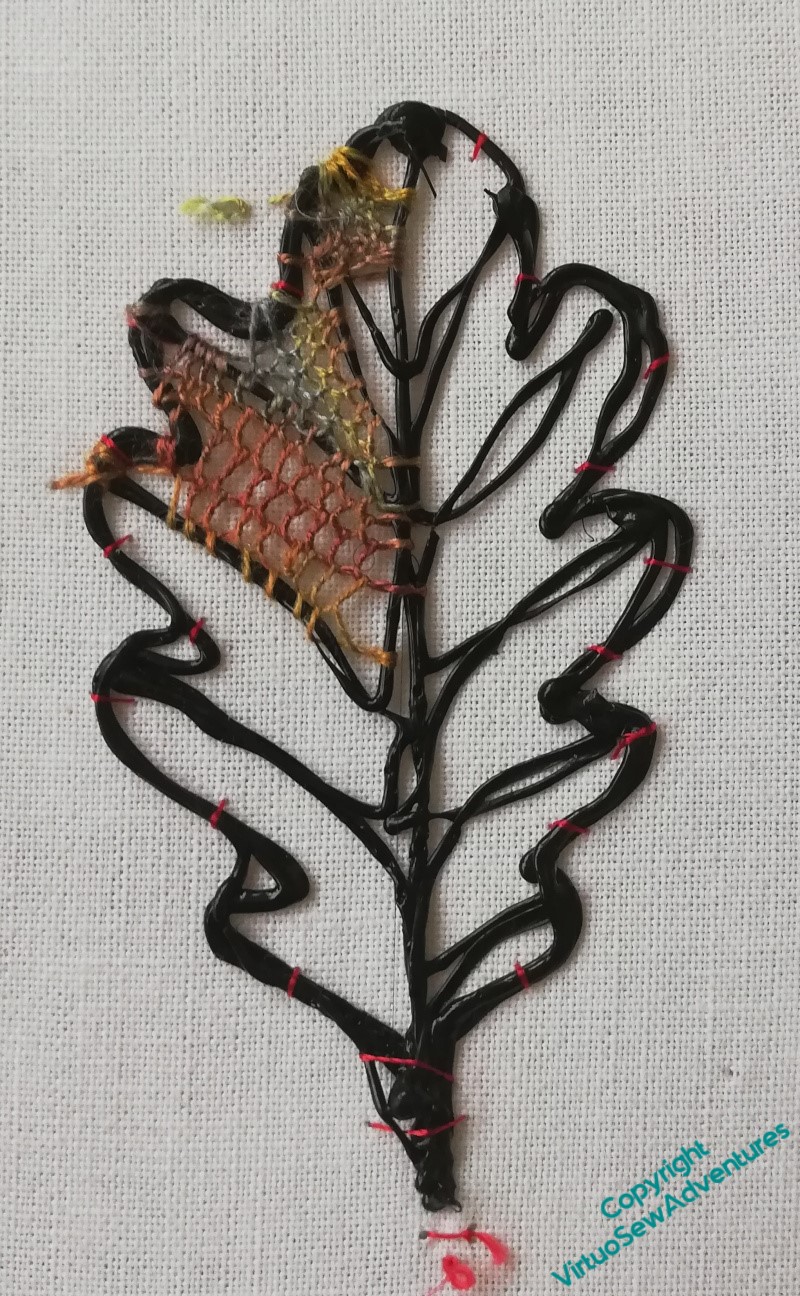
The final experiment for this week used a single strand of stranded silk. Caroline added veins to this one, and I tried to fit two different stitches around the veins and over the edges. Definitely not straightforward!
I found myself wondering about finding shorter needles for this project, maybe more like my Japanese needles, but blunt (the Japanese needles are super-sharp!). I’ve found the balance of the Japanese needles a bit challenging in the past, but fitting around the edges and corners of these shapes has also been a bit challenging.
What’s that saying about picking your battles?
And in the meantime, Episode 62 of SlowTV Stitchery is now live. In which we discuss Why The British Talk About The Weather, consider discoveries in the loft, and contemplate the placement of the needlelace slips.
Blogging has changed quite a bit since I started years ago, and blogging awards are among the things which have fallen by the wayside as the blogging world has fragmented into blogging, vlogging, and whatever the generic term is for instagram, pixelfed and the like. However, just in the last couple of weeks, an Outstanding Blogger has been circulating, and Alex from UnderATopazSky nominated me among others. So, on to the questions!
Verrucola
What would my perfect holiday be? Our family isn’t good at holidays. I recall a week’s holiday on Anglesey in my teens during which we came home in the middle so my Dad could make a phone call, and I never took to the idea of working on a tan. Resorts, beaches – definitely not. However, Mam and I have been on a couple of painting holidays, which have involved painting tuition and lots of lovely food, and we have both been rather taken with them.
But then again, I’ve been rereading “The King In The North” by Max Adams, and thinking that pony trekking the trail from Bamburgh to Yeavering in the company of an archaeologist or a historian of fourth to eighth century Northumbria might be a really fascinating way to spend a day or so…
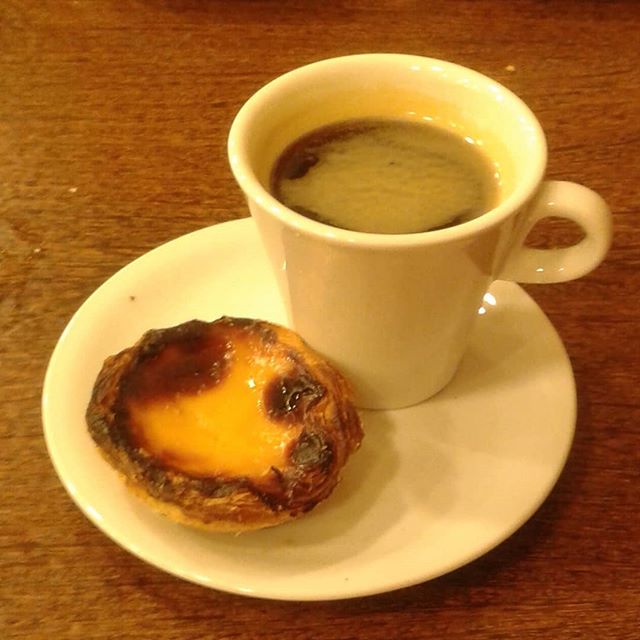
Where is my favourite place to walk? To be honest, it’s the company that makes the walk, as far as I’m concerned. Although, now I think about it: Paris. I spent a year there when I was an undergraduate, and it feels almost as much home as home does (if you follow me). My second favourite is Lisbon, which has a very ordinary cafe which sells the best hot chocolate that I’ve ever had, and beside that – pastel de nata. If you’ve not had a pastel de nata, you don’t know what you’re missing!
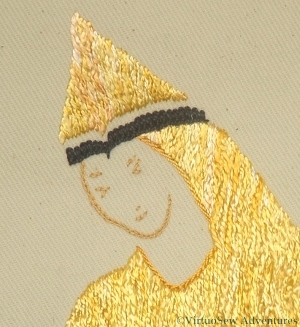
The Lady’s Head
What inspired me to start a blog? I thought it might provide a sort of accountability and help me to keep at my embroidery. I already knew that I loved embroidery and that it helped me keep on an even keel, but I’d also noticed that I tended to do it after everything else, and consequently it wasn’t getting done. I thought that if I had a blog to feed (as it were), there would be an added reason to embroider. That was certainly true, but the other thing that happened was that I found there were other embroiderers out there. Before I started blogging, the only people I knew who embroidered or were interested in embroidery were all related to me. That’s not true any more!
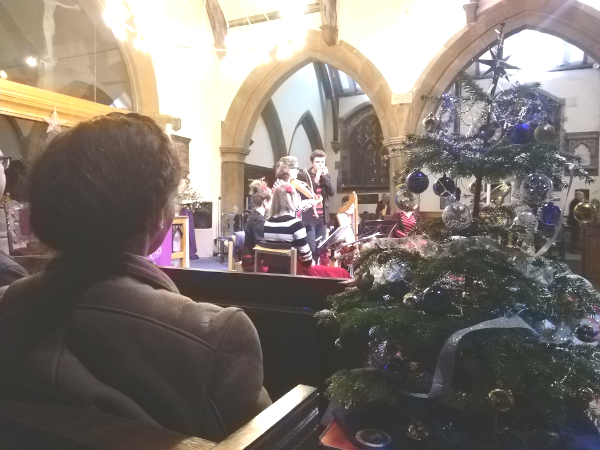
What did I miss most during lockdown? Concerts. I’ve enjoyed several online ones, but it just isn’t the same, especially in the case of ensembles I’ve known for years and who know me. I grew up going to concerts, in fact I’ve been going to concerts of the Allegri String Quartet since I was eleven (my Dad was particularly fond of Beethoven and Schubert), and I know that being an audience member isn’t an idle thing, it is something which contributes to the success of a concert almost as much as the musicians. I’ve missed being an active audience member, holding one end of the golden cord of concentration that stretches between musician and listener. And I’ve been worrying about my musician friends, deprived at once of livelihood and soul-comforting passion.
What was the last book I read? I read and reread constantly, so by the time you read this I’ll be on to something else. One bonus of last year was two of the best books I’ve read in the last several years – “Reynard the Fox” by Anne Louise Avery and “Kindred” by Rebecca Wragg Sykes. I mentioned them both in passing on SlowTV Stitchery episodes while I was reading them.
Another one – which I have also mentioned – is the Georgette Heyer ReadAlong on Twitter. We’re on “The Tollgate” at the moment, and discussions have included some fairly serious social history, a comparison of pikelets and muffins, and the Heyer/Pratchett crossover moment none of us saw coming..
But I couldn’t fail to remind you of “Neferiti Lived Here”, could I – the book that launched a decade of embroidery projects!
And now: Slow TV Stitchery Episode 61 is live, in which I continue to make progress on Tynemouth Priory, while musing on Oswald of Northumbria and his times..
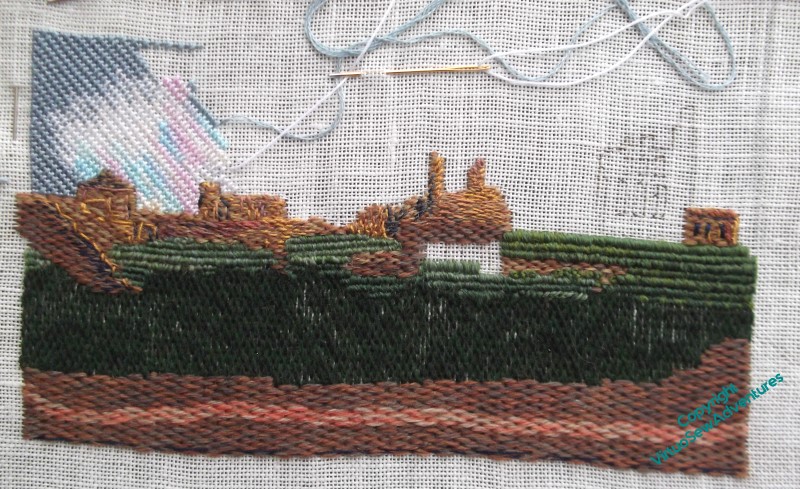
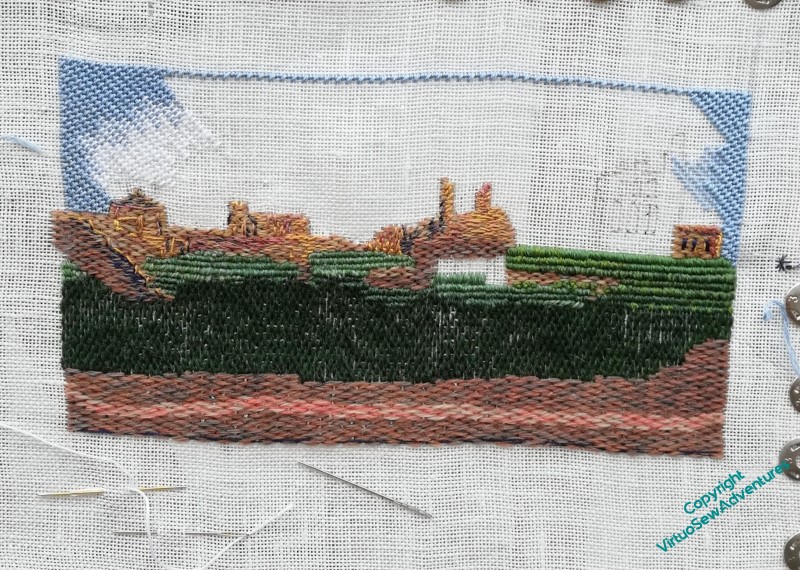
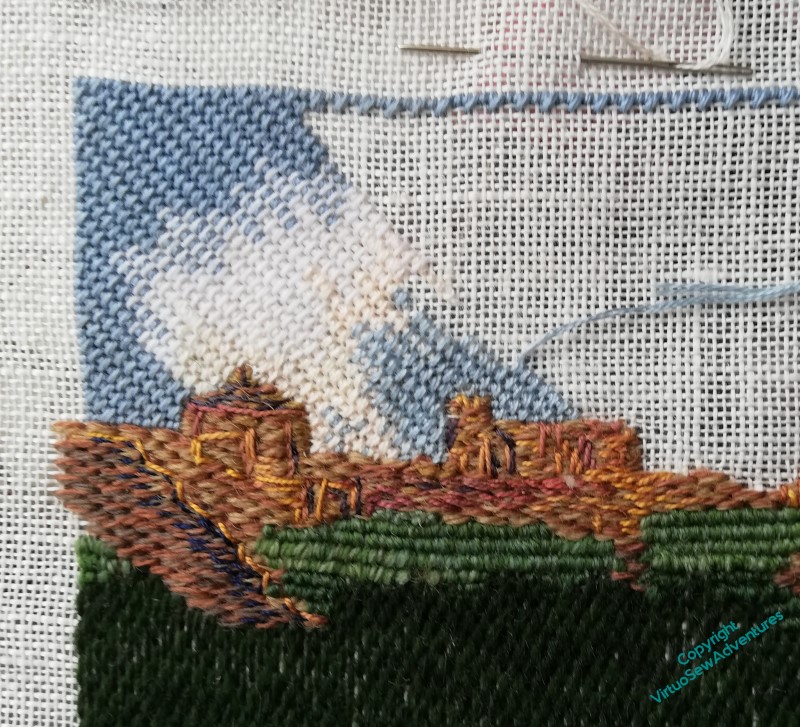
Now then, this is an old friend, and everyone who’s been following my SlowTV Stitchery will be aware that since this is the Year of Finishes, I’ve decided to finish it. This is the first “Tynemouth Priory”, which I started, only to decide that the colours were all wrong against the Flag Sunrise, and I had to start again. I’m glad I did, because the second version fitted into the complete “Leaving The Tyne, 1915” very much better than this one would have done.
However, when I came back to it and started stitching again, I realised that the variegated thread I was using in the cloud may have looked right in the skein, but it wasn’t right when it was stitched.
Sigh.
Time to channel my inner Penelope, and unravel at night everything I had worked during the day.
I picked out two slightly different pale cream stranded cottons to take the place of the variegated thread, and a stranded cotton in a slightly lighter blue than the coton a broder, to go near the horizon, and I’m now reinstating it, with interesting diversions to create cloud-like effects.
At this point I was still feeling very tentative, but I think the sky is improving as I progress across it!
Episode 60 of SlowTV Stitchery is now live. In which is considered making a virtue out of a necessity, arguments with the ghost of Miss Hunter, and a plea is made for an Introduction to the Picts, all supplemented with some meditations on literary sources for future projects.
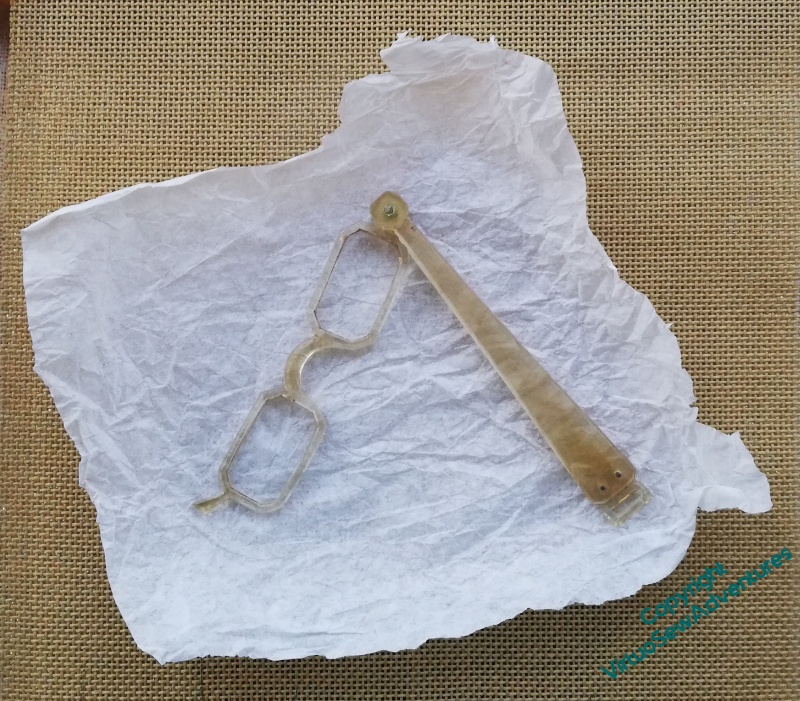
An old lady of my acquaintance once said to me, “Getting older is no fun, dear, but it’s better than the alternative”. Well, one of the effects of getting older – for me – is that I now need reading glasses. If I try to move while wearing my reading glasses, the results are sometimes disconcerting, sometimes positively disorientating.
I’d been wondering about what to do about this, until at the end of 2019, it occurred to me to channel my inner Lady Bracknell, and start wielding a pair of lorgnettes. I duly acquired some, with my usual impeccable timing (Ha!) at the beginning of March 2020.
Since then, of course, museums and menus have alike been out of reach, and I stowed the lorgnettes in my “Eve In The Garden of Eden” box in hopes of happier times to come. I’ve decided to get started on a case now, so as to be prepared for those happier times.
As I’m now dealing with the exhaustion consequent upon getting within sight of the finish on The Amarna Family Group (which has been going for nearly a year) and the Christmas Angel (begun around Christmas 2015!), I’ve been looking for small quick projects to reset myself, and this should be a good one.
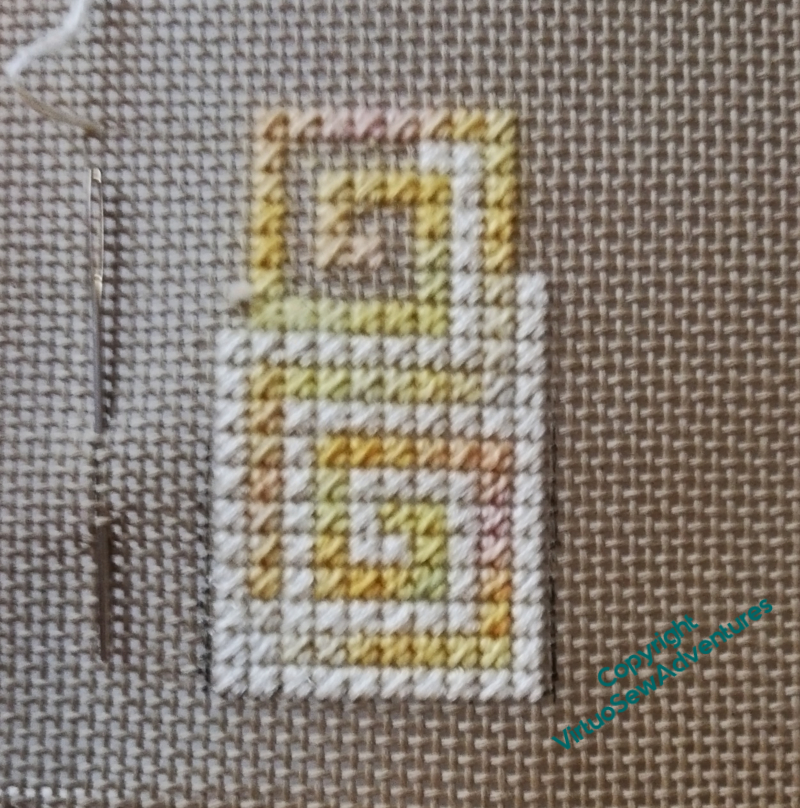
This is a piece of 22 count cotton canvas I found lurking in my stash, and so far I think it will be very simple. I think six repetitions of the scroll will allow me to wrap the lorgnettes with a closing flap, and the light yellow (pearl cotton) and cream (stranded cotton) should make it eay to find in the depths of my handbag.
Episode 59 of SlowTV Stitchery is now live, in which we have almost recovered from the unpicking following last week’s stitching, and consider the particular delight of a fully-stitched fabric.