
Tag: household
A Finish To Celebrate (not mine!)
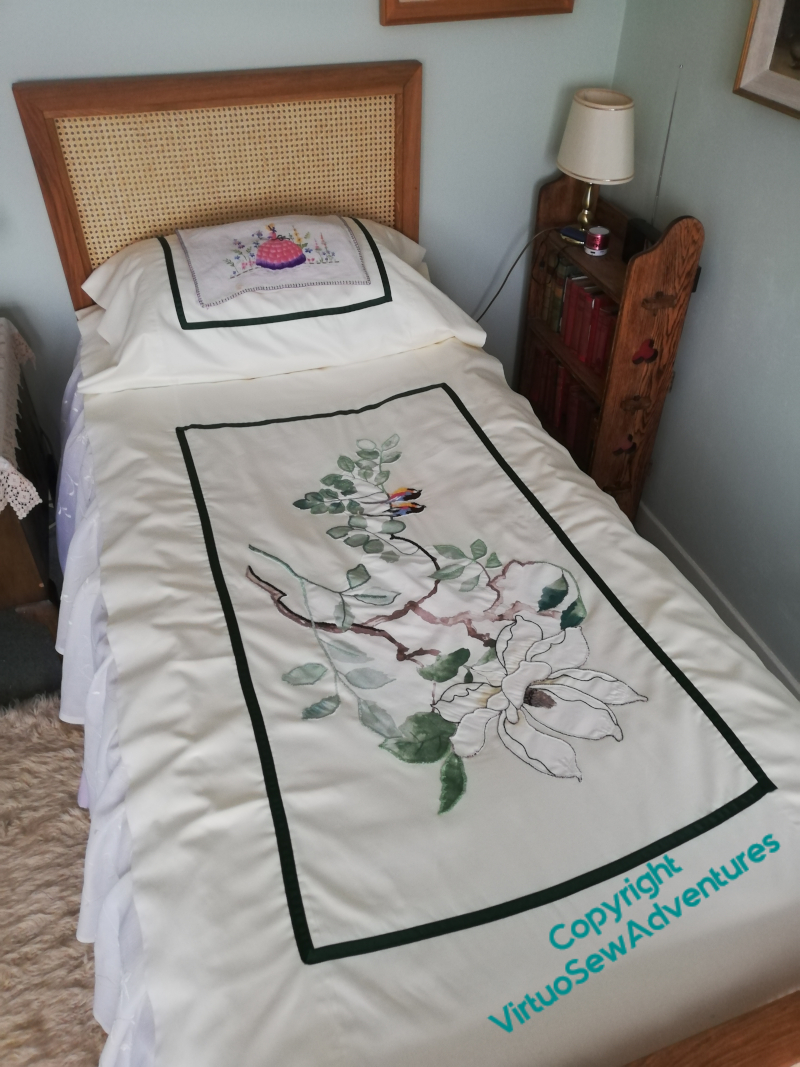
You may recall that my mother was embroidering details and edgings on an appliqu bedcover for herself.
It’s finished!
The slightly more marked colours and edgings make sense of it as a response to the curtains, rather than a random slice of curtain material, and the crisp green ribbon frame confines and sets it off rather nicely.
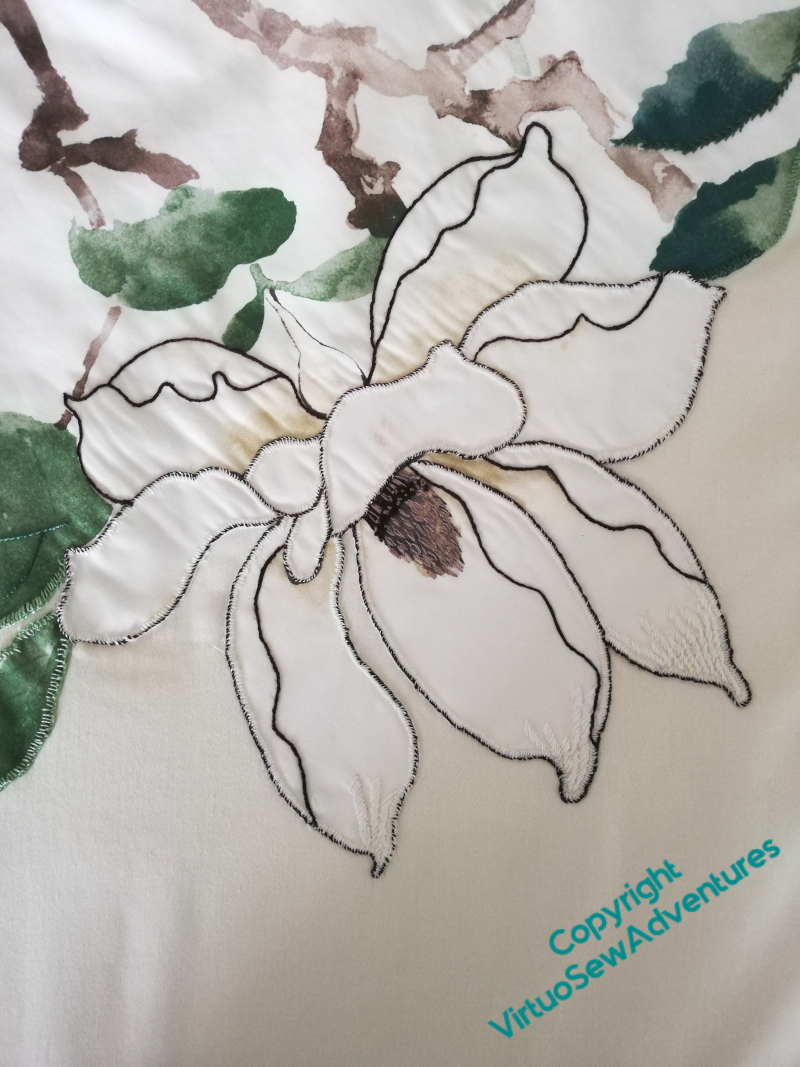
She occasionally asked for my advice, but I can’t say she needed it. This is the only point, I think, at which I made a material contribution to the finished piece. The fabric was lamentably keen to fray, so all raw edges needed covering, and this large flower would have looked very clunky with dark blanket stitch.
White blanket stitch, whipped along the outside edge, however – that worked!
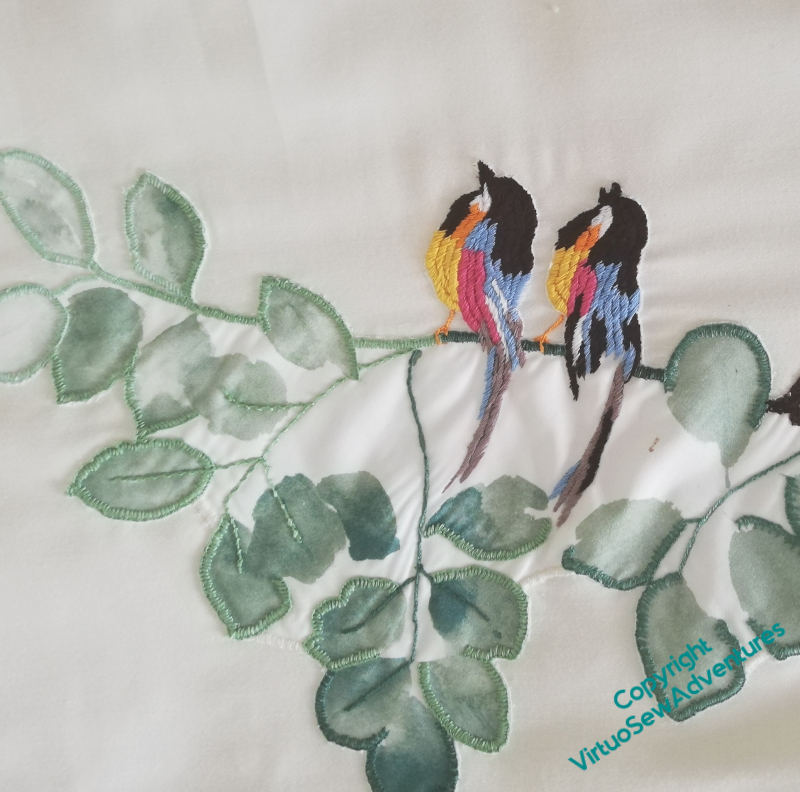
The stitching for the birds was inspired by something Grandmama did, and does look quite feathery, somehow.
It’s always satisfying when a plan comes together, even when it isn’t one of mine!
Returning to my projects, however, Episode 46 of Slow TV Stitchery is now live, in which are discussed the Delights of Stash and the Perils of OverEngineering.
Variations on a theme, 2
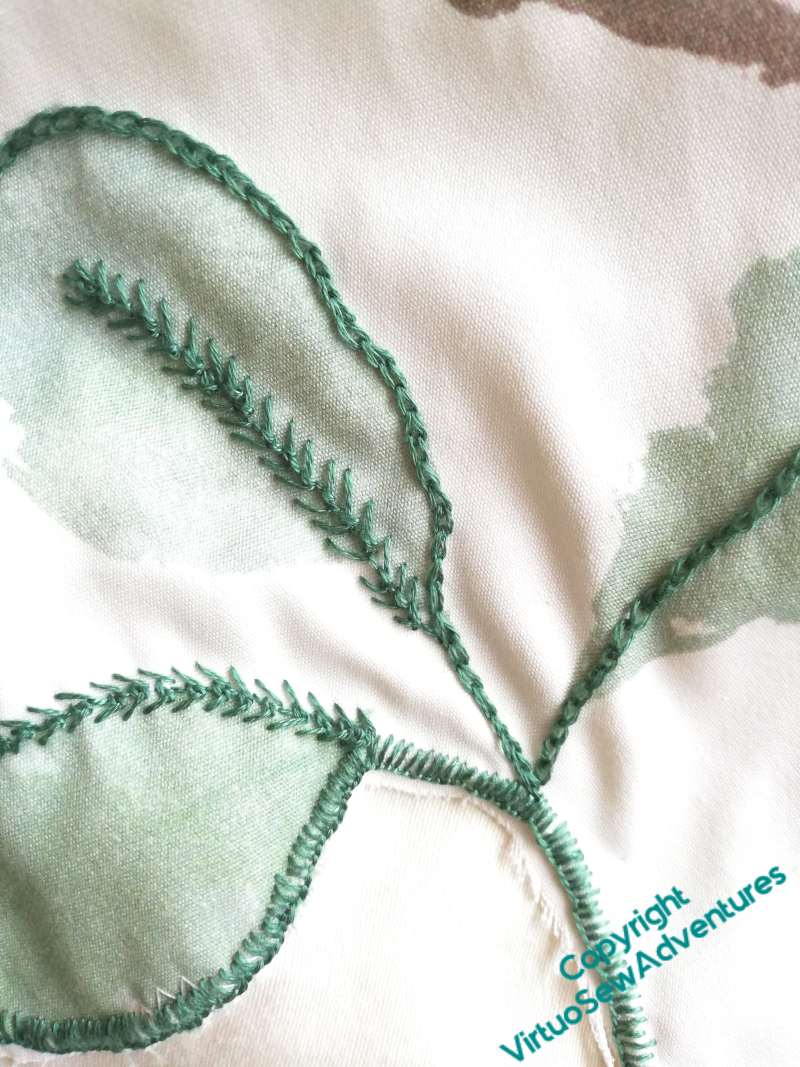
There’s plenty of variety in the stitching on the bedcover, although the choice is limited to those that can control a fabric much inclined to fray.
You can see here some close blanket stitch, nested feather stitch, and chain stitch used to add details.
The interesting thing that my mother has found as she’s worked on this one is that the spashy, “watercoloury” feel of the original print is becoming something slightly blockier, and more like an oil painting or a pastel. Since as a painter, oils are her first love, I suppose we shouldn’t be surprised…!
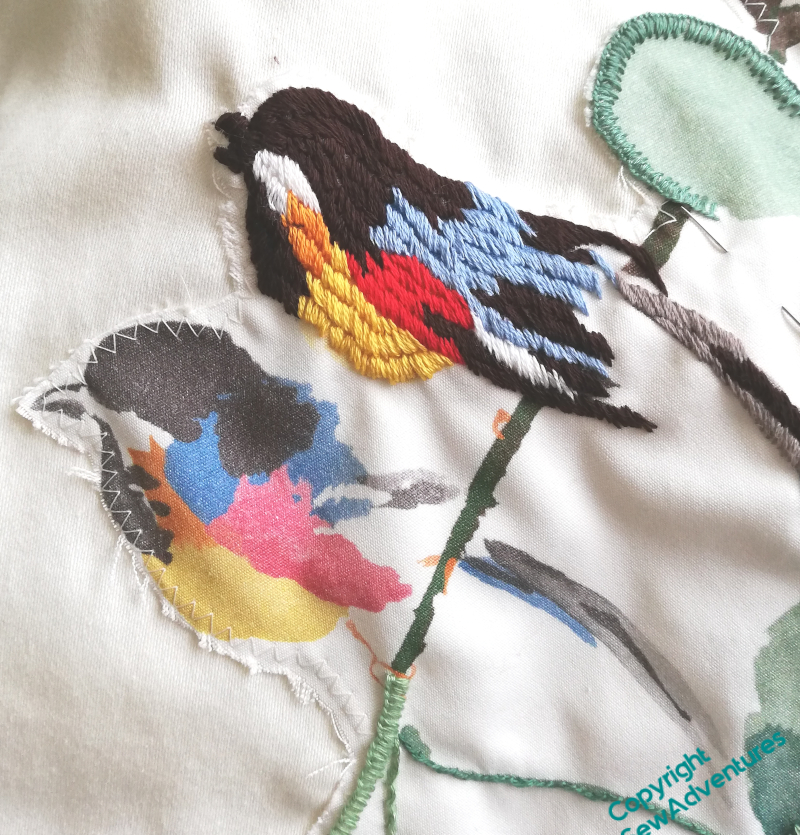
The birds, here, are a case in point. The slanted satin stitch seems to me an effective cross between feathers and brush strokes, and make for an emphatic motif. We looked hard at this photo, and then went rummaging in both of our stashes for more pinkish reds. It’s safe to suggest that there’s some unpicking ahead…
And while that is in progress, I can report that Episode 26 of SlowTVStitchery is now live! It concerns the distinction between bugs and features, and the siren call of shiny new projects – something we all know about, I think!
Variations on a theme, stage 1
It’s always mildly disconcerting to find myself consulted for advice, but as I inherited Grandmama’s enthusiasm as well as her skill, perhaps I shouldn’t be surprised.
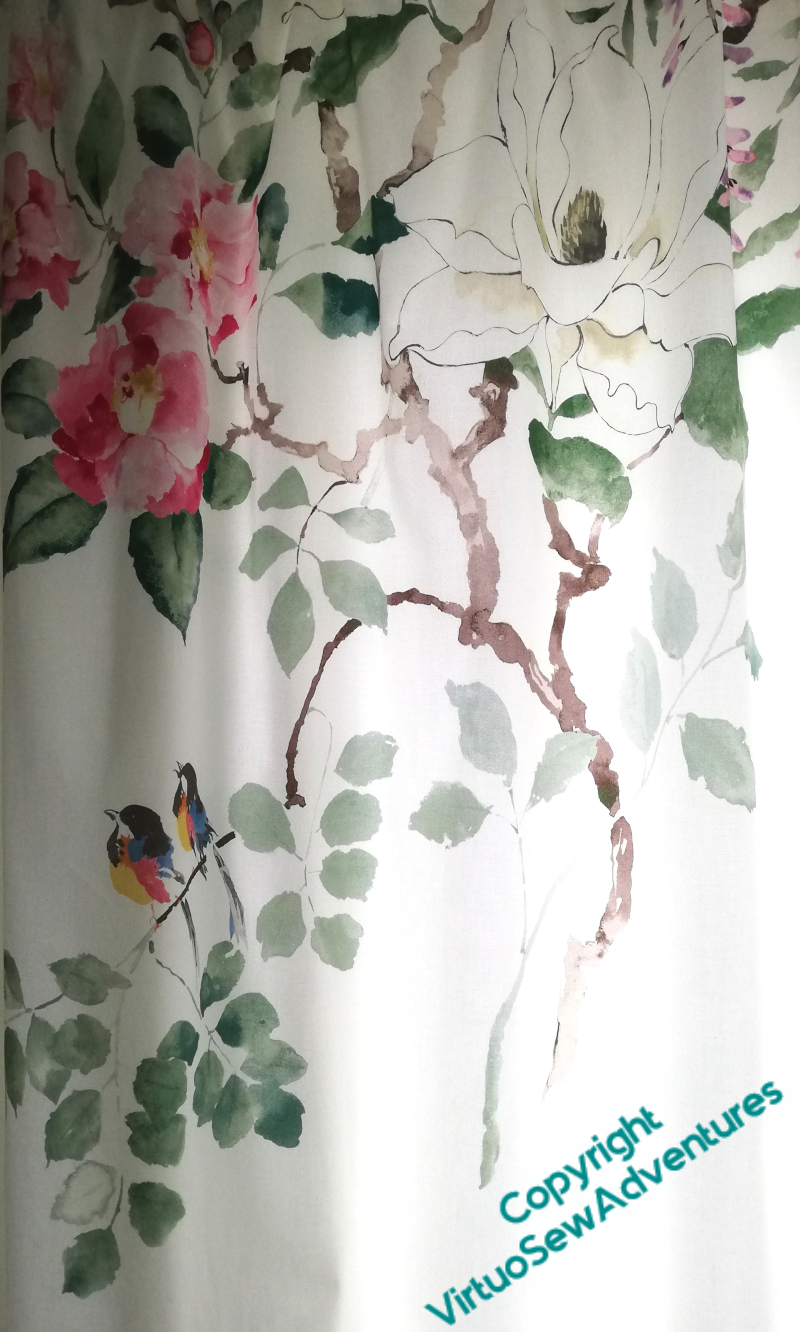
This is the curtain material in my mother’s bedroom. The print is big, light, and painterly, with the small, vividly coloured birds to stop it becoming saccharine. There was enough left for her to make a cushion for the blanket box, and to make an applique of some of it to put on the bedcover.
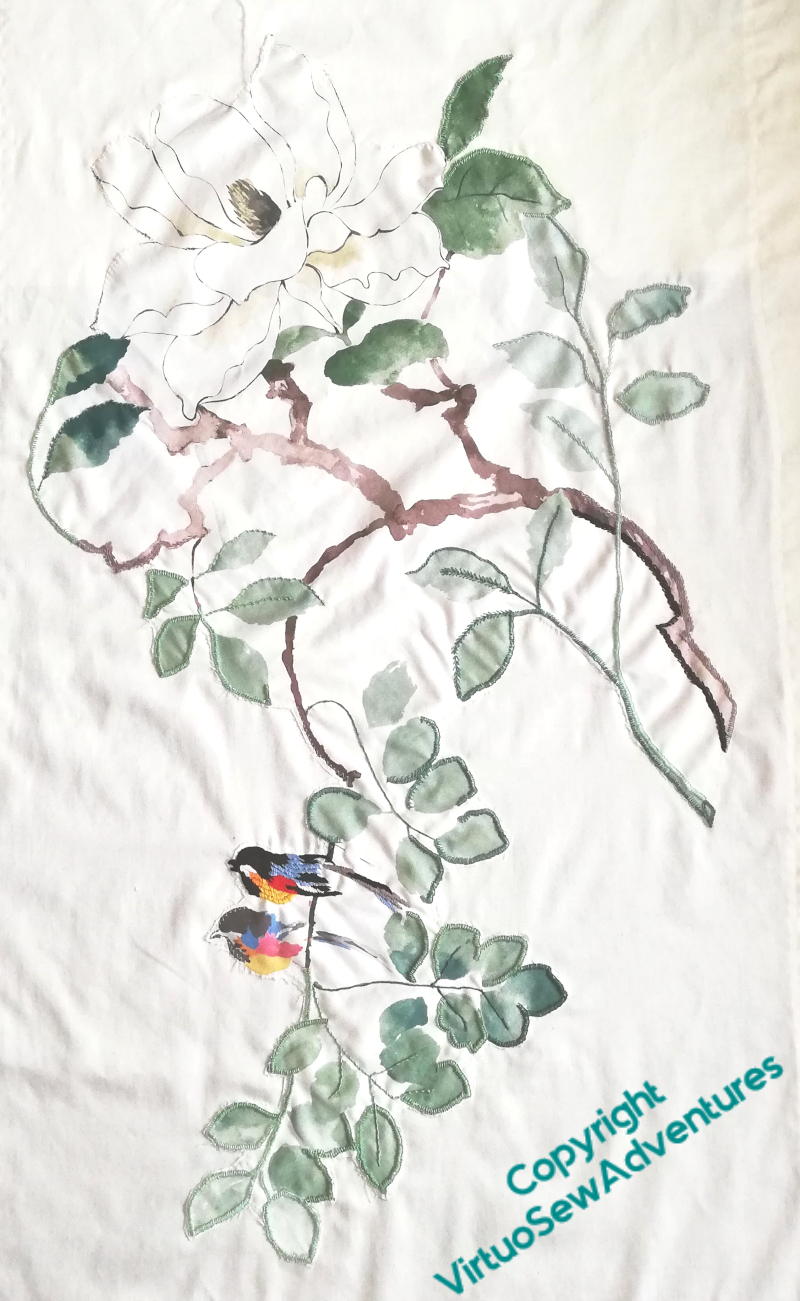
This is the section she’s applied. She wasn’t, originally, intending to do very much to it, and asked me to suggest a few interesting line stitches for the odd detail (portuguese knotted stem, double feather, chain, twisted chain…). Then, however, it revealed itself to be a demon for fraying.
No, seriously. It doesn’t look it – it’s a cotton satin, closely woven – but it started to prove truly infuriating.
So, suddenly, every raw edge has to be either machine satin-stitched (which didn’t appeal), turned under (likewise) or Properly Covered.
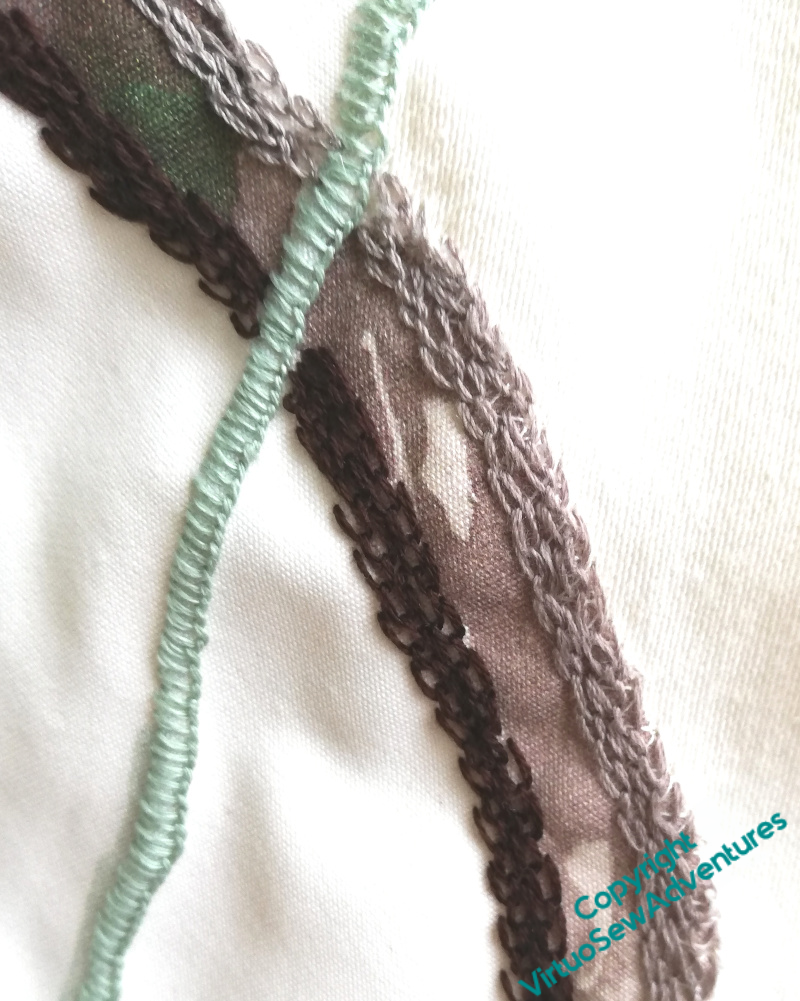
We fished out a variety of suitable threads, and she got started.
As you can see, in some cases she’s not just followed the line of an edge, but decided to add some further details. The blanket stitch line started off following an edge, but would have looked simply silly if she’d stopped when it started careering across the print, so she carried on.
For those craving more SlowTV Stitchery, Episode 21 is now up, in which is considered false starts and the avoidance (or not) thereof..
The Lady In The Garden – Progress
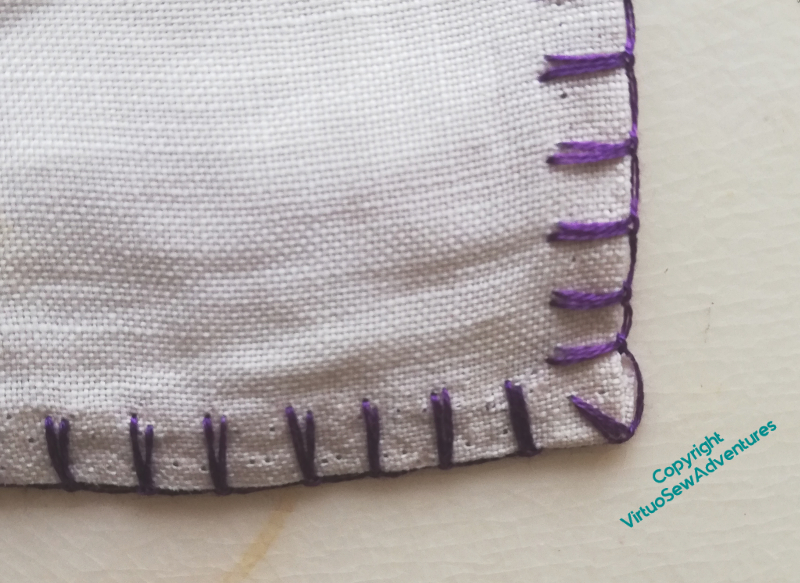
In a slight variation of what Grandmama did, I used Up and Down Blanket Stitch, which is one of my favourites, to work the purple section of the edging. It’s not as comfortable to work as an edging stitch as it is as a surface stitch, but I enjoyed it (as usual), and I’m pleased with how it looks.
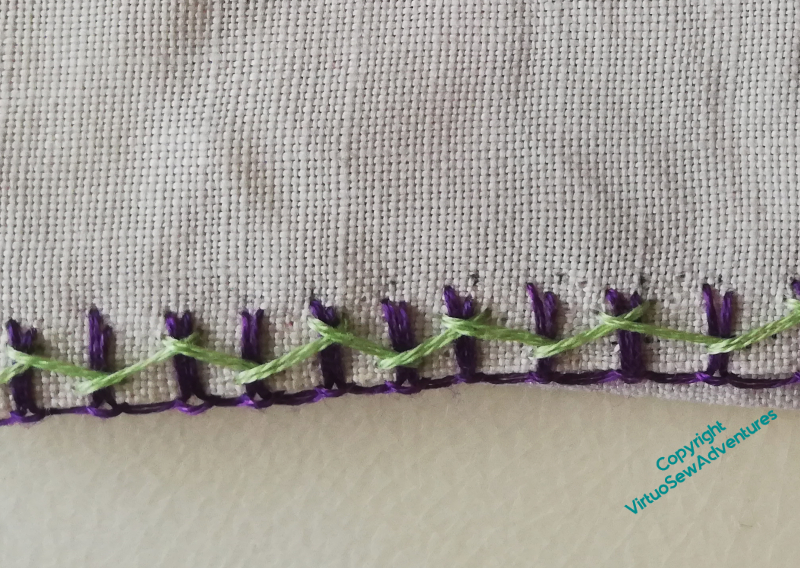
The second layer of the edging was in herringbone stitch, just as Grandmama worked it, but using a pale apple green instead of the pink. It will work much better in Mam’s room that way.
I’ve used two strands of cotton, which is what Grandmama did. I suspect that’s why the edging has collapsed in spite of not being used for decades!
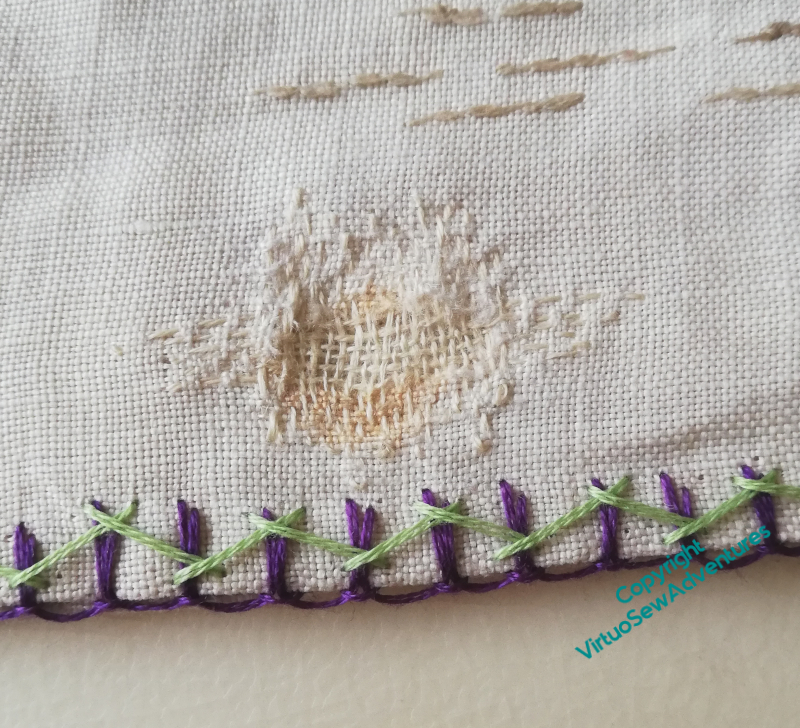
I’m not as satisfied with the darn, but I think it should stop the hole getting worse, and I’ve had a variety of suggestions for tracking down a suitable material to patch it with. At the best of times, that would be a tricky task, and in the current situation, it may well be years before I find something!
Progress continues in other areas, too – Episode Nineteen of SlowTV Stitchery is now up. It concerns, among other things, flyaway thread and the importance of writing things down…
Mending the Lady in the Garden

Grandmama worked this pyjama case for my mother when she was a little girl. It’s beautifully worked, but slightly faded now, and the decorative stitching over the edges has all but disintegrated. Mam has asked me to reinstate that stitching.
It’s a good thing that my collection of stranded cotton includes some of Grandmama’s threads and that of various great aunts. That gives me a chance of finding something not a million miles removed!

There’s some damage to repair as well. I’m not quite sure how I’m going to do so – there’s nowhere with spare threads to repair to attempt an invisible darn. So for now, I have outlined the area in split stitch, and I am going to concentrate – or try to concentrate – on putting in place a suitable border. The original was purple blanket stitch overlaid with pink herringbone, but we’ve decided that purple overlaid with green will work better in the room it will live in.

But we’ve already made a discovery. This slightly Art Deco looking border is the internal edging. It’s still undamaged, and I’m leaving well alone, but my Mam says she never remembers registering the detail here when she was a little girl!
We are pretty sure that the legendary Miss Hunter was involved in the stitching of this, so I’ve got a lot to live up to!
Meanwhile, in other news, Episode Fifteen of SlowTVStitchery is available, and concerns ideas for managing details, and the management of Very Long Projects.
Traycloth finished at last
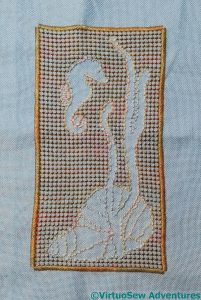
I started this traycloth years ago, largely to experiment with the pulled work stitch I used as the background of the decorative panel.
The idea was to have a sandy background against which the shells, seaweed, and seahorse would be set, and although I enjoyed doing it, it isn’t the most successful of my embroidered experiments. It feels a bit lacklustre, but at the same time, I can’t say I’ve been filled with enthusiasm by the idea of doing anything substantial with it.
While I thought about the details, to see whether I could find something that would work, I hemstitched around the edge, so I will have a useable, if not enchanting, traycloth.
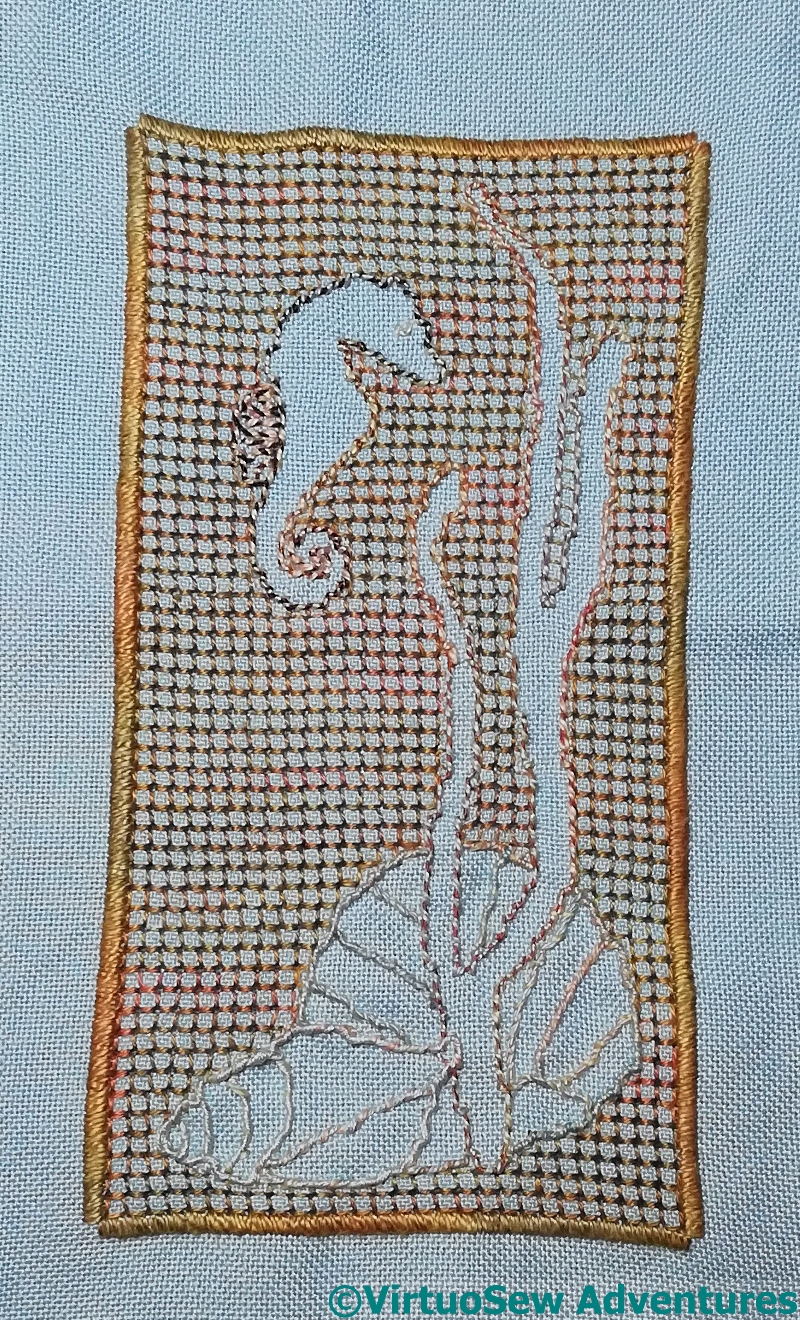
Then I thought hard. Maybe something could be done to differentiate the various elements without actually unpicking them all. The upshot is that the backstitched outlines have been whipped with a different colour of thread in each case, to pull out the differences a little more.
It still isn’t wholly successful, but it is now a usable traycloth and out of my welter of Unfinished Objects which occasionally leap, unanticipated, out of boxes I thought contained something else, to hit me in the face.
And that is most definitely a Good Thing!
More on the cover for the magnifier
Braid Stitch Curlicue
The embroidery on the new cover for Maggie The Magnifier is relatively simple, but it does involve a few favourite stitches.
First and foremost, Braid Stitch. Not the Infamous Plaited Braid Stitch – I was sure I wouldn’t have enough wool for that! – but the ordinary Braid Stitch. I’ve been fond of it for years, as it makes a good, strongly textured line, and it’s much easier than it looks. It’s also fairly easy to work in the hand, and this was very much a holiday period project, using bits and pieces I could easily get hold of, which didn’t include my embroidery hoops!
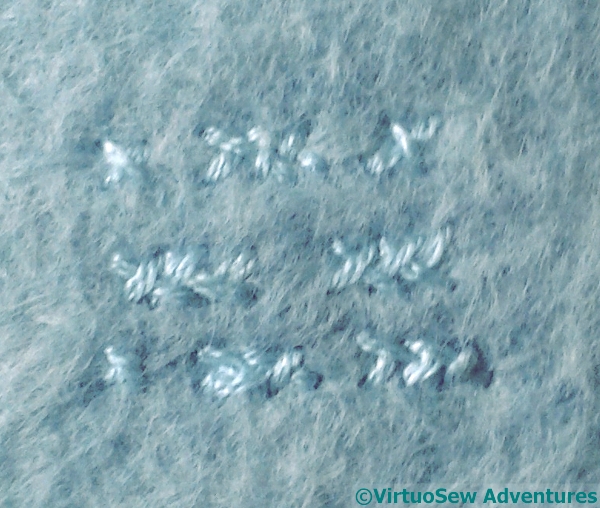
Magnifier Embroidery Finished
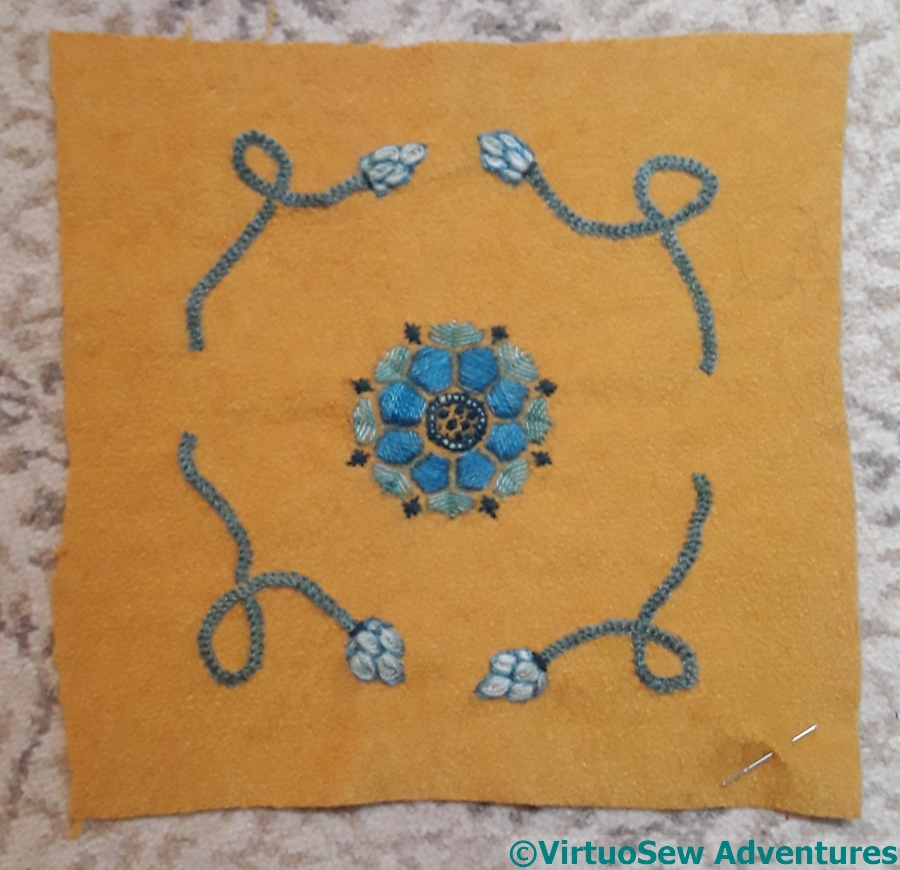
The central rosette uses satin stitch (not a favourite, exactly, but very effective!), Romanian Stitch, and in the centre, a little knotted stitch that I’m sure I know from a book, and has a name, but it just came swimming up out of my head, unattributed, as though I was making it up as I went along.
The buds, or finials, or whatever they are, are in nested fly stitches, outlined with further fly stitches, and you will note, from this view, that I stuck to my decision to draft the design by hand, and not tweak and even it up. This is very much a piece of domestic, informal embroidery, and there’s no reason for it to look glossy and machine made.
Cover for my new magnifier
Desktop Magnifier
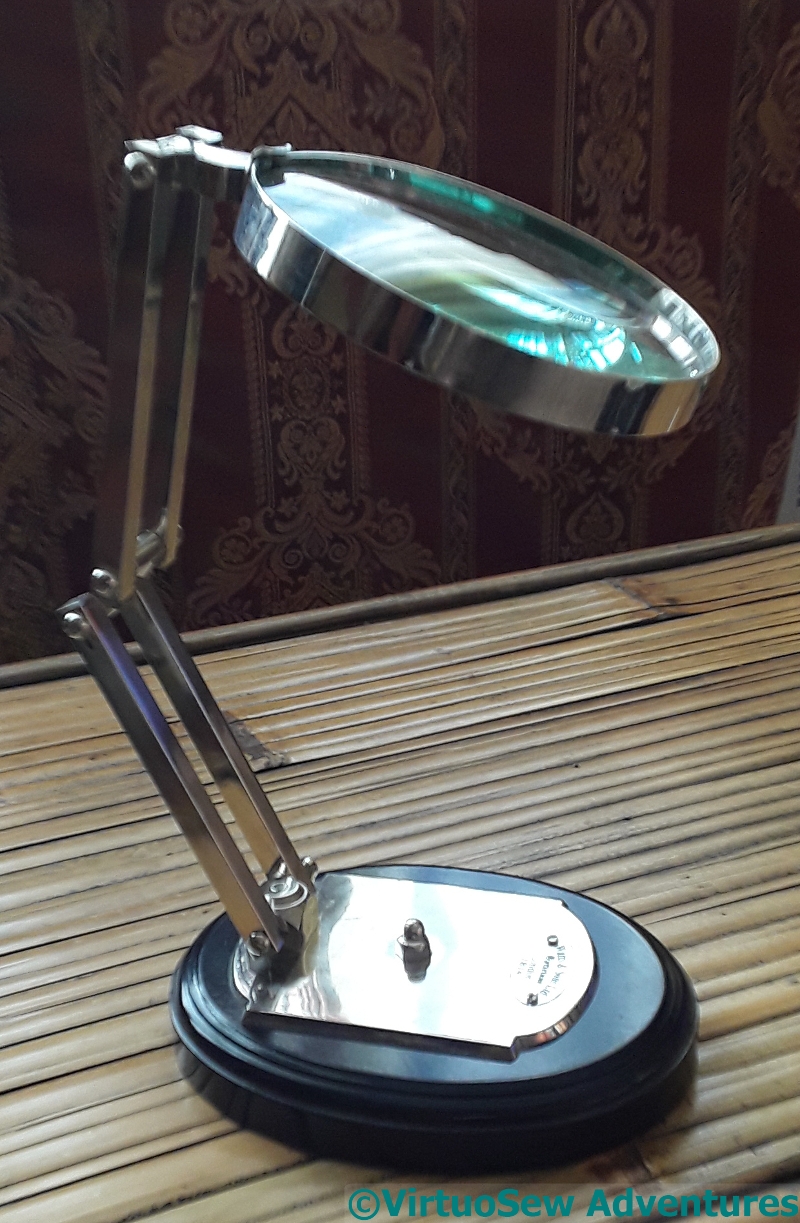
Meet Maggie the Magnifier, so called to distinguish her from Jenny the Jensen Magnifier Light. Maggie was a Christmas present from my cousin. She’s wonderfully sturdy, with a nice heavy base, and notwithstanding the base mentions 1815, we think that was the foundation of the company, and Maggie herself is probably from the 1920s. She will be very useful for details and work at the table, rather than at my embroidery frame, but she needs a cover, both to keep the dust off, and to stop her setting fire to things on those rare occasions when the sun comes out.
Making the cover seemed a good way to pass the time over the period when I had Akhenaten hidden away, so I used a piece of brushed bouclé fabric and some rather lovely wool thread I got from somewhere-but-I-can’t-remember-where.
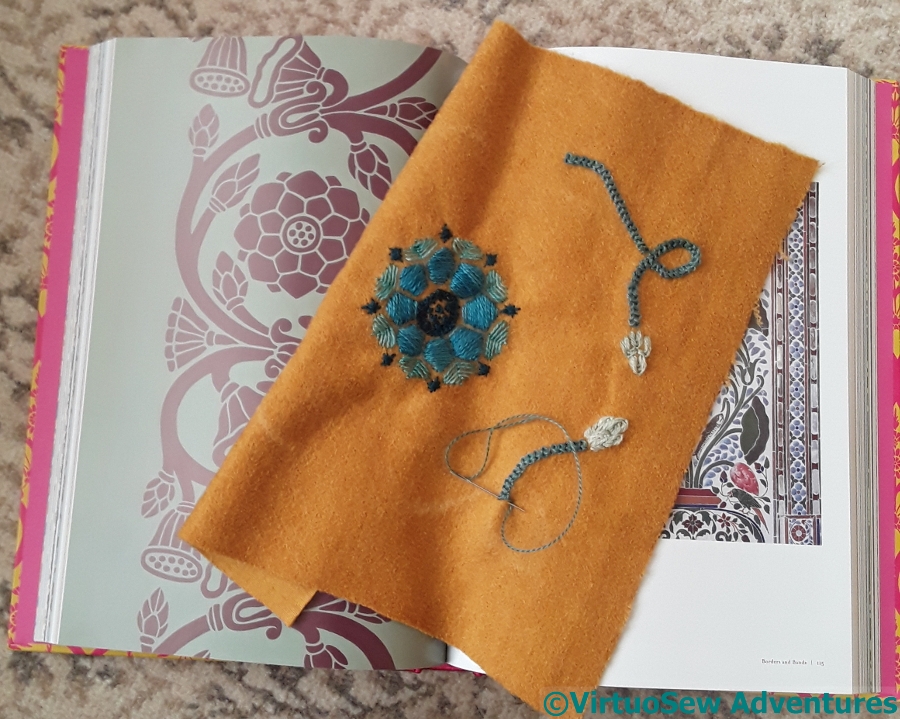
Inspiration And Progress
Since I did the Great Lady’s Magazine Stitch Off, I’ve become very conscious of what I learnt that I didn’t anticipate – becoming aware of how much more often an embroiderer of that period would have reckoned that Close Enough Is Good Enough, how often a pattern would have been sketched on by eye, rather than prick-&-pounced for precision, how much effect and speed would have trumped detail. I’m trying to apply that myself – when I don’t need exactitude, I don’t intend to strive for it. I hope it will make fun new projects more fun, and more “free”. This is a perfect candidate for that approach.
The basis of the design is a floral pattern from a rather gorgeous book called “Pattern and Ornament in the Arts of India”, with curlicues in the corners of the square of fabric. I practiced a couple of times in a notebook, and then simply drew the design in chalk on the fabric and started stitching.
This is going to be one of my New projects for this year…
A Wedding Gift

Coasters
It pays to be as organised as possible when you are dealing with weddings, but I’ve not been very organised in general this year. That said, not knowing what sort of things our friends’ combined taste would run to until two months before the wedding was rather a handicap. In the end, we bought something from the list and then I decided to do a little something extra.
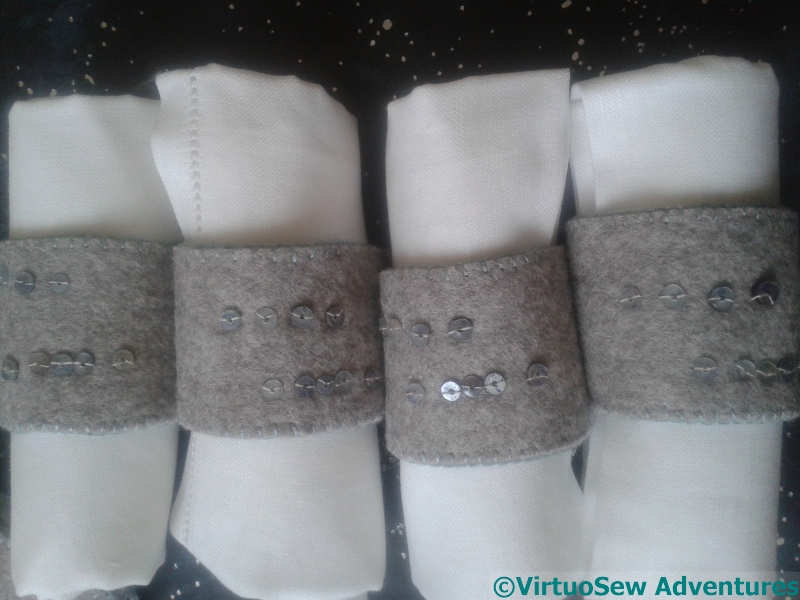
Napkin Rings
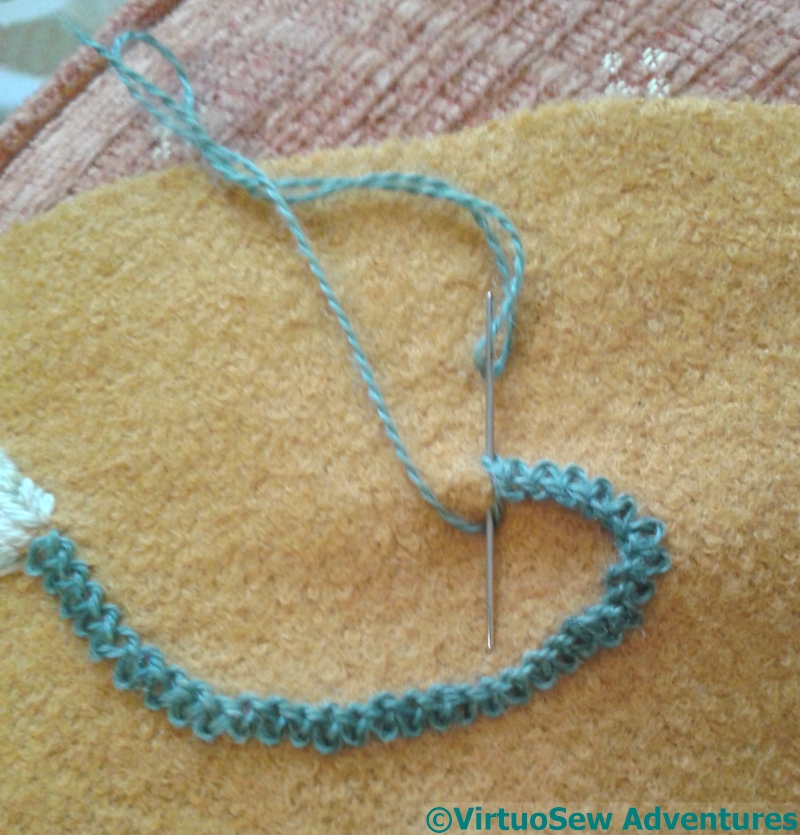
I’ve made a set of coasters and napkin rings in felt, in colours that should work with the crockery they’ve chosen, although they aren’t the same. The two layers of felt are bonded and then blanket stitched together using a vintage silk thread that just happened to work rather well.
And the embellishment is made using tiny sequin-like beads made of shell.
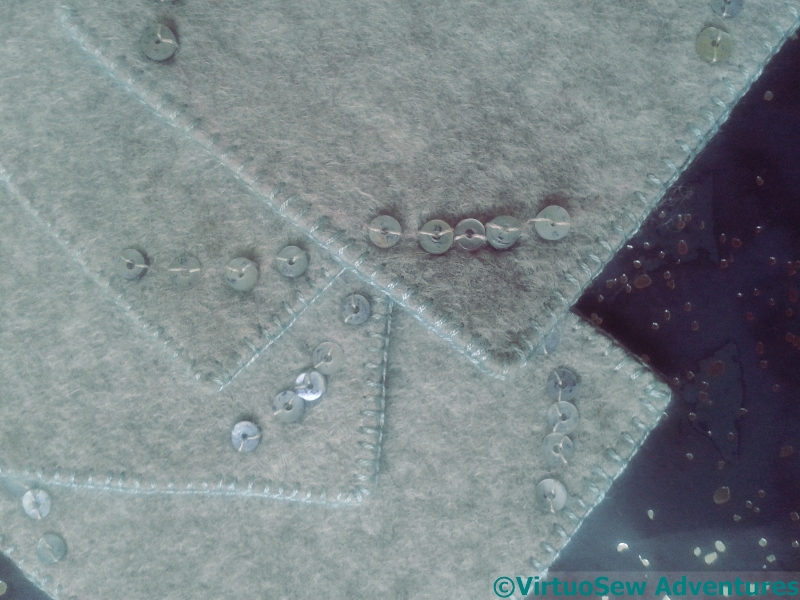
MorseCode
And what is the embellishment, I hear you ask? What else, I hear myself reply, but the initials of our friends’ given names in Morse Code. Fortunately the letters in question are both symmetrical and palindromic, so they work in whatever orientation they are placed. The coasters have each initial twice, in opposite corners, and the napkin rings once each.
Signature
As old friends, they know of my proclivities for using Morse Code, so, lest they be disappointed, I have signed each coaster on the back with my initials in Morse Code.