
Category: Dreams of Amarna
Presentation for the Amarna Family Group
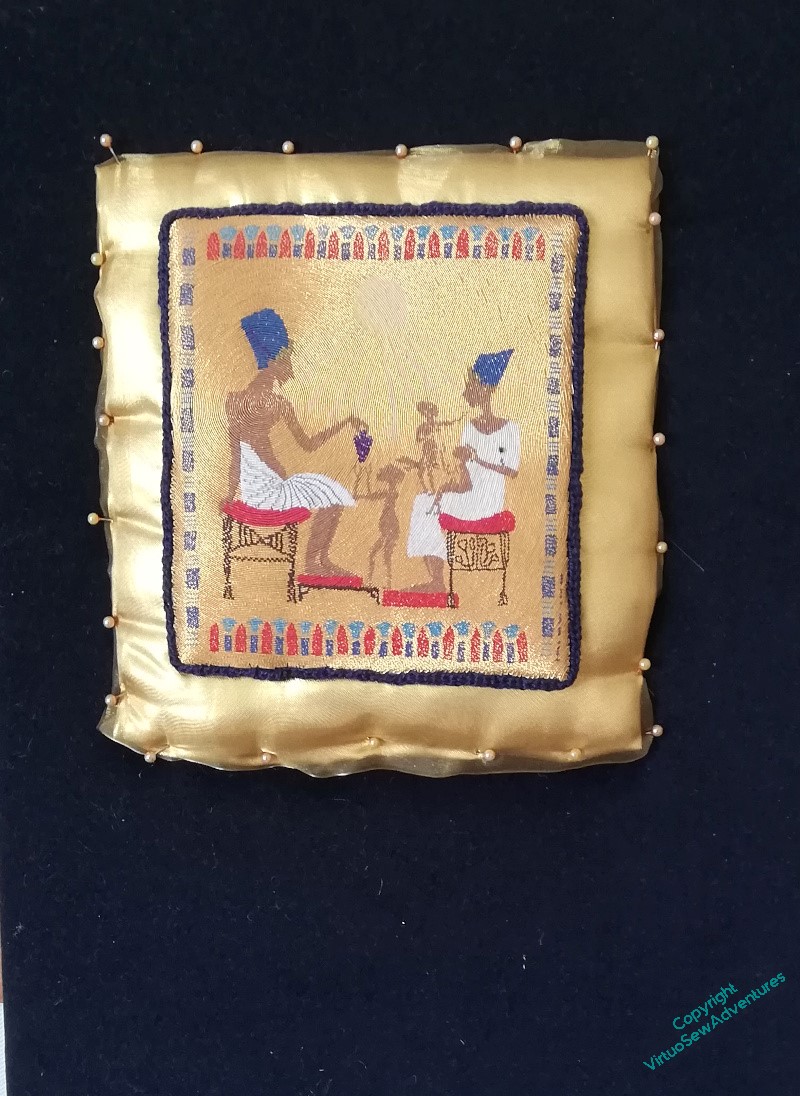
You may recall that when I had finished the or nué I started to apply it to the stela and was very upset because it did not look at all right.
Oddly, it seemed to need backup, as it were. So I thought – Ancient Egypt, gold, let’s give it a gold cushion, as it were.
Only to be less than thrilled with the result. I will grant you that merely pinned in place and without smoothing out the “cushion”, it wasn’t going to look its best, but still..
It has been leering at me across the living room for some months now, and every time I’ve caught sight of it, my head has dropped.
But then I had a thought – maybe what I need to do is pull out the colours in the border.
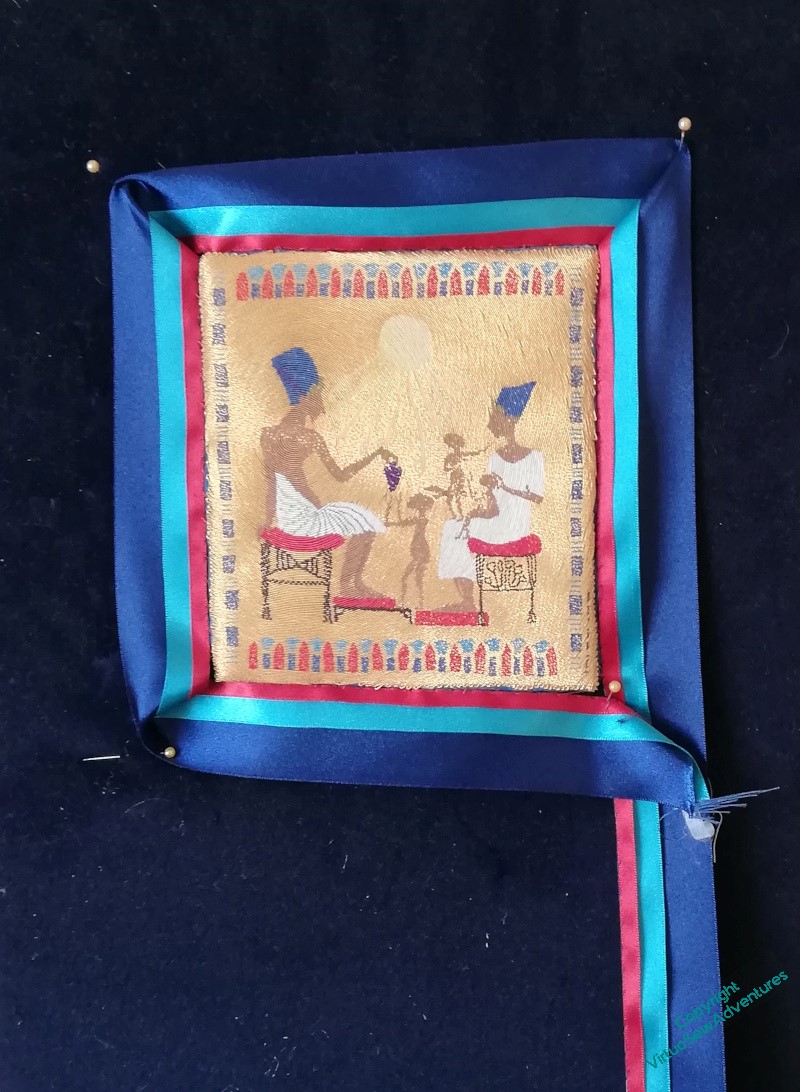
So I bought a couple of metres of satin ribbon in decreasing sizes, and spent quite some time attaching them to one another down one edge.
This is the result, attached in a very off-hand fashion, to be stared at for a while..
I think it’s better.
The question is, is it Best?
Difficulties With The Staff

I’ve been a bit bothered about this pair of workmen ever since I finished them. The pale stone coloured thead is a bit too close to the background colour, and the squarish stitch looks too spiky, too contorted, and very uncomfortable.
What’s more, no matter what highlight and shadow I have added, I’ve not liked it more. So while I’ve been working on sunlight and shadows, I’ve been thinking about it.
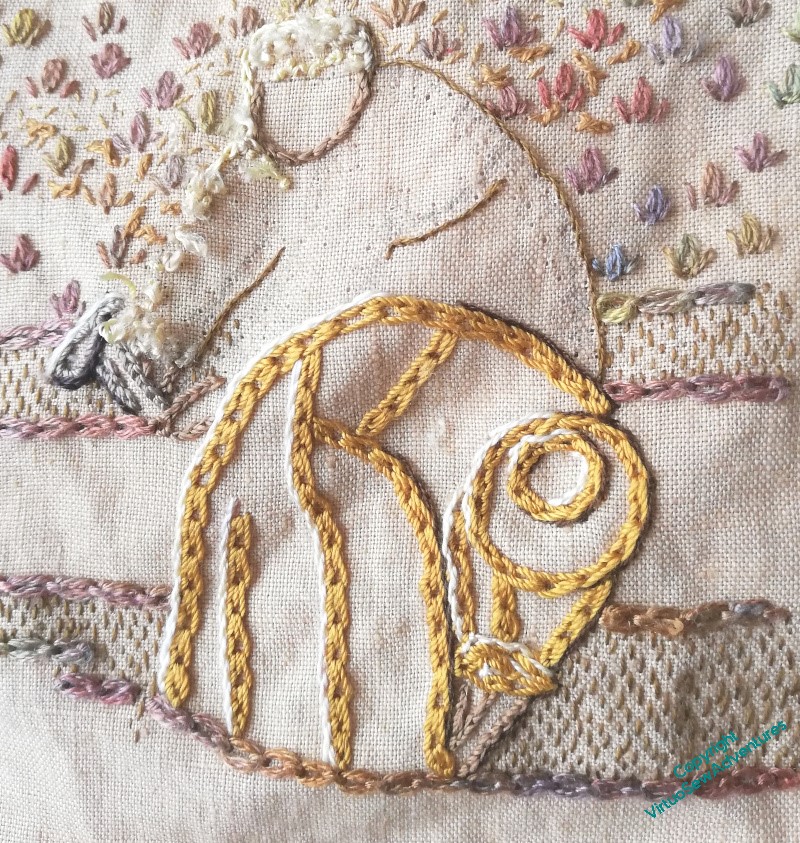
Out it has come, and good riddance!
However…
With what should it be replaced? Clearly not Braid Stitch/Cable Plait Stitch (depending on which dictionary you have beside you!) in pale yellow. Only about half of the workman was reinstated before being swiftly removed.
Well, the decision was swift – the action, rather less so!
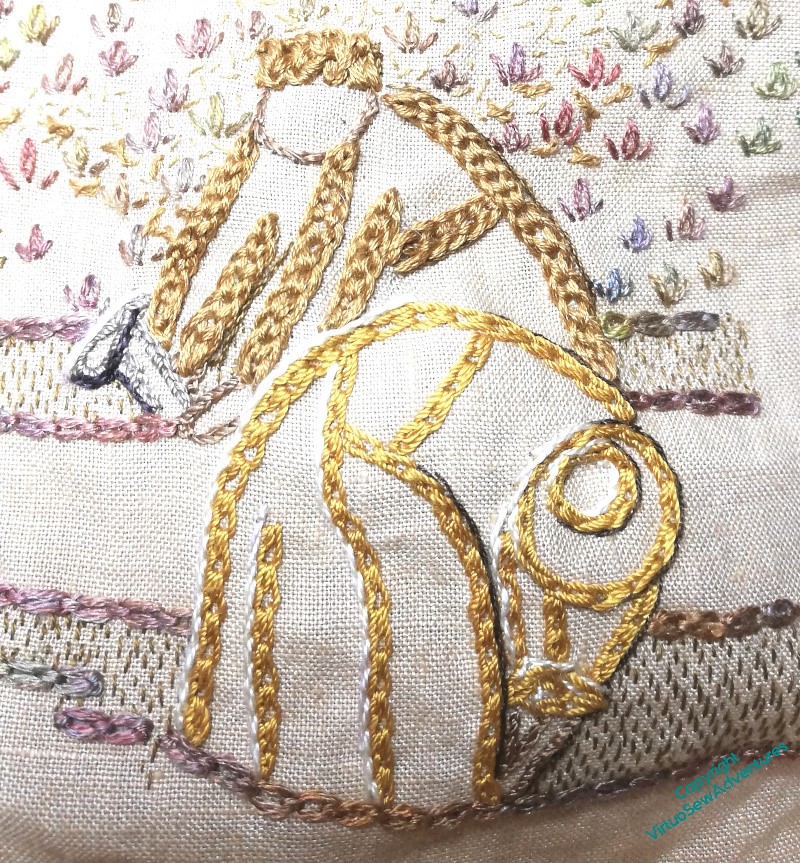
Fortunately all that playing and wrestling with it brought something else to my mind.
Hungarian Braided Chain is an old favourite, and I had been dismissing it because I’d already used it, but in one of the finer threads. Here in undivided stranded cotton, it has enough authority to back up the Shell Chain of the workman in front, and the slightly darker shade of gold helps too.
I think I’m happier now…
Continuing to think about display ordering..
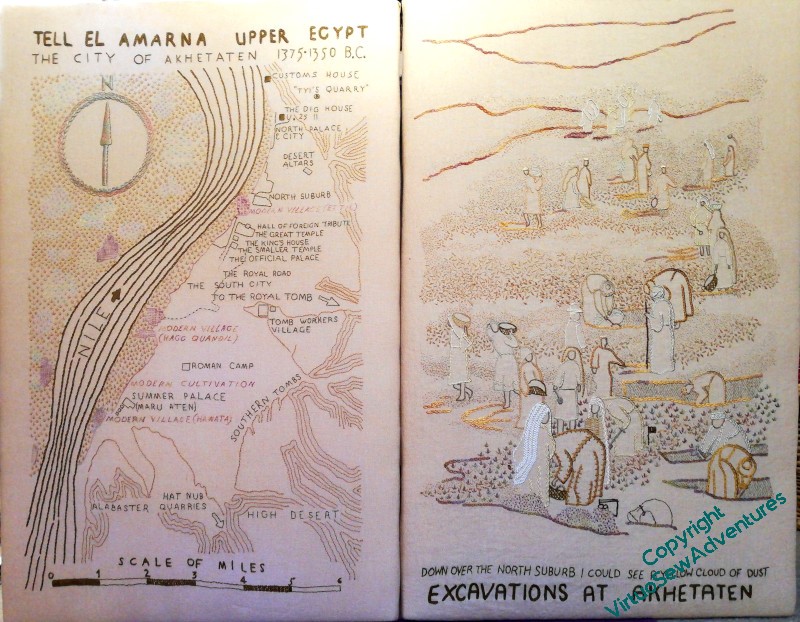
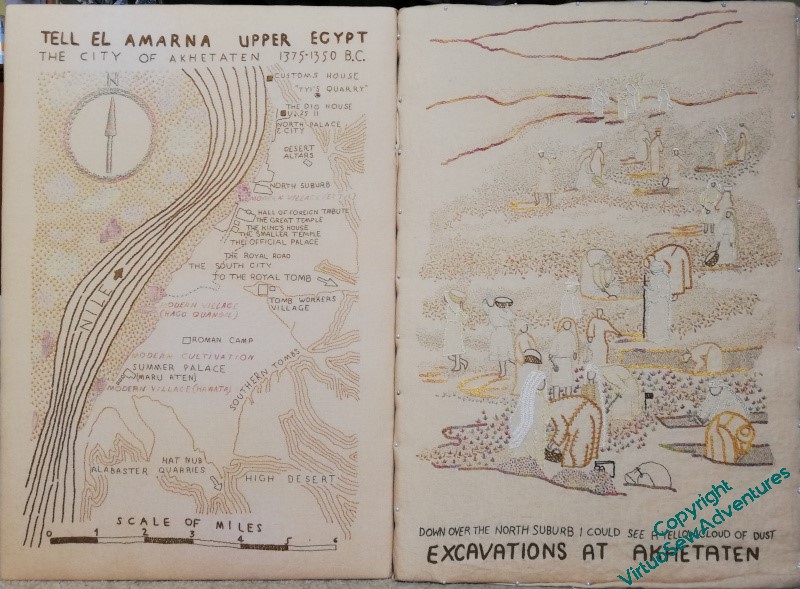
You may recall that I wondered whether I should reverse the order I had planned for these two main panels of the Dreams of Amarna.

When I finally add the border panels and the “spots”, my intention as far as possible to have the spots that were already known set with the Map, and the spots which are more closely linked with Mary’s experiences at the dig set alongside the View of the Excavation. I’m still not sure which way around to put them, but perhaps if I can arrange the border panels to be moveable, we can change that depending on what else is in the exhibition? There was a suggestion, pre-Covid, that particularly northern British museums associated with the EES might be interesting in combining my embroideries with their finds. Now that’s an enticing thought…
I don’t think I’ve quite finished adding details, and I still need to think out my reasoning and placement for these two, but although the extra shadows are barely visible, even in person, they have, I think, brought a better sense of focus. I do, however, have a few highlights and details to add!
One thing I really like is the clear, un-seed-stitched section at the bottom. When the fabric is washed and ironed, I think that area of plain cloth above the title and surtitle will help to make everything settle together.
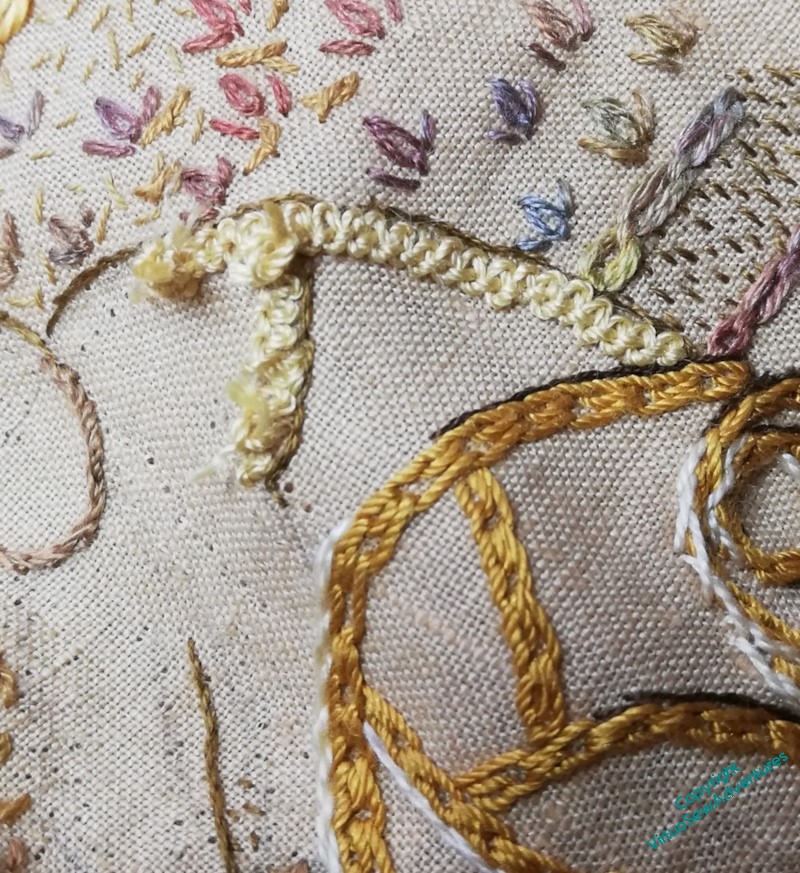
Adding more detail..
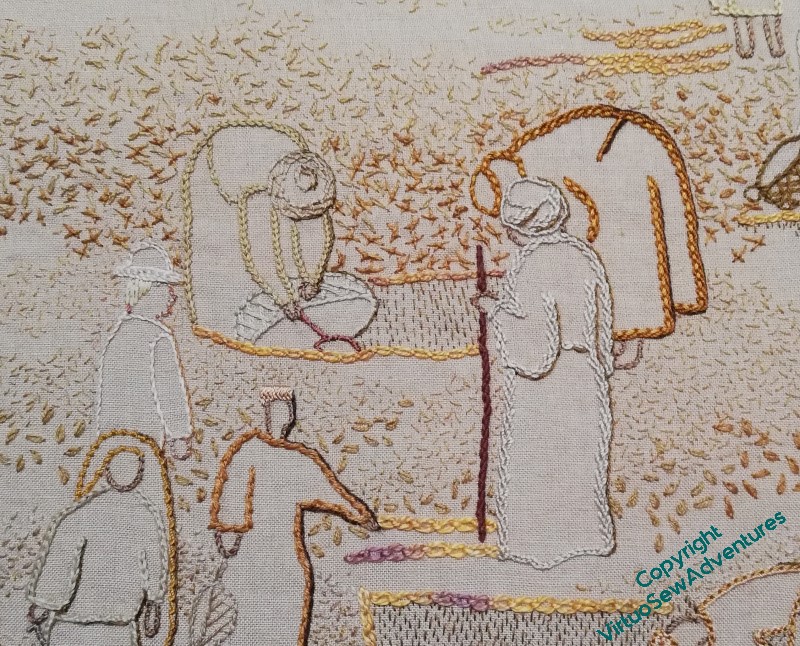
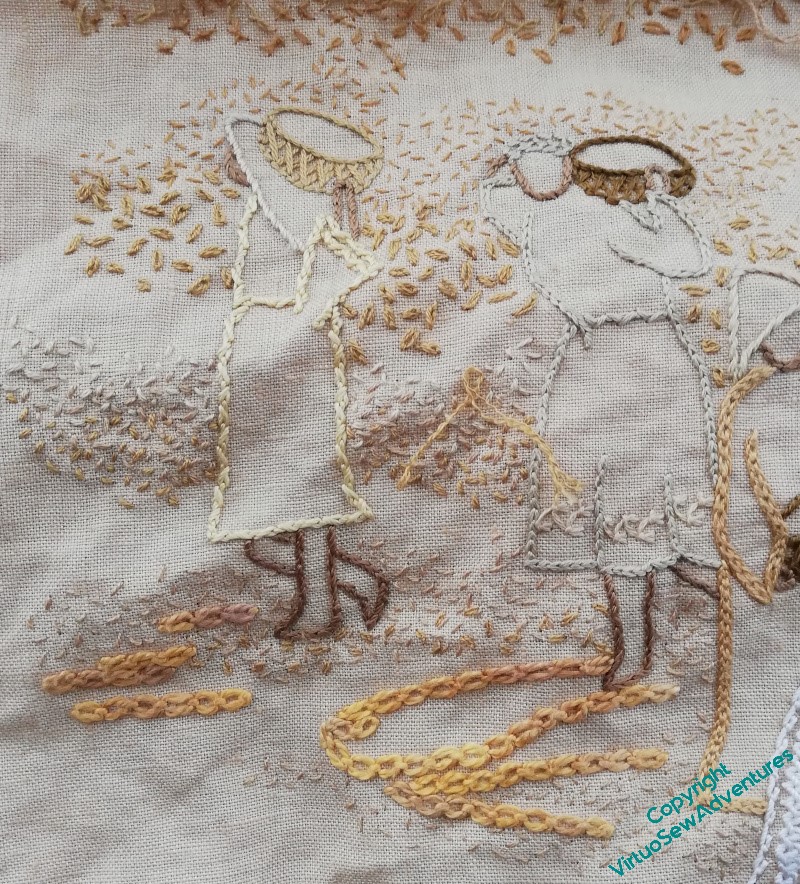
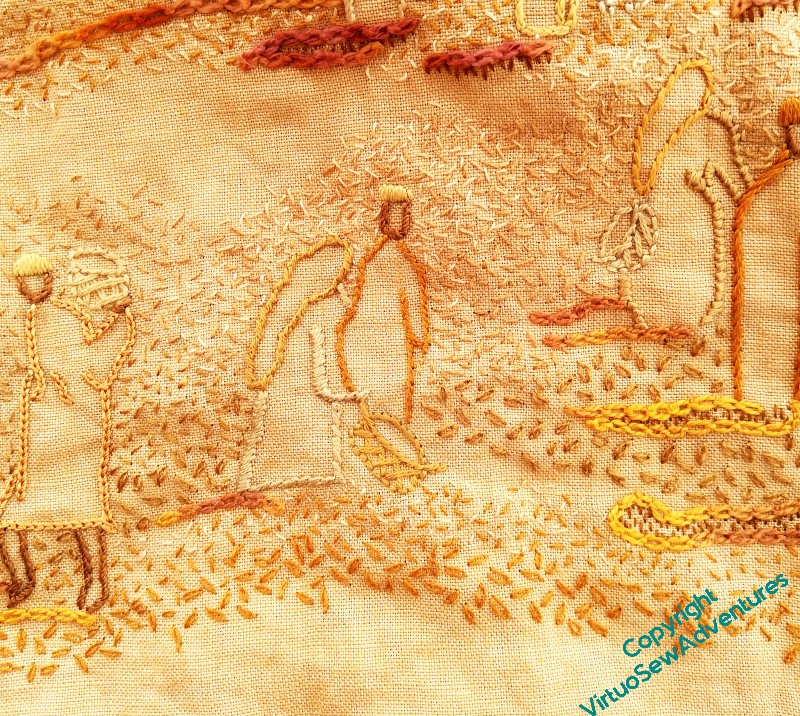
I started by tacking a shadow line along the edge of the Gufti with the staff, decided that it did indeed help, took out the tacking stitches, and started adding very fine stem stitch shadows in single strands of cotton or silk along the right hand sides of the figures.
I used different shades , and different levels of detail – I want the archaeologist in his pith helmet to remain only semi visible. He’s clearly consulting with the Gufti, but he’s not the focus of the flurry, he’s part of the pattern.
The middle distance figures gave me a little trouble, as the colours seemed a more emphatic, close to, than I remembered.
I’m looking across the room at them now, however, and they have settled back into place, just the slight thickening and darkening at the edge helping to make sense of the pattern that’s developing. Even the slightly darker basket, which I had doubts about when I’d stitched it, doesn’t unbalance the whole view.
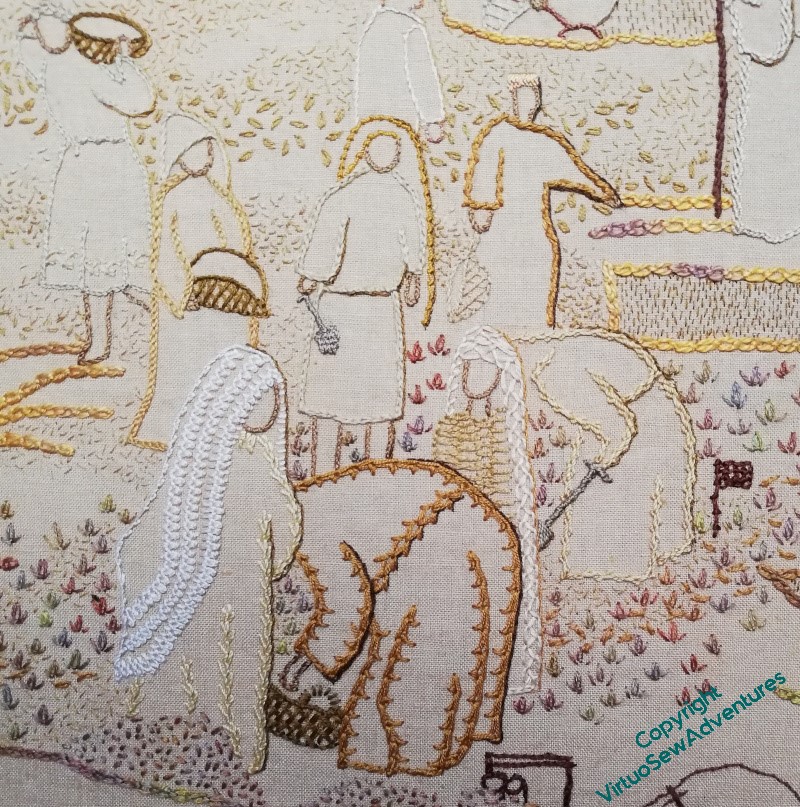
In this bit of foreground, you can see that I have been varying the amount of detail I shadow. Some of these figures may get a little more detail, to bring them forward even more.
I’m even wondering about putting a shadow on the edge of the creamy white veil the foremost figure is wearing.
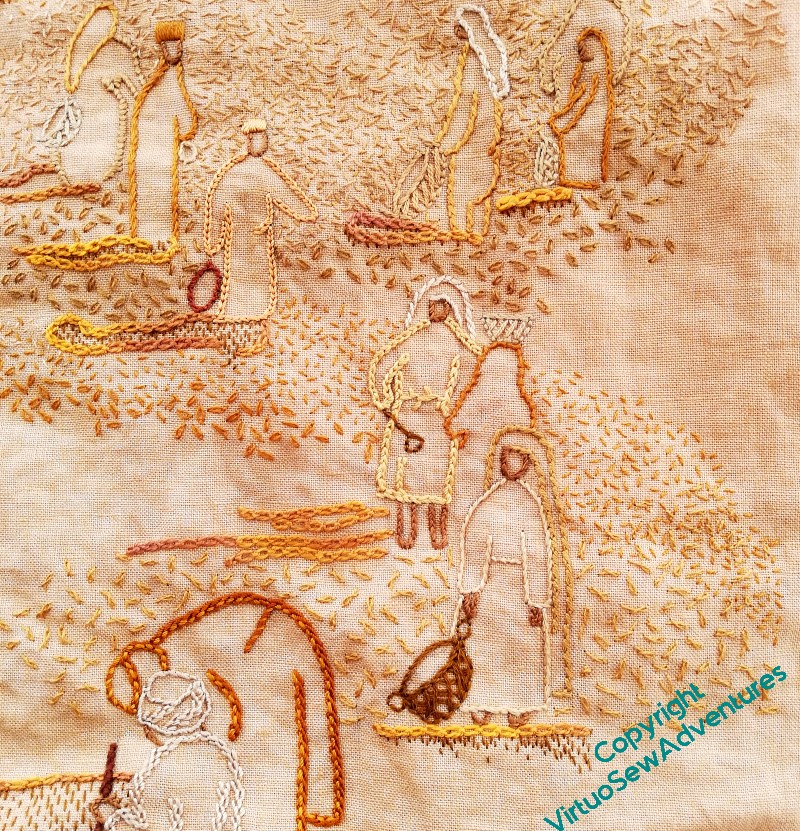
More to do, more to think about..
Having finished the title text and got to a point with the seeding where I think it is more or less complete, I pinned up the View of the Excavation over the lovely frame prepared for it, and then set it beside the Map, sat back, and stared thoughtfully.
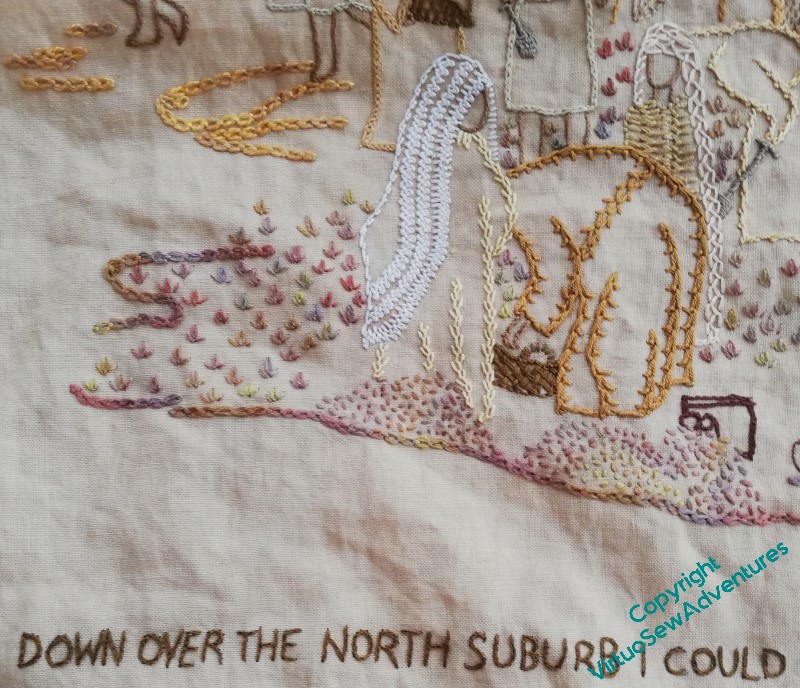
I think the conversation is beginning to happen, now. There are still a few infelicities – the area at the far right where the tete de boeuf stitch falls away from the trench, and the area above it where there’s a sort of funnel shape between the areas of seed stitches. I think, too, that in the far distance, the seed stitching maybe tracks the shapes of the people a little too closely, and I need to make the edges a bit wispier.
When summoned to act as Cardboard Programmer, or Rubber Duck(!), The Australian said that he was having a hard time making out some of the people, and could I put a very narrow shadow that would balance pulling them out of the scene with not emphasising them to the point of obliterating the dust?
And then I had another thought. I have always put them in this order: Map on the left, whatever else I was going to do on the right. Should I keep to that, or should I change my mind?
Developments on the View of the Excavation
I love my worklight. It gives a wonderfully crisp and bright light to work from, and it can even be useful in bright daylight because it washes out deep shadows that confuse the eye. By and large, it also gives a better idea of true colour than the earlier one I had, which didn’t have the “throw” to reach from my side table to my hands, and tended towards the blue.
However, just every now and again, it doesn’t quite hit the nail on the head, as it were, and this is a case in point. That row of Knotted Cross stitch is plainly in too cold a colour for the surrounding stitches, and yet when I was picking the colour, using my worklight, the thread looked good, a warm darkish olive-brown. When I looked at the stitches having completed them, it looked much colder, just plain Wrong. Out it comes!

I tend only to unpick first thing in the morning, so rather than continue with the seeding, I went back at that point to the title stitching. And it’s finished!
It’s not entirely even, but neither was the stitching on the Map, and I like the unevenness. It recalls the unevenness of the ground, particularly as the dig advances across the area, and it is just the right weight to anchor the picture.
Working on this section has reminded me of just how much I enjoy working on embroidery in the hand. As I work on William, or on goldwork pieces, or even canvaswork, all of them in a frame with fabric held taut, there is something that I miss about holding the fabric in my hand, taking my stitches and wrapping my threads. I think I need to make sure, for the future, that I have a suitable “in the hand” piece on hand, as it were, to keep me connected to my first love of stitching – the stitches themselves.
Continuing to bring the View forward
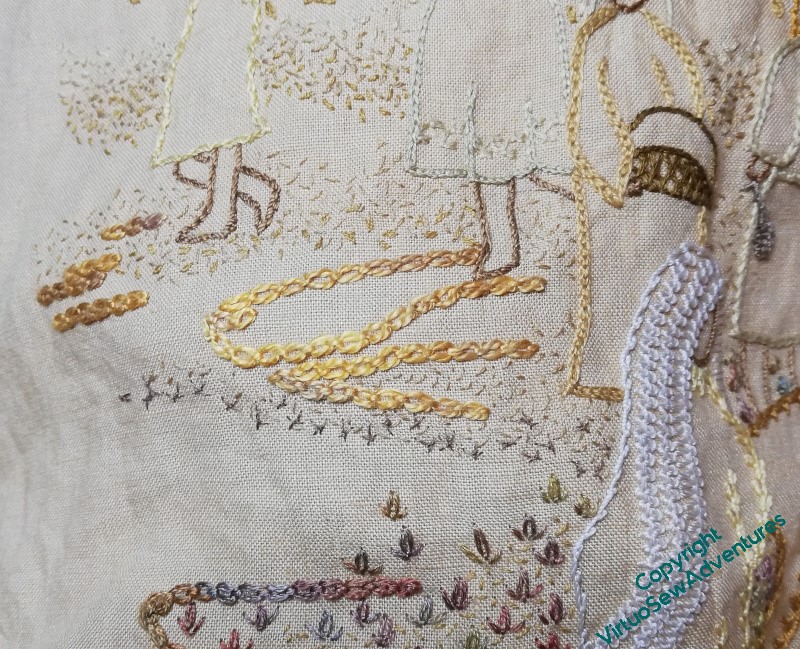
I decided to continue to use Danish Knot Stitch across this area. It makes for a lot of raggedy and flyaway texture, which I think works quite successfully. Furthermore, even if my original idea for these panels was that they would be viewed from a distance, I have learned over the past twenty years that embroideries pull people in. There needs to be something interesting for everyone therefore – the big story, what you see from a distance; the small stories told by the patches; and the details and flourishes added in the working, which may not be appreciated by everyone (although in my experience, anyone who’s willing to pay attention can be enticed into our world!), but which will certainly add something for those deeply interested.
As I continue to work forward, however, I’m not using exclusively heavier and more textured stitches. My starting point is still pale seed stitches. These help to pull the whole thing together (I hope!) and give me a first layer of texture. That’s the dust underfoot and in the air, the “yellow cloud of dust” referred to in the text. The heavier and darker stitching is what pulls the figures forward, responding to the heavier and stronger stitches used to outline them. Then tiny, pale stitches will sparkle through and change the texture again.
Even as I come right into the foreground, I’m starting with seed stitches. I think they won’t go across the whole of the area with the tête de boeuf stitches, as I want to make sure that those stitches keep their authority. I will, however, have to do something about the edge you can see on the right of the topmost trench in that picture, maybe more tête de boeuf stitches, maybe more trench. Wait and see!
The Excavation – Further Dilemmas
You may recall I was wrestling somewhat with the large title, still trying to work out what the stitch was. Since I had jumped the gun a little, and already have the Map stretched and stapled to the frame, I can’t look at the back, and I wanted to maintain consistency across the two panels, so I had to find out.
I did a little more rummaging on my blog, and finally found a reference to it!
So now I know what to do there, I can move on to my next dilemma..
You can see, I think, that the uppermost strand of this section is in Seed Stitch, and the next is Twisted Chain Stitch. All single strand (honestly, what’s happened to me, I used to be all about chunky stitching with six strands in the needle!!) and random as far as I can make them. I felt that the lowest area of this section needed to be more emphatic, and tried a variant on Danish Knotted Cross, followed by single chain, followed by both of those in a slightly thicker thread, and then stood back and looked at them.
Even with my glasses, I was struggling to see any difference.
Now, I find myself wondering, does this matter, or does it not? How emphatic do I need to be, how much do I need to emphasise this mid-ground area?
The Excavation – dust in the air
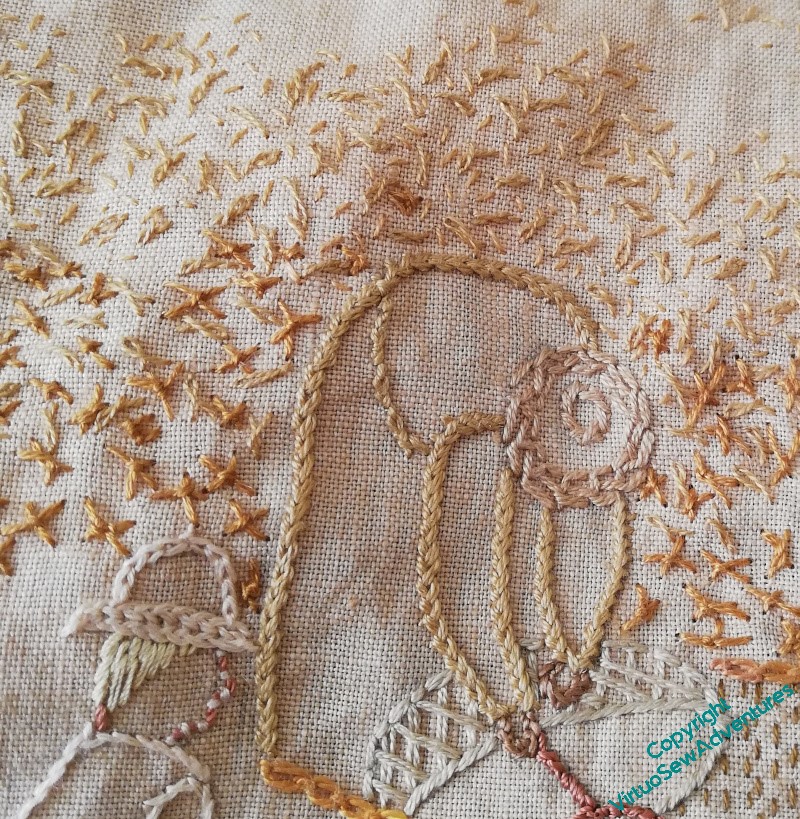
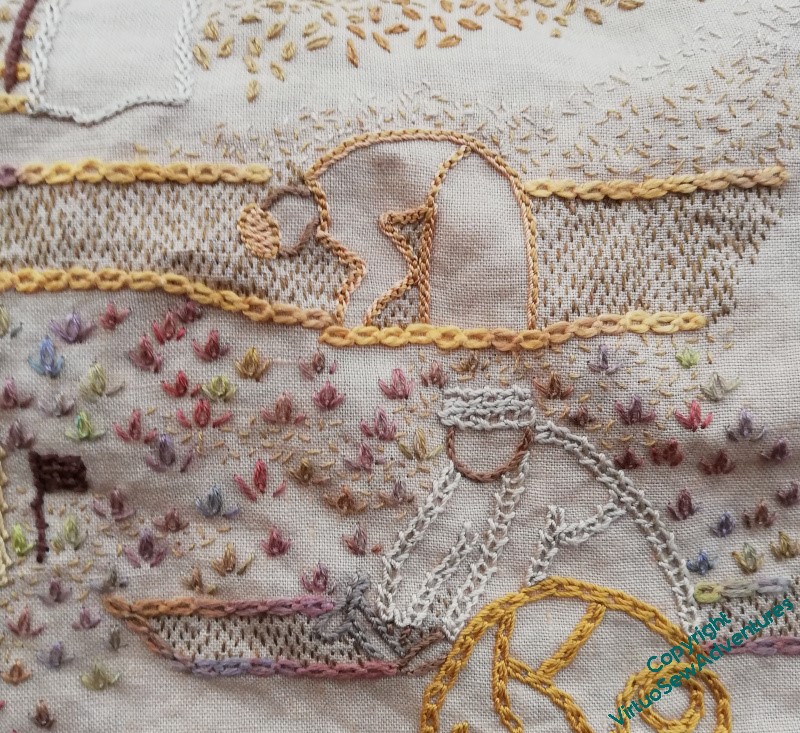
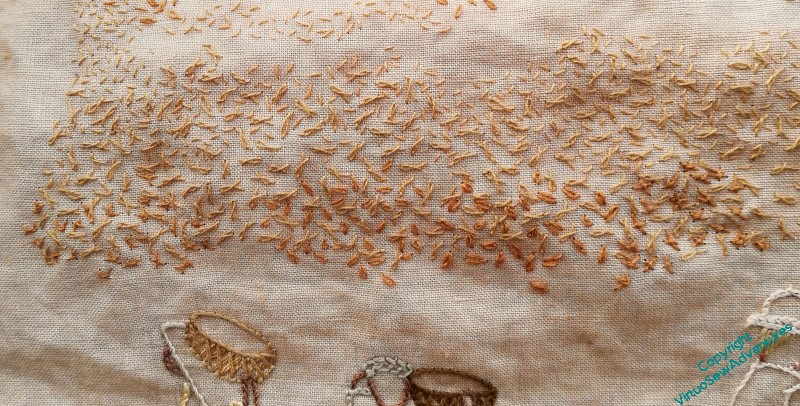
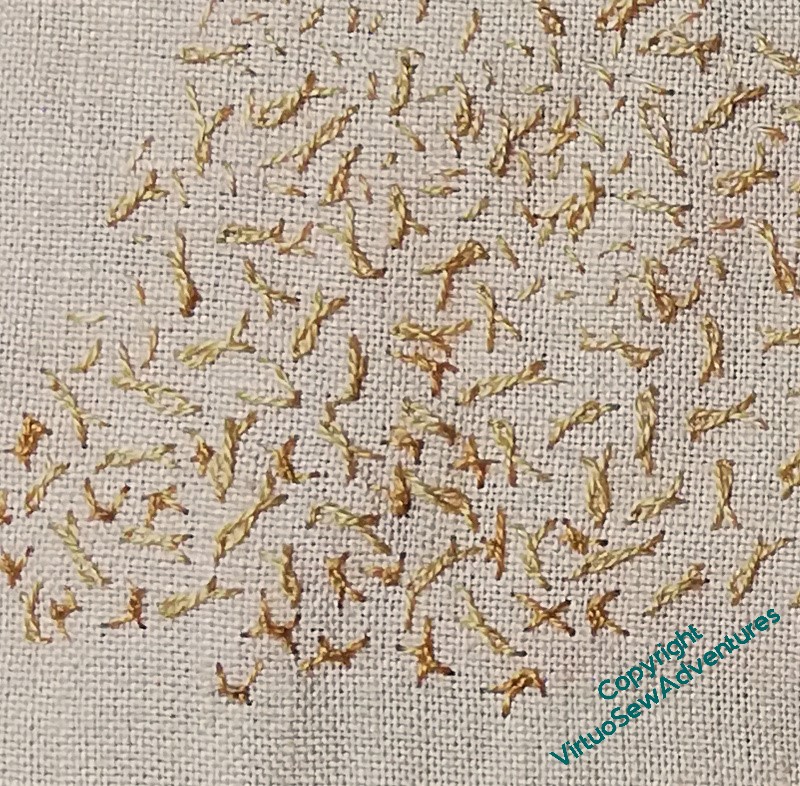
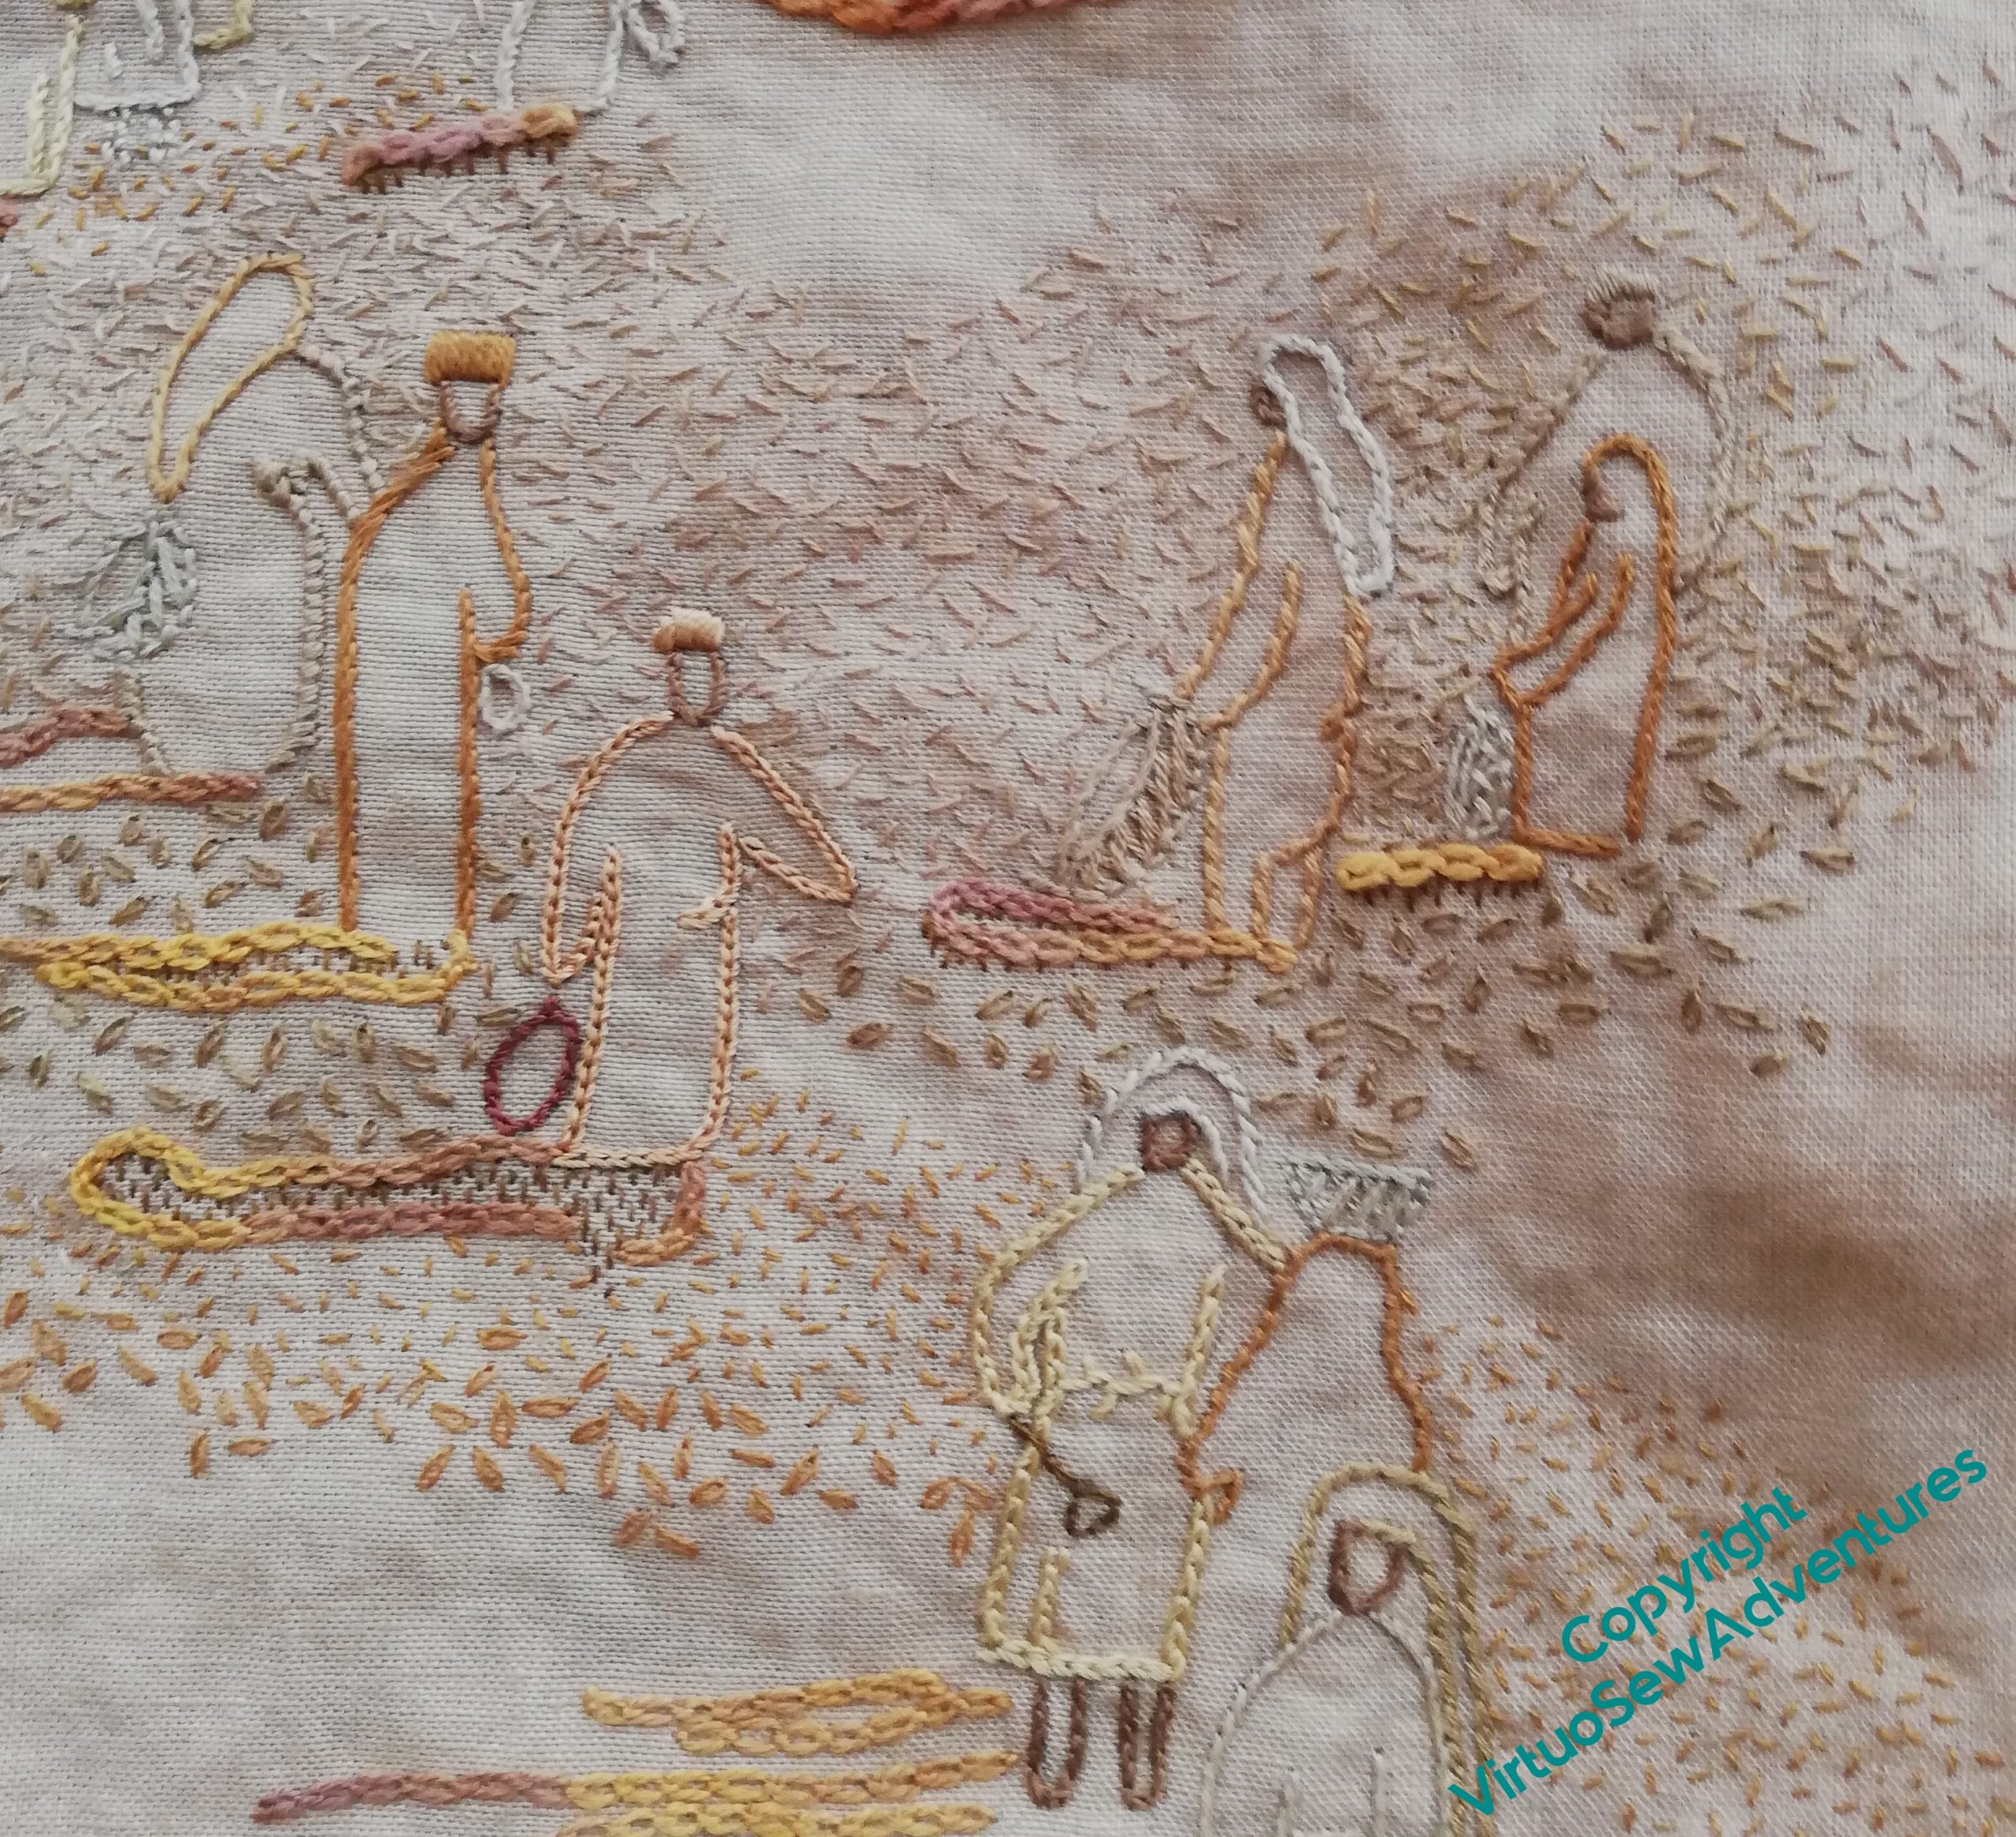
There’s a great deal of stitching still to do on the Excavation. I’ve not tackled the large title because my hoops are in the loft and I’ve not got them down yet, but in any case, adding texture across the piece to help the figures to pop out a little more is taking quite a lot of work. The seed stitches in the distance and around head height help to create the impression of dust in the air – much more effectively, in fact, than I could ever have hoped. Adding the very lightest cream stitches has made quite a difference, in a subtle sort of way.
The difficulties come as I bring the stitching forward, the figures being closer, but the air still dusty. There are relatively few singleton stitches, and many of them are quite square and “manufactured” in appearance, making the dusty, earthy effect harder to produce.
Here you can see that as I’ve moved closer to the viewer, I’ve moved from seed stitch, to single chain stitches, and now to twisted chain stitches. They are well spaced because I’m intending to flow other stitches around them – seed stitches and single chain stitches, to start with.
You might just be able to see one of my experiments here, although it must be said, good as phone cameras are these days, this picture is rather pushing beyond the limit.
I’ve added at the bottom of the section, in among the twisted single chain stitches, a variation on Danish Knotted Cross Stitch. In the original version, the cross is worked first, and the knot on top of it. That helps in working a regular shape, but I want something more tangled here, so I work one stitch of the cross, and work the knot as part of the second stitch. I’ve found that as I tighten the stitch, I can move the knot a little, and where I place the end of the last leg helps to make the stitch look more ragged.
Whether I like the result or not, I’m not yet sure!
The Excavation – more progress
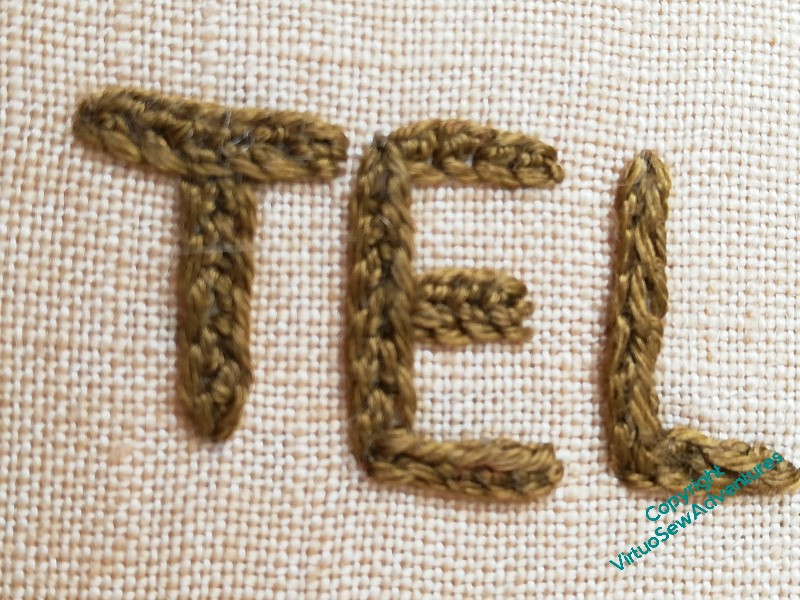
I was clear that the surtitle would be in split stitch, so I got started on that. It’s in a dark, plain colour, to be clear and readable and add weight to the bottom of the design.
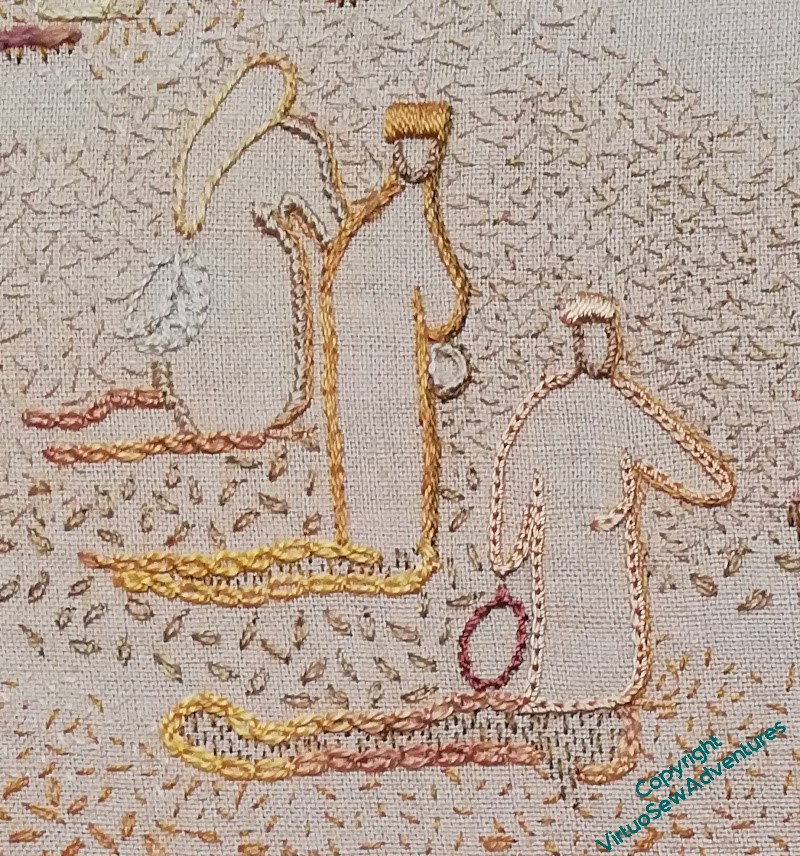
I definitely like the tête de boeuf stitches. They add visual weight, a good variation in colour, and although the colours in the thread are similar, the small seed stitch spoil heaps at the front look completely different.
I may yet find I need to add more stitches at the base, above the text, but of course, by now, you are all accustomed to the way I tend to build up these pieces as the elements occur to me!
The middle ground is, so far, not quite so successful. I am using small sandy coloured seed stitches, and they work at some distances, but not quite so well in others. It certainly doesn’t photograph well at present. I want to make sure that the colours aren’t too dark, because I want it to remain dusty, but developing this section will involve a good few extra layers!
The distant section, I think, has worked. It does all look very dusty, and the distant figures are pushed out of the stitching and don’t vanish into the fabric as much as they did.
Adding the random single chain stitches in the mid ground has also helped. They may need some seed stitches scattered through them the meld the areas together, but I am hoping that each part of this scene will make more and more sense as I continue to work on it.
I haven’t quite worked out which stitch I used for the title on the Map of Amarna. Quaker Stitch? Whipped or Interlaced Reverse Chain Stitch? I even checked the early blog posts, where I read a somewhat elliptical:
For the main title I picked up one of the stitches from the Tudor and Stuart Masterclass – it’s lovely to find myself using a stitch I’ve learnt recently in a project I first started thinking about over fifteen years ago
Me, in 2012
Be warned by me – better recordkeeping reduces frustration!