
Search Results for: Topsy
Still more work on Topsy..
Sleeve Lace
Report Number Three, including a hiatus or two…
The choice of this lace pattern is teaching me to use two gimp threads and to create a honeycomb effect – training me for the more complicated lace for the edge of the dress. I had a bit of a problem with this as I have the designated pairs of 15 bobbins plus the gimp and seem to be one pair short in the ground. After taking it out three or four times, changing where I hung the bobbin pairs to see if that made things right, the problem didn’t disappear so I developed my own fudge which seems to work!
(Inset: I even asked for help on Twitter, and everyone was as flummoxed as we were!)
Embroidery For Dress
Despite the complications above, I completed the first stretch of fudged lace for the sleeve in two weeks! I think that is because I am now lace-oriented, so that instructions are more readable, need less working out! Obviously, I’ve misread something, or I wouldn’t have to fudge – maybe the second piece of lace will resolve the matter. This project is taking less time than I thought it would, though I can see the final stretch of lace for the dress itself taking a lot longer.
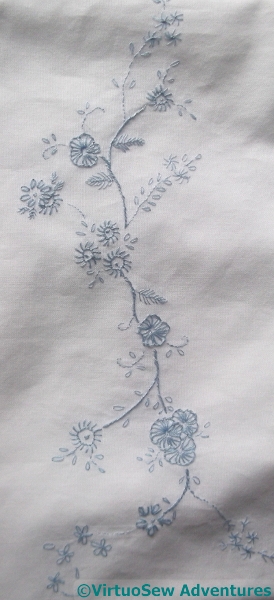
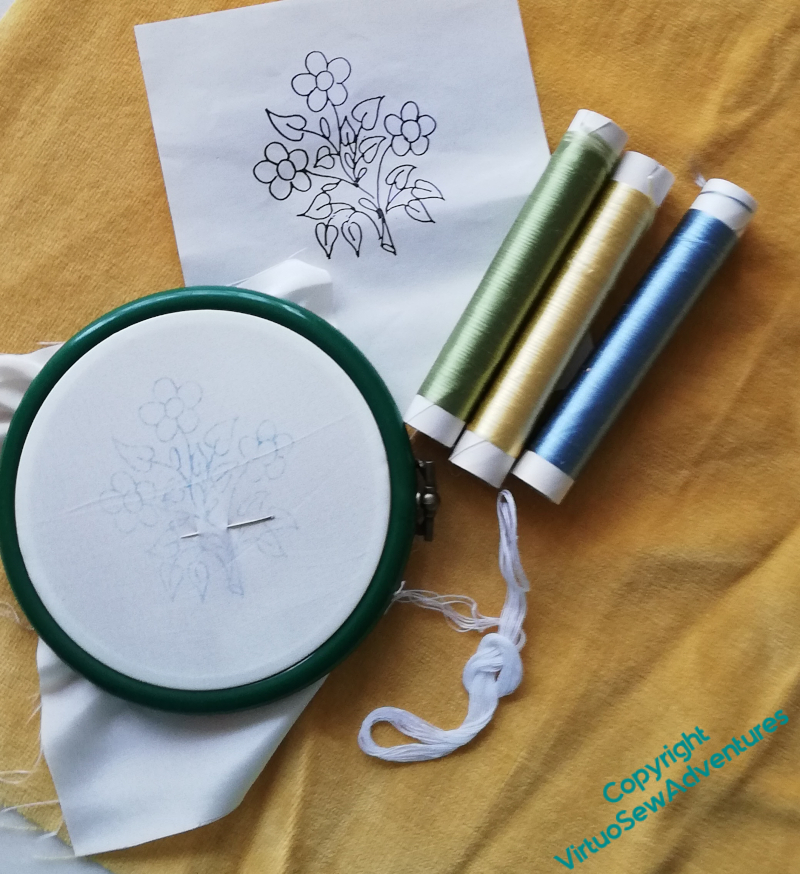
While I was working on the lace for the dress, I made and embroidered it. Topsy’s long dress is embroidered across the skirt and on the sleeves. I kept the embroidery on the dress simple. Blue is my favourite colour and it goes very well with her dark skin. The design is built up of small transfers arranged to give a pleasing flow – and the stitching not too varied. As she is a baby doll, a light touch in the design and in the stitching seems appropriate.
Sleeve Embroidery
So, the larger flowers are either Blanket Stitch or Reverse Blanket Stitch, the smaller ones suggested in Lazy Daisy, as are some of the leaves. The larger leaves are in Feather Stitch. The main stem is, not surprisingly, in Stem stitch while the thinner ones are Backstitched.
Long-standing readers may recognise the flower forms from the Flowered Blouse I embroidered using transfers from one of my issues of “The Needlewoman” inherited from Grandmama….!
Lace for Topsy..
Lace Pillow
Another report from my mother on the project to clothe Topsy..
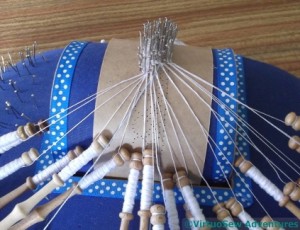
Topsy’s dress is going to give me a reason for stitching and lacemaking. I have done some torchon lace but I want to learn a new kind of lace – Bucks Point. Lace making looks far more complicated that it is, at least when using simple patterns. There’s lots of guidance, since the design is pricked out (literally) on stiff card, often with little symbol to help you remember which stitch you are doing. The bobbins’ weight provides the tension, hence the decorative beads, and in all the patterns I have used so far, I was working with only four bobbins at any one time, even though there may be twenty, thirty, forty bobbins in the design.
I have chosen the very simplest pattern, just the new “ground” and a “cloth” fan. For none-lacemakers, the ground creates that part of the design where you are just space filling, in this case it joins the fan to the footside (the straight edge which will be used to mount the lace on cloth). The cloth stitch is made by a weaver pair of bobbins going under and over the other threads just as if you are weaving cloth. The complication lies in remembering the sequence of stitches – it took an hour and a half to work out the sequence for one fan and attached ground. Since the design is a simple repeat, the next one took three quarters of an hour with much referring back to instructions. Six fans on, it takes half an hour with just occasional glances and I am looking forward to cutting down the time as I continue. There is a long way to go as this piece is to edge Topsy’s petticoat. I have more ambitious plans for the dress itself.
Petticoat Lace
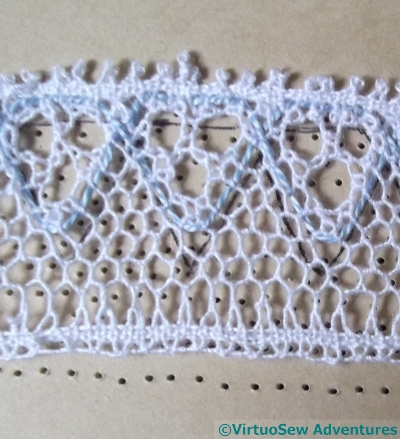
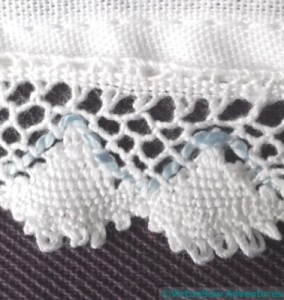
It took four months, but I completed the first length of lace and attached it to Topsy’s petticoat. And I am pleased with the result. It’s neat, decorative, not flamboyant – just what I wanted. The first two or three sections are a bit wobbly but thereafter the pattern becomes more crisp. The blue gimp will echo the embroidery on the dress.
I had some difficulty in remembering not to cover the pin in this style of lace making, since doing just that was an essential part of all the Torchon lace I have made. But once I’d mastered that, the ground became easy to do, and, of course, the fan was worked exactly as I had done in previous lace making. Heartened by this, I felt I was ready for something more complicated.
Little Jacket Again
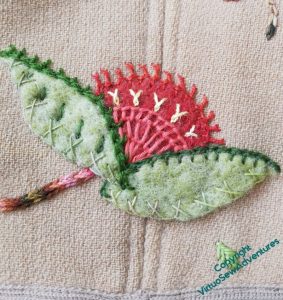
You might recall that this shape gave me some trouble when I was working the Coat of Many Flowers. Somehow, that wasn’t the case this time. It appears twice, and while this one is very different to the other, I think it works.
I like the contrast between the Mountmellick stitch facing inwards on one leaf and outwards on the other, the Bonnet stitch edging over the central red section.
I do wonder whether there should be more of the single twisted chain stitches, but I think I’m happy to leave them as is. You might also note, just behind the copyright notice, a tiny Fishbone Stitch leaf. There are a few blemishes on the fabric – to be expected with a jacket that’s probably at least thirty years old – and I’m covering them with these little leaves. I can add more if I find more snags or blemishes, and they will add a bit more fragmentation and frivolity.
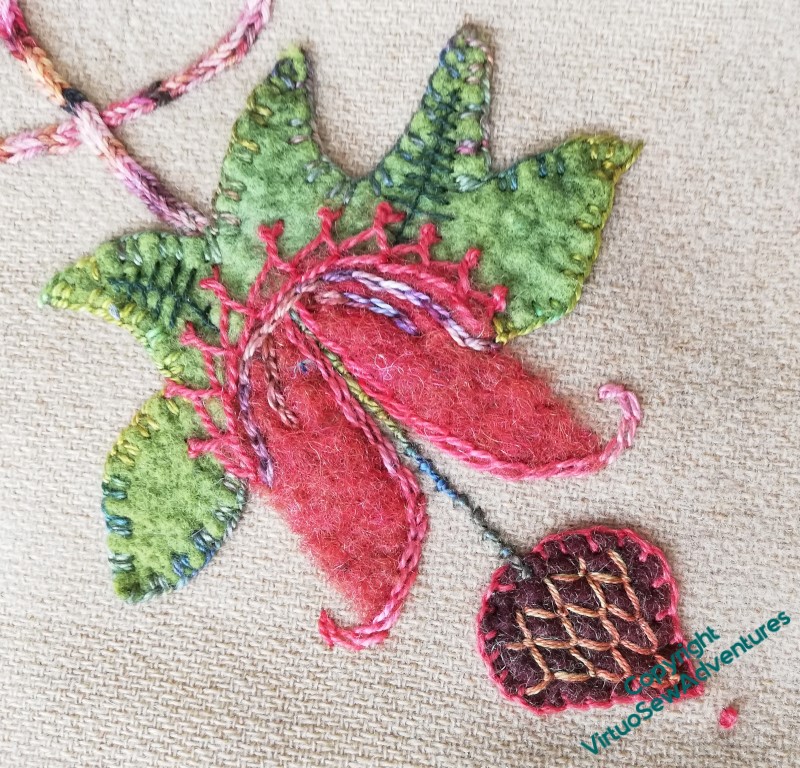
The whole theme of this design (if you can call it a Design, when it “just growed” like Topsy!) seems to be counterchange.
This one shows variegated thread and plain thread against plain felt and variegated felt. I’ve kept greens with greens and pinkish reds with pinkish reds, but the whole idea still lies in the layering of detail.
I’m pleased that I found a place for coral stitch as the stem supporting the brown shape, although the rayon yarn is an absolute monster to use. It tangles if you so much as look at it sharply, and while I would normally use a hoop to hold the fabric, giving me two hands for the thread, I’m reluctant to use a hoop on this fabric, so there was instead much muttering ..

There was much muttering, also, as I took the toggle loops off. I’m not quite sure how I’m going to finish the edges of the jacket, when I get there, but I’m already sure I won’t use the toggles and toggle loops which were already there.
They were attached by multiple overlapping lines of machine stitching, and since I wanted to avoid damage to the edging braid in case that remains the finished edge, I had to be very careful. Two evenings of fiddling and muttering produced this rather sad little heap of redundant loops.
But at least they are now off the jacket!
I can’t call this a UFO…
… because I never got around to starting it!
I found this, languishing in a box. It’s a kit for a Japanese embroidery design, complete with spools of flat silk and a handmade needle (which didn’t register with me as it should have done, I admit!)
What I didn’t have was the instructions, but I remembered that we bought two kits, one for my mother and one for me, so I asked…

And look what she came up with! As it turned out, her kit was safely packed up, together with the magazine that the instructions were in. So I’ve photocopied them, so as not to deprive her, and I intend to get along and finish it.
Then I’ll only have to decide what to do with it. Perhaps I’ll actually source a little box and put it in the lid, as suggested by the magazine! (Yes, I know, me, doing as suggested – the world has turned topsy-turvy!)
Still, onward, ever onward!
The first stage is to put in some padding stitches under the flower petals.
I’m always a bit reluctant to use my Japanese needles – I’ve found them tricky to thread, and I’m very conscious of their rarity, and don’t want to break them – but every time I’m reminded that they are really lovely to use. Although I’ll admit to finding them slightly disconcerting, because, being shorter than I’m used to, they balance differently!
Meanwhile, Amarna Family Group continues to make progress: Episode Twenty is now live, and chiefly concerns Nefertiti.
Found in Tidying
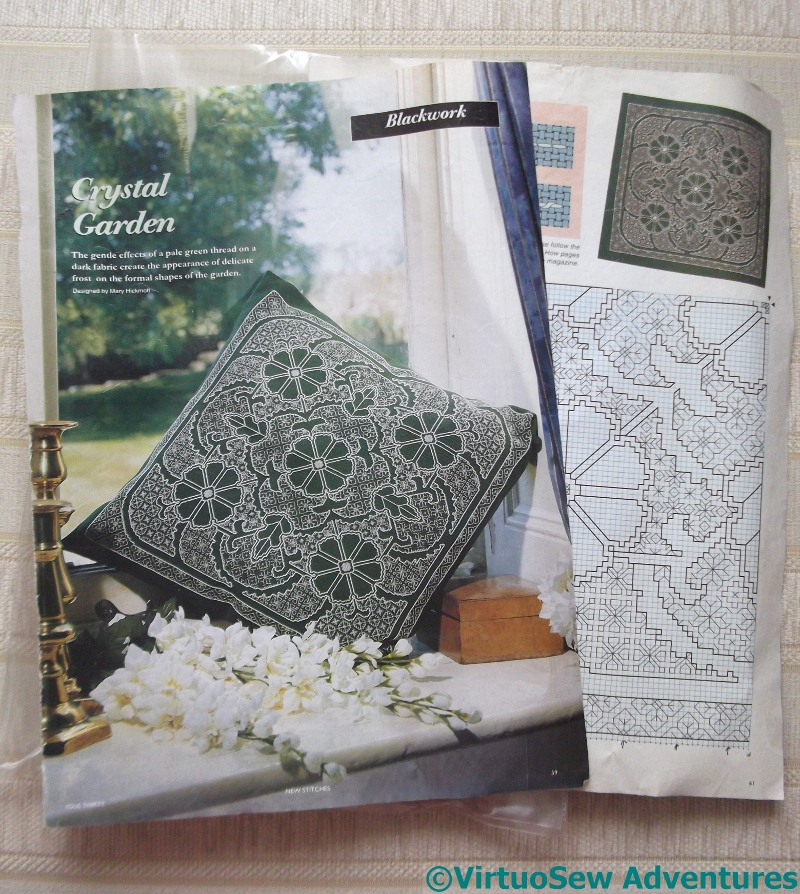
Blackwork Pattern
Remember all those frames? And the teacloth? And “Co-operation is better than conflict“?
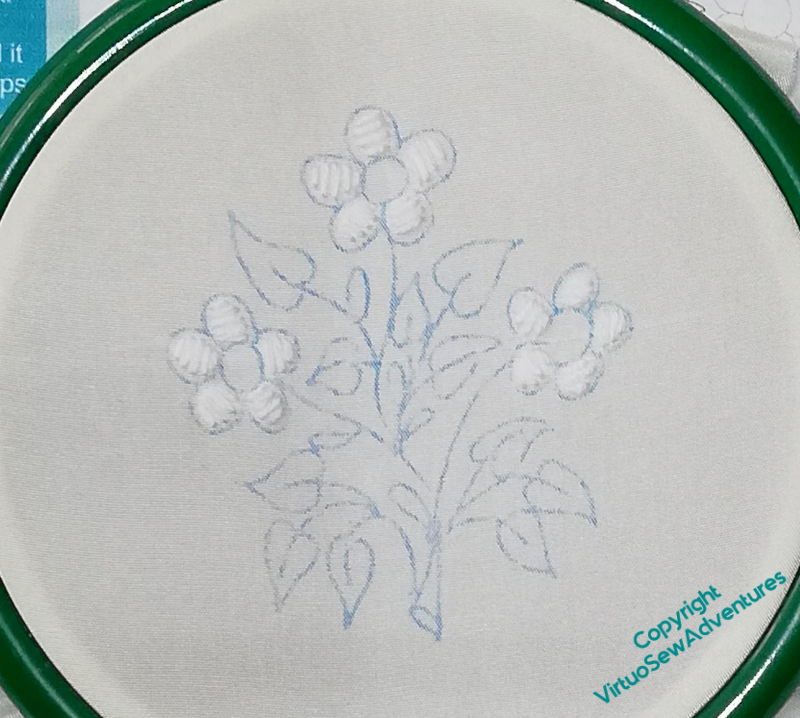
There’s been a bit more tidying up going on, and this appeared, ready prepared and kitted up. Presumably by the very same lady – or, given what embroiderers are like, possibly acquired from someone else who’d decided not to do it after all. I’ve found all sorts of half-completed needlework projects on Embroiderer’s Guild stalls!
The design was in a copy of “New Stitches” magazine, but heaven knows how old it is. At least eight years, because we’ve had it tucked away that long!
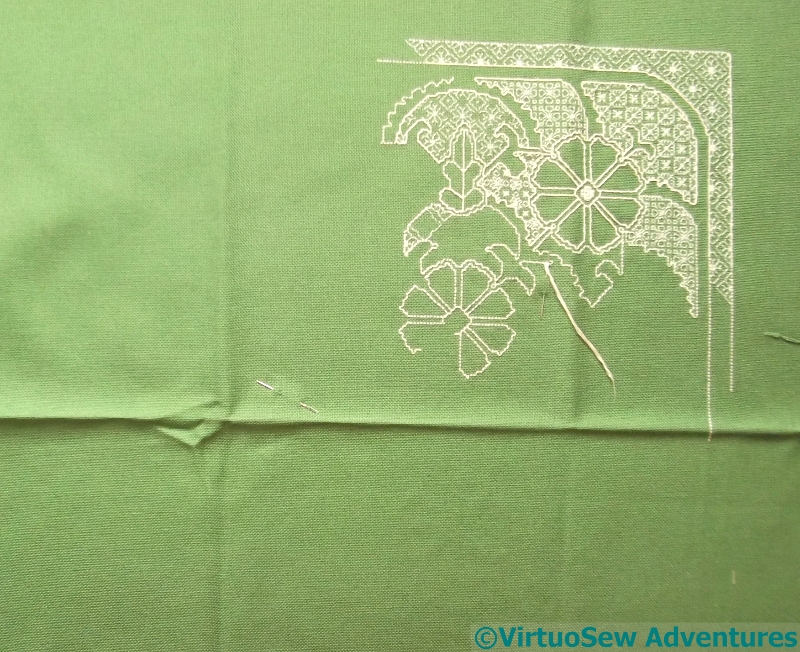
Blackwork As Inherited
There’s not much of it done, so one of us will have plenty to keep themselves occupied with.
In spite of Topsy, my mother is talking about taking it on. She’s much better at counted work than I am, so I’m likely to leave her to it, although I must admit it does look rather charming, and blackwork is a style I’ve yet to tackle!
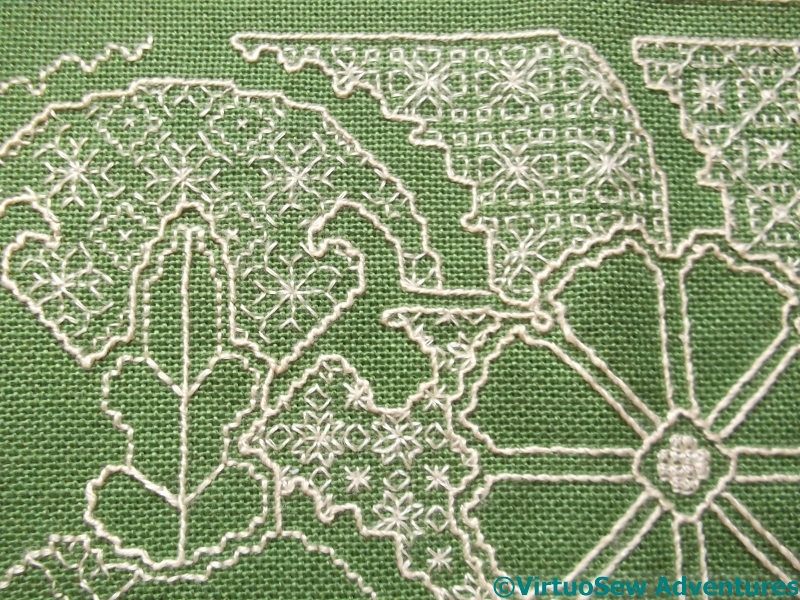
Blackwork Detail
Look at all the different stitch patterns here! So intricate…
If ever either of us gets this finished, I’ll be sure to let you know…
Not one of mine…
Mandy In The Cap
I’ve already mentioned that I’ve inherited my tendency to devise complicated and multi-element projects from my mother. She’s just finished one – she’s published a book (The Bridges of Dee – do go and look!) and I’m quite insanely proud of her for that – but once the bulk of the work was done on that, she looked around for something else.
Do you remember Mandy, last seen modelling the Glittering Gentleman’s Nightcap? Well, we’ve still not quite worked out what we’re going to do with her, but at the same time we found Topsy, who was my mother’s doll before she was mine. Topsy is made of papier mache, and jointed with elastic bands to hold her together, and in form she’s much closer to a newborn. So my mother decided to make her a layette, decorated with various forms of bobbin lace. So, over to you, Mam…!
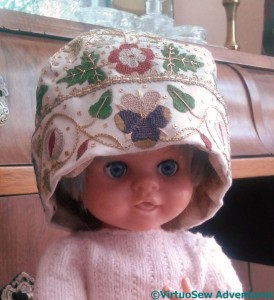
Topsy
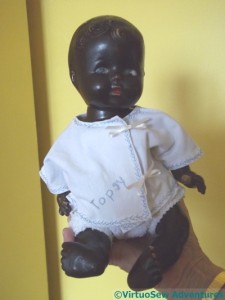
Meet Topsy. Her looks belie her age, since she was “born” just before the Second World War, 1939 or thereabouts. I cannot remember a time when I didn’t know her – too young to read “Uncle Tom’s Cabin”, so Mam must have named her for me. She is made of papier-mache, with her head and limbs attached by means of a internal rubber band, renewed many times over the years. She has survived numerous house moves, and somehow I could never persuade myself to give her away. About two years ago, she came down from the loft during a general clear out, but still tugged at my heart strings. I decided to treat her to some new clothes (she being naked at present) and let her rest in honour on the spare room bed.
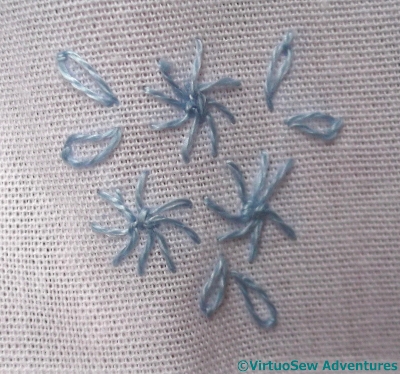
She is a baby doll, practically newborn, so I began by making her a baby vest such as I, and my daughter, wore at this age. It’s tied with ribbon bows at the front as getting a singlet over a baby’s wobbly head is awkward. It is made of fine knitted cloth with the turnings retained with feather stitch, very wobbly feather stitch, looking a bit like the tracks of a drunken spider (can spiders get drunk?). It’s a long time since I stitched, the cloth is unstable, the size of the garment small; excuses, excuses, I know, but I’m enjoying the work. Then I embroidered her name in backstitch. Her nappy is cut from the lone survivor of my daughter’s nappies, so nostalgia is in high drive.
Gabrielle, the Christmas Angel – Part Two
And now, the Finale…
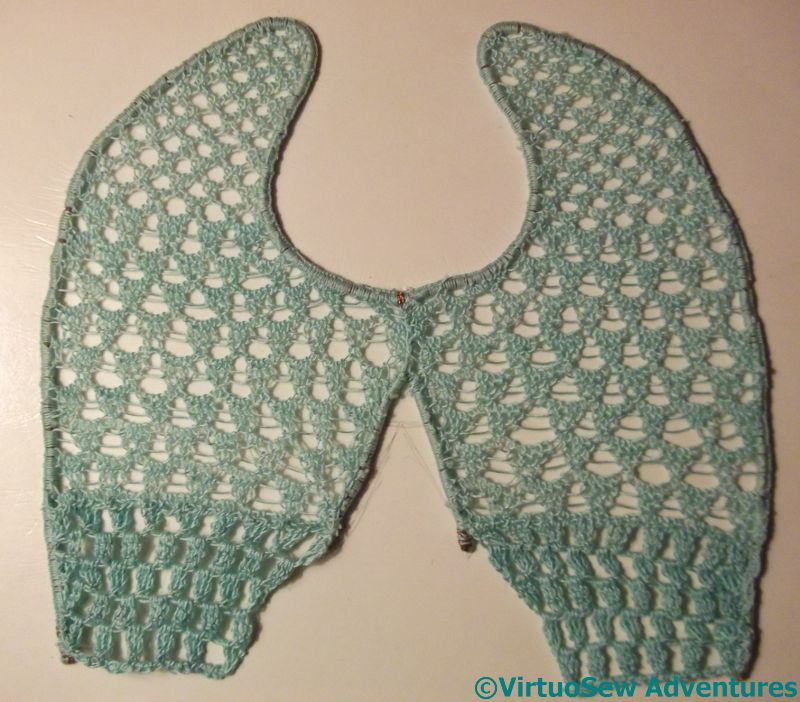
Gabrielle’s Wings – first stage
“Angels need wings. I have never made big wings before, only gauzy ones, so these grew a bit like Topsy! I had, fortuitously, a ball of crochet cotton which exactly matched Gabrielle’s dress, but I had already used crochet to make the lace on the overdress. Needlelace seemed an option if I could find a suitable former to hand. Wire proved to be too thin, and the thread slipped about, so in the end I made a frame from one strand of the plastic coated wire of electric cable. Yes, I know you can buy purpose made formers but I wanted to do it now.
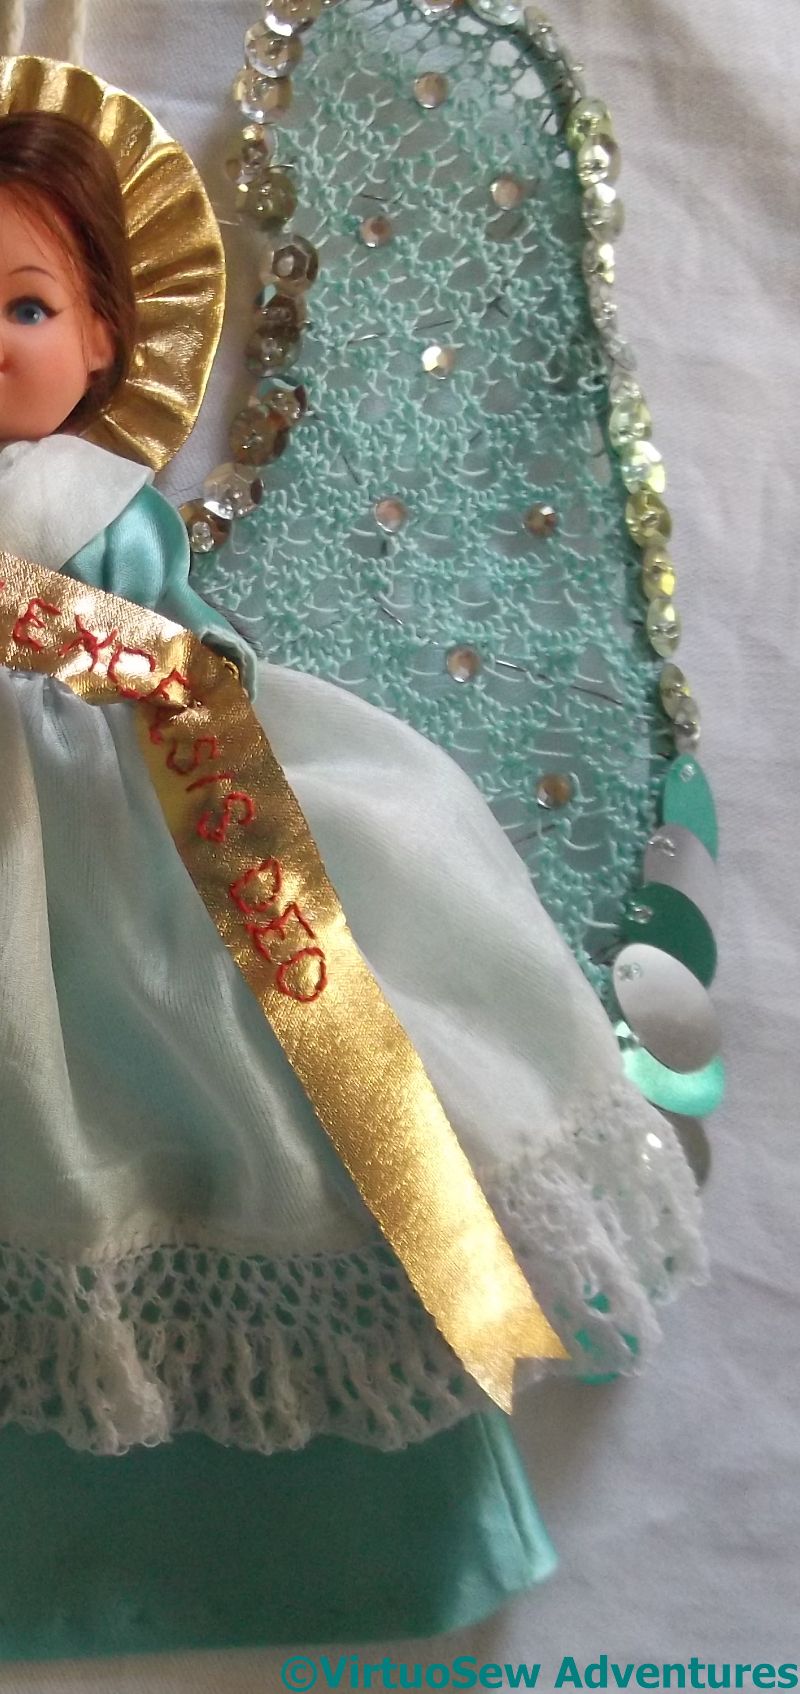
Sequins, crystals, and wire support
After drawing the shape on heavy card, and arriving at a good shape was an interesting exercise in its own right, I couched on the wire at widely spaced intervals, then covered the wire and its plastic coat in blanket stitch using my turquoise crochet cotton. Not only did this cover the wire but it provided a anchor for the needlelace itself. I used pea stitch at first then increased the number of loops in each group first to five and then to seven to add “weight” towards the lower edge. I hadn’t provided a former across that edge as I didn’t want it to be rigid, but needlelace requires just such an edge! A single thread helped a bit but a piece of applied crotchet finally did the trick.
She looked balanced, if a bit subfusc for Christmas, so I added sequins, left over from one of Rachel’s childhood projects, mainly cup-shaped but the lower ones are long ovals to suggest pinions. Again, the colours, turquoise and silver, were a perfect match. Some people have all the luck. Rachel added crystals to increase the “bling”. The halo is a cardboard former covered with cloth of gold. I used the gathered side to suggest an aura of radiating holiness and backstitched a banner “Gloria in excelsis Deo” in red on cloth of gold, too.”

Gloria In Excelsis Deo
We timed our photography just right, too – the last sunny day of Autumn, before the weather turned thoroughly nasty on us…
Outside, hanging from a fir branch in the garden, Gabrielle made a remarkably effective member of the heavenly choir.