
Tag: signing my work
Signing and preparing to finish the Amarna Family Group
I decided, when it came to it, that I would sign the Amarna Family Group on the gold, rather than on the support. I’ve been regarding the whole process of assembling the stele with something akin to terror, and signing on the velvet just seemed like bridge too far, especially since it would already be stretched on the frame at the time.
It looks a bit squiffy, I admit, but then it always does!
I’ve also painted the background calico with inktense. I’m going to try very hard to ensure that all edges are properly turned, and either concealed by the pile of the velvet or by other means, but knocking back the gleaming cream should help with the camouflage.
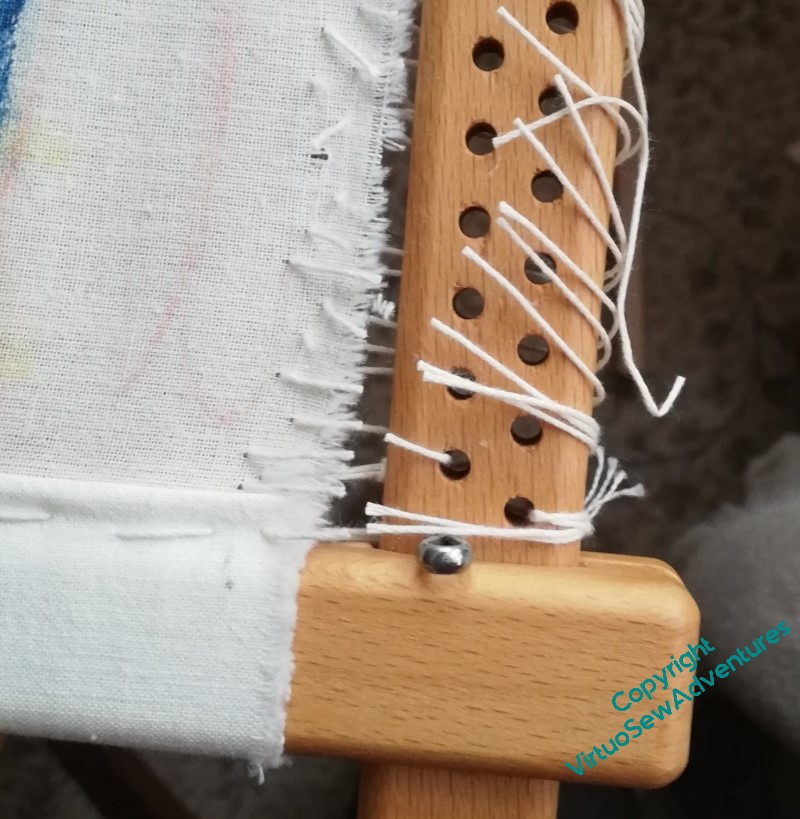
Both of these tasks were done while the fabric was still mounted on the frame, but I want that frame for William Marshall, so I’m going to have to get going…
Finally, I screwed my courage to the sticking point, and cut the threads holding the fabric stretched at the sides, at least half expecting some sort of terrible crinkled effect. But no, everything stayed nice and flat. Sighs of relief all round!
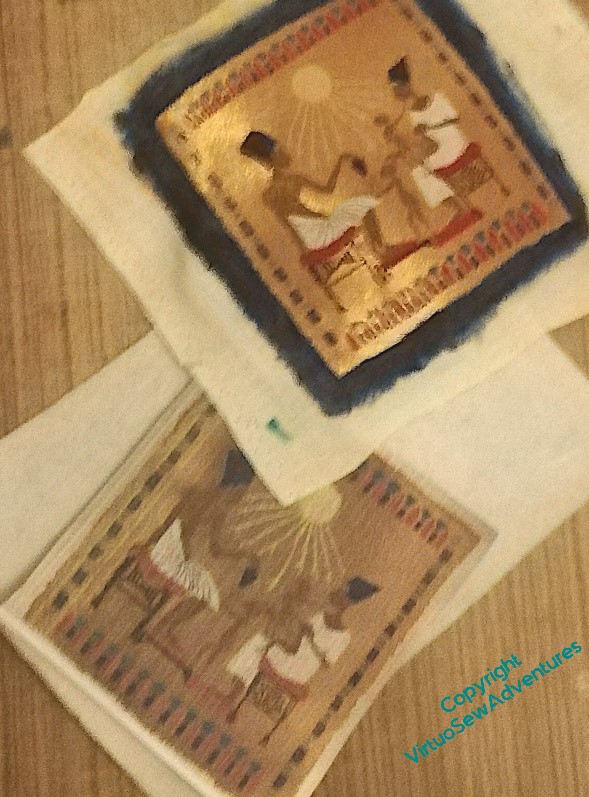
I want to pad the goldwork before I apply it to the stele, so the next stage was to use a photocopy of the goldwork to make patterns for the buckram and wadding I intended to wrap it around.
I could see what I was doing much better than the photograph suggests, I promise – although it wasn’t an entirely straightforward process, and I ran out of oomph at that point.
More in another post…
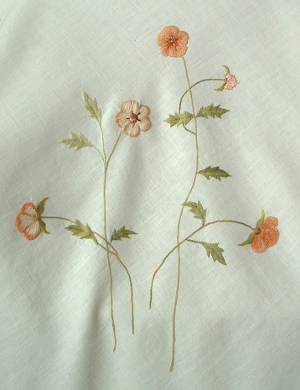
Poppies and Wheat – Another of Grandmama’s Pieces (Introduction)

Tray – Poppies And Wheat
The design for this tray was embroidered by my Grandmama during the period when she and her sister and all their children were evacuated to Burton in Westmorland during the Second World War.

Signed On The Back
We know that because it has been signed on the back!
Besides, my mother remembers it being used on ceremonial occasions. It was always a trial – it’s very heavy (because of the glass), rather slippery (glass again) and doesn’t have much of a rim to keep what’s on it safe. Especially with four children and a dog in the house.
In fact Grandmama, and now my mother, both resorted to propping it up somewhere and using it as a cross between a picture and an ornament. It makes a rather large ornament, too. I’ve seen mirrors over fireplaces that weren’t much bigger!
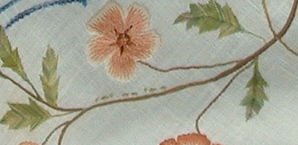
And of course – again because of that wretched glass – most of the time you can’t really see the embroidery for the reflections. Which is a pity, because it is exquisitely worked, probably one of the pieces overseen by Grandmama’s embroidery teacher, Miss Hunter. Recently my mother decided to take it out of the tray, find some way of cleaning it of some of the discoloration, and mount it properly as an embroidery. Naturally we will find some way to remount the signature from the back as well.
Needless to state, this turned out not to be as easy as we might have hoped.
The Camberwell Panel – Fourteen
Final view
So at last, Finished!
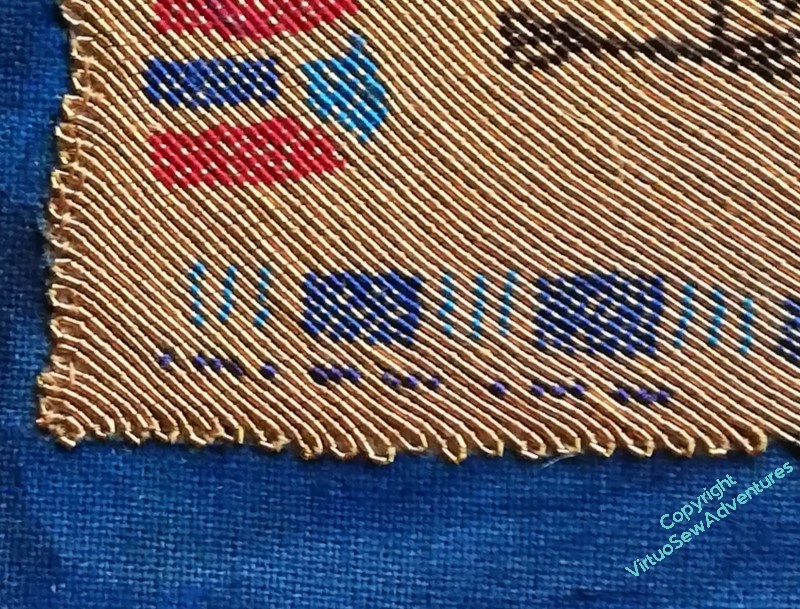
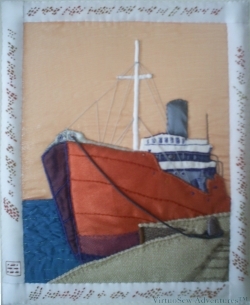
By the time I had finished stitching it all I could nearly read Morse Code, even when it was running diagonally. The dedication runs from the bottom left anticlockwise around the picture – so the top border is upside down!
When I’d finished the whole dedication, and got to the left hand border I felt the end looked a little vague, so then I worked the little cartouche at the end of the left-hand border which contains my initials in Morse code. Somehow that provided me with the “full stop” the piece needed. The dedication itself already included the date, so I only had to sign it.
My cousin has had it beautifully mounted and framed in a box frame, and I gloat over it every time I visit her. Fortunately she loves it too, and she is going to write a guest post about framing and hanging the Camberwell in her house.
I also provided a booklet for her which documented all of the process of planning, designing, and working the piece, so there is a complete “provenance” attached to the piece as well.
Frolicking Teddies – Part Two
Cone In Braid Stitch
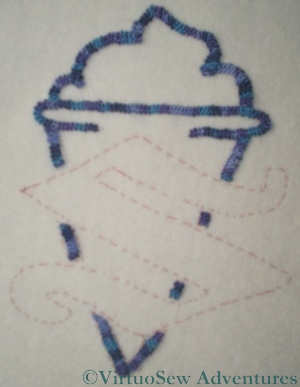
The logo on the Frolicking Teddies Cot Blanket was an interesting element to work. It consists of a letter “S” superimposed over an ice cream cone. Clearly as a graphical element, it needed to be consistent in feel – achieved by using the same thread in each part of the logo – but I also felt that stitches that would work for the “S” might not work for the ice cream cone.
In the end, I used the ordinary Braid Stitch for the ice cream cone, producing a strong, textured line. This is actually an easier stitch than it looks, and in fact when I have a broad line to cover, braid stitch is one of my favourites.

Logo for the Family Business
The “S” was a slightly harder question. I wanted it to be solid and “blocky”, and yet not to have excessively long stitches that might catch. I also wanted the thread to show to its best advantage. In the end I stitched most of it in vertical satin stitch, but outlined it in stem stitch and then created an ornamental line down the widest part, taking my cue from the pierced effect sometimes used for capital letters in illuminated manuscripts. I think this may well be the element I am most pleased with!
Morse Code Teddy
As this was a commission, of course I signed my work. One of the Marching Teddies is kicking a small cartouche in which my initials are worked – in Morse Code, as has become my habit, using French Knots and Bullion Knots.
I decided to line the Cot Blanket. With silk, of course. Although I rather doubted that it would be used except on special occasions, I thought it would be better to protect the back of the work from little kicking feet and little sharp nails! Attaching the lining was a time consuming operation, since I had to make sure it was very firmly attached, without pulling or dragging at any point.
I also provided a tiny leaflet explaining the idea of the design and saying a little about how it was done. This was my very first real commission, and I am glad to report that the client was delighted.
Frolicking Teddies – Part One
Frolicking Teddies
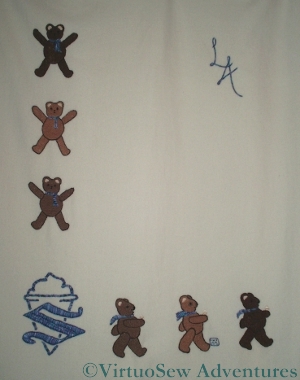
The “Frolicking Teddies” were created in response to a commission to produce an heirloom Cot Blanket for a much-anticipated first grandchild. In the initial stages of planning, the child’s sex had not been determined, so we planned a gender-neutral design of Teddies. I was also asked to include the logo of the family ice cream business, so in the end settled on a story of exuberant, star-jumping teddies down one side, with the logo in the lower left corner, and a procession of teddies with ice-cream cones in their hands (sorry, paws!) walking from left to right.
Once the child’s gender and name became known, I chose the colour for the logo and embellishments, and then added his initials in the top right hand corner. The initials gave me some concern, in fact. I usually use Portuguese Knotted Stem Stitch when I want a heavy line, but when I’d completed the Teddies and the logo, I felt that that would create too heavy an effect in the top right hand corner. I settled on Heavy Chain stitch, which produces a smooth, strong line, but doesn’t have quite the overbearing personality of the Portuguese Knotted Stem Stitch.
Since the commission was explicitly for an heirloom, I used cashmere blanketing as the base fabric. Fortunately, since it’s not easy to get in the UK, we were visiting my husband’s family in Australia at the time I was sourcing the materials. It’s really a lovely fabric to work with, and I still have some left, awaiting further inspiration. Or another commission!
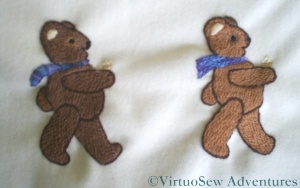
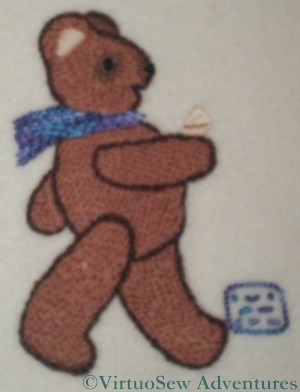
Two Teddies in Procession
The teddies are worked in long and short stitch using Paterna Persian wool. The only challenge there was the tension of the stitches, since it was especially important not to pucker the fabric. At the same time, I didn’t want the stitches to be too loose and snag on anything…
The ice cream cones were worked in stranded cotton, and the logo, initials, and the Teddies’ scarves were all worked in a standard variegated pearl cotton. Each scarf is worked in several rows of a different line stitch – stem, chain, Portuguese knotted chain, and so on. This was a way for my passion for stitches to inform and adjust the design, while remaining closely within the brief.
A final look at the Piano Shawl
Corner Motif on the Piano Shawl
The Piano Shawl was only a metre and a half square (only!), so there wasn’t really space for a stave in each corner, even if Elaine had wanted four melodies included! At the same time, there was enough space in the corners that without something there, the whole thing looked half-hearted and unbalanced.
So I had to do something. I traced some of the stems and devised a very light floral motif, consisting of four stems and a few leaves. The main stems are worked in Broad Chain Stitch, using a plain stranded linen thread, which I used in the stems on the main design elements too, but the shorter, smaller stems are worked in Portuguese Knotted Stem Stitch, using a variegated silk thread. I used several different variegated silk threads for the leaves throughout the Piano Shawl. Again this is by no means a naturalistic treatment – the flowers are something like dog-roses, but the leaves (all worked in Fishbone Stitch) aren’t like any I’ve ever seen in a garden before!
Initials in Morse Code on the Piano Shawl
My final picture is a shot to show my initials in Morse Code in one corner, pretending to be a caterpillar!
The picture also shows the centres of flowers, which were the same across the piece. The thread is a variegated, almost untwisted rayon thread, and it is used only in the centres of the flowers. It’s very like the thread I used for the headdress of the Prince’s Companion in the Persian Fantasy companion piece.
Now that I have seen the Piano Shawl in its destined place, I am happy with it. The overall effect is light-hearted without being entirely frivolous, and the time spent in Elaine’s music room pulling threads, and draping them over the furniture to make sure that they would all match nicely, wasn’t wasted.
However eccentric it might have seemed at the time!
Dreams of Amarna – Researching Techniques
I know that an embroidery which is “about” ancient Egypt – even if only indirectly – will have to include some gold and silver – not least, that same Crock of Gold hoard that caused so much consternation to the excavators when it was found (artefacts have a fairly limited and specialised market, while gold bars are much easier to sell, so there was some concern about security that would never have troubled the dig under ordinary circumstances).
All our own work!
So the next step was a trip to Durham, for a two day course in Modern Goldwork, given by Tracy Franklin. I had a fascinating time. Tracy is an excellent teacher, and it was a real treat to be able to concentrate on learning something entirely new to me. The class had the bonus that Tracy had plenty of goldwork materials available for purchase, and my local embroidery shops don’t have any. Some of what I bought for my coursework was in fact for “Dreams of Amarna” instead!
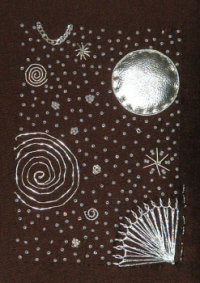
"Starbright", completed November 2008
When I returned, I worked a small panel as an attempt to consolidate my grasp on the techniques and the materials. I even included some padded silver kid leather, and the background is starred with beads.
I’m quite pleased with the panel, as I managed to use almost every technique we were taught. The base fabric was a tightly woven brown synthetic, which was rather trying to work with, but I wanted something very firm for this first solo attempt at goldwork.
I will need to use very different fabrics for Amarna, and I expect that trial and error will be much employed!
You might be able to see a line of stitching, running up the edge. That’s my “signature,” in Morse code. It’s much easier to do small and neatly than letters, and sometimes I manage to hide the signature in the design.
When I am creating an embroidered piece for someone else, I try to make sure that I also provide something about the design and the making of the work. Not just care instructions, but a description of the design choices and why I made them, or if I was working to a brief, a description of the influence of the brief on my approach to the work. Given my interest in history and archaeology, it’s perhaps not surprising that the idea of providing Something For The Archive rather appeals to me.
And on that score, and on behalf of those in the future who will be interested in embroidery – please, sign your work, date it, write about it. Just think how thrilled we always are to gain an insight into the work of designers and artisans of the past!