
Tag: interior decoration
Found in Tidying
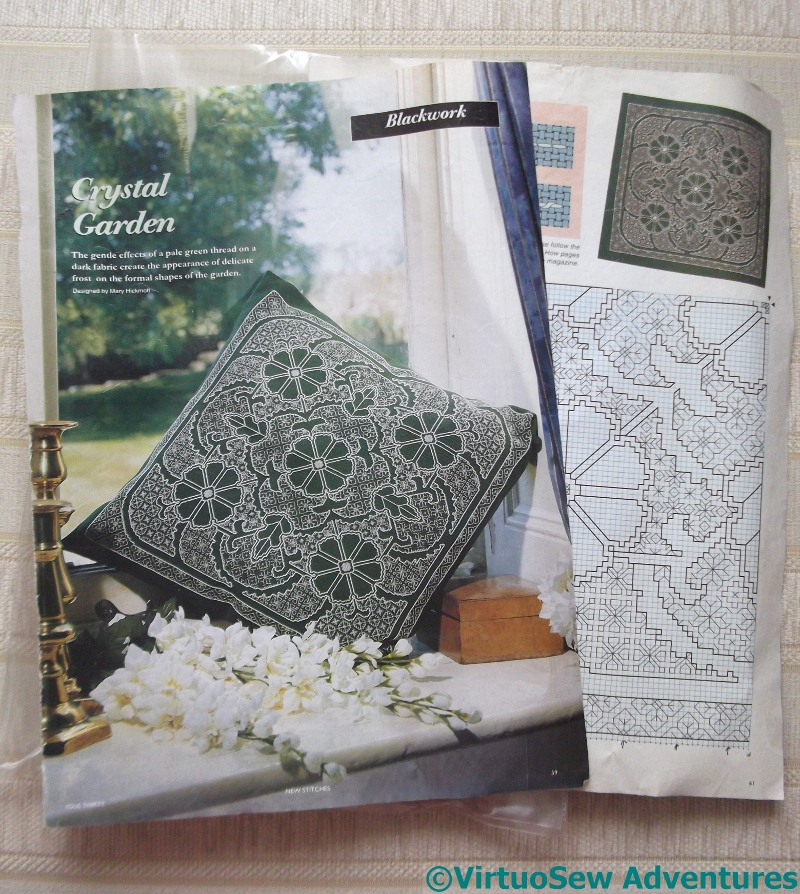
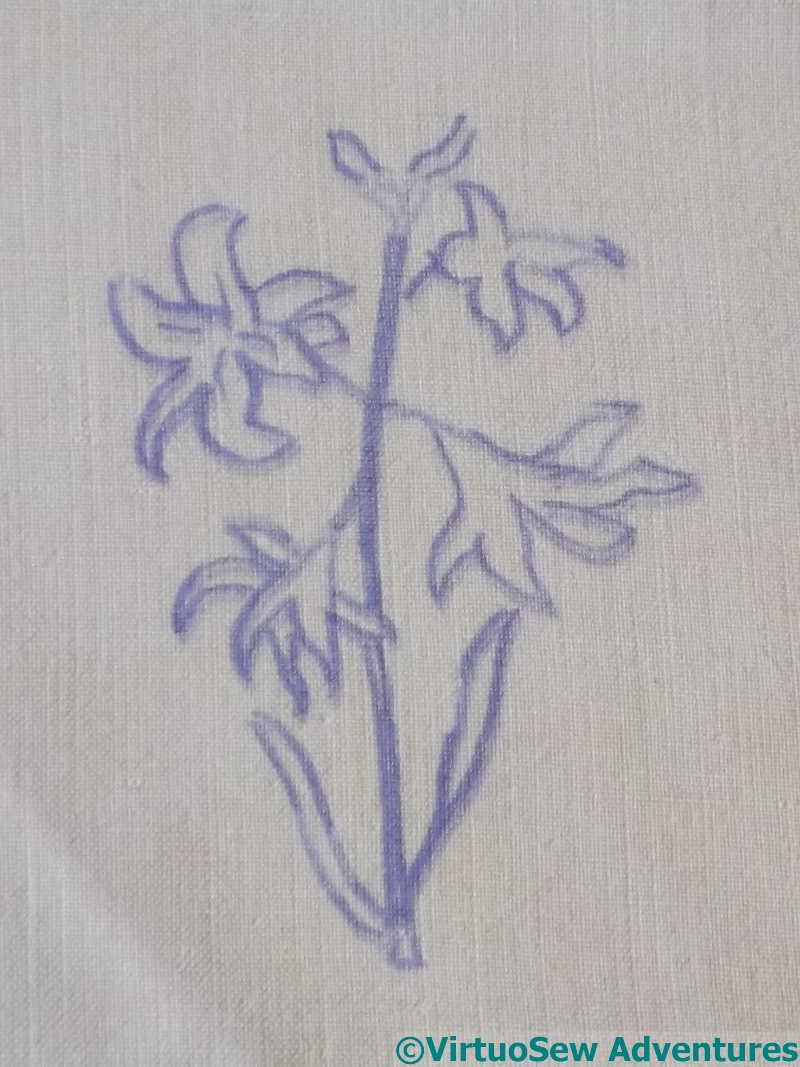
Blackwork Pattern
Remember all those frames? And the teacloth? And “Co-operation is better than conflict“?
There’s been a bit more tidying up going on, and this appeared, ready prepared and kitted up. Presumably by the very same lady – or, given what embroiderers are like, possibly acquired from someone else who’d decided not to do it after all. I’ve found all sorts of half-completed needlework projects on Embroiderer’s Guild stalls!
The design was in a copy of “New Stitches” magazine, but heaven knows how old it is. At least eight years, because we’ve had it tucked away that long!
Blackwork As Inherited
There’s not much of it done, so one of us will have plenty to keep themselves occupied with.
In spite of Topsy, my mother is talking about taking it on. She’s much better at counted work than I am, so I’m likely to leave her to it, although I must admit it does look rather charming, and blackwork is a style I’ve yet to tackle!
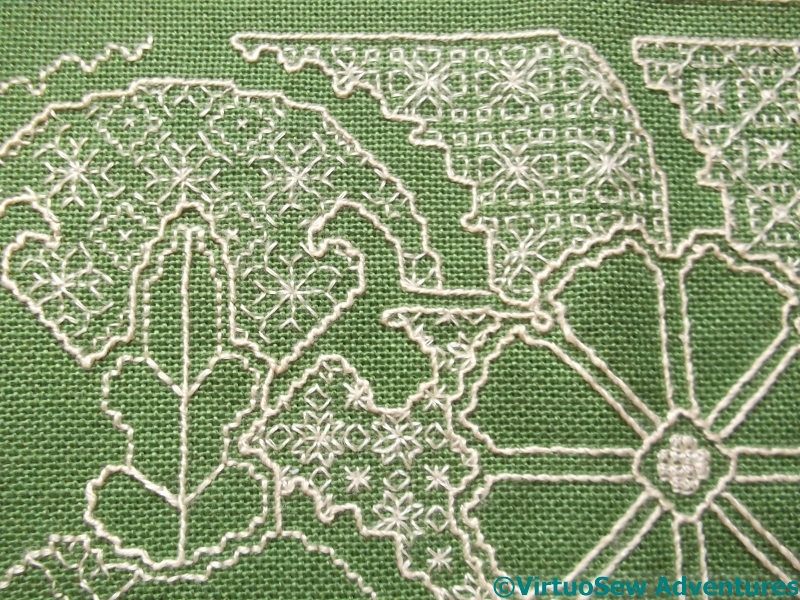
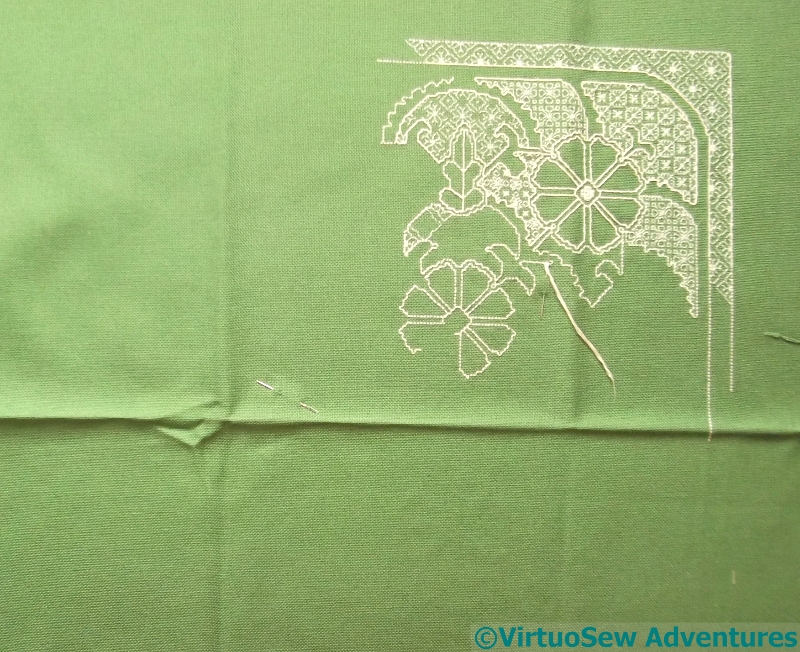
Blackwork Detail
Look at all the different stitch patterns here! So intricate…
If ever either of us gets this finished, I’ll be sure to let you know…
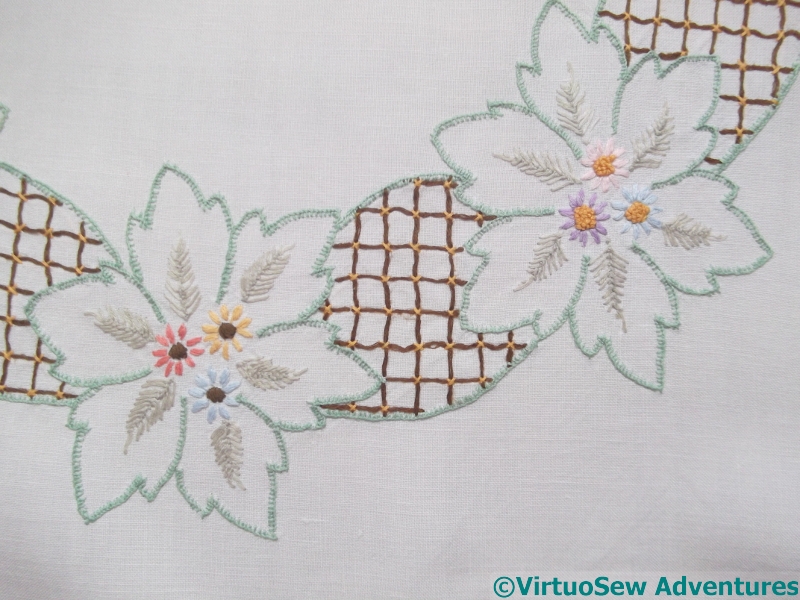
A Lovely Teacloth

One Corner Of Teacloth
This teacloth was worked by my mother as a schoolgirl.
The design came from a transfer, and there was another girl in her class that was working the same one. With rather a difference. Her flowers were all lazy daisy stitch, and anything else was stem stitch, apart from the edges, and she got the whole thing finished in a term.
Needless to state, as her mother’s daughter, and with the spectre of Miss Hunter in the background, my mother wasn’t going to use a stitch with “lazy” in the name.
Central Ring
She did all the edges in blanket stitch – which with my recent experience with the Azorean Cutwork has me extremely impressed. It takes so long to make any noticeable progress with it!
The leaves are all in feather stitch, and they’re beautifully shaped, and the flowers are satin stitch – very neat satin stitch, which again is one of my least favourite stitches, and one I only do neatly in short bursts and with something else to do in between!
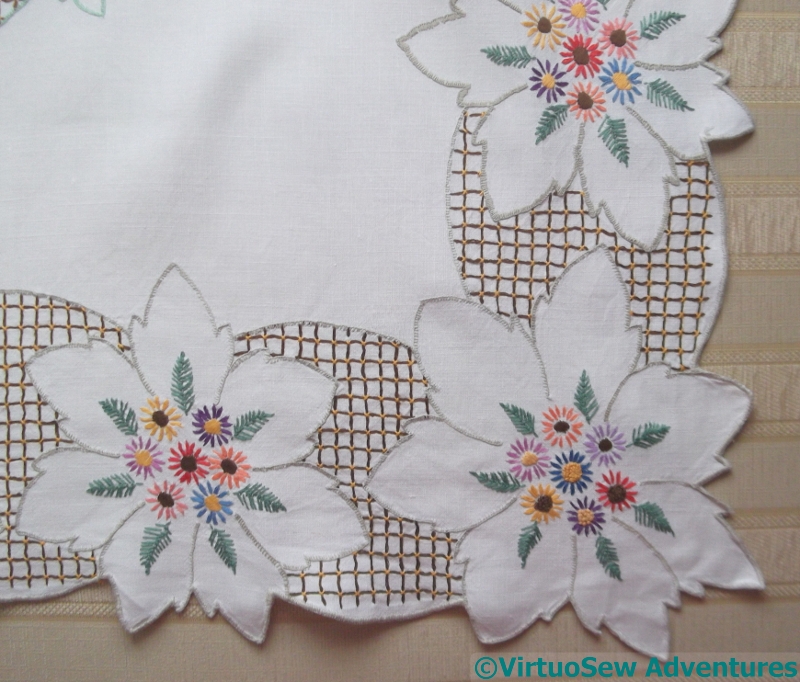
Detail Of Corner
Of course, my mother didn’t get her teacloth done in a single term – but her teacher was so impressed with what was finished that she took it home and handwashed and pressed the completed corner to put in in the end of term exhibition.
In spite of the fact that I very much doubt whether the teacher had contributed anything at all to my mother’s skill in the matter!
A Pause In The Modern Stitch Off
From The Back
I’ve reached a sort of sticking point with the Modern StitchOff project, so I’ve decided to pause and think about it.
I took the blanket outside (all four and three-quarter pounds of it!) and hung it on the washing line to stare at, and photograph for you.
This is the reverse side – that is, the side you don’t see when sitting at the embellisher, trying not to break needles.
From The Front
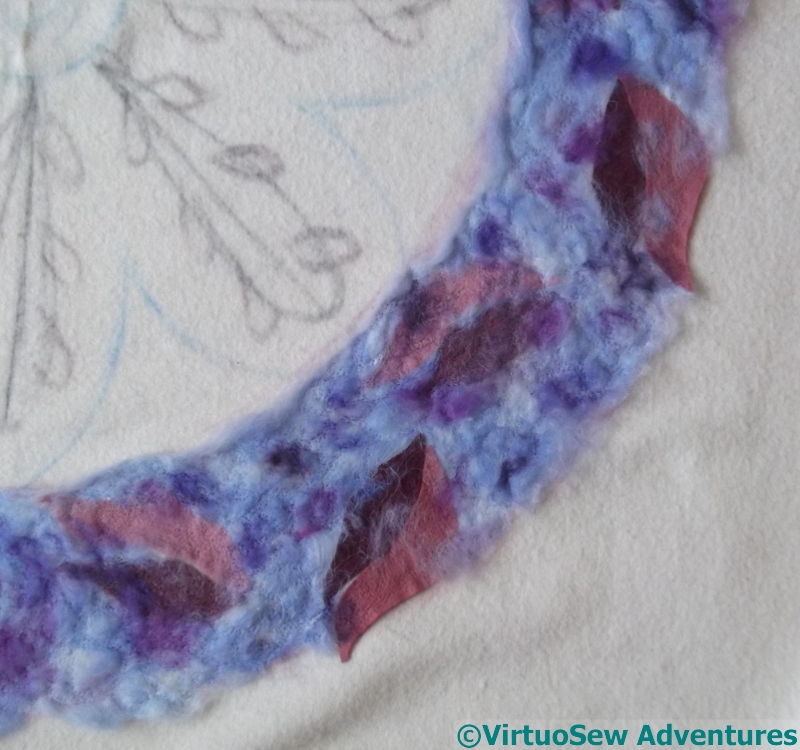
This is the front. It can be quite fluffy – the hexagonal net keeps fibre in place while embellishing, but at the cost of sometimes failing to realise it hasn’t been firmly enough attached. I’m learning that I need to make a first pass with the net, trying to be thorough, but then take off the net and go over the same area again.
I’m also noticing that although I used two different types of felt for the leaf shapes, and they behave differently under the needles, the effect on front and back is sufficiently similar that in future I will pick the felt which felts easily (if you follow me!).
-
- Detail – Back
-

- Detail – Front
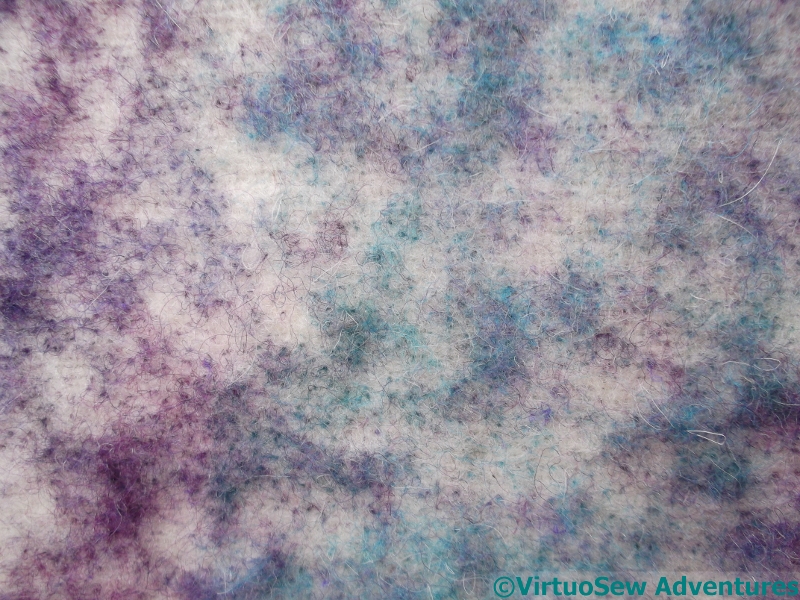
The reverse has a rather intriguing spotty effect. When there’s only one layer of embellishing it is easy to see that it is one tiny dot of colour for every needle (which makes sense!). The front varies rather more, sometimes flat and densely textured by the needles, sometimes fluffy and fly away.
My challenge now is to work out how to extend the colour and texture to the rest of the blanket, and then to decide, do I add some lines of roving, and if so, how. Although if anyone suggests using a hand-embellisher, my howls of outrage will be heard by NASA’s “Juno”!
Lady’s Magazine Stitch Off – A Traycloth
Don’t Do This
One of the few things that made being poorly tolerable when I was a small child was the way my food arrived – on the good china, on a tray, covered with a traycloth. A hand embroidered traycloth, no less!
It wasn’t enough to encourage me to malinger, I hasten to add. But anything to give the invalid a lift…
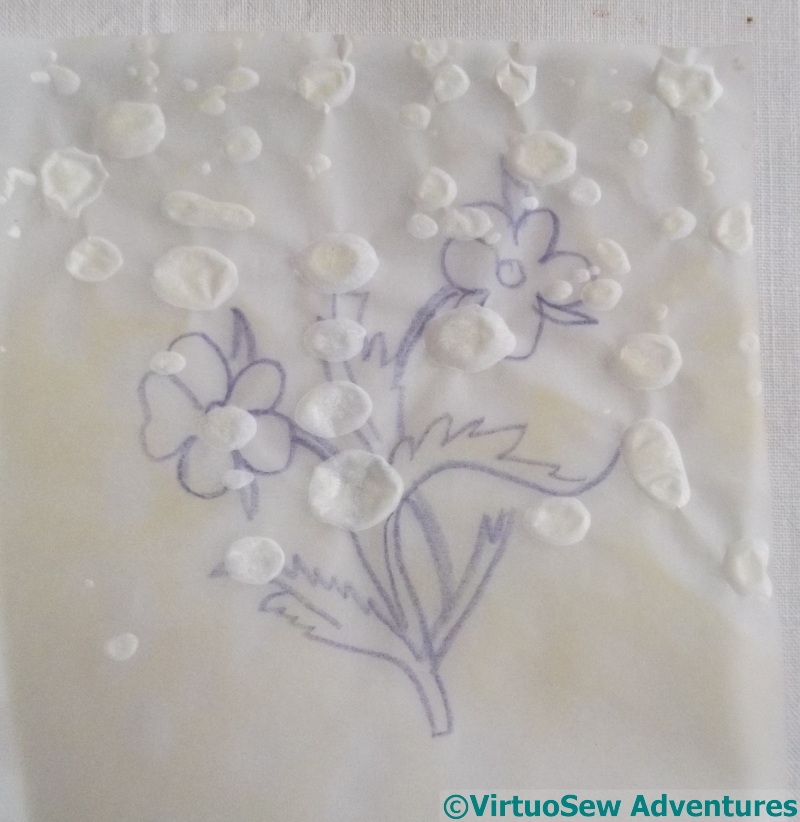
Not surprisingly, the family stock of traycloths is somewhat reduced since those days, many of those traycloths having disintegrated after long and faithful service, so I though that I would use some of the flower sprays found among the Lady’s Magazine Stitch Off patterns to embroider some more.
I decided to make my own transfers, and promptly discovered a forgotten hazard that I should have added to that post on Transferring Designs. Whatever you do, if you are using a steam iron, Switch Off The Steam! Not only is the transfer not usable again, it didn’t work the first time!
Flower Spray
Once I’d got the steam switched off, things improved, and I got two sprays transferred onto diagonally opposite corners of a traycloth I found lying around, unadorned. It’s linen, too, so I’m amazed it has taken me this long to embellish it!
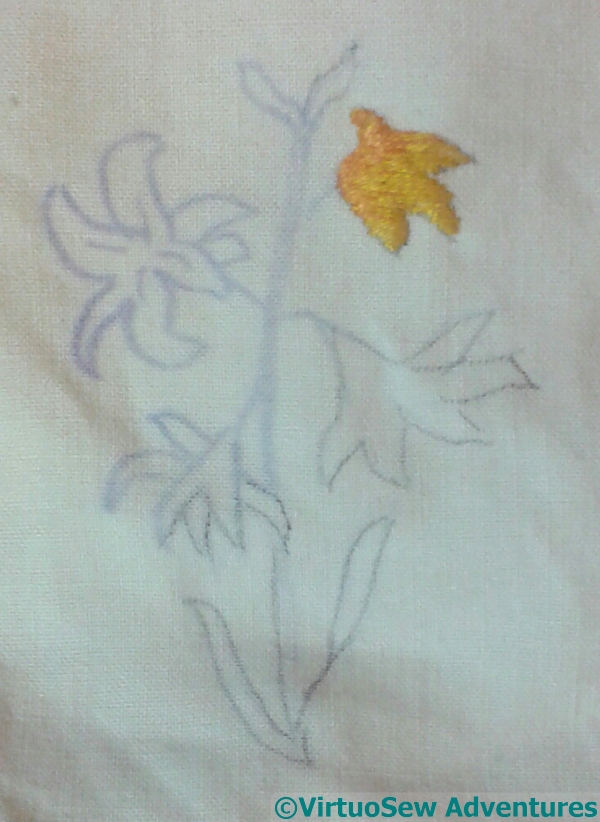
Starting The Spray
I’m no botanist, so I can’t hazard a guess at the flower this is intended to be. It may not be intended as anything up a pretty combination of shapes, of course, in which case any eccentricities of stitching are unlikely to matter very much..
I’ve decided to go for some bright, cheerful yellows – to cheer up any invalids who might see it!
Modern Stitch-Off Adventure – 4
Spare Needles
I’ve been gradually accumulating the skills needed to wrangle my embellisher successfully. It was worth buying the extension table that fits around the arm of the machine – that began to make the whole thing seem possible.
Using the net to hold down the fibres made a huge difference, and so did piling up props to keep the weight of the blanket from pulling on the needles. The props then worked better again when I covered them, and the table, with a slippery plastic tablecloth to stop them getting caught up.
I’ve also found that on my wooden sewing table, the embellisher “walks” with the vibration of its movement. Two layers of heavy batting on the table seem to have fixed that particular alarming problem, and then I bought some spare needles (20 of them!) and relaxed a little, which made it easier not to jerk at the fabric and break needles.
Fibre And Felt
So what with one thing and another, I’m beginning to feel as though I might be getting to grips with the embellisher!
I’m also beginning to learn which fabrics work. Obviously, the hexagonal net gets shredded and doesn’t get pulled into the fabric. Dense commercial wool felt doesn’t felt in well, in fact it seems to pull itself back out again; but real wool tweed and the lofty “pre-felt” pieces felt in like a dream, and end up looking almost as though they were part of the fabric.
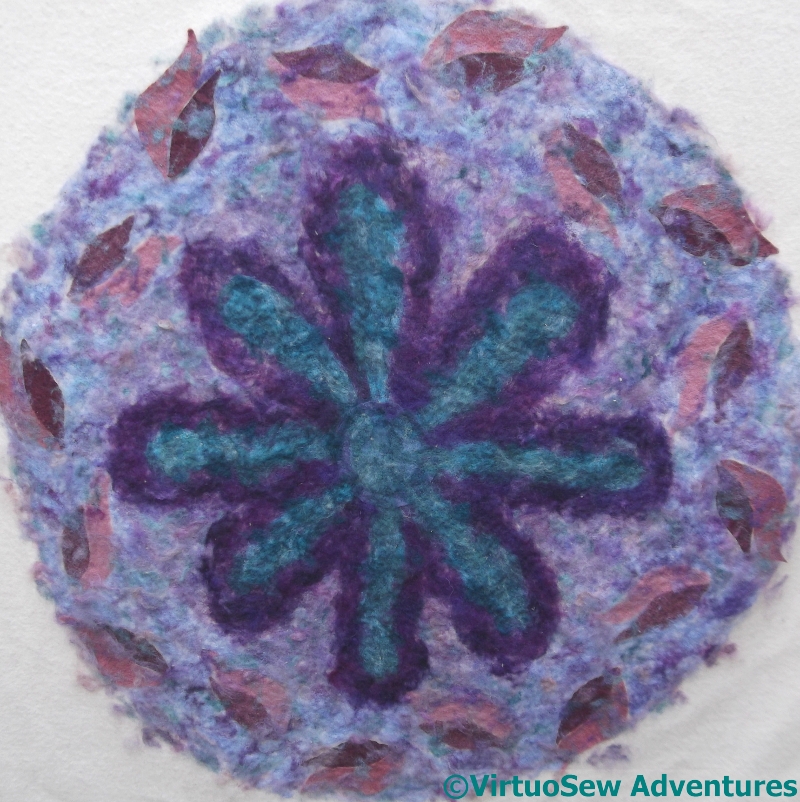
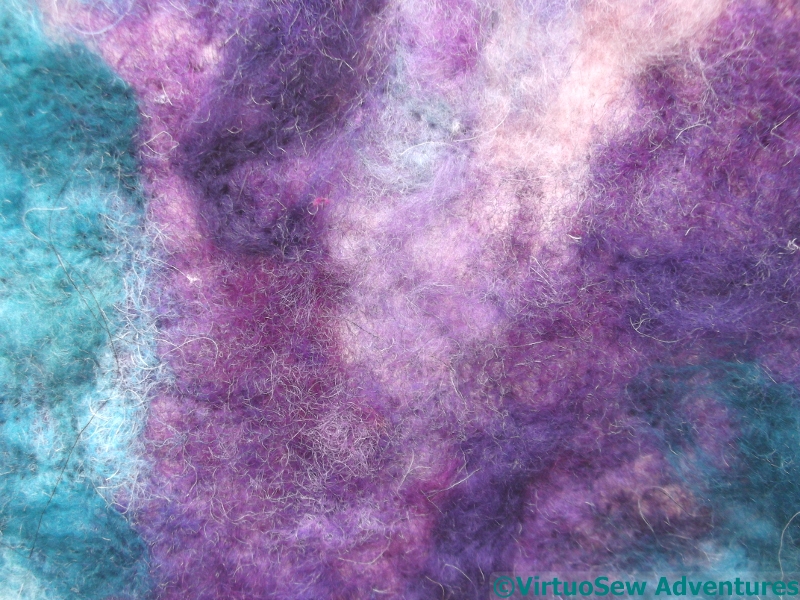
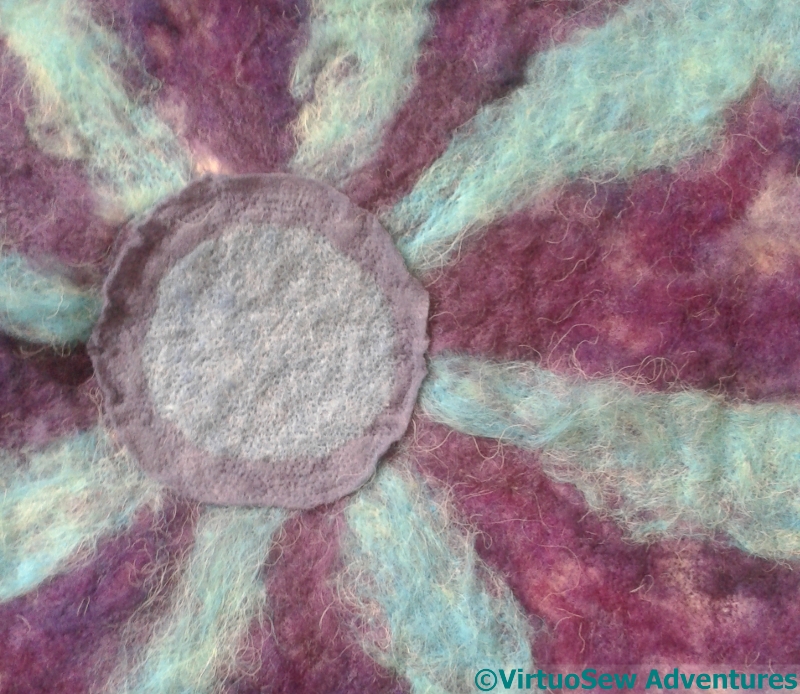
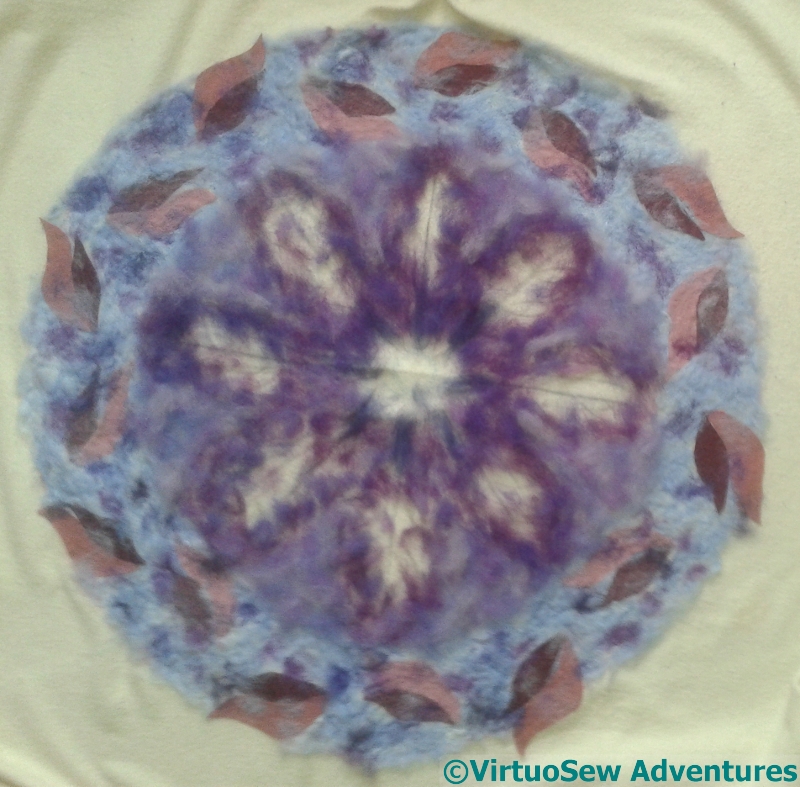
Medallion
The fibres seem to remain quite lofty and furry, even after being fairly thoroughly felted in, although the merino becomes flatter than some of the other fibres. The more I work with the embellisher, the more I realise that there is rather more to it than meets the eye!
A lot more….
At the moment, the colours aren’t quite working, but my next stage is to start to add details, and tweak the colours a bit. I need to add the teals and greens that are part of the fabric pattern that gave me the colour-scheme, and also help some of the edges and lines of the pattern to come to life..
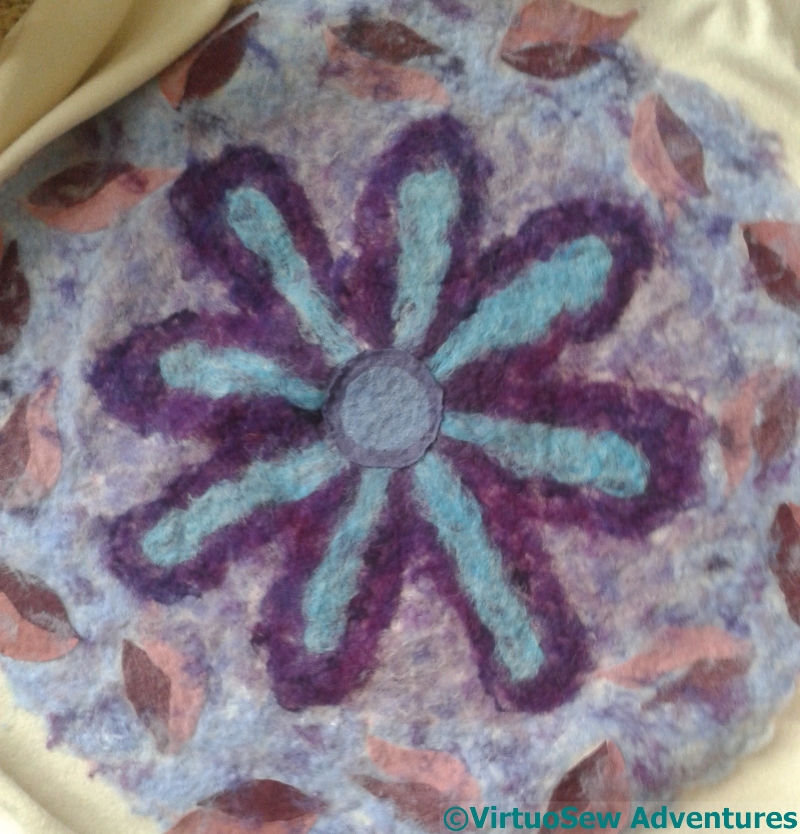
Back View
But I might also choose to use the back… The spotty, “dithered” effect is very like the overall effect of the fabric I’ve mentioned, so I need to consider whether to continue adding to what is at present the “front”, or to start adding tweaks to the “back”.
If it is still the back…!
Modern Stitch Off Adventure – 3
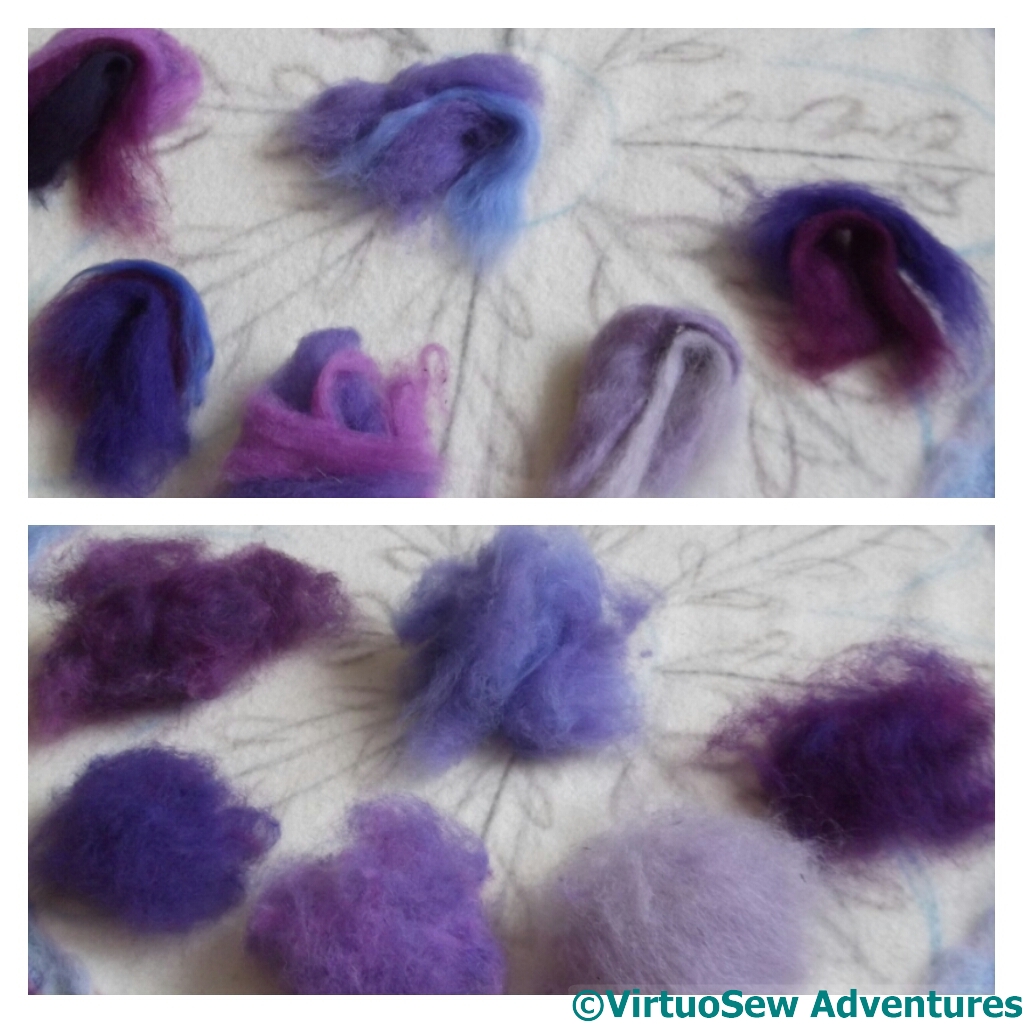
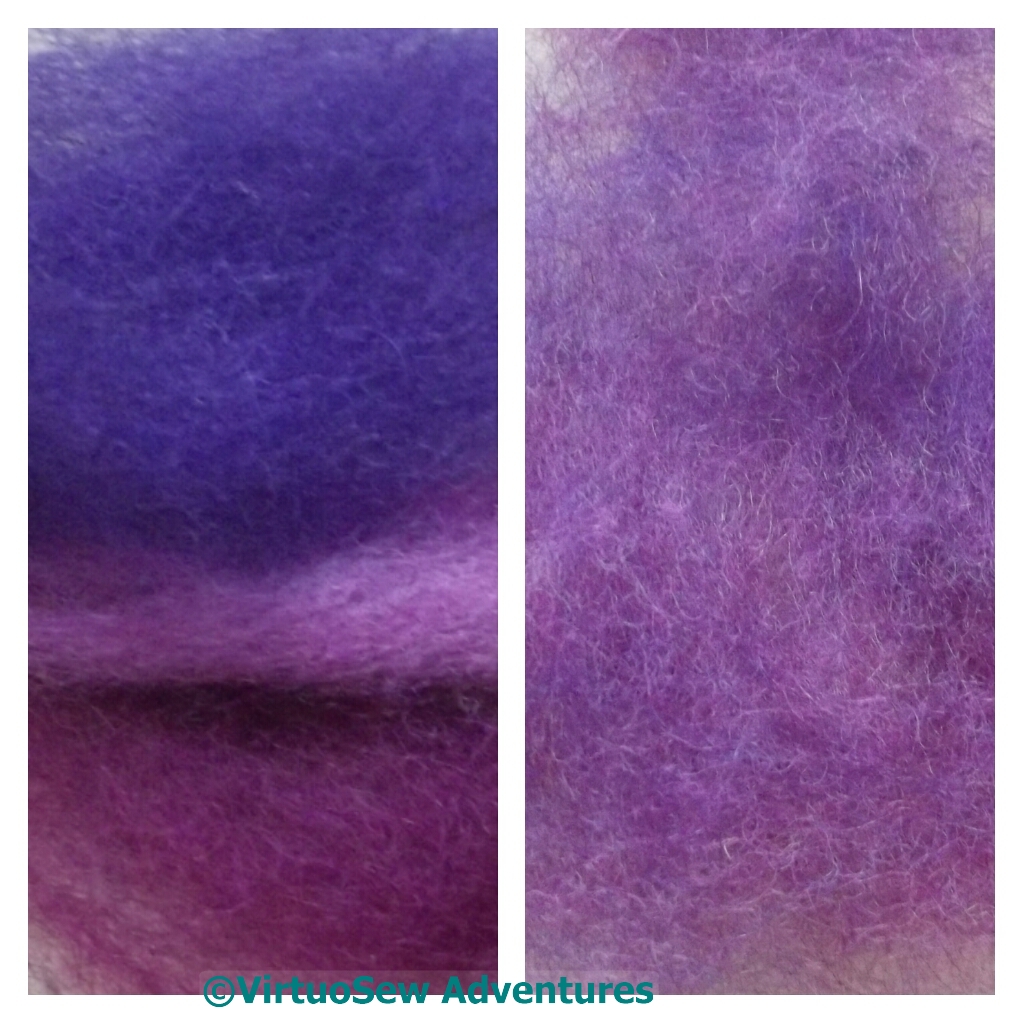
More Blends
I mentioned in the first post about this project that I was planning to use what are technically referred to as “intimate blends” of fibres to create a more subtle colour range. If you click on the picture you will get a better sense of the varieties I am putting together.
If I were planning to spin these blends, I wouldn’t start from here. Some of the colours are lovely silky-smooth, long staple, Falklands merino, and others, labelled “Nepal Wool” in my local shop, are short staple, and very curly and springy. I’ve even got some very wiry undyed Devon and Cornwall Longwool, bought last Autumn at the Lost Gardens of Heligan (go, if you get a chance: we had a wonderful day out there!). So the characteristics are very different, and that matters quite a lot with yarn, although there is a way to do almost anything if you have the time to make it work. It matters less with felting, so some of my blends would make my spinning master splutter something like “Didn’t I teach you anything?”.
Beginning Central Section
Fortunately, what I am attempting is based entirely on the colours.
The blanket became very unwieldy at this point. I’ve since found the label and discovered it weighed four and a quarter pounds before I even began!
However, that wasn’t really the problem. I didn’t want to have pins within the area I was working, because they’d be certain to get caught up and cause more breakages (by the action of what my father refers to as the Law of Maximum Cussedness). The central section is about two foot in diameter, so a lot of as-yet-unattached fibre was rather more free to move under the netting than I would have wished. Furthermore, because of this I was finding myself tensing up and pressing harder on the foot pedal, and that was when I would get out of sync and break a needle or two.
Modern StitchOff Adventure – 2
Second Layer Of Circle, with net in place
Hexagonal net laid over the fibres helps to keep them from around the “foot” for want of a better word, of the embellisher. I’ve pinned it down, inside and outside the ring, and spent a lot of time struggling with a piece of blanket which seems to get larger every time I go back to it.
The challenge with an embellisher is to move the fabric when the needle unit is up, because if the needle unit is down when the fabric moves, needles get broken.
And I can assure you, they break. Eight, I think, by the end of my first serious day of using my embellisher.
The blanket got heavier and more unwieldy, but by the end of the day I was beginning to feel I might be getting the hang of it.
Early Stage Outer Circle
This might be in part because my sewing table was gradually accreting some props. I covered it with plastic tablecloth, to help the material slide, and stretched the plastic tablecloth over a clothes horse.
That in turn helped to raise the main weight of the blanket – the bit I wasn’t working on – so that it was no longer dragging down on the section I was working on.
I even piled up some of the blanket on the windowsill, and I do rather wonder what anyone passing by might have thought of the net curtains swishing tempestuously with no person in sight!
Shredded Net
What was definitely not feeling better by the end of the day was that hardworking and hapless net. It doesn’t get felted in – that’s why it’s such a useful addition to the armoury of the user of an embellisher – but it does get pretty thoroughly shredded. This may be in part because I’m not yet experienced enough to know when I can dispense with it, or it may be because I’m working on small parts of the piece at once because it is so big and heavy.
Fortunately I bought a couple of yards of it, for precisely this purpose!
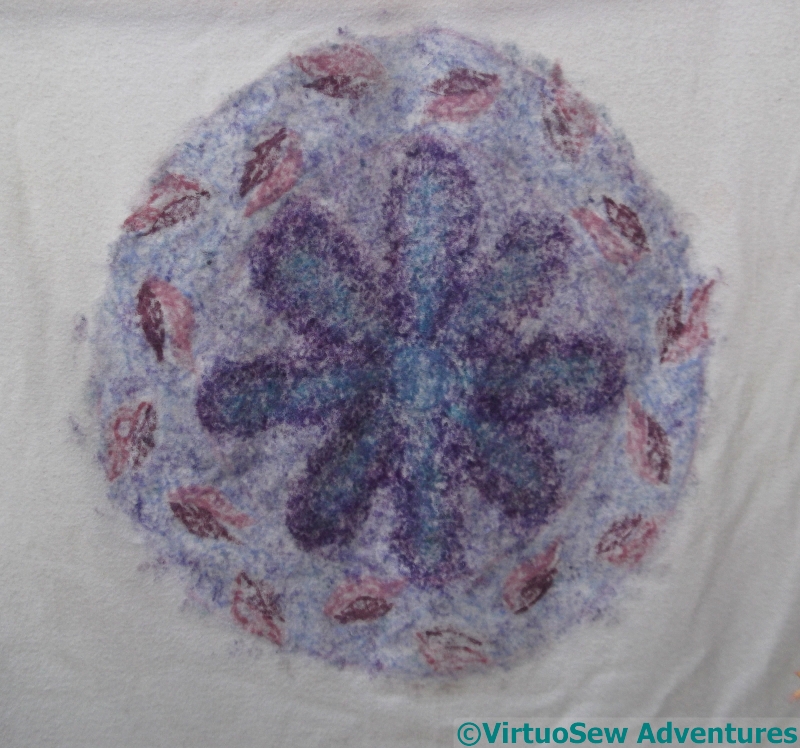
Lady’s Magazine Stitch-Off – A Modern Adventure
Sketched Medallion
I have a matchless talent for complicating my life. In my defence, I can say that this will be practice for future projects, but oh, my…
I have always had in mind to try a full-on-modern, Jane-would-never-have-done-this, take on one of the Stitch-Off designs. This is going to be that project.
I’ve been intending to do something with this blanket for quite some time, and I’ve also been intending to have a serious play (as it were) with my embellisher. Not the least of the challenges will be in managing a full size, pure wool blanket – nearly six foot square, and heavy.
First Thoughts
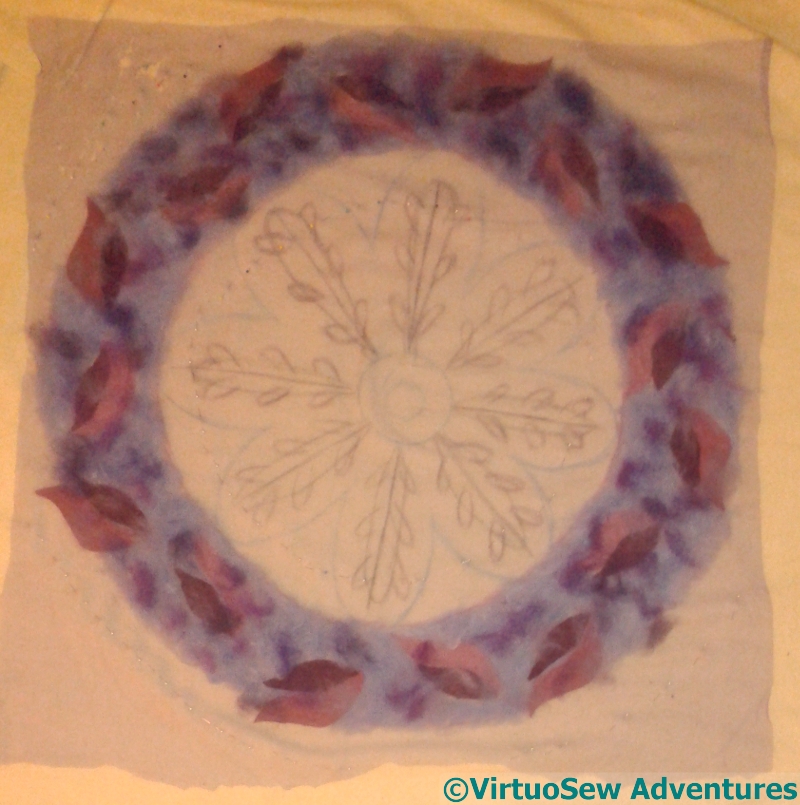
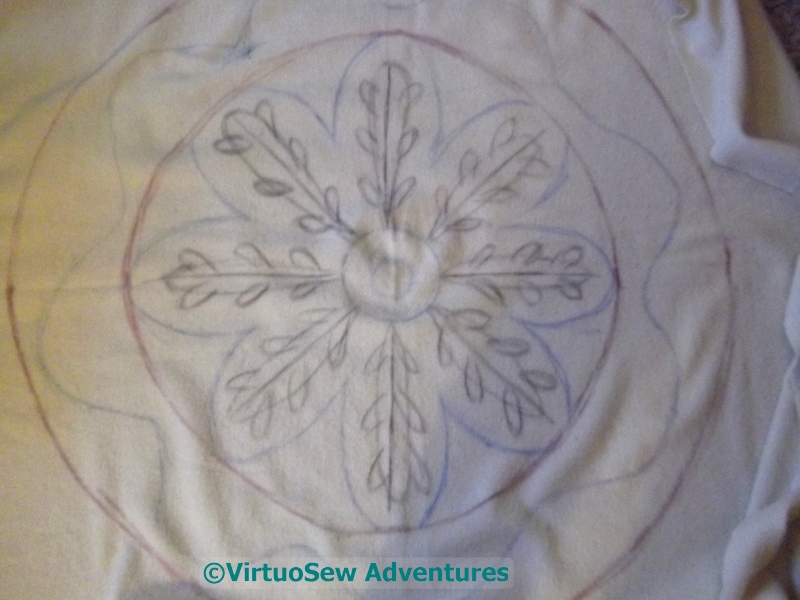
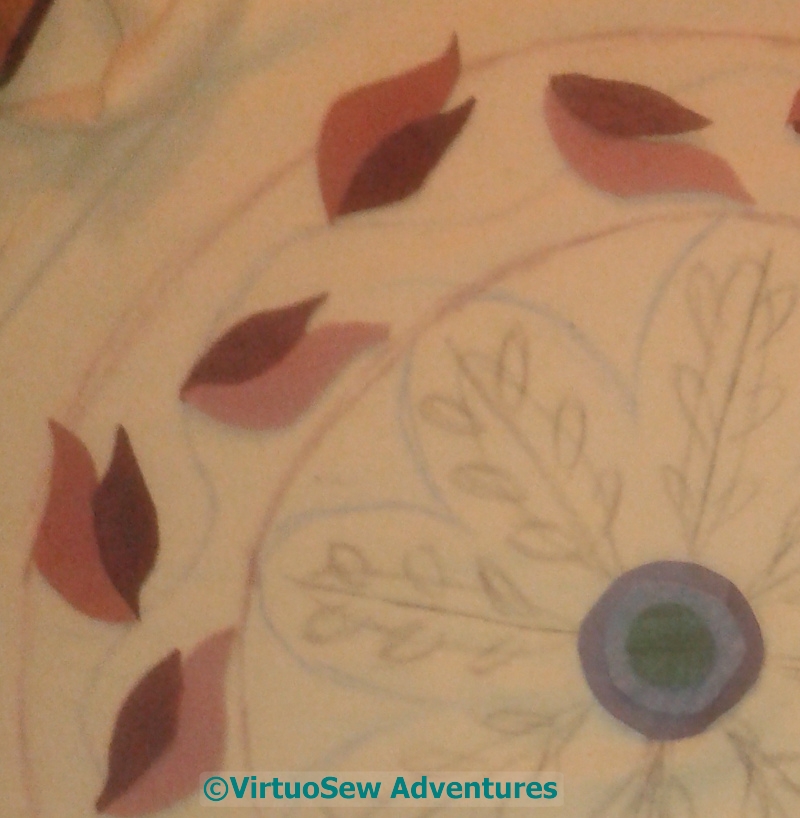
I’ve sketched out the central medallion from the design for the child’s cap by eye. From now on, it’s a venture into the unknown…
I began by cutting leaf shapes in two colours out of two different types of felt, and alternating them around the circle. My wavy stem line wasn’t quite even, so I’ve tried to even up the spacing by eye, and attached the leaves roughly.
I’m expecting to build up this pattern in layers, and fine-tune the felting as I go, so the first stage here is just to make sure nothing moves too much..
Originally needle-felting was an industrial process for making a non-woven fabric. It dates back to about the 1860s, and these days is used for things like geotextiles and insulation. A quick rummage online told me that among the applications are tiles on the Space Shuttle and tennis court surfaces. The application to craft and art is much more recent, but it uses exactly the same needles – just not as many of them!
An Experiment in Blending Fibres
However, because of this background, an embellisher is a great way to use wool fibre as well as fabric in a project, and that in turn means an opportunity to play with colours. One of the strongest memories I have of my childhood introduction to the textile industry is visiting a woollen mill in Totnes in Devon, which made upholstery fabrics. The manufacturing process began with bales of alarmingly bright colours of wook fibre being thrown into a carding machine, and ended with wonderfully subtle, lively colours of fabric coming off the looms. I’m going to see what I can do to emulate this intimate blending of colour using my little hand cards.
Crazy Canvaswork Cushion – Part 10
Section Sixteen
The last section, Section Sixteen, gave me a lot of trouble. I suppose that is partly because the end was in sight, and I wasn’t quite as focused as I could have been!
I was originally looking for a crossing stitch, but every single one I tried either looked wrong, or simply failed to cover the canvas. I sent several tweets enumerating my trials, with one or two strands being too fine, and three strands too heavy, and in the end I abandoned the crossing stitches entirely.
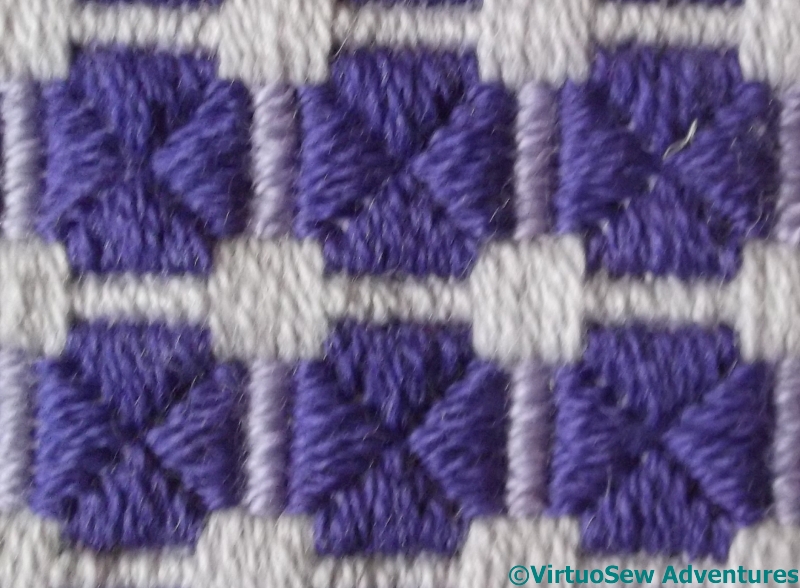
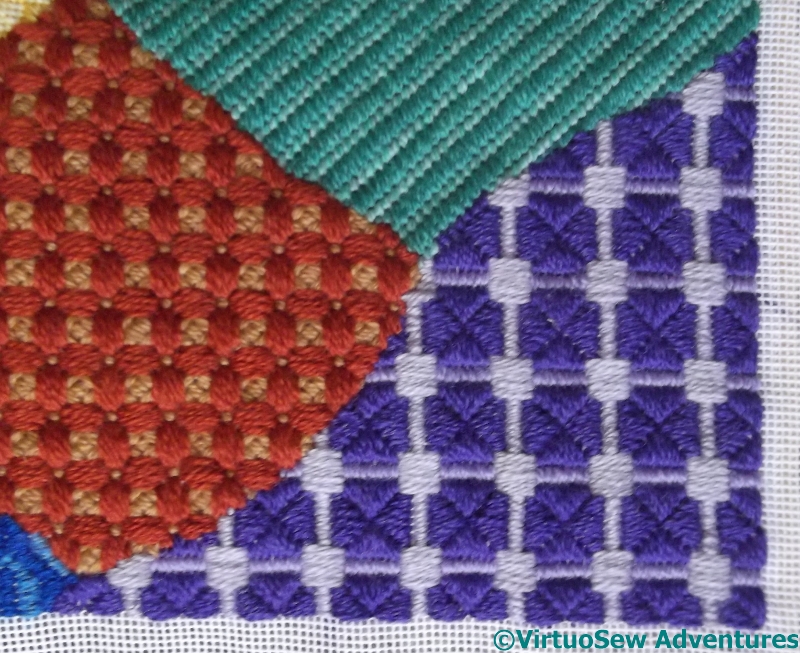
Framed Triangle Stitch
In fact I devised my own variation on Triangle Stitch, which I’ve called Framed Triangle Stitch. I rather like the way it has turned out. It is a bit of a trial to stitch economically, but since I am attempting to reduce my stash, that is scarcely a problem!
Although I like the pattern it creates, I’ve been somewhat concerned about the scale of the pattern, which is perhaps a little too similar to the blue pattern of Section Thirteen.
However, I now have the challenge of unrolling the whole piece, blocking it, and working out how to finish the cushion.
As they say – watch this space!
Crazy Canvaswork Cushion – Part 9
Section Fourteen
As I mentioned in Part Eight, I gave myself a framework for the patches, alternating crossed, diagonal, and straight stitches.
Looking at the photograph now, there is a slight look of Victorian floor-tiles about the combination of the blue and yellow of the previous sections, and the brown and beige of this one. The proportion of brown isn’t correct for Victorian floor-tiles, but still…
It occurs to me that we might have a lot of fun looking at this cushion when it’s done, looking for other things that it reminds us of!
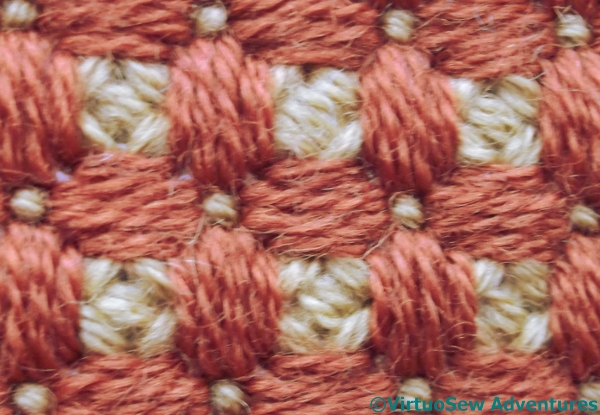
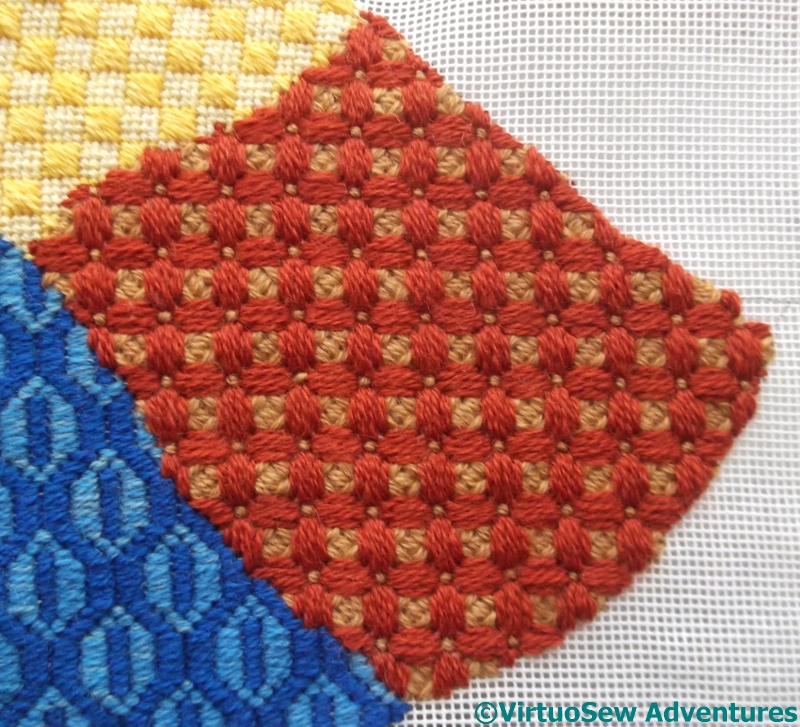
Caged Rice Stitch
I chose a Rice Stitch caged with straight stitches. I suppose this could be regarded as a combination of crossed stitches and straight stitches, which may throw my scheme slightly off-balance. I like it, though – the straight stitches look nicely padded, even though they aren’t, and the rice stitches add texture. I can imagine it looking “floral” in some colour combinations, but in this version, I think it emphasizes the “Victorian Floor Tile” feel I mentioned before.
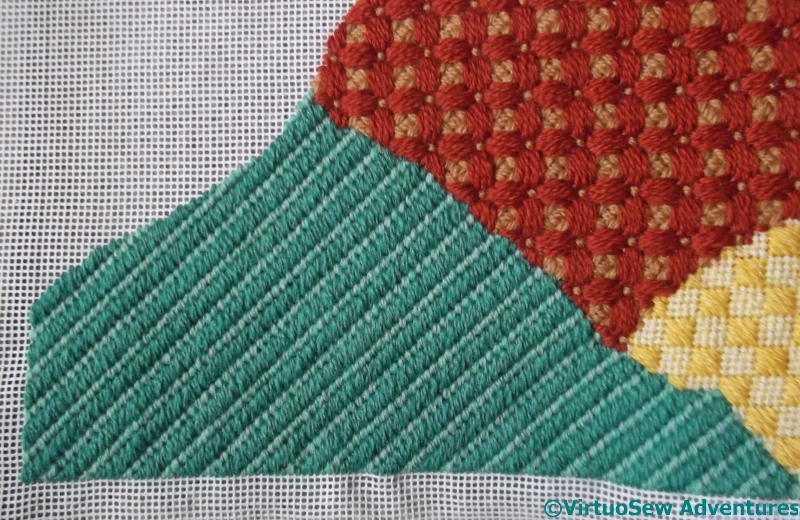
Section Fifteen
I am getting really close to the end now – Section Fifteen is the last but one, as you can see by the square corner. Since I didn’t work on this project over the summer, I’m a bit surprised by that. I wish the project had been as good at stash busting as it has been at growing!
You might have noticed that teal is one of my favourite colours and wondered why you haven’t seen more of it, but my stash is partly inherited and I don’t have very much of some colours.
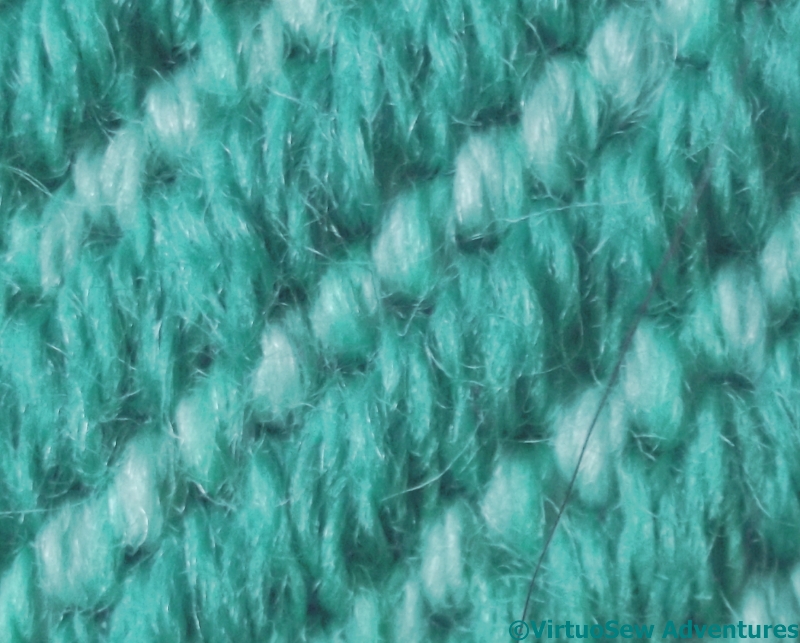
Double Twill Stitch
After the complexity of Caged Rice Stitch (which, while fun, is on the complex side!) I went very simple indeed for Section Fifteen – Double Twill Stitch.
So now I need to work out what colour – and what stitch – to use on the last section. And then how to finish the cushion…
Easy, right?