
Tag: interior decoration
Crazy Canvaswork Cushion – Part 6
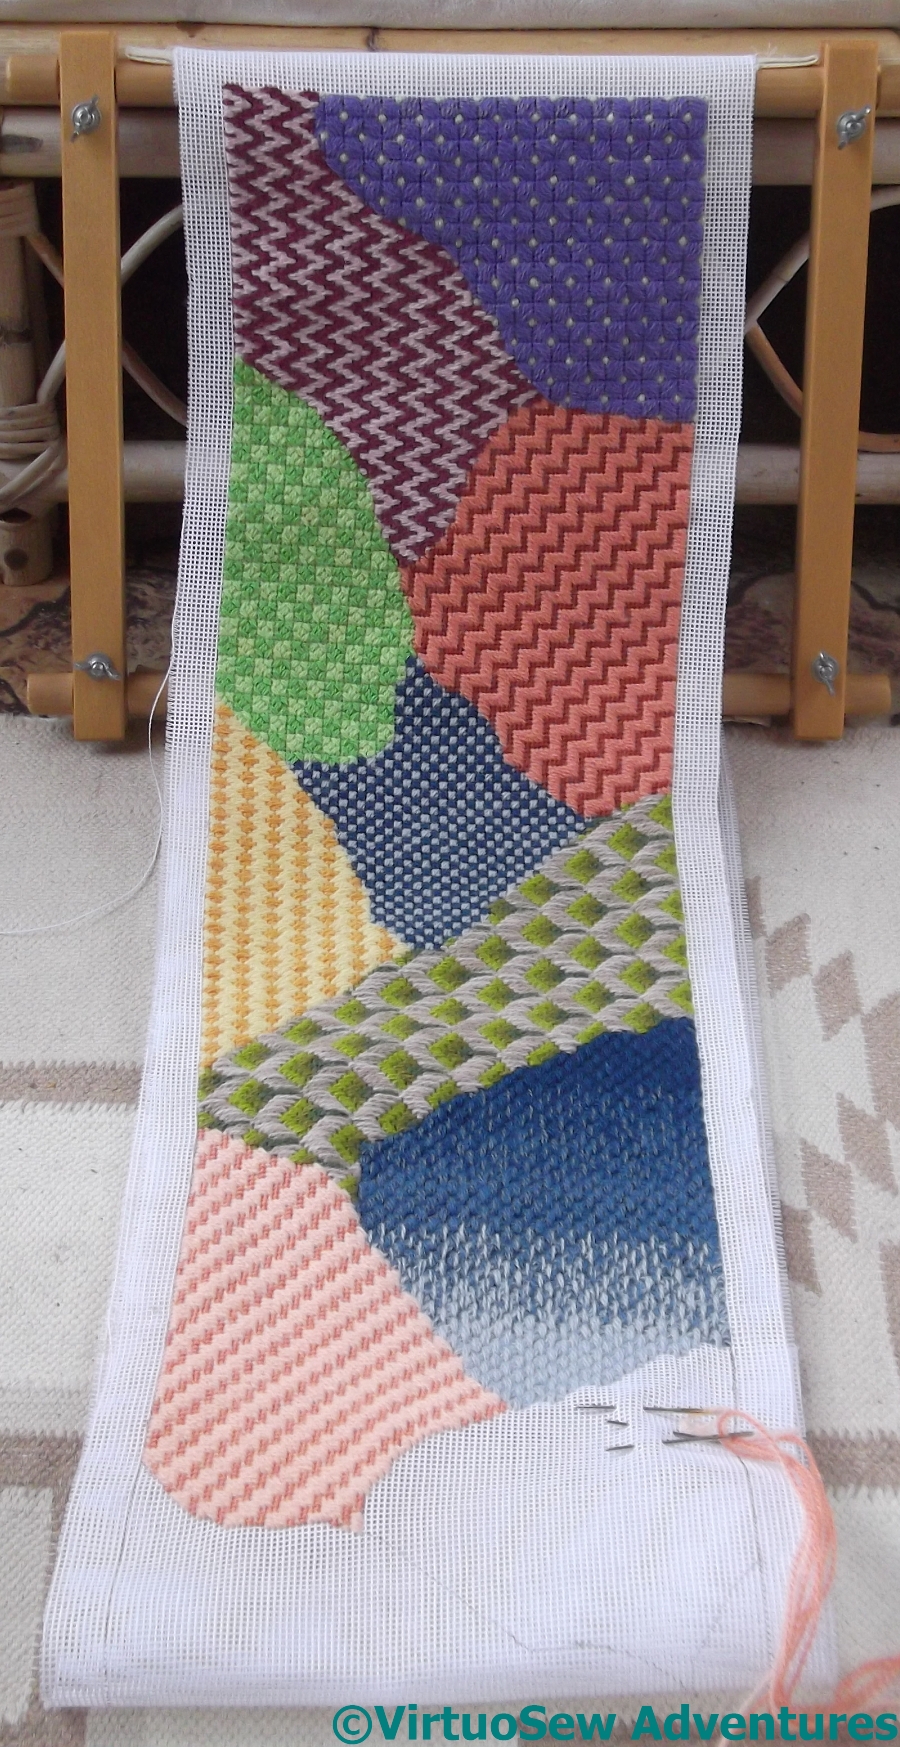
Two Thirds Done
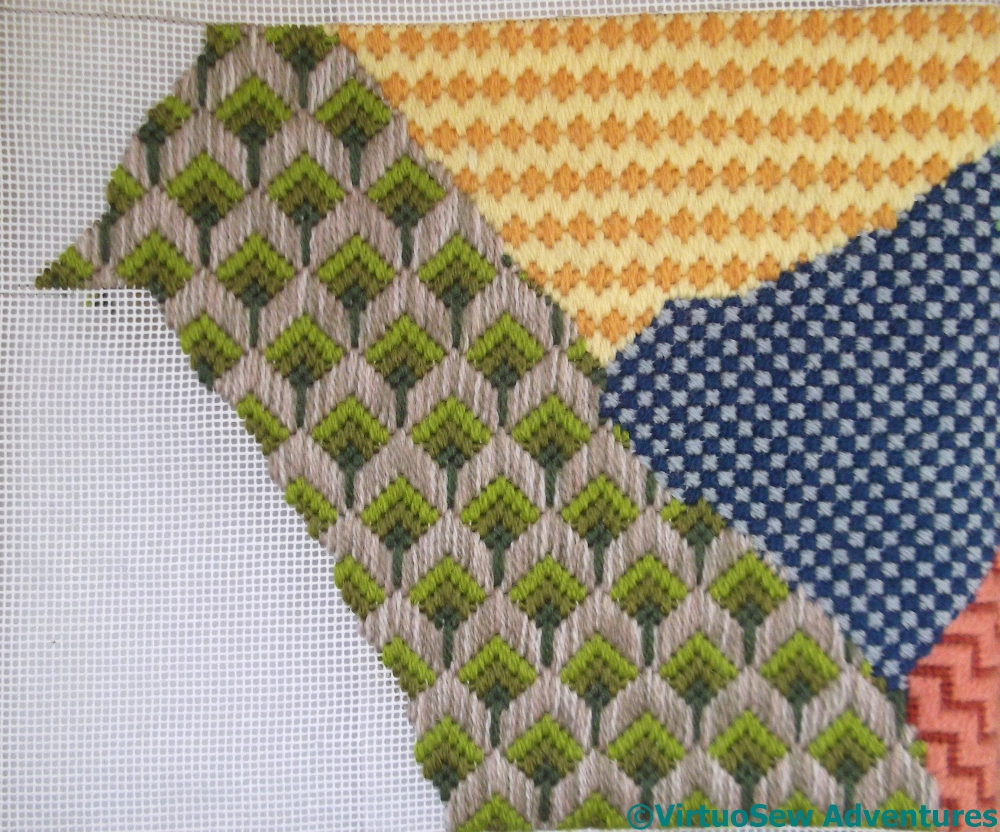
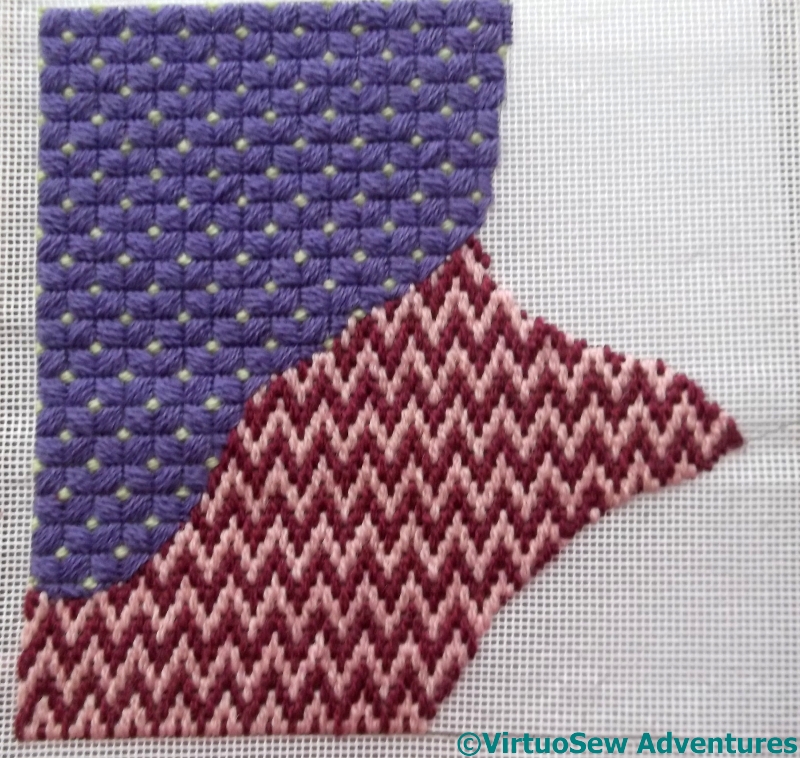
We interrupt our normal programming…. to bring you your first sight of the whole Cushion.
Probably your only sight until I take it off the stretchers, too. As it turned out, getting the canvas rolled up neatly again, under sufficient tension, was really quite a task, involving two people and much changing of minds, as well as many rollings and unrollings. Furthermore, since the rollers are permanently set in their sockets, it won’t be possible to show the whole thing without taking it off the stretchers. I shan’t be doing that, because I really don’t enjoy the mounting process!
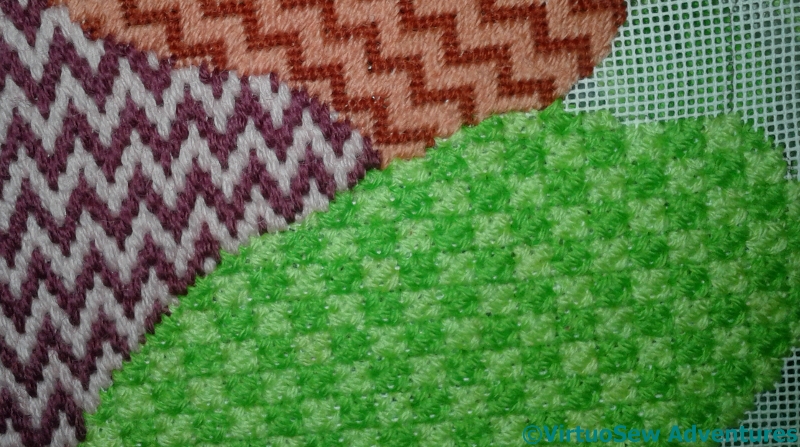
However, I can report that I am really very pleased with how it is going. I think I need another set of greens for the next section, since there seems to be a rhythm of sorts going on there. I certainly need something bright, with a bit of punch and impact. I like the last two sections — they work well together – but they are beginning to look a little too well behaved. It’s not quite as riotous as I was hoping…
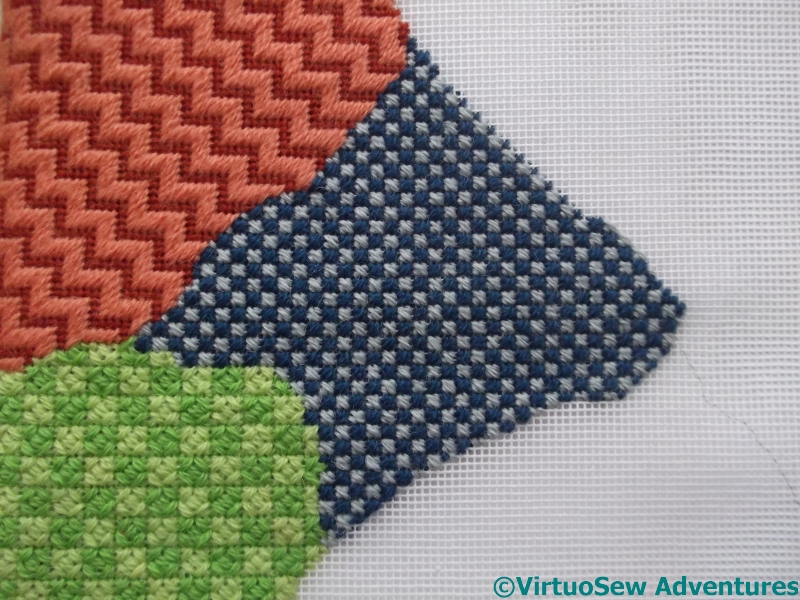
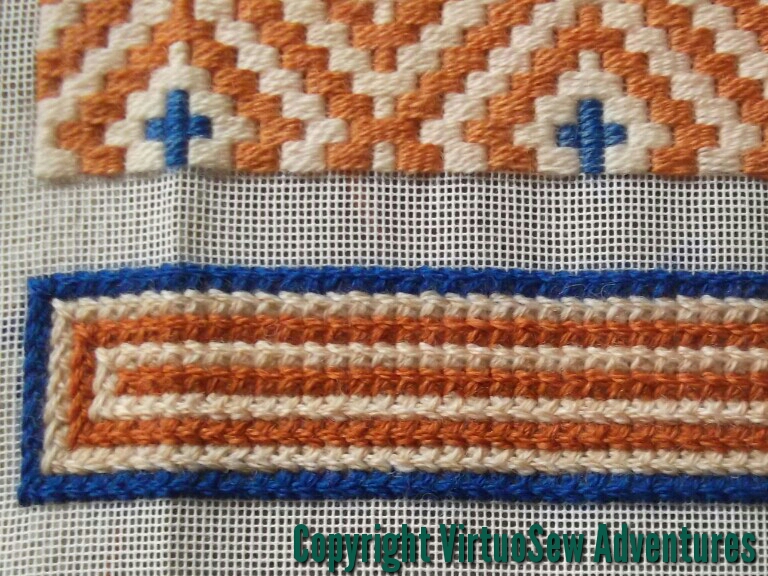
Moorish Stitch
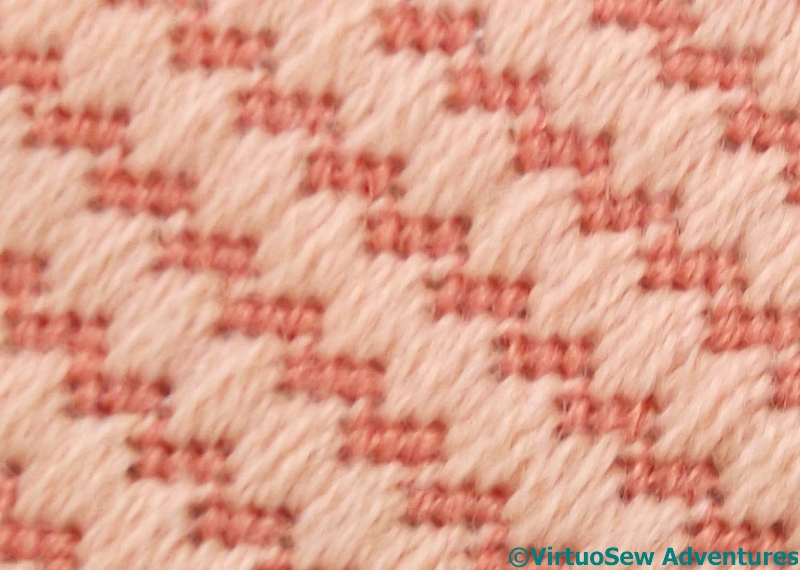
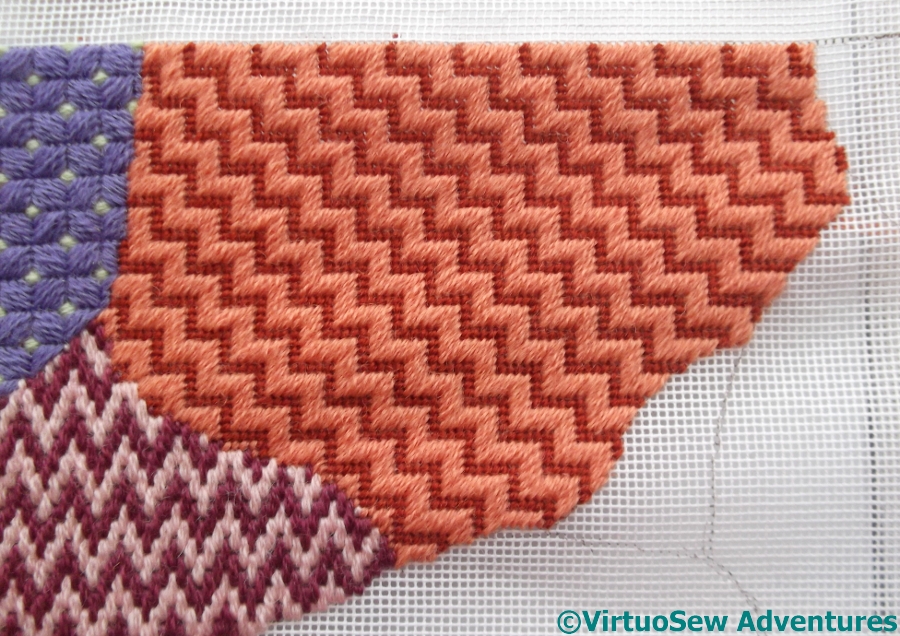
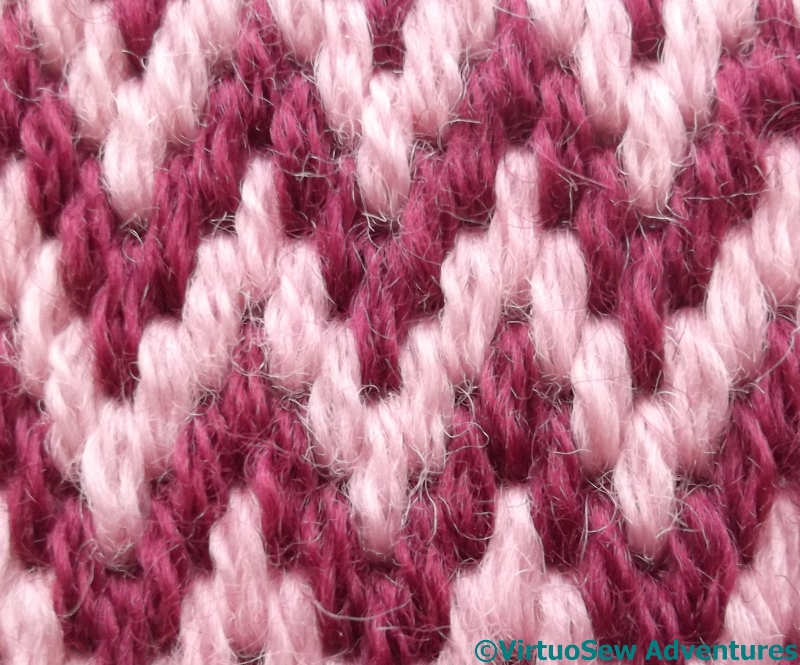
Section Nine of the Crazy Canvaswork Cushion is worked in Moorish Stitch, a diagonal stitch to set against the crossed stitch of the previous patch.
There is one heathered thread in this pattern – the solitary tent stitch vertically separating the short dashes. That’s turned out a bit too subtle, but it does help to maintain the difference between Moorish Stitch and Jacquard Stitch, for example.
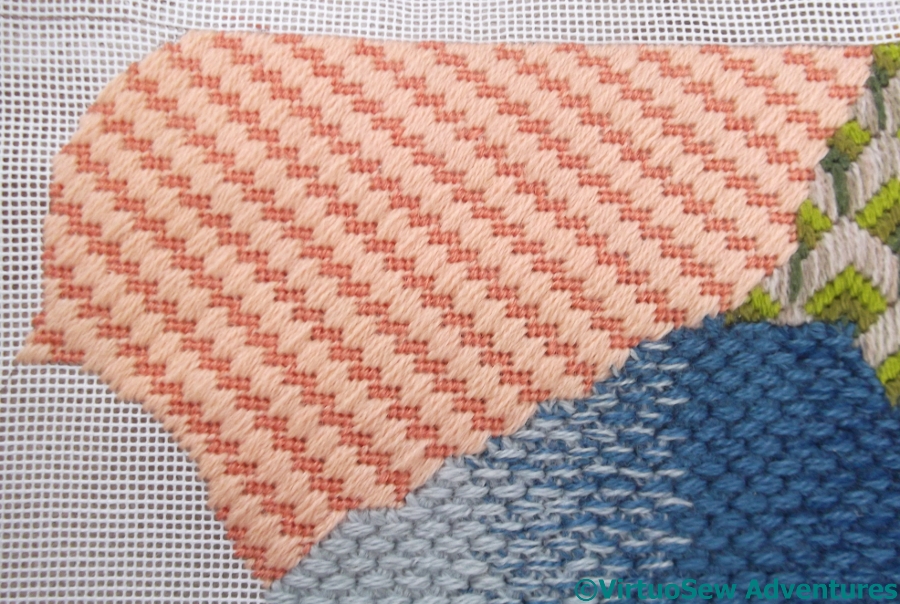
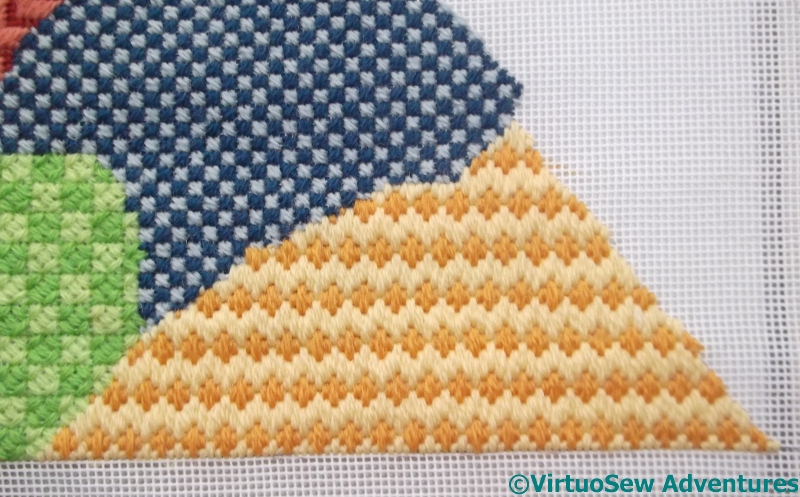
Section Nine
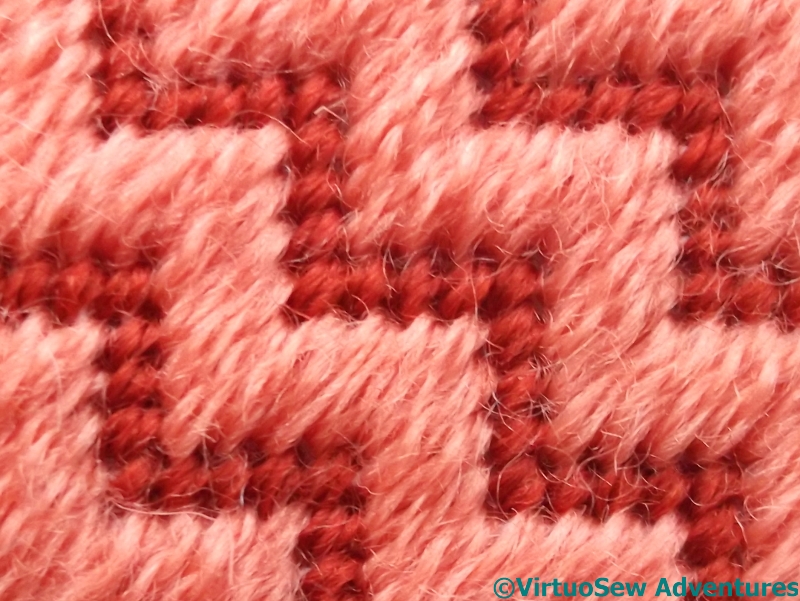
This patch took longer to do because as the weather warms up, wool becomes a less appealing material to work in. In addition, the main, peach wool proved to be rather harder to separate that I expected. It’s labelled Paterna, and should be exactly the same as all the other threads, but it was harder to strand, and has slightly less sheen.
Now I need to pick a stitch – I think it should be a straight stitch, with pattern that runs horizontally – and then pick the colours for Section Ten…
The Crazy Canvaswork Cushion – Part 5
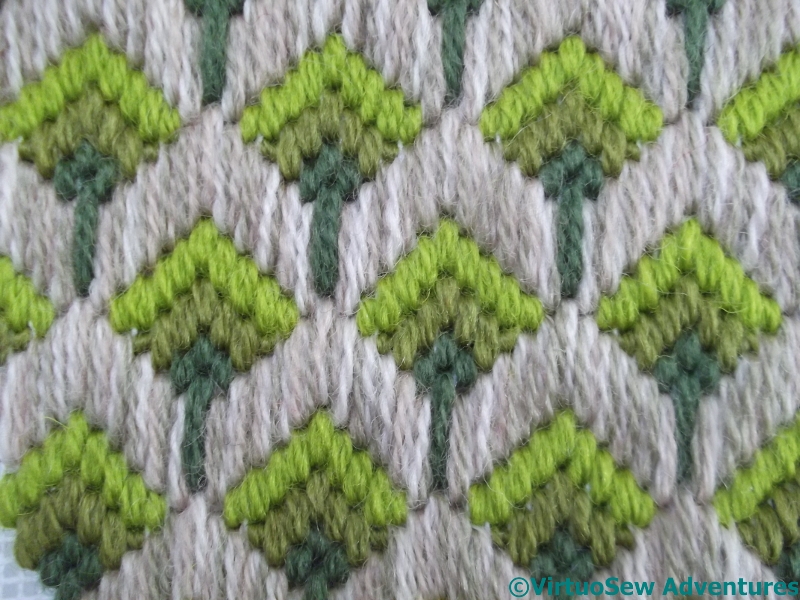
Tree Pattern
This tree pattern is one I’ve been looking for an excuse to do for quite some time. The book in which I found it suggests using it for small pieces like spectacle cases, but I’m not sure I agree. I think it might make for a rather overpowering pattern if not contained by something else. That same book said it was easy, and I’m not sure I agree with them about that either – I had to unpick all the trees the first time I did them, because I’d repeatedly got one element of the stitch placement wrong, in a rather unfudgeable fashion!
Section Seven
Section Seven covers – just – the whole width of the cushion, and makes a good interruption to the rhythm I’d built up.
It occurs to me that it might be a good candidate for a single colour design, one of these days, especially a light colour that will allow the ends of the stitches to cast shadows and build up the pattern.
As though I don’t have enough plans swirling in my head!
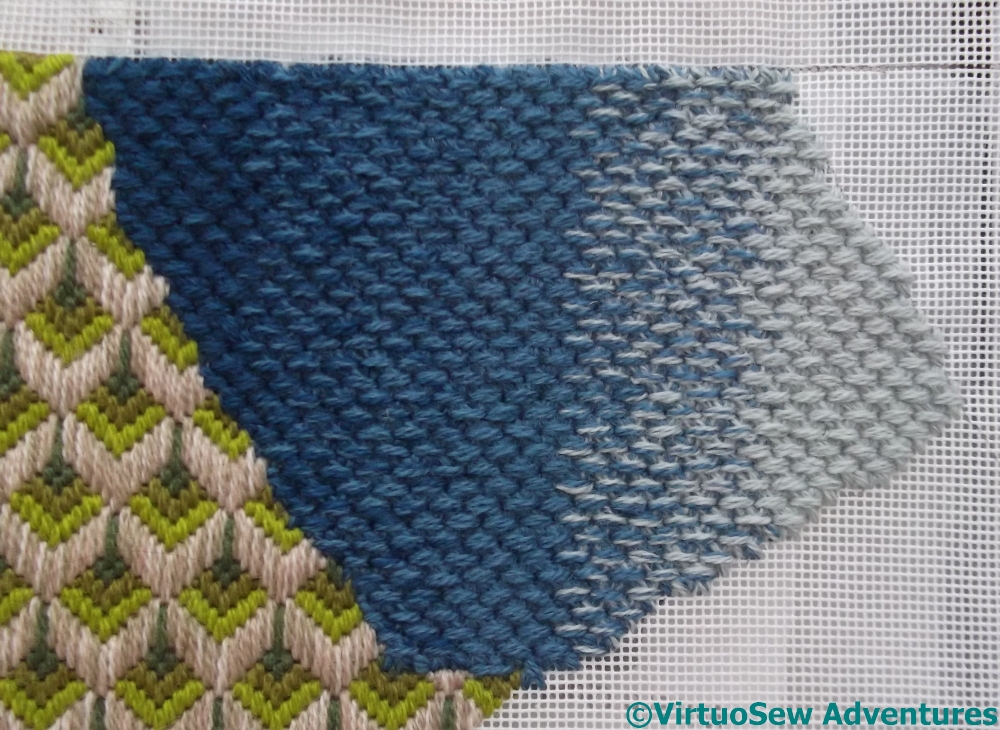
Section Eight
It turned out that the next section was rather tricky to pick a colour for, until my mother suggested blues, to help reflect the pattern around Section Seven.
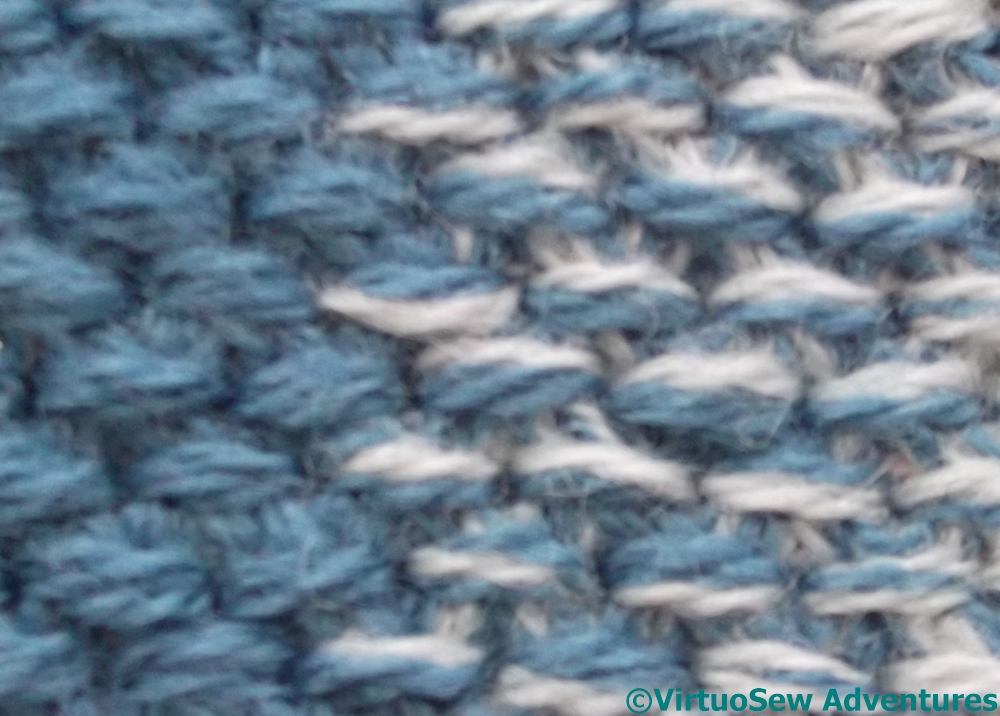
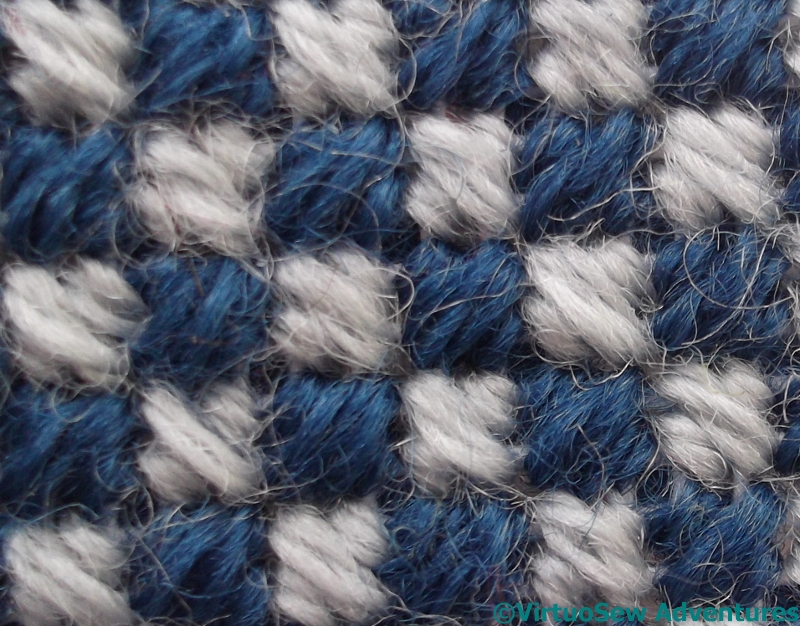
I decided to create a shaded effect on Section Eight. I used three strands of wool, which meant that I could create a fairly subtle graduation starting from three dark strands, and progressing through 2 dark and 1 medium, 1 dark and 2 medium, 3 medium, and then 2 medium and one light, 1 medium and 2 light, then finally 3 light.
Dutch Stitch
The stitch is Dutch Stitch, found in Mary Rhodes’ Dictionary of Canvaswork Stitches. It is a condensed, closely worked crossing stitch. In fact it is so condensed as to be quite an effort when worked in three strands on this canvas!
Still, I expect it will prove a hardwearing stitch, and the texture is a good contrast with the smoother textures of the straight stitch patterns.
The Crazy Canvaswork Cushion – Part 4
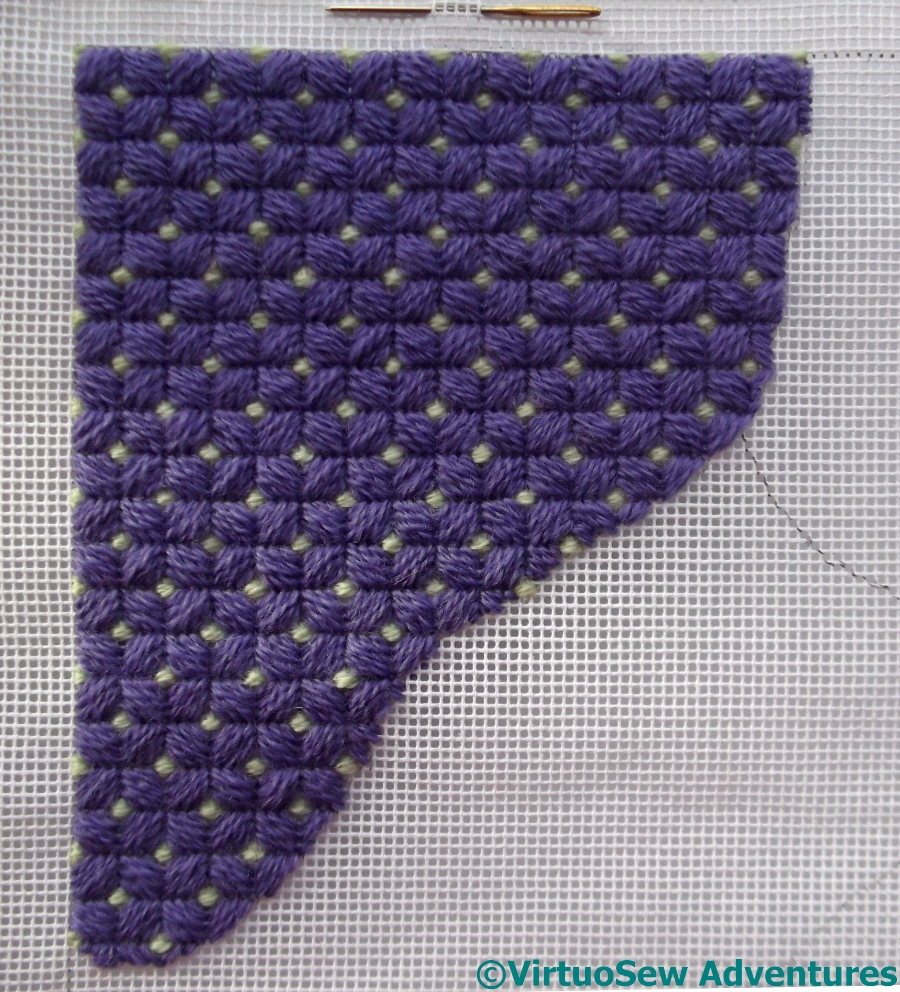
Reversed Mosaic Stitch
Section five needed to be worked in something that would help to calm down the acid green of section four.
I chose two shades of blue, and Reversed Mosaic Stitch, which at this scale is a small, neat pattern. The dark blue stitches are at ninety degrees to the light blue ones, hence the term “Reversed”. It also echoes to some degree the orientations of Brighton Stitch in the very first section. Just as in good script writing for a series, odd references may be made to incidents several episodes in the past, in designing large pieces of embroidery, references of colour, style and stitch help to give some cohesion to the overall item.
Section Five
I am a little concerned, in fact, that this pattern has calmed everything down too much, that it is looking rather grey and dull – which in turn means I need to take some time and effort to pick the next section, both stitch and colours.
I have even braced myself (reluctantly!) for the possibility that when the whole thing is finished and unrolled, I may look at this section askance and rip it out!
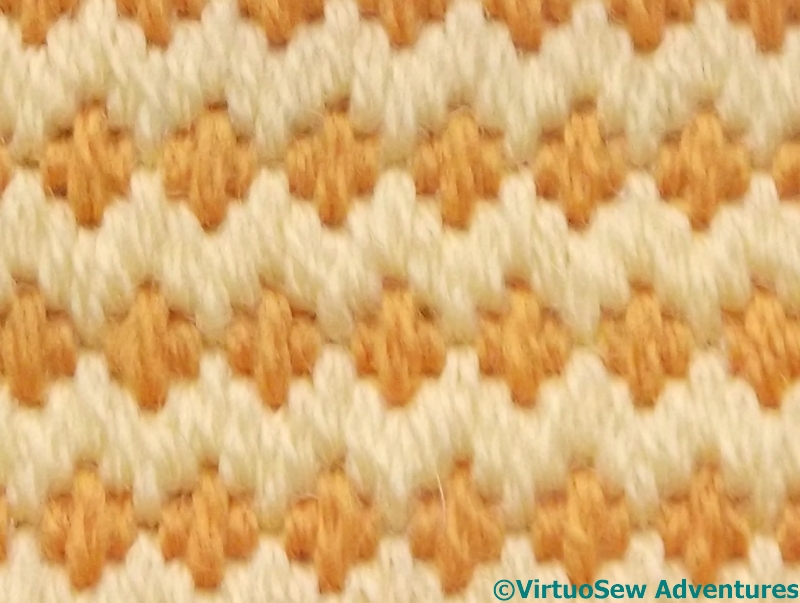
Hungarian Grounding
Moving on to Section Six, I wanted to choose a warm colour again, to counterbalance the warm colours of the Jacquard stitch, and eventually picked out two shades of warm yellow for the Hungarian Grounding Stitch. This is one I have wanted to do – I haven’t the faintest idea why! – ever since I found it, but have never had the right project to put it in. It’s a particularly useful one because it’s stripy, but at the same time spotty, so it reflects and recollects several different stitches.
Section Six
Seen from a distance the effect is stripy rather than spotty, but since the finished cushion is probably destined for my mother’s studio, it will be examined close up as well as from a distance!
The next pattern I choose will be much larger, and involving more colours. I am now far enough towards the centre to move on to the more multi-coloured sections, for maybe four sections before moving back to two colours. Some heathering will be involved, as well. Although my stash seems extensive it’s completely unstructured, being the leftovers of several of my own projects as well as inherited bits and pieces, and heathering will allow me to extend some of the colours to fill the elements I need them to.
I hope!
The Crazy Canvaswork Cushion – Part 3
Jacquard Stitch
The third section is in Jacquard Stitch. I’ve always liked this stitch. It creates an effect rather reminiscent of a twill weave, which is one of my favourite fabric structures – you may recall that the Persian Fantasy screen was embroidered on a cotton twill, and that I used a cotton twill fabric for the superstructure and bridge of the Camberwell. It’s a little tricky to start, and doing the compensation along all the wiggly edges had me counting and recounting to try to make sure I didn’t create any steps that were longer than others. It is very much easier to do when the edges are straight!
Third Section
This view shows that whole shape of the third section.
As you can see, I am trying to change around between diagonal stitches and straight stitches, stripes and squares. Although Jacquard Stitch and Florentine stitch are both striped, one uses diagonal stitches and the other straight stitches. And strangely, again, the section used approximately the same amount of wool as the previous sections. By now I was beginning to be confident enough to pull out that number of strands from the hank and see what happened..
Section Four
For my next section, I looked for a square stitch which involved crossing threads. Since I chose to alternate the colours, the amount of each colour would be approximately the same. This is a rather acidic green, and swore violently at some of the other colours in my stash – although it does look better in real life than it does here!
Rice Stitch
I chose Rice Stitch. This is probably the simplest way of using two colours for Rice Stitch, although later I may use the variant which has the corner crosses in a different colour to the underlying diagonal cross stitch.
Next time I may also choose to use three strands in the needle. Two are usually sufficient with a crossed stitch, but although this looks hardwearing , in real life it looks a little “thin”.
The Crazy Canvaswork Cushion – Part 2
First Section
Once I had managed to get the canvas mounted on the frame, I could start stitching. Although the project is inspired by Crazy Patchwork, and is supposed to be random in feel, I always find it easier if I can give my randomness some structure, so I have worked out a few guidelines for myself:
- At least two colours in each patch
- Heathering will be permitted, but confined to the middle of the cushion
- Try to use crossed, slanted and straight stitch patterns in equal measure
- Don’t try to straighten lines – use partial stitches.

Brighton Stitch
They are only guidelines and I may ignore or break the rules later on!
The first section is worked in purple and pale minty green, using Brighton Stitch. I like this stitch. It creates a neat, geometric effect, covers the canvas well, and can be made as subtle or as dramatic as you like.
I’m also keeping track of the amount of thread I use. It will give me some sense, as I get nearer to completing the cushion, of whether or not I am likely to reach the end of the cushion or the stash first!
Florentine Stitch
For the second section, I decided to use the simplest and most basic of Florentine Stitch patterns. Only two colours, and a simple, regular zigzag.
I’ve found that three strands of the Paternayan are necessary for this stitch to cover the canvas, whereas for the Brighton Stitch I only needed two strands. The basic Florentine stitch is also terrifyingly quick to do. I realise this is an odd thing to say, but I want this project to last me a while, and if the sections turn out to be really quick, it won’t.
Second Section Added
It’s too early to draw any conclusions, but the first two sections also used about the same number of strands taken from the skein, even though in one case the lengths were used whole while in the other, two lengths from the skein produced three needlefuls!
I have yet to decide whether I will emphasize the joins, either by creating some sort of seam embellishment, or simply by back stitching in grey thread to make the edges seem crisper and sharper. That decision can wait until I’ve finished, not least because I suspect that I will need to see the whole thing at once before I decide!
The Crane – playing with silken thread, Part Two
Japanese Crane Design
Here is the Crane design, finished and ready to be mounted for display.
I picked a wooden pot from Framecraft Ltd. People who have been stitching for a long time may remember them as “Framecraft Miniatures”, and they were always a good source of silk gauze and other supplies for people interested in furnishing dolls’ houses. They also supply a huge variety of other items with spaces for inserting embroidery – you might remember my Homage To The Opal, if you’ve been reading my blog for a while.

View Of Crane Pot
Framecraft supply a plastic cover to protect the embroidery, but as my cousin isn’t the type of person to maul a piece of embroidery with sticky fingers, I decided she would probably prefer to see the embroidery properly. They also supply padding, but it is a light foam, and I substituted two layers of a very fine cotton wadding instead. The cotton wadding has a bit more substance to it, and created a nice firm dome, which looks much better when the embroidery is displayed without a plastic cover.

Crane In Place
The colour changes and textural stitches keep the design from looking too stiff, but because the silk thread has a slightly matte appearance it looks soft and doesn’t dazzle the eye.
When my cousin took it home, she strolled around her house asking the Crane where he wanted to live. He chose the bedside table in the spare room, where his colours talk nicely with the wallpaper and the bedspread, and the wooden pot echoes the dark wooden bedhead and wardrobe.
Another Needlepoint Project – The Crazy Canvaswork Cushion

The Old Form
I very much enjoyed working the Stones of Venice footstool last year. It was really lovely to have something that I could pick up as a relief from the fine silk and metallic threads in the Hittite Amulet, and my various Thistle Threads courses. Furthermore, at this time of year, something I can enjoy in the evening without switching on my daylight lamp is a good choice for those days when I haven’t managed to stitch during the day but have been longing to.
Naturally, I’ve been casting around various family homes, looking for a destination for the canvaswork once completed. And I’ve found it – in her studio, my mother has an old form (a bench) which she remembers from her childhood home in Westmorland. It’s shabby and tired now, but giving it a good sand down and a fresh coat of paint will work wonders, and a long cushion will make it altogether more comfortable to sit on.
Welding Canvas
We’ve decided that this, too, will be a stash-buster, insofar as that is possible, so I’m going to have to weld my canvas together (bear with me!) and the inspiration for the canvaswork itself is to be Crazy Patchwork. I’ve been told to make it look Cheerful.
It is fairly simple, but a little time-consuming to “weld” canvas together. Create an overlap, lining the canvas up to match the holes, then stitch together by making several lines of whip stitching along the length of the join. Trim off any superfluous selvedges, and you should find you have a secure join that is almost unnoticeable once the decorative stitching is applied.

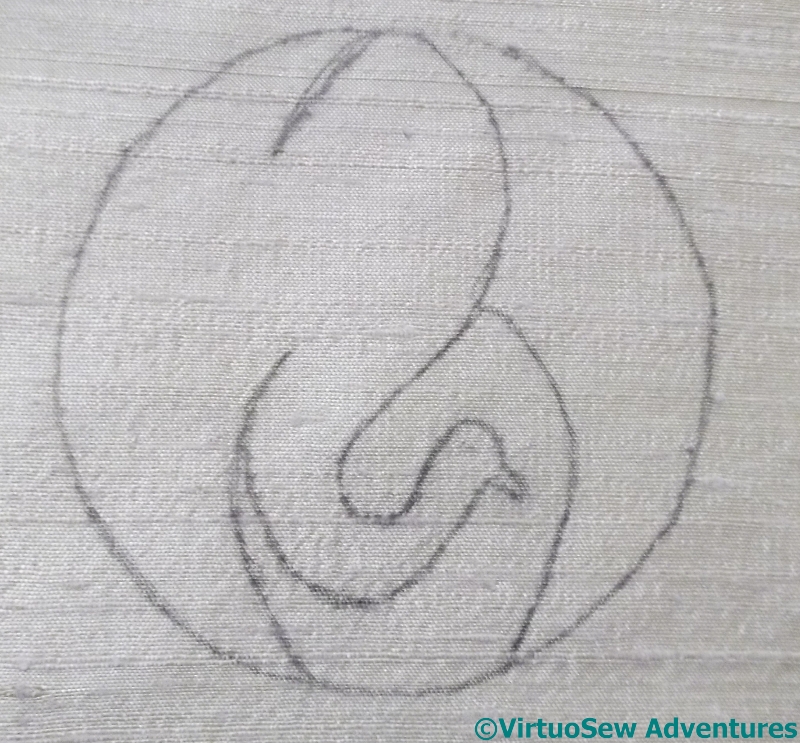
Design Outlines
Since I am trying to use up a rather peculiar collection of wools, the leftovers of an assortment of projects that were never intended to live together, the theme of Crazy Patchwork seemed the most promising.
What it wasn’t, was Easy To Plan. You can see that in the top variation I ended up trying something very much more formal, a sort of paisley pattern layout. I like it, but not for the purpose of this particular cushion. It might work better for a piano stool or something in a similarly formal setting.
Then I tried a layout with straight edges, and was less than happy with it – there’s not enough sense of rhythm or flow in the design. The layout with wiggly lines works rather better, and I’ve settled on that, drawn it onto the canvas, and attached my canvas to a frame.
The form is nearly a metre and a half long, and about 20 centimetres wide. I’m now wondering whether I have a stash big enough for the task!
The Crane – playing with silken thread, Part One
Japanese Bird
I decided to make a “Useful Pot For Putting Things In”, as Winnie-The-Pooh would have called it, for my cousin for Christmas. In fact, I cheated and merely embroidered a design for a lid!
I found the motif in the Japanese section of “Pattern Motifs: A Sourcebook” by Graham Leslie McCallum. I think it’s a crane. The design is very pared-down, and I thought it would make a good way to show off some of the superfine silk thread from Stef Francis, maybe even an excuse to use some more unusual stitches to see how the threads show them off.
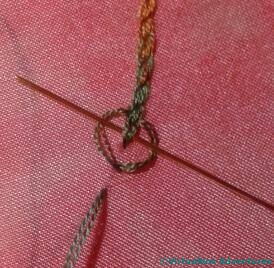
Hungarian Braided Chain Stitch
Those of you who follow me on Twitter may recall that I tweeted this picture of the stitch I eventually chose to use. It’s called Hungarian Braided Chain, and I found it in one of those books by Edith John that I mentioned when I began embellishing the Circles Skirt. If you think of it as Heavy Chain with the needle weaving over and under the threads as shown here, you will get the idea.
I’m very taken with the stitch, in fact. It creates a fascinating textured line, and colour changes in an over-dyed thread bring it to life even more. I can imagine using it in plain thread as an indication of braid on clothing, or ropes on a ship, or even simply in side-by-side rows to create a textured effect.
This is the first – so far unfinished version, in superfine silk on silk habotai. The relatively short colour changes in this thread create subtle changes from stitch to stitch, emphasizing the structural patterning and texture. When the destined pot arrived I decided the combination looked altogether too hot and bothered, and went rummaging in my stash again…

Close Up Of Stitching On The Crane
The fabric I finally chose is a rough dupion from The Silk Route, in a golden cream colour which is extraordinarily difficult to photograph, and I picked a slightly different silk thread, more restricted in colour range. Using four strands of thread produced a lovely cable-like appearance, which you will see if you open the photo at full size.
The dark section of the design, behind the bird’s head, I worked in a dense version of trellis stitch, with horizontal, vertical, and diagonal lies all tied down with tiny cross stitches. Even working in a hoop or frame, trellis stitch cane be a bit of a challenge to stitch, but I made it in the end!
Stones of Venice Footstool Finished
One Side Turned
Once I had finished the sides of the footstool, I cut out the sides and the top and turned in the edges, leaving one thread of canvas all round, to help sew them together.
The next task was to assemble the pieces to create the box shape for the top of the footstool. I used a herringbone stitch which creates a fairly strong edge, and nicely echoes the stitch I used for the sides.

Canvas Stapled
I covered the foam (freshly cut – the old foam was disintegrating as fast the old cover!) with an old teacloth, and then unpicked the lower edge of each side, and covered the combination with the canvaswork.
Next came the challenge of fastening it all down. Fortunately I had help! We turned the whole assembly upside down and leant on it, and then my mother held everything in place while I wielded the staple gun. As I’ve said before, staples don’t damage the wood as much as tacks or nails, and I think they also do a better job of holding everything in place. They are also much easier to take out !
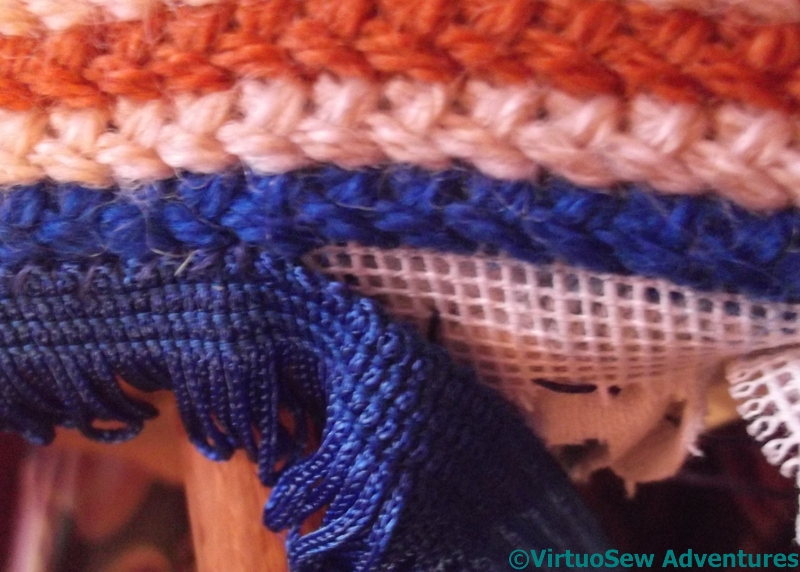
Attaching Blue Fringe
Finally, I decided to hide the edge of the canvas with fringe. I found in the end that the best way was to sit cross-legged on the floor, like a tailor, because then the legs of the footstool brought the edge I was concentrating on to a convenient distance from my eyes, so I didn’t have to bend over it and strain my back. It’s very important to find the right angle to work at, because there is no point enjoying the stitching only to find you can’t sleep for backache!

Finished Footstool
So here is the finished footstool.. It was really very lucky that I found fringing to go with the wool, and what’s more, in the little needlecrafts and notions shop in our local indoor market. The fringing isn’t long or luxuriant, but it’s just enough to hide the canvas – unless you want to lie on your tummy and examine the whole thing at close quarters, and who would do that?
Er – apart from everyone who reads this blog, and anyone I’ve taught to look at handiwork when I’ve shown it to them…
Stones of Venice Footstool – decisions about the sides
First Side Panel Completed
When last you saw the Stones of Venice Footstool, I was lamenting the speed with which I had finished the top panel, which had brought me face to face, far too soon for comfort, with the challenge of deciding what to put on the side panels.
I had originally thought to devise a smaller pattern, of some sort, borrowing from some of the ideas in the comments on the last post and from any convenient pictures of the Doge’s Palace that I could find online, but when it came to it, I felt that it might prove both difficult and unrewarding to create repeating patterns which worked well beside the larger pattern on the top.

Side Panel Close Up
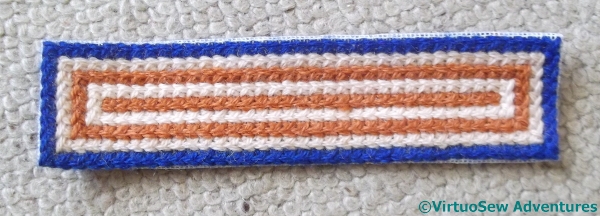
My first step, therefore, was to bring the blue more to the fore by creating a blue border for each panel. It seemed to me that this would help the side panels to stand away from the top and set it off nicely. After much poring over my needlepoint stitch books I settled on Greek Stitch, which is a sort of long armed cross stitch. Again, this solved the question of having the stitches running with the top on some of the sides and against on others, which had been worrying me quite a bit.
I worked out a way to turn the corners so that each side panel could be a self-contained unit, and decided to to work all four borders while I considered my next move. Which floated swiftly to the top as I stitched. The blue on the top panel was the central motif, and on the sides was forming the edge – so the obvious continuation was to reverse the order of the colours. Challenge met, I think!