
Tag: Goldwork
Adding details to the Amarna Family Group
It has been some time since I reported on the Amarna Family Group, and that is partly because, when I had finished the basic design, I was more than a litttle uncertain how much detail I wanted to add, and quite frankly, I was a little unnerved by the mere idea of adding any detail at all!
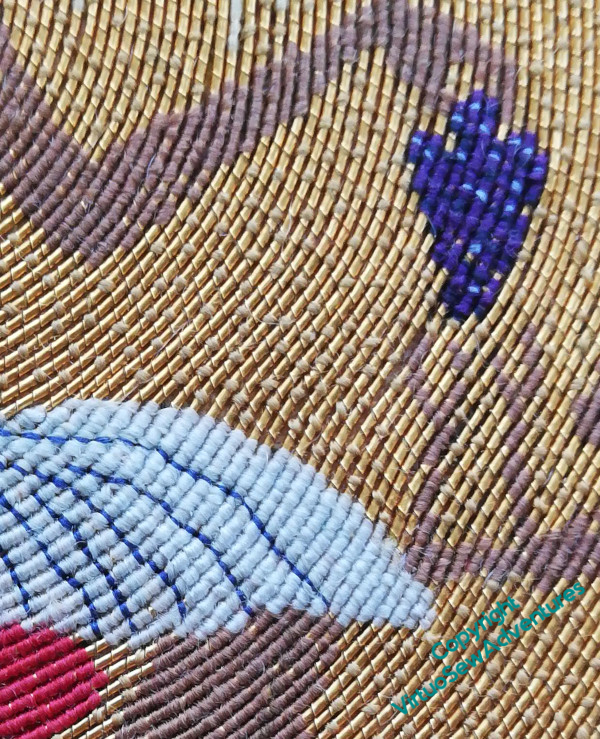
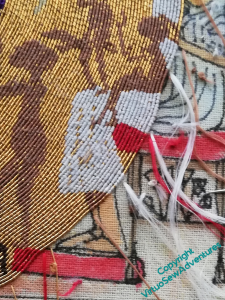
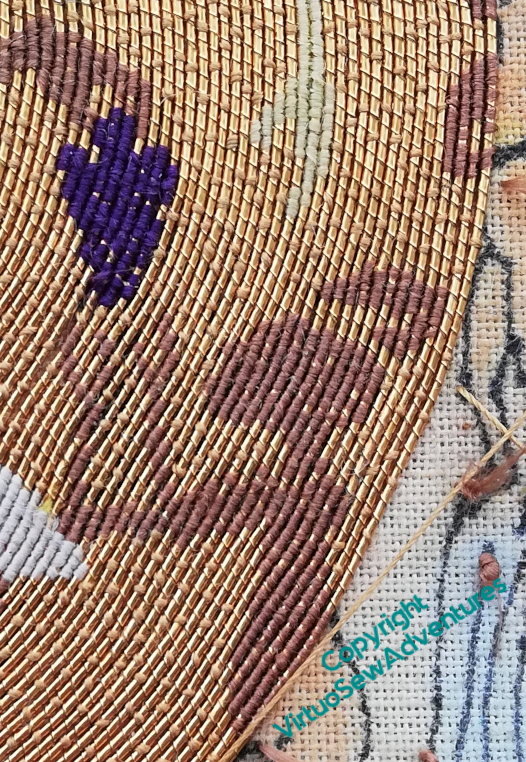
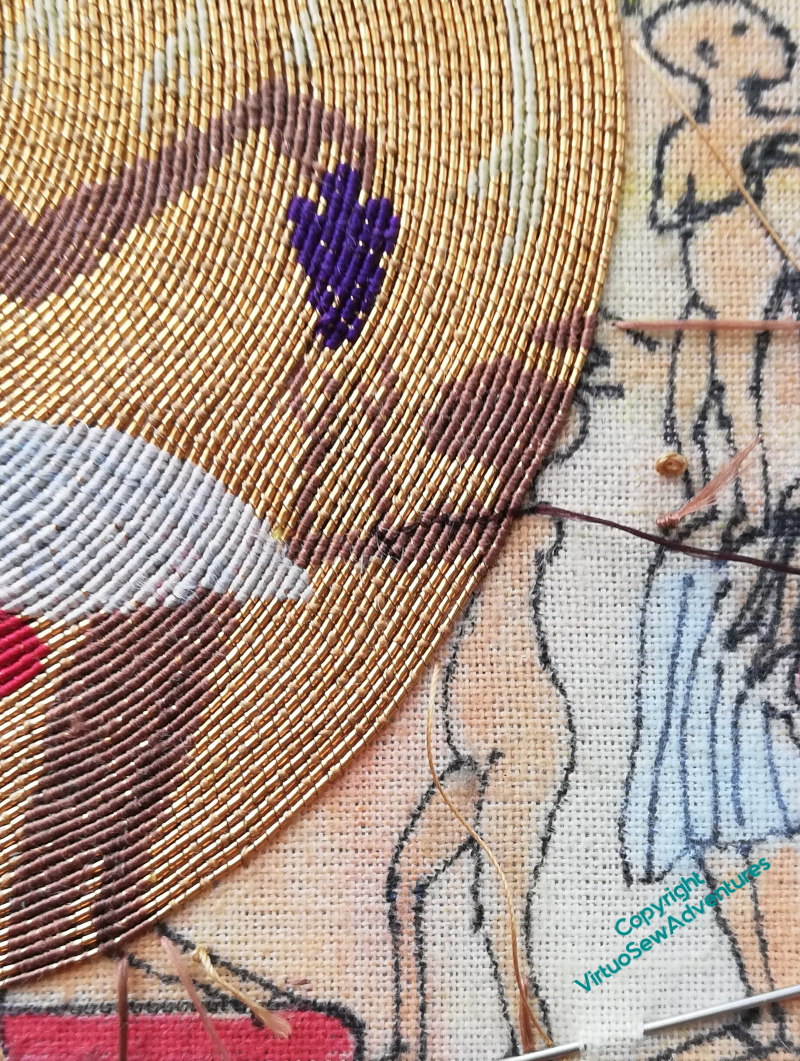
However, eventually, I gathered my courage in both hands, and started to make an attempt. First, a few lighter and darker purple stitches on the grapes – I may decide to add more, but I don’t want the details to overwhelm the design.
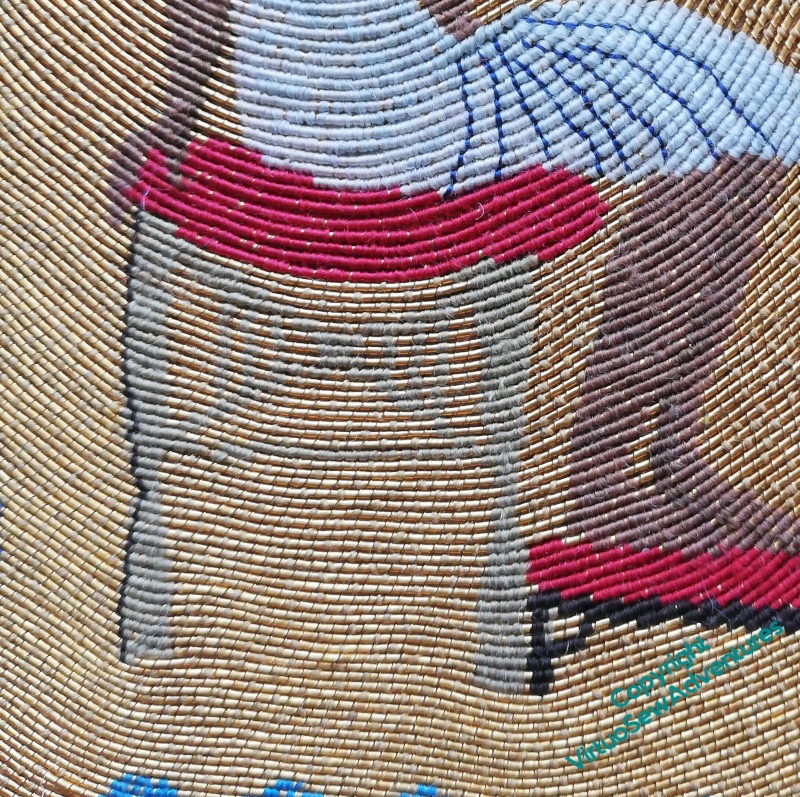
And this is the point at which I went astray. Whitening the kilt with dark lines for the creases and additional white stitches was rather difficult and stressful, so I moved on to tackle the seat. I tried to add enough details to bring the seat to life and pull it away from the background, but instead found it too detailed, too fussy, drawing the eye away from the warmth of the family group and emphasizing the furniture. Not at all what I wanted.
I left it alone overnight, hoping that it would settle together and I would see it with a clearer eye.
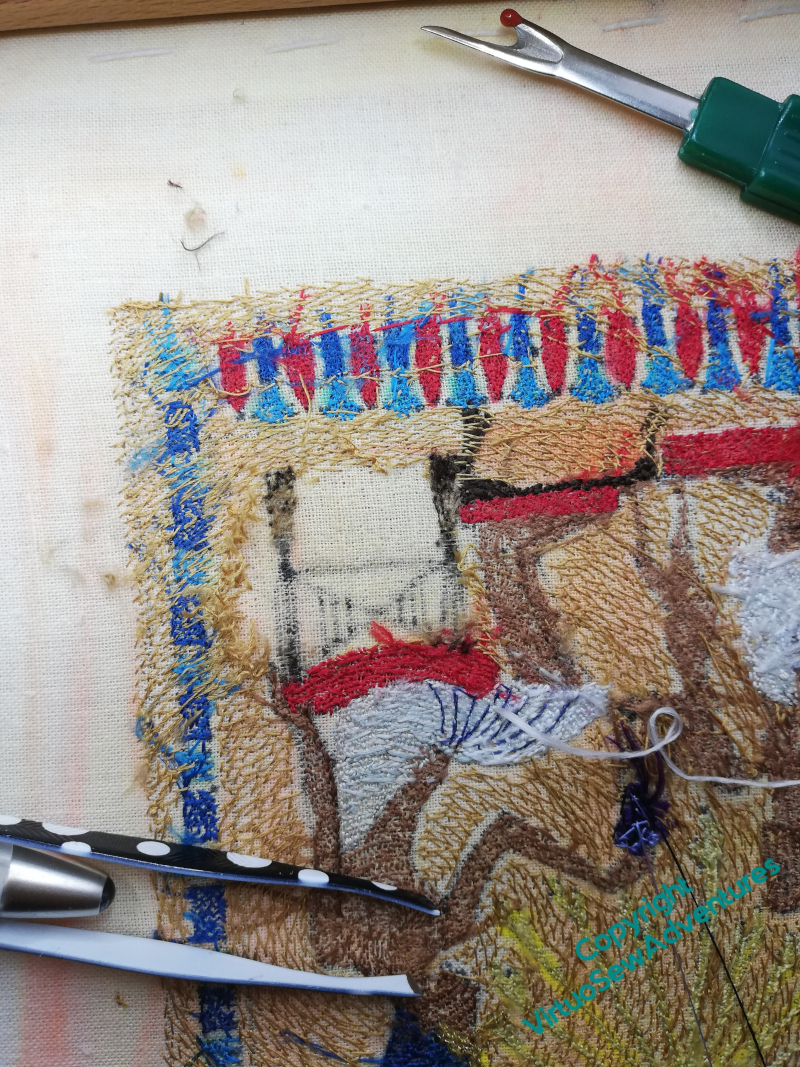
It didn’t settle together, and I did see it with a clearer eye. I was so frustrated and upset, I didn’t stop to take a picture, but sat down, picked up scissors, stitch ripper, tweezers, and a blunt tapestry needle, and unpicked it.
It took all day.
That was some time ago, so Episode 50 of SlowTV Stitchery is about Something Else Entirely. A fishy experiment is introduced and there are some musings on the blending of threads.
More Progress, Amarna Family Group
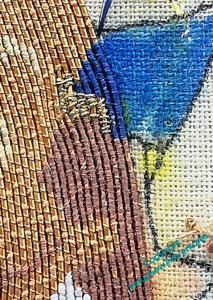
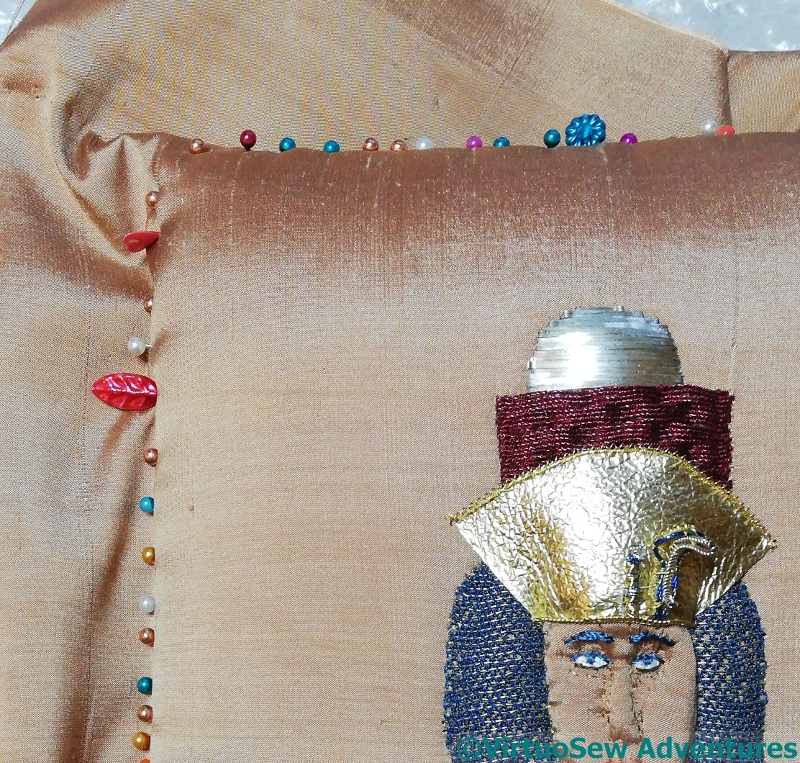
As I kept on with the little girls, of course, I kept on with Nefertiti, and eventually tackled the famous profile, which worked better than I feared, although I will admit that the lighting here doesn’t let the skin colour show as much against the gold as it does in real life. Next was the gold uraeus on the headdress, which, as I commented when I worked Akhenaten’s uraeus, does feel rather “peak Ancient Egypt” in the use of gold to hold down gold! Still, the royal blue against the golds is enough to make the heart sing.
You can see here that the blue in Nefertiti’s skirt has been replaced – all but one stitch, which I will have to deal with in the “details” phase of this one – the list for which is getting increasingly full of anxieties!
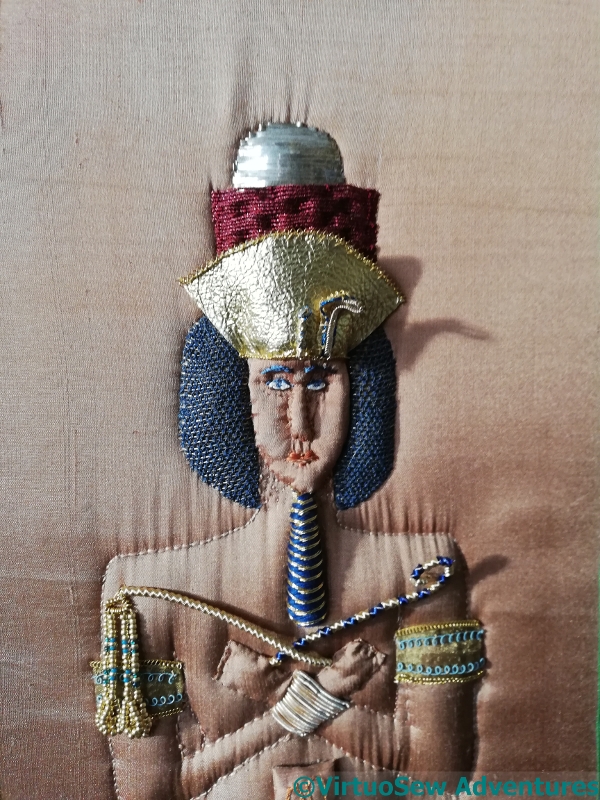
Nefertiti’s feet were among the anxieties, but as you can see from this photo, just leaving them right to the end was increasingly untenable, in spite of the stool leg and the foot cushion to anchor the gold threads.
However, the difficulty of working them starting away from the rest of the body was also considerable, and I do think I made the right decision in waiting until I could start from the legs!
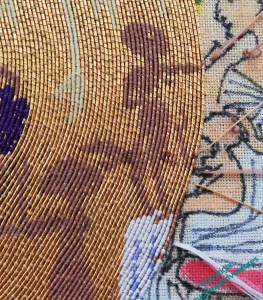
I’m still not sure whether I will fill in some of the sections of the stool Nefertiti is sitting on. At the moment, it looks strong, but it doesn’t separate itself from the background as much as perhaps it should, especially as the figures are looking so striking. I don’t want Nefertiti to look as though she’s sitting on air!
Episode 28 of Slow TV Stitchery is now live, and it considers the post mortem reputations of kings, the perils of scarifying a lawn, and the expertise of the laundries of Amarna.
More on the Amarna Family Group

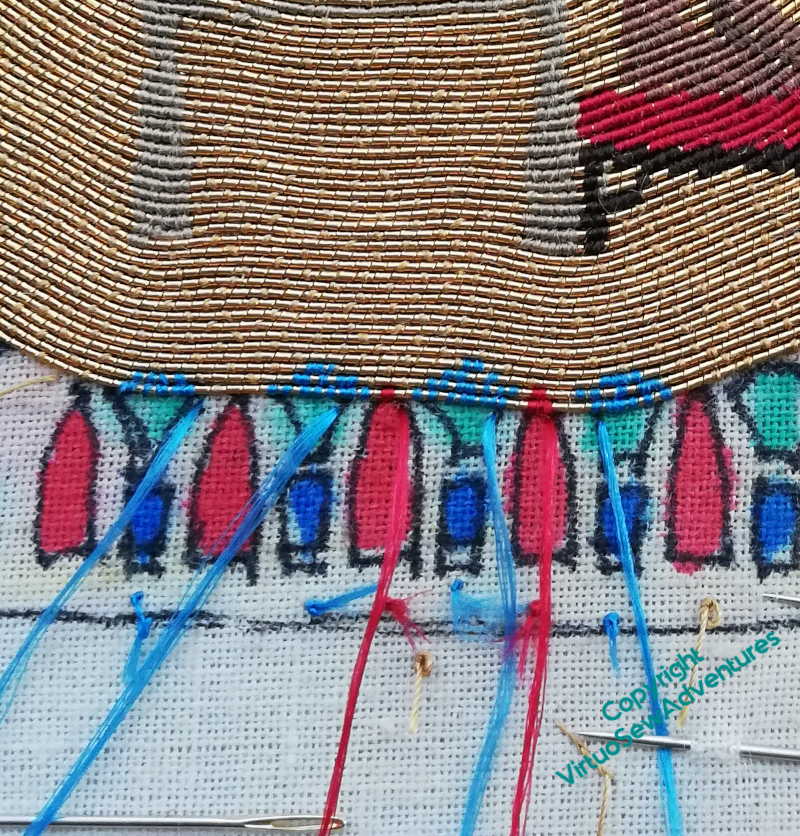
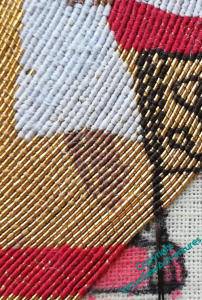
So, edges. Obviously, with the straight version of this technique, the edges are simple – either every single one is plunged, or maybe every other one, if the threads are used doubled. I have a strong aversion to plunging threads, I hate waste, and I just couldn’t face the tangles I experienced when I was working on Christus Natus Est.
So the edges of this piece are being done simply by turning the thread back on itself. I will, of course, have to cut the thread to fill in the corners, but that’s much less fuss, and I am intending to oversew each end very firmly, and not plunge the threads at all.
I began on Nefertiti’s dress intending to do something like I’d done with the pleats on Akhenaten’s kilt, but making the lines more definite.
Having started, though, I decided it wasn’t at all satisfactory. Whether it was the wrong colour, the wrong resolution (not that I can make the lines any narrower!), or simply not simple and crisp enough, I’m not sure. I was sure that it needed to come out.
So that’s what I did.
Unpicking is really not fun, and some of the white silk fell victim to my unpicker, so the raggy bits had to be eased to the back and tidied up before I could even think about reinstating the white.
Notice, however, that the little girls are making pretty good sense just as they are!
The next episode of Slow TV Stitchery is up – Episode 24 – which covers Looking ahead to The Next Epic Project, lessons from the Impressionists, and the trick of making a design’s evolution look “meant”. Do go and have a look!
Amarna Family Group Progress
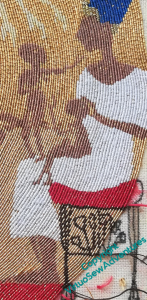
In the end, I sighed, consigned the Cretan memories to perdition, and decided to do the little girls in the same colour as their parents. However, while I was looking at the tangle of limbs and bodies of the two smaller girls on Nefertiti’s lap, I thought that something definite would need to be done to keep them from turning into an amorphous tangle of limbs, something like one of my early memories of my two big cousins. I’ve since got my cousins separated in my head, but I thought it would be nice to keep Nefertiti’s daughters individual from the start!
So I started putting in an outline on the eldest daughter, using a fine, very dark brown thread from Devere Yarns.
Only to stare at it with hostility, because it somehow managed to look a bit too clunky!
Considering that Devere silks are really very fine, this is quite an achievement, although I’ll admit it wasn’t one I particularly cherish.
So I decided to just keep working on the “block colours” of the design and trust to later inspiration to find out how to keep the girls from blurring into an undifferentiated shape. I’ve left a few deliberate gaps where limbs cross, to help the design “read” properly.
And I’m not sure, now, that they really need anything else…
The video is well in advance of these posts, because I lost the photos I was going to use. Heigh-ho. Anyway, enjoy Episode Twenty Two, in which, among other matters, the mathematical concept of “triviality” is discussed…!
The Amarna Family Group – getting started
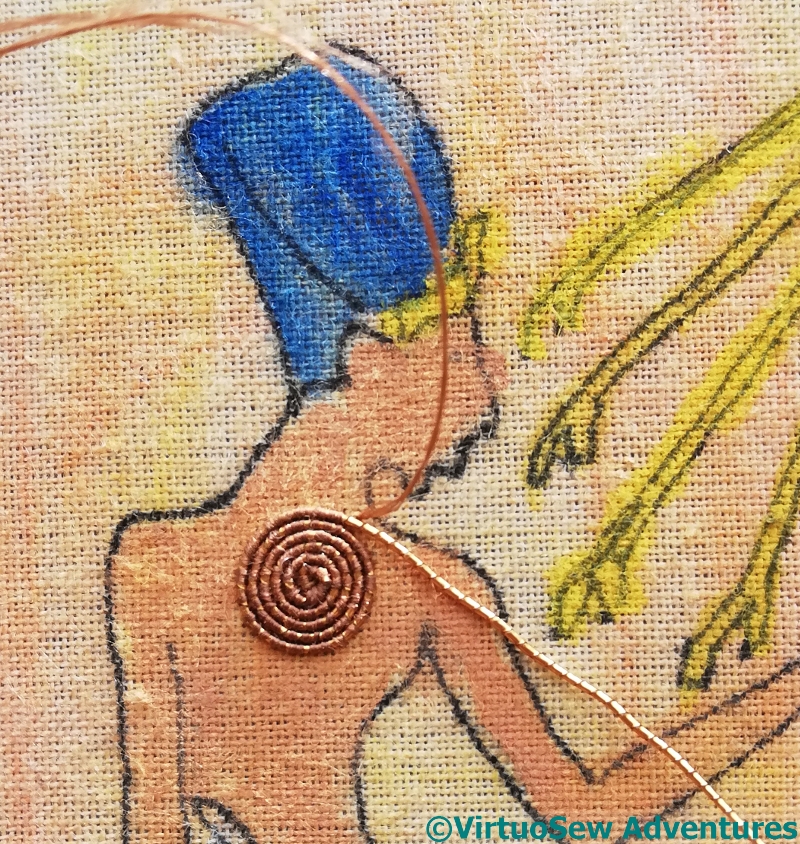
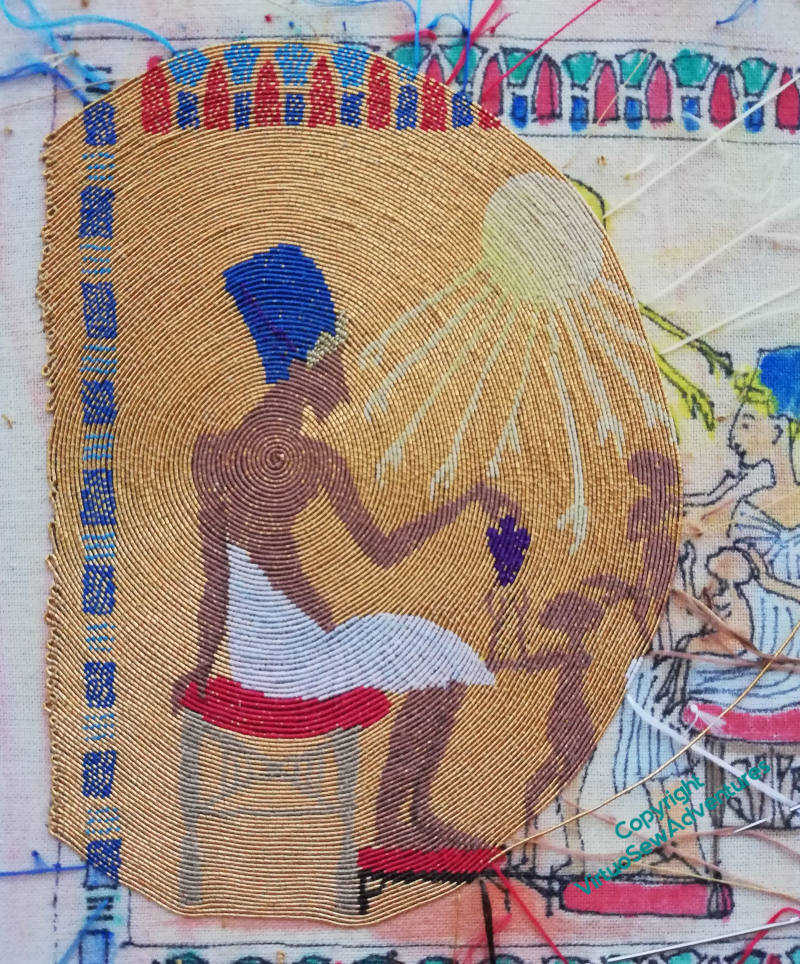
I’ve decided to work spiral Or Nué, as I did for Christus Natus Est, rather than the straight version I used for the Hittite Amulet. It creates more of a sense of movement, and that is very much in keeping with Amarna period art.
That, however, meant that I had to work out where to start the spiral, and as I mentioned on the first video, I had several options. The first was simply to start in the middle of the piece, but I felt that would either look very static, or, almost worse, create a rather 70s psychedelic vibe, not at all appropriate! The next three options could all be taken as emphasizing interpretations of the story of Akhenaten and Amarna. One of these was to centre the spiral in the centre of the Aten – but to be honest, for all Atenism is seen as one of the very earliest adventures in monotheism, that didn’t seem to me to reflect the stories that filter through Mary Chubb’s book.
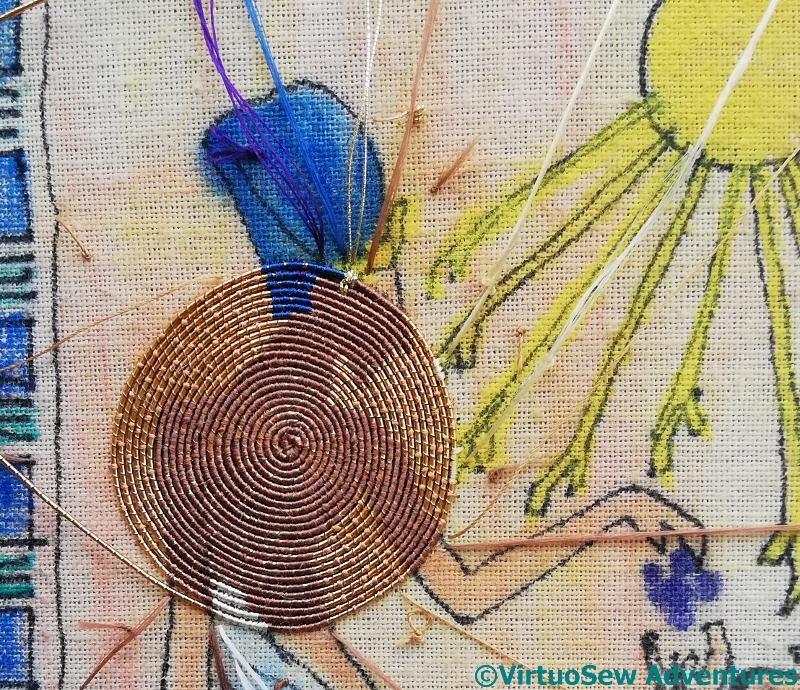
So then I had a choice between centring the spiral on Akhenaten’s head, to reflect the idea that he espoused Atenism as a political ploy to break the power of the priests of Amun at Thebes, or centring it on his heart, to suggest that he believed he’d received a genuine religious revelation. You can see which I chose!
The second video is here, and will show you some of the progress to this point, as well as my musings as I stitch. I have a few more quandaries to sort out, but you’ll hear about those in the next episode, as I tackle them. As before, if you have any questions about what I’ve said in the video, or what I’ve done, please ask, and I will do my best to give you a sensible and useful response!
The Amarna Family Group – finishing the design
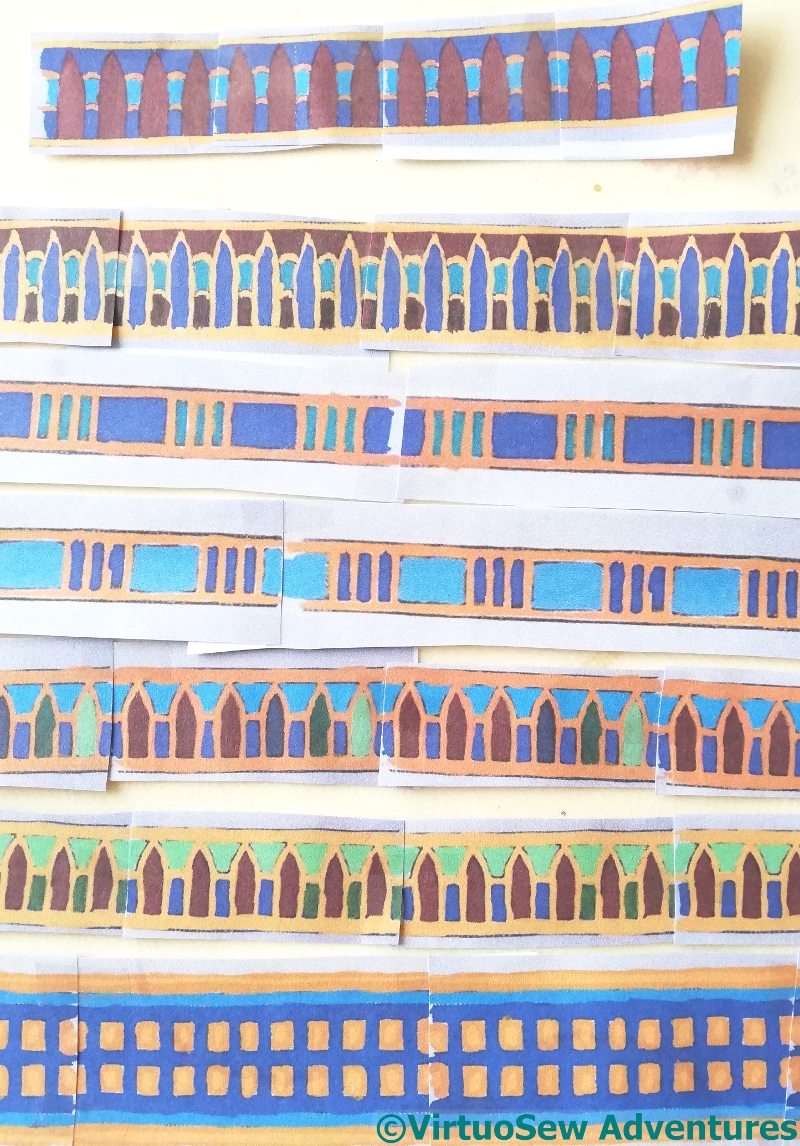
We left the design in a sort of semi-developed stage, and the next stage was to work out which border I was going to use…
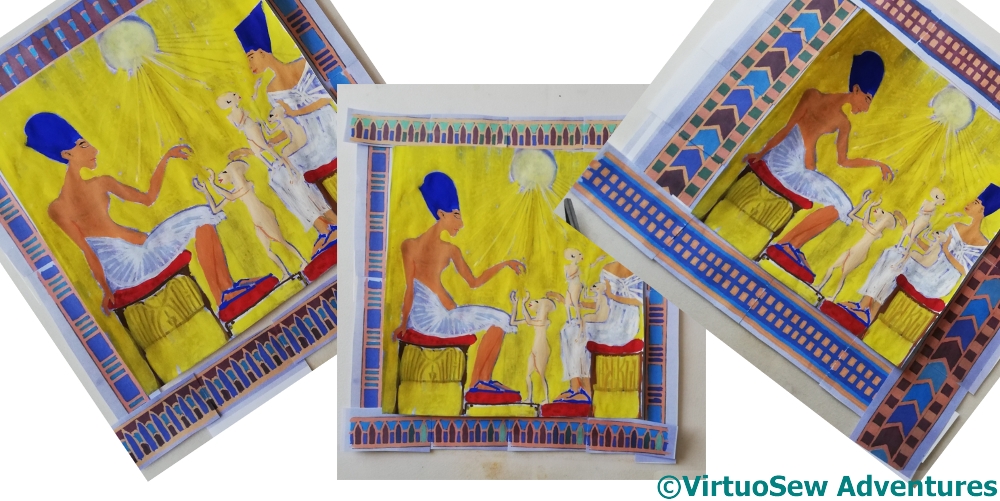
So, the one on the right – no, the borders are too wide, and given the size I’m going to do it, they’ll take away too much of the design area from the family group. I do like that arrowhead design, though. I wonder where else I could put it?

I started playing around with the widths of the borders a bit more (computers are very useful for scaling fiddly things like this – more new tricks learned!), and ended up with something I think will work. You can see that there are some details I’ve not quite settled yet, and indeed, I think I’ve decided to reverse the colours in the vertical borders. The blocky colours come from having used the computer to produce a line drawing, and then coloured it in by computer as well.
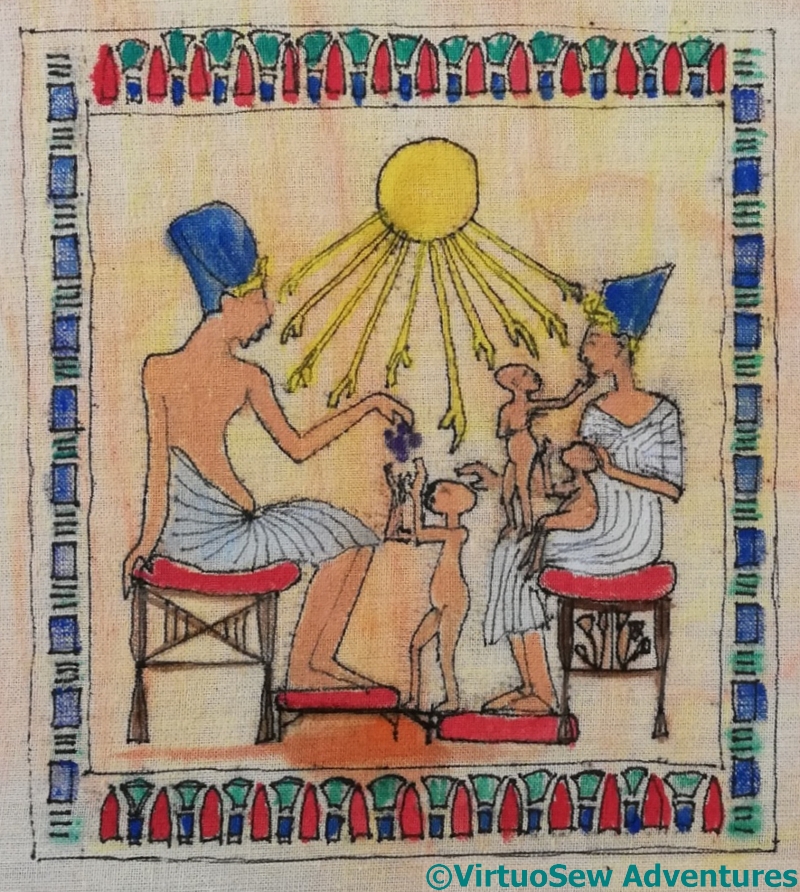
The design is now transferred onto the calico, and coloured in with inktense blocks. Rather sloppily, I know, but none of this will be visible, and I will be tweaking the design as I go, in any case. This is just to give me a a better chance to keep track of which colour I’m intending to use where – that small section with Nefertiti and the two little girls on her lap was dismally confusing before I painted it!
I have begun to stitch, and just as I promised (threatened?), I’ve been recording my progress, and uploaded the first video to: https://vimeo.com/402311907. It’s about twenty minutes long, spliced together from several files, because my camera kept switching off. I did say it would be a learning experience!
I hope it will be interesting, and maybe entertaining, for you all!
The Amarna Family Group
The eagle-eyed will have noticed that I now have a Ko-fi account. I’ve been meaning to do that for a while, but the current situation has given me plenty of time in which to do so. At the moment, the hope is that any “coffees” will help with the costs of running this blog, but in the next couple of years, I hope they could also help with venue costs to hold an exhibition of “Dreams of Amarna” embroidery.
I’m going to try to learn a few new tricks while we all need to keep safe at home, trying to slow the spread of the coronavirus, and one of them relates to this project. It occurred to me that people may need something gentle to watch, so I’m going to try to work out how to do little videos of the stitching. So, health permitting, watch this space…!
Version 1 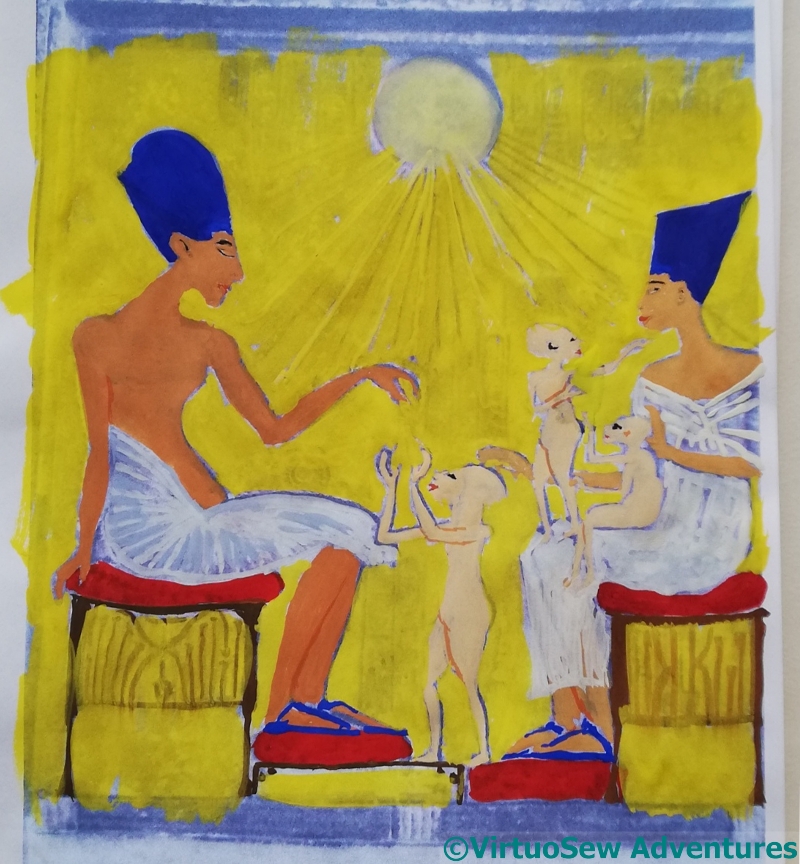
Version 2 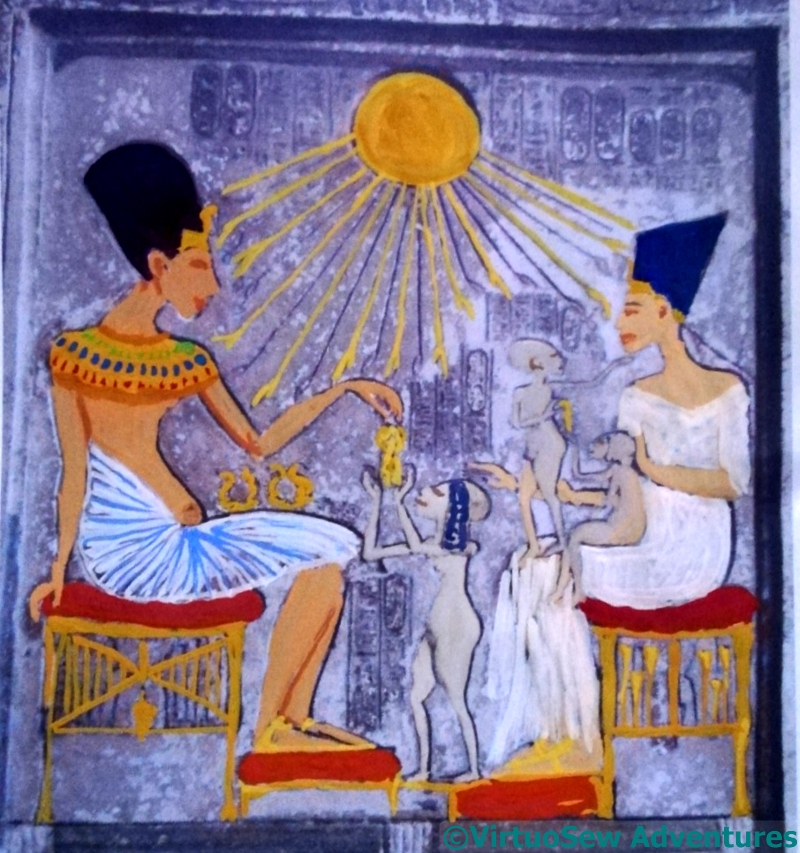
Version 3
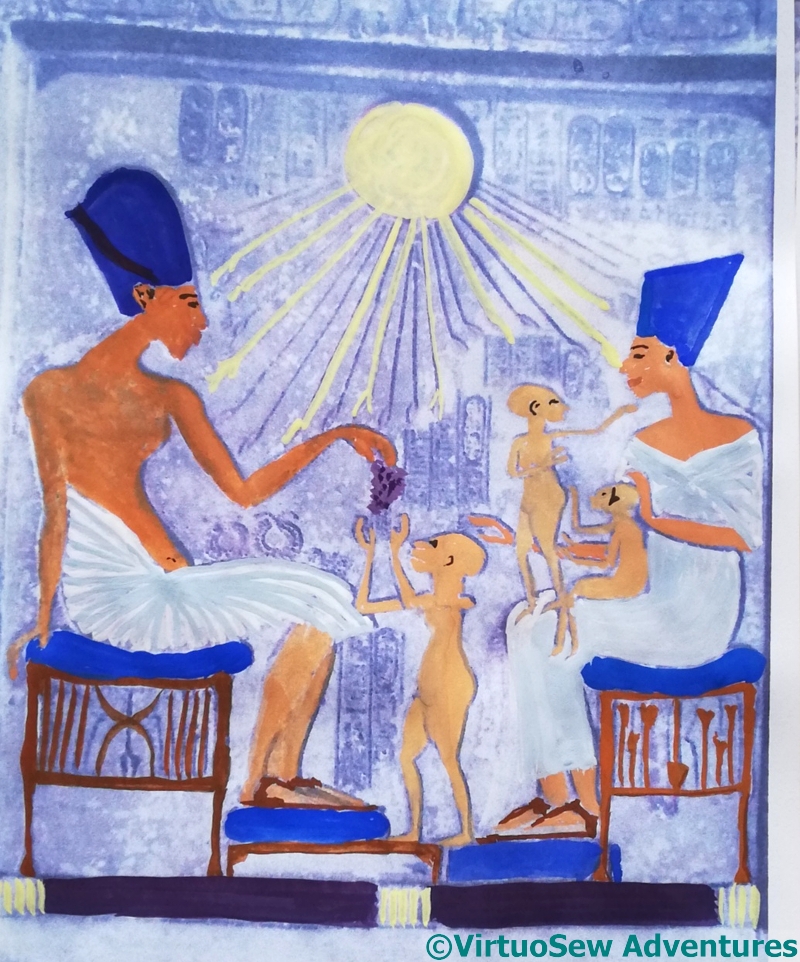
I had thought that once I’d done the Faience Necklace, and finished the Hunting Cat Fresco, that would be all for Dreams of Amarna, but then it occurred to me that the informality and intimacy of the depictions of the Royal Family in Amarna-period art was one of the reasons it has caught and held our attention. Mary Chubb describes the scene depicted on this stele in her book (there are several broadly similar scenes), and it came to my mind in conjunction with the bejewelled golden chair in Tutankhamun’s tomb which shows him with his wife in a similarly informal pose.
So I’m going to work it in or nué. I’ve been playing with my paints and some prints of the stele, trying to find a satisfying arrangement of colours, and work out what I’m not going to include – for instance, the hieroglyphs, at least half the rays of the Aten sun disc, and the gold torques in Akhenaten’s lap. I’m struggling a little with colourings, because the grey background of the print rewards the use of yellow (/gold) whereas on the background of gold used for or nué that colour becomes insignificant.
Then I need to plan a border for it….
Mounting Akhenaten – Part Two
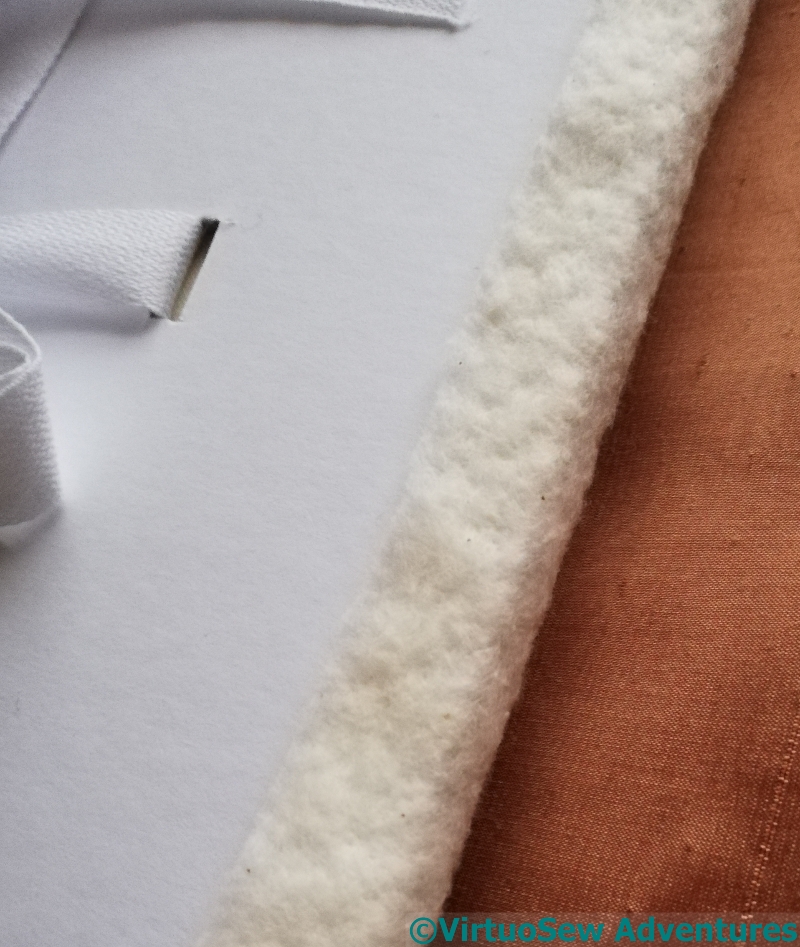
Now, if your memory reaches back to the beginning of Akhenaten (no surprise if it doesn’t – that was in 2017!), you may recall that at the very beginning there were four layers – the calico, polyester wadding, light cotton padding, and then the silk. The first stage was then to outline Akhenaten and cut away all of the light polyester padding that wasn’t behind him.
So once the calico was laced into place, the next layer to be dealt with was the cotton padding. The eagle eyed may have noted that there’s a new piece of card here. That’s because this card has slots in to carry cotton tape. I’m intending to lace the finished panel to the middle of a larger fabric covered panel, and these tapes will help to support the weight. I hope. This is not a method of mounting I’ve ever seen before, and I’m making it up as I go along!
Then I pinned the silk into place, carefully, and not too tightly. Once I’d finished that, I turned over the whole thing and breathed a sigh of relief – the uraeus is still undamaged!
Then I wrapped him in acid-free tissue paper and put him away in a box. There are two reasons for this – firstly, because fibres and fabrics, particularly delicate ones, don’t like prolonged manipulation (yes, honestly, fibre in spinning mills is often left to “relax” between processes!), and secondly, because I’m still thinking about the details of the next stage.
The next stage is to fix the silk in place, and I’m still trying to work out how to do that without tangling with the cotton tape. I may decide to use double-sided sticky tape, but that is more likely to degrade and give way than lacing, and I really don’t want to do this job twice!
Mounting Akhenaten – Part One
Akhenaten has been glaring at me autocratically (well, that’s in character, at least!) from the far side of the living room ever since I finished him, and I decided he needed to be off the frame and hidden away for a while. At the moment, I’m rather out of love with him, not even sure he’s come close to my original conception. I need to hide him away so that I can move on Other Things.
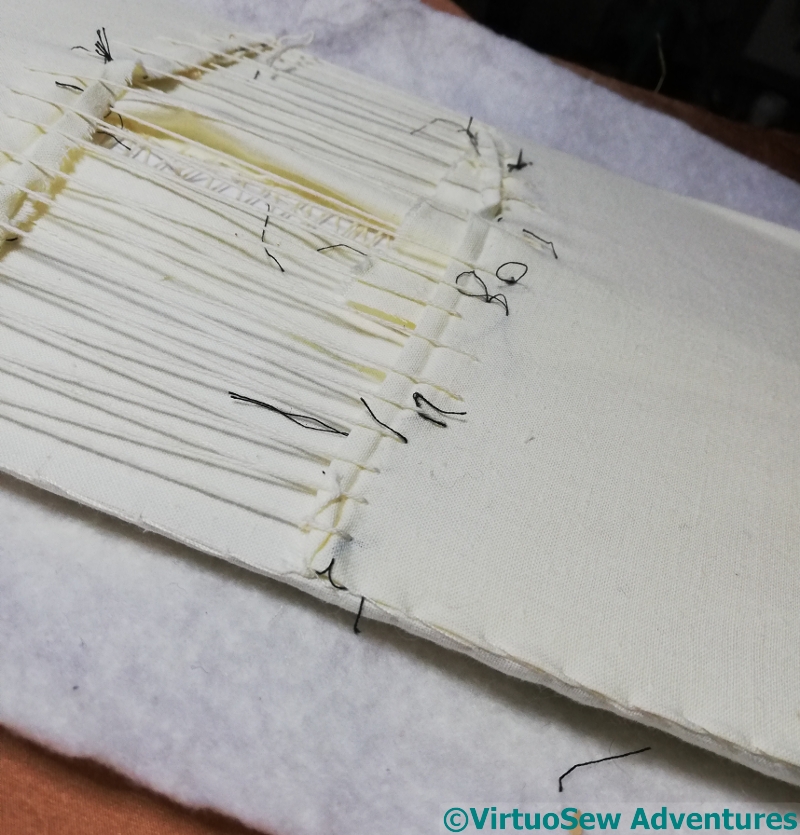
I took this photo just before I cut the thread holding the fabric in place, and you can see from the shadows just how strongly raised some elements are.
I think he’s looking pretty anxious about what lies ahead, as well!

I don’t think Akhenaten can possibly be as anxious as I am. We have a phrase in our house – “exporting stress”. There was a lot of that going on. In fact, I banished The Australian from the room lest I prove contagious!
However, I read, a little while ago, of using layers of bubble wrap to protect a raised piece while mounting, with holes or popped bubbles to alter the amount of padding so that the most highly-raised elements don’t also suffer the highest pressure. Considering the fragility of the uraeus, that’s important.
So I decided to give that a try. I’ll report when the whole process is finished!
And it’s going to be quite a process, because there are three layers of fabric to wrangle, and I’m not going to frame him under glass, so the mounting is going to be on display, at least to a degree.
I’ve started by lacing the long sides of the calico supporting layer, quite closely, to spread out the tension, and then the short sides. These were spread out a bit more, and I also stitched the edges of the folded-up short sections to the calico sides.
Colossus of Akhenaten
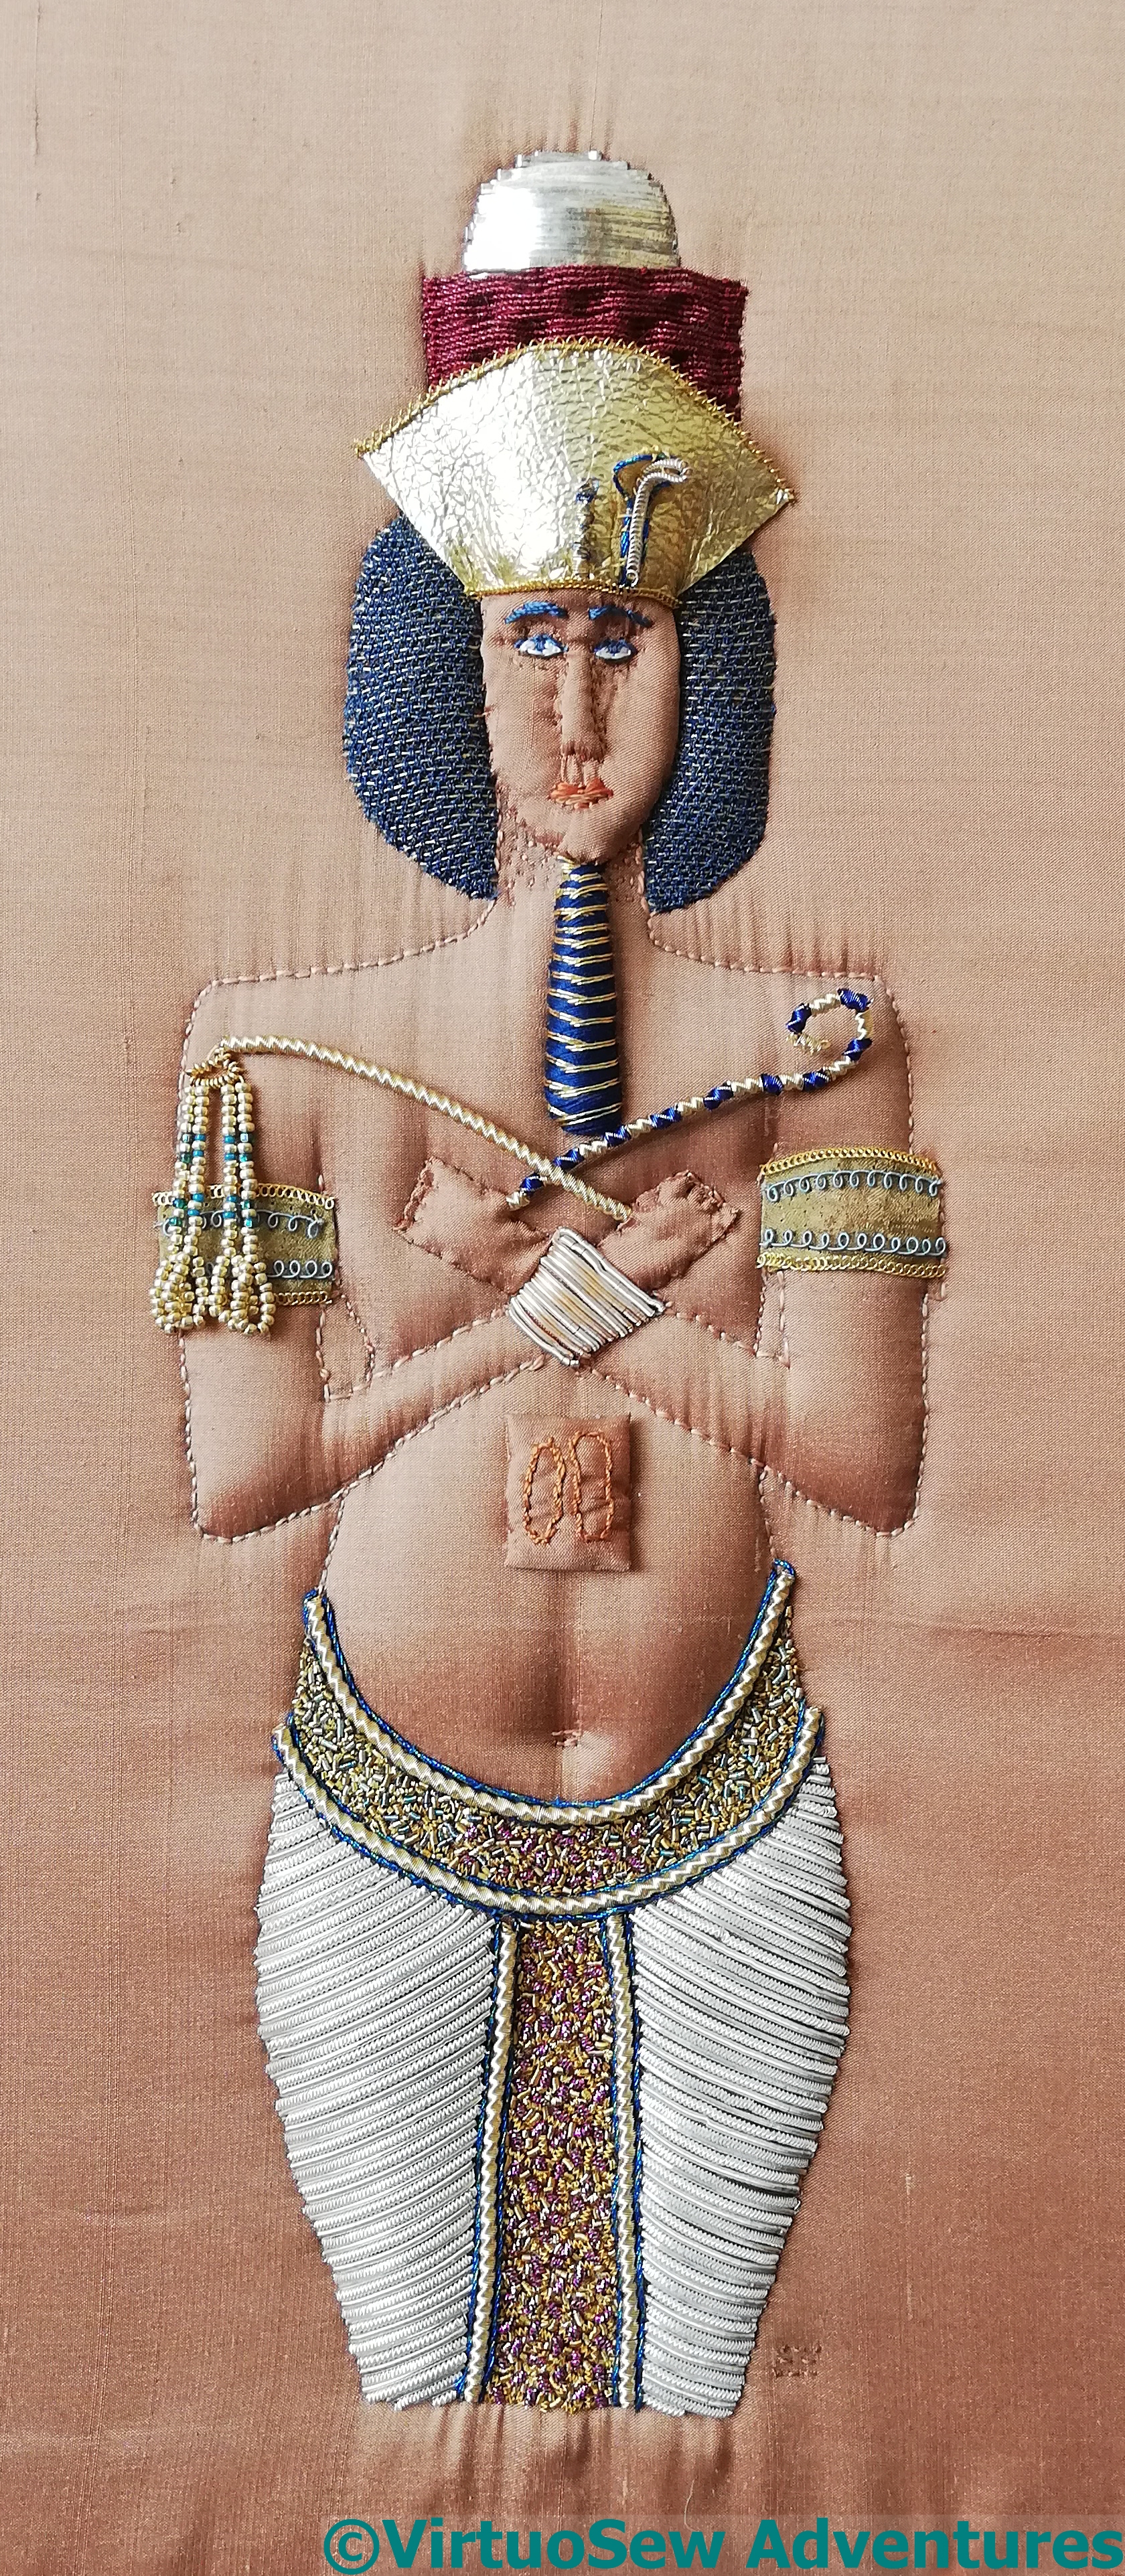
The Colossus of Akhenaten, in a combination of trapunto quilting and goldwork, is now finished.