
Tag: experiments
An experiment for Placidus
Bear with me, please!
At the moment, the idea for The Vision of Placidus is that the main picture – the encounter between Placidus and the Christ/Stag – will be framed with a depiction of denizens of the natural world – underwater creatures in the lower section, bulrushes and dragonflies in the upright sections, and birds in the upper section. I’ve been thinking of putting the symbols of the Evangelists in the corners, to obviate the necessity of dealing with getting the design around those corners.
However, what I’ve not yet sorted out is the technique I might choose to use. This is going to be an experiment to see whether using canvaswork – a sort of freeform Bargello with embellishments – will create a pleasing effect.
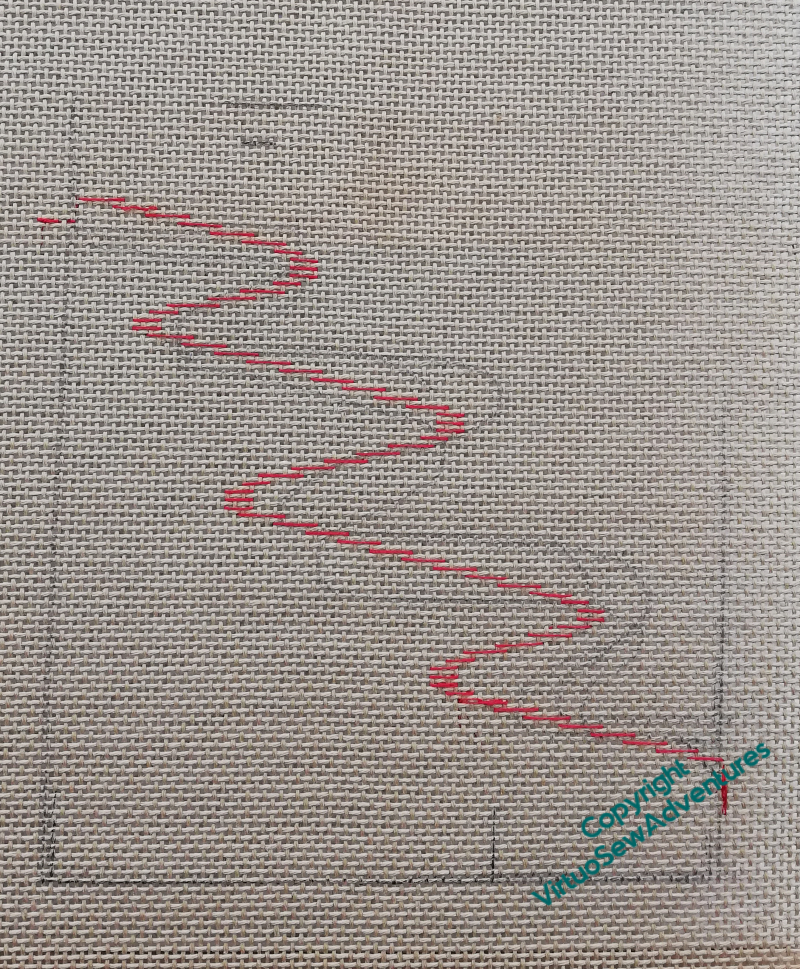
I was really very pleased with how quickly this came together when I began thinking about it. The red line is a guide for the freeform Bargello, representing the current in a stream, and the fish is simply there to help me test how to deal with the boarders between the flowing background and the motifs.
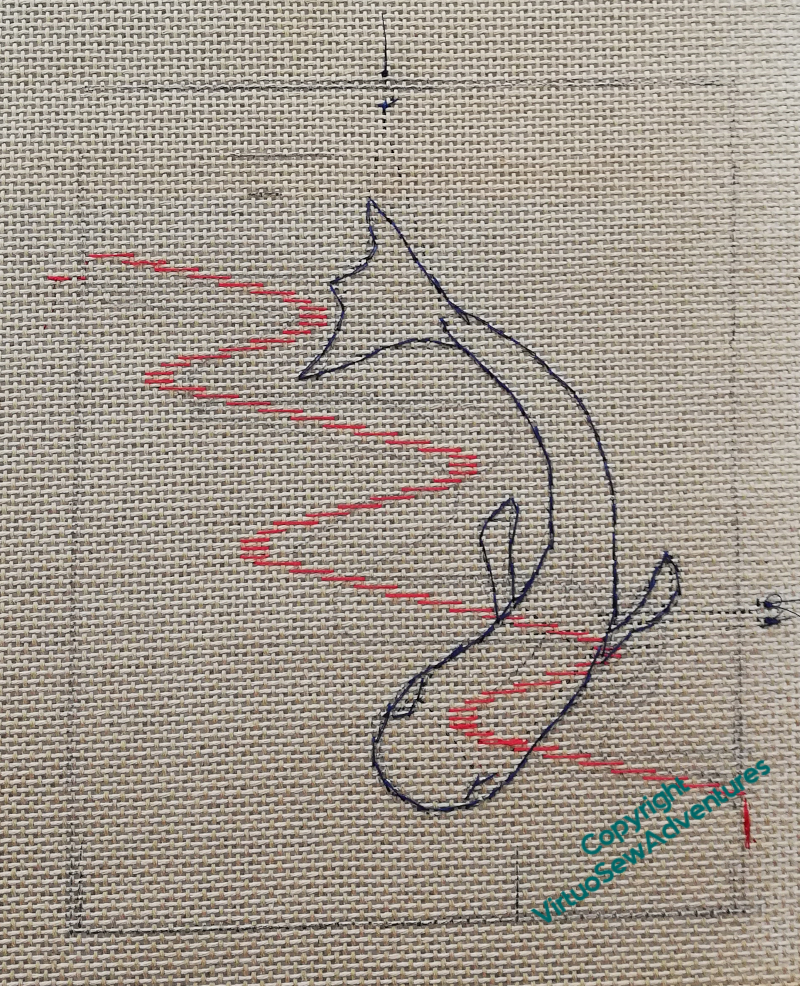
That might be easiest to achieve if I worked the fish, and then added in the background, but if I do that, I think it will be nearly impossible to place the background correctly on the far side of the fish. So this time, I’m doing the background first, putting in the stitches across the fish in sewing cotton, as a sort of “draft”.
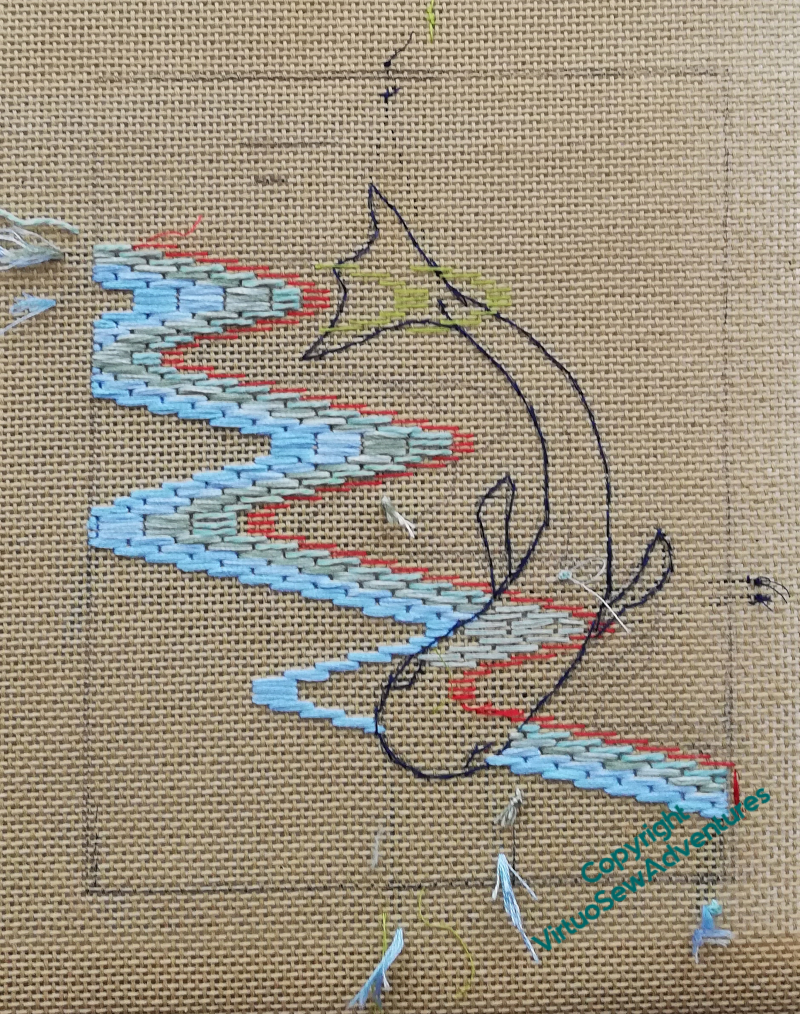
I’m using stranded cotton, separated and combined to create blended shades. As it turns out, six strands are not quite enough for full coverage, so here I am using nine.
Episode 51 of Slow TV Stitcery is now live, including a comparision of bone and steel laying tools, consideration of two possibilities to experiment with for Placidus, and thoughts about taking sagas seriously.
Grape Hyacinths, 2
Having completed all the greenery and removed the satin stitch flowers, I had to put new flowers in. Naturally, that didn’t happen first time, either!
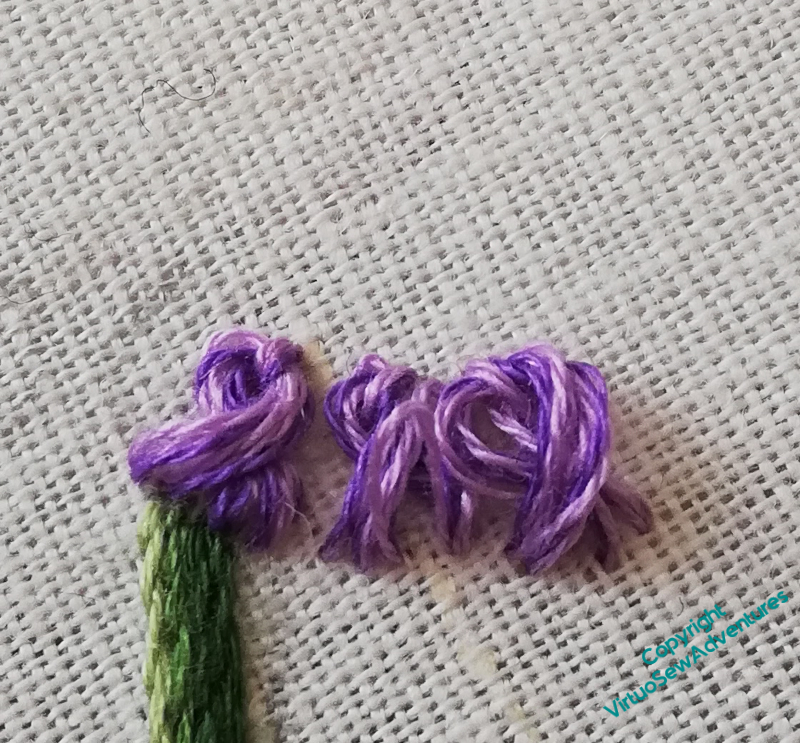
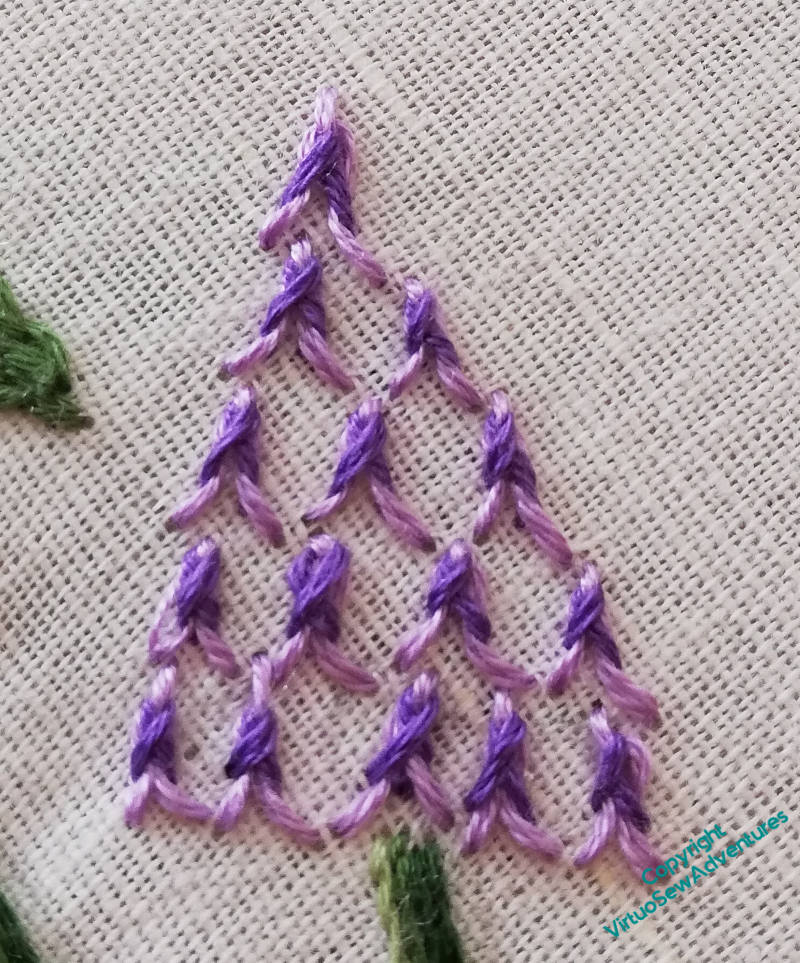
This was my first attempt at the individual flowers on the grape hyacinth flower heads – twisted chain stitches using several different coloured strands of stranded cotton.
I wanted to try something raised, to contrast with the flatness of the stems and leaves, but this, slightly full, version of twisted chain hasn’t really worked. It looks far too heavy for a spring flower!
Out it came, and I tried again.
And for my second try, I may have invented another stitch. Again!
This is Fly Stitch topped with Twisted Chain Stitch. What I wanted to achieve was the slight sense of a ruffled skirt at the bottom of the individual bells, and this certainly works well enough for me to keep going, using this stitch, at least until I have a better idea!
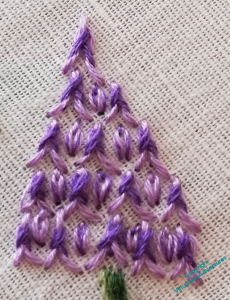
All that admitted, I felt I’d ended up with too great a space between the stitches, and of course, I don’t want to try to fit more in, in case I lose the ruffles (as it were!). So I have filled in the gaps with single detached chain stitches.
Of course, I may yet come back and do somethign entirely different. but I decided at this point to leave this in place and continue my experiments!
The next SlowTV Stitchery is now live. Episode 36 tackles the difficulties of the canvas, Reynard the Fox provides a distraction, and there is some tackling of quandaries by changing tack..
Traycloth finished at last
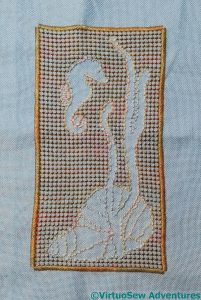
I started this traycloth years ago, largely to experiment with the pulled work stitch I used as the background of the decorative panel.
The idea was to have a sandy background against which the shells, seaweed, and seahorse would be set, and although I enjoyed doing it, it isn’t the most successful of my embroidered experiments. It feels a bit lacklustre, but at the same time, I can’t say I’ve been filled with enthusiasm by the idea of doing anything substantial with it.
While I thought about the details, to see whether I could find something that would work, I hemstitched around the edge, so I will have a useable, if not enchanting, traycloth.
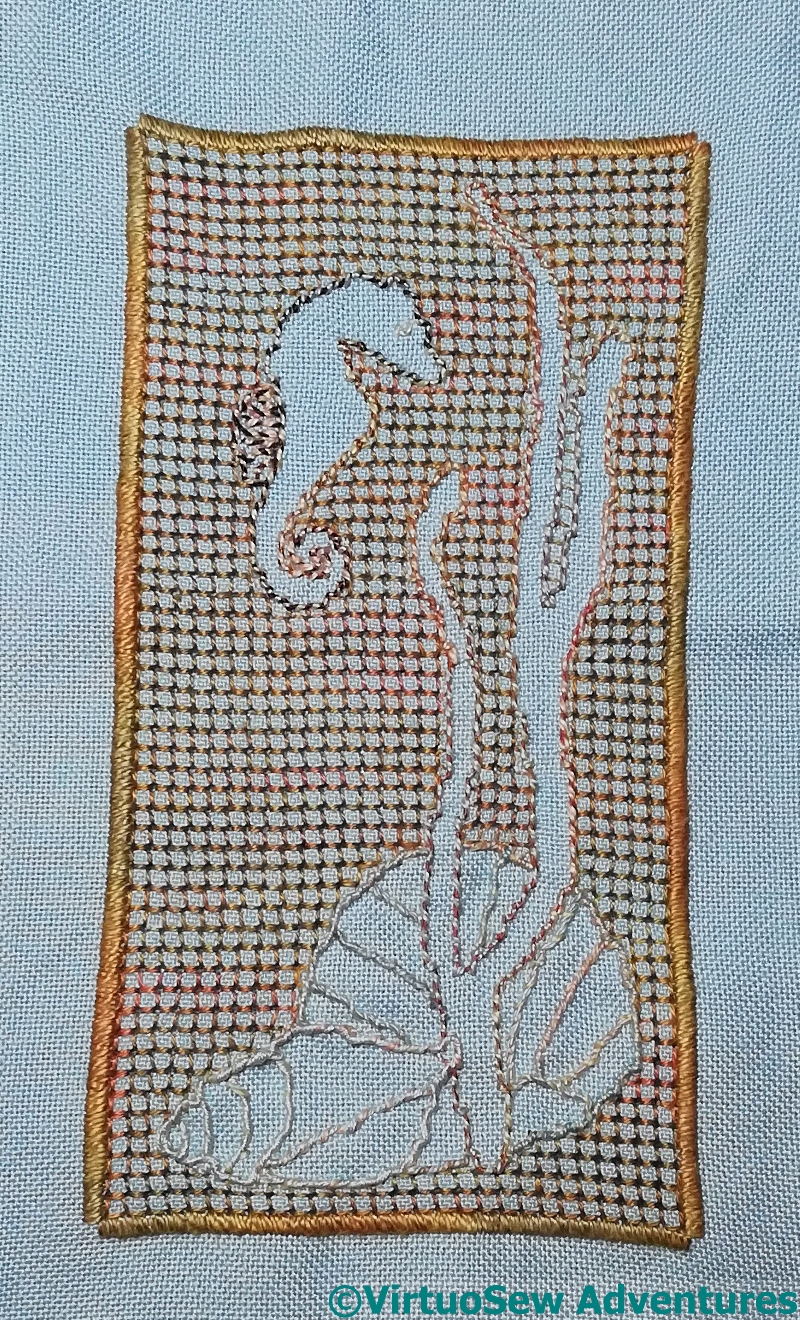
Then I thought hard. Maybe something could be done to differentiate the various elements without actually unpicking them all. The upshot is that the backstitched outlines have been whipped with a different colour of thread in each case, to pull out the differences a little more.
It still isn’t wholly successful, but it is now a usable traycloth and out of my welter of Unfinished Objects which occasionally leap, unanticipated, out of boxes I thought contained something else, to hit me in the face.
And that is most definitely a Good Thing!
A strange buddleia
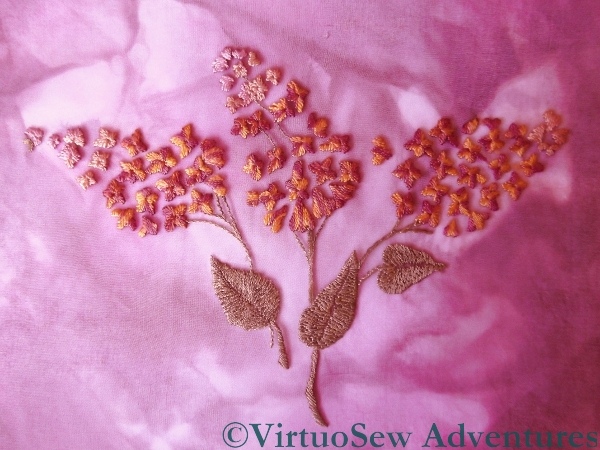
I really cannot imagine what I was thinking of when I worked this piece. The design was a transfer, I remember that much, and I worked it many years ago.
It is yet another discovery from a forgotten box, and the reason it was in the forgotten box in the first place is that I’ve not the vaguest idea what to do with it!
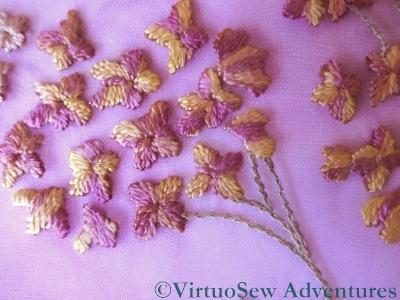
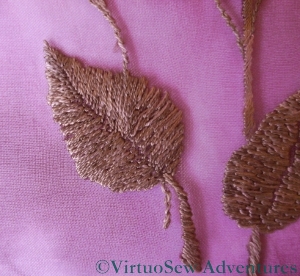
The fabric is a variegated gauze, and the embroidery is in two variegated silk threads – the florets in satin stitch (on gauze – I must have been mad!) and the leaves in long and short stitch.
The burgundy gauze isn’t quite so bright in real life – it’s turned out really very oddly in the photograph – and the green leaves don’t disappear in real life as they do in the photo.
I have thought about applying it to an evening blouse – I wouldn’t need jewellery with that at the neckline – and I’ve also thought of mounting it to create a non-folding fan, but the engineering involved in the latter rather defeated me, and I have yet to find a fabric that it will work with for the former.
These forgotten boxes, by the way, are beginning to drive me absolutely wild – there’s something I would love to write about if only I could find it, and not only is it not in any of the boxes I have discovered by accident, it is in none of the sensible places I’ve looked, either!
Trialling a finishing technique
Attaching The Geese
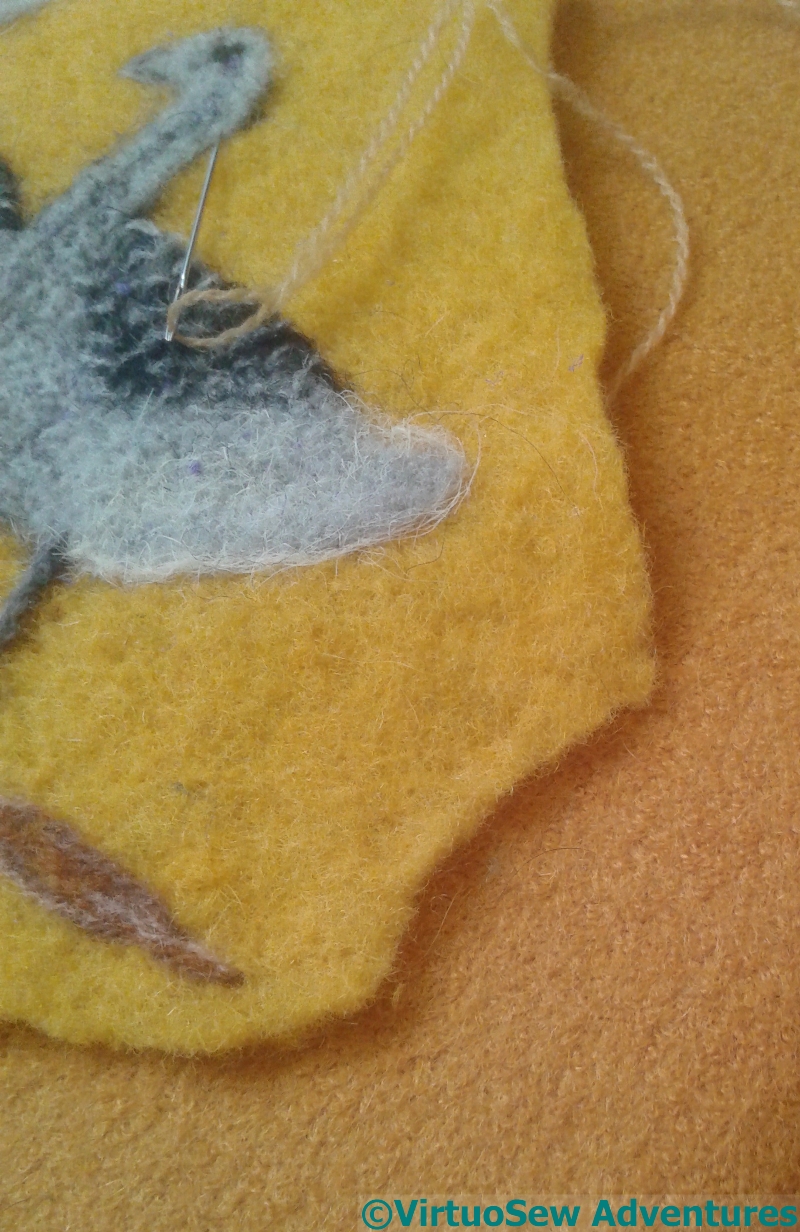
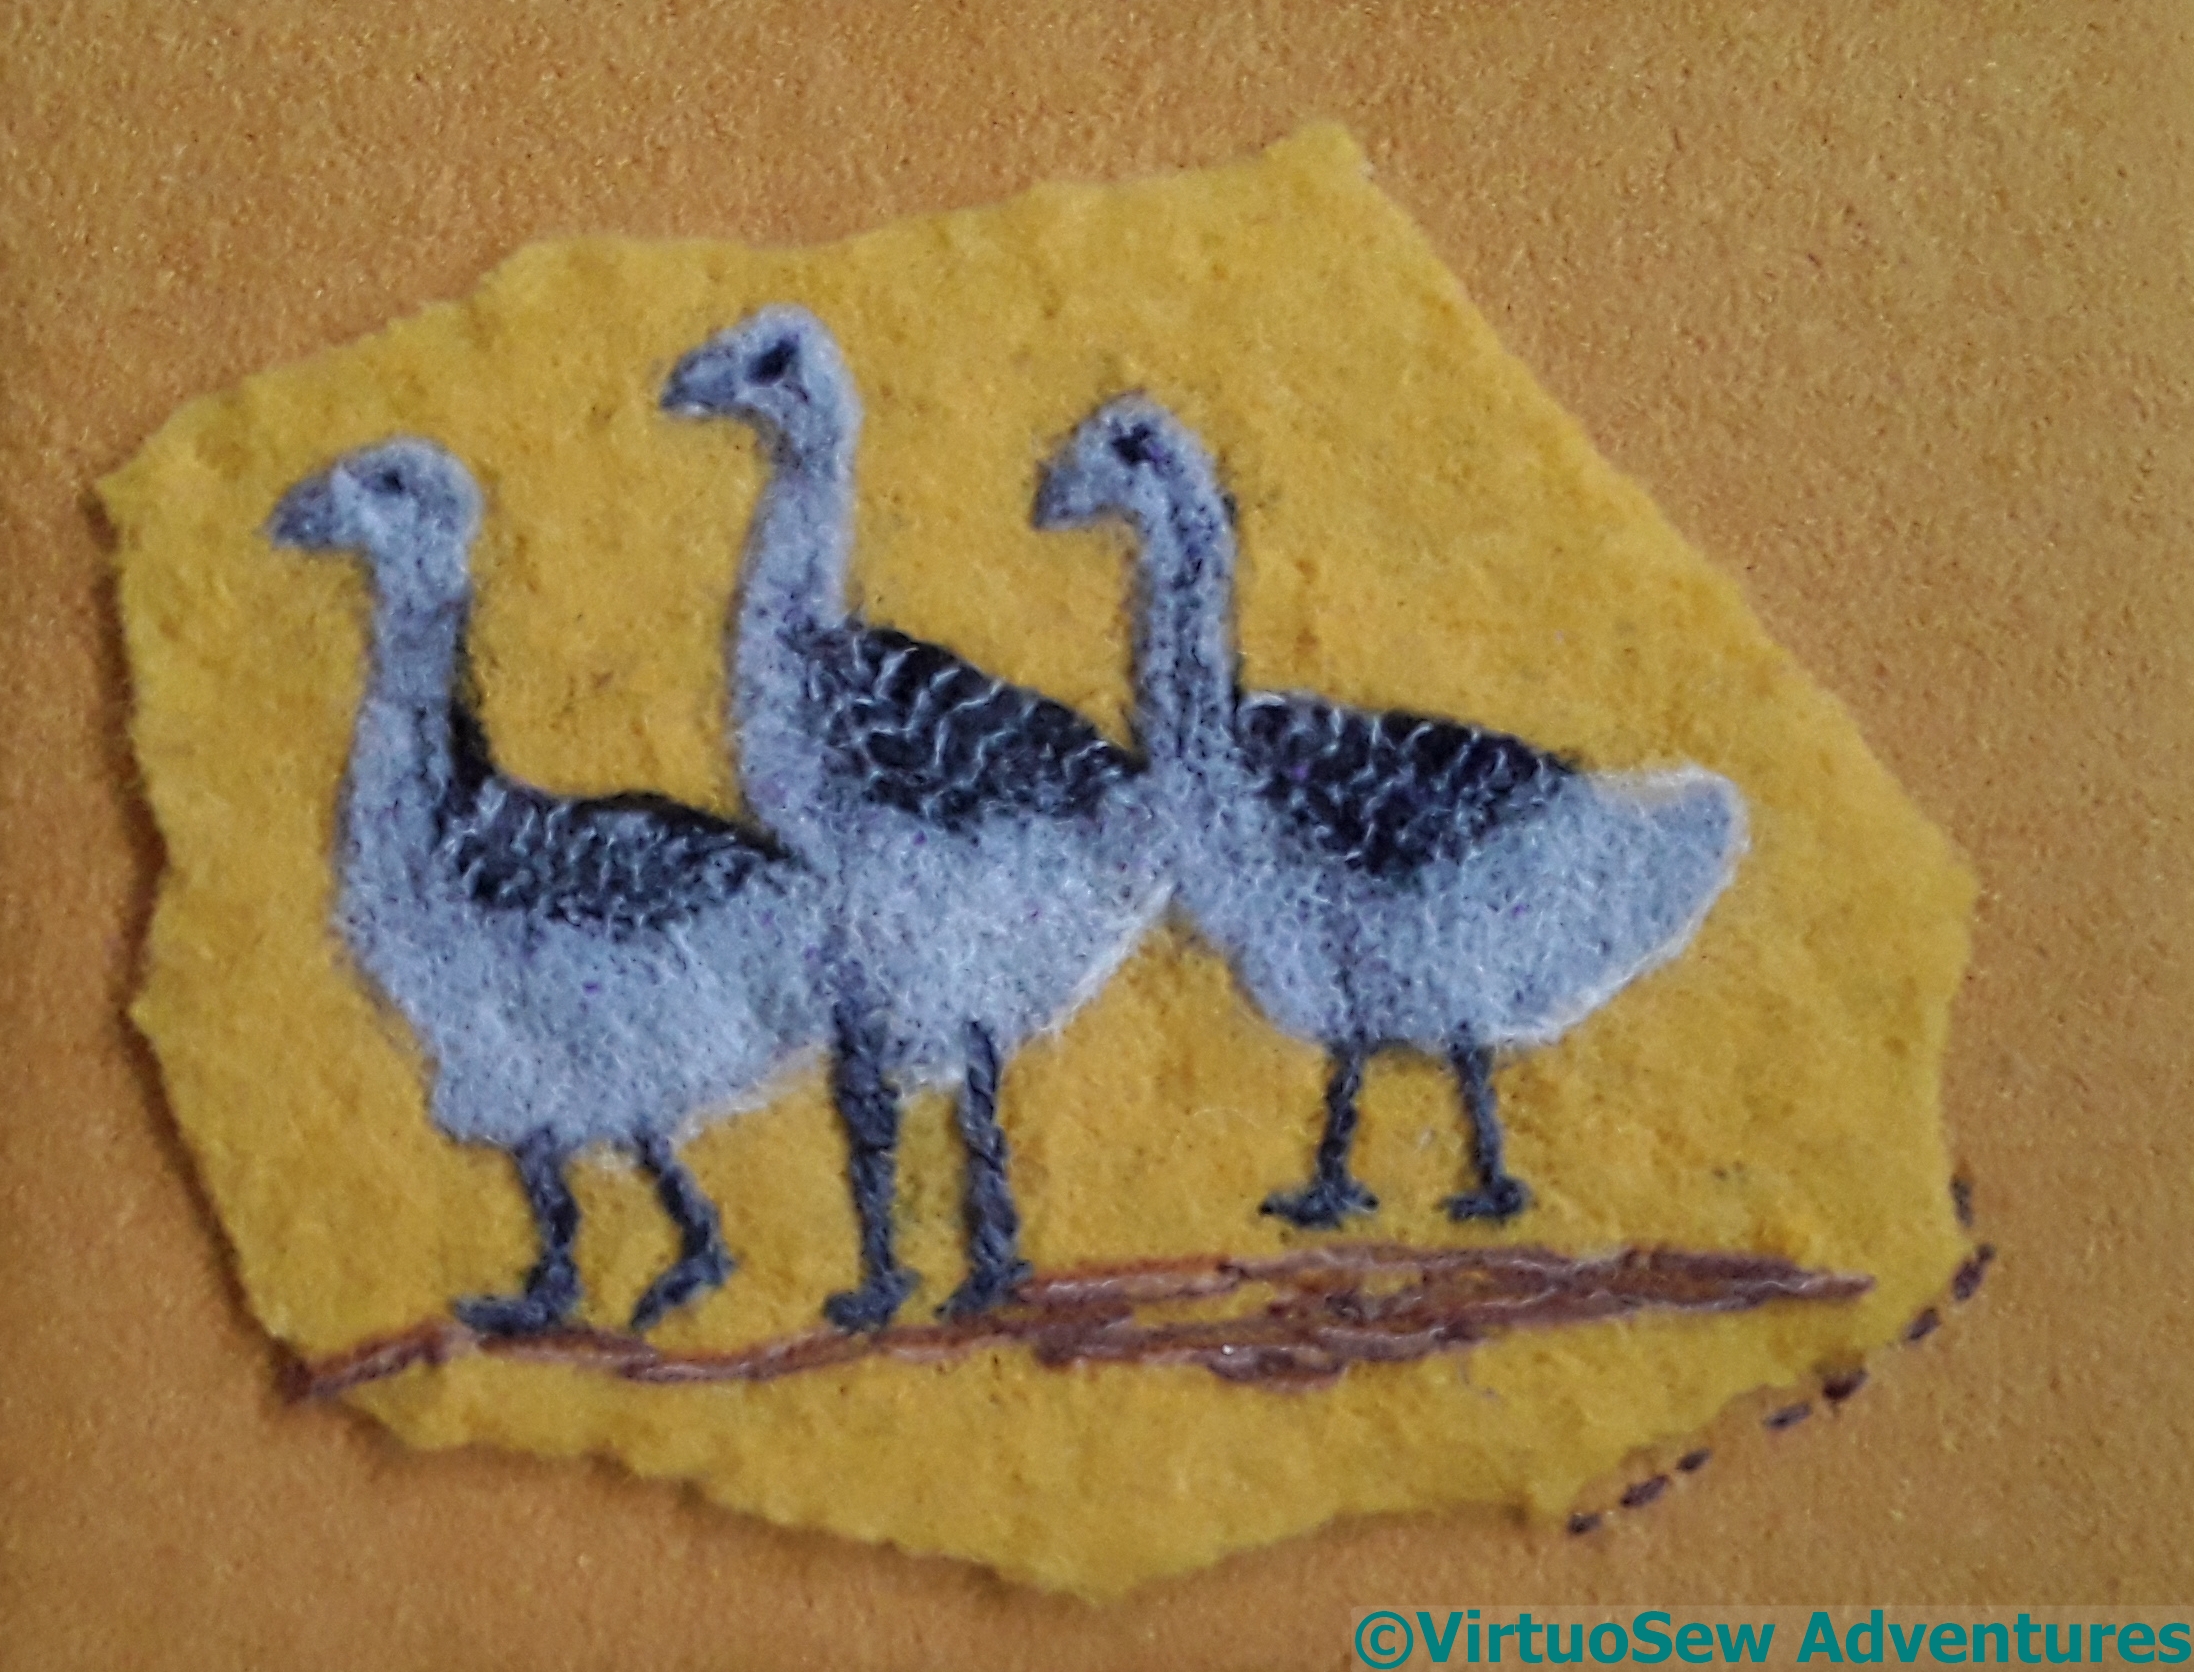
I’ve not been finishing any of the Amarna pieces for presentation, because once mounted and framed, they take up much more space, and also because I’m not sure which pieces are going where. However, the needlefelted pieces are not going to form part of the main panels, and I rather think it may take more than one attempt to get them just right. I’ve decided I want to present them rather as pieces of fresco are presented in museums, on a background which is similar in colour to the main colour, but not close enough to mislead.
So the first thing to do was to find a suitably-sized artist’s canvas, and cover it with some padding and then a nice woollen fabric which is a warm yellow, slightly darker than the felt background. Then I cut around the Amarna Geese to make a rough, uneven shape. I should probably have cut off a head or something so that the fresco would look suitably fragmentary, but I simply couldn’t bring myself to do that!
Mounted And Signed Too
I used a fine woollen thread to attach the felt to the background fabric, as far as possible remaining within the thickness of the felt. That was quite tricky, and I wonder whether there might be an easier way. I’m glad I didn’t start with the two princesses!
My Morse Code signature is in double straight stitches, following an edge. And there’s a bit of a corner left open there. I might do an extra goose head and add it in as a separate fragment!
Another Attempt at the Dig House

Dig House Cut Out
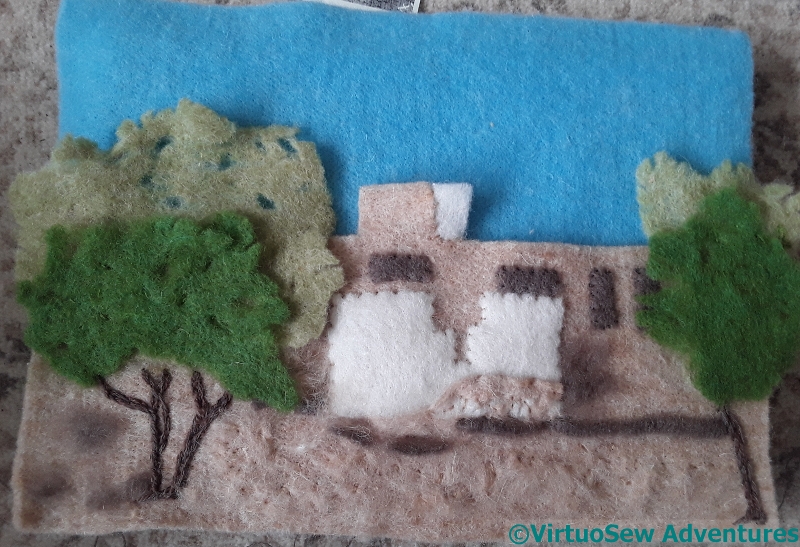
I’m continuing to experiment with my embellisher, trying to learn new tricks.
I’ve found a photo of the Dig House from a different view to the previous one I tried, and cut out some pieces of felt to represent the trees and the various pieces of building. It’s not going to be a very accurate representation, because, firstly, my cutting wasn’t as accurate as it could have been, and second, I’ve found that needlefelting doesn’t always go to plan.
Dig House Preparation
That said, a bit of stitchery helps to keep the pieces at least approximately in place.
I felt the felt of the trees looked a bit too solid, and snipped holes in it, snipped the edges, and then tugged and tweaked at it to open up the fabric.
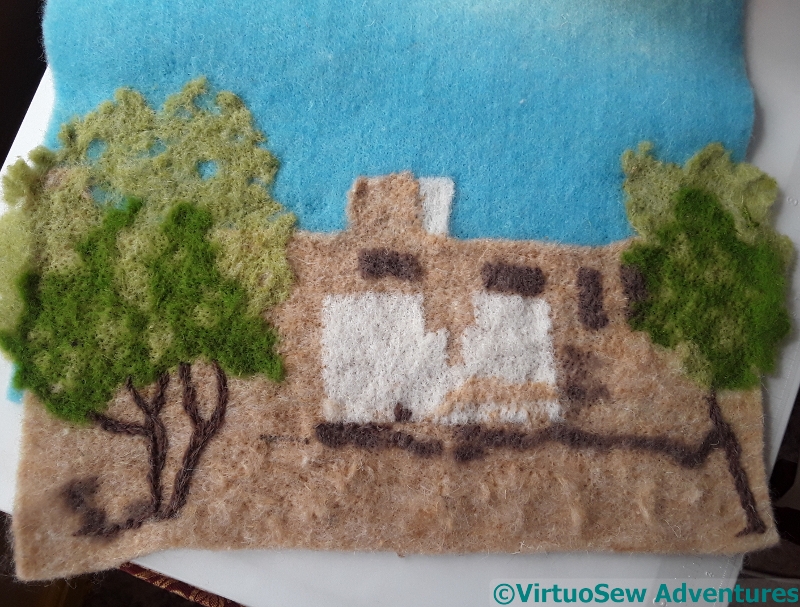
Then I started to use my embellisher. And oh joy, a needle broke! I changed the needle plate and slowed down a bit after that. It turns out that three layers of even this fairly light felt are a bit much for the machine.
Dig House Needlefelted
However, after much slow and careful embellishing, I have this.
The trees look much better now, with the edges and the holes satisfactorily destroyed and battered around the edges. The various layers of felt are melting into one another and flattening together.
This should at least provide me with an interesting basis for further stitched details!
Some early (very early!) experiments for the Vision Of Placidus – Part Two
First wet felted tree
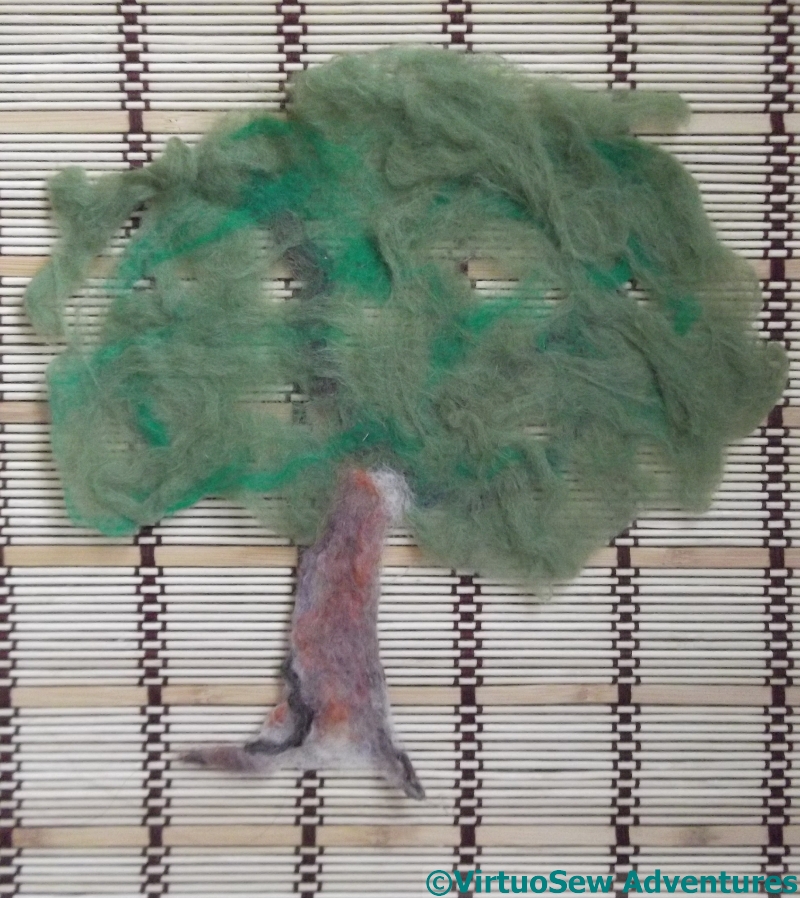
Once everything had dried, I could sit back and look at my trees.
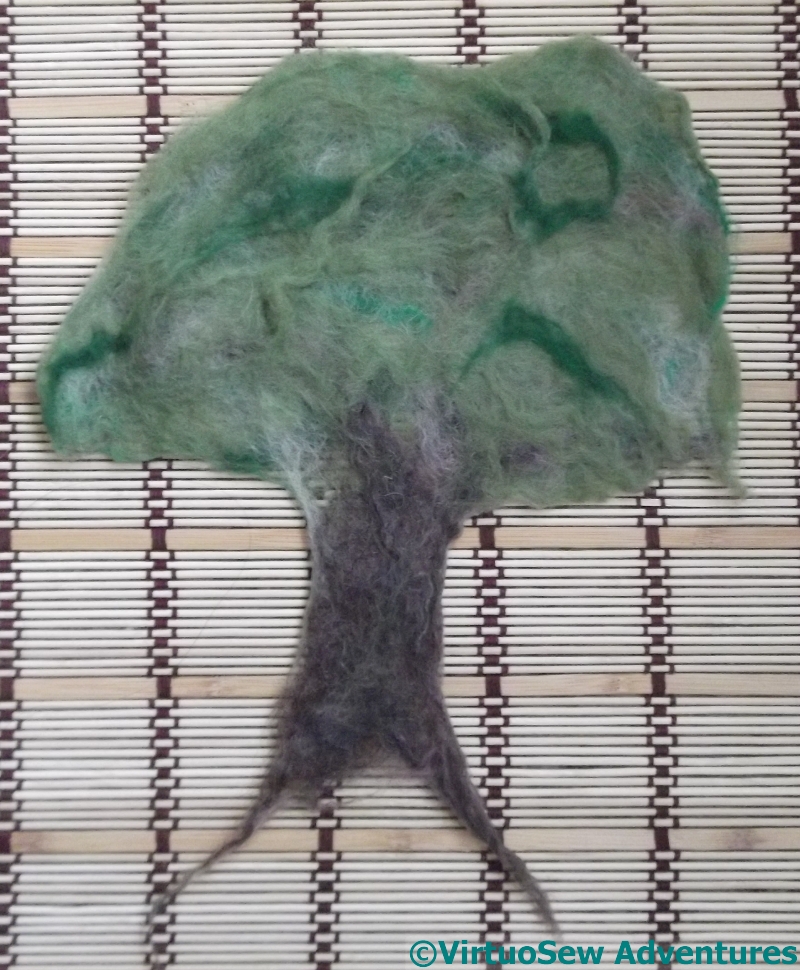
This is the first one I did. It used some multicoloured merino in the trunk, and two greens from the beginners felting kit I bought on eBay a while back. They’re not very nice greens, but all I’m doing is investigating the technique.
There are only two or three layers of wool in this one, which means there are gaps in the felt, and the junction of the trunk and the canopy is a bit flimsy. Gaps in the felt for the canopy are no problem at all – they would help to add depth to the finished piece. Since everything will be caught down (somehow – I don’t yet know how!), strong, dense felt isn’t really the aim here.
Second experimental tree
The second experiment had the addition of some short staple (that is, short fibre length), very crinkly wool. I was hoping it would result in greater shrinkage, which it has a little. It also produced a greater variety of shades in the canopy, lightening and interrupting that rather dull green. This may have promise, and the felt itself seems a little more stable and would be easier to stitch into.
Since the fibres are rubbed and soaped and rolled, and generally beaten up, it’s not surprising that the effects of trying to place the fibre colours to create a particular appearance is, to put it mildly, an inexact science. I wonder whether I could combine needle-felting with wet-felting to make the results more controllable?
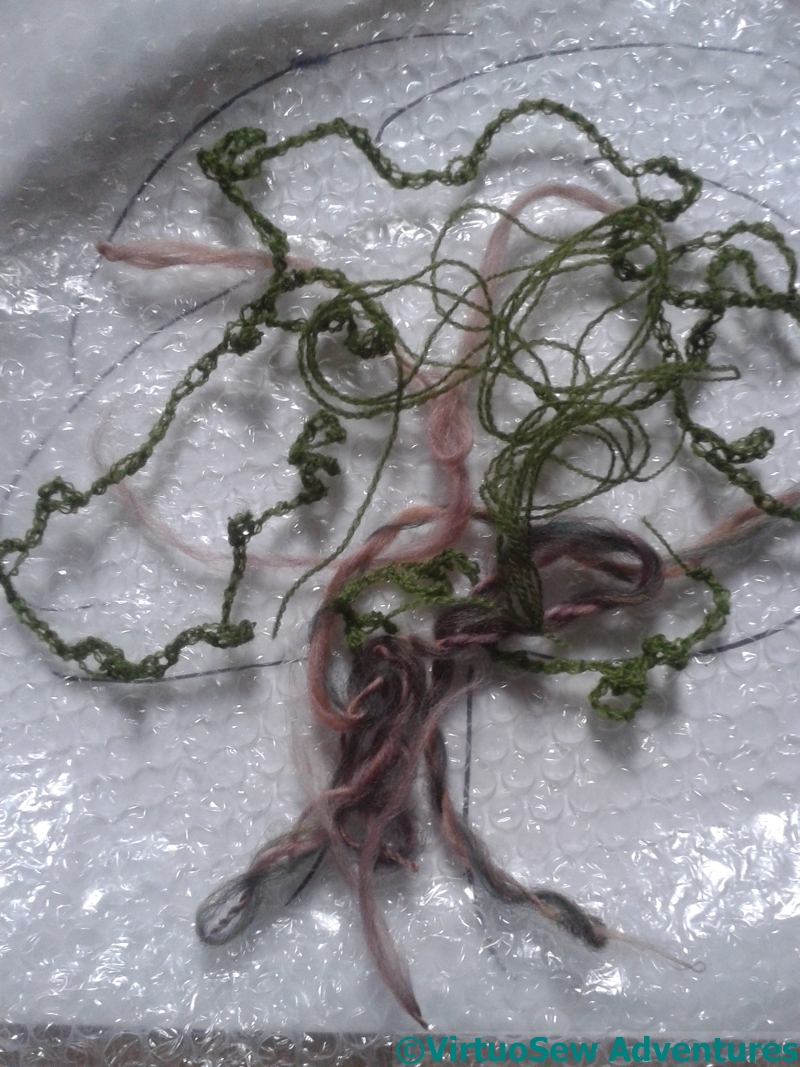
Third experiment, with yarn
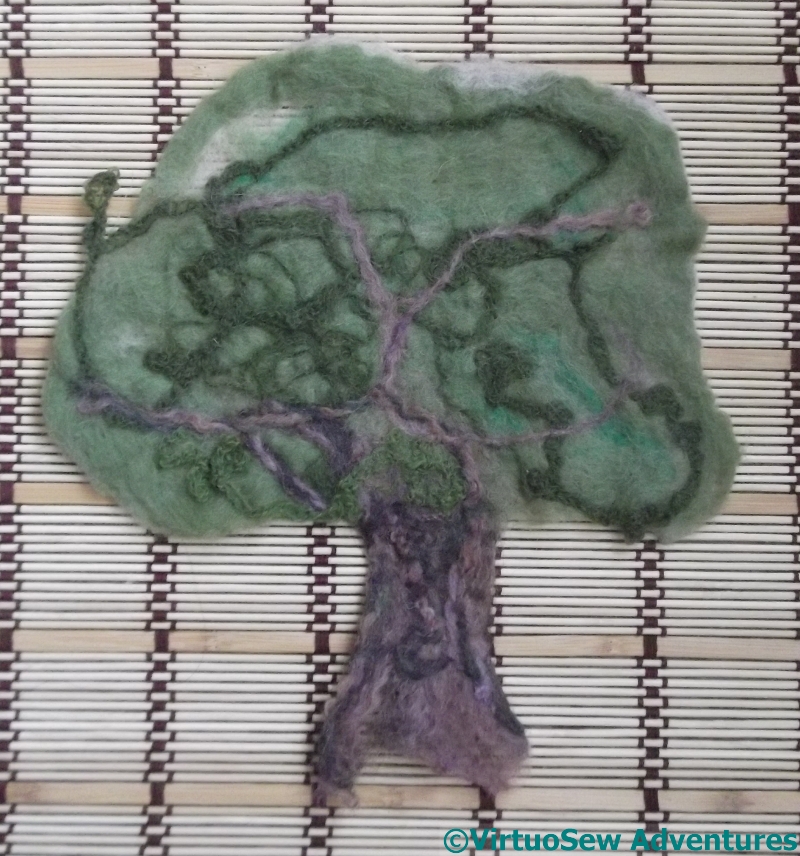
In the final experiment, I added crocheted chains and some tangles of yarn as well. Some parts of the chain didn’t felt in quite as well as I might have hoped, but with more crocheted chain and a better understanding of how to felt it in more thoroughly, it might produce a very good effect.
My semi-spun yarn on the trunk has worked, though, and looks even better in real life, although, again, what it needs is the courage of my convictions and rather more of the same.
So, not a completely unsuccessful experiment, and certainly a good basis for further experiments, perhaps with added stitching…
Some early (very early!) experiments for the Vision Of Placidus – Part One
Experiment One
I’ve been struggling with a sore and stiff shoulder for some months now. It’s made me reluctant to go back to Eve In The Garden of Eden because at this stage she demands perseverance in a single, small stitch for the gold groundwork. The Head of Nefertiti has involved more variety, and earlier signs of progress, while the canvaswork is perfect for evenings.
However, my shoulder is beginning to ease and I’m feeling more willing to experiment. So I had a very entertaining morning last week (it was on Instagram and Twitter) having a go at something I saw on someone’s blog a few months ago and thought might have possibilities for the underlayer of my planned Vision of Placidus panel. If what you see looks familiar, please let me know and I will gladly edit the post to give credit!
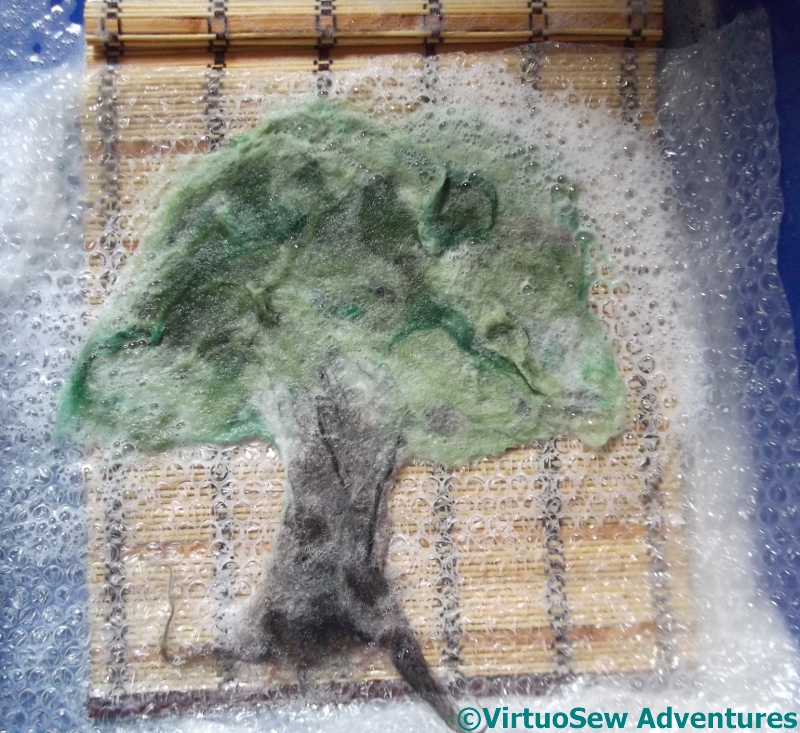
Wetted Out
Now, the Placidus panel is going to be about five foot by four foot, so even using some of the chunky threads I am happy to use (… and may even spin for the purpose!), it will take quite some effort to cover it. So I thought maybe I could wet felt some rough elements – trees, rocks, clouds, the stream, which could then be applied and tweaked, improved and generally titivated with stitchery.
In the absence of a real – waterproofed! – studio, therefore, I was to be found squatting on the kitchen floor, using a Lakeland Limited tray for cleaning oven shelves to contain the splashes and soap. I must have looked distinctly odd, but I’m accustomed to that!
Experiment 3 – First Layer
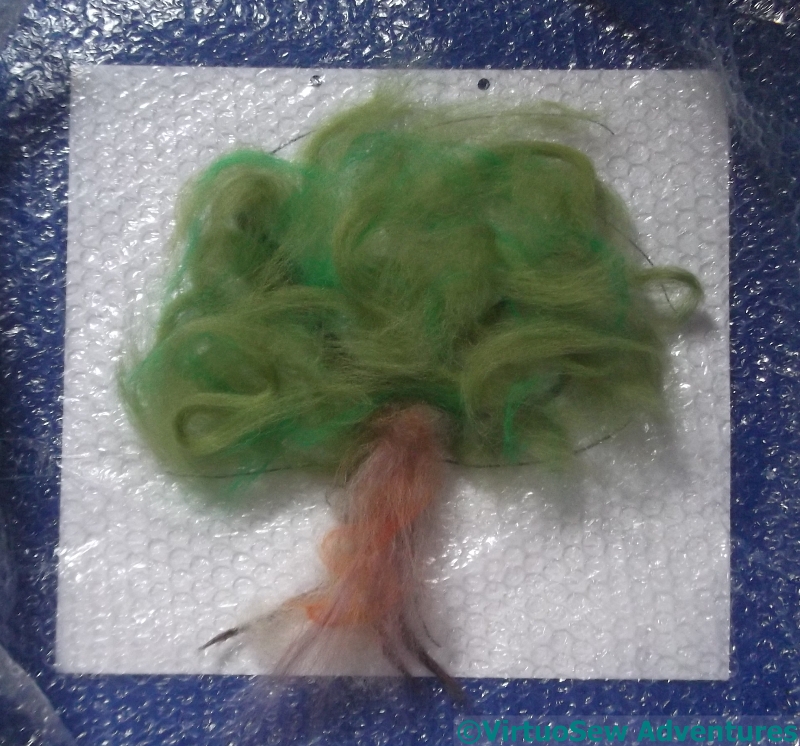
In the case of the final experiment ( I did three), I rummaged for some fine crewel wool and made a crochet chain, with some very slapdash and freeform loops added in, and laid that down first, with a tangle of leftover yarn.
I also fished out my spindle and had a go at spinning and doubling some wool to create a different effect on the trunk. That didn’t work too well – the yarn kept unspinning itself. My shoulder isn’t up to a concerted attempt to crack spinning, so I made do with what I’d got, and backed it with various other wools to hold it together.
At this point – creaking slightly in the lower back – I decided to stop, rinse everything off, and let my trees dry before going any further. .
Shadow Play
Printed on gauze
I decided, as I stared at the printing of this blocky pattern onto gauze, that I wanted to use the transparency of the gauze as part of the finished effect.
I don’t have a destination in mind for this piece which will give me a theme, so I decided that, in order to highlight that one quality, I would use a single thread (as it happened, a variegated silk), and design a fragment that would allow me to experiment with the effect of stitch cover and openness.
Sketching
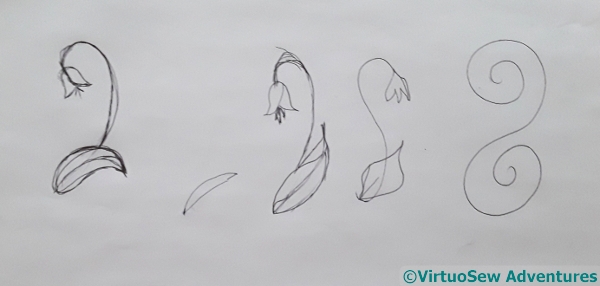
I leafed through books about pattern, saw nothing that gave me the combination I wanted, and then evolved the fragmentary organic sketch on the far left to give me the balance of line and form I was looking for. Incidentally, this is quite possibly the swiftest and shortest progression of any sketched design I’ve ever come up with!
Finished Fragment
It’s astonishingly difficult to trace a design onto a fabric which is essentially invisible, and still harder, I might add, to follow the lines when you have finally put them there!
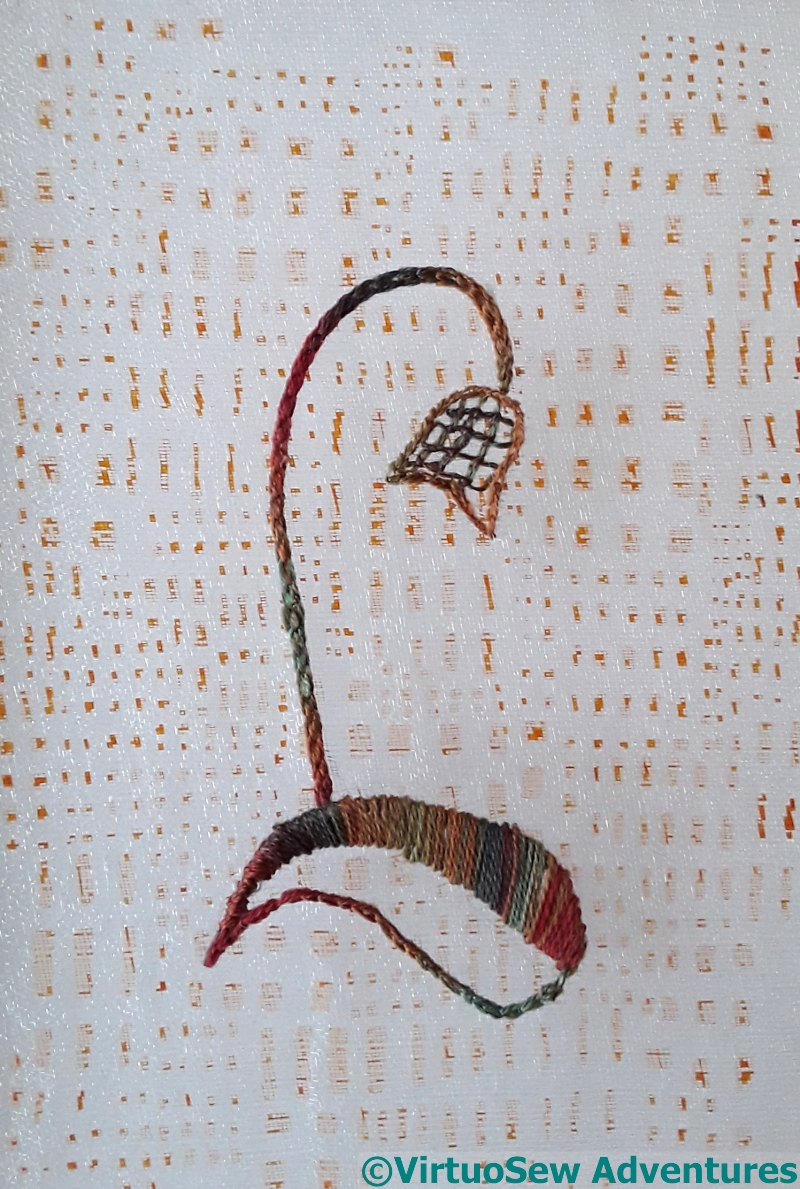
I used Hungarian Braided Chain Stitch for the stem, satin stitch for the solid side of the leaf, and Jacobean trellis for the flower-head. Clearly that gives me a solid coverage, and a firm line; I was hoping that the Jacobean trellis might offer a sort of half-shade.
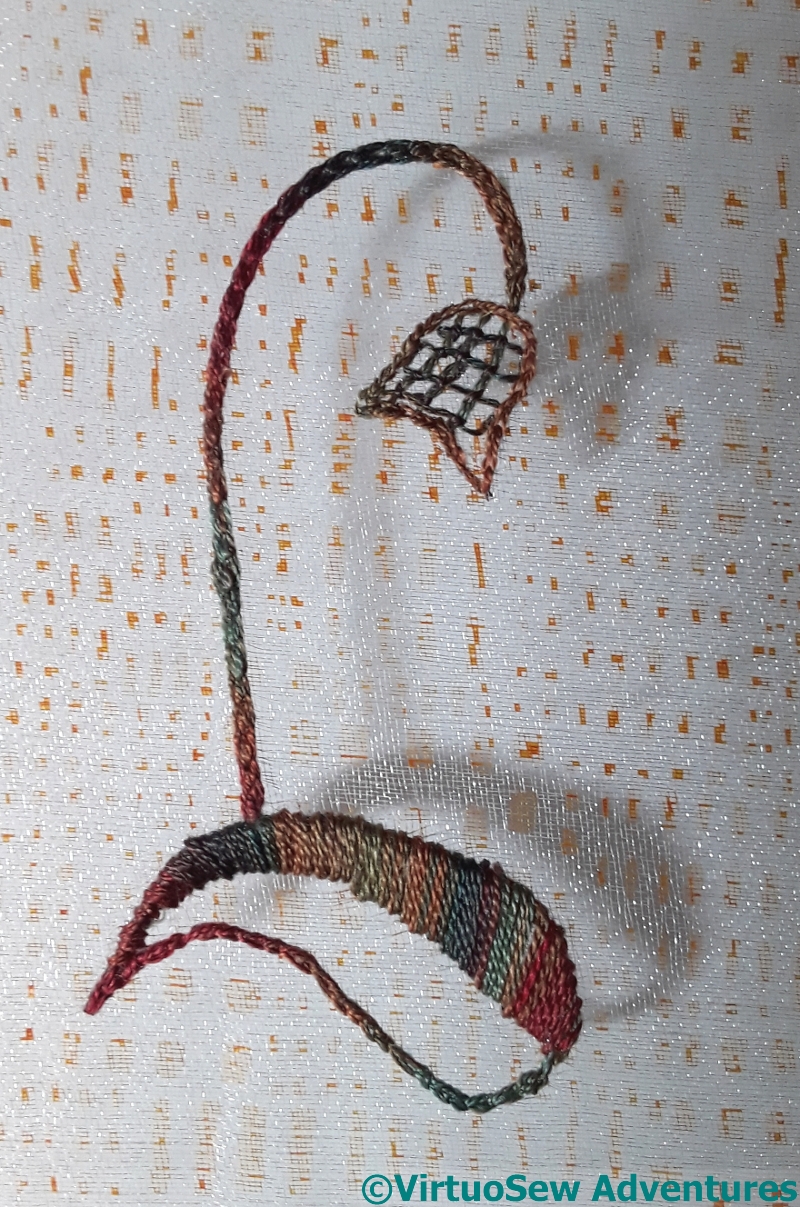
Shadow Play
A qualified success, I’d say. The printed pattern doesn’t create a shadow, and the Jacobean trellis shadow isn’t a sort of half-depth.
But, my goodness, the shadow of the stem and the leaf work exactly as I hoped! The gauze itself almost disappears, leaving the printed pattern floating above the surface, and the leaf and flower thrown forward by their shadows.
Experiments for The Head of Nefertiti
Screen and equipment
You may recall that the final “Dreams of Amarna” pair of panels is intended to include the heads of Akhenaten and Nefertiti, screenprinted onto gauze, and floating over the top as free-hanging veils.
I decided to have a small screen done of Nefertiti, in order to practice the technique and experiment with the different types of gauze.
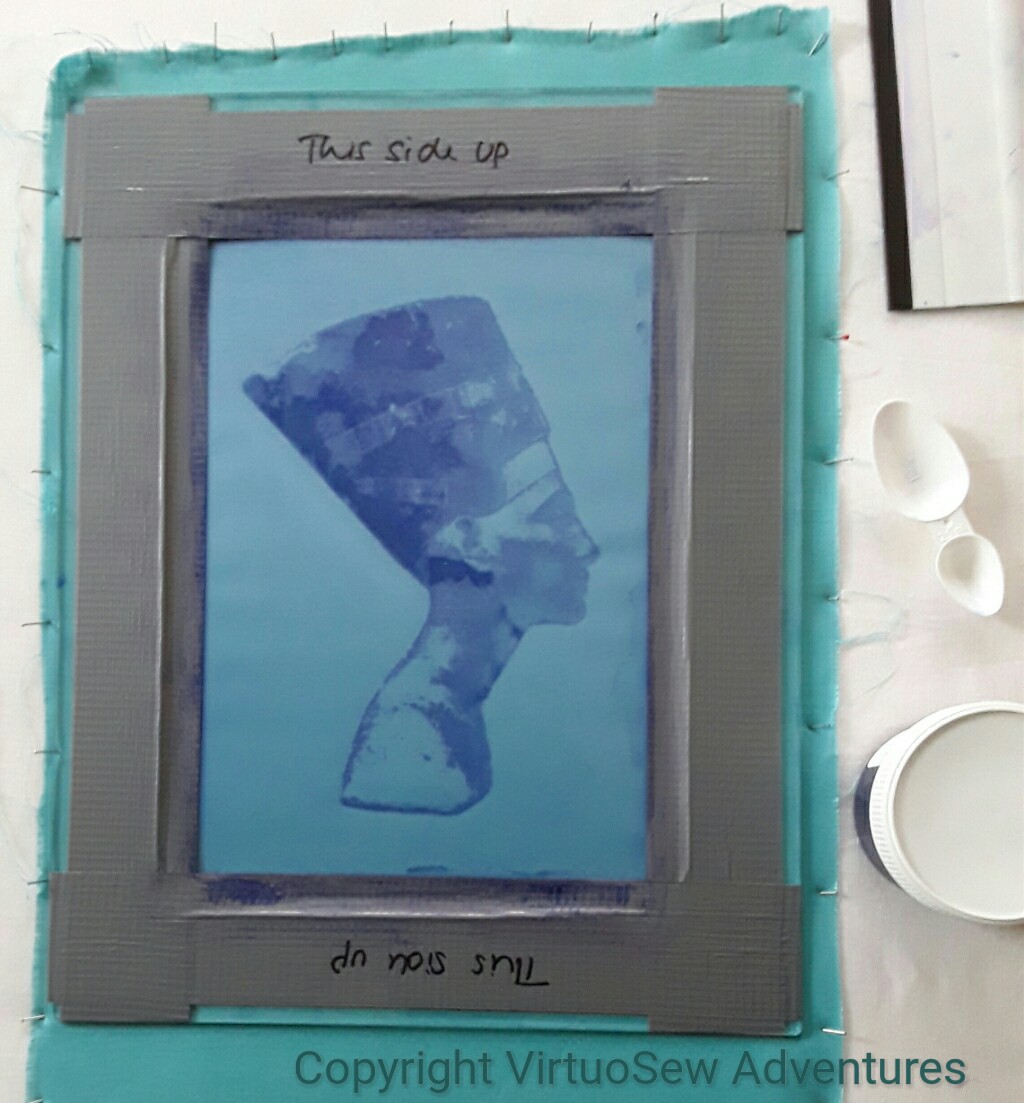
Too heavily printed
The screen duly arrived, and I did about six prints, all of which were dreadful. I put the screen away in disgust and decided to try another time.
This print shows some of the problems. I pressed too hard, obscuring some of the detail and caking the fabric – in this case a linen, because I have a plan to add silk and gold embroidered highlights. It would be impossible to get a needle through, and if I did, a metallic thread would be stripped in short order.
Printnig On Gauze
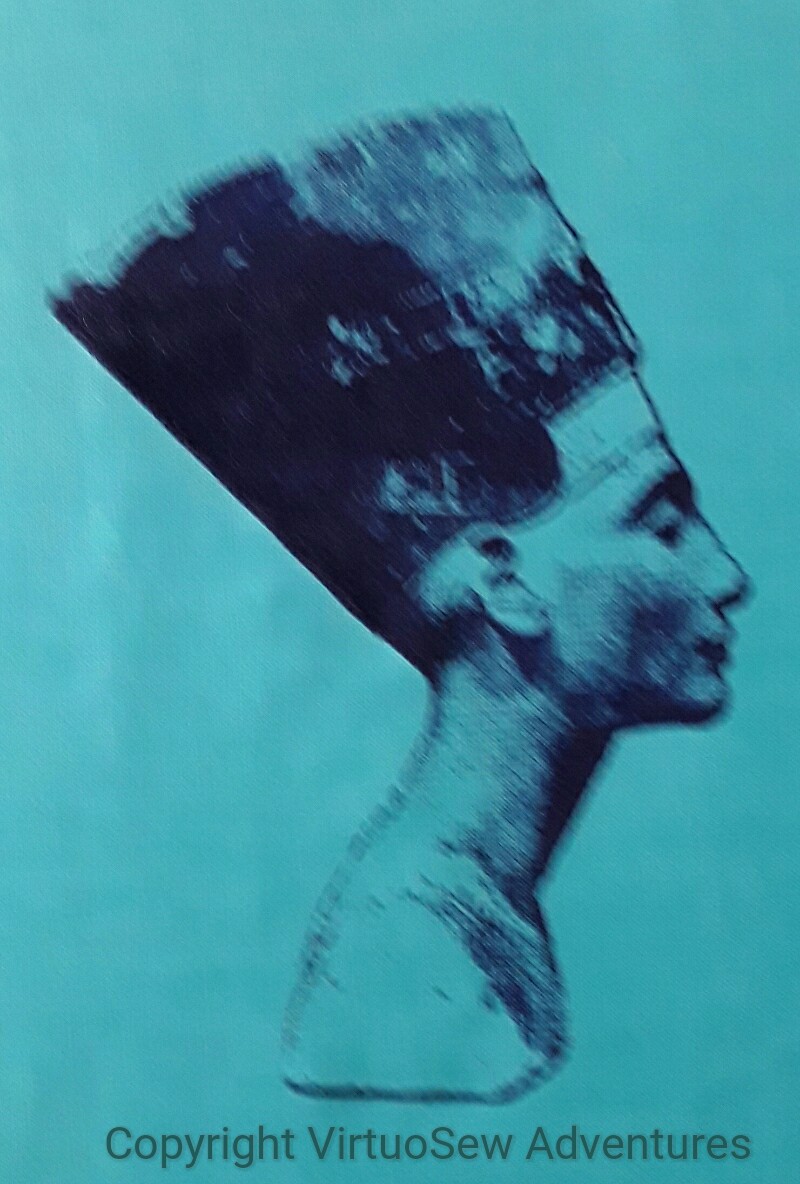
There’s clearly a trick to it – a combination of pressure (not too much), amount of ink (enough!) and angle of the squeegee (just right).
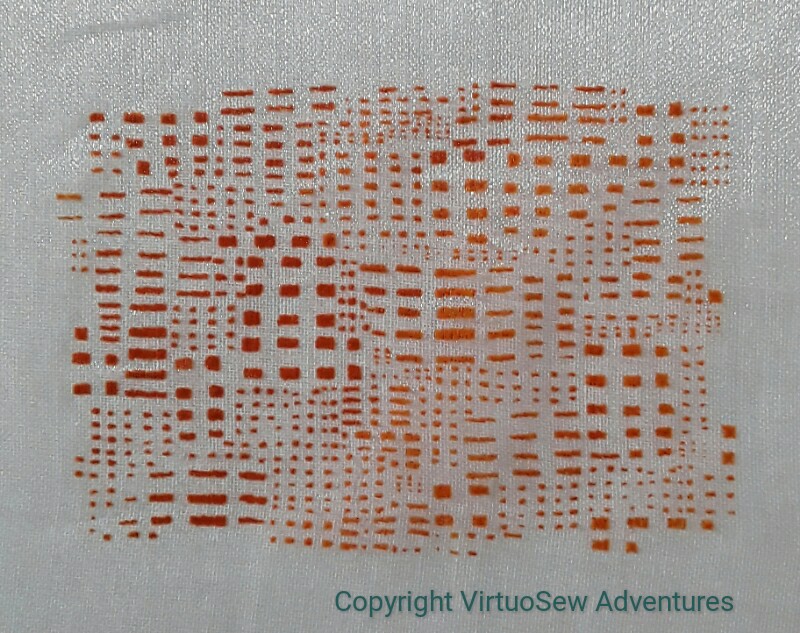
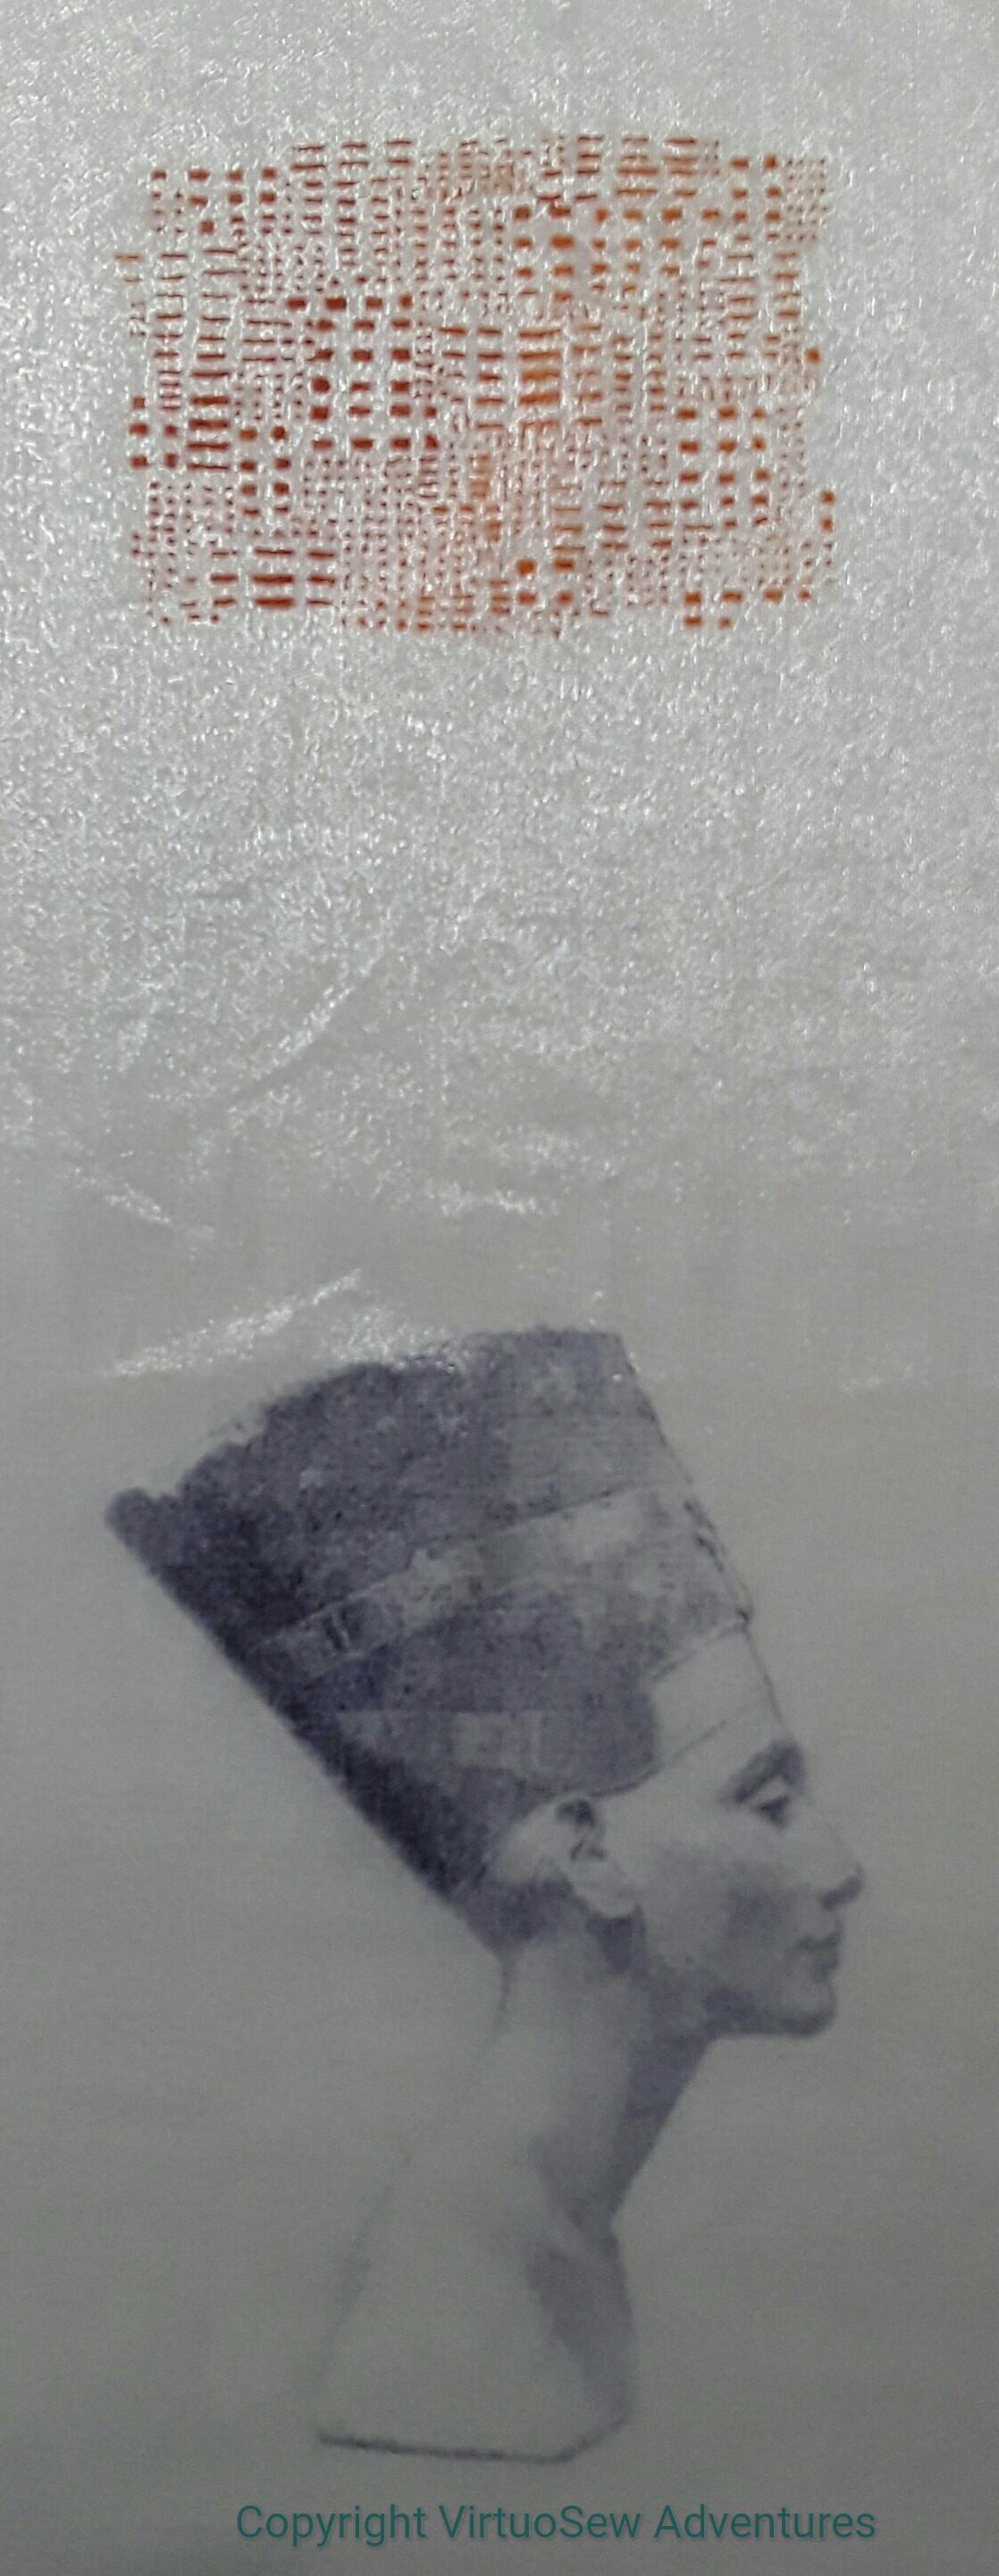
These two prints on gauze give me some hope. The orangey-terracotta is the small, blocky screen I bought to test out the idea first of all. I’ll embroider something over the top of this, just to see how it works.
And the head of Nefertiti is rather better, too. Next time I get out my Dreams of Amarna pieces to stare at them and play with layouts, I will be able to hang the gauze in front and play with distance and placement.
I’m beginning to think that it isn’t outside the bounds of possibility that I might finish the Dreams of Amarna one of these days, and even be pleased with it!