
Tag: embroidery for interior decoration
Another footstool
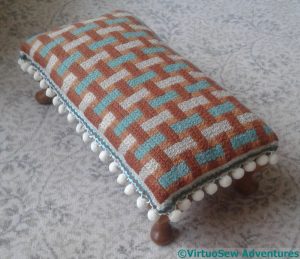
Remember this footstool?
It has a cousin, also worked by Grandmama, which has been working hard as the footrest at my mother’s computer desk, and the stitching of which is past recovery.
So the idea is that I should do a canvaswork panel for it, and Only From Stash. After all, where is the point of having a stash if you don’t make good use of it?
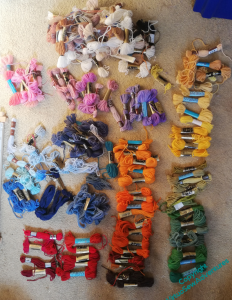
That is all very well – I do have some suitable canvas. Just!
But much of my tapestry wool stash is inherited from others – notice the huge pile of neutrals! – and it might be rather a wild ride to get a 10 x 21 inch piece of sensible 10 count canvaswork out of this selection.
I had intended to do something with Clarice Cliff colours, but as it happens, I don’t have as much leftover of those colours as I thought I had. I’m pretty sure that the pinks won’t figure, and unfortunately the greens are too thin on the ground and too mismatched, as well. Much thought will be needed!
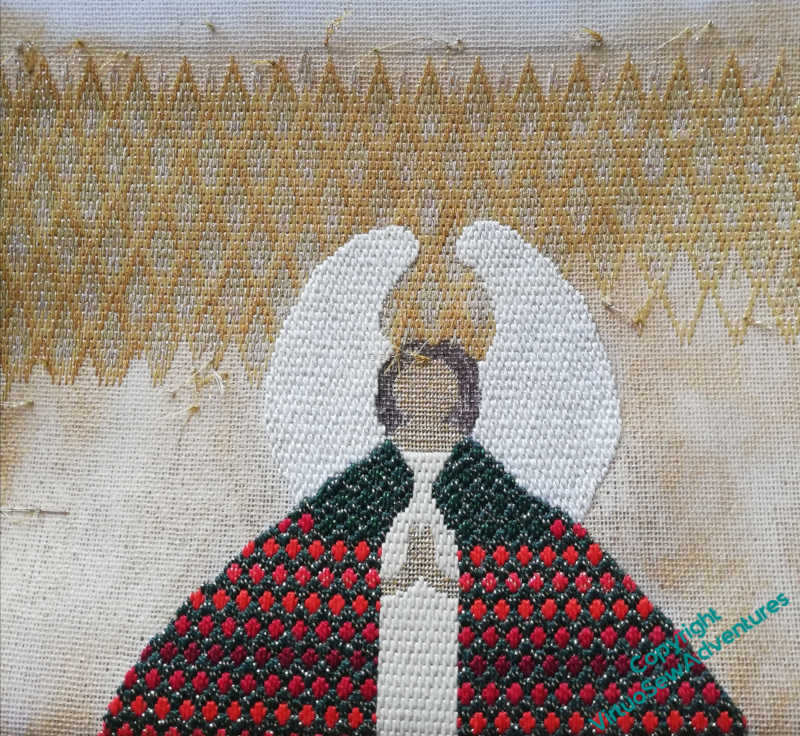
While I was thinking about that, however, I also prepared Episode 35, the first SlowTVStitchery video for the new project, the Canvaswork Angel, in which the Christmas Angel is introduced, and there is some discussion of the detrimental consequences of visual confusion and the delaying effect of Doubts.
A little box to embellish
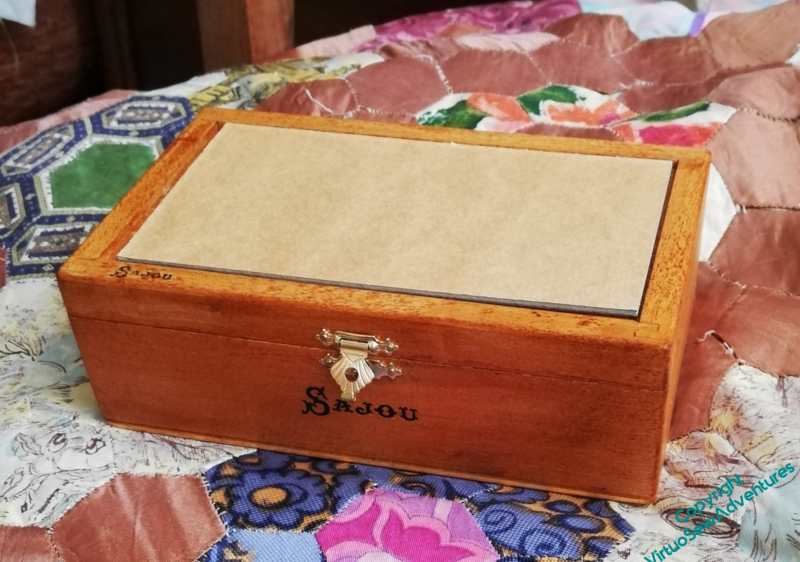
I can’t remember where I got this little box – probably eBay – but it was so long ago, I don’t remember what I had in mind, if anything. It’s about five inches by two inches.
I found it again, and decided it was about time I came up with something to do with it.
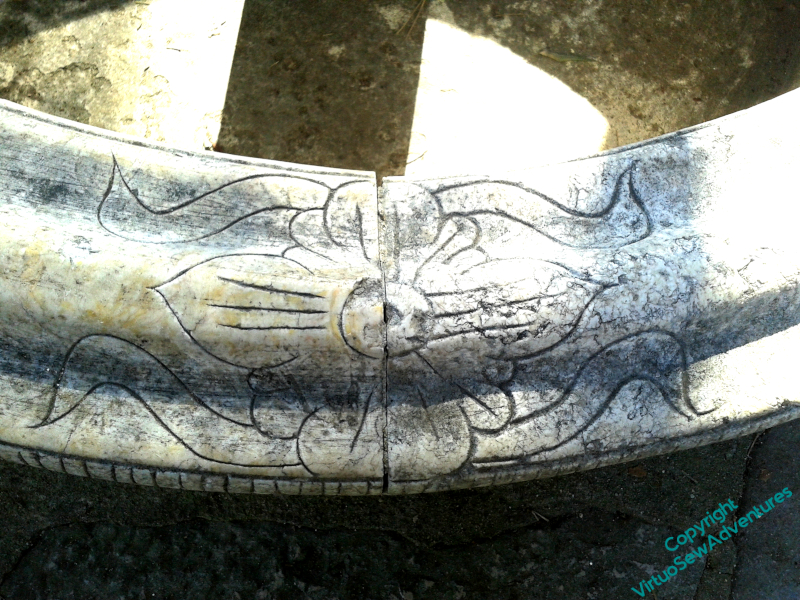
This is a bit of carved stonework I photographed in Lisbon. I should warn you that the finished piece is probably going to be really very unlike this inspiration, because, if you look at the rough ideas below, you will see it is already wandering. And when I started thinking about it, it was going to be surface embroidery, and now I’m thinking about silk purl and wire purl.
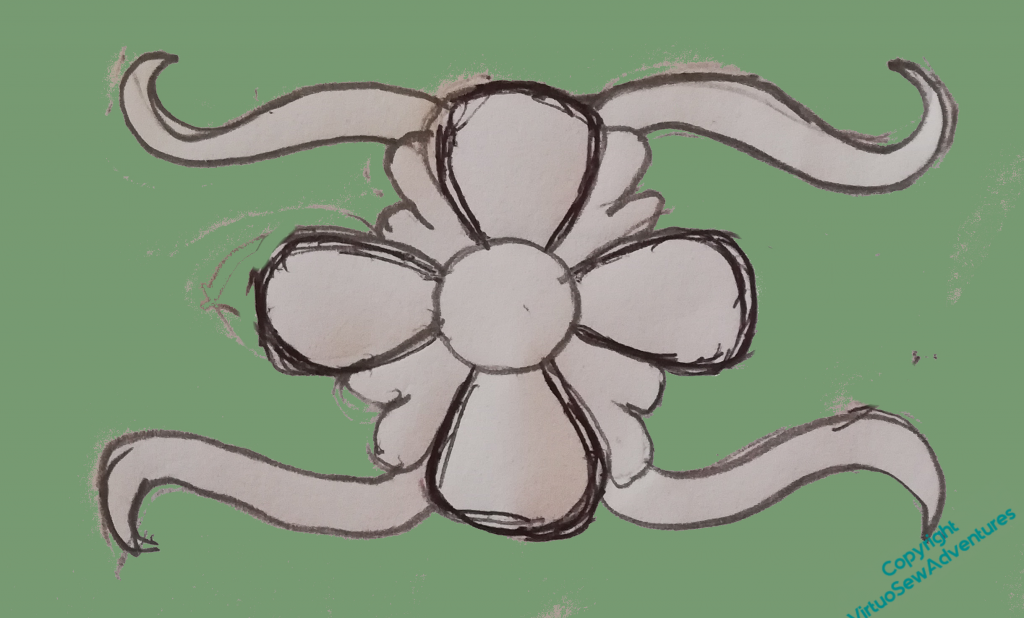
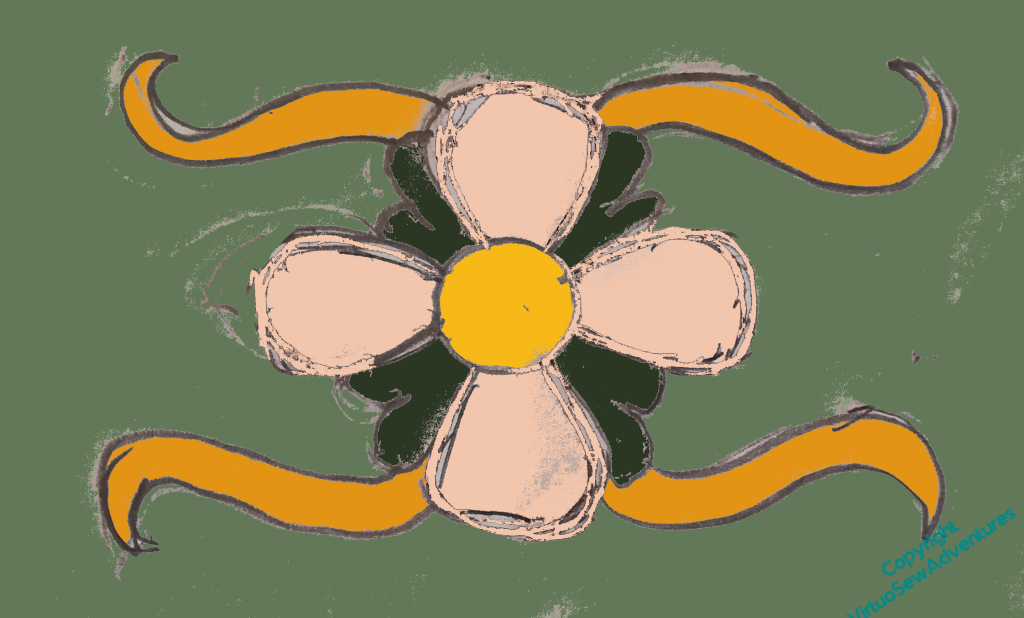
I think the ribbon things are going to change somewhat as well, although I’m not sure quite how..
In other news, Episode 33 of Slow TV Stitchery is now live, in which the penultimate corner is completed, and the contents of Autumn’s book stash is discussed.
More on the cover for the magnifier
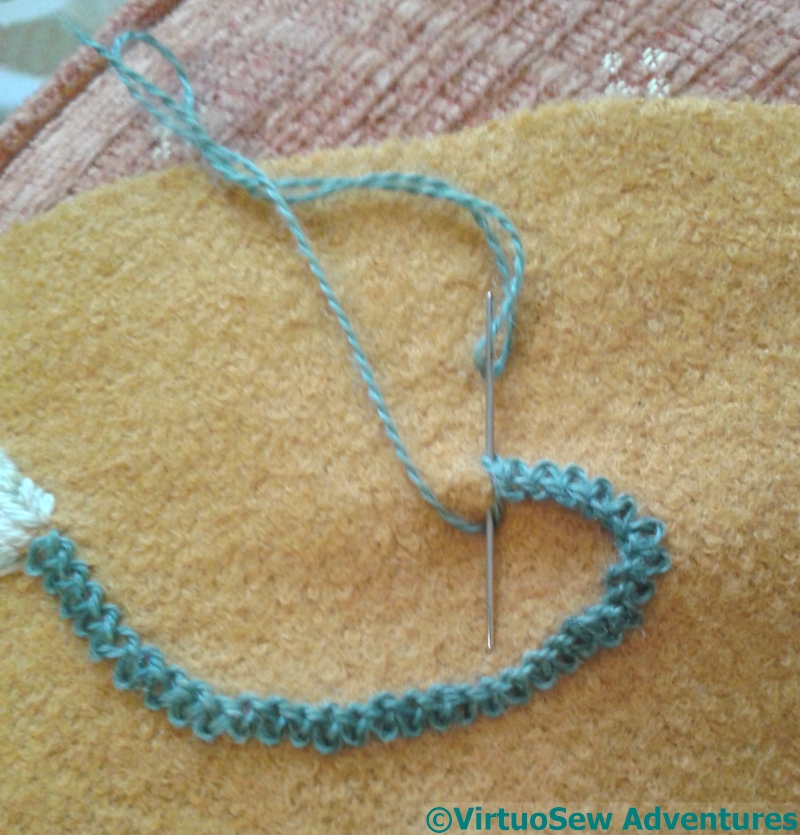
Braid Stitch Curlicue
The embroidery on the new cover for Maggie The Magnifier is relatively simple, but it does involve a few favourite stitches.
First and foremost, Braid Stitch. Not the Infamous Plaited Braid Stitch – I was sure I wouldn’t have enough wool for that! – but the ordinary Braid Stitch. I’ve been fond of it for years, as it makes a good, strongly textured line, and it’s much easier than it looks. It’s also fairly easy to work in the hand, and this was very much a holiday period project, using bits and pieces I could easily get hold of, which didn’t include my embroidery hoops!
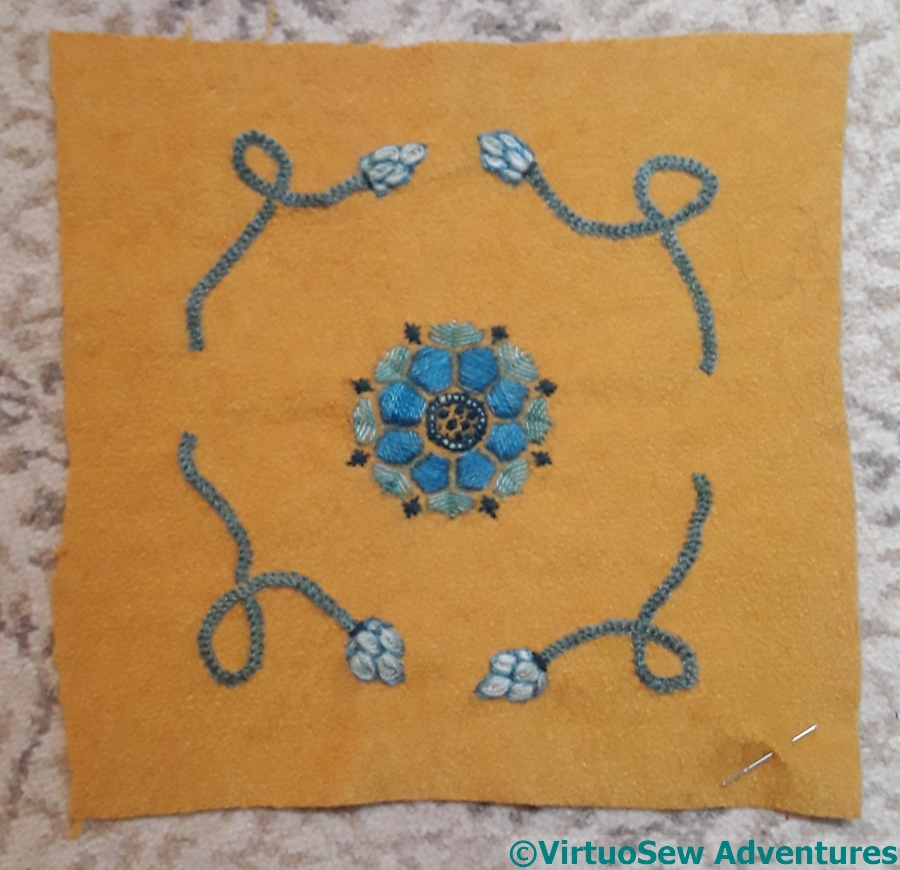
Magnifier Embroidery Finished
The central rosette uses satin stitch (not a favourite, exactly, but very effective!), Romanian Stitch, and in the centre, a little knotted stitch that I’m sure I know from a book, and has a name, but it just came swimming up out of my head, unattributed, as though I was making it up as I went along.
The buds, or finials, or whatever they are, are in nested fly stitches, outlined with further fly stitches, and you will note, from this view, that I stuck to my decision to draft the design by hand, and not tweak and even it up. This is very much a piece of domestic, informal embroidery, and there’s no reason for it to look glossy and machine made.
Cover for my new magnifier
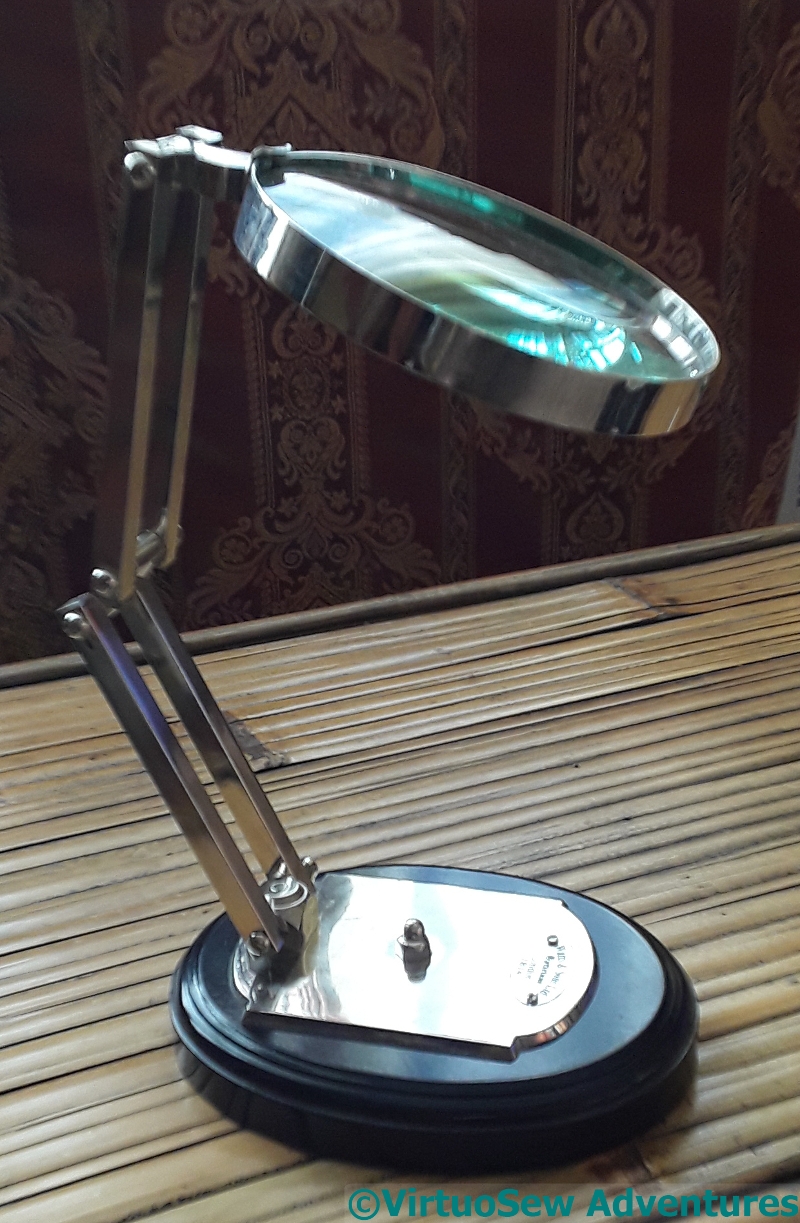
Desktop Magnifier
Meet Maggie the Magnifier, so called to distinguish her from Jenny the Jensen Magnifier Light. Maggie was a Christmas present from my cousin. She’s wonderfully sturdy, with a nice heavy base, and notwithstanding the base mentions 1815, we think that was the foundation of the company, and Maggie herself is probably from the 1920s. She will be very useful for details and work at the table, rather than at my embroidery frame, but she needs a cover, both to keep the dust off, and to stop her setting fire to things on those rare occasions when the sun comes out.
Making the cover seemed a good way to pass the time over the period when I had Akhenaten hidden away, so I used a piece of brushed bouclé fabric and some rather lovely wool thread I got from somewhere-but-I-can’t-remember-where.
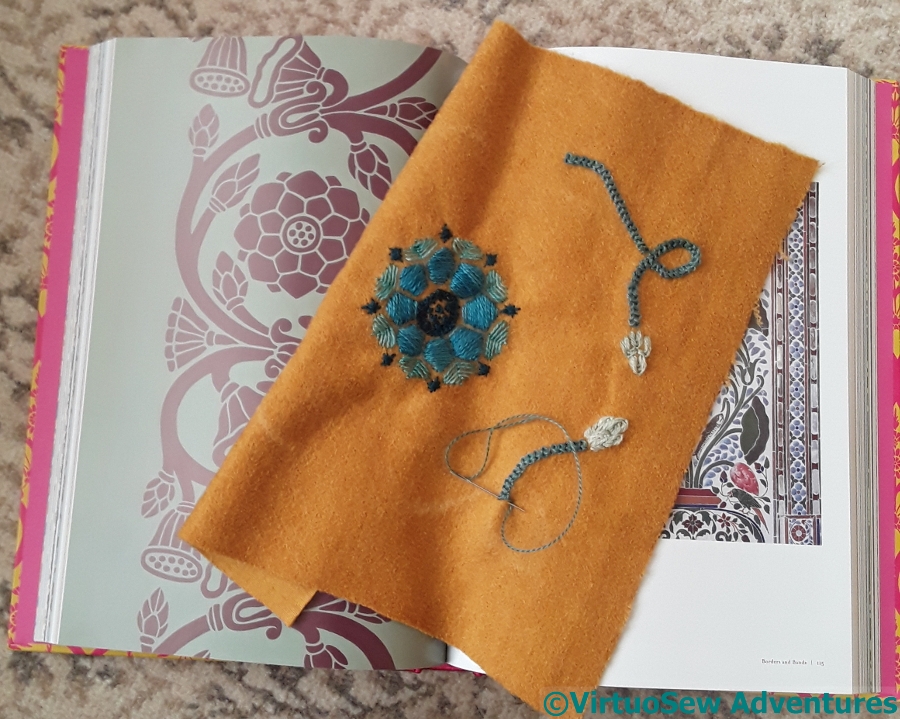
Inspiration And Progress
Since I did the Great Lady’s Magazine Stitch Off, I’ve become very conscious of what I learnt that I didn’t anticipate – becoming aware of how much more often an embroiderer of that period would have reckoned that Close Enough Is Good Enough, how often a pattern would have been sketched on by eye, rather than prick-&-pounced for precision, how much effect and speed would have trumped detail. I’m trying to apply that myself – when I don’t need exactitude, I don’t intend to strive for it. I hope it will make fun new projects more fun, and more “free”. This is a perfect candidate for that approach.
The basis of the design is a floral pattern from a rather gorgeous book called “Pattern and Ornament in the Arts of India”, with curlicues in the corners of the square of fabric. I practiced a couple of times in a notebook, and then simply drew the design in chalk on the fabric and started stitching.
This is going to be one of my New projects for this year…
The Worktop bin – finished
Edges turned in
There is always more “engineering” involved in these projects than you expect. Once I’d turned in the edges and done the herringbone stitch “piping”, I realised that the top of the bin was probably going to be on show on the inside. I found some felt to line it with, but since it was a spare offcut, I decided to run a line of straight stitches on the inside, just in case there wasn’t enough of it!
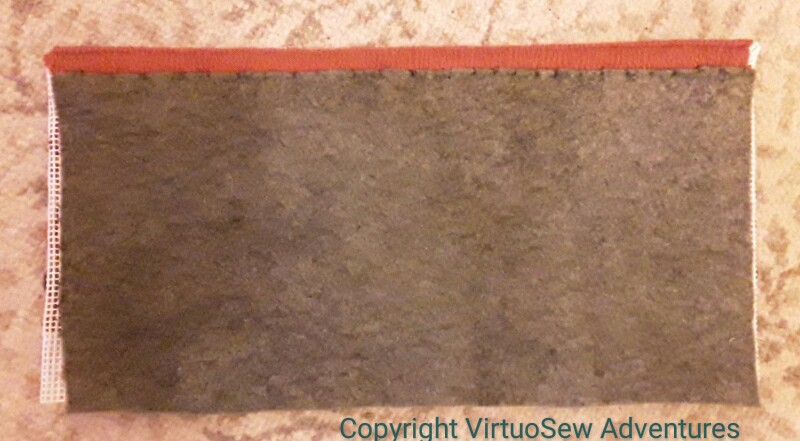
Felt lining attached
I attached the felt with small stitches, not too tightly, but just enough to make sure that it doesn’t move unless I want it too. It’s almost a pre-felt, not too dense, so it showed some adventurous tendencies. Some firm treatment, a tug or two, and it settled down nicely.
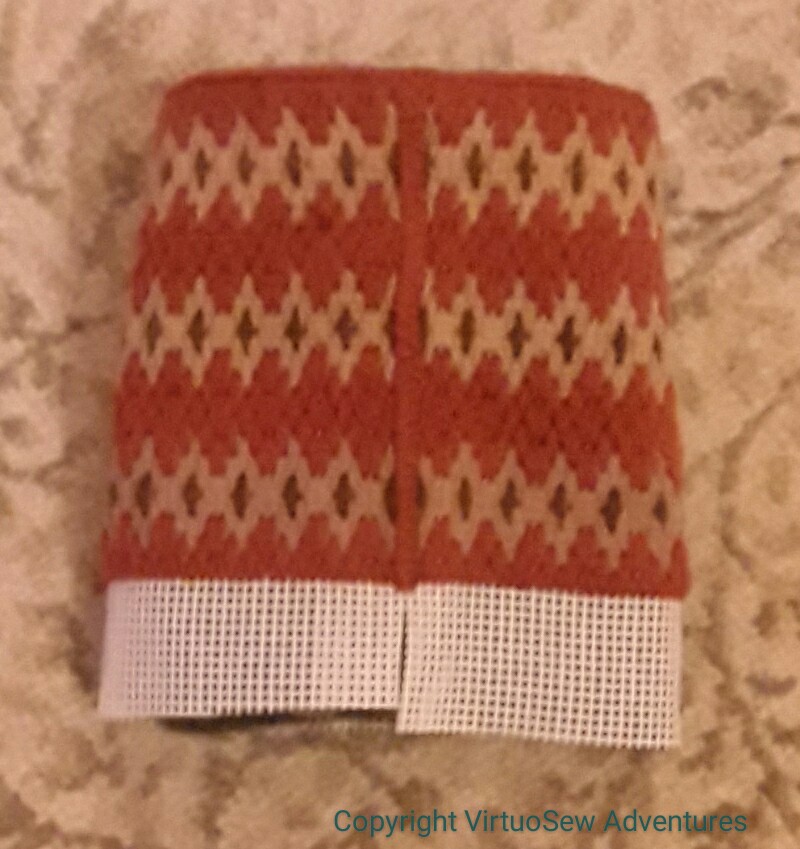
Vertical Seam
Which allowed me to consider tackling the seam turning it from a flat piece to a tube. After some of my usual thoughtful staring, it finally occurred to me that I already had the answer: Herringbone stitch, just like the edge finish at the top.
Obvious, really, isn’t it! It makes a sturdy seam which won’t permit much lateral movement, and since I’ve used it on the top edge, it doesn’t introduce yet another texture.
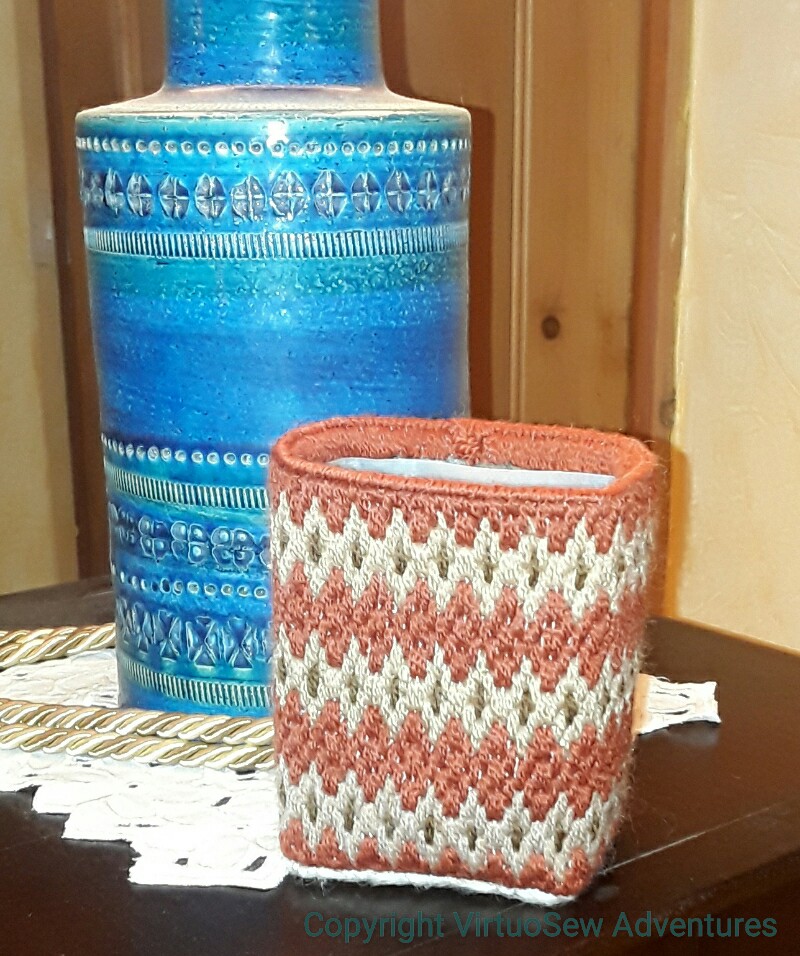
Finished and in service
When it came to sorting out the base, I put the sawn-off milk bottle inside to make sure I made everything fit, and folded in the canvas, holding it with a few rough stitches.
Finally I attached a piece of very dense felt to the bottom to hide all the canvas edges and make sure they don’t scratch any of the furniture. It is already in use, and you have to admit it’s very much better than an unclad sawn-off milk bottle would be!
Continuing The Worktop Bin Cover
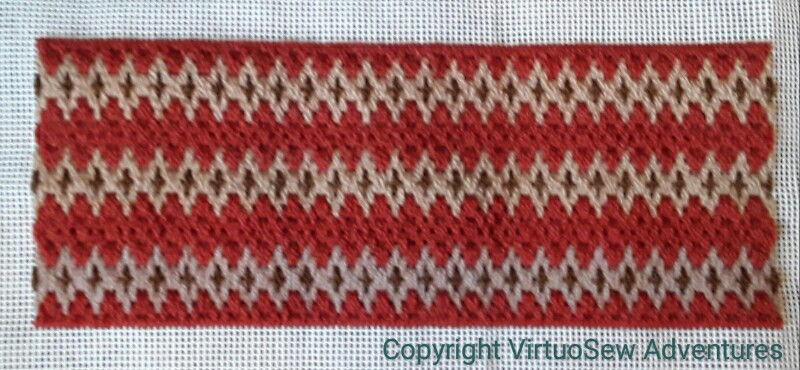
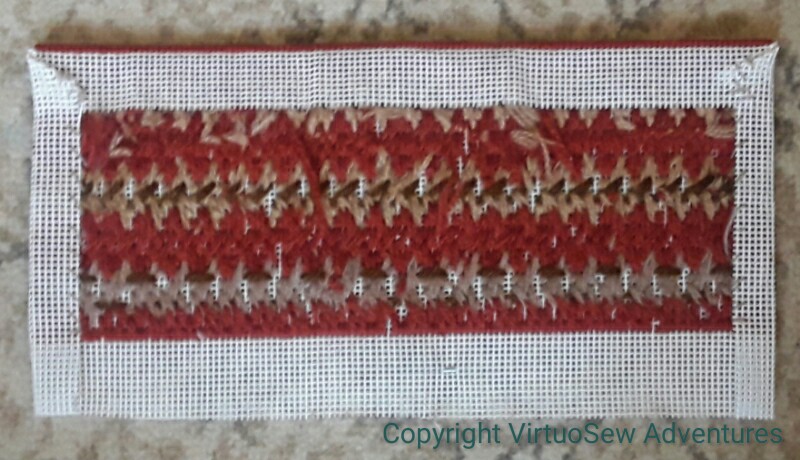
Bargello Panel
Once I’d settled on a pattern, it fairly romped along. Ten count canvas is such a lovely rest after the forty count linen of Eve In The Garden Of Eden!
As with the Crazy Canvaswork Cushion, I’m not buying extra wool for this, hence the row of light stitches which aren’t the same shade as the other two. Most of the thread is Paterna Persian Yarn, but the odd one out is Appletons. The texture and level of shine are different, but then, anything will be better than a sawn-off milk bottle!
Edges Turned In
The next stage is to turn in three of the edges. I’m going to use the canvas at the bottom to help create the bottom of the bin, so I’ve left that, but the short edges will be seamed together – somehow (I’ve not solved that puzzle yet!).
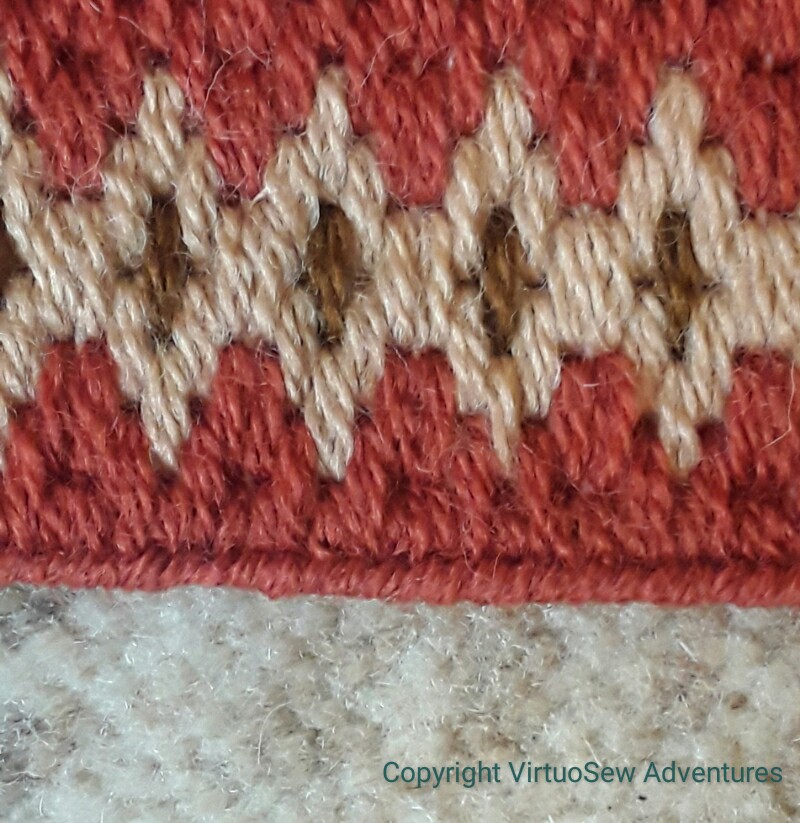
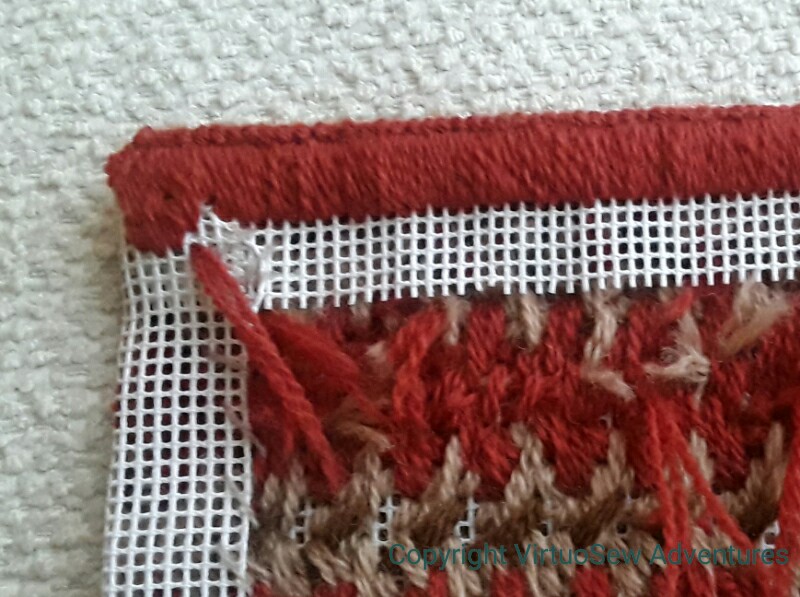
Herringbone Edge
I’ve learnt, over the years, that it is better to finish the folded edge of a piece of canvaswork than it is to try to fold the edge to be completely invisible.
So what will be the top edge of the bin has now been finished with herringbone stitch. It creates a lovely piped effect, much denser and firmer than a simple overcast stitch, and that will be very useful to help the bin stand up!
Small canvaswork worktop bin
First Trial
I have a small plastic bin – cut down from a milk carton – on the worktable beside my chair. It’s very useful for odds and ends, but it scarcely adds to the ambience.
Since all my embroidery at the moment – “Eve in the Garden of Eden”, and something I’m planning for “Dreams of Amarna, but haven’t quite got ready for stitching yet – is fine and detailed, I’ve decided to work a cover for it in bargello work.
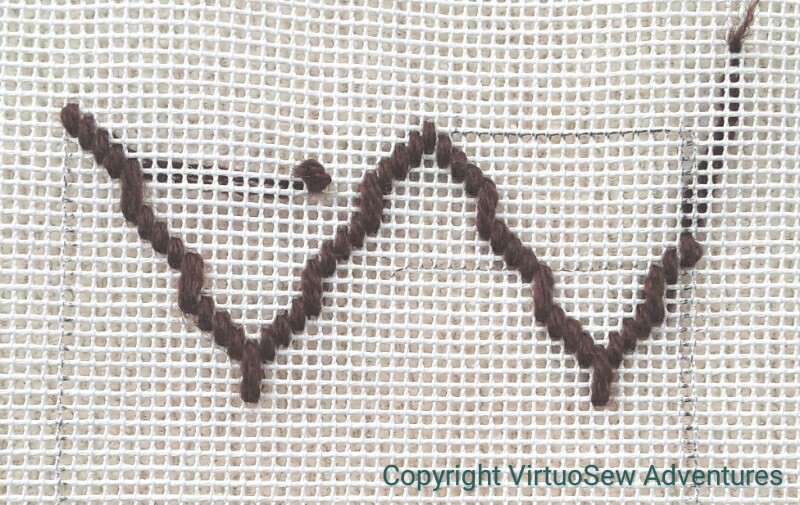
One stitched and one drawn
I’m using another of those offcuts of 10-count canvas. Ideally I would use something finer, but since I want a rest for my eyes, and in particular to use up some more of that persian yarn, I’ve been playing with various patterns in an old book. In this case, one pattern drawn on, and the other stitched, partly in wool, and partly in a fine silk, just to help me with stitch placement.

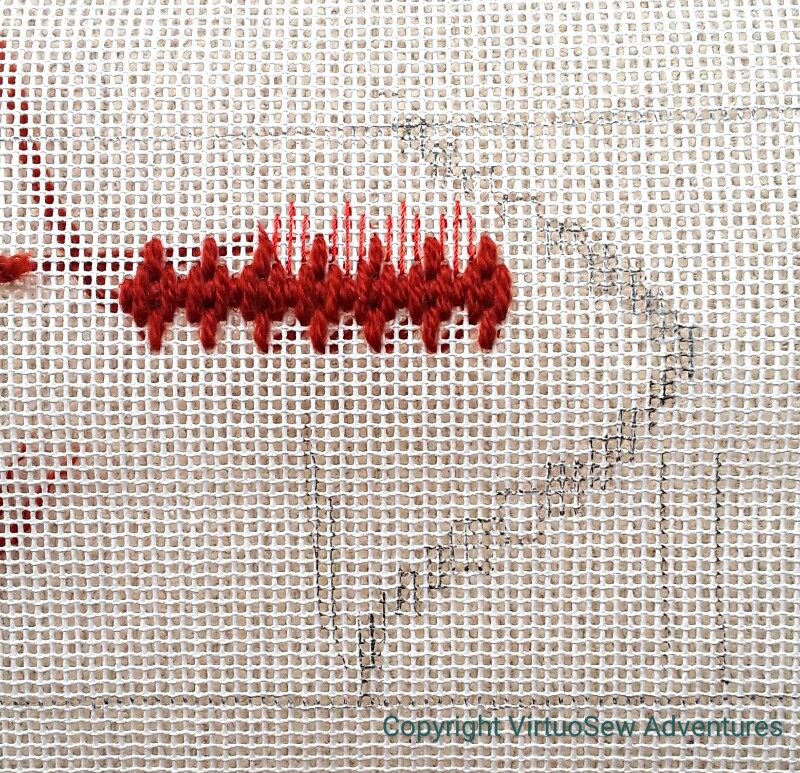
Another trial
I’ve decided to use the rusty colour, which I have rather a lot of, as the main colour, and I’m trying to find a small pattern that won’t dominate the room. I don’t think the “pomegranate” pattern qualifies…, but this one might…