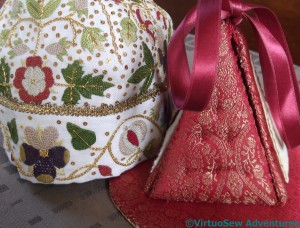
Pincushion
Having attached the ultrasuede and doctor’s flannel to two of the triangles, and made a brocade pocket on the third, the fourth was given extra padding, and extra stitches created an almost upholstered effect, making a pincushion.
Once the brocade backing triangles were attached, the four triangle assemblies had buttonhole loops added at the top corners, to provide a channel for the ribbon that will hold the étui closed. Then they needed to be joined in a chain at the bottom corners, and attached to the circular brocade-covered skirtex base to create a square-based pyramid.
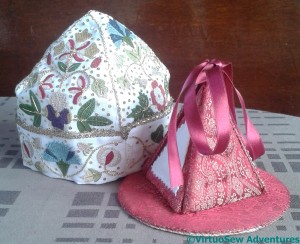
Etui Done
It turned out really well.
I’ve had lots of practice with trellis stitch and detached buttonhole stitch with return, I’ve Spangled until I’m seeing stars, and I’ve done a lot more reverse chain stitch in gold.
I can’t quite see myself using the étui in my ordinary stitching life, but I can see myself putting it in a carefully lit corner and gloating over it!
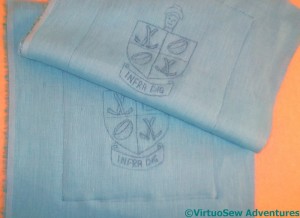
Dig Crests
Some time ago I started to work on a design for my version of the crest that John Pendlebury doodled for the dig on the first night after the expedition arrived. It was to be the corner design for one of the panel assemblies, matched by I’m-not-sure-what in the other corner.
In the process of my recent replanning, the corner design turned into twins – there will be one for each panel. The design has also become less spare. I am planning – as originally – to work all the lines in couched metal thread (one silver, one gold), but instead of leaving the background plain I am now intending to couch or stitch a background of spaced rows of wavy lines. Some of the small fragments of painted plaster from Amarna show such a pattern, and it will create some texture and density in the corners of the finished panels.
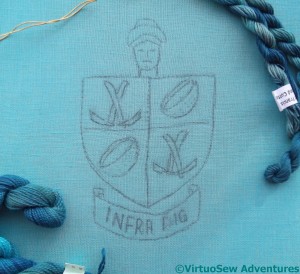
Auditions
I am using the remains of the gold thread I used for Christus Natus Est, but I’m still not sure what thread to use for the background. By the time I took this photograph I had already decided that I was going to choose a matte thread for the couching. This will help to bring the gold forward.
I had also already decided to use a variegated thread. The wavy pattern usually alternates rows of dark and light, but in this case I hope that the fabric will provide the light and the variations of colour across the background will give a sense of movement and “flow”. The couched metal thread will be very static and stiff, and without some sense of flow somewhere, the whole thing will look a bit pedestrian.
I have yet to make a decision here. The choice, unless I find some other thread which appeals even more, is between a pearl cotton and a stranded cotton. They are both from Stef Francis, and both are in the same colour sequence. I hope that when I have the gold done, the answer will come to me!
In the intervals of stitching, I have been wrestling in thought with the background to the second panel of the Dreams of Amarna. My original idea was to balance “The Map of Amarna” with “London to Amarna, 1929″, but I have been struggling to envisage how to set the elements into a harmonious pattern. Then I had a conversation with my mother, and did some more leafing through my photographic sources, and all my ideas turned upside down…
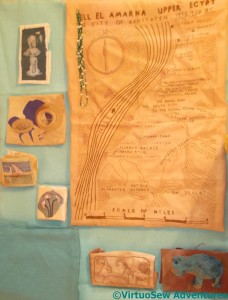
Rough Layout of the first panel
Here you see a very rough layout, to give you an approximate idea. I’ve laid out the Map of Amarna and the linen for the side and corner panels, and then put the patches on the side panels.
Of course, the patches won’t be set out in this arrangement. Not least, I am considering putting the cartouches of Akhenaten and Nefertiti on the horizontal panels, which will mean that there would be no space there for any patches at all. Fortunately I can double check that I have the right hieroglyphics, because the Egypt Exploration Society have been very helpful!
There is a fair mix of shapes and sizes of the patches, and the colours seem to be working well, so for the moment I am very pleased with the way this is looking.
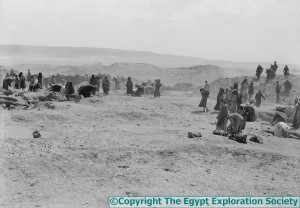
Scene At The Dig
Copyright The Egypt Exploration Society
And Panel Two?
Well, I am now thinking about showing the travel in patches around the sides, and showing a section cut from this photo of the excavation in progress on the main panel.
This will give me plenty of opportunity to use the different threads I used in the Map to differentiate all the people from each other.
At least, if I get it right, it will…!
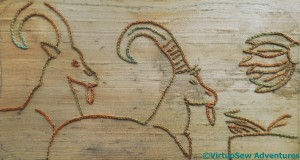
The Antelope Stitched
That didn’t take as long as I expected. Reverse chain stitch goes quite quickly once it gets started.
I am not at all sure what the elements to the right of the Antelope are intended to represent, but in the interests of completeness I’ve included them anyway.
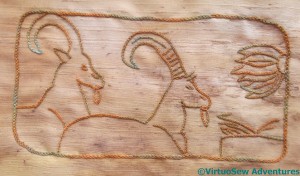
Finished and Framed Antelopes
I decided to stitch the frame after all, using the Hungarian Braided Chain Stitch I first used on The Crane Pot last year. It is structurally easy to get a grip on, especially immediately after an orgy of reverse chain stitch!
And furthermore, I’ve rather fallen in love with it – the intricate braided effect excites all my imaginative faculties!
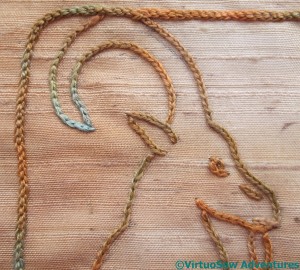
One Antelope Close Up
The slubby, handpainted silk is rather reminiscent of the sort of papyrus that tourists bring back, but rather than the garish coloured designs that are painted on those sheets, the subtle variations in the silk thread pull the impression back to resemble the stone in the original photograph. I also rather enjoyed the simplicity of a single stitch and a single type of thread.
I was really pleased, when I took this close up, to see how even the stitches were. This evenness hasn’t, in the past, come naturally to me – anyone who has ever received a handwritten letter from me will know that – but I think all the work on Thistle Threads Online University Courses is beginning to pay off!
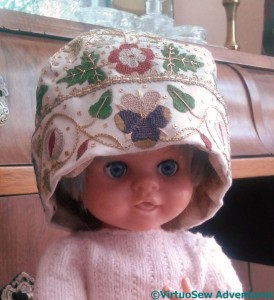
Mandy Modelling The Nightcap
Before we move on – here is the Glittering Nightcap, being modelled by Mandy, who was given to me for my first Christmas. My grandfather made me a cradle to fit her, and I intend to make some bedding, and some clothes for Mandy, to go with the patchwork coverlet my grandmama made for the cradle. Unfortunately, I carried Mandy around by her hair for years, so the hair you can see is a wig, which in turn meant that that when I found Mandy again I didn’t think any modern little girl would welcome her. The cradle, with bedding and Mandy will end up as a sort of display piece. Eventually.
In the meantime – doesn’t she look sweet!
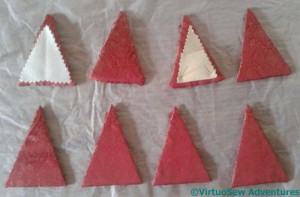
Etui Sections
The étui is made of triangular sections covered with brocade and mounted on brocade covered circles to create a little pyramid. Each external face consists of skirtex with padding covered with brocade, and then has a different element – a doctor’s flannel panel for needles, an ultrasuede scissor pocket, a pincushion, and a brocade pocket for stilettos or mellors. The ultrasuede is a real trial to stitch – very, very tough to get the needle into – but it’s done now.
Each face is backed by another triangle, of card covered with brocade, and the two slip stitched together. Then there will be the interesting challenge of mounting the triangles somehow.
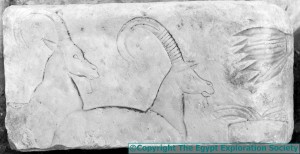
Antelope Carving – Photo copyright The Egypt Exploration Society
When I finished the Hittite Amulet, I didn’t have another piece ready to go, but feeling a little jaded with metal threads, I didn’t want to move straight back to the Tudor Rose… So I went rummaging in the wonderful selection of photographs that the Egypt Exploration Society allowed me to have copies of to use as reference, and found a photograph of a small piece of stone, carved with part of a frieze of antelope.
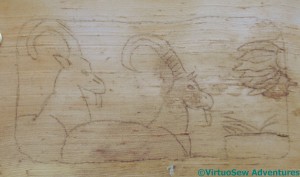
AntelopeFrieze
I transferred the design onto some handpainted silk using the prick-and-pounce method, and went over the lines with a pencil, then framed it up over a calico backing, picked out a skein of hand-dyed twelve strand silk and thought about stitches.
In the end I decided that what had attracted me to the photograph was the simplicity of the lines against the slightly uneven texture of the stone, and so I should make my version absolutely simple too.
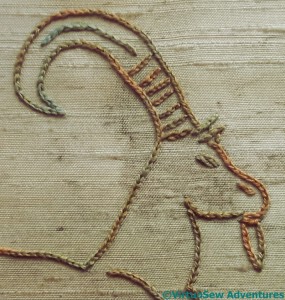
Antelope Close Up
With that in mind, all the lines will be in reverse chain stitch, worked as small and as evenly as I can manage without using a magnifier, for all the lines. Reverse chain stitch is so much easier than ordinary chain stitch when the fabric is in a frame!
I am thinking of using Hungarian Braided Chain, which I worked on the Crane Pot, for the edge, but I am also considering the possibility of not stitching a frame at all, but instead stretching the silk over a piece of skirtex cut to the shape of the stone.
This is a real contrast with the Glittering Nightcap – very simple and very “minimal”. Almost like a palate cleanser after a heavy meal!
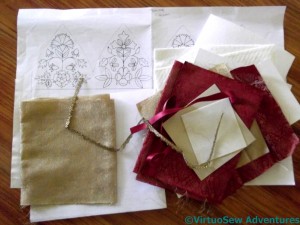
Materials To Finish The Nightcap
So now, having finished the embroidery, I need to assemble the Nightcap. In addition, Tricia has designed a stand for it, which is in the form of an étui. Consequently I have a rather distracting heap of brocaded silk, doctors flannel, ultrasuede, ribbon and gold lace. Not to mention batting and buckram…!
As I’ve said before, I am never entirely at ease finishing a piece into three dimensional form. So there was a slight hiatus while I gathered my courage to begin.
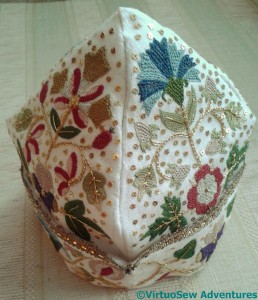
In Three Dimensions
I decided to finish the Nightcap itself first, as – not least – I was rather keen to see it!
The first stage was to add the lace to the top of the brim, and then create the shape by sewing up the seams on the crown. The lace was easy enough to apply, once the folds were in place, but sewing up the seams on the crown was surprisingly fiddly!
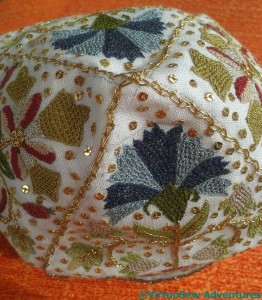
I had wondered, in looking at the instructions, why the seams were embellished with reverse chain stitch, and I think you can see why in this photo of the Nightcap finished (externally) apart from that detail.
Aerial View With Gold
As this picture shows! Admittedly the orange background also helps to bring the Nightcap to life, but the reverse chain stitch in gold is another detail – like the pearl centres on the Floral Glove – that adds sparkle and polish to the piece.
The next stage was to line the Nightcap – using a lovely pale gold silk brocade. Again, simple enough to state, but slightly tricky in execution!
Lining completed, another deep breath and pause prepared me for the next stage…
Beads Ready For Spinning
In “Nefertiti Lived Here” Mary Chubb describes excavating a necklace, and being reminded of a bead necklace she had as a child, partly by the delicacy of the necklace she was working on, and partly because the fact that she had no idea where it had gone gave some insight into how the excavated necklace could have been lost in antiquity.
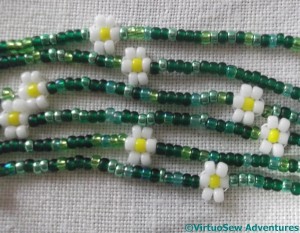
Of course, she didn’t describe the necklace very much – she only said it had daisies on it – but I want to include some trails of daisy embellished lengths of beading, hanging off the edge of one of the Dreams of Amarna panels. Beadwork is not a technique I’m very familiar with, so it’s yet another adventure into the unknown!
Bead Spinning
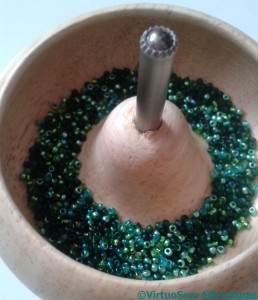
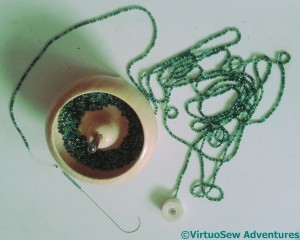
I wanted to make sure that there was some variety of colour in the green strands, and I used this “bead-spinning” pot to thread a random selection of green seed beads onto a strand. I got a little carried away here, because it took me some time to get used to the technique. I discovered that, strongly right handed though I am, it was more successful to hold the needle in my left hand, and turn the spindle with my right. In the end I had at least a couple of metres of bead strand waiting to be used, and I still have a metre left!
Close Up Of Strands
Here is a close up of the beaded strands I have created, with very simple bead daisies interspersed with lengths of the green beads. I’m rather pleased with it. It has the sort of delicacy that would have been considered suitable for a little girl in the early years of the twentieth century, and I can just imagine a small Mary gleefully rattling her beads and feeling very grown-up!
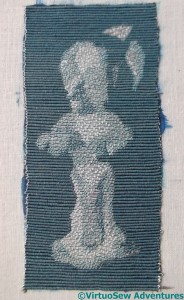
Hittite Amulet – Finished
Those who follow me on Twitter will have seen a Tweet full of rejoicings last week – I have finished the Hittite Amulet at last! He’s been quite a challenge, and required considerable stores of patience, but I’m very pleased with him. He’s looming out of the darkness very impressively!
I began working on him last July, and got rather less than halfway before I put him away in a boxfile before Christmas when I was getting ready for festive visitors. After Christmas, I decided to concentrate on the Glittering Nightcap, because I was beginning to fear that otherwise I would never finish it, and didn’t begin again on this fellow until May.
Since then I have simply persevered. I’ve not written about him, because in truth there is little to say. Or nué is a simple enough technique – in essence, satin stitch over a metal thread – it is just that there is a lot of stitching needed before any appreciable change is seen.
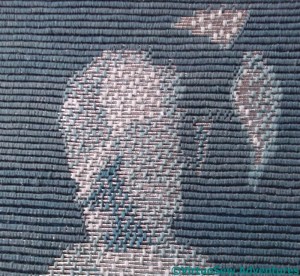
Detail Of The Head
Although it is a simple technique to describe, doing it well is less so. As you can see from the close up of the head, I’ve not managed to keep the rows perfectly even in their spacing or coverage. Perhaps, although I used pre-shrunk calico as the basis, I should have used two layers to make it sturdier (I hope not, it was tricky enough already!) or perhaps the waverings are owing to stitching over two rows at a time.
Now he can doze quietly in my Dreams of Amarna box while I continue with new pieces…
I had a skein and a half left of the dark silk, after all that panic buying last year. Getting quantities right is almost impossible.
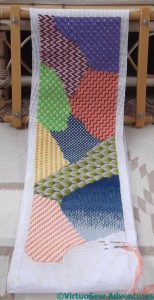
Two Thirds Done
We interrupt our normal programming…. to bring you your first sight of the whole Cushion.
Probably your only sight until I take it off the stretchers, too. As it turned out, getting the canvas rolled up neatly again, under sufficient tension, was really quite a task, involving two people and much changing of minds, as well as many rollings and unrollings. Furthermore, since the rollers are permanently set in their sockets, it won’t be possible to show the whole thing without taking it off the stretchers. I shan’t be doing that, because I really don’t enjoy the mounting process!
However, I can report that I am really very pleased with how it is going. I think I need another set of greens for the next section, since there seems to be a rhythm of sorts going on there. I certainly need something bright, with a bit of punch and impact. I like the last two sections — they work well together – but they are beginning to look a little too well behaved. It’s not quite as riotous as I was hoping…
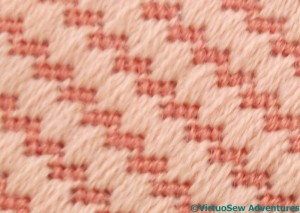
Moorish Stitch
Section Nine of the Crazy Canvaswork Cushion is worked in Moorish Stitch, a diagonal stitch to set against the crossed stitch of the previous patch.
There is one heathered thread in this pattern – the solitary tent stitch vertically separating the short dashes. That’s turned out a bit too subtle, but it does help to maintain the difference between Moorish Stitch and Jacquard Stitch, for example.
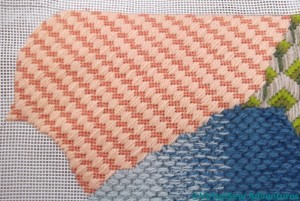
Section Nine
This patch took longer to do because as the weather warms up, wool becomes a less appealing material to work in. In addition, the main, peach wool proved to be rather harder to separate that I expected. It’s labelled Paterna, and should be exactly the same as all the other threads, but it was harder to strand, and has slightly less sheen.
Now I need to pick a stitch – I think it should be a straight stitch, with pattern that runs horizontally – and then pick the colours for Section Ten…


