
Tag: online university
Finally Finishing The Embroidery on Eve In The Garden of Eden
Coiled Silver Wrapped Strip Added
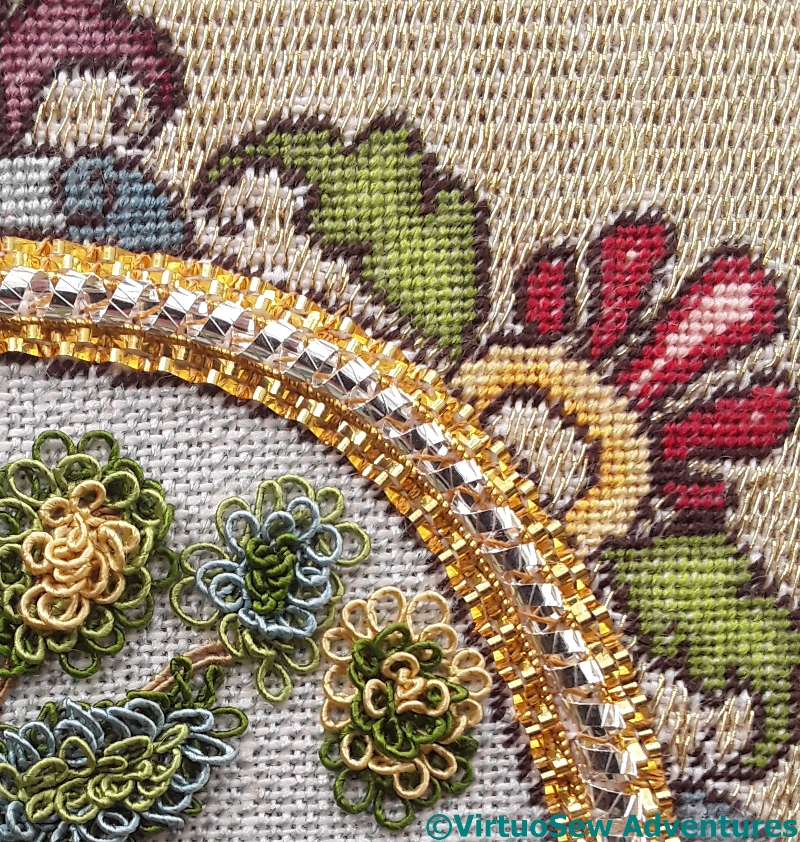
The Coiled Wrapped Silver Strip finishes off the metal thread frame for the cartouches beautifully. It fits between the rows of crinkle strip and pearl purl, and almost balances on top of the pearl purl, so it’s raised quite high.
And once the first cartouche frame is finished, there’s the second one to do!
Webgimpe Added
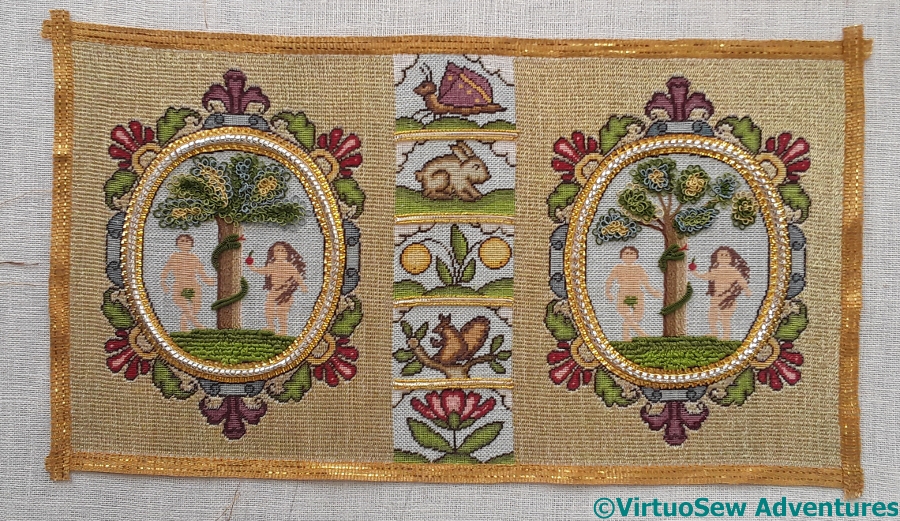
Then, finally, the last stage before the adventure of turning it into a box is to add the gold webgimpe, which is a rather stiff woven ribbon.
I know it looks a bit twisted, but the next stage is to block it. Then I have to tackle the question of glue again. It will be a while before I tackle that challenge!
More Goldwork for Eve In The Garden Of Eden
Very Fine Pearl Purl Added
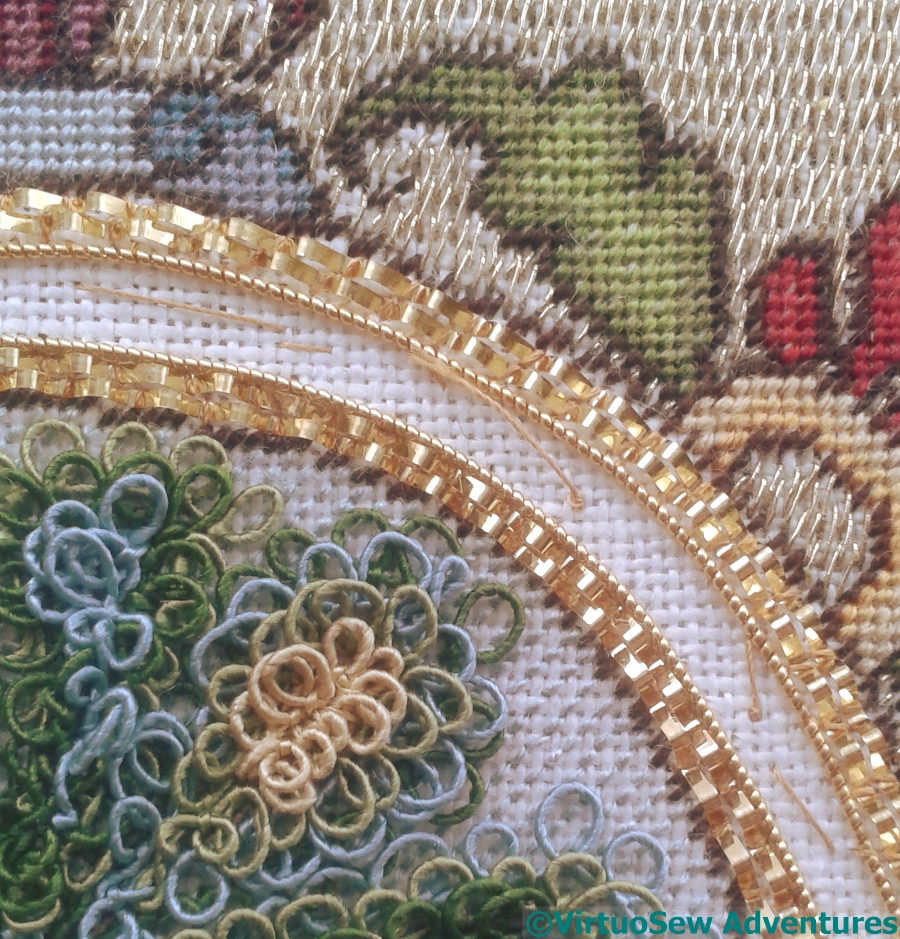
The next stage in the goldwork cartouche frames for Eve in the Garden of Eden was to add a row of very fine gold pearl purl inside each double row of the crinkle strip. Now, this doesn’t need a stitch in every gap – it’s more like a very fine, very tight spring, and follows curves quite well – but it is quite fiddly and concentrated, and there’s rather a lot of it. Fortunately I did each cartouche individually, so I had a rest from pearl purl while I tackled the next stage….
Twisting Silver Strip
Which was this!
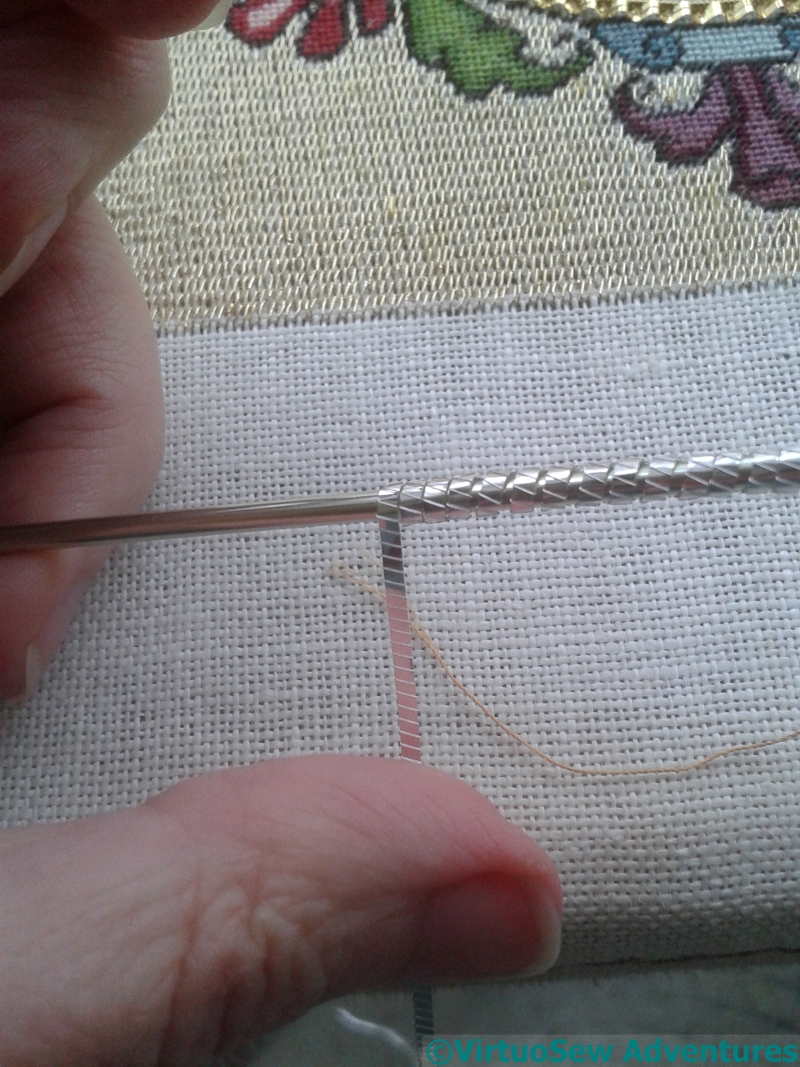
The Silver Strip which was to be the central row of the cartouche frame arrived flat – or at least, loosely coiled in its box. In order to spring to life and create a gorgeous, opulent central row for the cartouche frame, it had to be coiled into a spiral around the second of the knitting needles that arrived with the kit.
One of the things I enjoy about Tricia’s courses is that sometimes our materials require further elaboration before we use them…
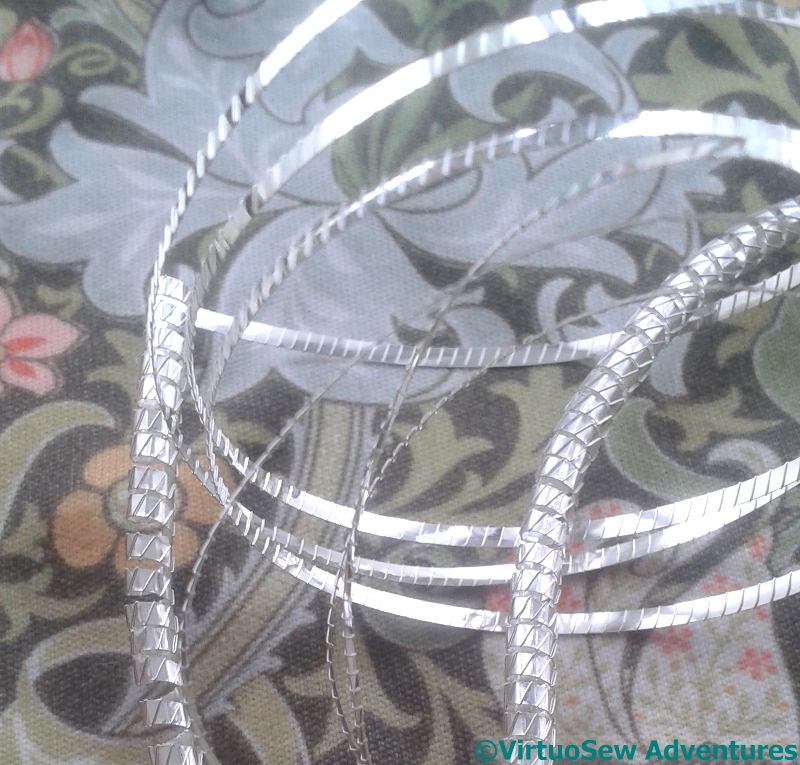
Half Twisted
Here you can see the texture of the Wrapped Silver Strip. I think it is engraved or embossed, rather than actually wrapped, but it does add to the general variety of response to light, and that, after all, is part of the reason for having metal threads on an embroidered piece….
You can also see how the effect is enhanced by twisting the strip into a spiral!
Adding Goldwork to Eve in the Garden of Eden
Spine Embellishment
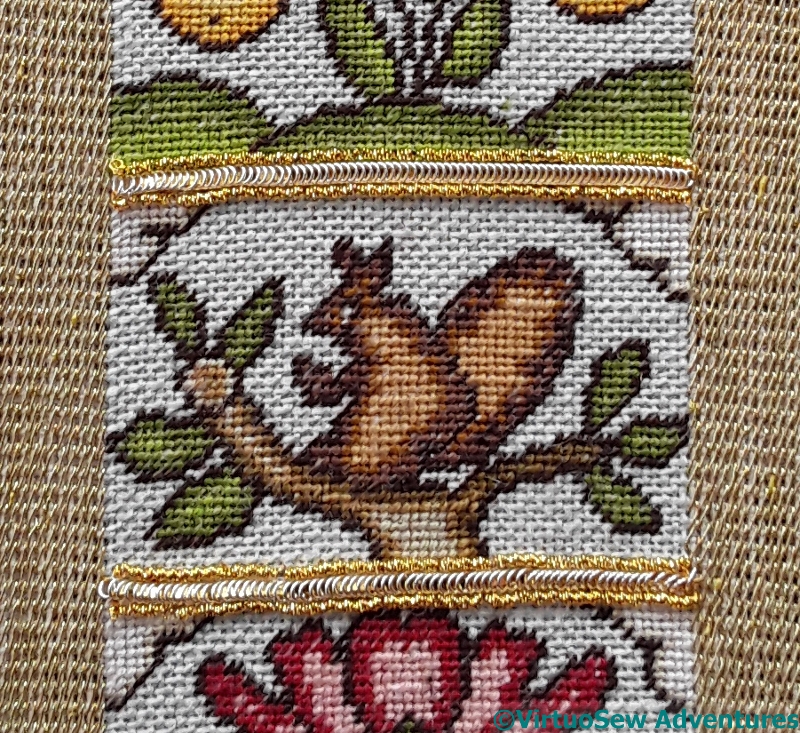
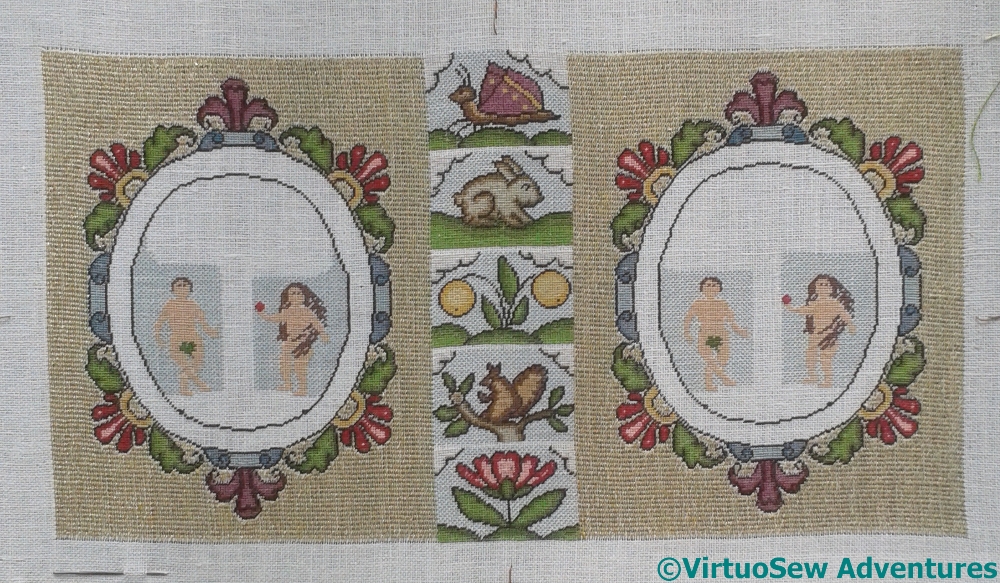
Once the foliage and the snake were done, I could start on the goldwork.
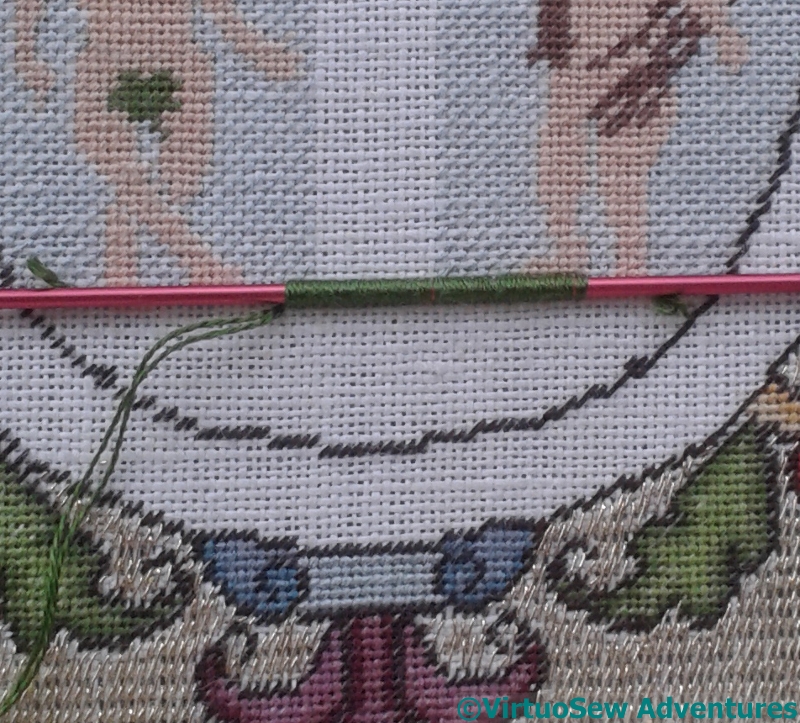
First, the spine. Each gap between the polychrome panels was filled with three rows of metal threads. The middle one was silver wrapped around a gilt strip, and the two outer ones in each case were of a very fine check purl. This last was very fragile, and if I had realised in advance just how fragile, and how inclined to catch on cuffs, sleeves, and threads, I think I might have worked the spine last.
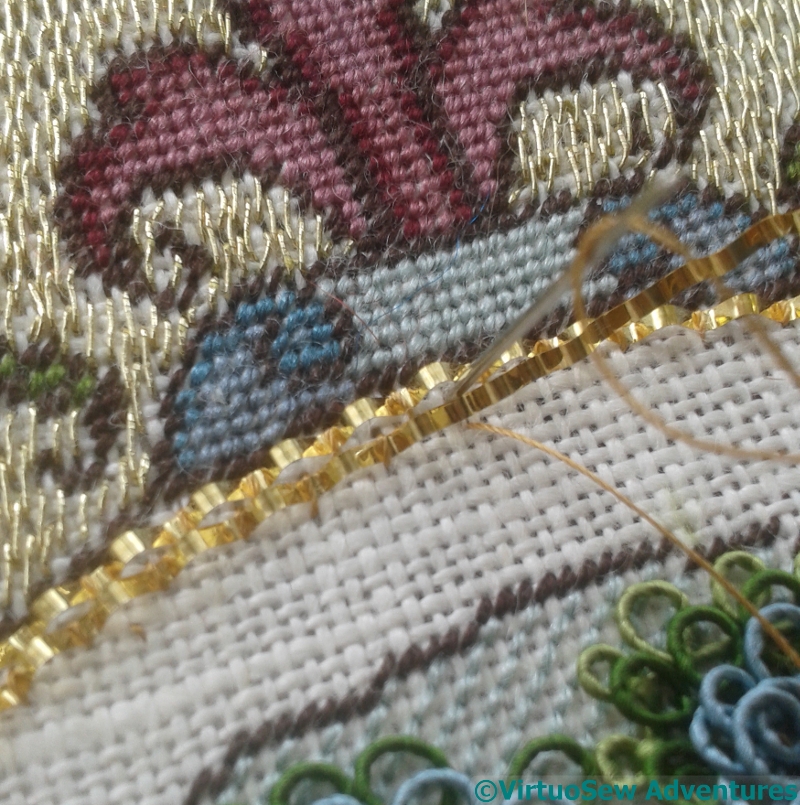
Gilt Crinkle Strip
The goldwork around the cartouches began with four rows of Gilt Crinkle Strip, two couched around the outside of the frame, and two around the inside.
The instructions said to place a couching stitch in every valley of the crinkle, which was certainly necessary – it doesn’t willingly follow curves when it is couched flat – but I might not have thought to do without instruction. It makes for a wonderful effect, if rather visually confusing when you’re working it, because the hills and valleys of the crinkle strip bounce light every which way, in a rather delightfully dazzling fashion…
You might think, by the way, that this is fairly straightforward and done in no time at all. You’d be wrong! That Gilt Crinkle Strip looks lovely, but my word, it has a mind of its own, and being very springy and having lots of little corners to catch, it makes a spirited attempt to tie itself in knots. A third – and even fourth – hand might have helped!
Overcoming the difficulty

Second Tree Done
It took me quite some time – several weeks, in fact, before I got myself over my frustration with “Eve”, gathered up my patience and my courage, and had a go at the second lot of foliage.
The curls of gimp are a bit tighter, and more closely packed than in the first one, and the bunches of foliage are spaced out a bit to allow the branches to show through. There was a great deal of muttering, and I spread out the frustration by doing one clump at a time, then getting up and doing something else instead.
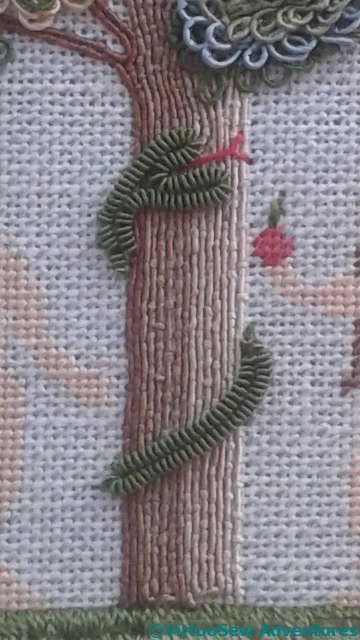
Snake In Silk Purl
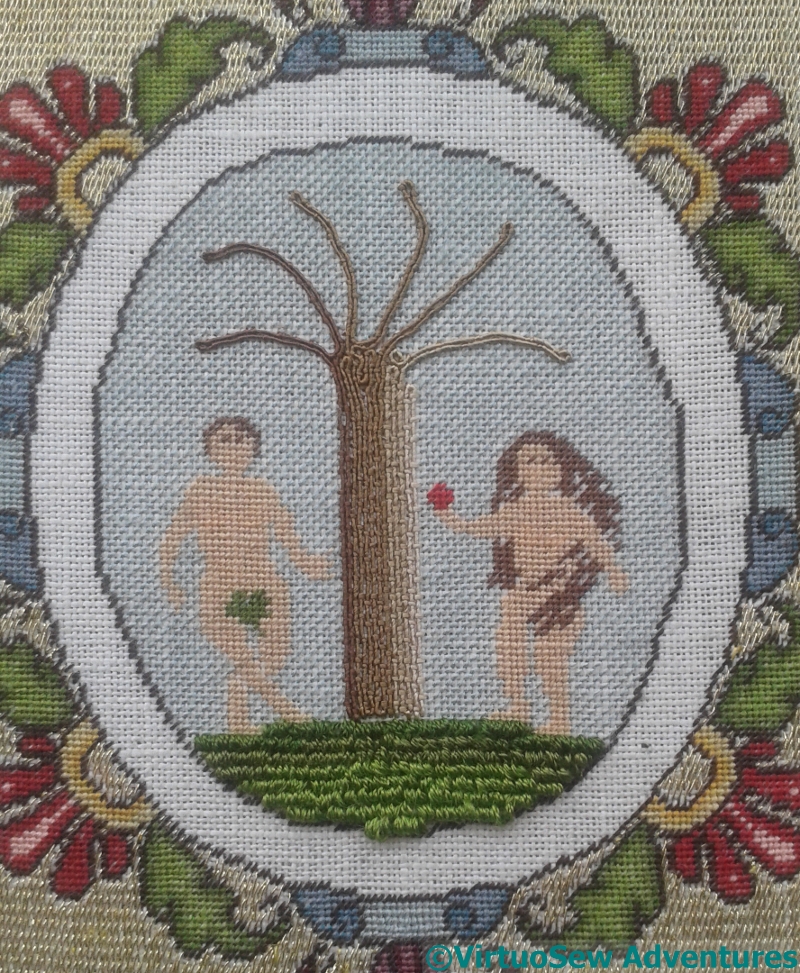
Naturally no garden of Eden can be complete without a Snake. In this case, using green silk pearl purl, carefully couched down in two sections to create the head (with flickering red silk forked tongue) and then the tail, to give the impression that the snake has wound itself around the tree.
I rather enjoyed the Snake (both of them!), because I only seemed to need the two hands I already have, rather than the three extra that seemed to be needed for the foliage! The silk thread used to couch the pearl purl also made a leaf for the apple.
And now I’m ready for the next stage…

Both Snakes Added
Foliage for Eve In the Garden of Eden
I Decided To Do The Sky
I really should pay more attention to myself. I have said before that trying to work around edges is work for fools, and that often it is worth doing more stitching than is going to show. In the end I decided to listen to myself and do the whole sky.
If I’d done that before putting the trees in, however, the stitching would have been less fiddly and the experience, less frustrating!
Making The Foliage
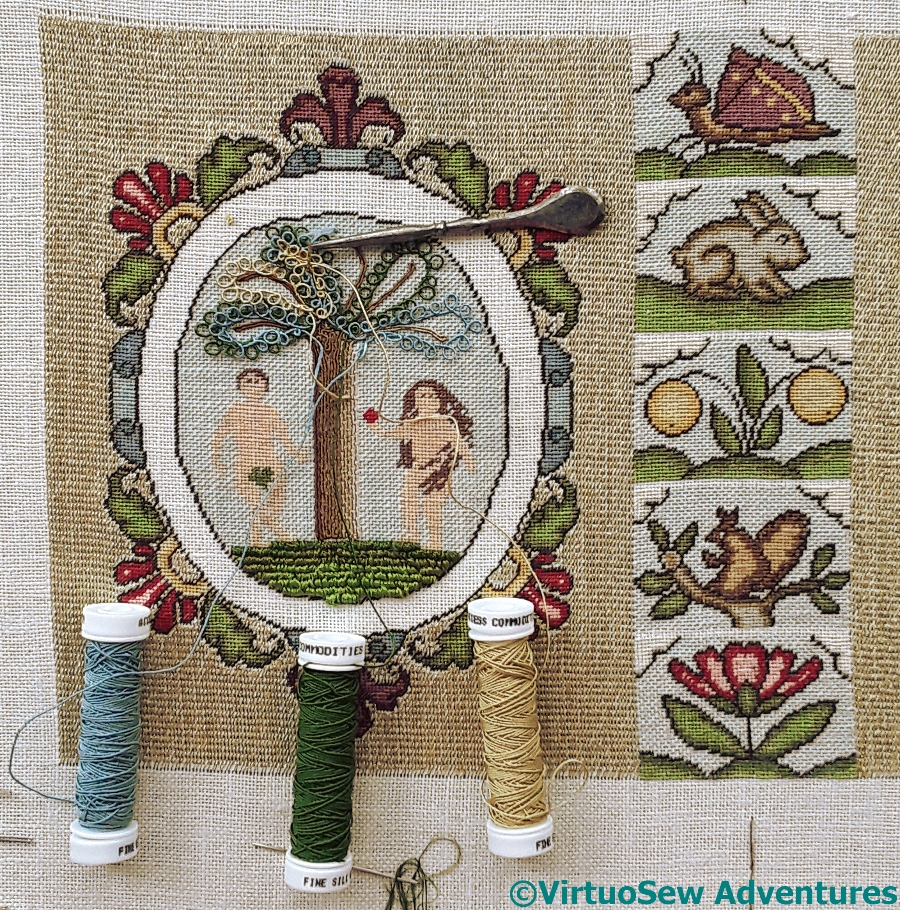
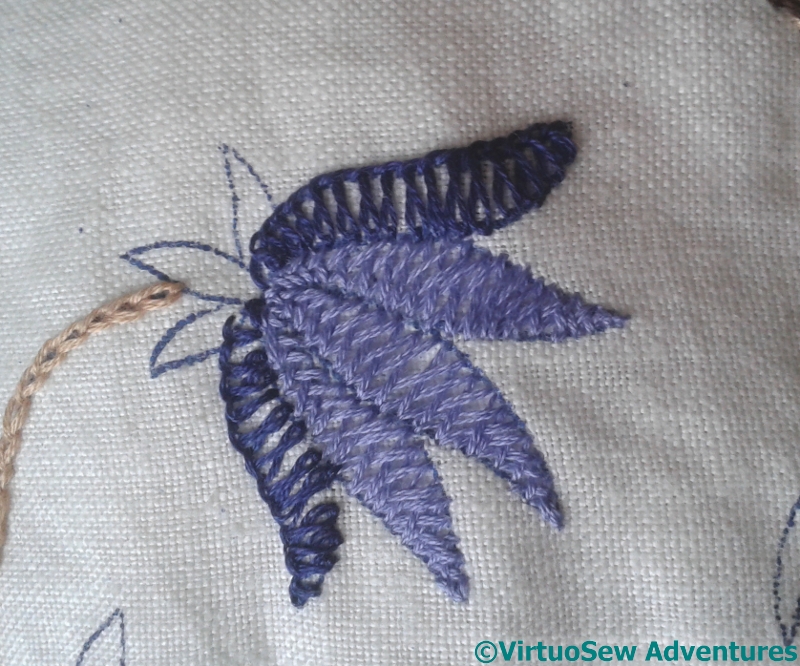
The next stage is to add the foliage, more silk gimp couched with Soie Ovale, but this time couched in little curls.
I had been looking forward to this, as it looked rather entertaining in the photos, but thus far I haven’t enjoyed it at all. I’ve got myself tied in some terrible knots, and I’ve ended up cutting the gimp more often than I like.
I need to rethink how I tackle this, look again at the photos and instructions, and try to work out why I’ve ended up with something that looks congested and floppy, both at the same time. I also need to work out, if possible, how to hop from section to section, rather than cutting the gimp.
17 UFOs in 2017 – August
More Progress On Eve
Now I’ve got Eve out again, it’s fairly romping away, which means I genuinely have progress to show for Meredithe’s “17 UFOs in 2017“. At least, it is romping away when you consider that everything has to be done twice…! The second hillock took a couple of afternoons (I try not to work at the frame for too long at a time, in case it makes the shoulder worse again!), and then I got started on the trees and their branches.
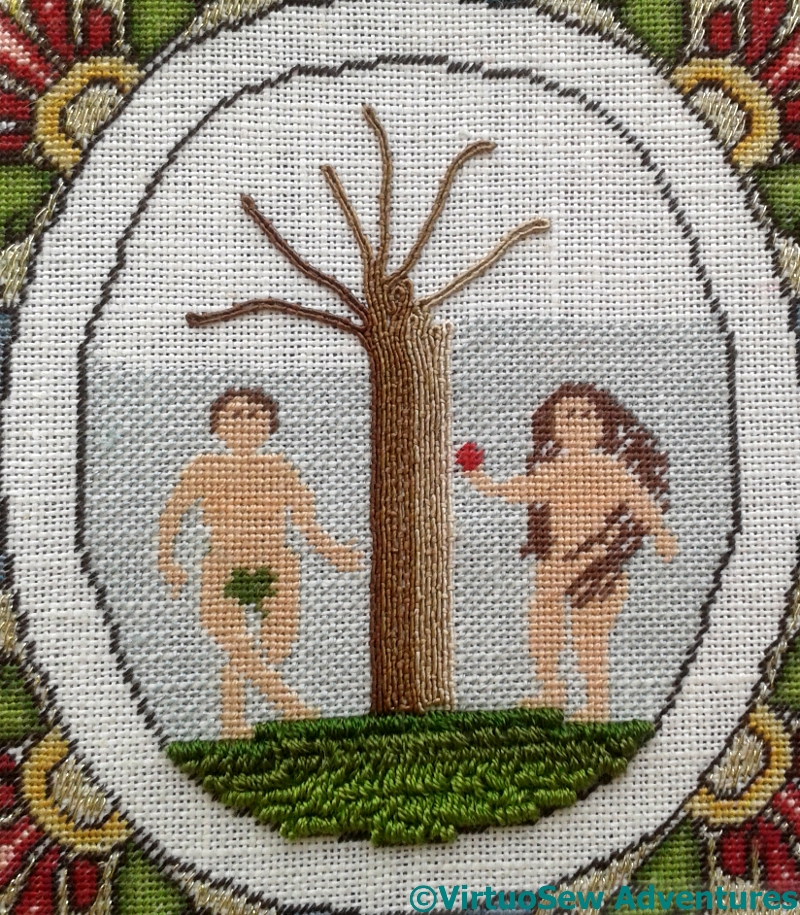
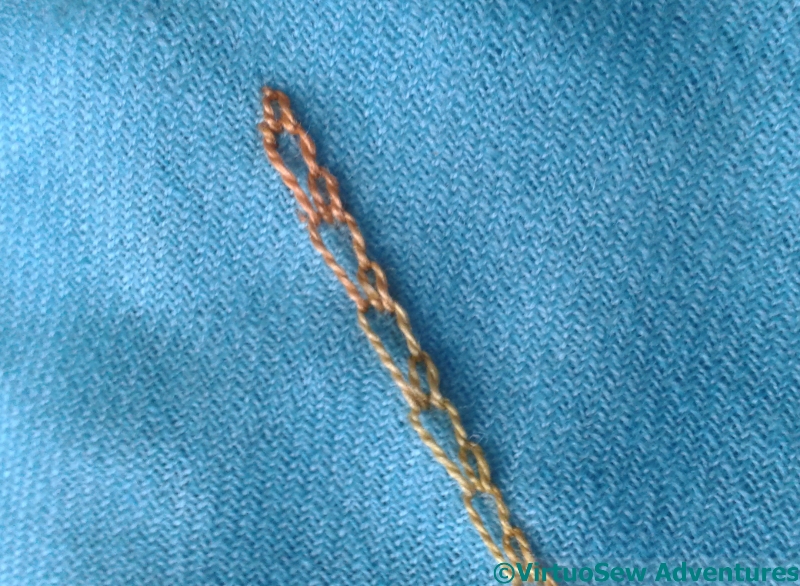
Trunk And Branches
The trunk and branches are of couched silk gimp. The kit included four different colours of gimp, with the accompanying Soie Ovale, for couching, and each colour is couched as a single length. It’s expensive stuff, and you end up using three or four inches at each end for plunging and finishing off. Most of the branches will be covered by the foliage, also in couched gimp, but I’m pausing for a moment to consider whether I want to fill in more of the sky.
Pashmina
Lilac Flower
And as if that weren’t enough, I’ve also finished the gold border on the Nefertiti Shawl, and made a start on the four lilac flowers for the travelling project!
More Progress – at long last
Gold Stitching Done
Those of you who follow me on Twitter or Instagram will have seen some rejoicings over the weekend. I have been working on the gold stitched background for the polychrome tent stitch for what seems like forever, but in fact it is less than a year – I began the Elizabethan Ground Stitch in October of last year. A serious shoulder problem interfered with my work at my floor frame at one stage, and then I was all taken with with my ideas for the Head of Nefertiti, so it was only recently that I got back to it. And now I have finished that laborious stage, and I can move on to the more complex and intriguing techniques which were the whole reason for taking the course.
Starting The Hillocks
For instance, this one. Tricia describes this as a variation on Velvet Stitch, worked in silk thread over what I presume is a fine double ended knitting needle. It makes a perfect spacer for the pile of the stitch, anyway, and arrived with all the other bits and pieces.
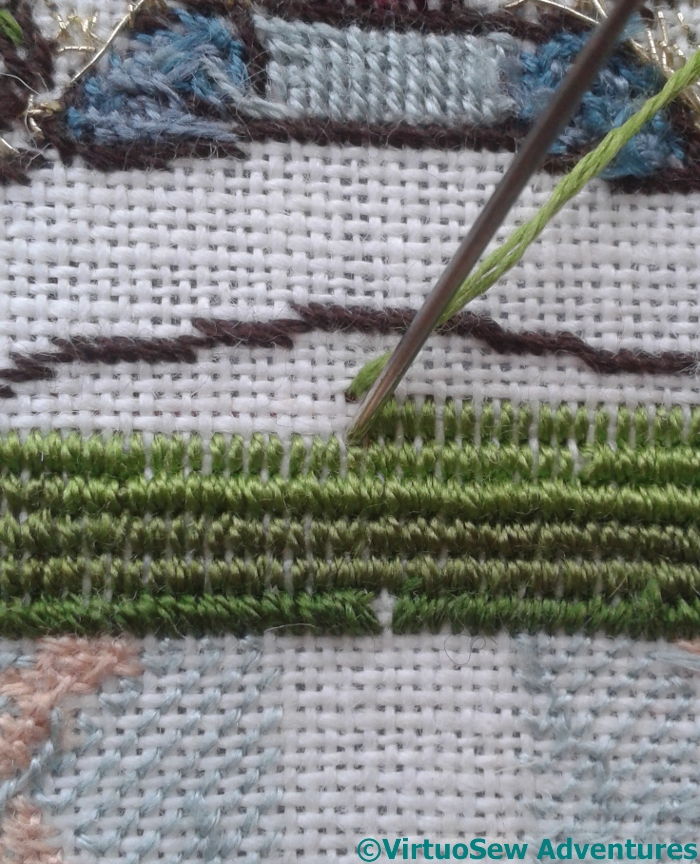
Better Worked From The Back
Tricia tells us to come up through the already occupied hole, to avoid pulling the thread through to the back and reducing the pile. I went a step further and worked it from the back, ensuring that I kept the stitch neat and the stitching going up through the right holes!
I must admit I enjoyed this, simple, and straightforward, but with just enough challenge to keep me awake and alert.
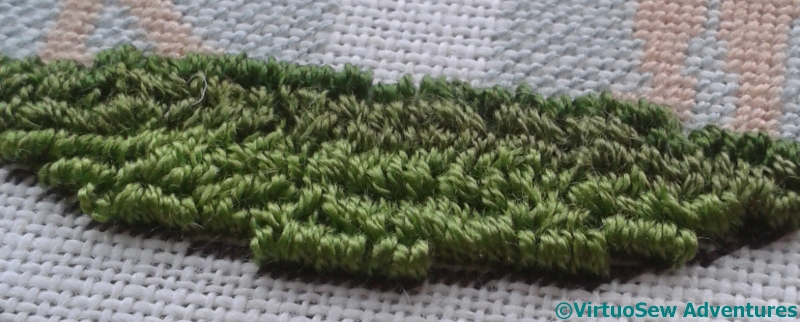
A Sideways View
And here is the first hillock, finished and fluffy. It looks as though it would be beautifully soft underfoot, doesn’t it!
Well, At Last!
Rejoice with me!
I have finished the polychrome tent stitch on Eve In The Garden Of Eden!
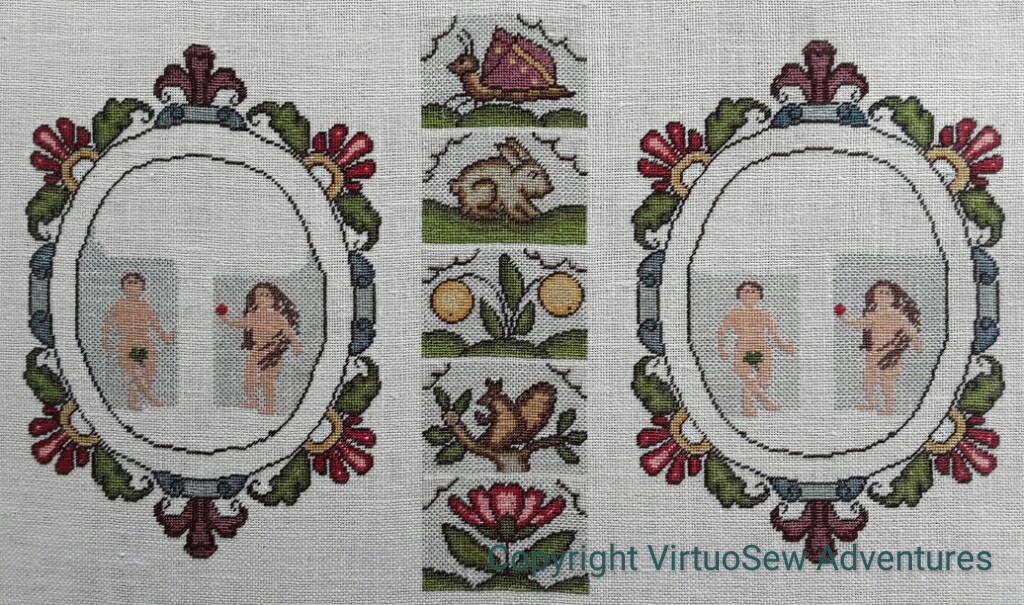
It has taken what felt like forever (although the post describing the start is less than a year old, as it happens), because firstly, I have to do counted work in short bursts or it drives me up the wall, secondly it is very fine and required a magnifier, and thirdly – there’s a lot of it!
In fact, to be strictly accurate, I haven’t quite finished, but that is because the skip tent backgrounds for the cartouches reach under the trees, and I want to decide how leafy I want to make them before I do miles of tent stitch that may all be covered. But I feel as though I’ve reached a milestone, so please don’t rain on my parade!
Progress on Eve In The Garden Of Eden
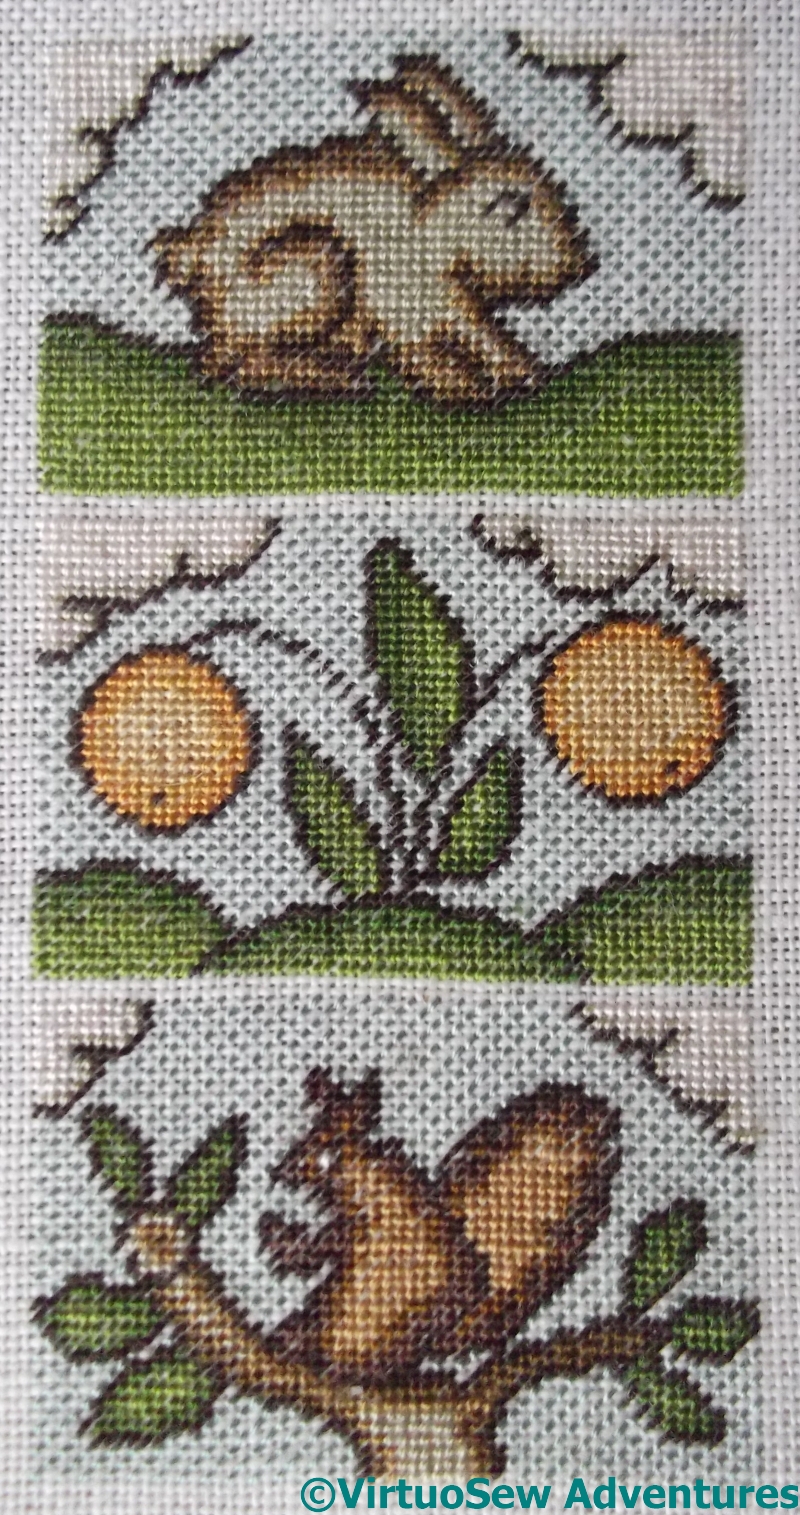
Progress on the spine
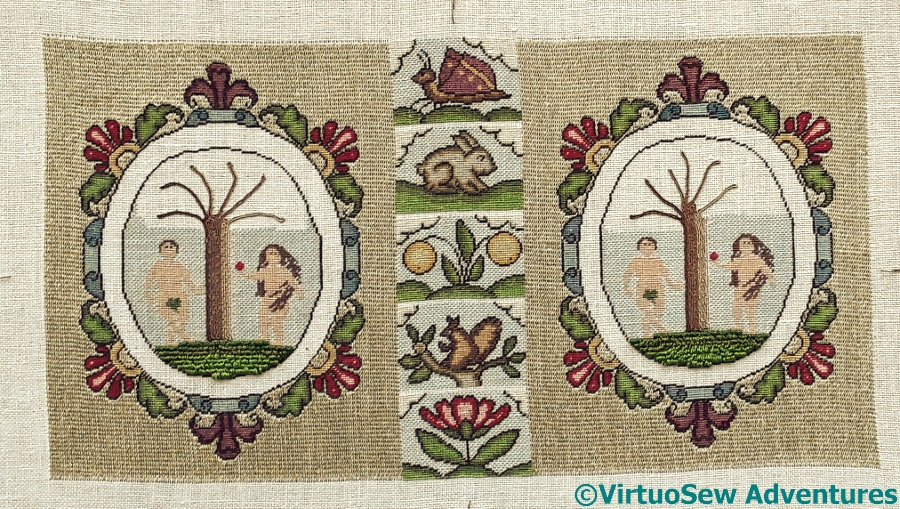
After all those good intentions, I’ve rather fallen behind with “Eve In The Garden Of Eden”. It’s not that it’s difficult – rather fine, requiring the use of the magnifier, but not especially difficult. Unfortunately I’ve only got as far as three of the five panels on the spine of the bookcover. There are two more little panels on the spine, and then two identical ornamental frames, back and front, showing Adam, Eve, the Tree Of Knowledge, and the Snake. And that’s before I start on the complicated bits!
Reasons/excuses for the delay? Well, I moved over to the Canvaswork Angel over Christmas (it seemed more appropriate somehow!), and then I was blindsided by the The Great Lady’s Magazine Stitch Off. Not that I am complaining, you understand – it’s been fascinating to begin finding out about the early days of periodicals and to see the designs provided for subscribers, especially as even more are beginning to come to light!

Another Parcel
And now I have been reminded that I really need to get on with it, because the finishing kit has arrived, including some rather lovely silk brocade, and some fancy threads I’ve not come across before.
Still, I need to finish that pashmina first…
Eve In The Garden of Eden Bookcover
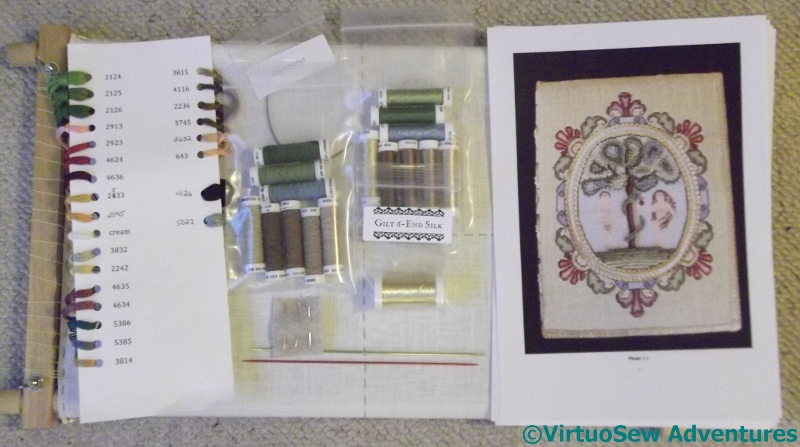
Garden Of Eden Kit
There’s another Thistle Threads course starting, a book cover called “Eve In The Garden Of Eden“, and I was highly intrigued by it.
I was even more intrigued by two of the items that came with the first kit. They look rather like double ended knitting needles, but the picture doesn’t seem to included anything knitted. The kit also includes an assortment of gimps, a gold thread, and a wonderful selection of silk floss. I’ve fallen in love with silk thread since I started following Tricia’s courses, and while I still find uses for my cotton, linen, and wool, silk is always a treat.
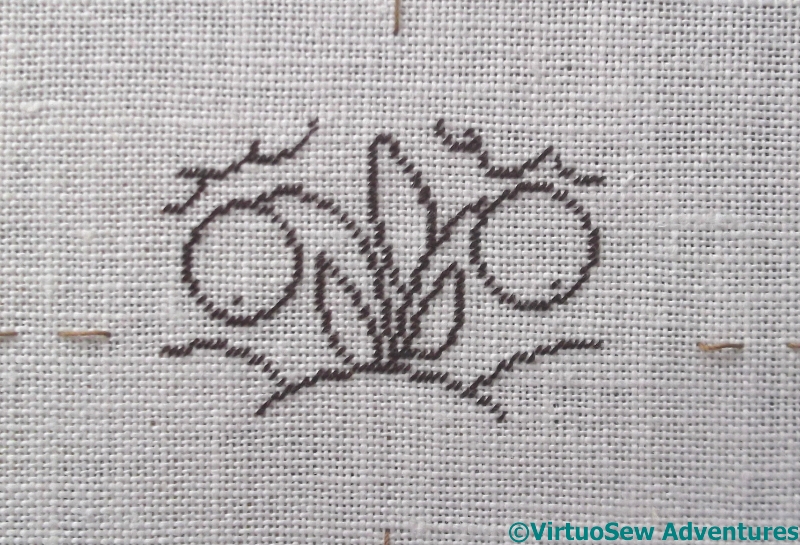
Getting Started
The first stage is all in tent stitch. The fabric is 30 count, which is fine enough to that I have been using both my goosenecked magnifier, and my magnifying glasses. This is the central panel of the spine. I’ve decided to enlarge the chart before I do any of the colour stitches, because the chart is a bit small, but I’m rather pleased with it so far.
I’m going to try to keep up with this course, because I’ve just seen that there is a Stumpwork Lion course being planned, and he looks wonderful!