
Tag: interior decoration
Yet another idea!
Long time readers of my blog know that I use it, not just to talk about the embroidery I’m doing at the moment, but also as a place to put some of my ideas, in the hope that the Search facility will help me find them again, rather than having to paw (I use the word advisedly!) through stacks of paper and notebooks. This is one of those posts!

Some of you may recall that the Association of Mouth and Foot Painting Artists used to send out, not just cards, but little sheets that had angels printed on them. You could press them out and curve them into a cone shape, making a charming little Christmas decoration. I was reminded of them when we got the decorations out of the loft, and found a whole boxful!
It occurred to me that I could use a variation on that little pattern to create a needlelace Nativity scene.
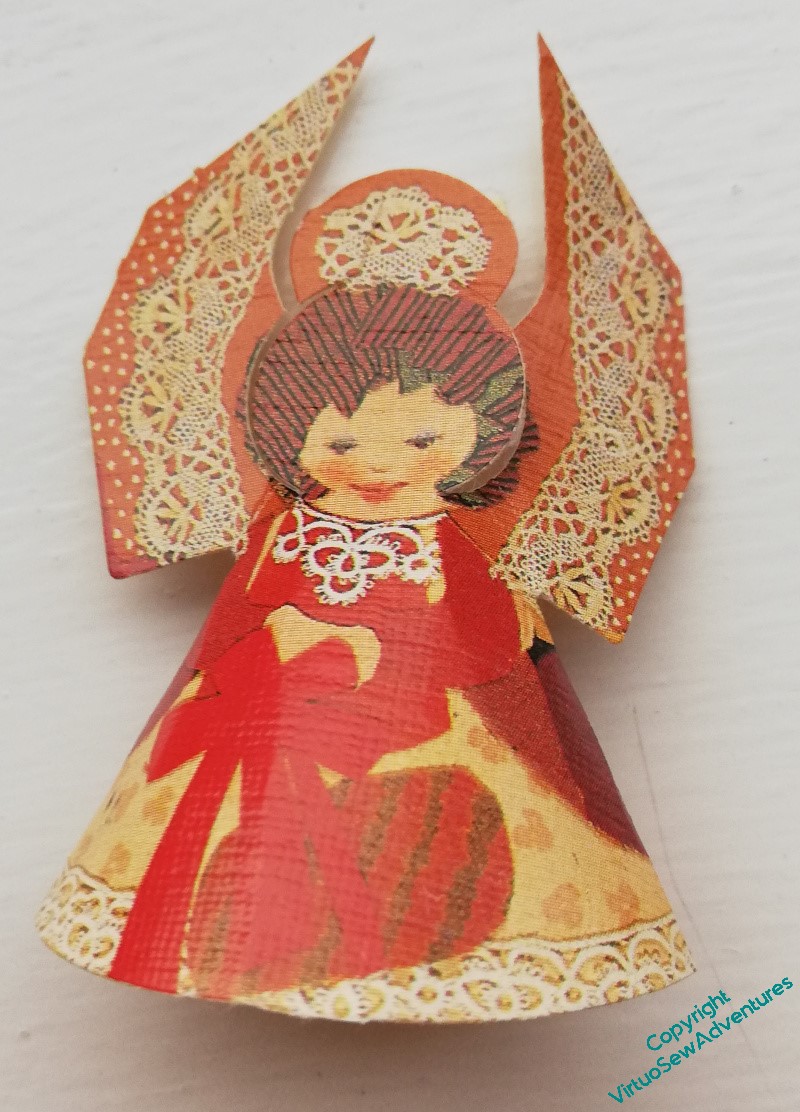
That idea became a bit clearer when I looked at a few of them. If you look at this one, the angel’s wings have clearly been made to represent fabric with a bobbin lace edging laid over it, and if that necklace isn’t based on a piece of tatting, I have never seen tatting before!
Clearly, I would want to tweak the shape a little. Only the angel, of the characters in the Nativity, needs wings, and besides, I think a bit of variation in height would be advisable!
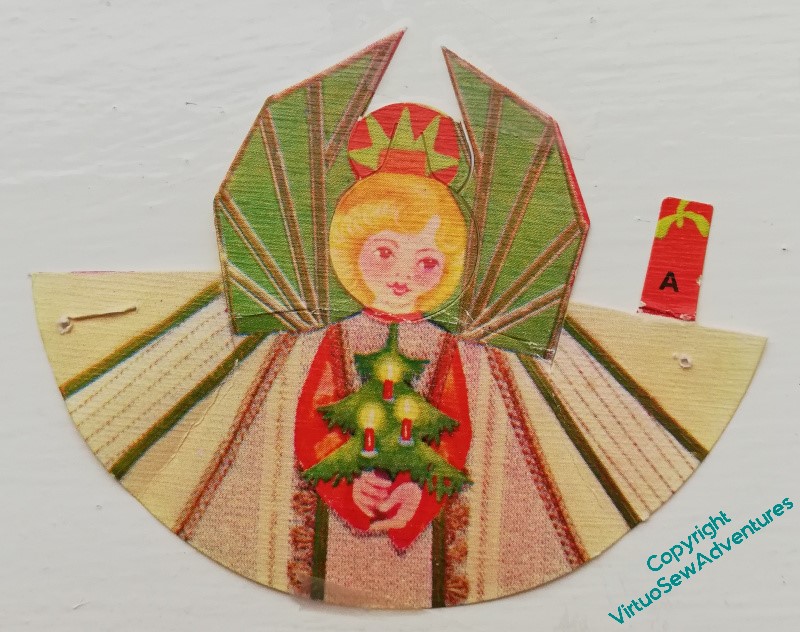
The basic shape can be seen when you open one of them out. The wings wouldn’t be hard to remove, for those that don’t need them. But the shape is fairly simple, and it would mean that I could use really gorgeous thread and stitch, allowing the thread and the stitch to do all the work.
I doubt I will be tackling the idea any time soon – I still have to work out how to create the Baby Jesus in the manger in much the same style! – but I think it would be fun to do.
A tree for the trinkets..
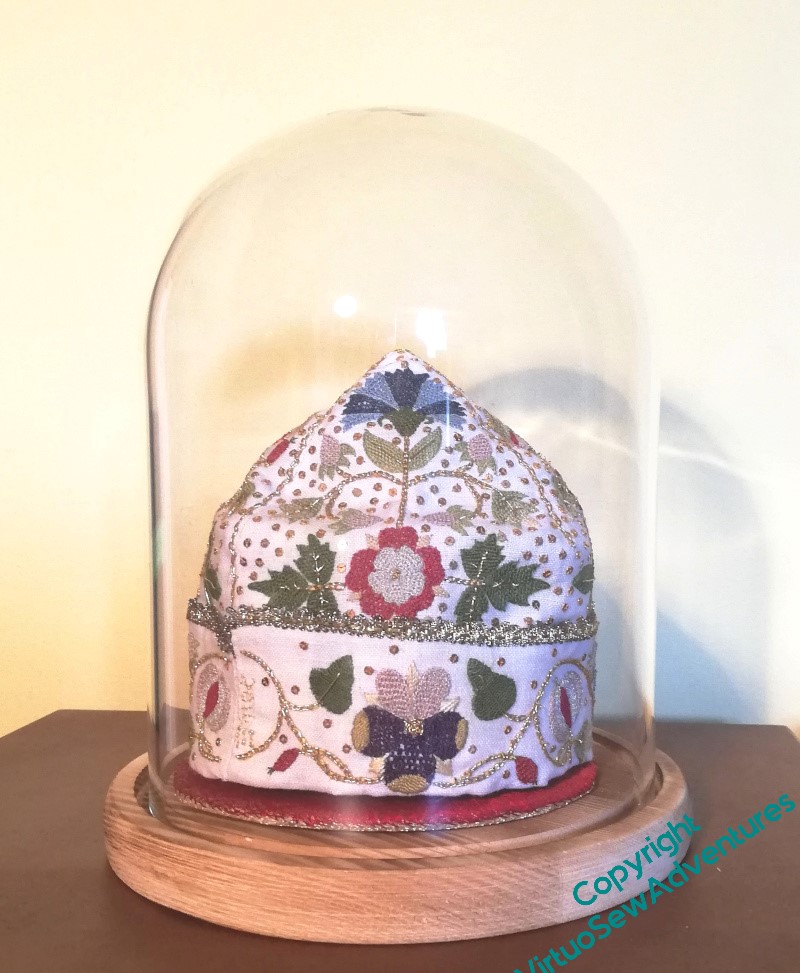
When I had the idea about using a parlour dome for the Violets and for the necklace, I realised that I would need to play with how I displayed them, trialled the Tudor Nightcap in the dome and realised that I could now put it on display.
So what about all the other Thistle Threads pieces?
Well, it turns out you can get parlour domes that aren’t round, so I got the largest I could bring myself to buy and then stopped to think…
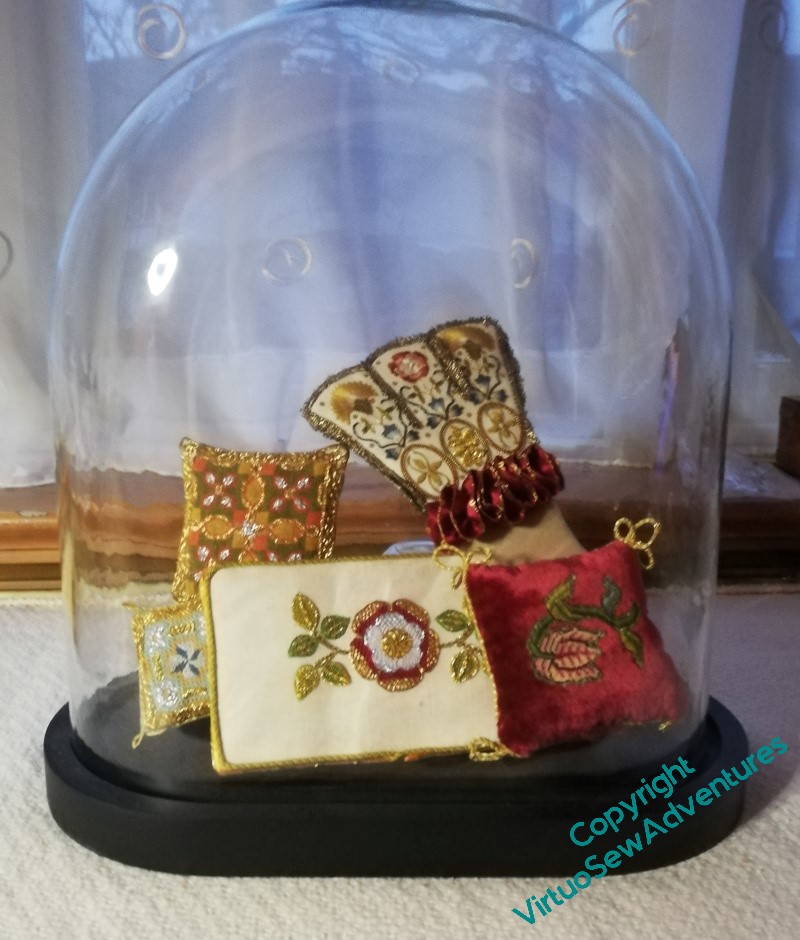
I started by playing around with propping the various pieces I’ve been planning for that Winter Decoration Corner against one another within the dome. It’s a flattened oval, and quite high, but anything I could improvise seemed not to have the height I wanted without taking up all the display space.
I think this shows the idea will work, but it doesn’t really have the presence that the pieces deserve.
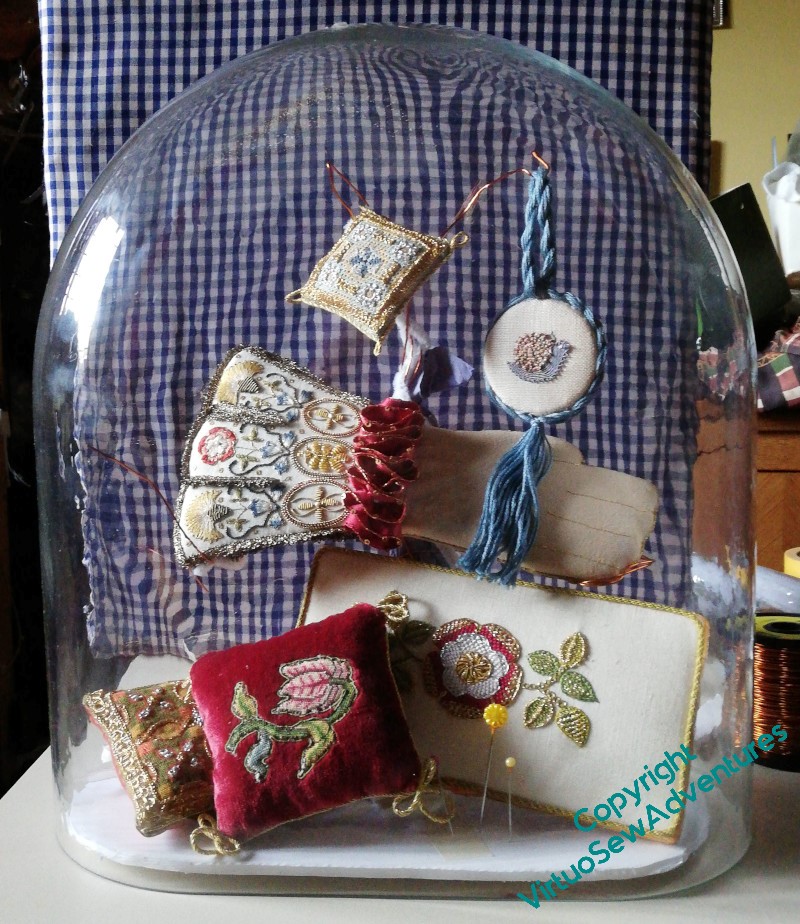
This is better. I’ve used offcuts of the foamcore that I bought to help me with Nefertiti and Akhenaten to create the base that will sit inside the glass, sandwiching the beginnings of the wires forming the tree between two layers. I’ve built up a support for the green and orange cushion at the back using smaller bits of foamcore, and wrapped pipe cleaners around the wires.
It’s not perfect, but I’ve set it up in the hall where I will pass it every day, to work out whether I like it. Then the idea is that I will have a lovely messy hour or so covering the wire with papier mache, allow it to dry, and paint the whole thing gold.
The Tudors were as fond of bling as the ancient Egyptians, after all!
Mending a tablecloth, second stage

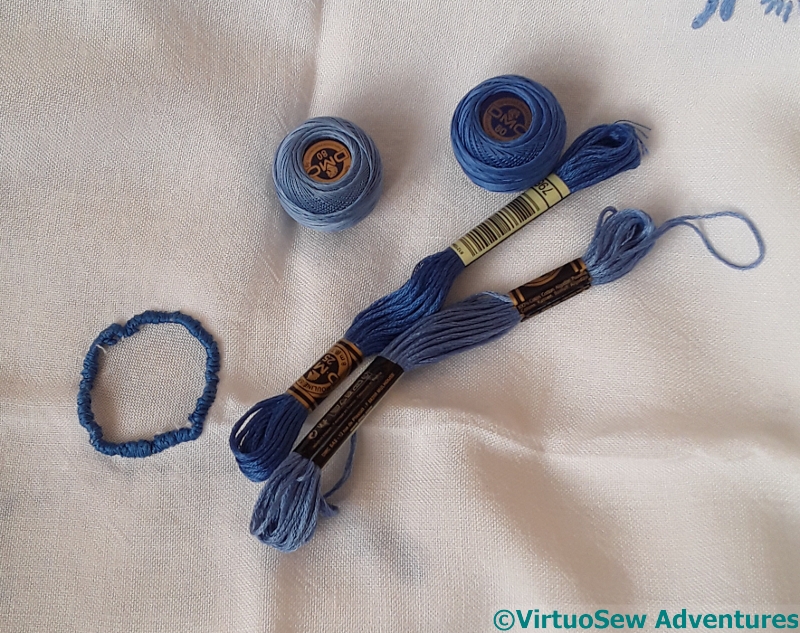
Having settled on a smaller circle, but still worried about the stability of the fabric, I paused for thought.
I’ve used tear-out fabric stabiliser underneath the fabric, and placed a circle of it over the previous overcast stitch ring so as to leave trimming out what isn’t wanted until the last moment. It’s now enclosed between two layers of stabiliser, so I shouldn’t catch my needle in it.
And this is definitely a case for using a hoop. Most of my Amarna pieces have been worked in slate frames or bar frames, and the Jacobean coat is being worked in the hand, but a table-sized piece of fabric of which a small element is the focus requires a more limited approach!
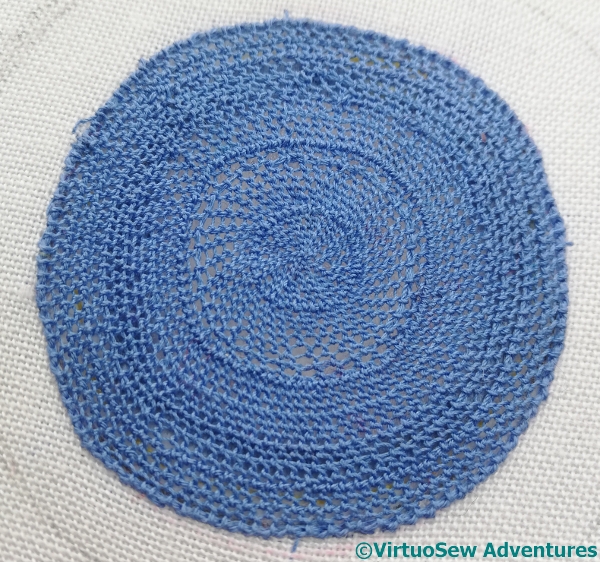
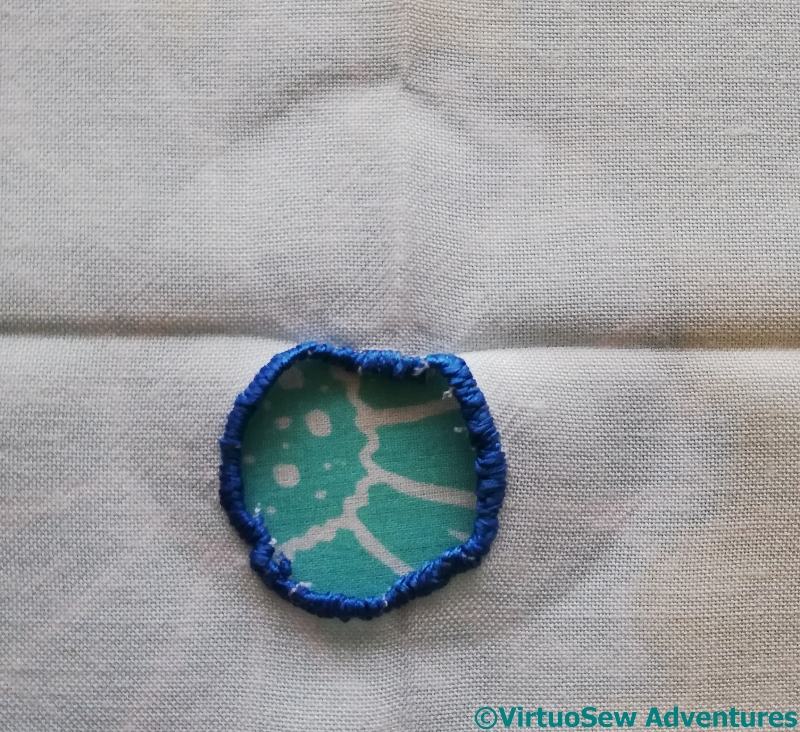
I decided in the end to use simple cloth stitch for the needle lace, but of course, choosing to work it in a circle rather complicated matters! I had to use several lengths of thread, so it became a matter of concern to make sure that firstly, there was no chance of it coming undone, and secondly, weaving in the ends made sense!
It was also important to bear in mind that while classical, straight cloth stitch has a free “return” stitch, I couldn’t expect to keep control of a “return loop” in my circular variant. So instead of that, I whipped the base of the stitches to create the heavier line.
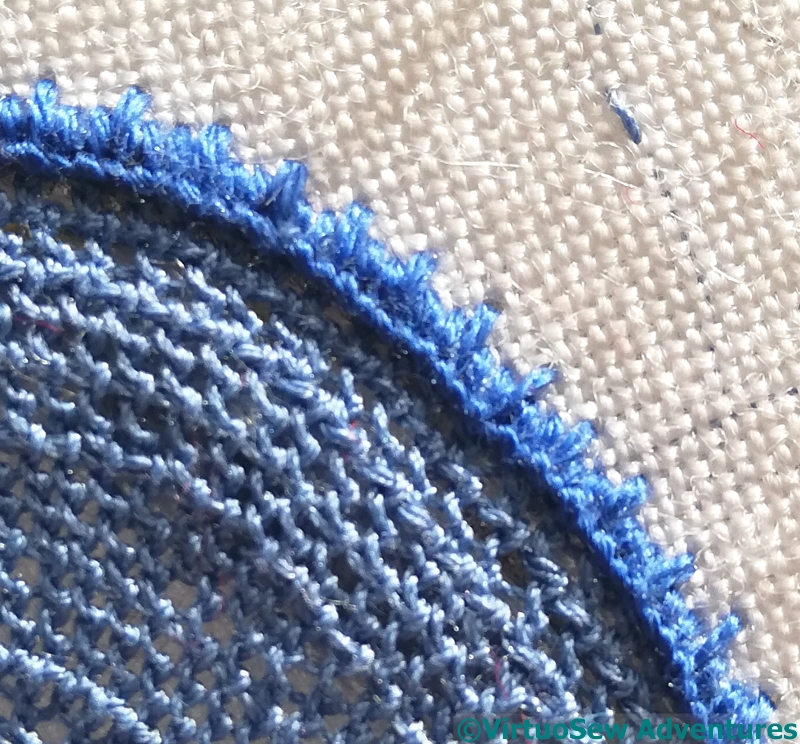
Once the needlelace was finished, I had to consider the edging. The whole aim of this exercise has been to cover the hole in the tablecloth in a manner that looks considered and deliberate – not just a mend, but a thoughtful mend. So the edging had to be thought about too.
In the end I chose to work a pattern in the buttonhole stitch – the uprights of the buttonhole stitch covering the split stitch and the edge of the needlelace alternate one long with two short. I also considered enlivening the needlelace with some daisies in white, reversing the blue on white of the main decoration, but decided that that was going a bit too far!
Mending a tablecloth, first stage
Over the New Year, my cousin showed me a rather charming embroidered tablecloth she’d bought, only to discover, when she got it home, that it had been rather amateurishly adapted for a table with a parasol. She doesn’t have such a thing, and all the ironing in the world hasn’t flattened the buttonhole stitch, so she asked, could I think of something?
Yes, I could. I’ll re-do the buttonhole stitch, slightly larger, and infill the entire hole with a needlelace stitch of some sort. I’ve not decided which of these threads to use, but I’m prepared for when the decision is made!
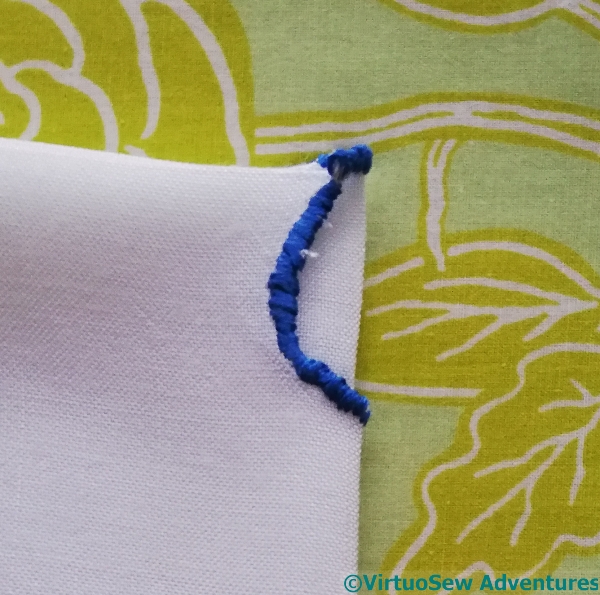
When I got it home, and folded it carefully to check that the hole was central, I discovered that it really wasn’t.
It really isn’t at all, in fact. And this close up gives you a chance to see just how tatty the oversewing around the edge turned out to be.
Oversewing, not buttonhole stitch. I’ll have to do better than that, won’t I!
In fact, once I’d done a bit of playing around and found a suitable circle that both encompassed the existing hole and placed the hole centrally, it was HUGE – at least three inches across!
That seems too big – even for infill with needlelace, it seemed to me that this would unreasonably weaken the fabric, so I started to think of suitable backing materials, and then emailed my cousin to ask whether she had some thoughts. After all, it’s her tablecloth.
She rang, and we had a chat, and she says she would prefer a smaller, non-central hole, without too many baroque attempts at backing it. So simple it is, then…
Finally! Crazy Paving Canvaswork finished!
In fact, it was finished a long time ago, and somehow I didn’t get around to writing it up…
Not that there is much to say. All of the interest (almost!) was documented in the stitching.
The old form has been scraped, holes filled, sanded, and repainted, and the cushion is a simple shape, tidied up with piping cord.
Some of the interest, in fact, is in the backing fabric. It’s an unremarkable jacquard woven pattern in cotton on a synthetic warp, but the design – rather ironically, since I’m card-blind for all practical purposes! – is a design of suits I created during my MSc in Textile Design Technology. It’s clunky, and not well-differentiated, but it was the first time I designed a jacquard pattern. The only time, too, but it was fun while it lasted, and I’m glad I asked the technician to weave a half-metre for me instead of the 10 cm that was all that was needed for the module.
Renovating Grandmama’s Footstool
Beginning Refurbishment
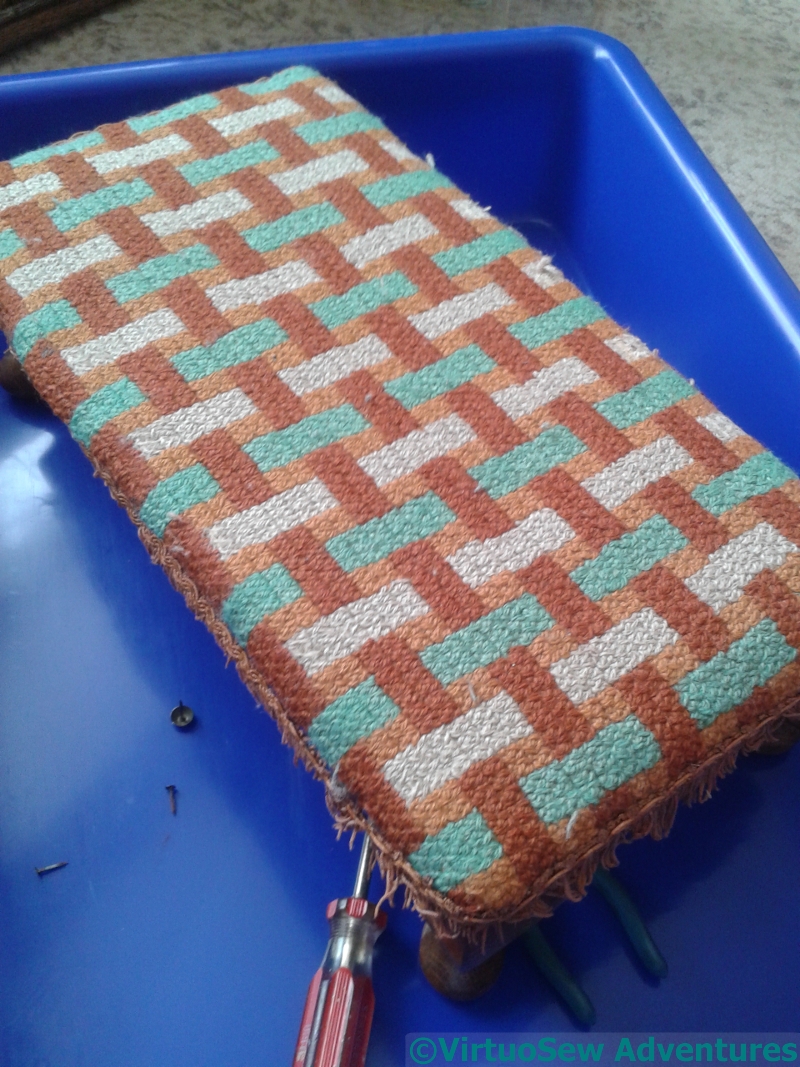
Having been working on the Heart, I was still thinking about Grandmama, and noticing that one of the footstools she made was getting a bit shabby and buckled, I decided to renovate it…
It’s worked in tapestry wool on binca (that strange cotton matting fabric that stitching happened on at primary school – does anyone else remember it?). I think I still have, somewhere, Grandmama’s draft of the pattern on squared paper, but the best I can do for putting my hand on it is to say it is Somewhere In The House! Since I don’t have a workroom, I put the footstool in a plastic tray, which I seem to remember is sold for cleaning oven trays. I use it for wet felting and to contain messes when I’m doing things like this. The blued-steel flat-headed nails were very hard to get out, and indeed, some of them lost their heads (!) and didn’t come out. In due course they were hammered firmly back in, instead!
Repaired Stitching
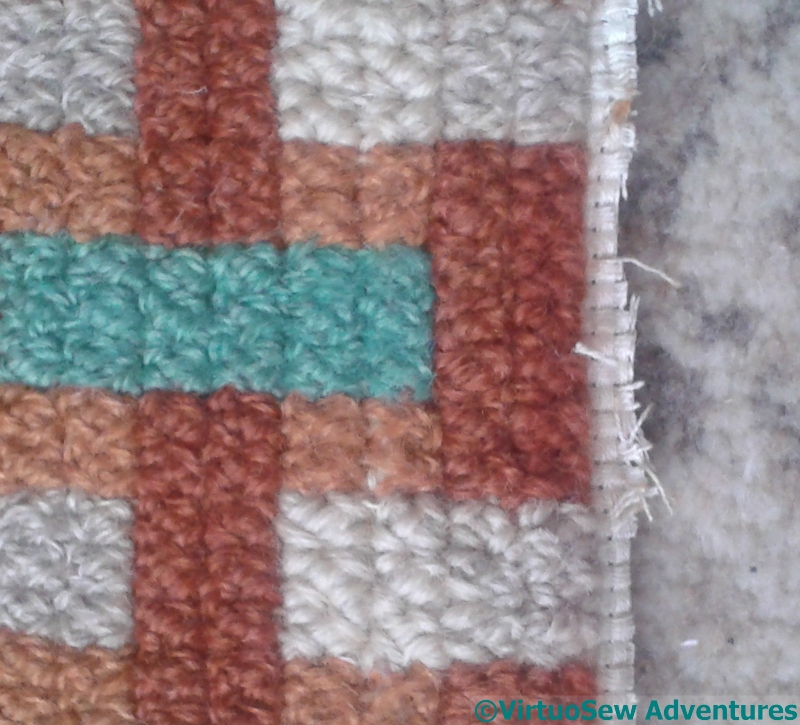
The binca around the edge was badly mauled by the nails, so I knew I would have to do something about that, but in the meantime, there were sections of the canvaswork that needed to be reinstated. First I washed and dried the whole thing (by hand) and then spent some time looking very hard at the stitching. More than fifty years of use have worn a few small sections, and the stitch took some identifying, but in the end, I decided it was Rice Stitch, and found a pale oatmeal tapestry wool that didn’t shout its’ newness too loudly.
Attached To Calico
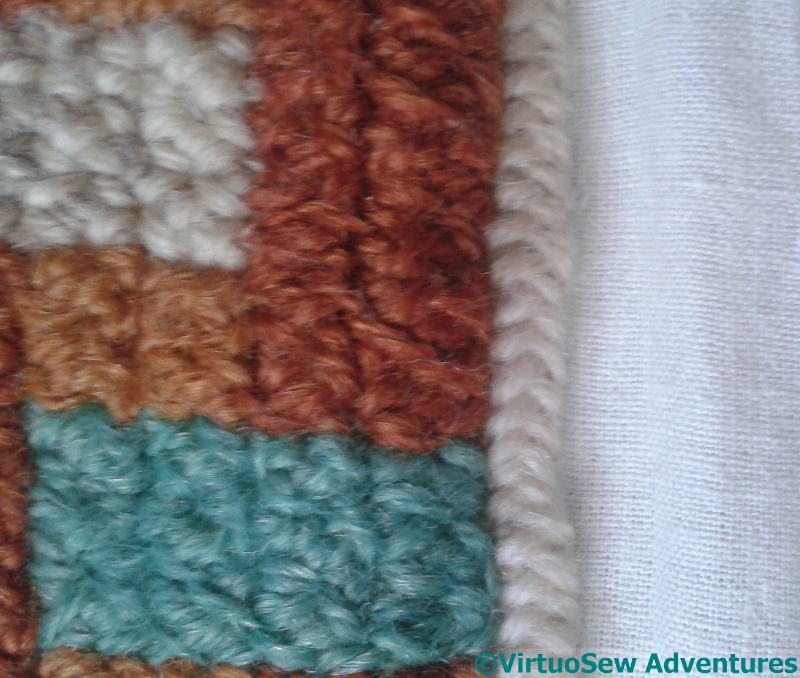
Then I attached the binca to some calico and covered the join with one of the long-armed cross stitches. I wasn’t absolutely sure I had enough of the plain oatmeal colour so I alternated a needleful of each all the way around.
In the end, I had plenty left over, but I’ve said many a time before that when ekeing out assorted supplies, the trick is to Make It Look Deliberate!
Finished Footstool
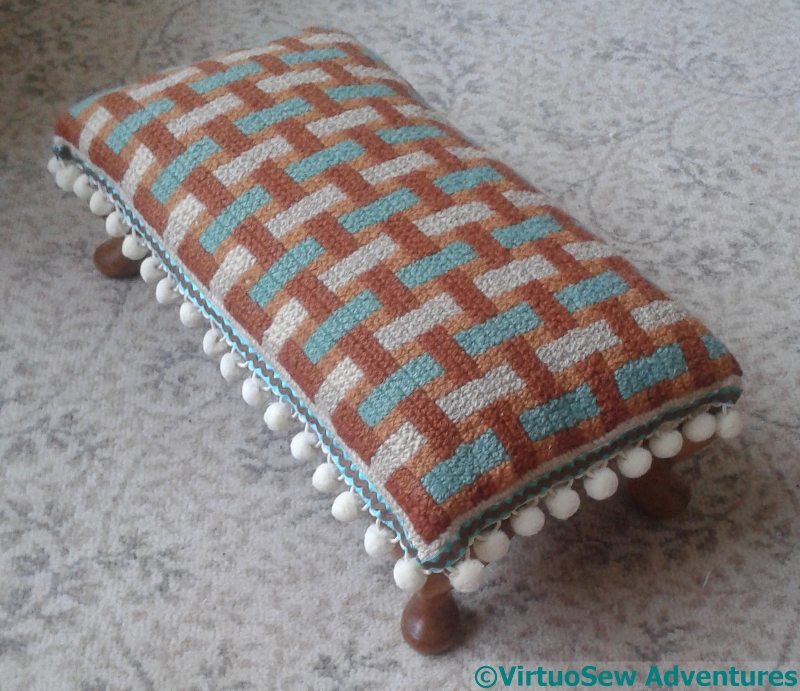
I had to do that with the trim as well. Nothing in our local needlework shop was even remotely suitable so in the end I took some bobble fringing, a length of ribbon and some ricrac, and made my own!
There are one or two infelicities in the details, but it’s certainly got a good few years left in it now.
Thank you, Grandmama.
The Second Worktop Bin
Stage Four
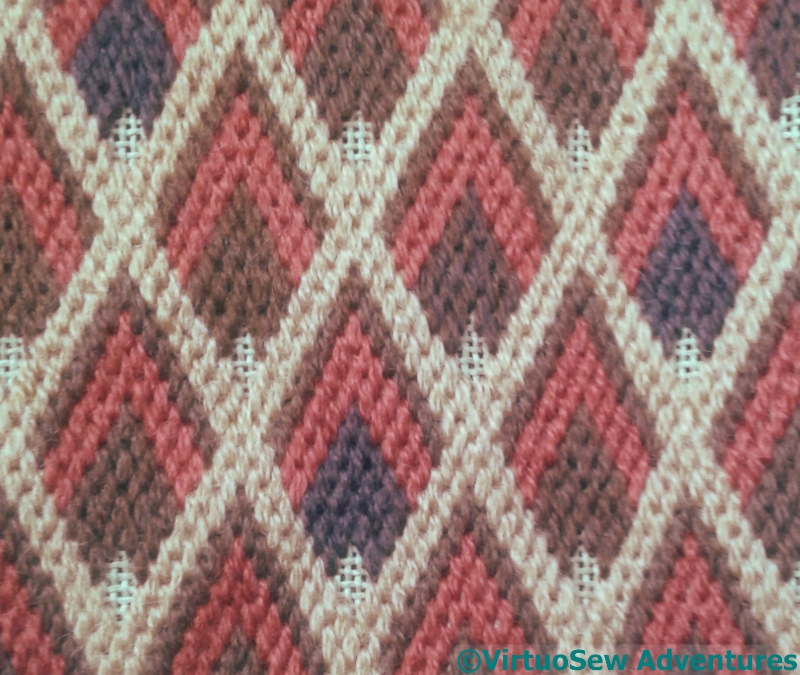
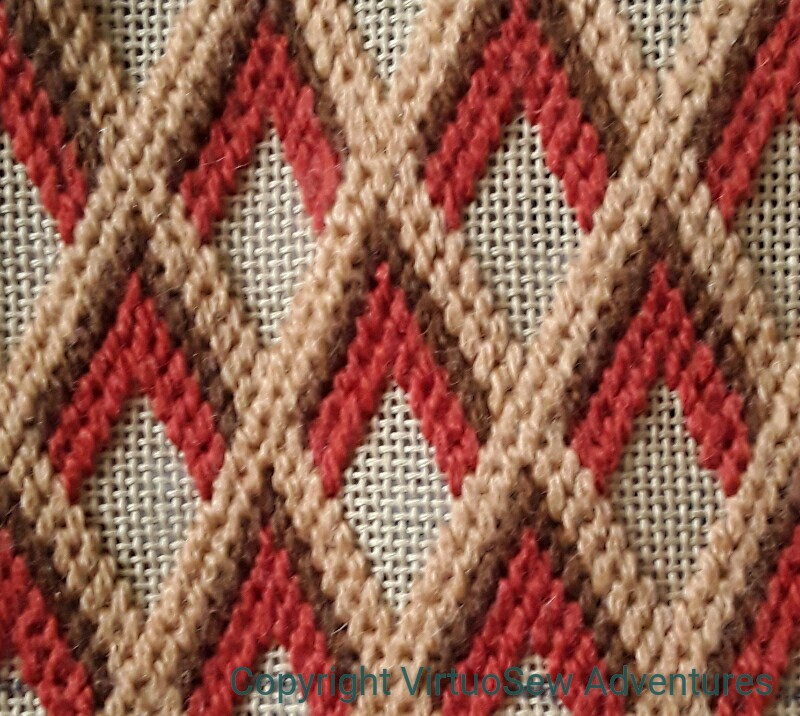
I did indeed find myself mixing and blending a lot of different browns to fill in all those brown sections.
Remember what I said about stash busting being “an inexact science”? Well, the trick about dealing with that (in this context) is to make the various infills and changes look deliberate. I scattered the different shades in a random looking pattern across all the different diamonds. There are four or five different blends, and outside the central section there are only two of each shade in any one row.
Stage Five
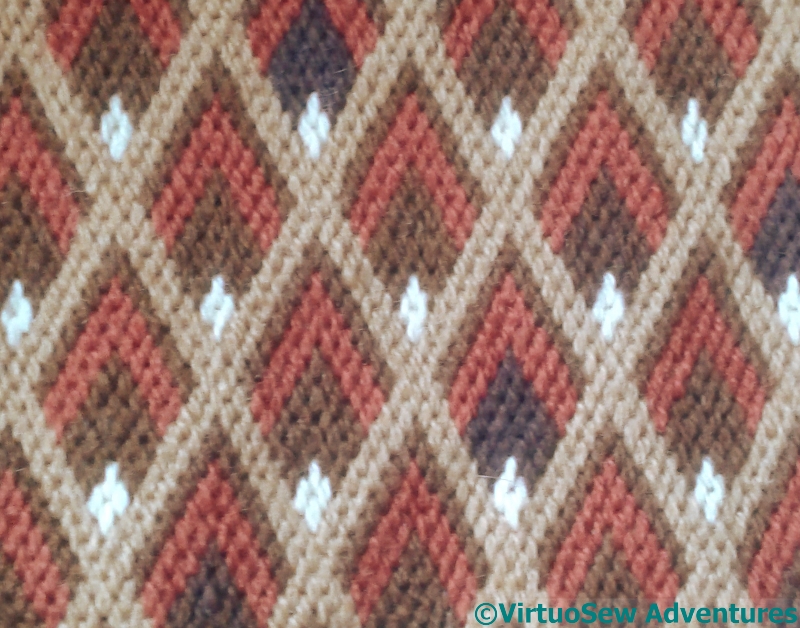
The central section has brown diamonds all the same colour because I was using the central section to help me lay out the trellis pattern, and I simply kept going. In fact as I look at the canvaswork while I write this post, the central section blends beautifully into the outer sections. It really does look deliberate.
The tiny diamonds that lift the whole effect are in a very light cream. Fortunately I didn’t need much of this one, and I had enough!
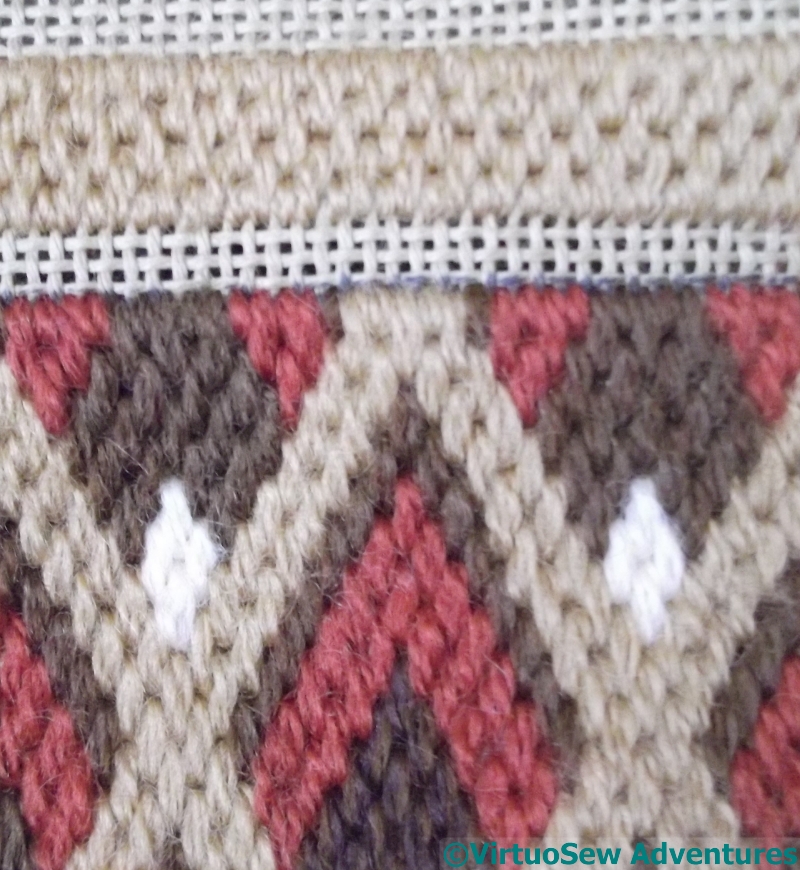
Inside Top In Place
I profited from the experience of making the first little worktop bin, and instead of stitching the inside section after I’d folded back the top and stitched the rim, I worked it while the canvas was still flat, which was altogether easier to do!
Although I confess, I was wondering whether I would have enough of this beige to complete it, or whether I would have to take it out and use a different colour entirely…
Another Worktop Bin
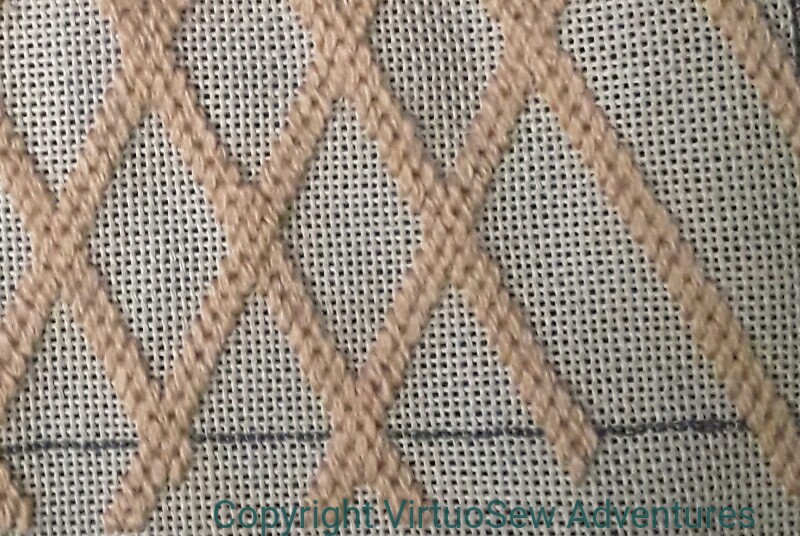
Diamond Framework
The first worktop bin was such a success that I decided to do another one.
This time the bin itself is a cardboard drum that used to contain chocolates. It’s rather bigger than my sawn-off milk bottle, and furthermore, the canvas is finer (I’m only using two strands of Paterna in the needle, not three), so the canvas is going to take a little longer to do.
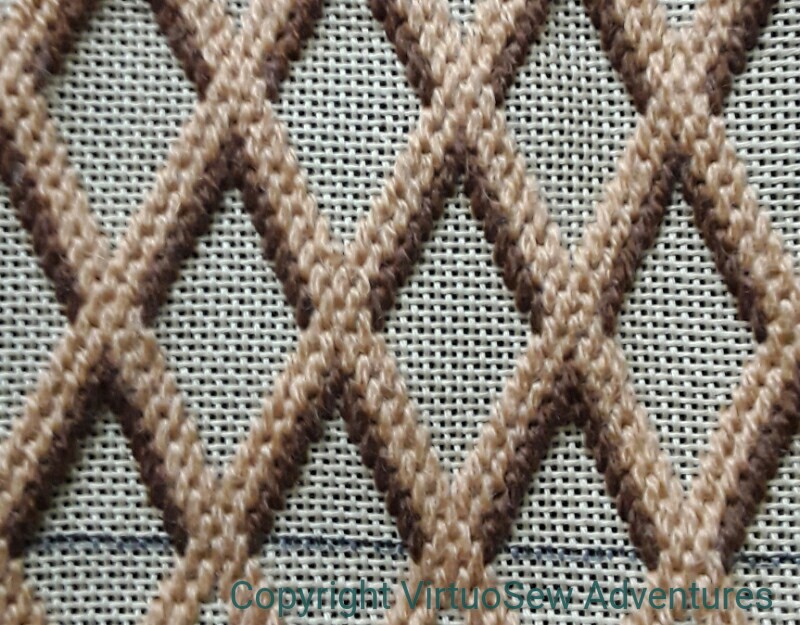
Stage Two
I’m staying with browns, and with diamond patterns, and starting with this diamond lattice pattern. I’ve had enough of the creamy beige wool to work the framework, and since it is only two strands, I should have enough of it to work the edging and seam as well.
But there is a lot more dark brown to come and I may very well find myself combining threads to stretch my varieties of dark brown to fit the pattern. Never mind, I will then have made some Stashbusting Progress!
Stage Three
Has anyone else noticed what a very inexact science stashbusting is? You embark on a project, full of hope that it will consume vast stores, only to find that the Stash in question has shrunk not at all…
Right up until the project when you rely on that happening….
Finishing the Form Cushion – Stage One

Corner of the Form
When I’d finished the stitching of the canvaswork for the Form Cushion, it was a little puffy and warped, and badly in need of blocking, but being long and thin I had nothing suitable for blocking it on. Until I had an inspiration – use the form itself!
We covered the form with an old towel, and then worked on alternate sides of the form. I’ve put an old length of cotton curtain header over the canvas, so that when I come to remove the staples, it will be fairly easy to do.
In theory…
It took quite a lot of heaving and tweaking, and the combined efforts of my mother and myself (for a client, she’s having to put a lot of effort in here, isn’t she! – she’s started on renovating the form too.), but in due course we managed to get the canvas firmly attached, and stood back to look at it.
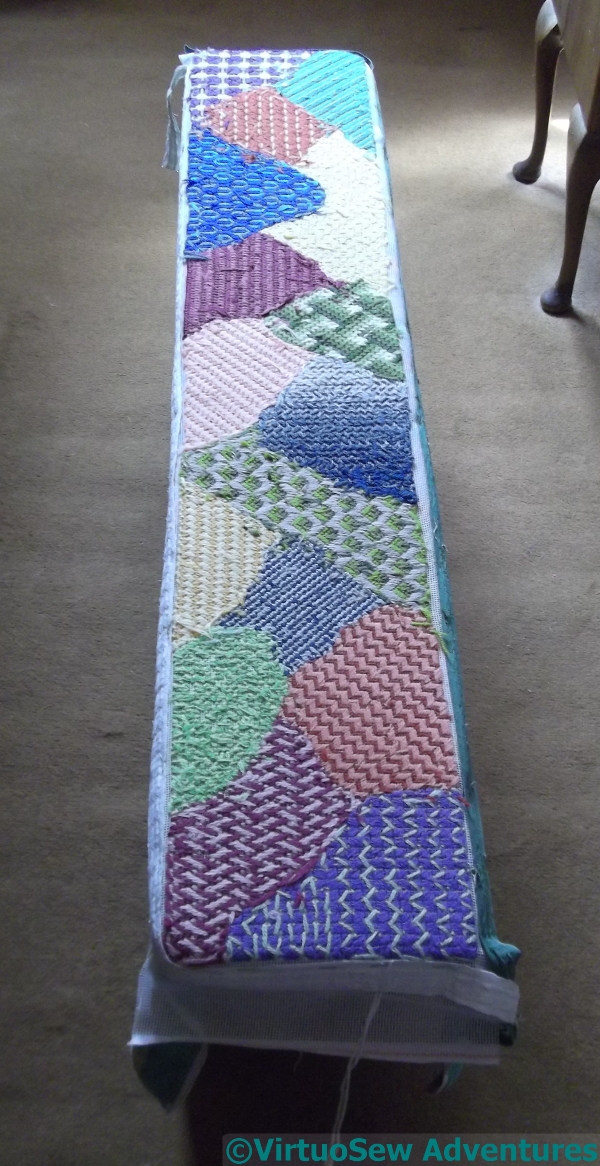
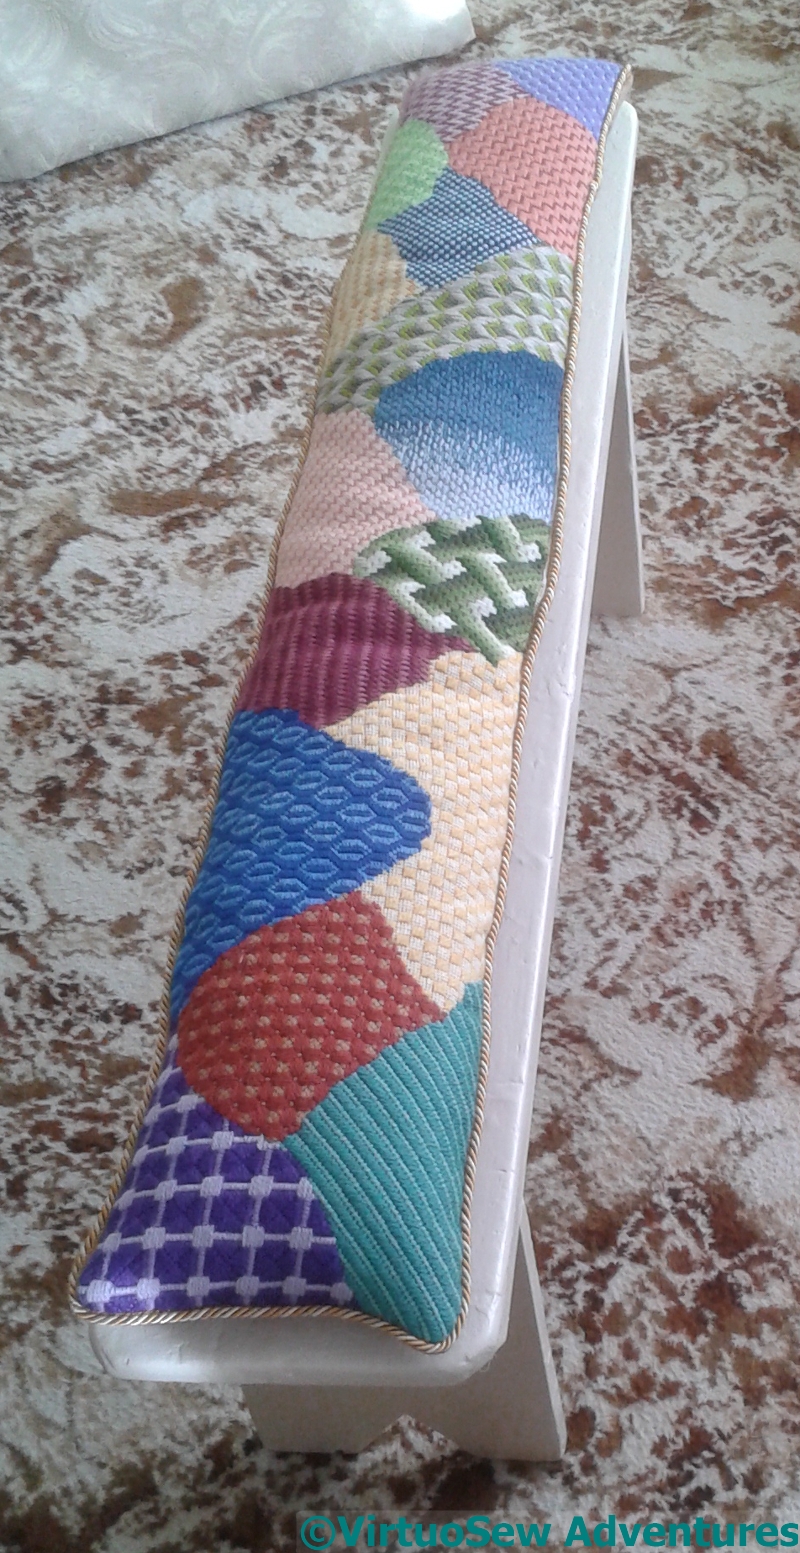
Taking The Long View
It didn’t look nice and smooth as it does here. It was bumpy and lumpy, and not very happy at all.
So I steamed it gently, using a steam iron but not letting it touch the wool. Very, very carefully, and slowly..
It started looking a great deal better (even upside-down), but then we set it aside, still stapled in place, for a few weeks. We wanted to be sure that it was very thoroughly dry before we moved on to actually making the cushion.
And besides, I’m not entirely clear on the type of cushion it will be!
Finished Stitch Off Traycloth
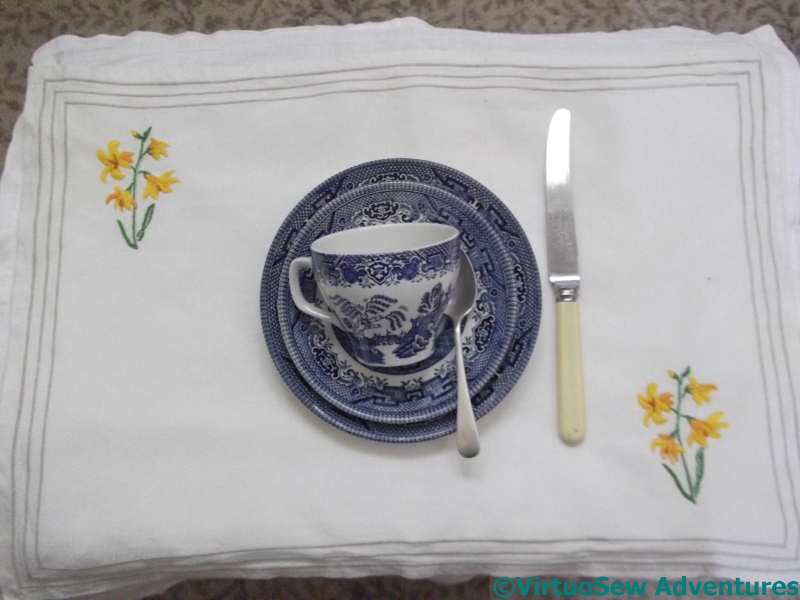
StitchOff Traycloth
So here is the completed traycloth, laid on a convenient tray and assisted by the hand-me-down cutlery (from my grandparents) and the hand-me-down Willow Pattern (from my cousin). We were very entertained (and very pleased for them!), when going around a stately home last year, to find that Willow Pattern was the servant’s hall crockery, although I don’t know quite why.
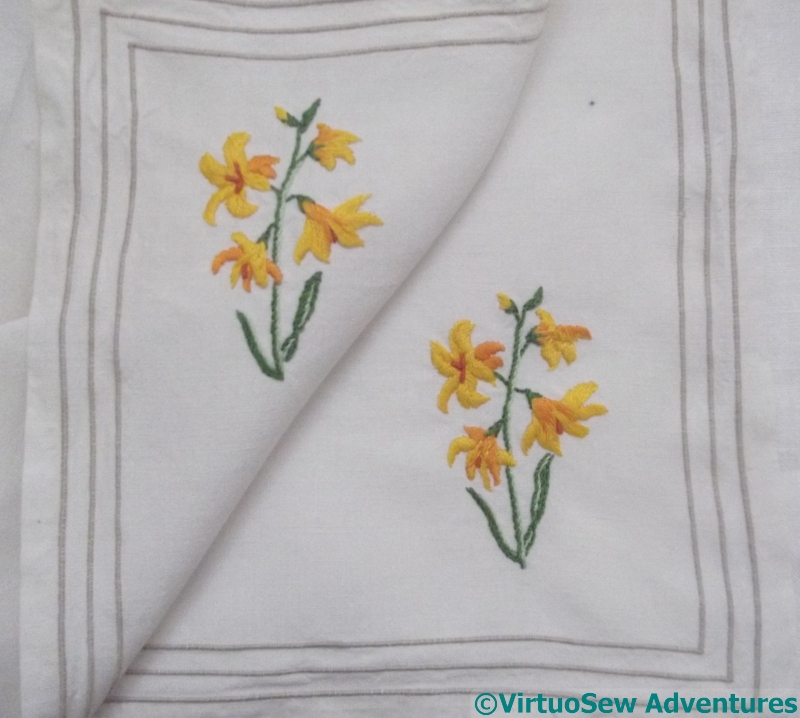
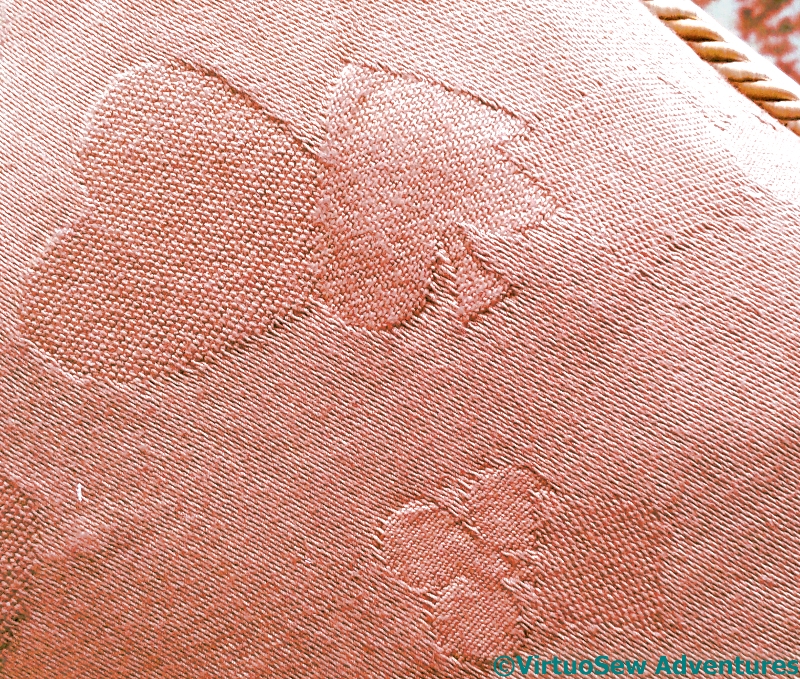
Traycloth Elements
I didn’t attempt to stitch the two motifs identically. The original sketch of the patterns didn’t look identical, and to my mind that form of perfect repetition is overrated in any case. This shot also shows the machined “satin stitch” border, of three very narrow bands. I suspect they may be padded in some way because the bands are very heavily ridged.
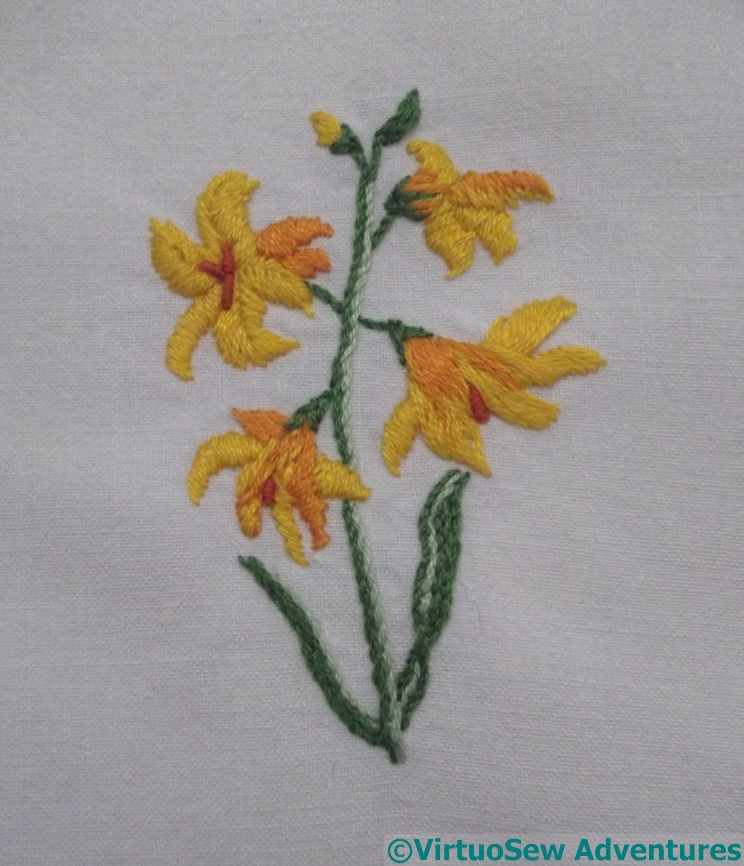
StitchOff Motif
I chose to use very few colours – a yellow, two oranges, and two greens. The stitchery is simple, too, stem stitch and satin stitch, with bullion knots for the stamens. I don’t much like doing bullion knots (a holdover from early attempts) but sometimes they are simply and unarguably, the right stitch for the job.
They didn’t take long, and the completed traycloth does have a very cheering look to it!