
Tag: mending
Mending, Upcycling, and other adventures
As a family, we have always made and remade, mended and upcycled, garments, furnishing and furniture. There is a tale of five year old me, accompanying my mother to buy fabric for a dress in the now long-gone and much-lamented fabric shop in town, and piping up, as she was paying, to ask “What will it be _next_?”, so you can tell this is deeply ingrained!
Usually this is something I let pass without comment, but two episodes lately seemed worth mentioning, in case they give someone else an idea..
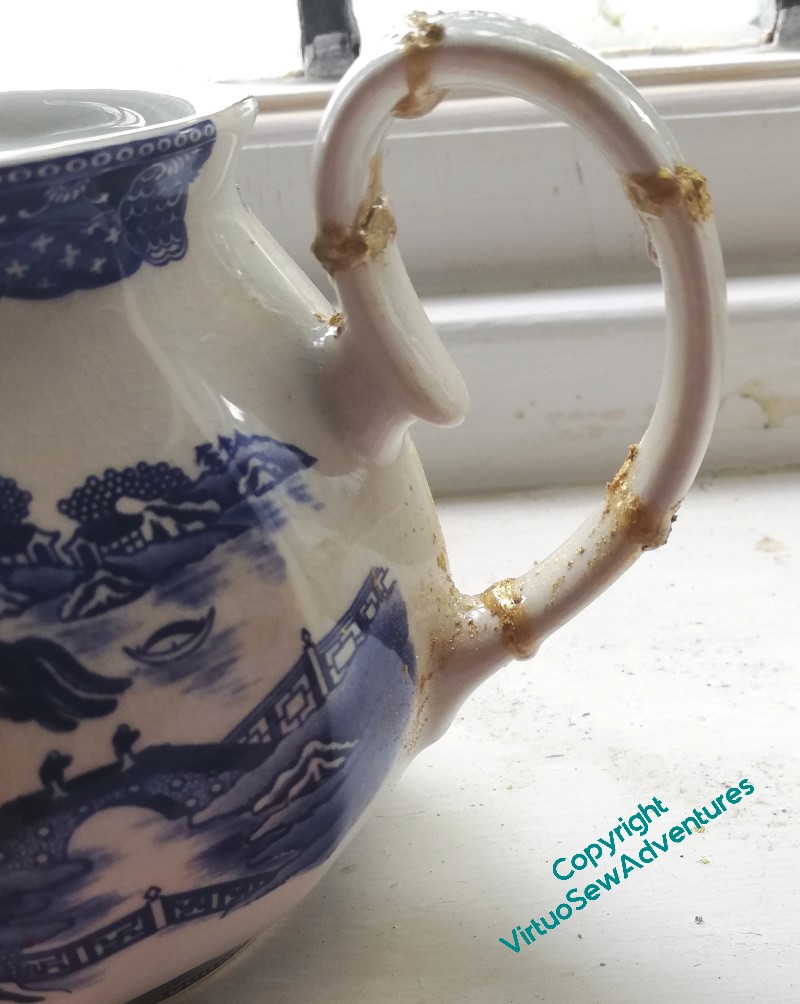
The Japanese mending technique for pottery, “kintsugi”, involves highlighting the mends with gold, so as not to obliterate the history of a piece. I can’t say I’m very good at it, but I had an entertaining afternoon with a kit that enabled me to play with the idea, at least.

And then my cousin mentioned a footstool she had with an entirely unsuitable cover for the surroundings, and a few oddments of furnishing fabric from earlier work on the room. Cue a Kintsugi-inspired crazy patchwork footstool cover, with all the seams emphasized with gold piping! This took some work and collaboration, as my sewing machine isn’t up to the task, but Mam’s was.
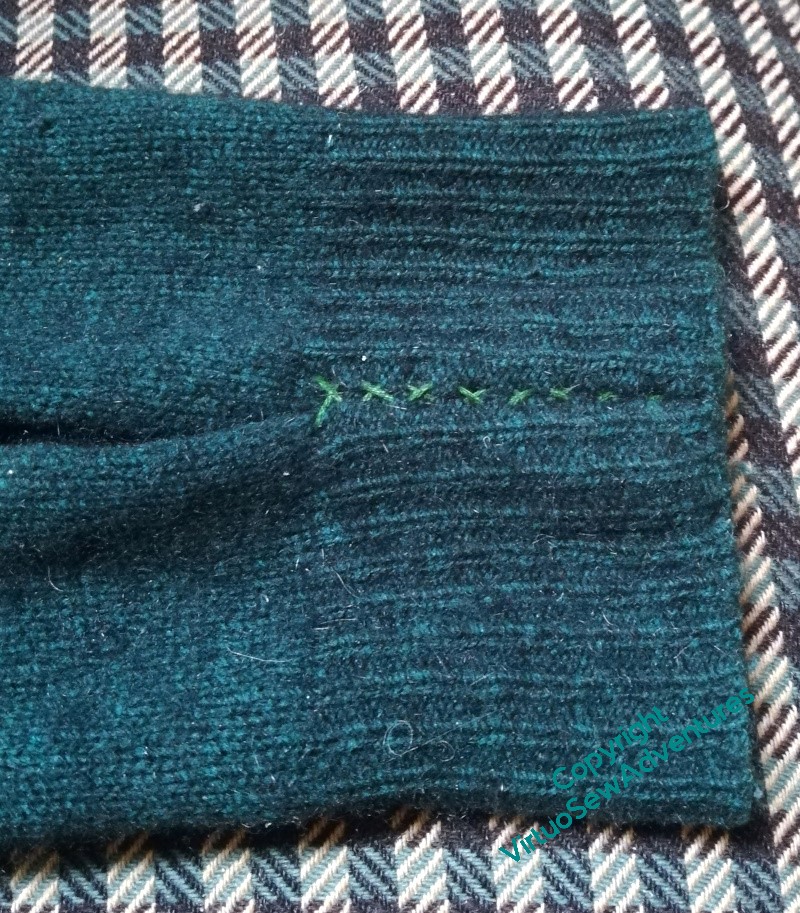
And on an entirely different scale – one of the problems with older knitwear is the way the ribbed cuffs seem to lose all their elasticity, and what was once a trim and neat shape, will often become shapeless and saggy with age. I’ve tried in the past adding elastic, but I couldn’t make that work (if anyone has – what’s your trick?), so it rather nags at me.
Then this winter we made a dress with rather extravagantly tucked sleeves, and I thought I had an idea that might work. I’ve created an inverted box pleat in the cuff here – it’s just held with stranded cotton at present, something that will show up so I can play with it until it works, and then do it properly (or not!) – and held it together, starting at the sleeve end, with crossing stitches. Then I caught down the side of the box pleat.
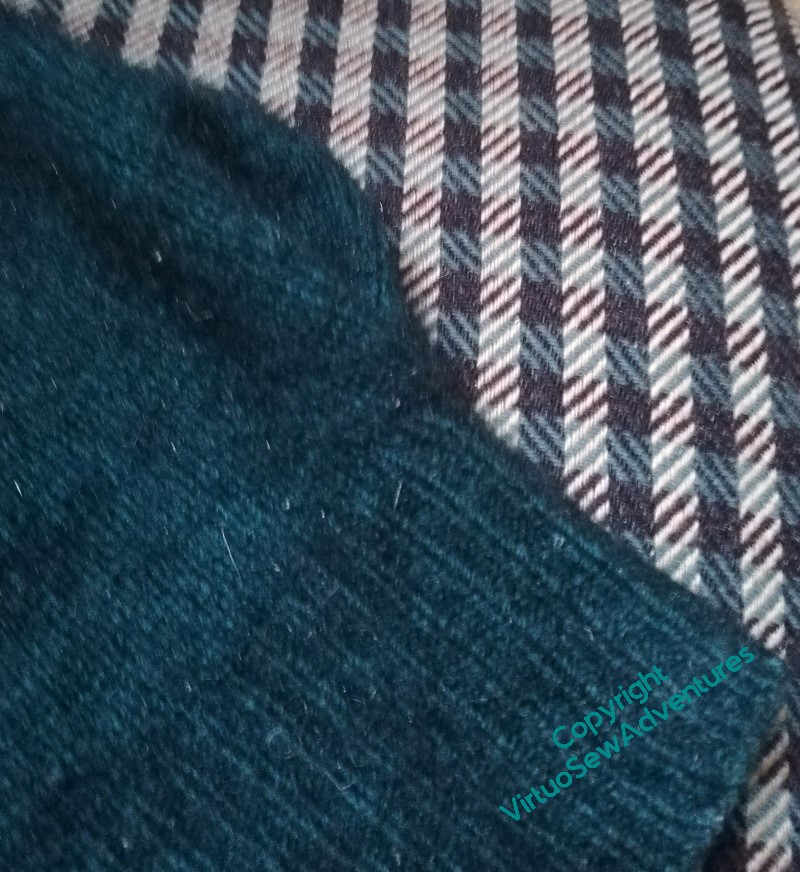
You can see in this picture how the cuff is now neat and close, and the sleeve has a bit more shape, and rather less “flop”. I’m very pleased with that, and I may extend this to other, similar garments.
Mending a tablecloth, second stage

Having settled on a smaller circle, but still worried about the stability of the fabric, I paused for thought.
I’ve used tear-out fabric stabiliser underneath the fabric, and placed a circle of it over the previous overcast stitch ring so as to leave trimming out what isn’t wanted until the last moment. It’s now enclosed between two layers of stabiliser, so I shouldn’t catch my needle in it.
And this is definitely a case for using a hoop. Most of my Amarna pieces have been worked in slate frames or bar frames, and the Jacobean coat is being worked in the hand, but a table-sized piece of fabric of which a small element is the focus requires a more limited approach!
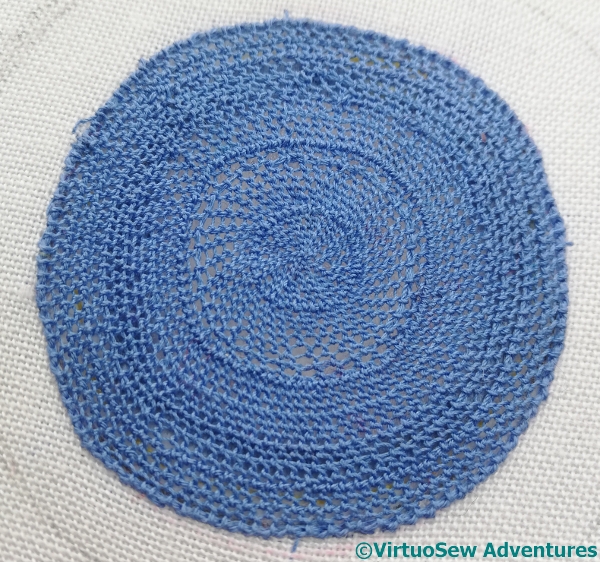
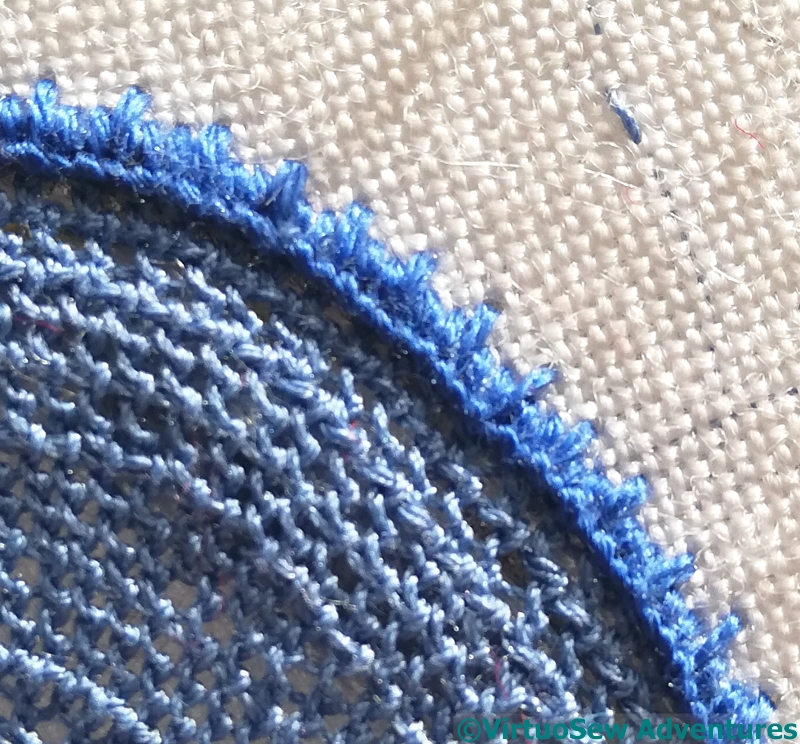
I decided in the end to use simple cloth stitch for the needle lace, but of course, choosing to work it in a circle rather complicated matters! I had to use several lengths of thread, so it became a matter of concern to make sure that firstly, there was no chance of it coming undone, and secondly, weaving in the ends made sense!
It was also important to bear in mind that while classical, straight cloth stitch has a free “return” stitch, I couldn’t expect to keep control of a “return loop” in my circular variant. So instead of that, I whipped the base of the stitches to create the heavier line.
Once the needlelace was finished, I had to consider the edging. The whole aim of this exercise has been to cover the hole in the tablecloth in a manner that looks considered and deliberate – not just a mend, but a thoughtful mend. So the edging had to be thought about too.
In the end I chose to work a pattern in the buttonhole stitch – the uprights of the buttonhole stitch covering the split stitch and the edge of the needlelace alternate one long with two short. I also considered enlivening the needlelace with some daisies in white, reversing the blue on white of the main decoration, but decided that that was going a bit too far!
Mending a tablecloth, first stage
Over the New Year, my cousin showed me a rather charming embroidered tablecloth she’d bought, only to discover, when she got it home, that it had been rather amateurishly adapted for a table with a parasol. She doesn’t have such a thing, and all the ironing in the world hasn’t flattened the buttonhole stitch, so she asked, could I think of something?
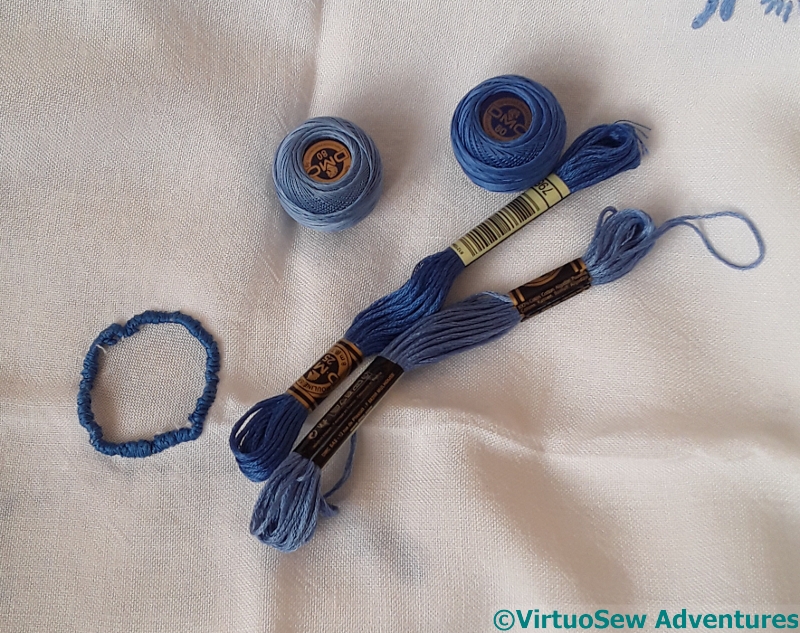
Yes, I could. I’ll re-do the buttonhole stitch, slightly larger, and infill the entire hole with a needlelace stitch of some sort. I’ve not decided which of these threads to use, but I’m prepared for when the decision is made!
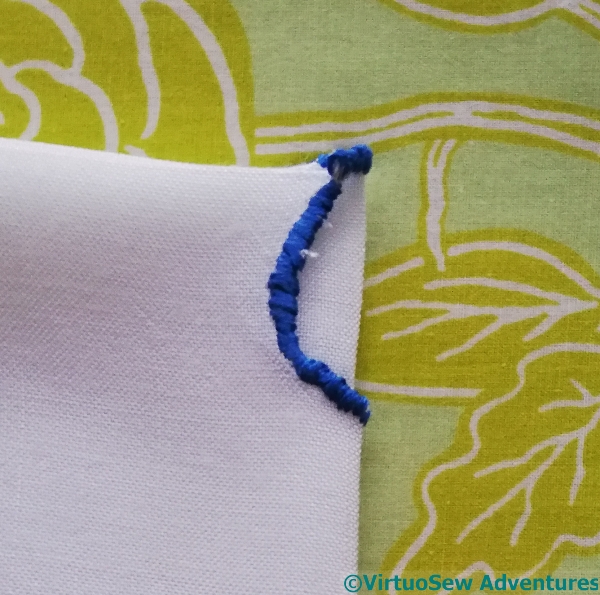
When I got it home, and folded it carefully to check that the hole was central, I discovered that it really wasn’t.
It really isn’t at all, in fact. And this close up gives you a chance to see just how tatty the oversewing around the edge turned out to be.
Oversewing, not buttonhole stitch. I’ll have to do better than that, won’t I!
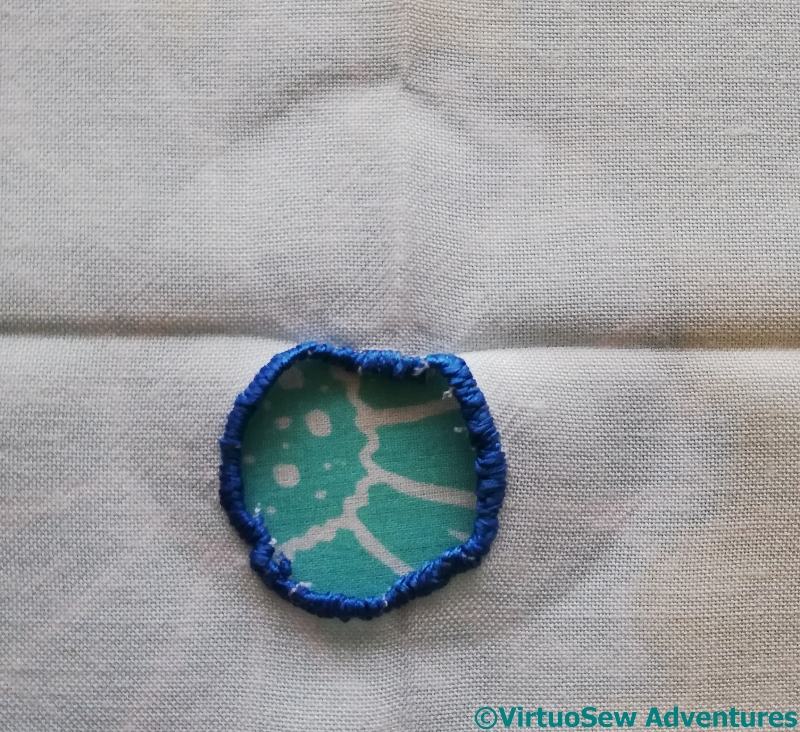
In fact, once I’d done a bit of playing around and found a suitable circle that both encompassed the existing hole and placed the hole centrally, it was HUGE – at least three inches across!
That seems too big – even for infill with needlelace, it seemed to me that this would unreasonably weaken the fabric, so I started to think of suitable backing materials, and then emailed my cousin to ask whether she had some thoughts. After all, it’s her tablecloth.
She rang, and we had a chat, and she says she would prefer a smaller, non-central hole, without too many baroque attempts at backing it. So simple it is, then…