
Tag: Dreams of Amarna
More Experiments with a Parlour Dome
Once I had put together my coiled pot of cord, and, at the very least, I could feel I had something to play with, I had a look at how to assemble the parlour dome display.
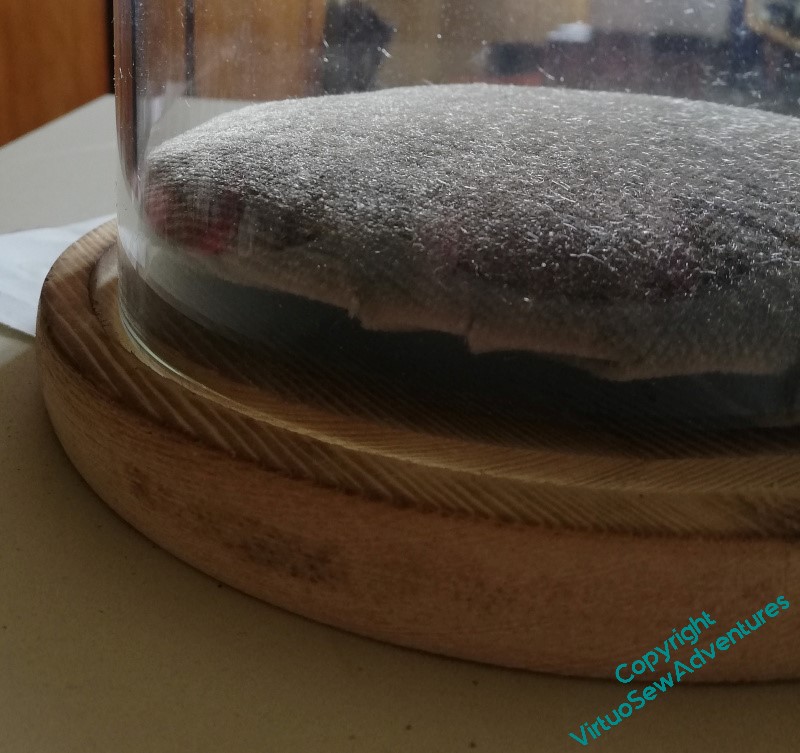
I intended to set the pot upon a little velvet cushion; that will give the sense of something “presented” rather than simply stashed away from the dust. Furthermore, I had some cotton velvet in a sort of inderminate brown, taken off a piano stool, which I thought would combine being unobtrusive with being sufficiently present. However, my first attempt to stretch the velvet over the padded card has left me with something that sticks a bit, and raises the card (and thus anything on it) rather further than I anticipated. More thought needed here, I feel.
While that thinking continued, I thought I might as well play with the whole display, to find any other difficulties so that I could think about those as well.
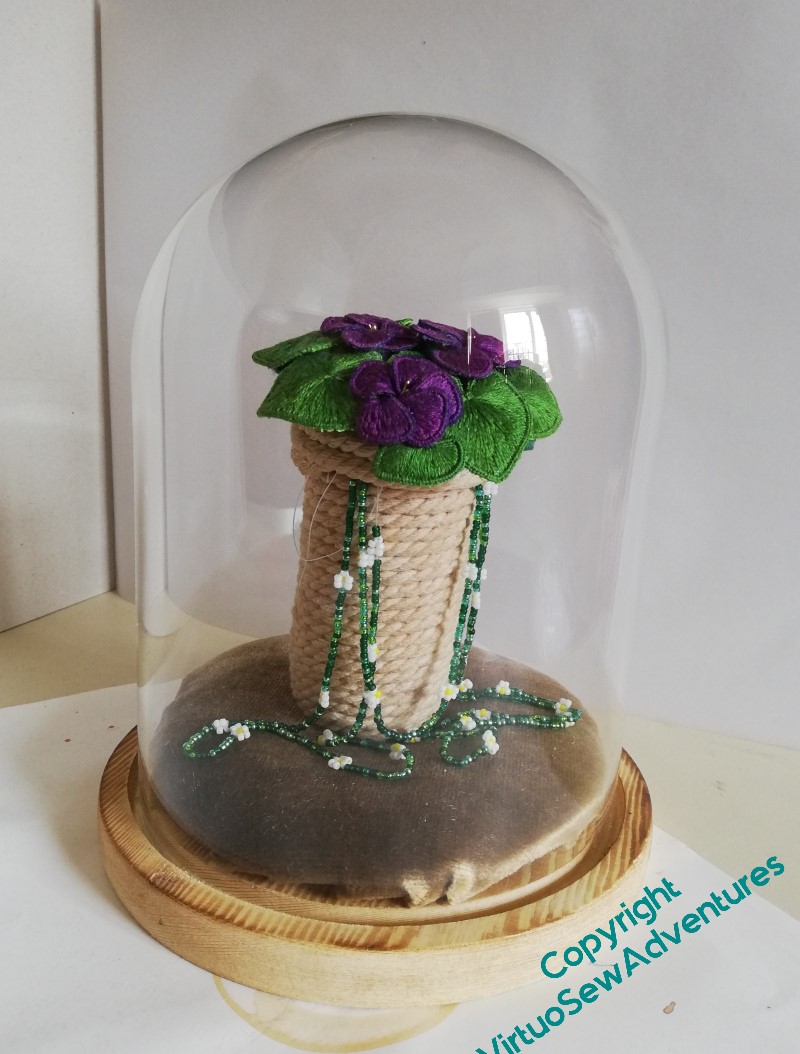
The tea-dyeing has worked, I think: the daisy beads stand out nicely, but it’s not the sort of high contrast that would overwhelm them.
And I think the beads flowing out of the pot and down onto the velvet work as well. The textures and scales seem to be properly in tune with one another.
But I think the pot is too tall, and the violets stick out a bit too much. Violets are “mat forming”, apparently, so I would expect them to follow the contours of the lid a little more closely, shading the beads.. And somehow, with the pot so tall, I feel that the violets can’t breathe.
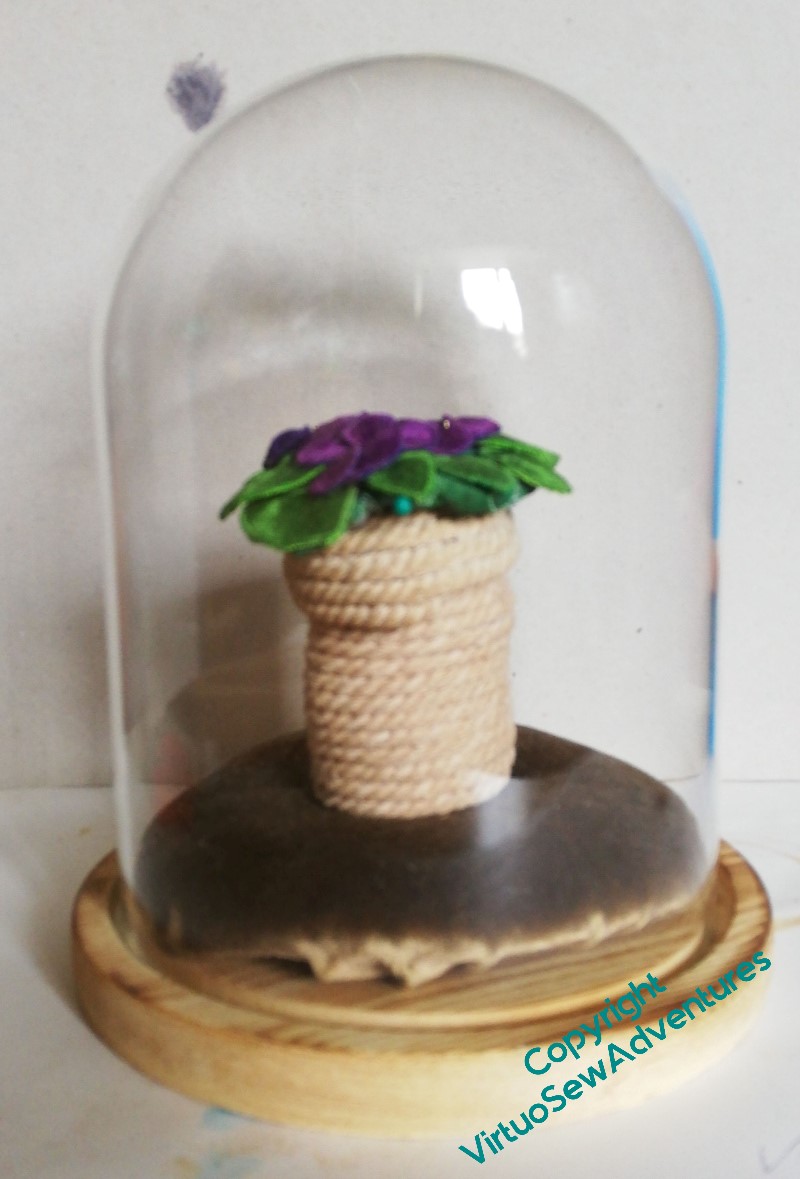
And indeed, although this photo is rather hurried (you can even see the pin holding the violets in place), I think it shows what I mean. The shorter pot gives the violets more air, and somethow that makes for a pleasanter display.
However, I do still need to find a solution for the Problem Of The Cushion!
Experiments with A Coiled Pot
You may recall that I had an idea to combine the Daisy Beads and the Stumpwork Violets into a little display under a parlour dome. The colours and scale don’t work with the main panels, and besides, both items are tied specifically to Mary in a way that nothing else is.
My first thought was a gold trinket pot, but so far I have entirely failed to find a pot of the right sort of dimensions. For some reason, everything I could find was too wide or too high, or not the right surface for gilding.
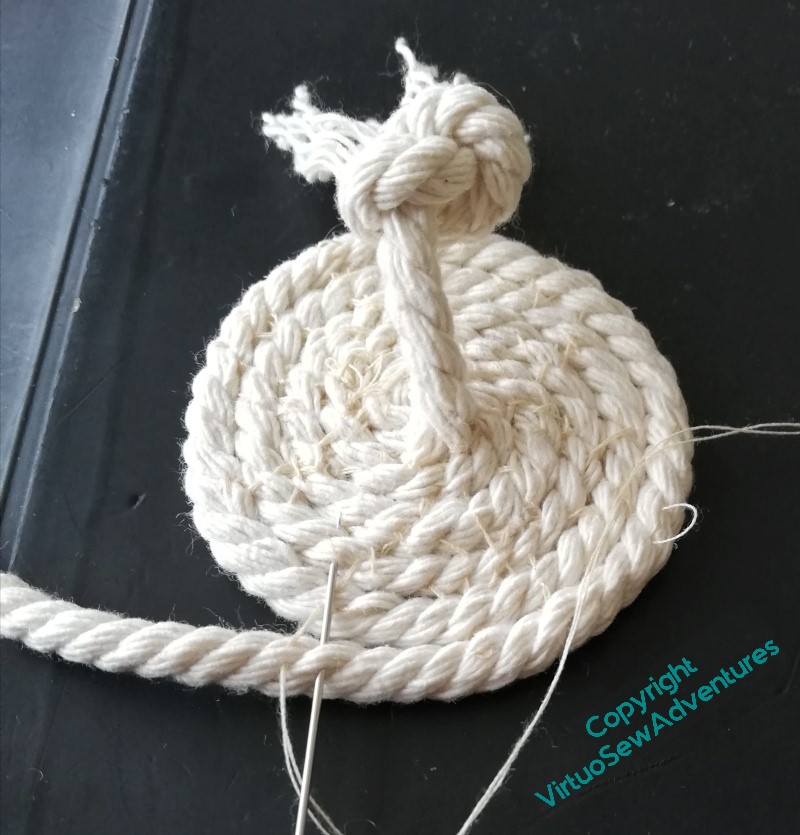
So after some frustration, I decided to tie the display back to the excavations by using a coiled pot made using braid or cord. It should be slightly reminiscent of the baskets used to carry away spoil from the excavations.
After some experimentation, I settled on piping cord, sewn together with ordinary sewing cotton as I wrapped the cord around a former (a spice jar, since you ask). Even that involved some unpicking and restitching.
When I’d done it, however, it was too white and stark, not a kindly background for the Daisy Beads. Hmmm…
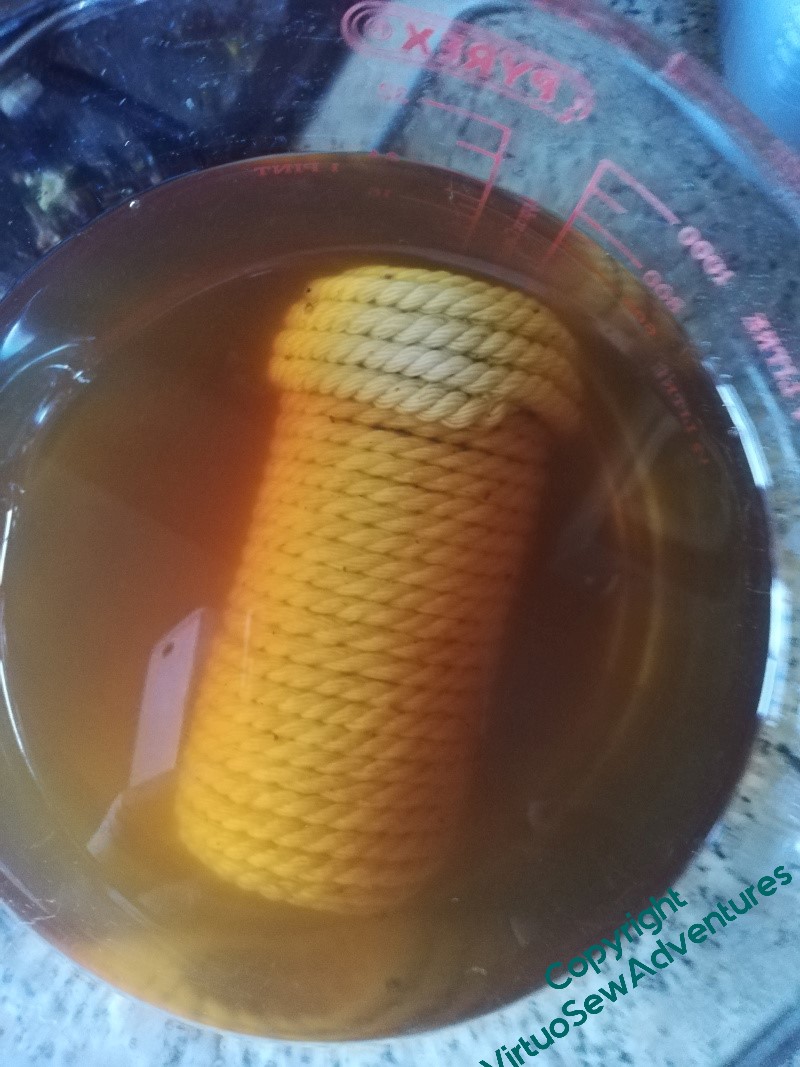
So that is how I found myself tea dyeing a coiled pot made of piping cord!
More layouts..
Telling stories without words can be a little tricky..
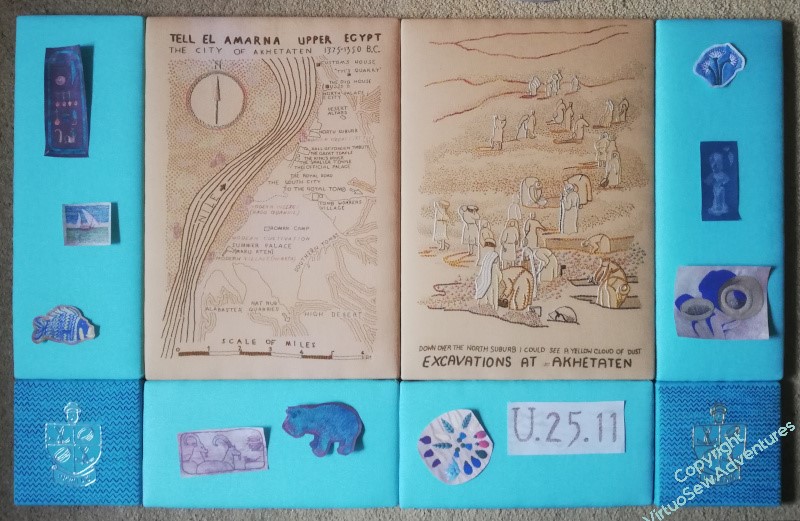
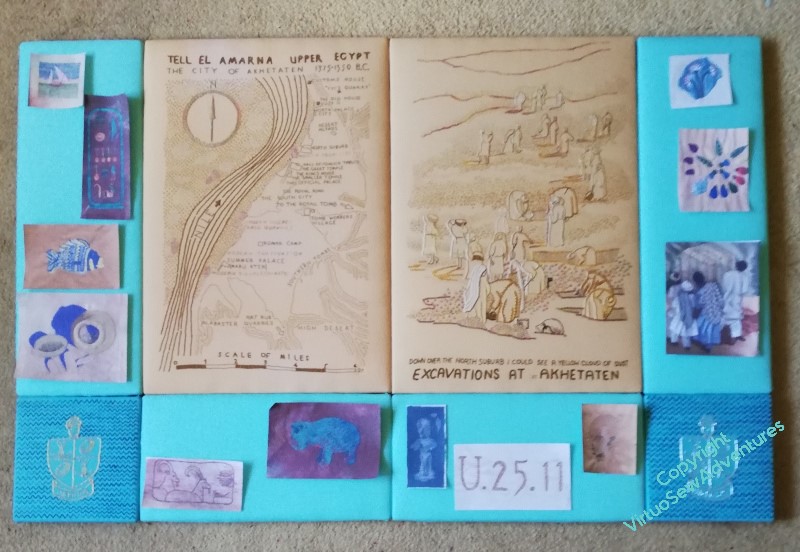
I’ve managed to get the Amulet and the Crock together here, and “Typed on Camelback” is on the horizontal panel, which works. But I put the Lotus Fragment at the top because it is the first thing mentioned in the book, only to find that it makes the whole thing fizzle out rather.
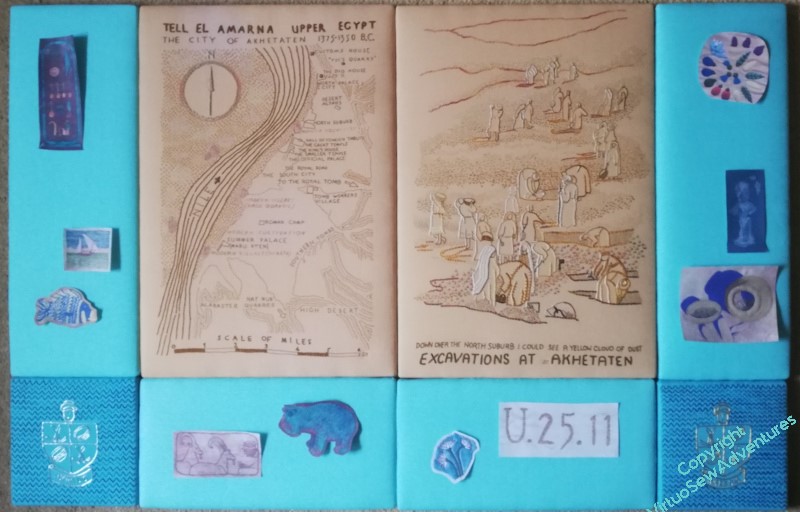
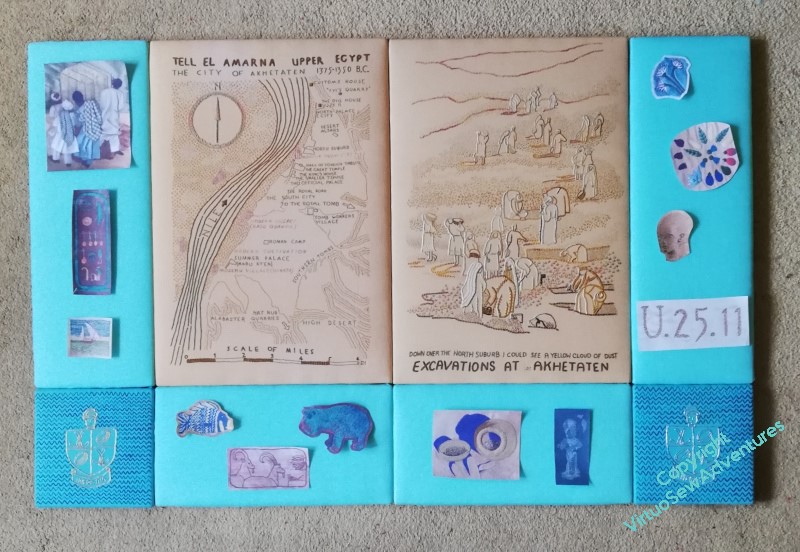
So for the next one, I’ve swapped the Faience Necklace with the Lotus Fragment. Better, I think. I like the way the Amulet echoes the Cartouche in shape, but not in placement. I also rather like the new, closer placement of the Fishie with the Felucca. Typed on Camelback and the Lotus Fragment look fairly happy together, too.
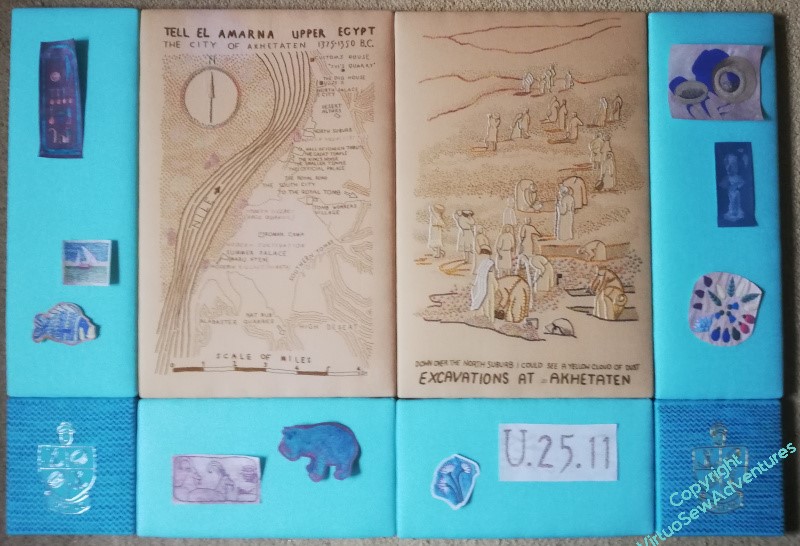
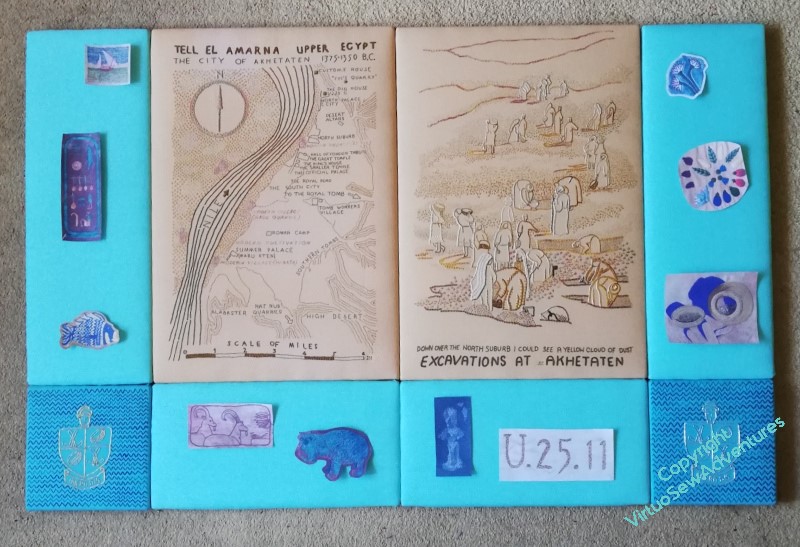
So, final tweak. The square tops of the Cartouche and the Crock of Gold balance each other nicely, and the grouping of Fishie and Felucca take only a little more space than the Faience Necklace. I think I will put the Hippo lower and the Antelope higher, mirroring the Lotus Fragment and Typed on Camelback. And incidentally, making more sense of them – antelope are dry land animals and hippos like water, after all!
So, have I finally made sense of this?
You know, I think I may have done!
Laying out the “spots”
The first place to start with planning layouts was to simply trim my photocopies neat, square, and not too close, and see what result I could achieve.
I’m not at all pleased with this. It looks much too congested – or alternatively, not congested enough! If I had twice as many spots, maybe slightly smaller, and had them all jammed together, it might work, but this is betwixt and between, which is no place to be!
So I tried again, trimming some of the pieces closer or in a more shaped fashion, but still all of them being used. This is better. Actually, much better – but I think it still feels congested, and rather unbalanced. So, I need to think about what I can pick up from this, and take forward.
But before I do that, I do have a guideline in mind already: I want to use the “spots” which refer to finds or incidents that Mary referred to in the book with the View, and the ones which depict things already known about with the Map. So it’s arguable that I should either have “Loading The Felucca” with the View, or mount it separately. As it is bordering on too large in any case, I think I may choose to mount it separately.
The other one which is a bit tricky to wrangle is “Typed on Camelback”. It clearly has to be with the View, but it’s a little too wide to fit comfortably on the uprights, where I had it in the earlier two pictures.
So how about this? I’ve taken off “Loading the Felucca”, and the “Head of Ankhsenspaaten”, and everything is now rather more spaced out. I think this works quite nicely, but at the same time, I thought the “Hittite Amulet” and the “Crock of Gold Hoard” had looked very happy side by side, so I wonder what further adjustment I can come up with?
Finishing The Family
The next challenge was to work out how to attach the Family to the navy blue velvet stele I had prepared for them. It was a bit too awkwardly sized for the various tables I have tried to work on – or they were at entirely the wrong height – so I ended up perched on a stool beside the ironing board.
What’s the phrase? Adapt, improvise, and overcome!
I keep trying to make use of my Grandmama’s curved needles. For some reason it has become one of those skills I am determined to master. Goodness, I wish I’d asked Grandmama how she managed!
In this case, I began to feel that maybe I was getting the hang of the idea. Gradually. Work speeded up a little after I managed to remove a burr from the point, restoring the proper sharpness.
I was a bit baffled to begin with as to how to remove that burr, but a question on Mastodon elicited several replies in varying detail. I used a nail file, since you ask (lowest tech solution), although one of my friends suggested a dart sharpener – which I never even knew was a thing that existed!
I have a lot of mounting embroidery in my future, so I suppose I am going to get the hang of it – or go stark crazy, of course, always an option!
Anyway, several stitching sessions later – the Family had to stand on their heads for their closeups, to bring themselves into reasonable range of the camera!
Mounting the Head of Nefertiti
As regular readers are well aware, when in doubt I have a policy of benign neglect which allows ideas to ebb and flow until something filters to the surface as The Right Idea. Sometimes this takes longer than others, although I have noticed that recently I’m getting ideas a bit more quickly.
Or maybe it’s just everything coming to a head, all at once!
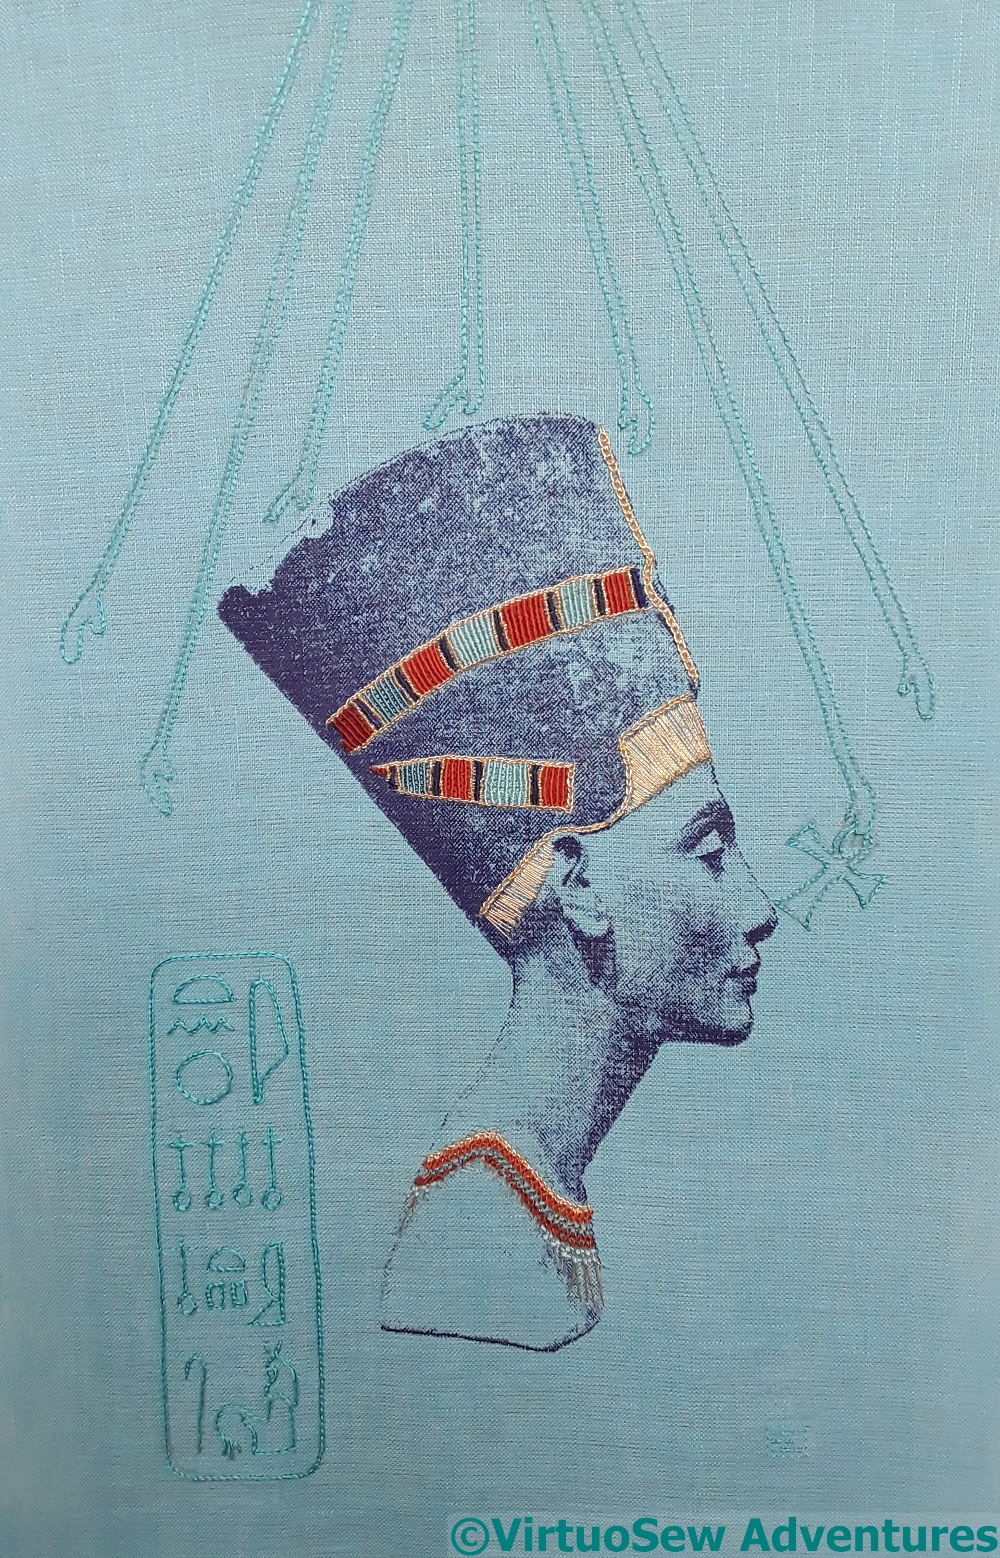
Nefertiti came off her frame after I’d finished her (in 2017, dear heavens above!), and then went into a box while I tackled such hair raising adventures as the Colossus of Akhenaten and the Amarna Family Group. This was partly because that seemed safest, and partly because I hadn’t the vaguest idea how I was going to display her. She certainly couldn’t be mounted on anything that would move, or suffer abrasion, not with the sort of gold thread I had used, but I have a deep aversion to mounting embroidery behind glass, except in particular circumstances.
So what I needed to find was some way to mount, frame, and display the Head of Nefertiti in a way that would be satisfying and sufficient, that that would allow her to stand alone, with no glass, no frame, but nevertheless complete. I’m not sure when the idea finally swam to the surface, but I had a thought that maybe what she needed was cloth-of-gold.
Then I found some!
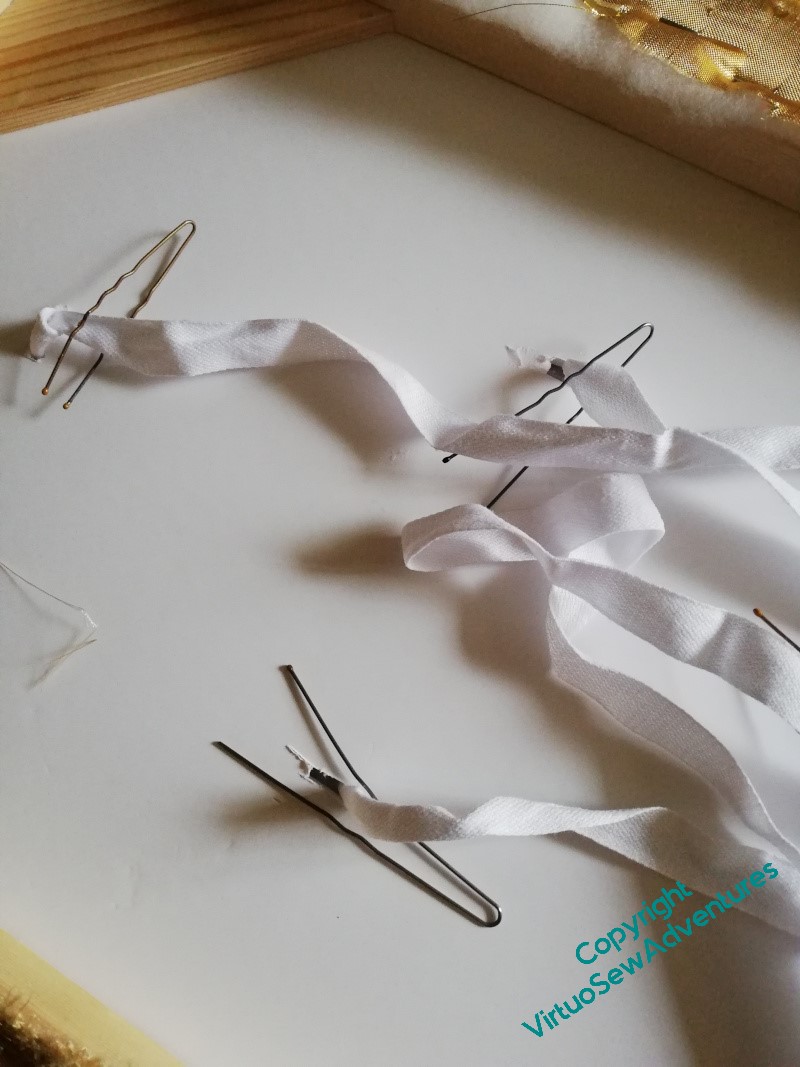
Not the real thing, unfortunately, but at least I found something rather spectacular, that clearly had the idea of cloth-of-gold somewhere in its family tree. Then the difficulty became how to make the assembly work. The wretched stuff frays, pulls, and crumples. Then it didn’t iron nicely – but it responded well to being steamed under tension and ironed on the back, so that was well in the end! Next, the frame my friendly carpenter made had a front of foamcore attached, with slots corresponding to the slots in a separate piece of card attached behind Nefertiti, through which I had threaded cotton tape. The foamcore was covered with padding and then the “cloth-of-gold”, and then, with some trepidation, I cut through the padding and the gold from the back. I’ve reinforced the cuts with fabric glue, to inhibit fraying.

Then I resurrected a hairpin-as-hook trick I used to use to fasten my character shoes in ballet class (buttonhooks being no longer available, in these degenerate days!) to pull the ends of the tape through to the back, pulled the tapes tight, and tied two bows.
This of course skates over a lot of fussing and measuring, stretching and stapling, anxiety and tension, but I’m sure most of you have had similar experiences and don’t need every detail!
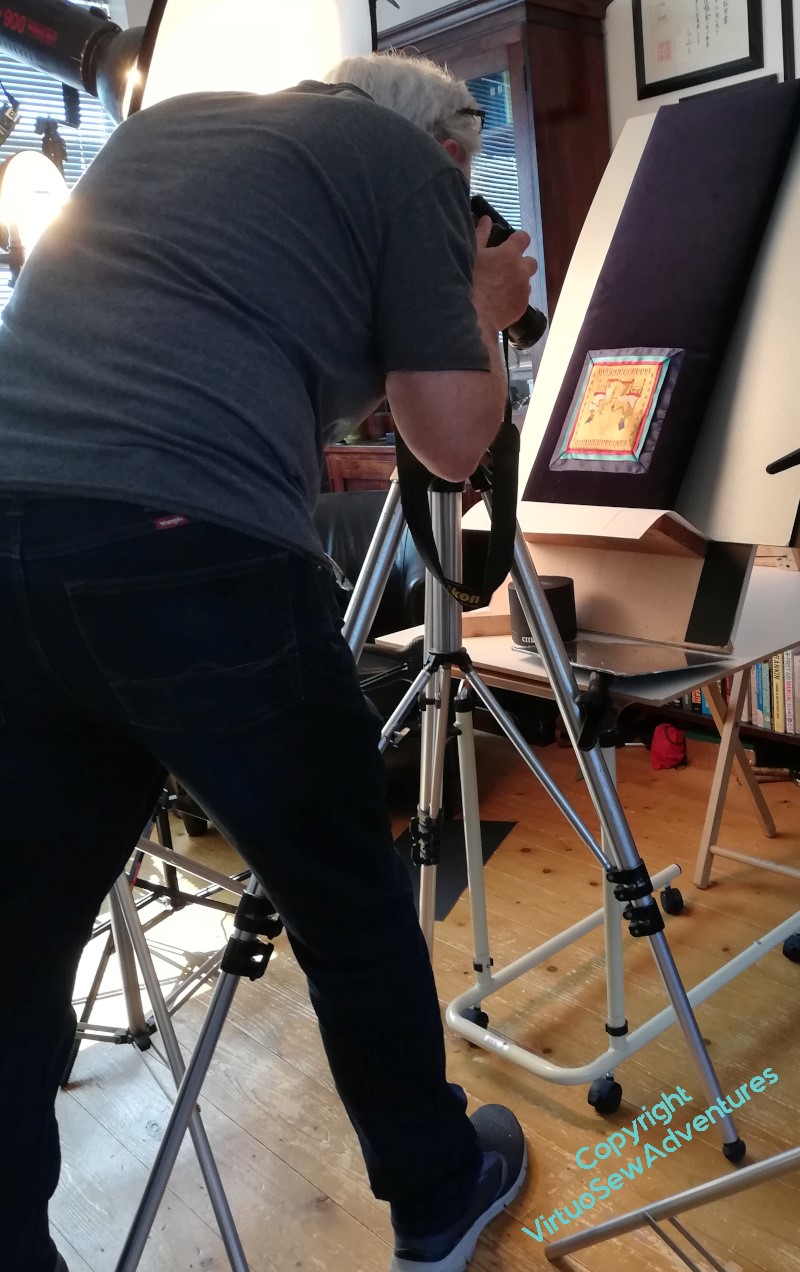
However, the final result is what you see here – Nefertiti, The King’s Great Royal Wife, At Whose Coming One Rejoices – on set at Bernard Rose’s studio, ready for her close up and commanding the stage.
Worth waiting for, I think!
Framing the Family
We left the Amarna Family lurking at the far side of the living room, surrounded by coloured ribbon. I was very certain it was better than the gold, but I wanted to be sure I was happy that there was nothing better somewhere at the back of my mind.
After rather longer than is evident in the gap between the posts on the subject (doing and writing often get thoroughly out of sync, for me), I decided that it was probably the best presentation I was going to invent, and needed to be done properly. The ribbons were already attached, so the next stage would be to make sure the corners were made neat and square, and the attachment was secure.
Secure, and not too noticeable.
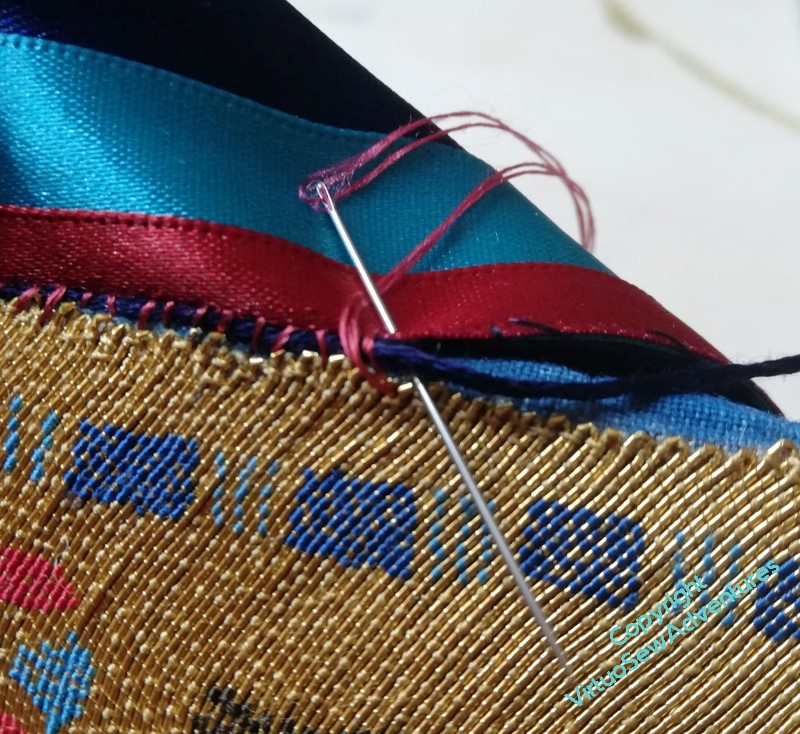
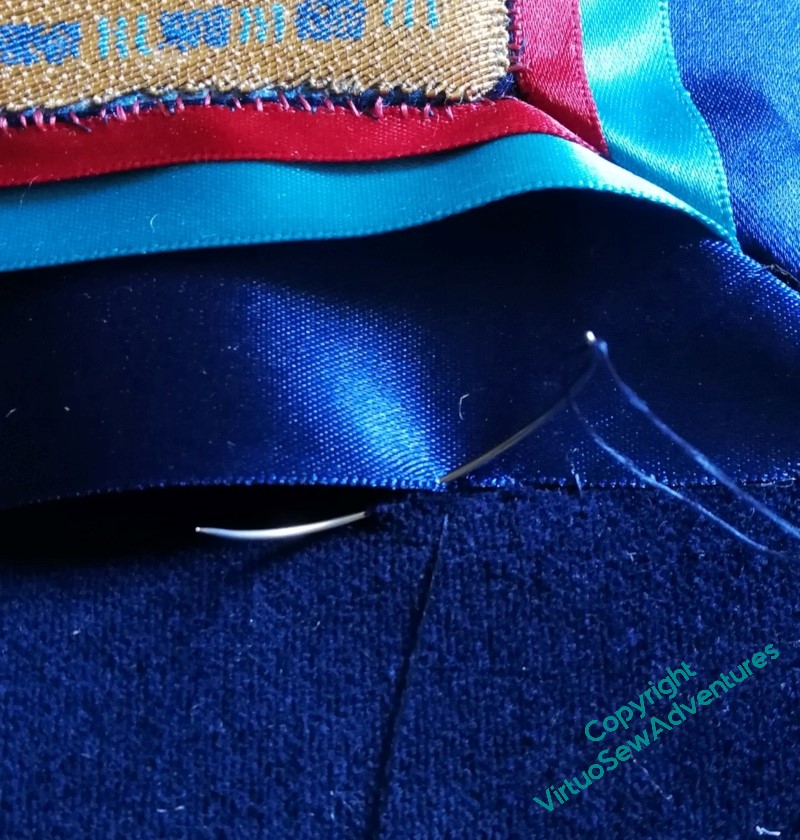
I was a little afraid that the join might leave the fabric showing, or otherwise draw attention to itself, so after a little thought, I decided to overstitch a navy thread (stele-coloured, as it were) with red silk. I’m hoping that because it’s not a single colour, the join will be slightly camouflaged. I did consider gold, but decided in the end that camouflage-by-lighting was not my aim!
The whole process took a couple of days, because holding the navy thread at the right angle and tension was something that required frequent breaks to avoid cramping fingers.
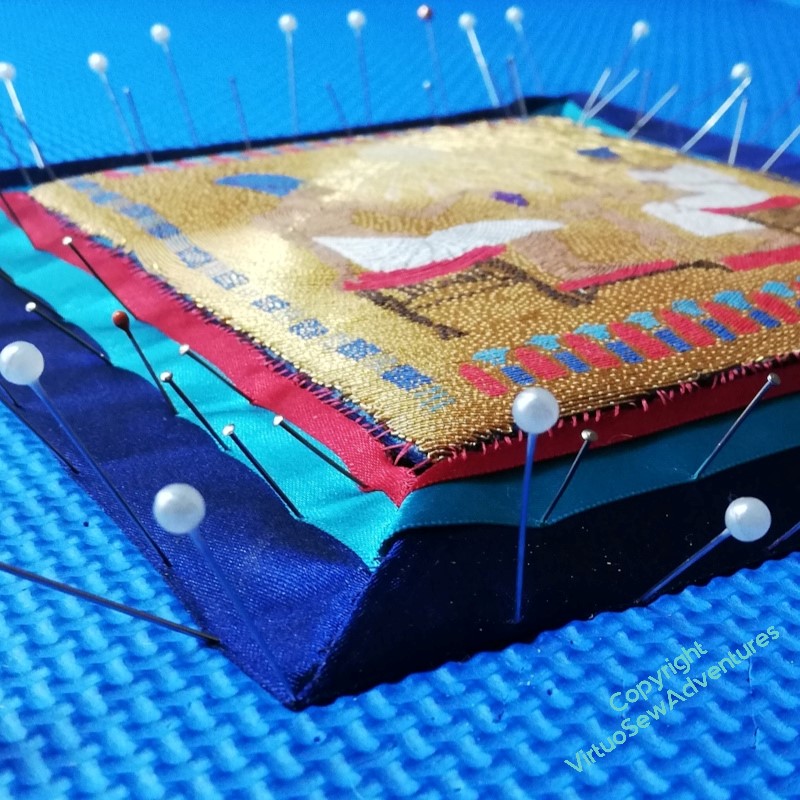
Each corner then required some manipulation to make it work, so once I felt I had the corners mostly settled, I pressed them (not the goldwork!) very, very cautiously.
And then pinned them down very thoroughly, and turned my back for a few days!
A (not very) Blank Slate

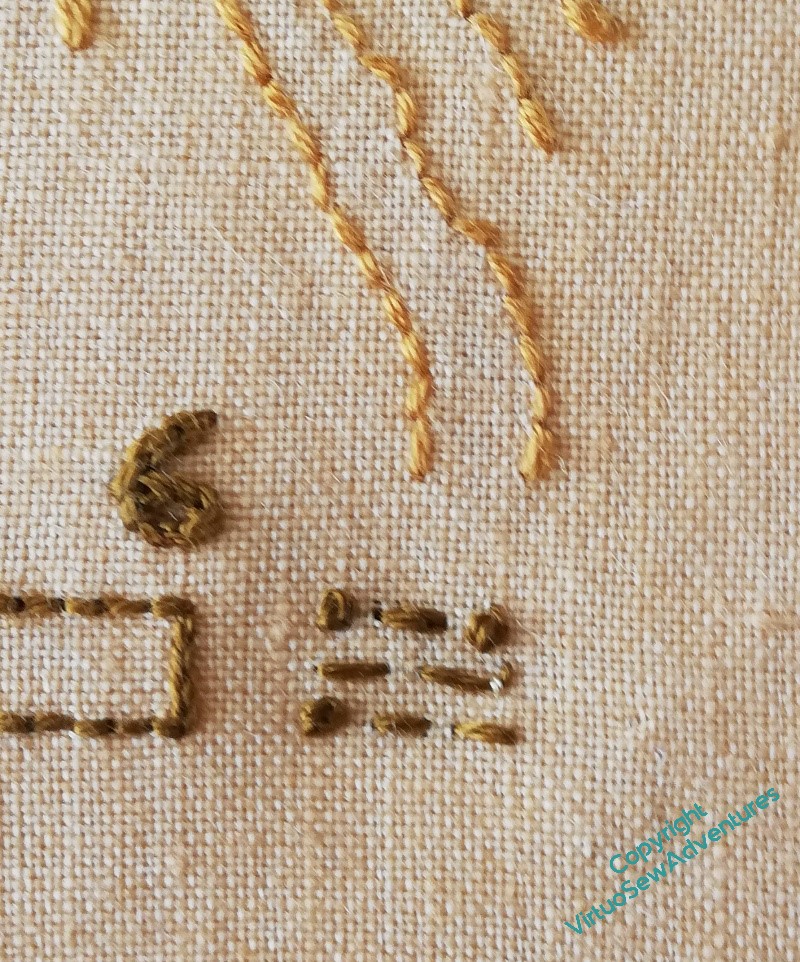
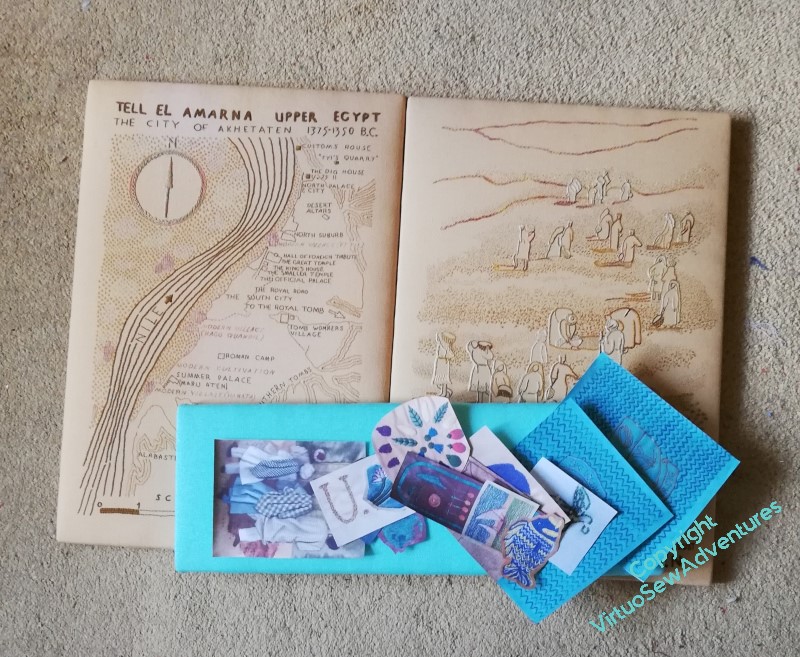
Finally, it occurred to me that I hadn’t signed the panels – either of them! Soon rectified, but as I didn’t notice until after the panels were mounted on their frames, the stitching itself was a bit harder than it would have been had I been more alert.
Never mind, the Map is now signed at the end of the scale , and the View of the Excavation is signed just before the A of “Akhetaten”.
Now I have to plan the spots.
I’ve taken photocopies of the various “spots” that will be attached to the side panels, so that I can use them to play with layouts and avoid too much handling of the real things!
Among other things, I’ve not decided whether to trim close but square, or to trim to shape (the Glass Tilapia, for example).
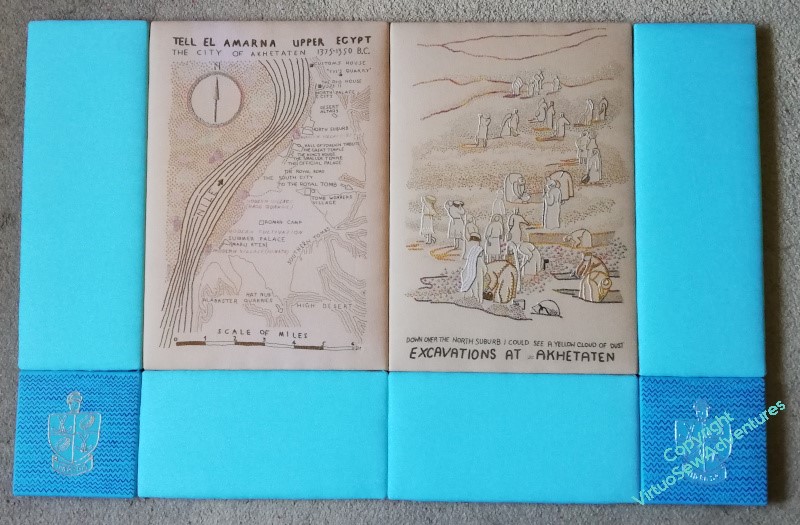
I think the two panels stand up to each other much better now, and better again in real life than in photographs. The next stage will be a whole series of shuffling of the photocopies around the faience coloured pieces, to see what sort of balance I can create. I’m not even sure that all the pieces will be used – some may end up being mounted in some other way.
When I’ve had a bit more of a play, I will show you how I’ve been thinking…
In which I find an expert to delegate to..
Embroidery, as many of us have cause to know, can be extremely difficult to photograph successfully. I’m much better at it than I was when I started this blog, but mostly because the technology has improved enough to make up for my deficiencies! So I decided that it might be a good idea to get a Real Photographer to take photos of the Amarna embroideries for me.
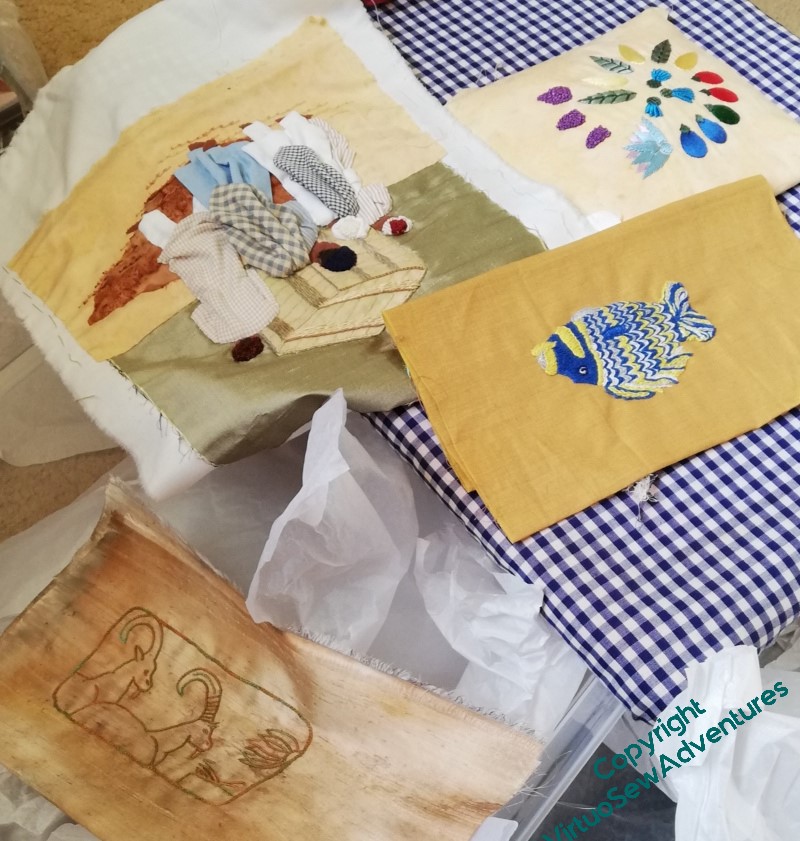
It’s going to happen in two stages, the first covering as much as possible, and the second the finished assembly of the colour block panels, and anything else that needed final details. So the first thing for me to do was to get all the “spots” for the main panels stretched over card so that they could be photographed before I assemble the colour block panels. Then I bundled them up with the Amarna Felts and the two main sandy panels, and went to visit Bernard Rose in his studio.
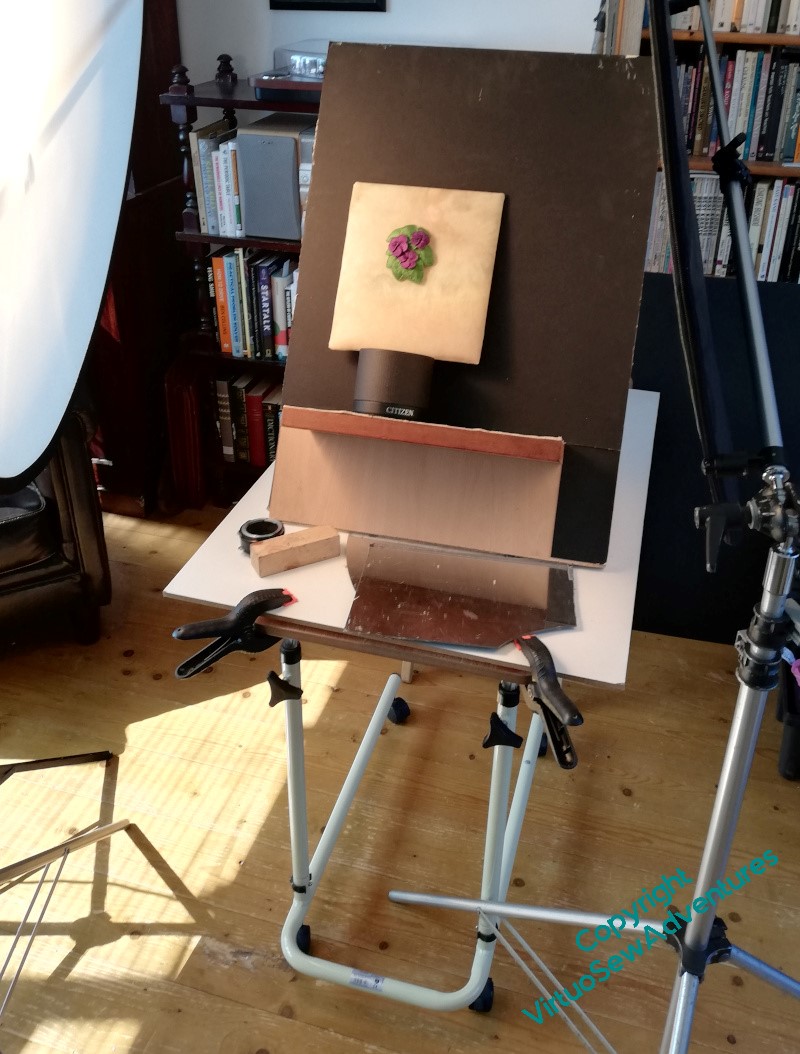
We’d already met to talk about what I was doing, and so that I could show him what, precisely, the challenge involved (to say that The Colosuss of Akhenaten offered scope for experiment doesn’t really cover it!), so when I arrived, he had already set up lighting and a table with an easel of sorts on it, so that the embroideries on their temporary mounts could be easily set up, and easily interchanged. There were also a whole range of different reflectors to add in as each piece demanded, some of them wielded by me, some by him, some propped or clipped to the table.
Here you can see that the Clump of Violets is in place. I made a separate, sandy-coloured card for the Violets and the String of Beads, because I think these will end up together, but I’ve not got How quite sorted in my head.
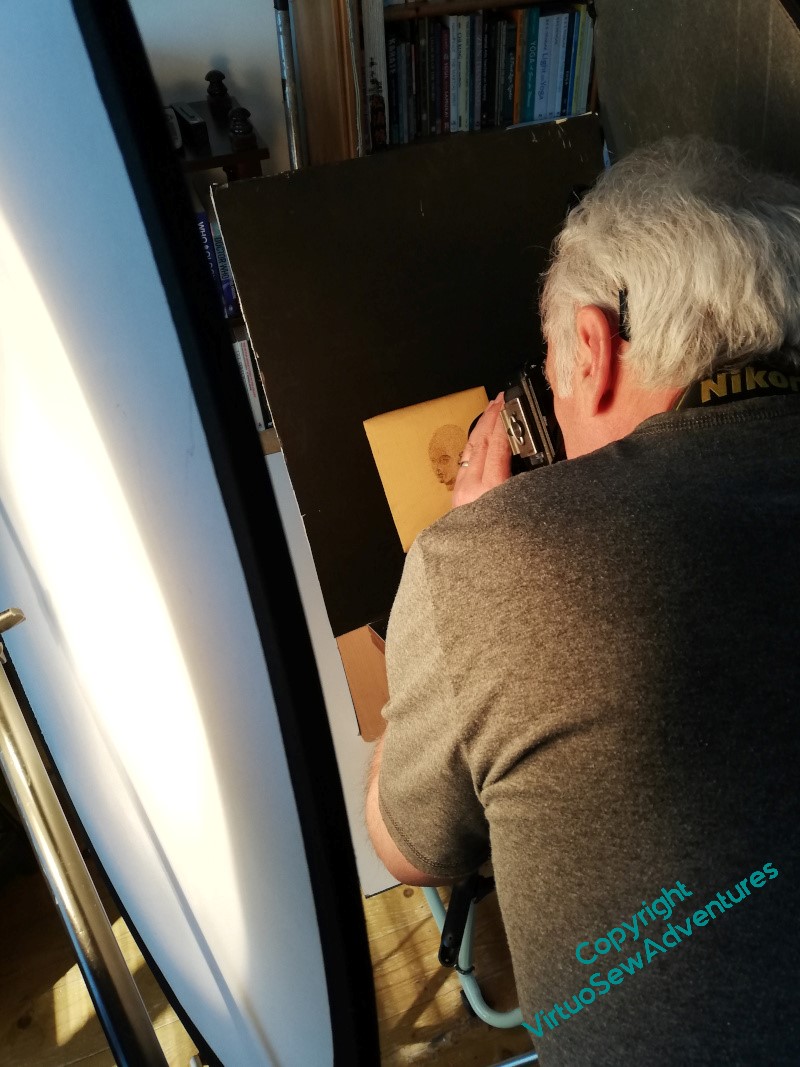
Since Bernard seemed to enjoy himself more every time an embroidery proved particularly difficult, we had a tiring but successful and rather entertaining morning. Here the Head of Ankhsenspaaten is the focus. I’d forgotten how tiny she is, and wasn’t at all surprised when he abandoned his tripod and took the camera in hand!
I’d also rather forgotten how much I’ve done that’s Amarna inspired.
Quite a shock, that was!
Presentation for the Amarna Family Group
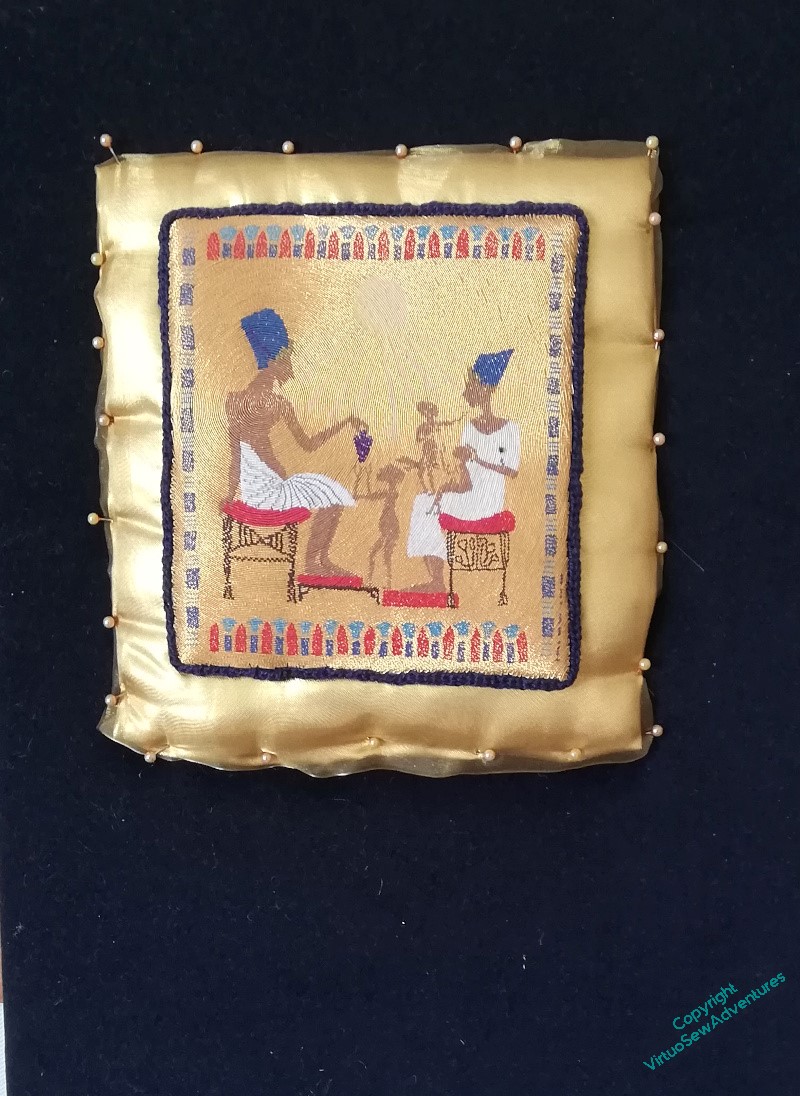
You may recall that when I had finished the or nué I started to apply it to the stela and was very upset because it did not look at all right.
Oddly, it seemed to need backup, as it were. So I thought – Ancient Egypt, gold, let’s give it a gold cushion, as it were.
Only to be less than thrilled with the result. I will grant you that merely pinned in place and without smoothing out the “cushion”, it wasn’t going to look its best, but still..
It has been leering at me across the living room for some months now, and every time I’ve caught sight of it, my head has dropped.
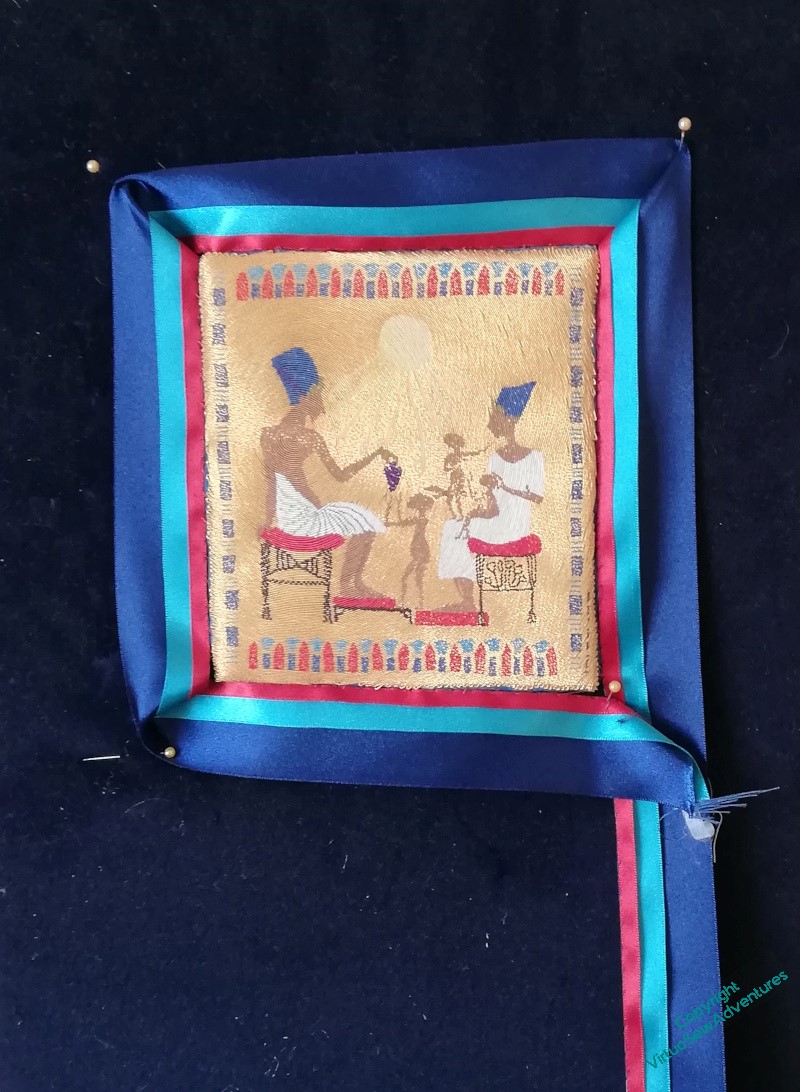
But then I had a thought – maybe what I need to do is pull out the colours in the border.
So I bought a couple of metres of satin ribbon in decreasing sizes, and spent quite some time attaching them to one another down one edge.
This is the result, attached in a very off-hand fashion, to be stared at for a while..
I think it’s better.
The question is, is it Best?