
Tag: photography
Another day of photography (second helping)
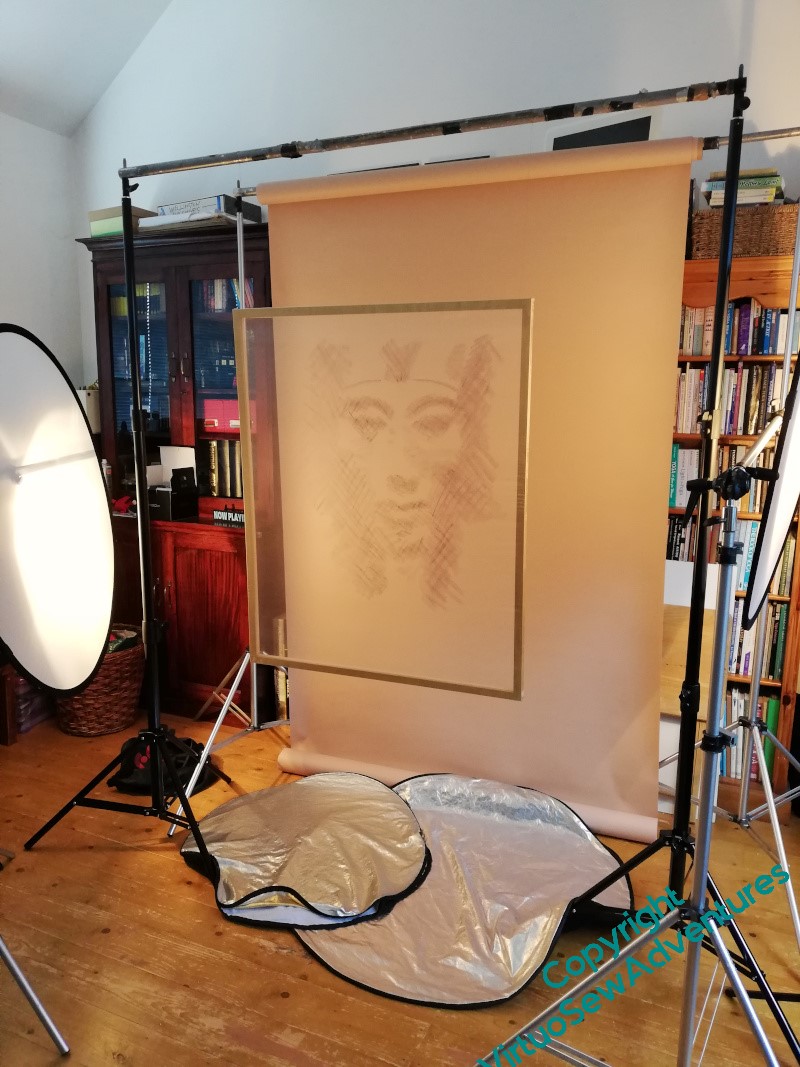
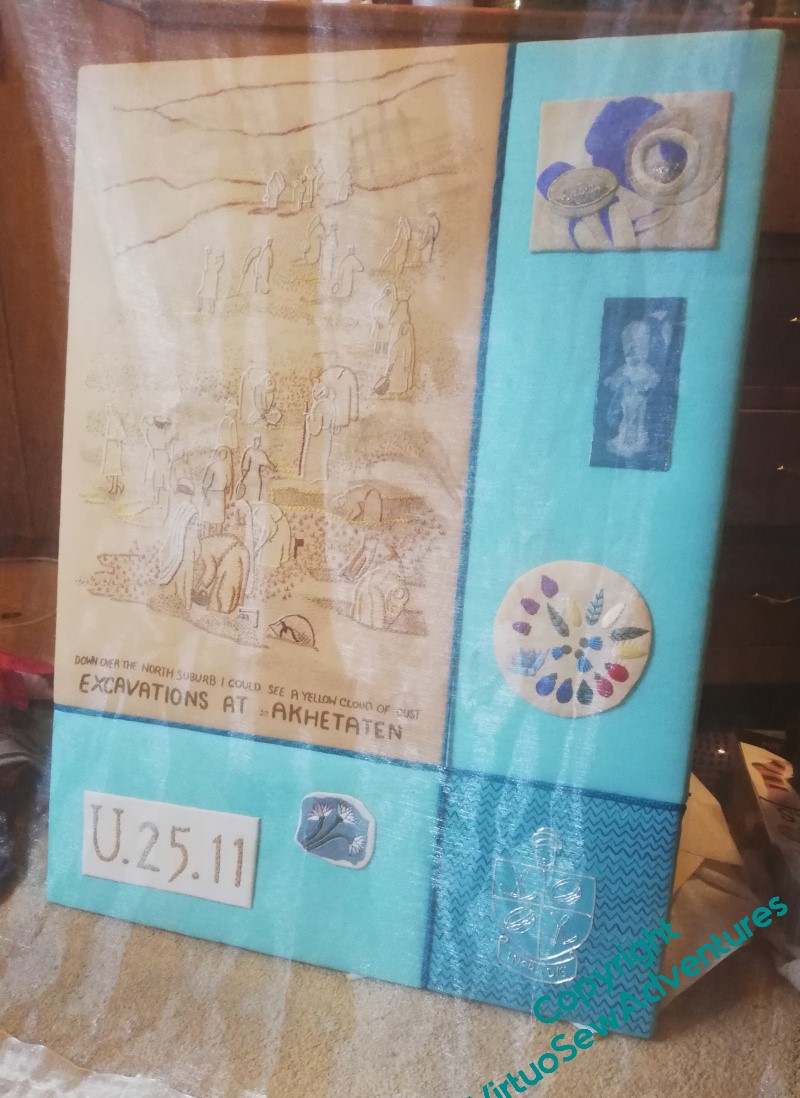
The complication of the overlays against the panels is introduced by the facts that the overlays are slightly bigger than the panels, they are transparent, and the overlays themselves are heavy. In any final display, the overlays will be screwed to the wall, but we couldn’t do that in Bernard’s studio!
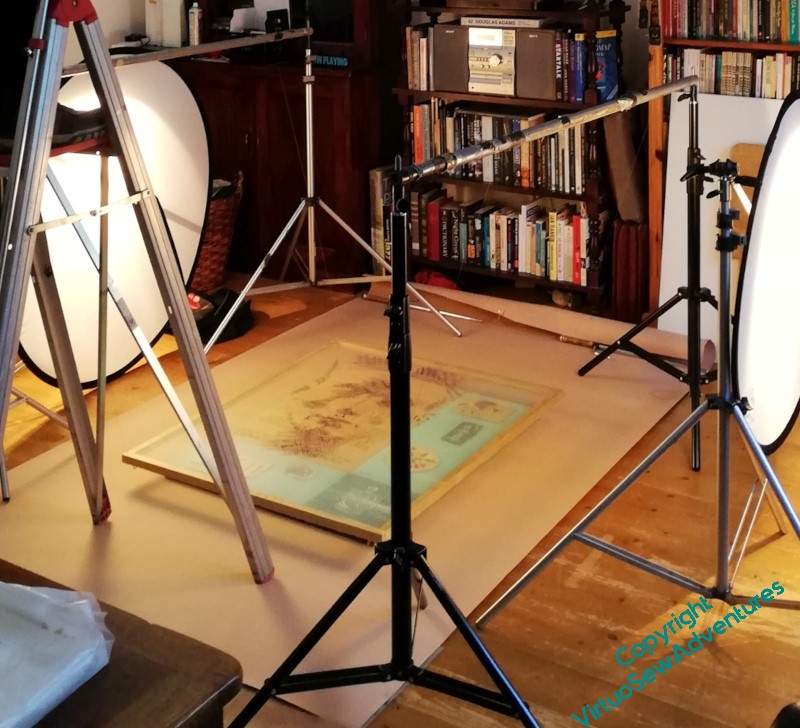
When we took the original photos, the panels were put on the very edge of a table, tied using fishing line through that convenient gap between the lower panels and the higher ones to an extremely heavy tool box, and with the background hanging behind. Since I wanted to include the frame of the overlays, that wouldn’t do.
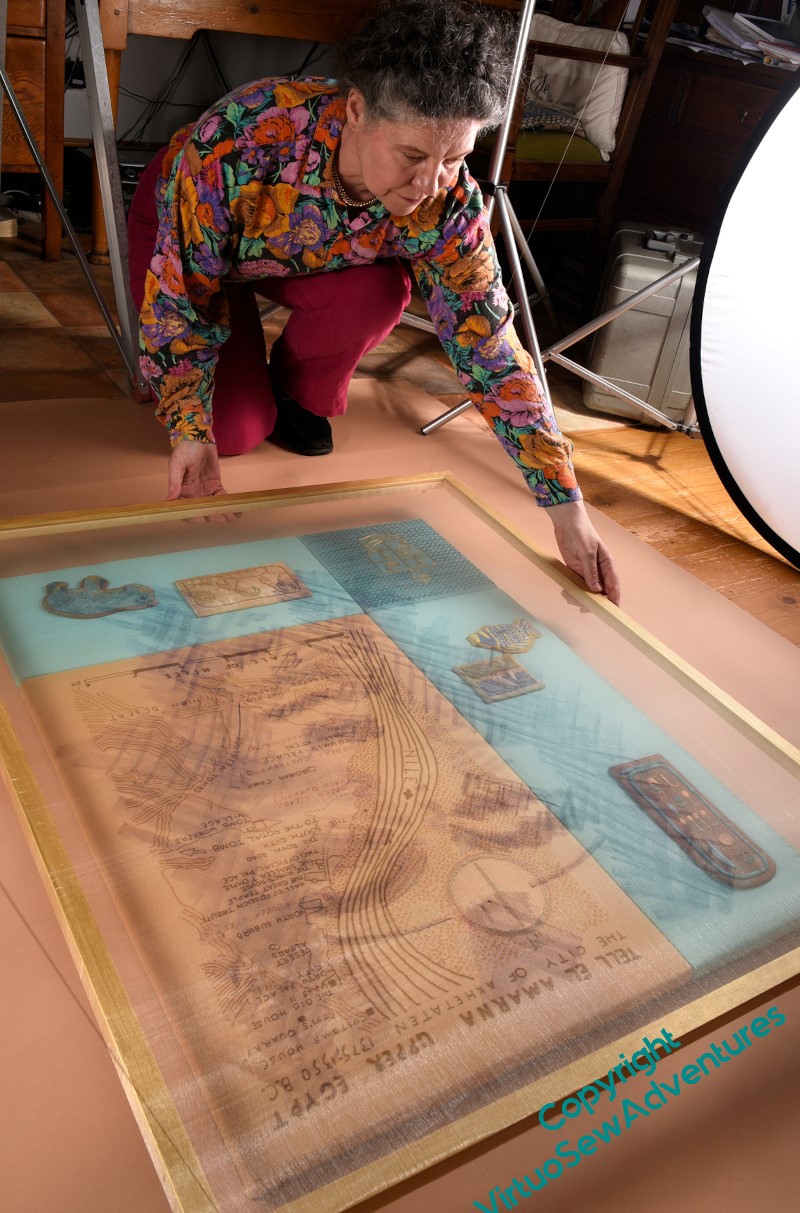
So here is what we ended up with! A section of background is laid on the floor, with the panel laid on it. Then we set up a set of tripods on either side, poles between them, and ran a length of fishing line from pole to through eyelets in the back of the frame. We get the shadow that reveals the overlay to be a separate thing, and several ways to adjust the whole thing until it works.
It did rather turn the studio into a low-budget version of that scene from the film Entrapment where the cat burgler is practicing avoiding a mesh of lasers with a mesh of strings with bells on, but that just meant a certain hilarity entered the proceedings!
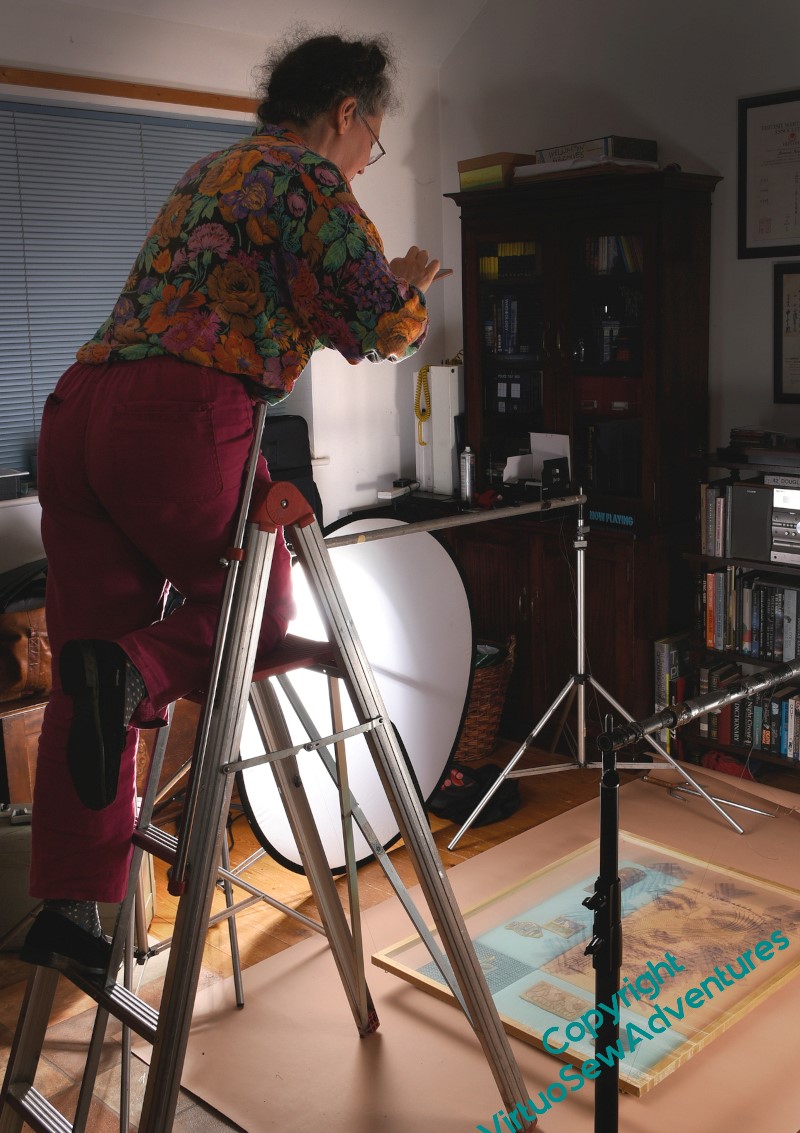
It also meant the deployment of a ladder for the viewpoint to be high enough. It’s a proper ladder for the purpose, and it was sturdy enough – Bernard was happily standing on the platform at the top to take the final shots, which I wasn’t quite up for, as you see.
I do think the set up will produce the right photos for the purpose, but my goodness, photography really isn’t “Just Point And Shoot”. Bernard also tweaks the raw files to make sure that they bring out what he saw when he took the photos, which means that we have something really good to start from. Technology has improved immeasurably since Mary Chubb’s time, but even so, there are losses in quality as you add processes, and to have something decent at the end of a sequence of design, layout, and printing processes, you have to start with something really excellent.
Another day of photography (first helping)
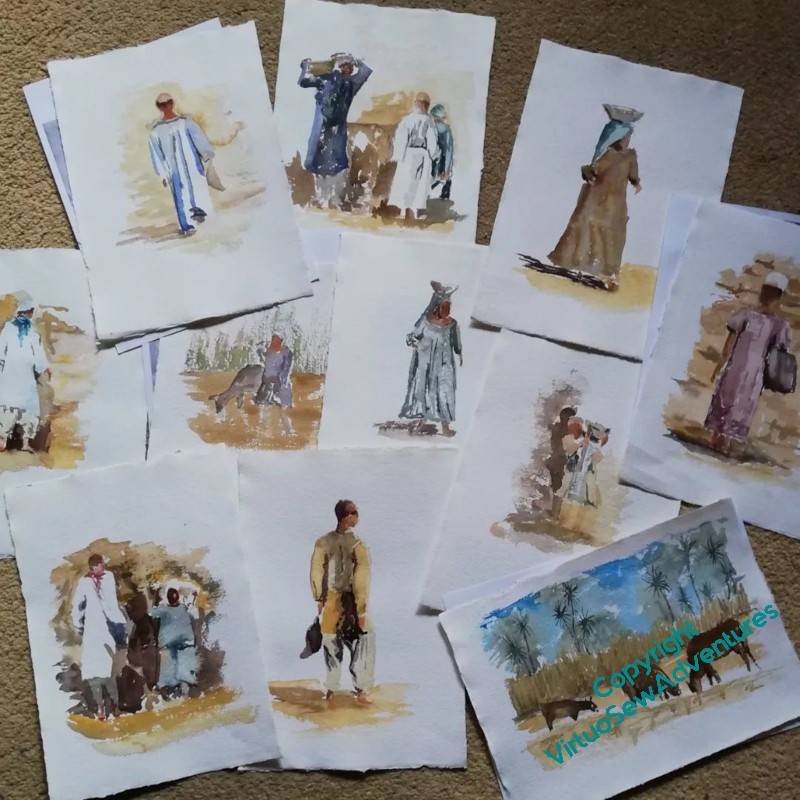
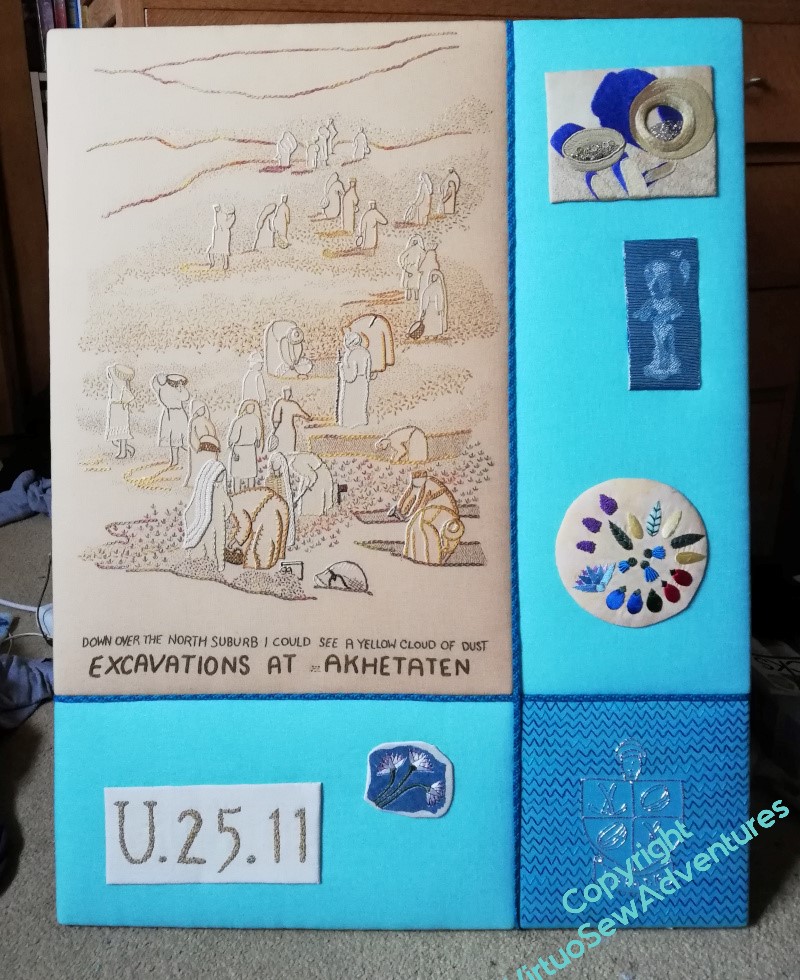
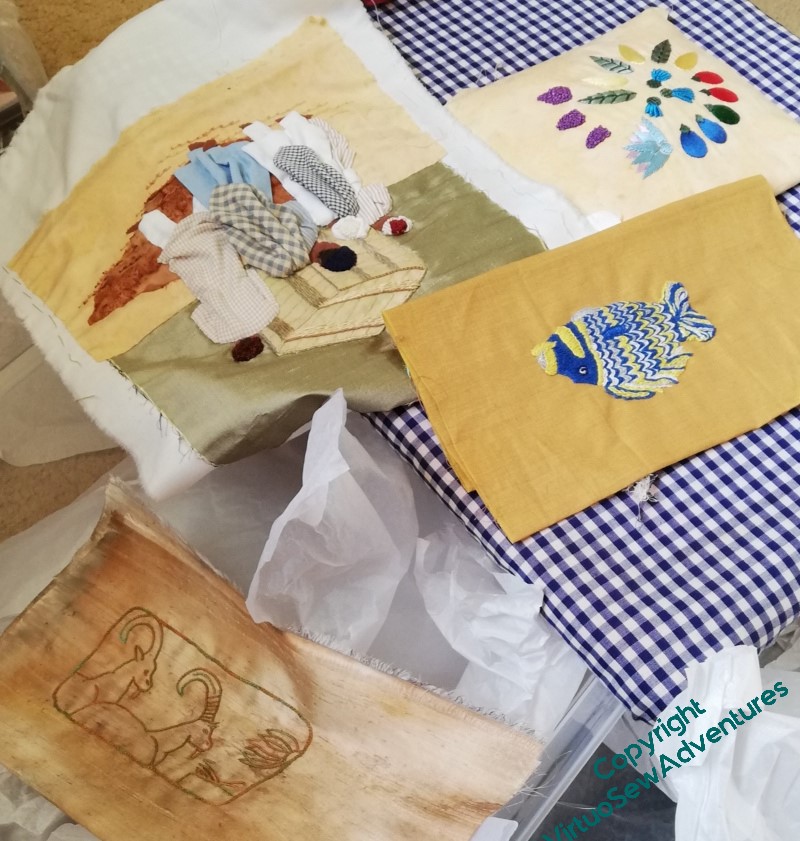
I’ve been working hard on the manuscript of the book I’ve written around the Dreams of Amarna, and one of the things I want to do is stitch the story together with pictures of the ordinary Egyptians working on the dig. They are honoured in the stitchery (View of the Excavation and Loading The Felucca), but that didn’t seem quite enough.

So I’ve been doing lots of little watercolours of labourers, basket carriers, and fragments of the dig and the scenery, and now I’ve sorted out the overlays (there will be more about my experiments with ink and inktense later), I bundled up the whole kit and caboodle and took it across to Bernard Rose Photography to see what he could do.
We rattled through the watercolours in fine style, as apart from occasionally flattening a piece of paper (I tend to paint a bit sloshy…!) there was little adjustment needed.
Then, however, matters became more complicated… The overlays are big, and the fabric is slightly shiny, and I hadn’t worked out how to hang them. So we started with the easy bit – overlays on their own, in front of a background. You get a hint here of the reflectors spaced all around, and just the general sense of engineering involved. There are two pairs of tripods with poles between them, one with the background, the other supporting the overlay, suspended on fishing line through eyelets. Then there are the tripods with the diffusers on, and out of shot, there’s the tripod with Bernard’s camera in place.
Overlays Are Tricky!
A further episode in the Difficulties of Assembly…
I spent hours – literally – making some kumihimo braid to trim the main Amarna panels, and finally finished the second three metre length during the MathsJam weekend in November. Rejoicing at this success, I pinned the braid in place over the interections in a panel, sat back, and was rather pleased. I thought it looked crisp and added a lovely finishing touch. WooHoo!
Then I put an overlay over the top and I was Most Disappointed. Rather than adding a neat little finishing touch, the braid seemed to shout over the embroidery, breaking up the panel into the constituent parts, rather than stitching it together.
That’s very odd. I’m not sure that the photograph really conveys the impression, but it was very striking in real life, and when I checked my perception by showing the piece to my mother, she agreed. She’s not been living with the project as I have, so I can trust her not to be jaded and seeing difficulties where none exist!

So that braid may need to find another home.
As you can see, the Trickiness of The Overlays continued into the photoshoot. It’s as well that the braid was not included in the end – there’s a length of fishing line in the horizontal gap, tieing the panel to a very solid weight to keep it upright. And the framework from which the gauze is hanging was macgyvered on the spot. See what I mean about the photoshoot turning into a creative collaboration?
What It Takes..
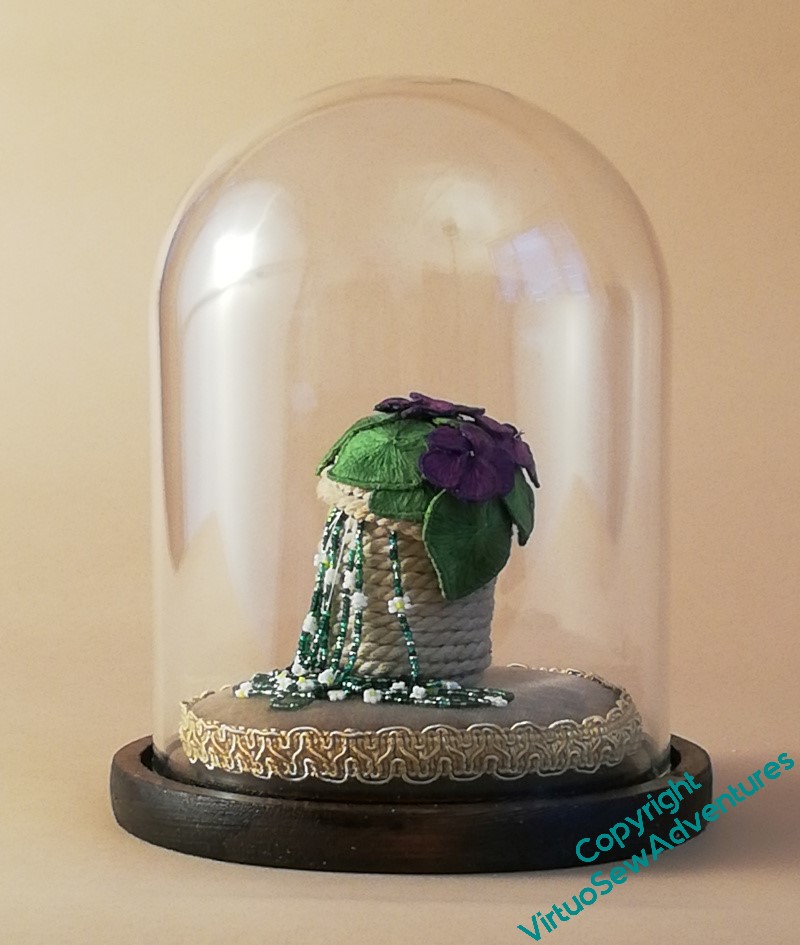
On the left, my photo. Granted, with my mobile phone, but it’s the best I have available to me. It’s in the same place, and against the same background, and with nearly the same lighting, as the one on the right, taken by Bernard.
In Bernard’s version, the colours are brighter, warmer, the crevices and shadows are reduced or enhanced in different places to bring out the details in the various elements, and the placement of the highlights on the glass was carefully tweaked and managed to ensure that the shape of the dome was brought out without any odd little bright spots in the wrong place. The highlights even bracket the embroidery, framing and presenting it.
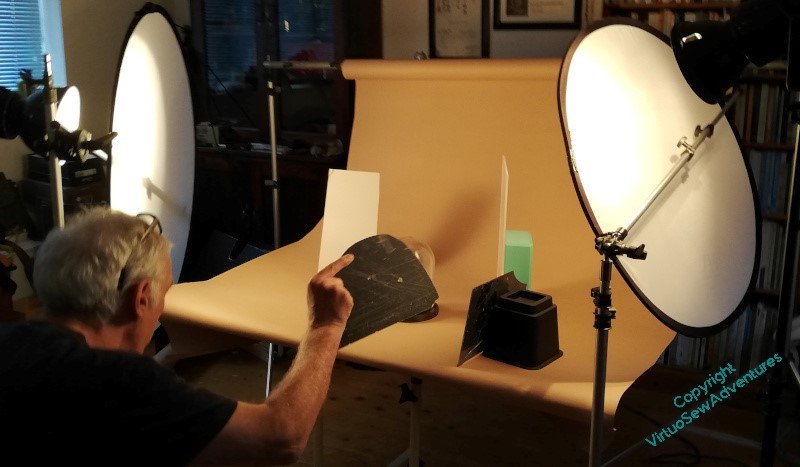
And now you see what it took. Lighting and diffusers, and then a whole slew of little improvised mirrors and reflectors, including one held in Bernard’s hand while he operates the camera with the other one.
We all say that embroidery is hard to photograph, but in truth, until you’ve seen the effort that an experienced professional photographer will put in to get a good shot, you have no idea just how hard!
And all this tells me something else – part of the trick is that, with a lifetime of doing this behind him, Bernard can look through a view finder and think, no, we can do better. I would be impressed from the start, and give up too early, not because I don’t want to achieve a good result, but because I’ve no idea just how good a Good Result can be, and still less of an idea of how to attain it.
But incidentally – I’m so glad I tinted the base of the dome. That dark, vaguely walnut shade works much better than the plain pine!
More Delegation
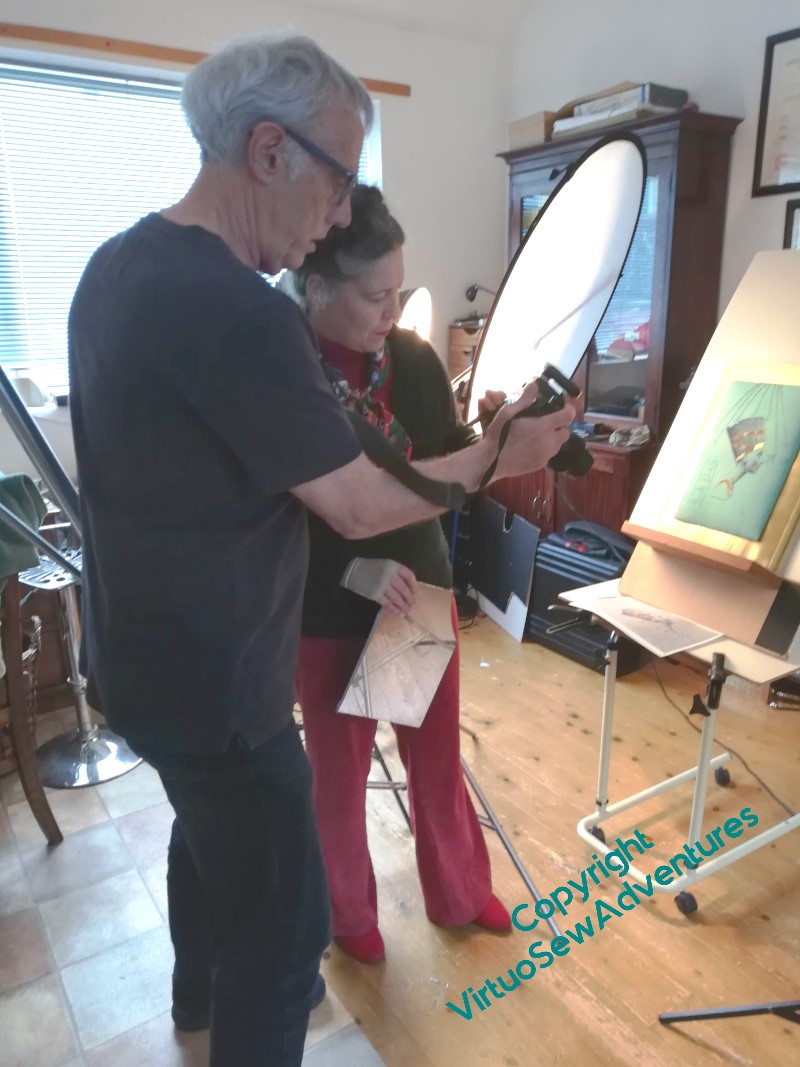
Before Christmas, but still, thanks to an arm injury earlier in the year, very much later than I had hoped (remember the original report, on the first photography session, was in April!), I took the remaining Amarna pieces to the wonderful Bernard Rose for their portraits to be taken.
In fact, we had a great time, because although it’s fair to say I was delegating everything about the photography to Bernard, he took a very collaborative attitude. He was interested in the stories I was trying to tell, and the impressions I was trying to convey, and that meant that, rather than just going “point and shoot” (albeit with better equipment and lighting!), he put great effort into bringing the best out of the various pieces.
Although, halfway through the morning, as he tried to develop a structure from which we could hang one of the overlays, he did comment on the level of puzzle-solving being demanded of him, which is apparently not entirely usual with other clients!
It’s a good thing that my arm injury is reduced to a mere occasional twinge, though – there was quite a lot of heaving things around, and the two main panels, now consisting in each case of four wooden frames screwed to a half centimetre or more of MDF, are really quite heavy and awkward.
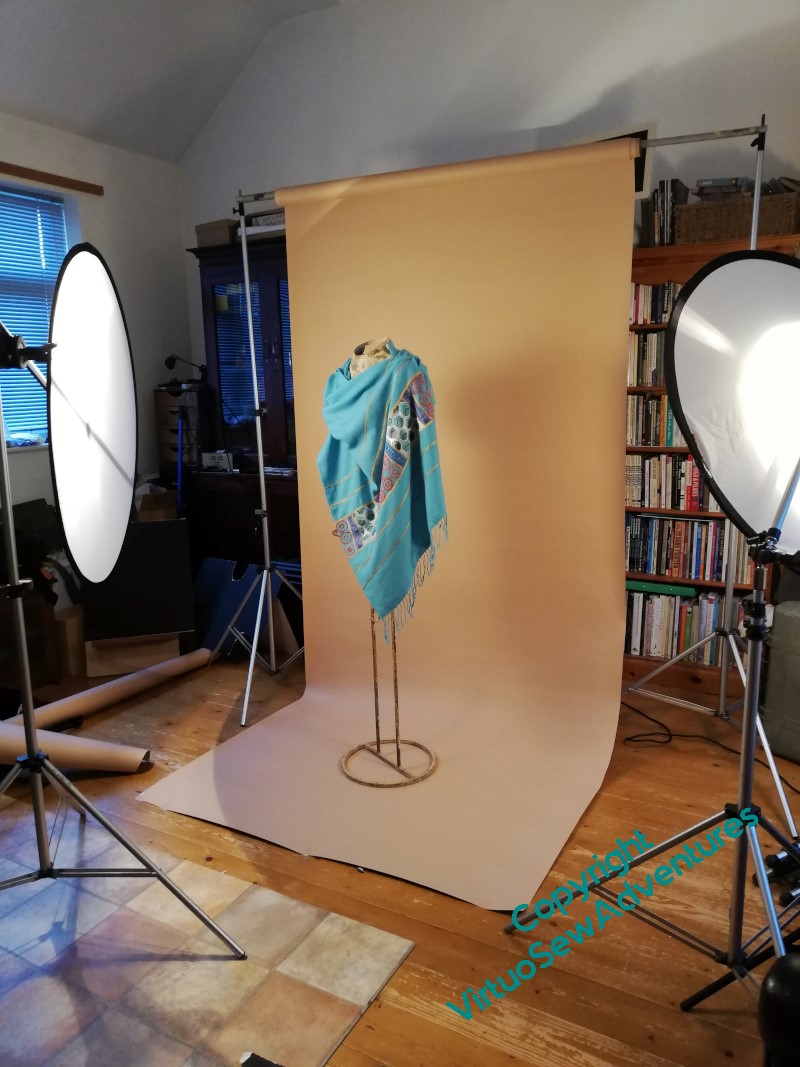
The mannequin belonged to him, too. The battered paintwork helped to bring out the idea of something inspired by archaeological discoveries. And the fabric drapes beautifully, in spite of the heavy embroidery, and the additional layer of the lining.
So I think all the photography is now done – although I will be writing a bit more about what I observed and learned during the two sessions.
That’s a relief!
In which I find an expert to delegate to..
Embroidery, as many of us have cause to know, can be extremely difficult to photograph successfully. I’m much better at it than I was when I started this blog, but mostly because the technology has improved enough to make up for my deficiencies! So I decided that it might be a good idea to get a Real Photographer to take photos of the Amarna embroideries for me.
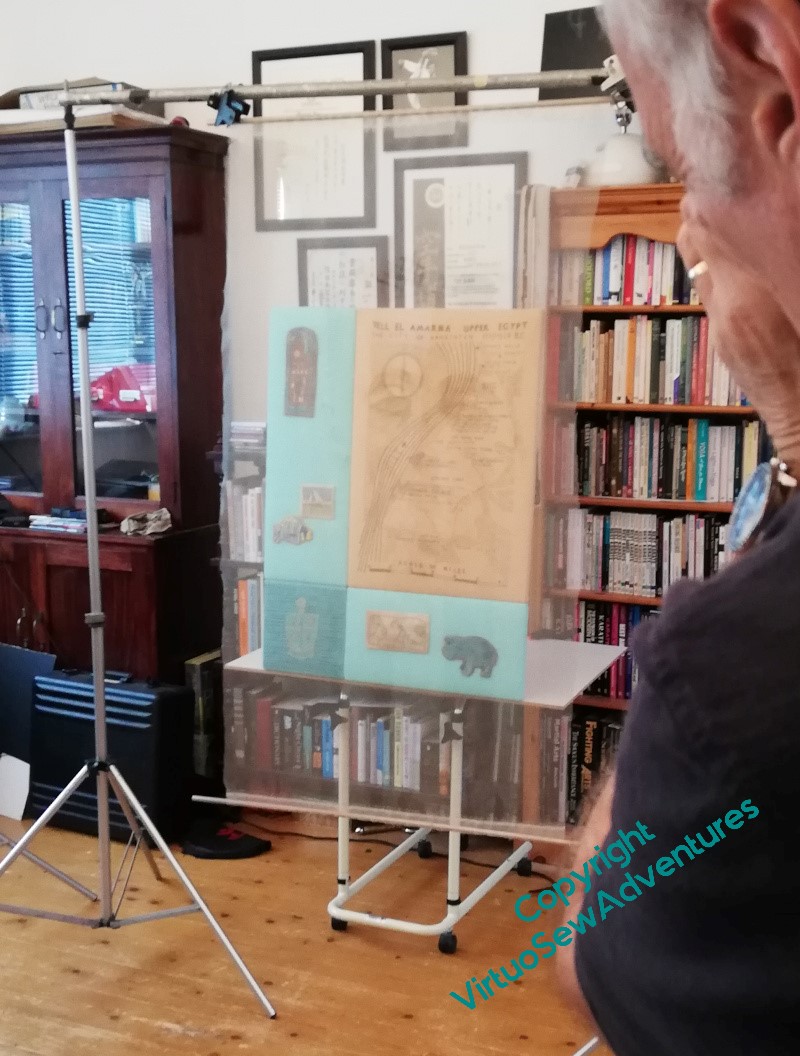
It’s going to happen in two stages, the first covering as much as possible, and the second the finished assembly of the colour block panels, and anything else that needed final details. So the first thing for me to do was to get all the “spots” for the main panels stretched over card so that they could be photographed before I assemble the colour block panels. Then I bundled them up with the Amarna Felts and the two main sandy panels, and went to visit Bernard Rose in his studio.
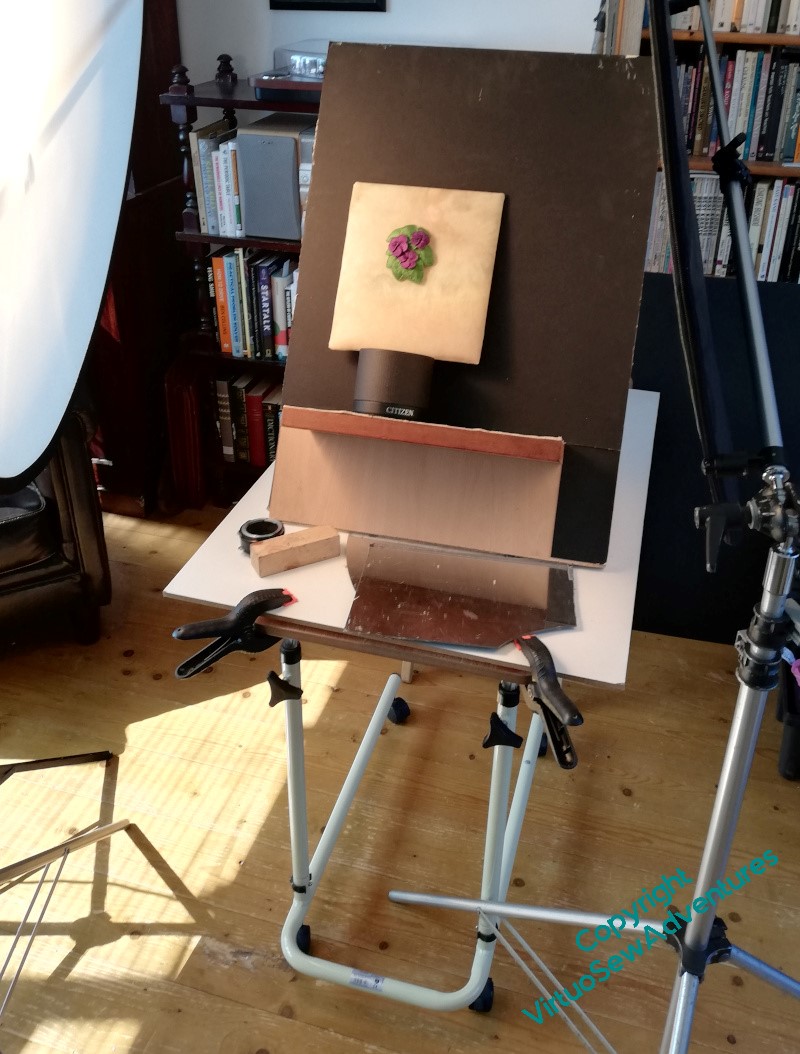
We’d already met to talk about what I was doing, and so that I could show him what, precisely, the challenge involved (to say that The Colosuss of Akhenaten offered scope for experiment doesn’t really cover it!), so when I arrived, he had already set up lighting and a table with an easel of sorts on it, so that the embroideries on their temporary mounts could be easily set up, and easily interchanged. There were also a whole range of different reflectors to add in as each piece demanded, some of them wielded by me, some by him, some propped or clipped to the table.
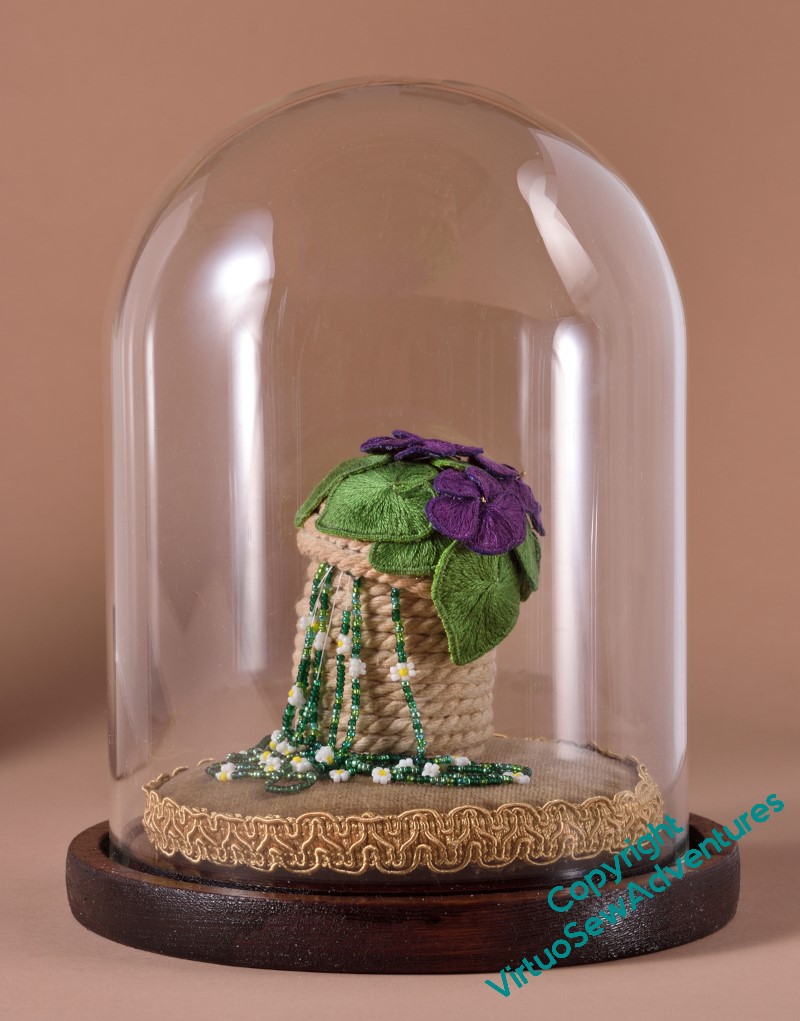
Here you can see that the Clump of Violets is in place. I made a separate, sandy-coloured card for the Violets and the String of Beads, because I think these will end up together, but I’ve not got How quite sorted in my head.
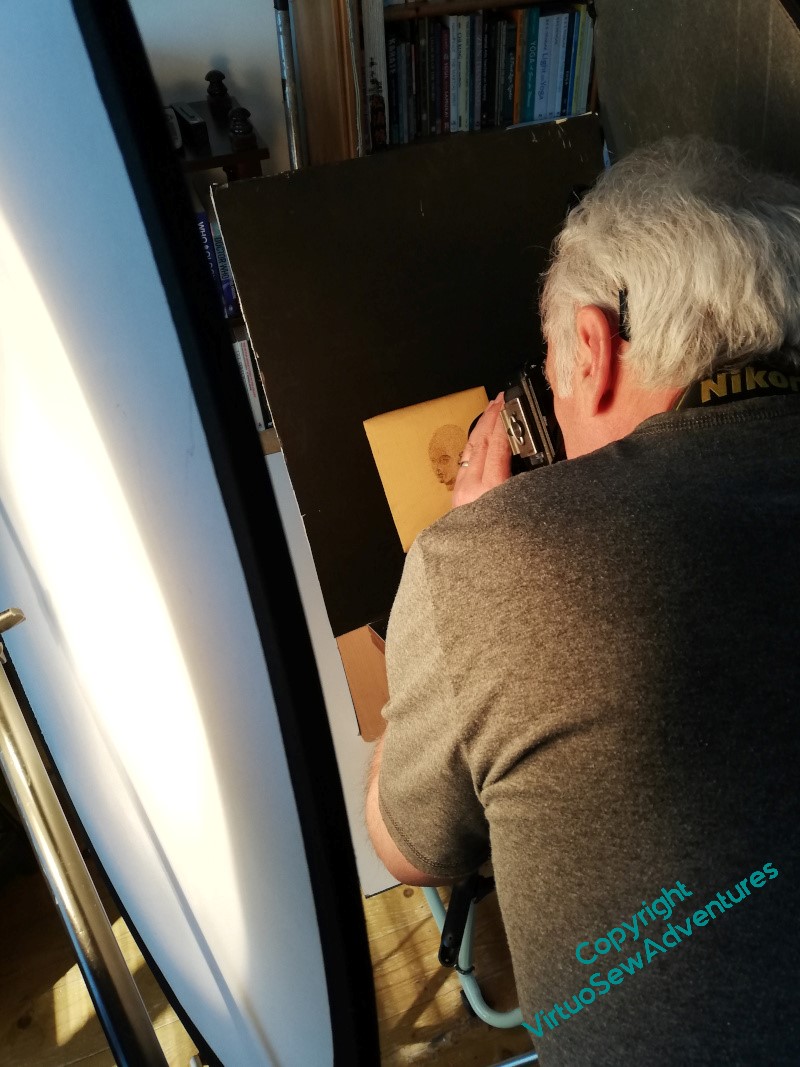
Since Bernard seemed to enjoy himself more every time an embroidery proved particularly difficult, we had a tiring but successful and rather entertaining morning. Here the Head of Ankhsenspaaten is the focus. I’d forgotten how tiny she is, and wasn’t at all surprised when he abandoned his tripod and took the camera in hand!
I’d also rather forgotten how much I’ve done that’s Amarna inspired.
Quite a shock, that was!