
Search Results for: William Marshall
Getting Back To William Marshall
You probably recall that before Christmas I had started to practice my basketweave underside couching and had even got as far as drawing in the guidelines.
And there, I got stuck. Partly because my stitching frame was in the way of the Christmas tree and had to be folded down, and partly because I rather lost my nerve – the interval, you understand!
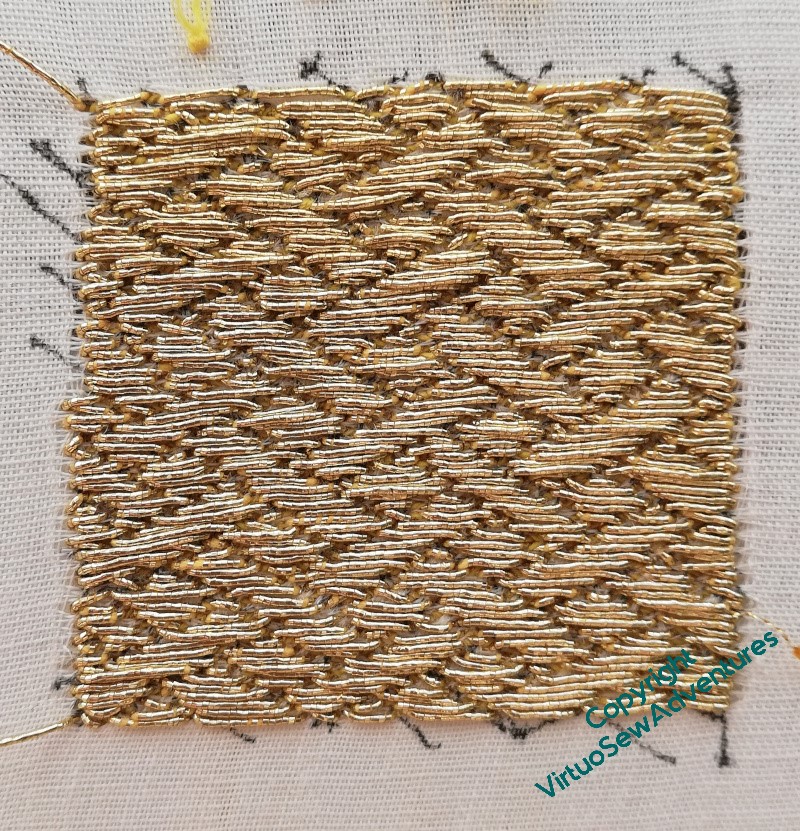
I decided to finish the test patch with the actual thread I’d decided to use, and then I would have No Excuse.
And in fact, this doesn’t look too bad, does it?
There are bits I’m less than chuffed with, but on balance, the pattern is fairly clear, clearer than on the previous piece, and I think I have to decide that any further improvement had better take place in situ, as it were.
So here I go!
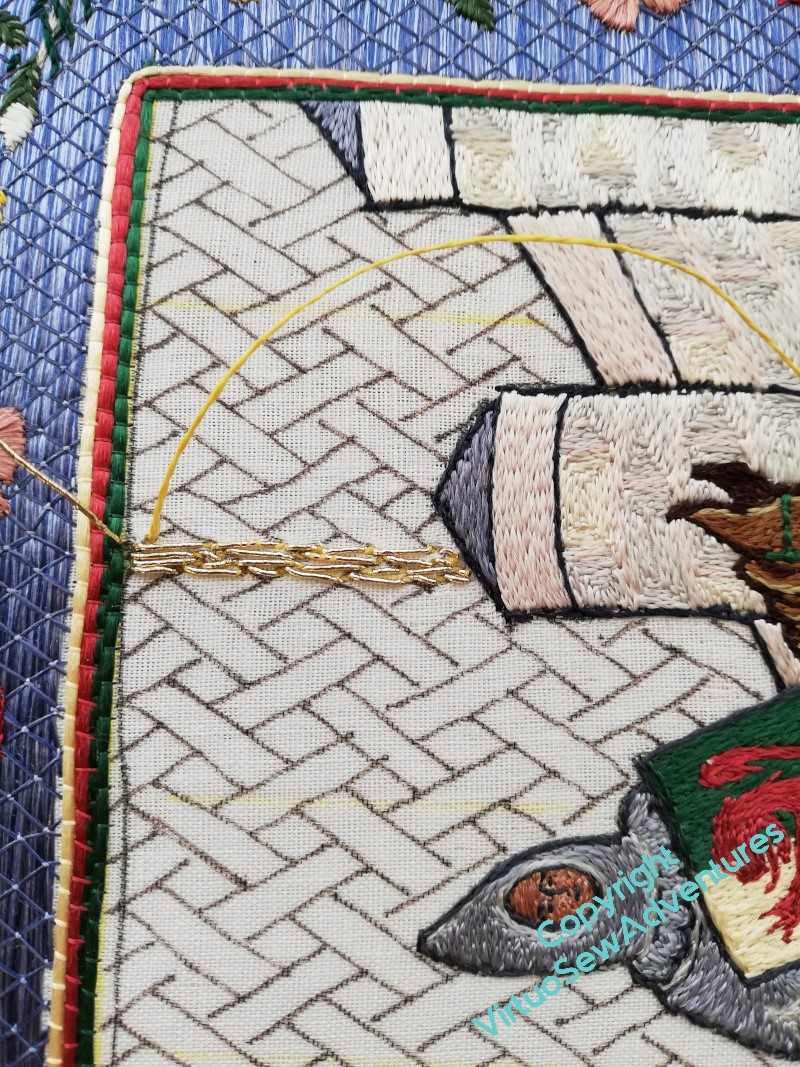
I decided to start on one of the straight lines I drew at intervals to help make sure I stay on track, and slightly off-centre, so that any particularly egregious infelicities in the changeover aren’t bang in the middle. You may recall that one of the discoveries from the practice piece is that I am more comfortable working horizontally and away from me. So I will work from this point to the far edge, and then turn the frame around, and work to the far edge in the other direction.
Wish me luck!
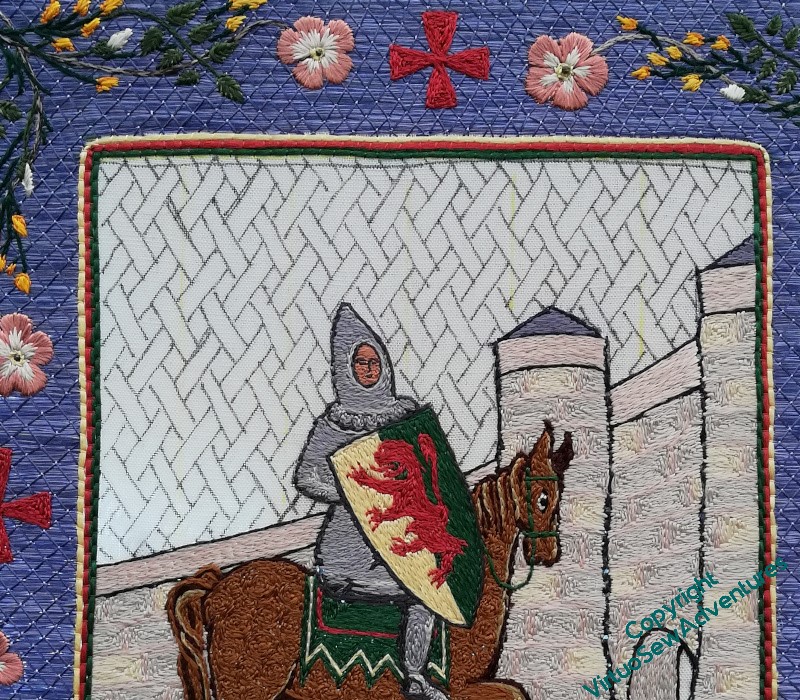
William Marshall – first Turret
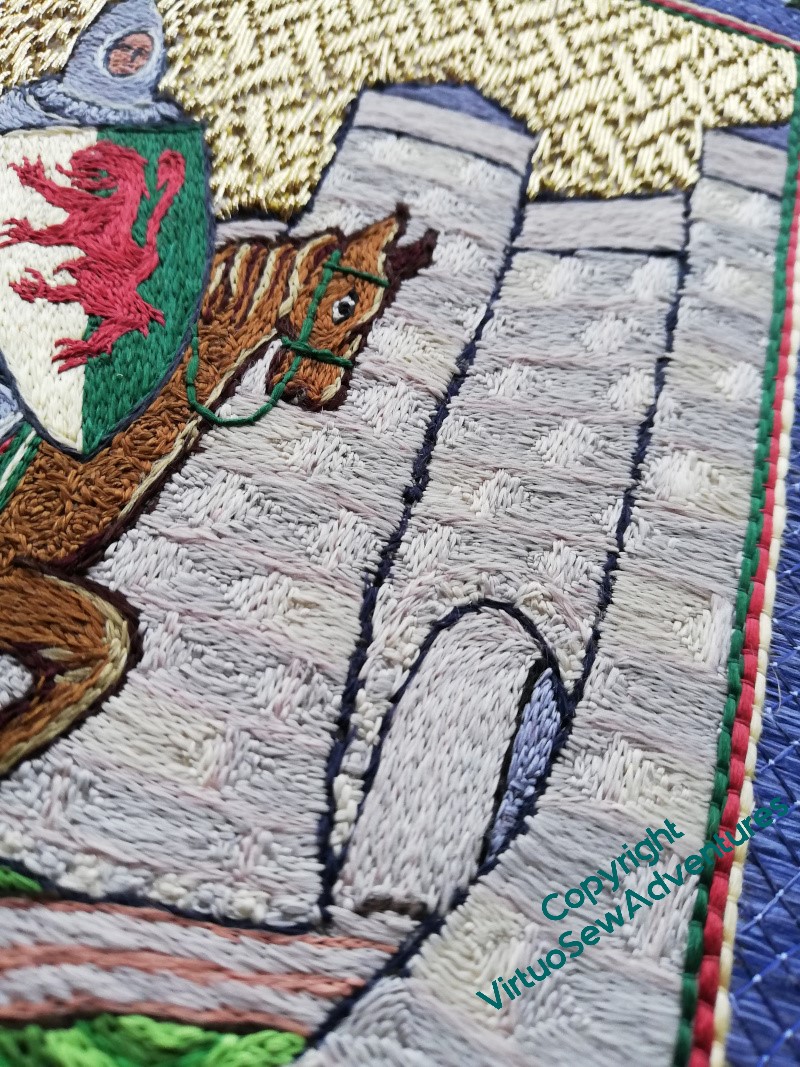
I had three colours for the stone – a grey, a cream, and a pale rose. The idea is to echo the colour variation you often see in stone when you start looking, but also, at least some medieval masonry made ornamental use of colour variations. Again, remember that I am looking for a faintly mythological feeling to this, not a historically accurate one, so I don’t mind that I’m tweaking my representation of the Chateau de Tancarville until William’s kinsman wouldn’t recognise his own home. He might, after all, rather like what I’ve done!
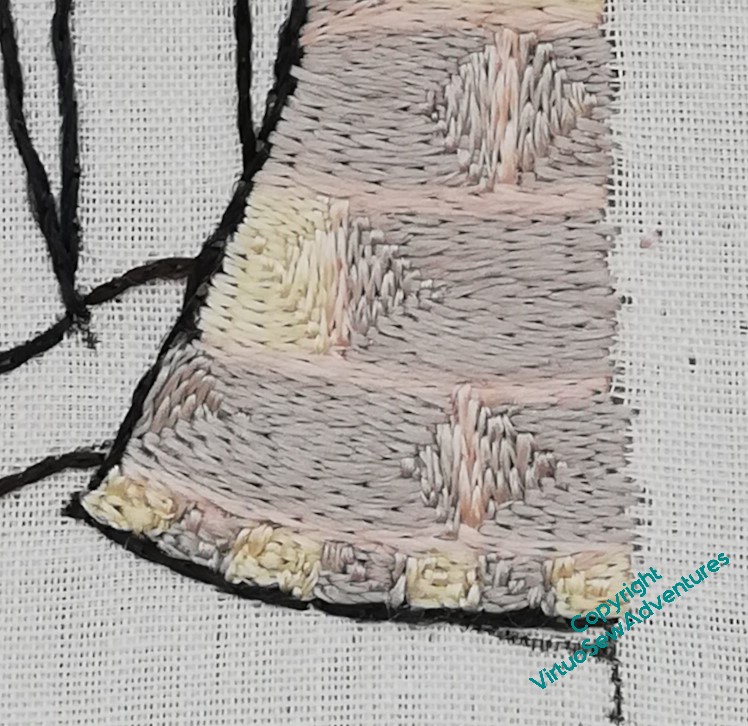
I put some thought into whether I would use all three colours in the walls, and if so how, but in the end I decided that since the “sky” will be underside couched in gold, it would be better to put the rose or the grey on the topmost course. Grey felt a bit too lowering, like a stormy sky, and William had quite enough squalls to face in his life, so I chose the rose, and used it also for the mortar.
The narrow course at the base seemed to need a different treatment, still in the the same vein. I used six strands instead of the four I’m using elsewhere, and made a little narrow chequerboard, without any suggestion of mortar.
And here it is, the first turret of the gatehouse complete. I was a little anxious lest the sameness of everlasting split stitch prove exasperating or otherwise offputting, but as it turns out, that’s not the case. I’m finding the different effects of stitch length and direction endlessly intriguing, and while I don’t expect to spend the rest of my stitching days entirely on split stitch, I’m certainly expecting to enjoy William.
William Marshall – beginning to stitch
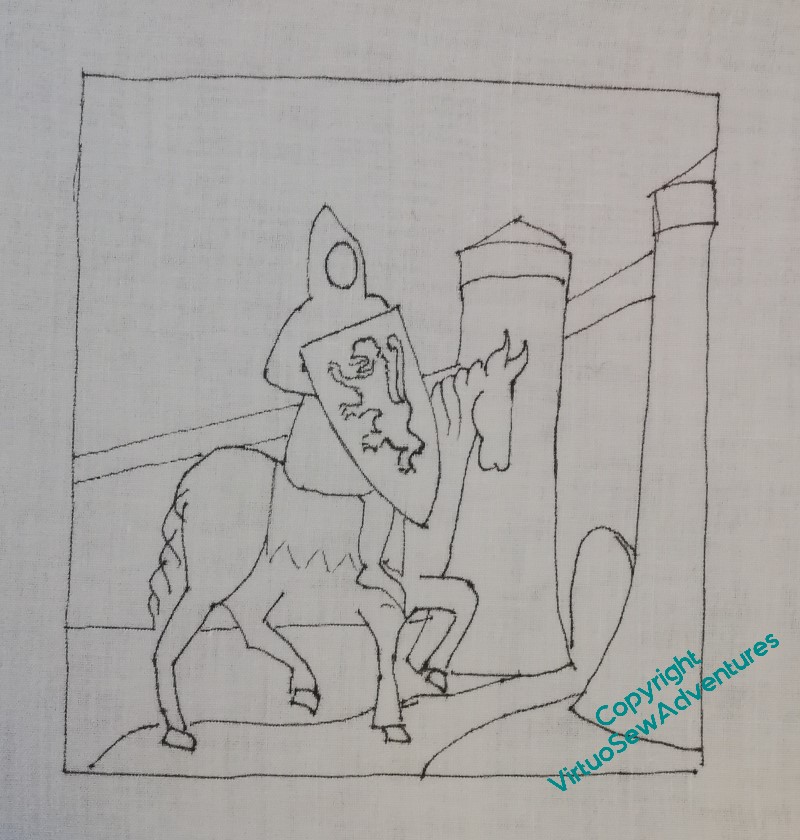
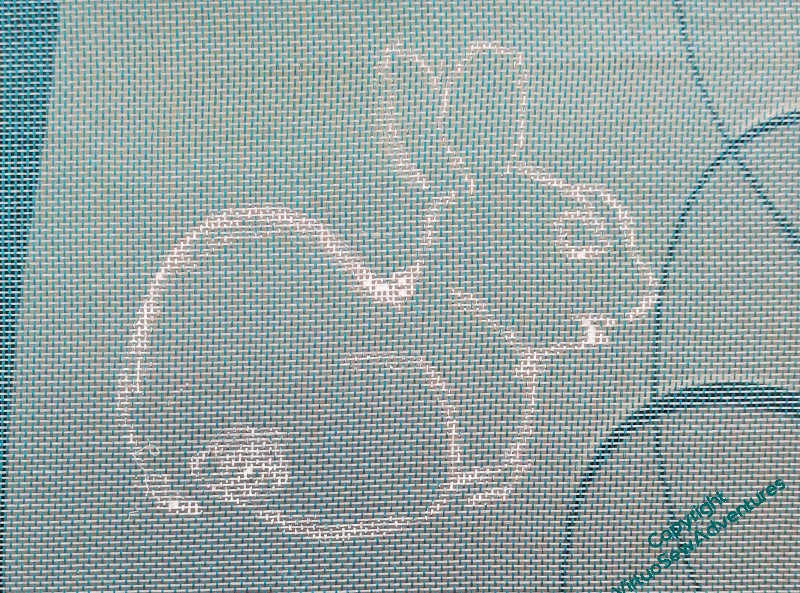
I have a small lightbox now, so I used that to transfer the design. It was a bit of a battle, because the lines showed through so clearly I couldn’t be sure I’d got them all.
And I hadn’t – spot the non-deliberate mistake!
However, one horse’s belly can be added freehand. I haven’t put in the lines for the reins, either, because I’m anticipating putting them over the top of the stitching below, and that layer of stitching would cover the design lines anyway.
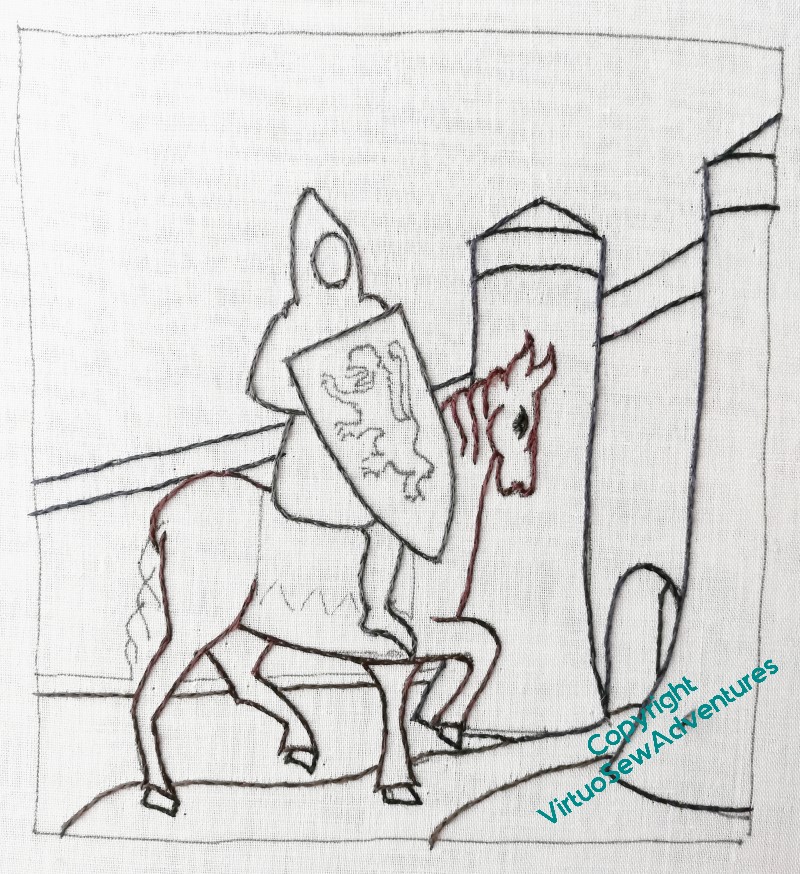
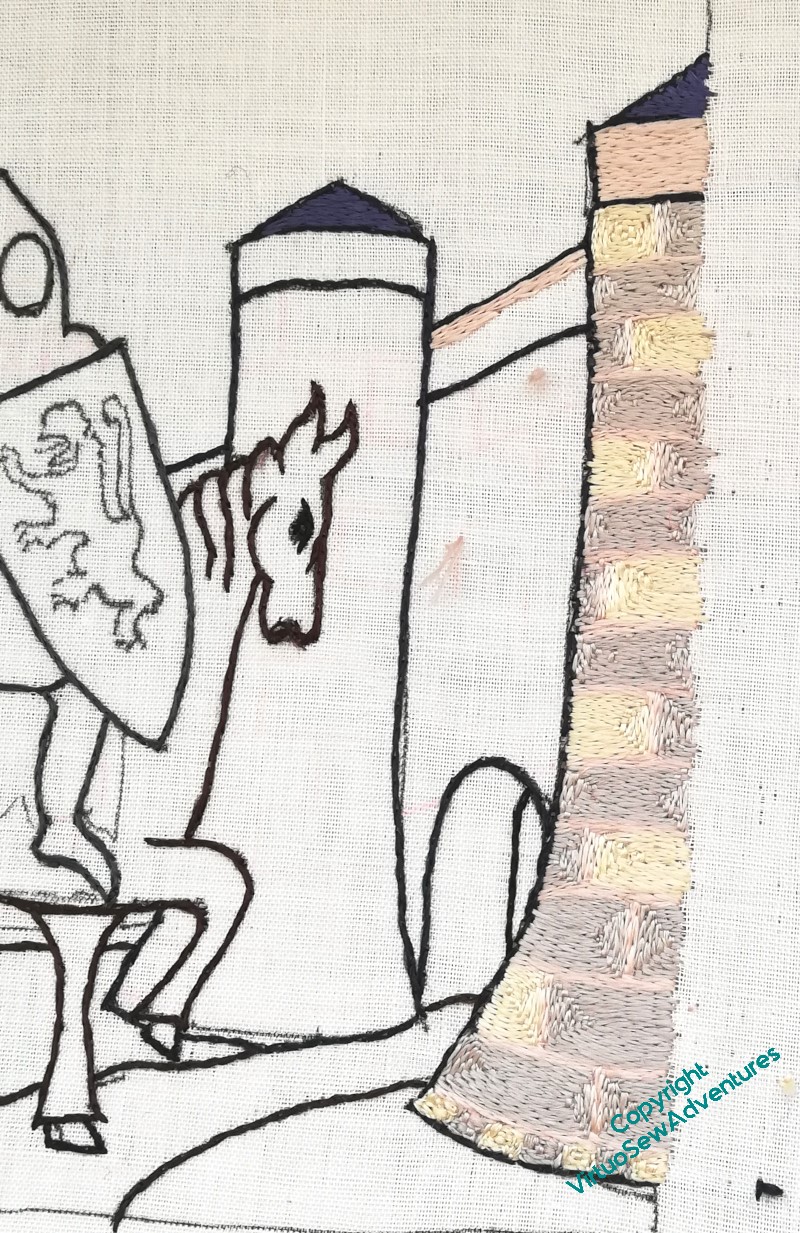
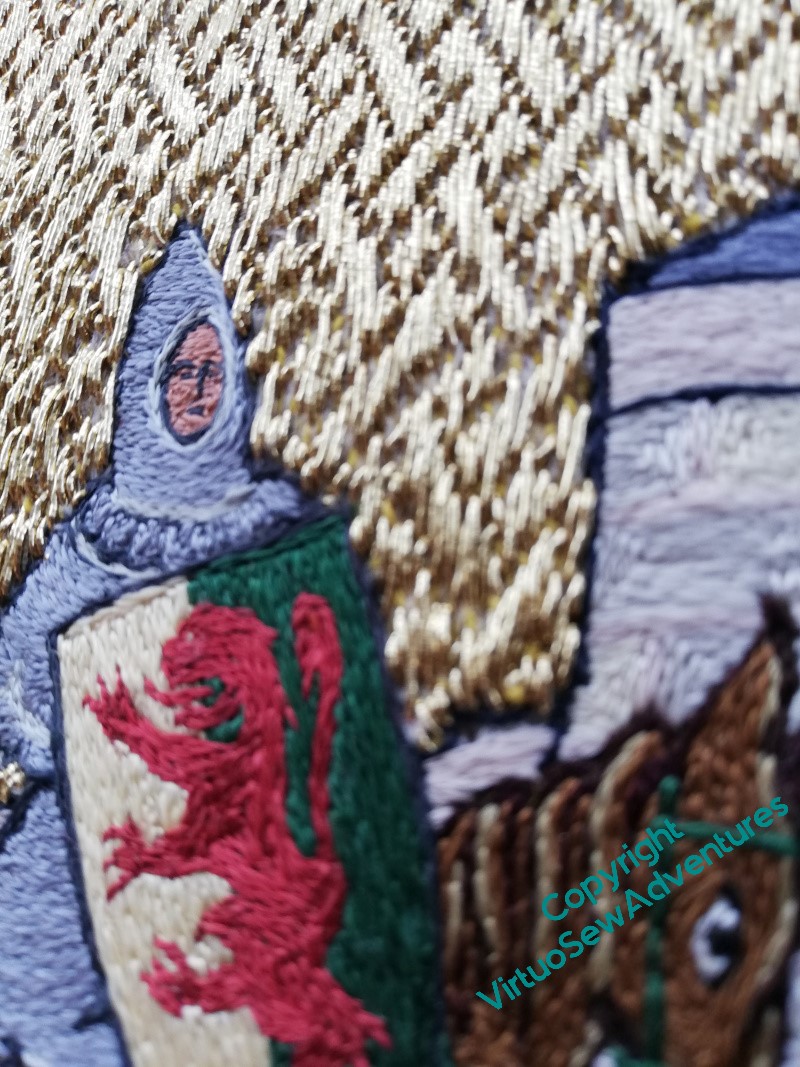
When I began the outline, I used the darkest thread I have, “Ebony”, and it looked a bit monolithic. After a couple of comments from Tanya Bentham, I unpicked it all, took the opportunity to restretch the fabric, which had sagged, and reinstated the outlines with some variation – navy blue for the building, brown for the horse, and dark grey for the armour. They are all very dark colours, so there’s only a slight difference, but there is a difference, and already the design looks livelier.
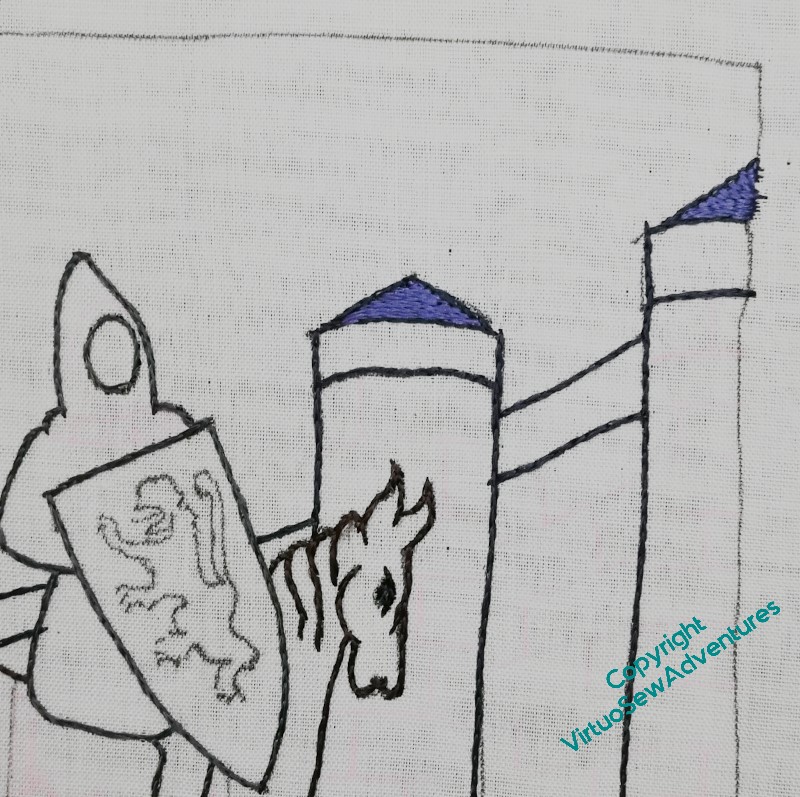
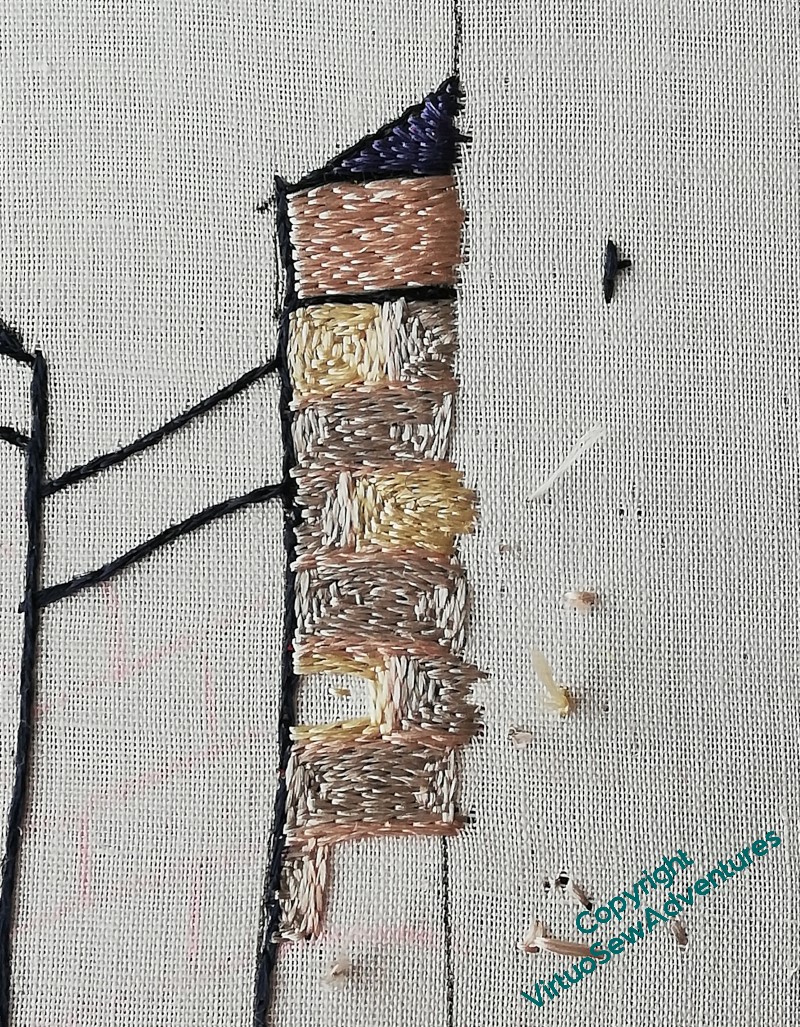
So, once I had the outlining in, I started with the conical slate roofs on the gatehouse turrets.
At this point, I should admit that those conical roofs are not remotely historical. The seventeenth century engraving that gave me the view of the gatehouse I liked the most didn’t have conical roofs, and I think I can be pretty certain that in William’s time those turrets probably had a man-at-arms on patrol, and no roof.
All that said, I’m not doing an entirely historical piece. I’m telling different stories here, and I want a slightly fairytale/mythological quality to the image. I think the conical roofs help with that.
Ready to Start on William Marshall…
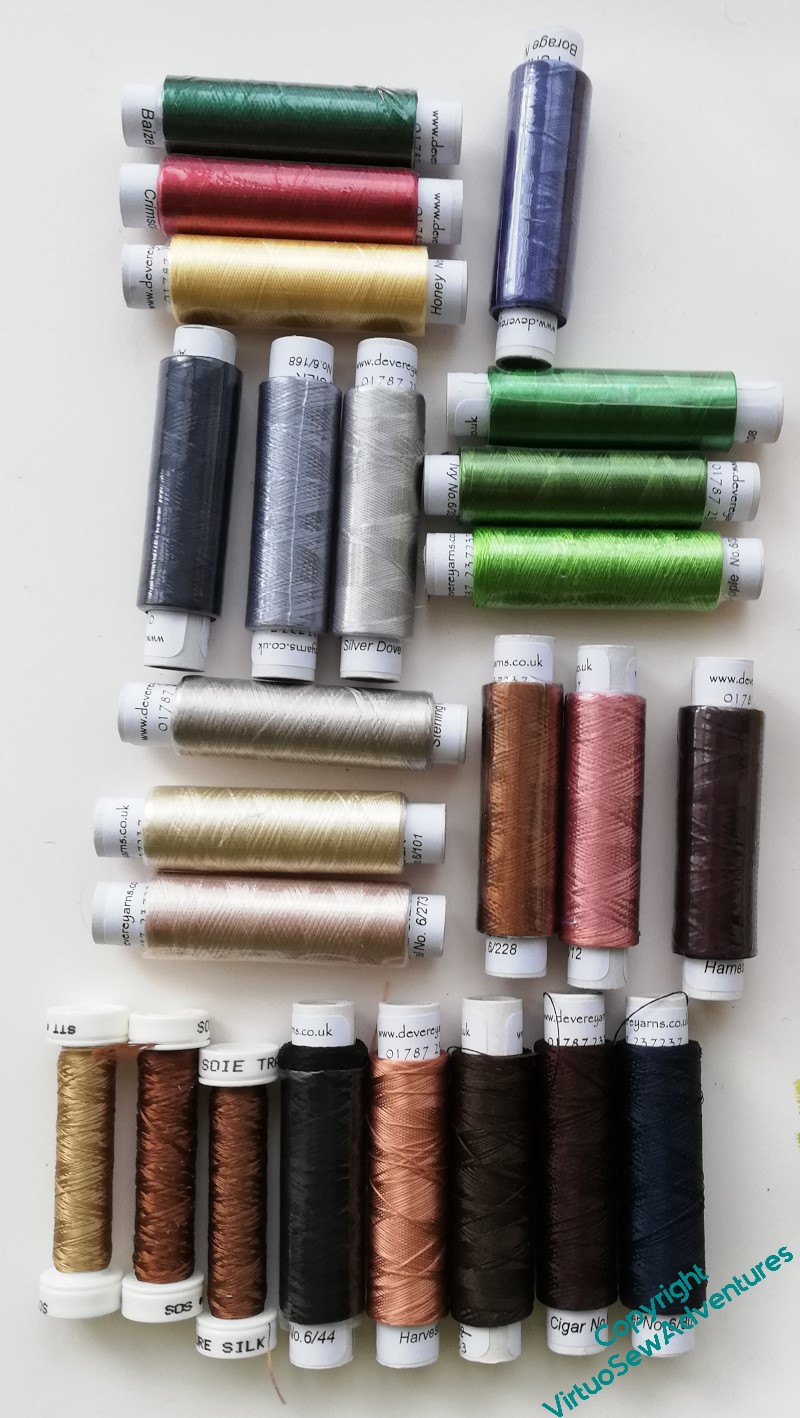
Having spent some time in my stash, deciding that mixing even filament silks might be a bit unpredictable, I finally pulled myself together and placed an order with Devere Yarns. While I waited for them to arrive (it didn’t take long), I went back to Tanya’s book and read the early technique sections again. Homework is always more fun when you’re interested.
I do have some darks left over from the Amarna Family Group, so the outlining is sorted. I’ve got three stone colours, three shades for William’s armour, three greens for grass, three shades for the horse, the three heraldic colours for the shield, and a blue for the slate roofs on the turrets.
The blue is probably also going to be the colour I use for the border.
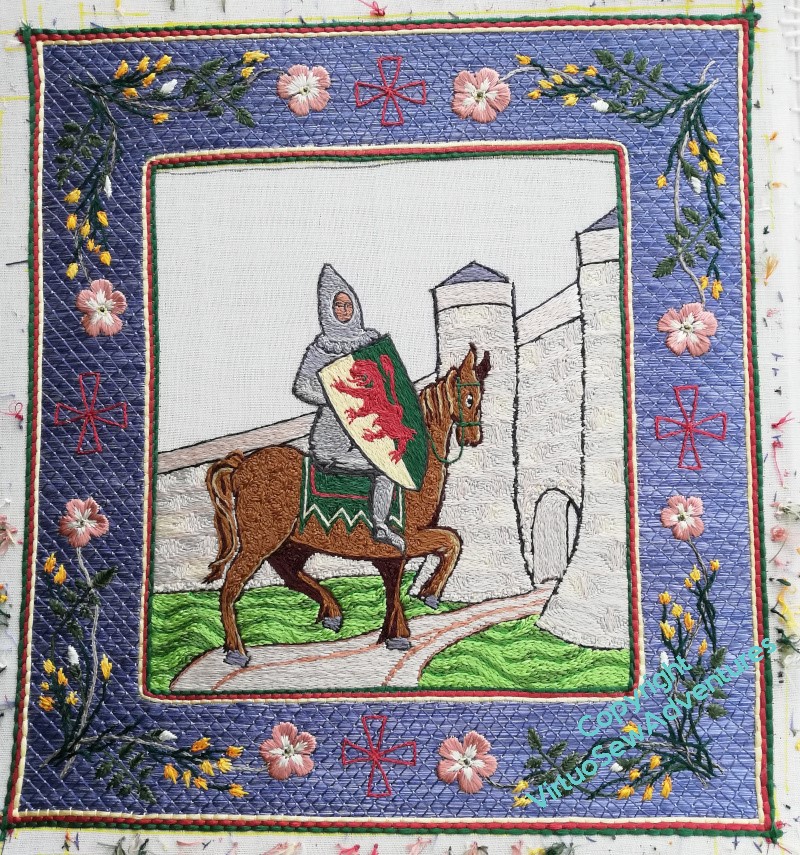
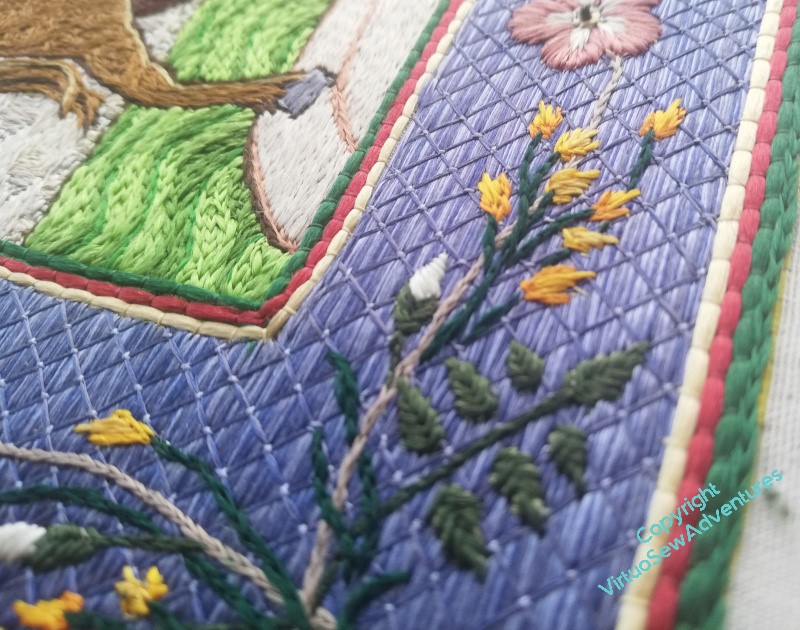
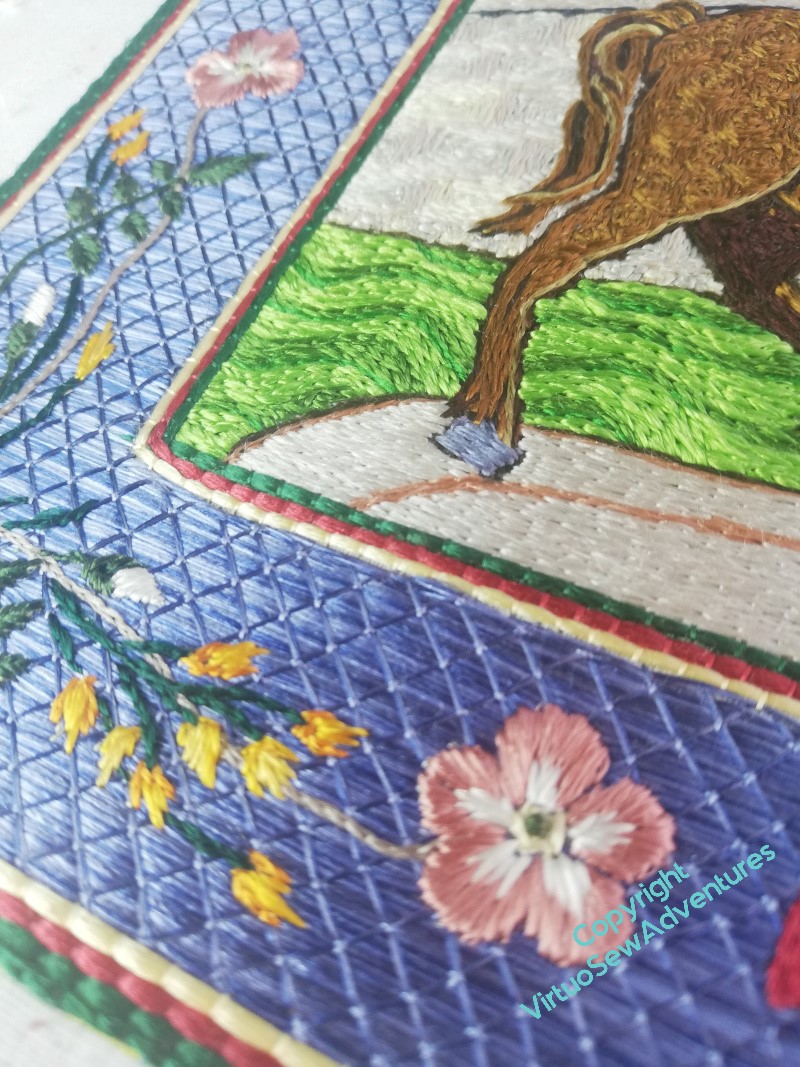
The Victorians remodelled Temple Church, where William is buried, found a strapping six-footer that they believed – based on what we’ve been told of him – to be William, and in due course, reburied him, and everyone else they’d moved, in the garden. So I’m planning a silk border, of blue laid-&-couched work, embellished with roses (for the garden) and common broom (for the Plantagenet kings he served so faithfully).
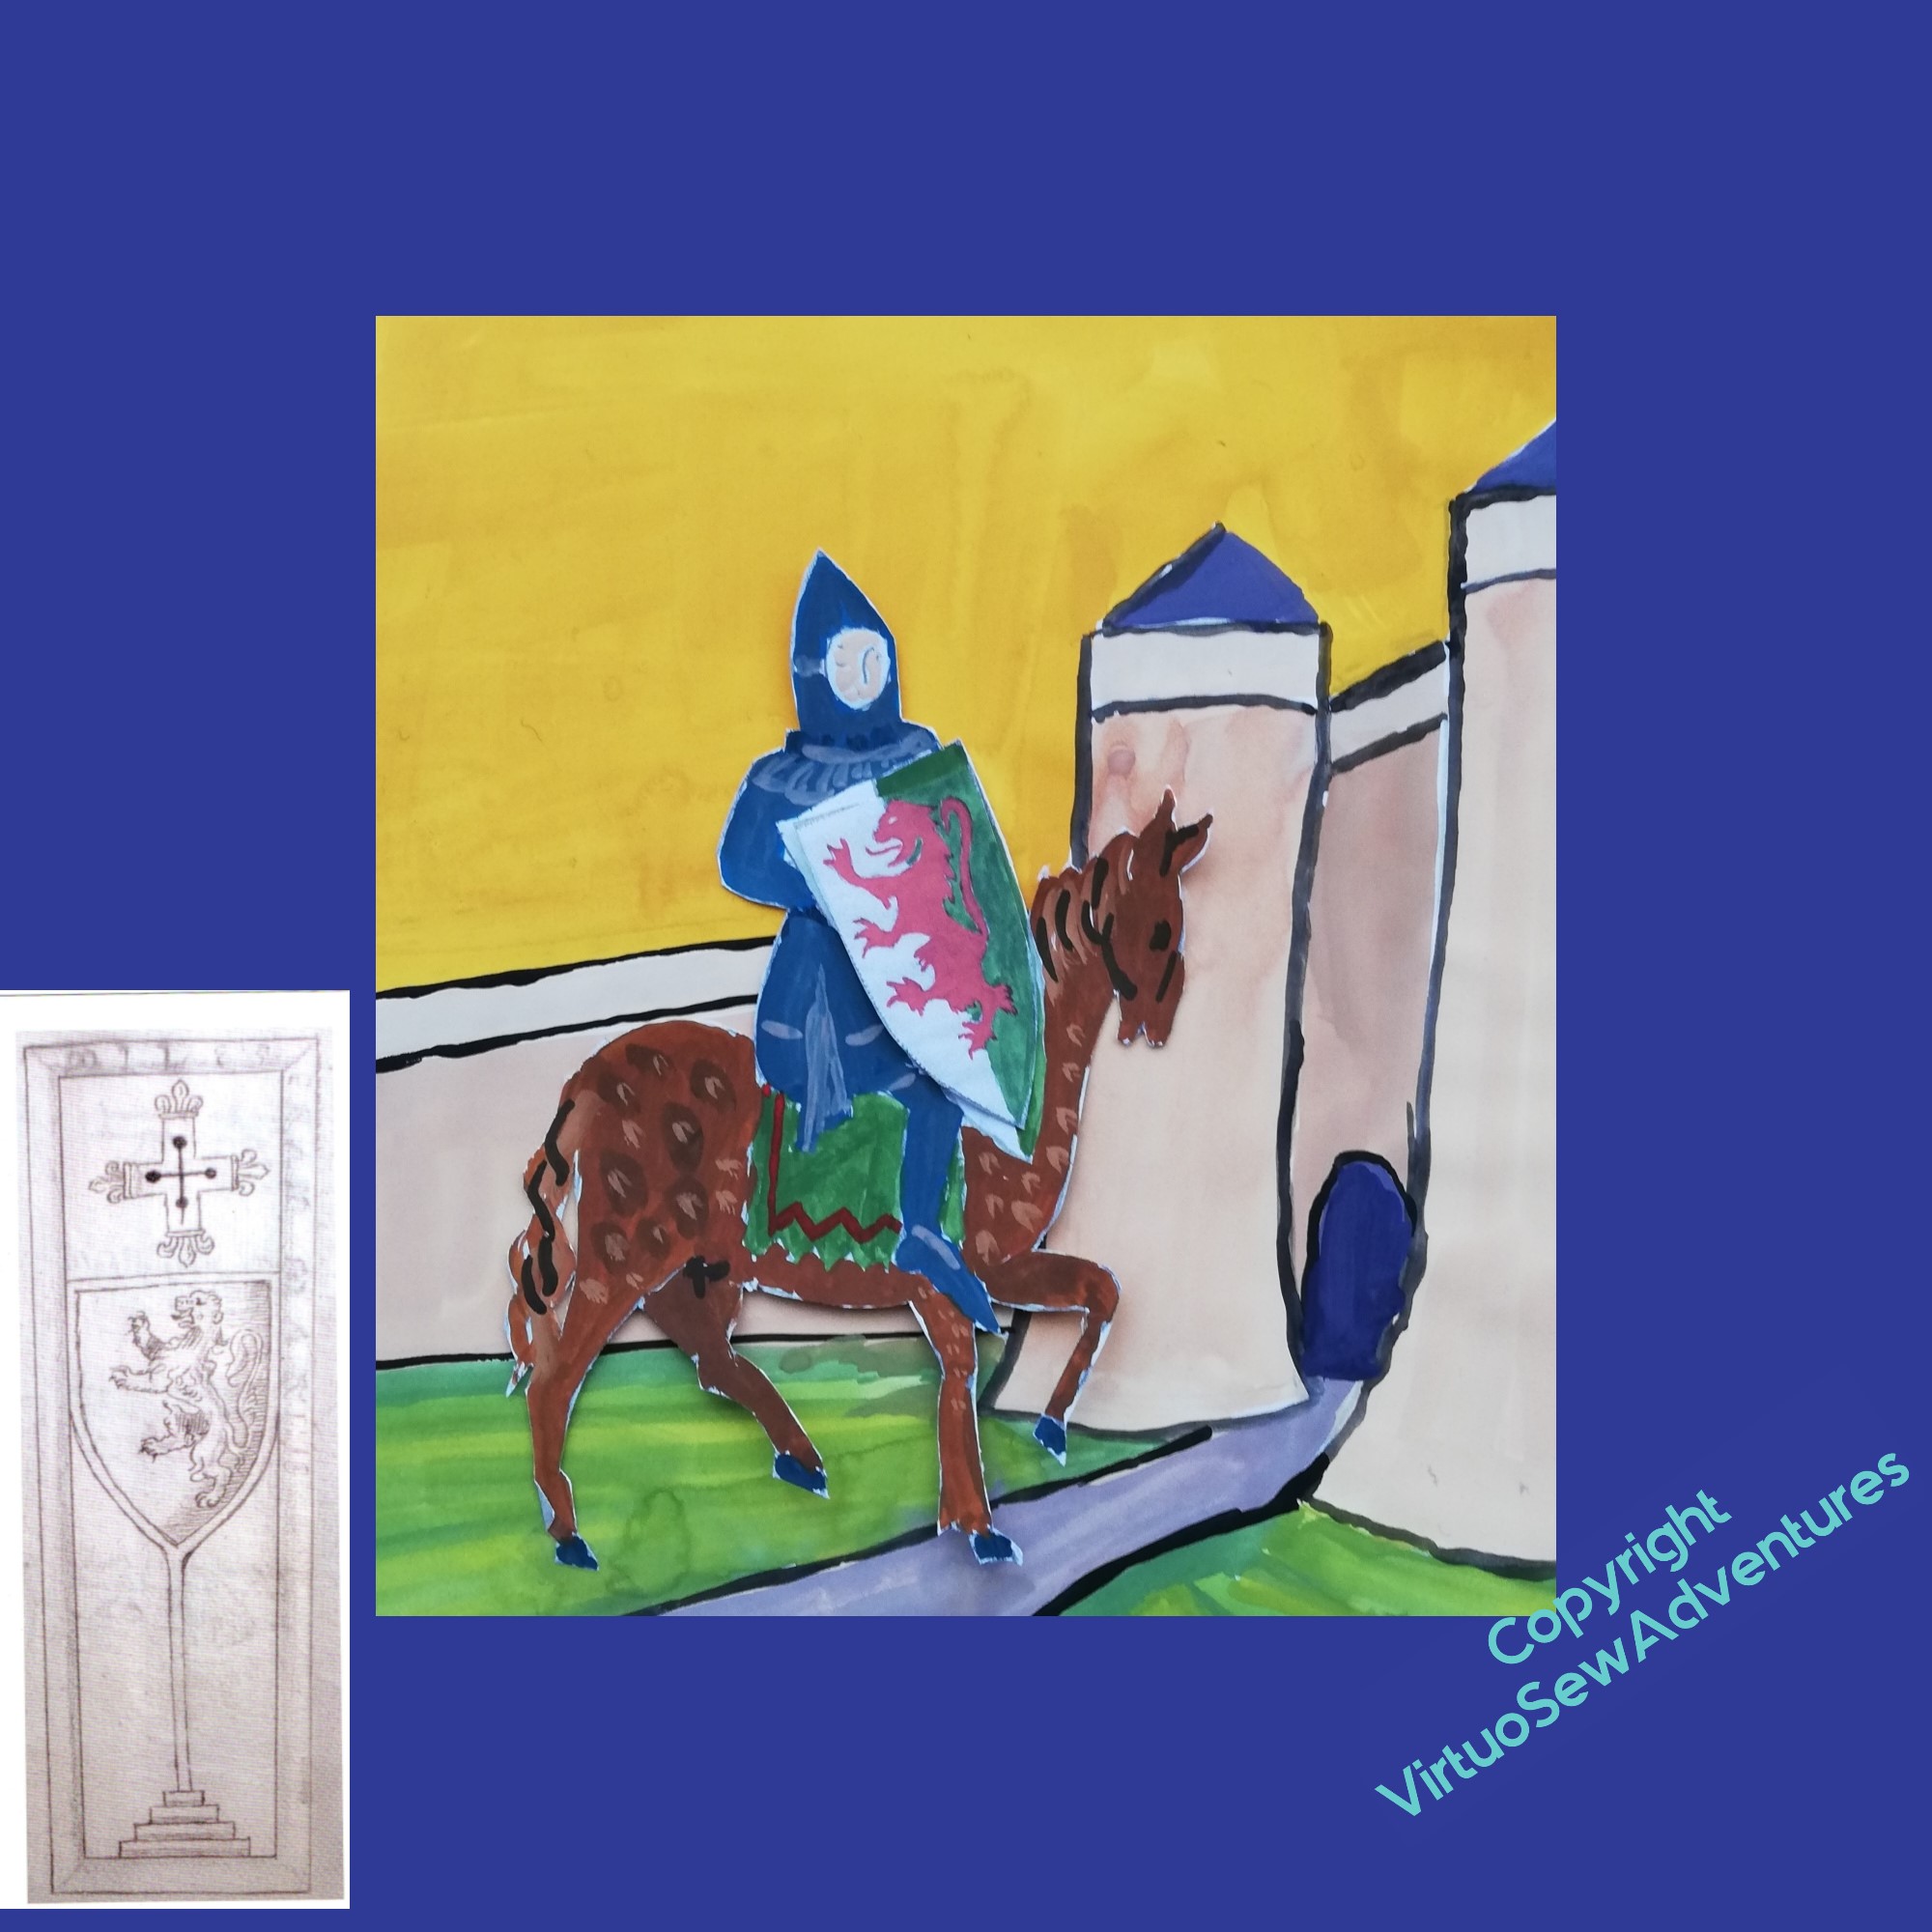
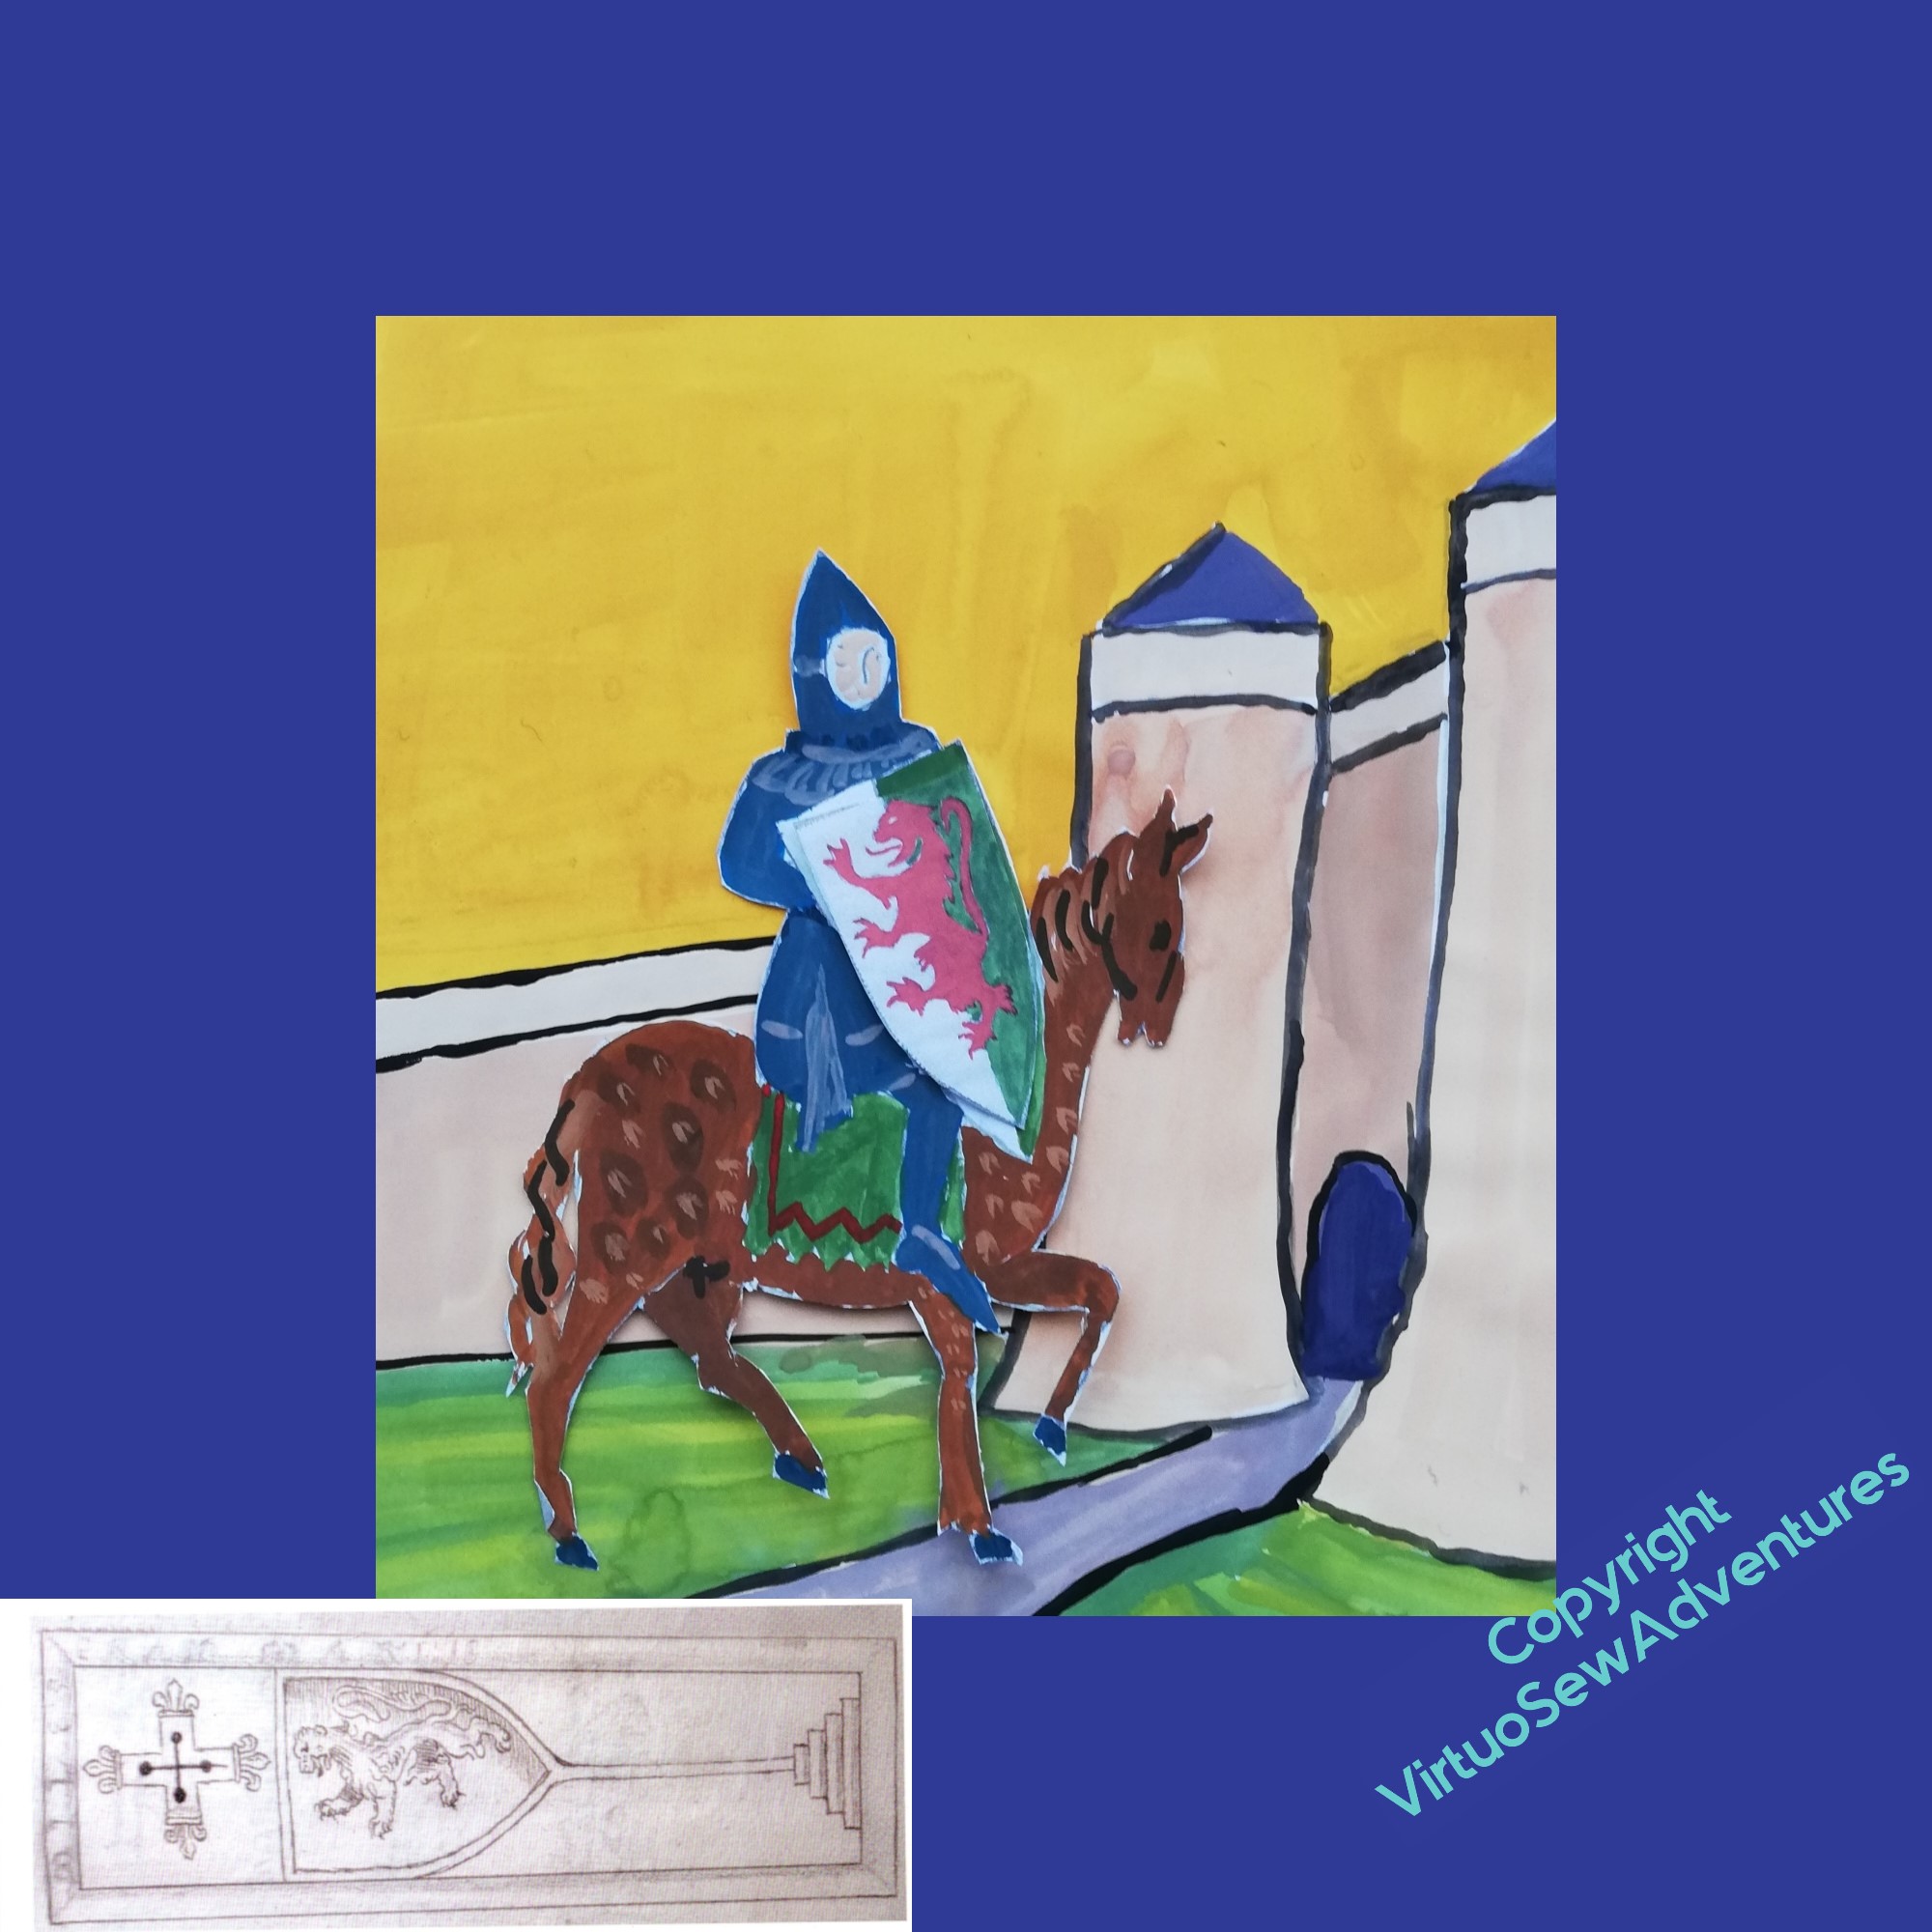
The grave slab is shown in a leaflet I got when we visited, which is no longer in existence, but is shown in an engraving from the 17th Century, and was thought to be associated with William. The lion looks right, anyway! I’m wondering whether to include that in my design for the border in some way, and if so, in what orientation..
More on William Marshall
Since I’ve always been interested in heraldry, and deeply distrust online search results, which so often depend on something unexpected in the search terms, one of my bits of research involved an email to the College of Heralds, asking about William’s coat of arms. I received a commendably prompt and completely unperturbed reply from the Officer-in-Waiting, Rouge Dragon Poursuivant, telling me that:
“The left-hand side of the shield, from the viewer’s point of view, should be Or, meaning gold (or yellow). The right-hand side should be Vert, meaning green. The lion should be Gules, meaning red, and it should be rampant, meaning it is upight and standing on its left foot with its right foot slightly raised off the ground.”
You’d think embroiderers emailed for advice every day of the week! Maybe they do, of course…
I had painted a whole series of variants on the design, and then had another thought, namely – maybe I wasn’t exploring all the variations possible. I attempted to do the exploration on my computer, but went to bed that evening with a ligament in my arm squealing. Back to the paintbox!
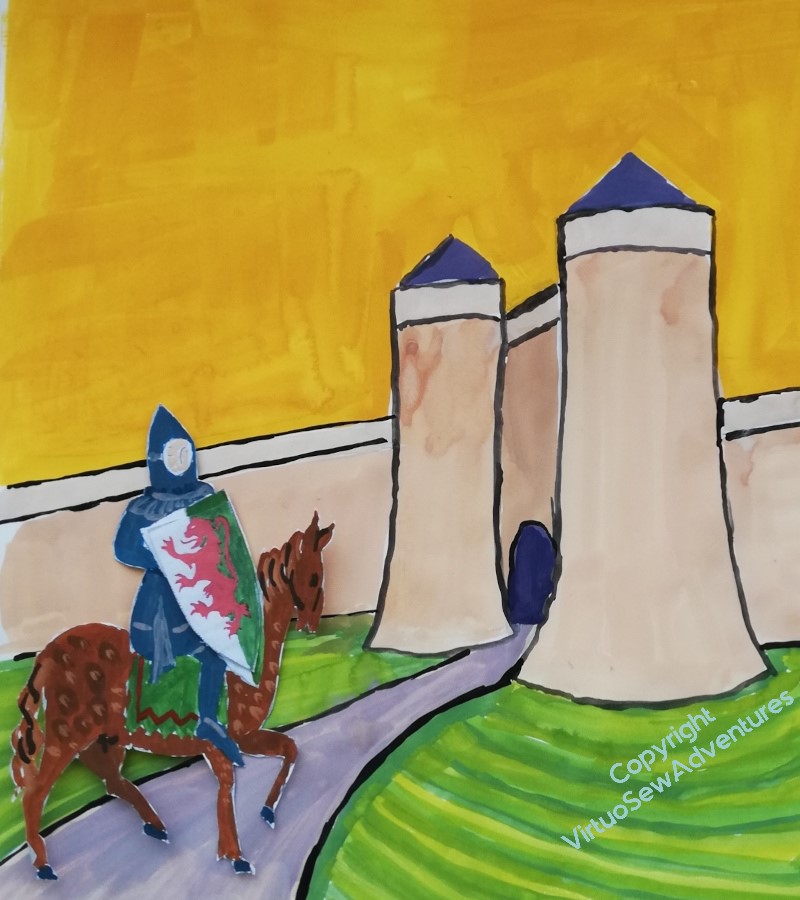
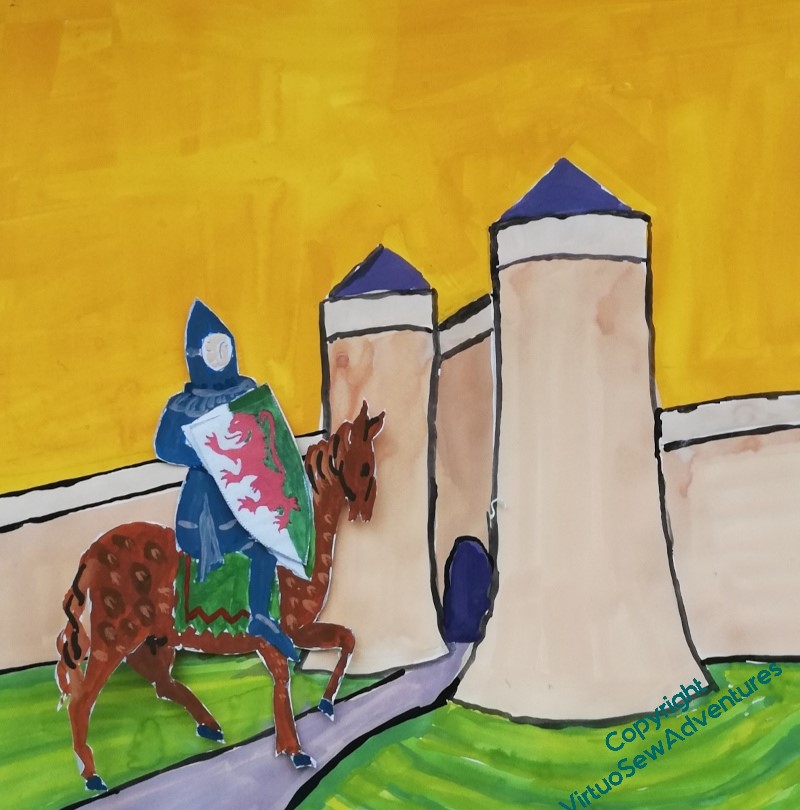
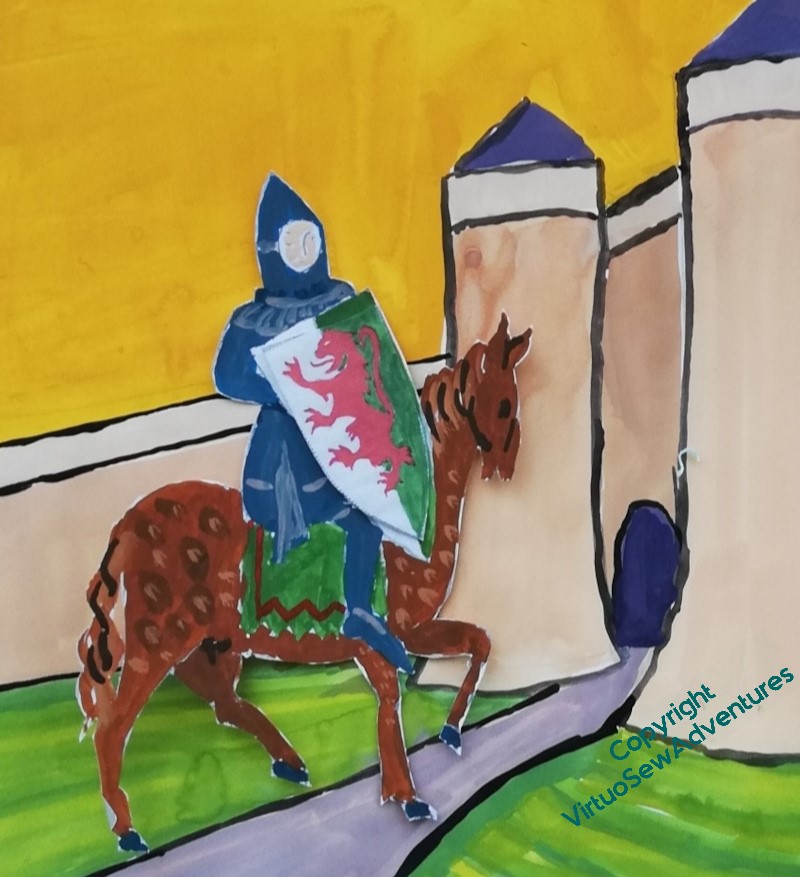
So I fished out one of my largest blocks of paper, and painted the chateau with a bit more wall on either side, and an actual path, and then painted a separate William, so that I could move him around on the background and experiment with cropping.
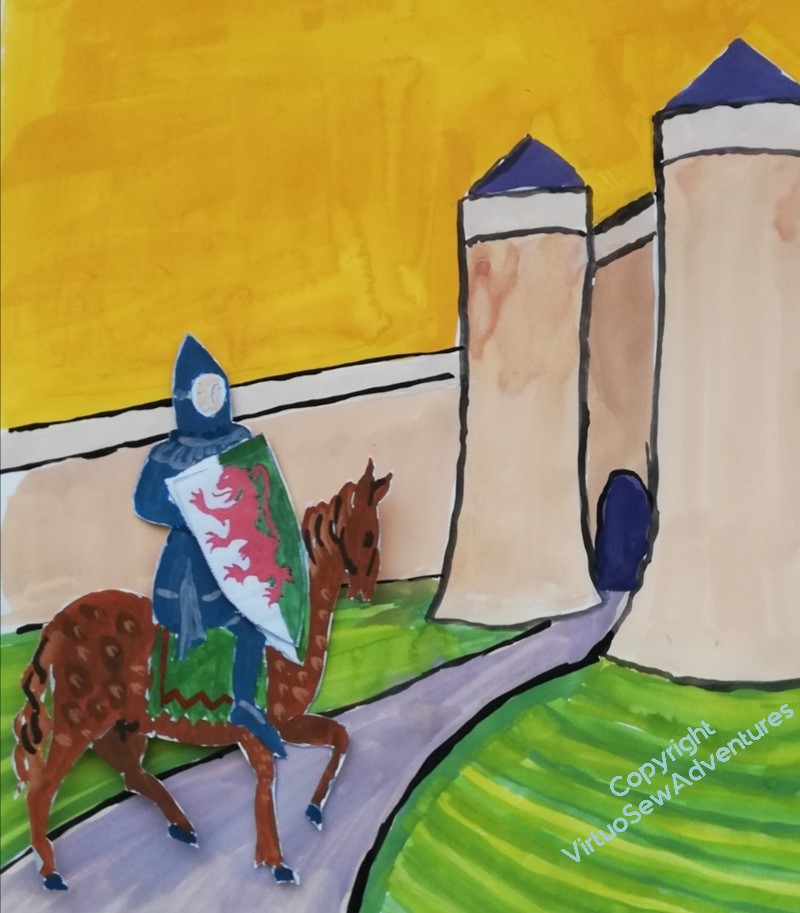
I’ve left his shield as white and green in the design for now. I intend to use underside couching for the “sky”, but I’ve not yet decided whether to use couched gold or silk thread on the shield, and making sure the colours are different in the design will help me to remember I have a decision to make.
I’m still havering, but encouraged by Tanya Bentham, who wrote the book that started me on this, I’m thinking about the third of the four options in this post. As Tanya pointed out on Instagram, in the medieval period people messed around with scale and perspective quite cheerfully, so I have no need to make sure my knight will fit through the gate!
Finishing William The Marshall
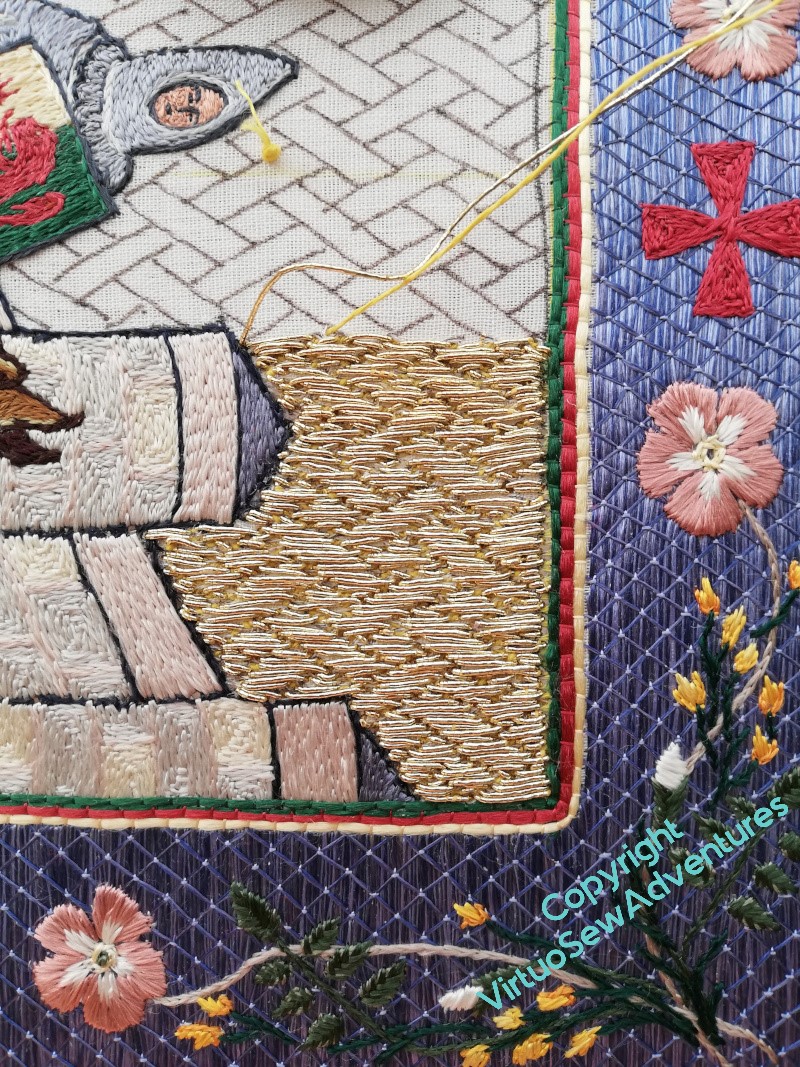
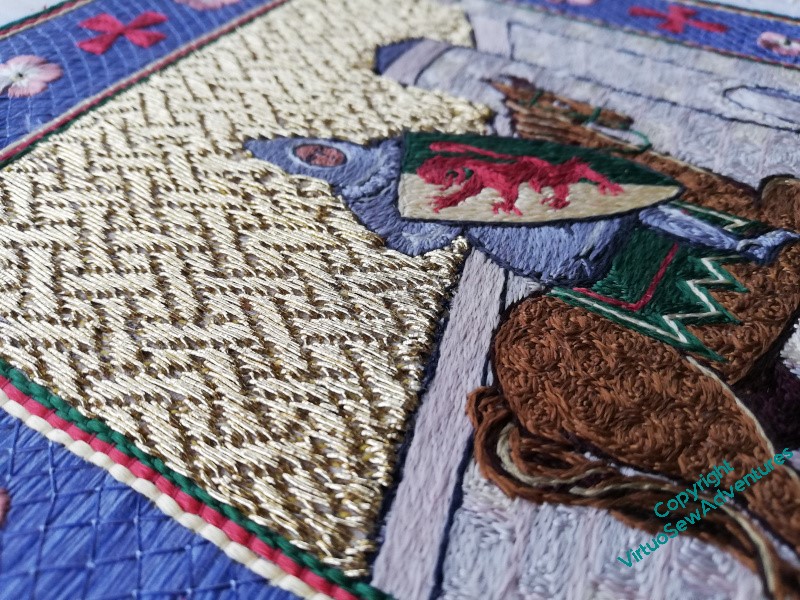
When we left William, I had just embarked on the underside couching, not without some trepidation, I have to say!
I stuck closely – one might say, religiously – to the advice about working underside couching that Tanya Bentham gives in her book about Opus Anglicanum. That is to say, no more than about half an hour at a time, no more than three sessions a day. In fact I think Tanya says 45 minutes, but I rapidly learnt that I lost focus and precision about the 33 minute mark, and two sessions were very much better for me than three.
If you click on any of these pictures to expand them, (they should open in a separate window) you will certainly see some of the infelicities in my workings here – scraggly bits of fabric showing, unevennesses in the pattern, all sorts of misadventures. There were even a couple of points where the fabric, doubled though it was, gave way at points, necessitating all manner of ingenuity. I suspect that my tension was adrift, as I have a definite tendency to pull too tight on my stitches, especially if I’m concentrating on the unfamiliar.
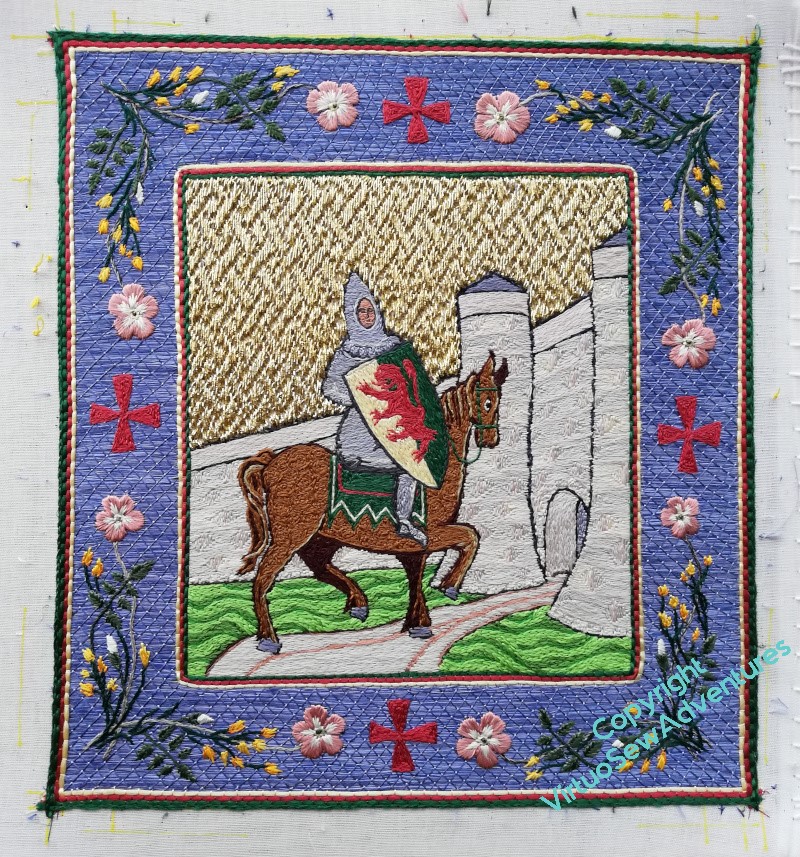
However, judge for yourselves whether I shouldn’t be pretty pleased with myself…
I do, of course, have to work out how I’m going to mount him, and on what, and it may be that in the end the lines of red, yellow, and green framing the border will need to be redone in some fashion. I like them as an idea, but as I move on to Aethelflaed, Rahere, and the Lady Julian, how much of a unity do I want to retain, and how on earth would I embody it?
Return to William, just because!
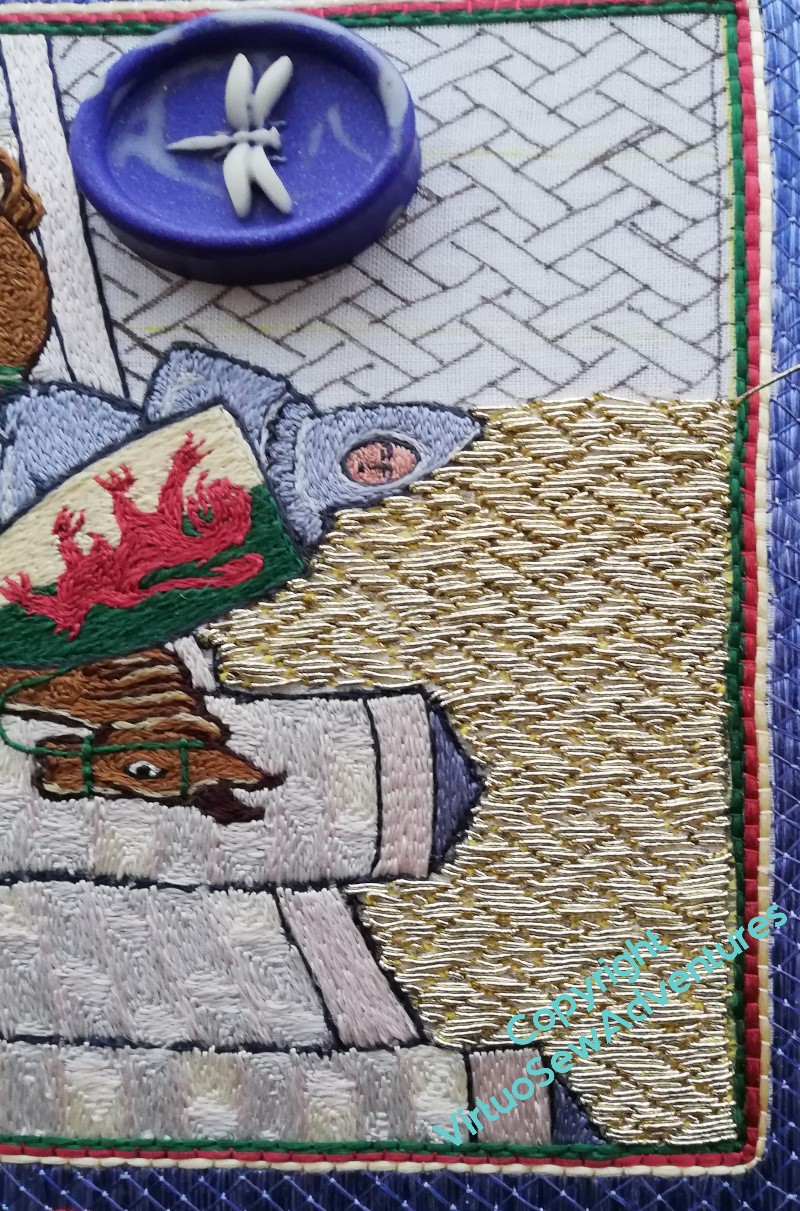
I thought people might enjoy some shots of William from different angles and in different lighting, both of which affect the gold and silk very strongly.
I don’t have much to say for myself, just – Enjoy (with a little editorial, as it were)!
I had intended to fill in the end of the gatehouse tunnel with underside couching, but decided in the end it would make a lot less sense of the picture.
I was greatly relieved that the various oddities around the edges seem not to be drawling attention to themselves!
The lion rampant isn’t completely successful in terms of the details of stitch direction, I think, but I couldn’t see a better way to do it, and since when I put a picture on social media, someone was able to type their guess of the blazon (heraldic description) into a search engine and have “William Marshall, first Earl of Pembroke” pop up immediately, I think I’m just going to let well alone!
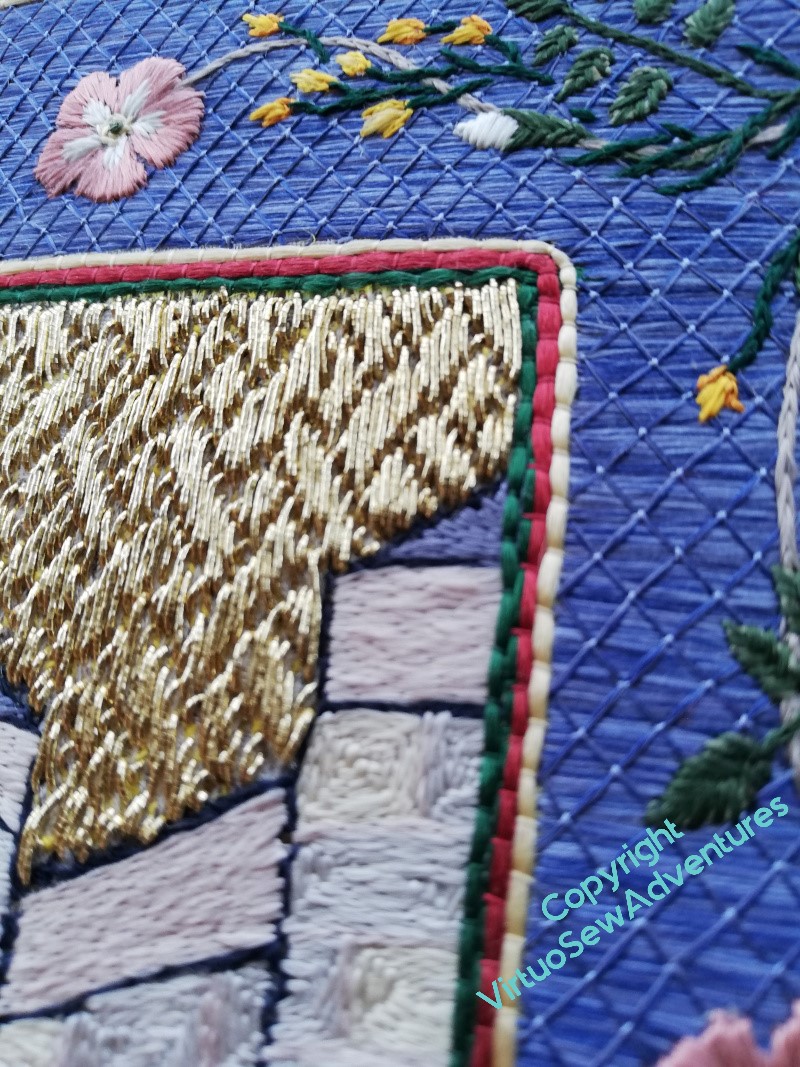
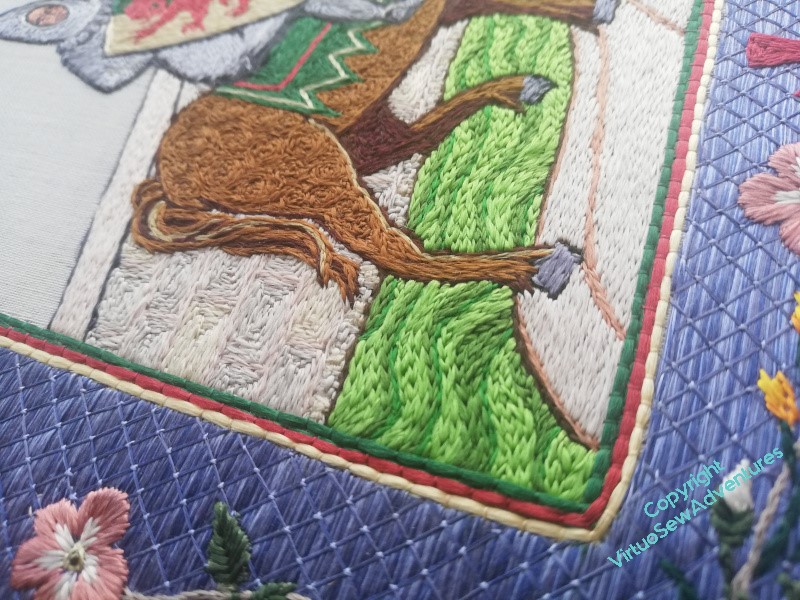
The points of light are couching stitches on the trellis couching. The flash doesn’t show up the stems in the border as well, but it does wonderful things for the stitch direction on the stonework and the dapples on the horse (Mars, we called him in the end, didn’t we?).
William, as far as he’s gone
I realised when I came to write about beginning to practice underside couching, that you’ve not seen William for a while, so here is a a quick update on progress.
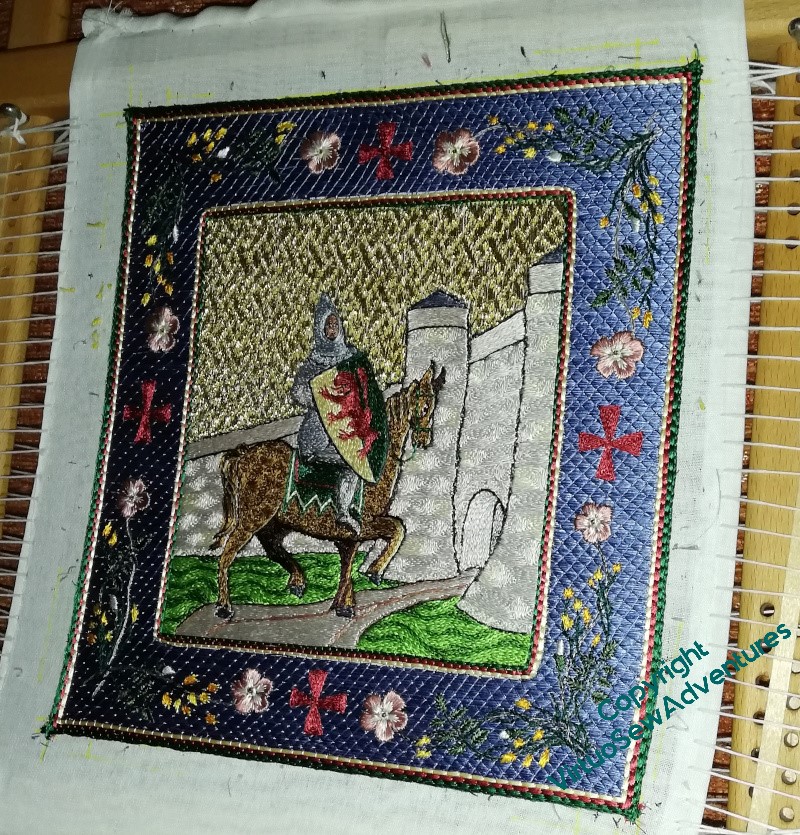
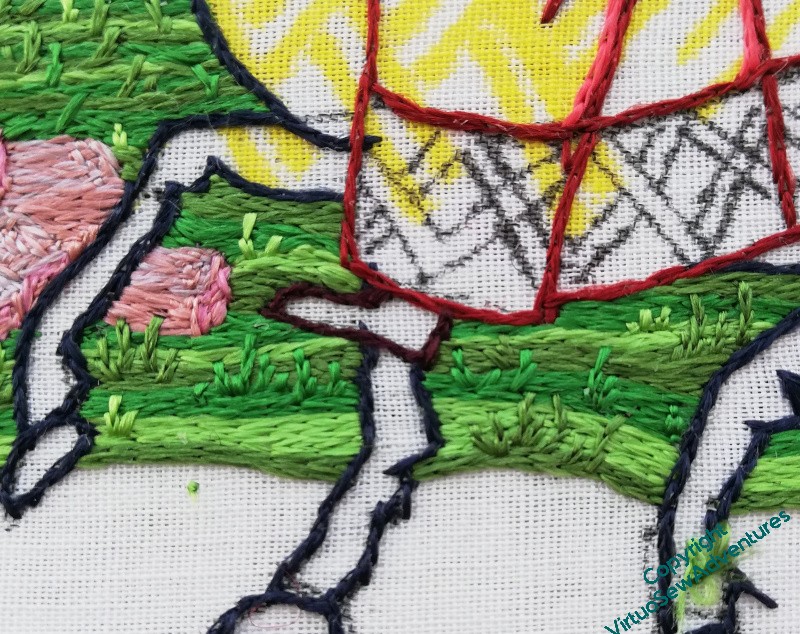
I got all the broom and dog roses done on the border, and then sat back to look at it. You may recall that I said last time that I thought that I would be filling the crosses, but I wanted to sit back and stare again, just to be sure.
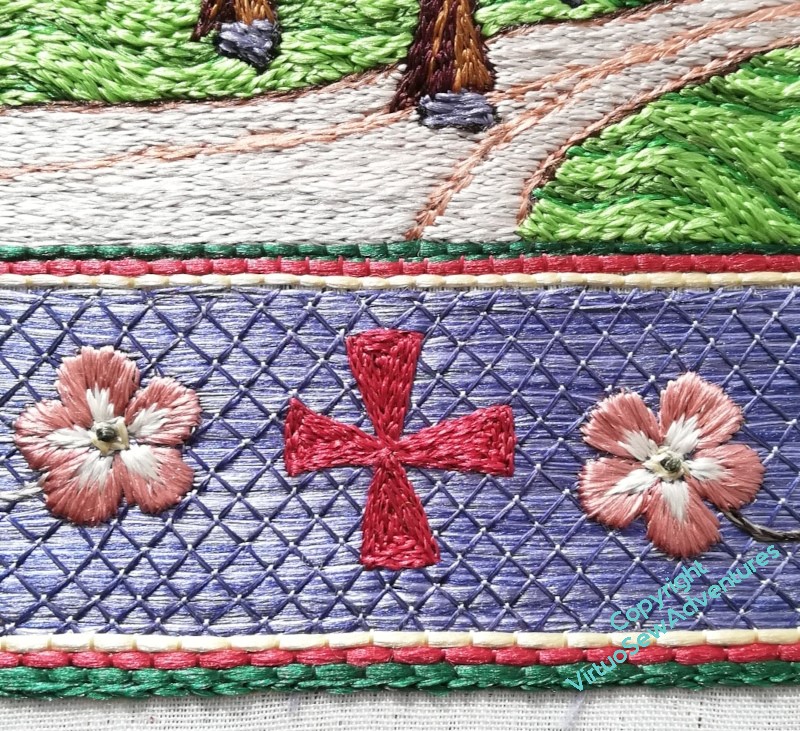
That staring didn’t take long. The crosses, as outlines, don’t really have the authority they need, so it soon became clear I needed to fill them all in. I doubled the outline, as a single line, and then filled in each triangle separately in split stitch. I did consider using satin stitch, or some sort of couching stitch, but I felt that with the dog roses bracketing the crosses, a different texture was required, and I am content with the result, I think.
One of the delights of working with floss silk is to see how it responds to the light, so here are some more pictures to enjoy.
Tackling Stones And Tussocks
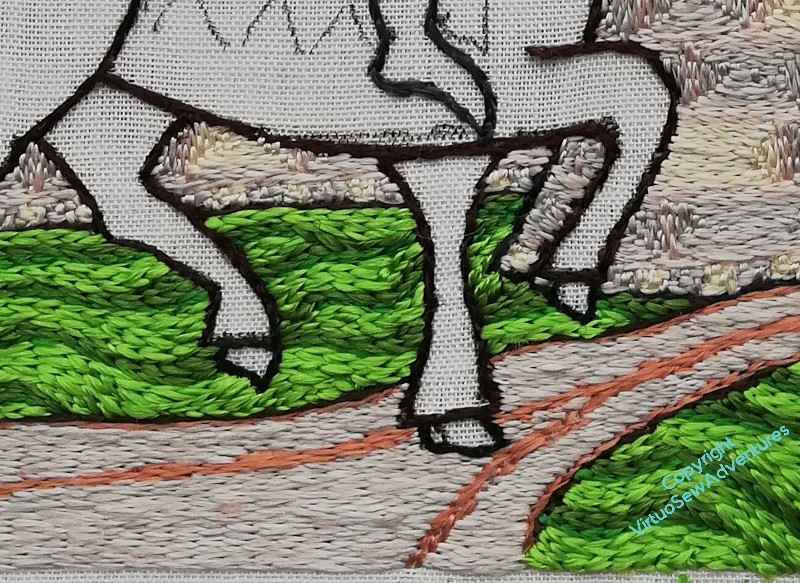
You may recall that when I was stitching William Marshall, I chose to use more strands of silk in the needle, and to stitch relatively calm curves and unevennesses in the ground. I wanted to suggest that William’s kinsman kept the land around the walls of his stronghold close clipped (by grazing, one presumes) so as to ensure that he could not be take too much by surprise, whether by welcome or unwelcome visitors.

Aethelflaed, of course, is visiting, in effect, a building site. She has no road, and her horse is picking its way around heaps of building stone and over grass that’s tussocky and and uneven. I gave some thought to the question of how to represent that, staying true to the aesthetic, using only silk and split stitch, but creating some of my own variations. After all, this is modern, inspired by the past, not a reconstruction of an existing piece. I have a little freedom of movement here!
So I’m using three different greens, and I’ve not increased the thickness of the silk in my needle. I’m not stitching the curves quite as regularly, and I’ve devised a way to stitch little tussocks at uneven intervals across the ground. They are just little groups of split stitch lines crossing the flows of colour, but I think they are working rather well so far.
It has only just occurred to me, however, that I may have a slight tweak to make in my process for doing them, as I come forward: they need to get bigger, cross more of the lines of colour. Do I now just put the colour in, so that small tussocks don’t compete visually with large tussocks, or do I just carry on regardless?

Now, a reminder that I shall be giving a talk for the Embroiderers Guild on June 3!
I believe I’ve turned this image into a link to the Eventbrite page, and for anyone not in the right timezone, or otherwise occupied on the day of the talk, the Guild makes recordings available for some time afterwards.
I shall remind you every week until it happens!
Starting More Animal Vignettes
Since I’ve decided to start on the animal vignettes for the Vision of Placidus, I’ve been making a hay while the sun shines, thinking of animals I want to include and finding picture sources. I do need to re-read the book to make sure I don’t miss out a critical element, but with Aethelflaed, Rahere, and the Lady Julian all swirling around in my head, a lot of research is also swirling around a bit, making it hard to keep things in order. However, while I have the gauze mounted on frames, I might as well keep going.
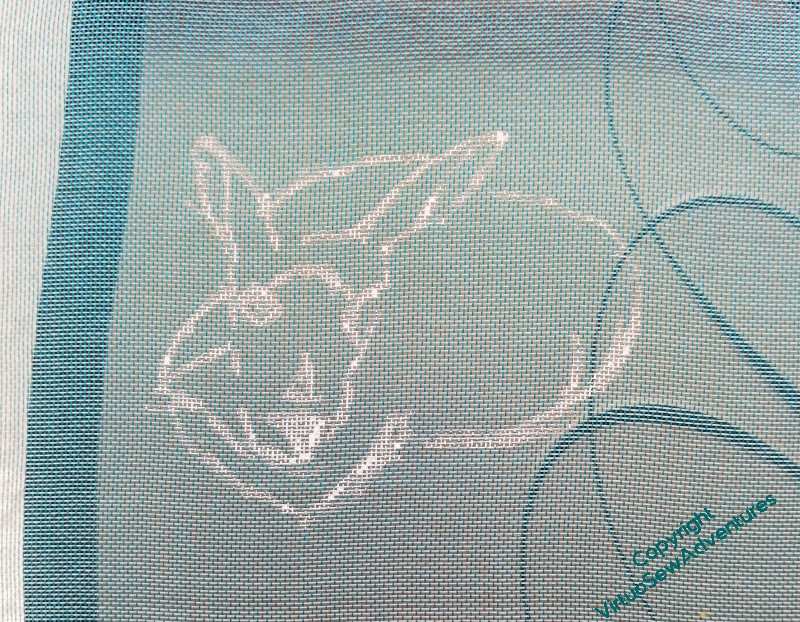
So here we have a fawn and a rabbit. The drawing is maybe not quite the success of the brockis, but it’s all so much stronger than it would have been two or three years ago that I’m taking merely the doing of the drawing as a huge success. I’ll probably keep on going on about this. At school, not only did I have no discernible skill with pencil and pen, I could make a biro blotch just by taking it in my hand. I’ve only really started to work on my drawing skills since late 2018, so when it works I’m almost indecently thrilled!
The sketches are side by size on the gauze, so I started thinking about them and working on them at the same time.
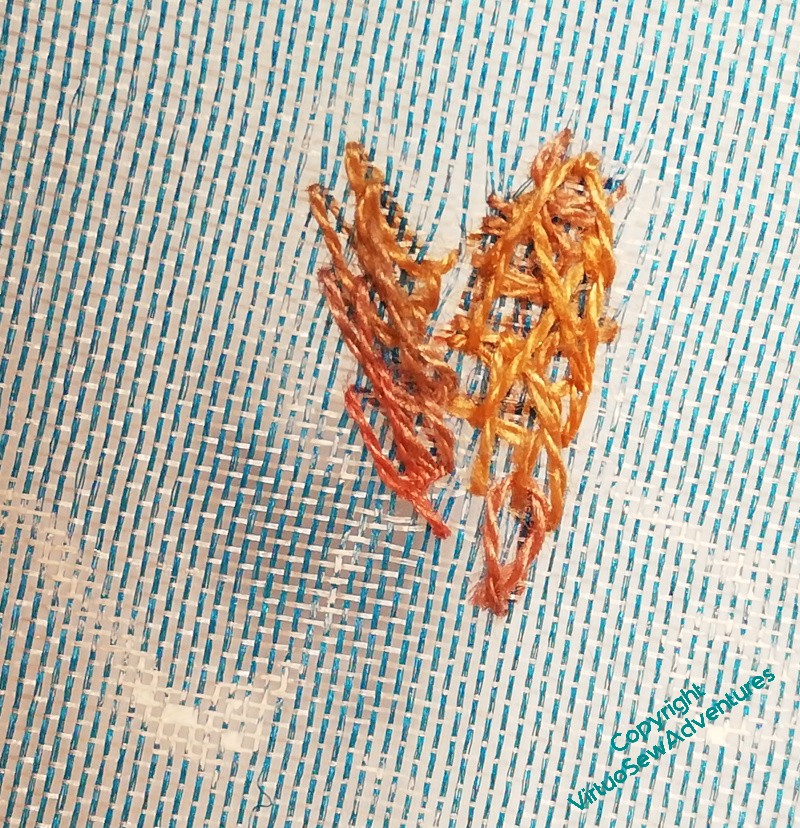
I probably won’t continue to give you quite such close ups, but I wanted to emphasise a few things about how this is beginning to come together in my head. The Medieval Movers and Shakers (William Marshall, Aethelflaed, Rahere, and Lady Julian) are going to be fairly strictly constrained to true Opus Anglicanum, split stitch and underside couching, and I will do that joyfully because it is part of my conception of them.
However – as I believe I may have said before! – my true love in embroidery is in playing with the texture and intricacy of thread and stitch. Even though it’s going to be a huge piece – I’m intending it to be five foot by four, at least – I want it to live and breathe my enthusiasm, in every detail and however closely you look at it. Each ear of these two has something slightly different about the fall of light and the way the lines and edges show, so I’ve tackled them slightly differently.
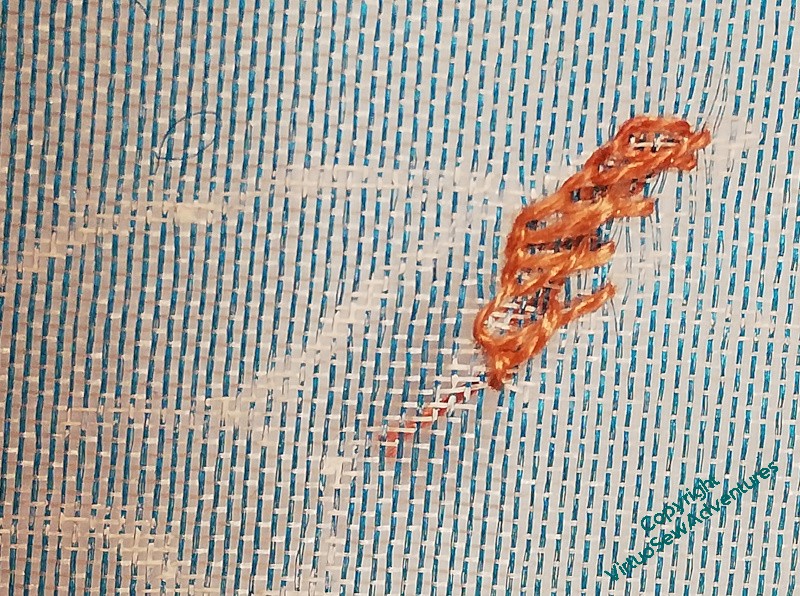
I’ve learnt from Mus’ Renard, and for now I’m using a single strand of stranded cotton (a Stef Francis variegated one, since you ask). I’ve used crossed blanket stitch in some places, because that gives me a thin line of the pinky-orange in a distinct area. And in the larger one of the two ears of the rabbit, I started with some fly stitches overlying each other. That gives some little shadows and helps everything come together with varying degrees of coverage.
Already this has changed from the Hawk, who was all in satin stitch to cover the gauze. I’m not trying to cover the gauze completely anymore – I’m already quite happy to allow the back to show through, just a little.