
Tag: interior decoration
Stones of Venice – moving quickly
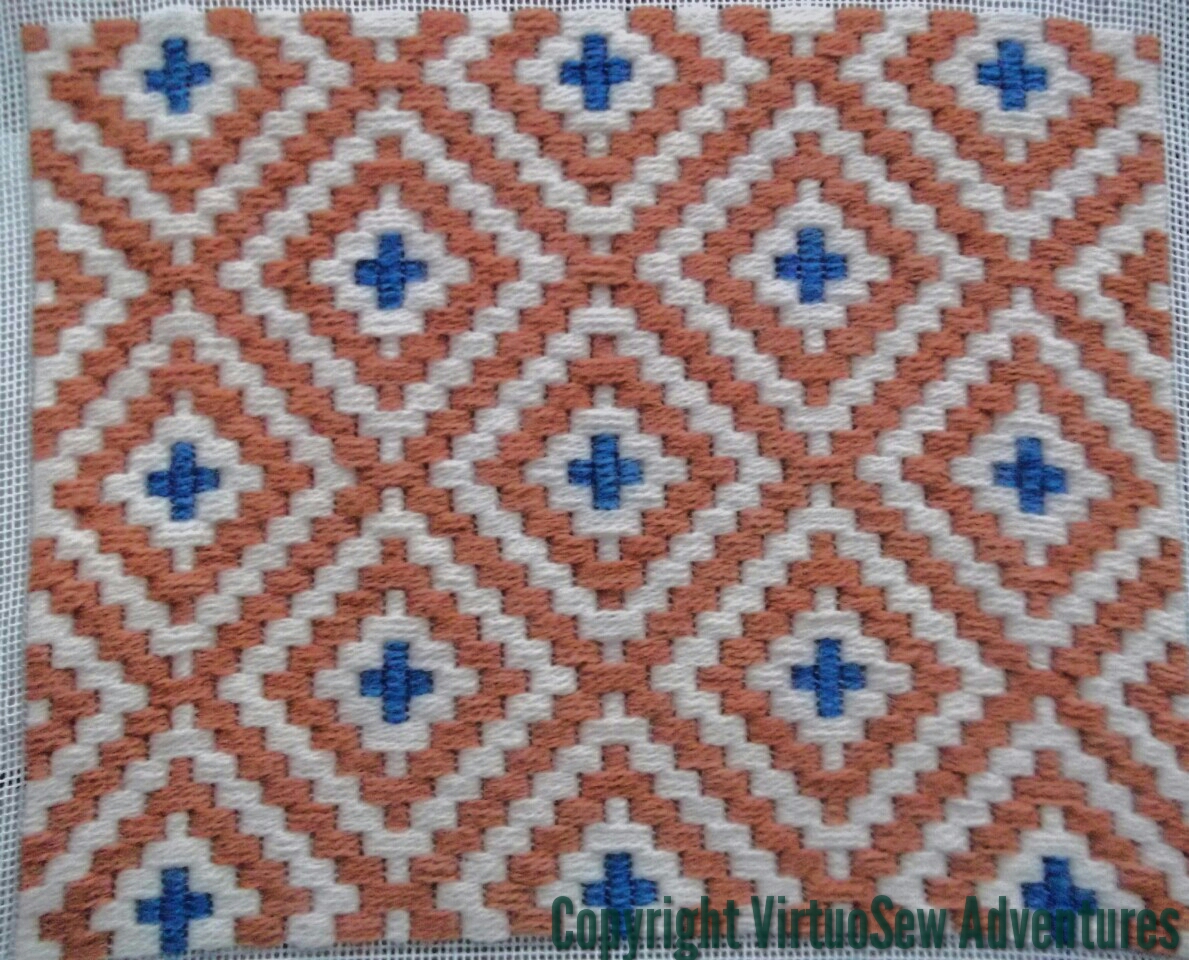
Stones Of Venice Panel
Oh dear, that didn’t take very long!
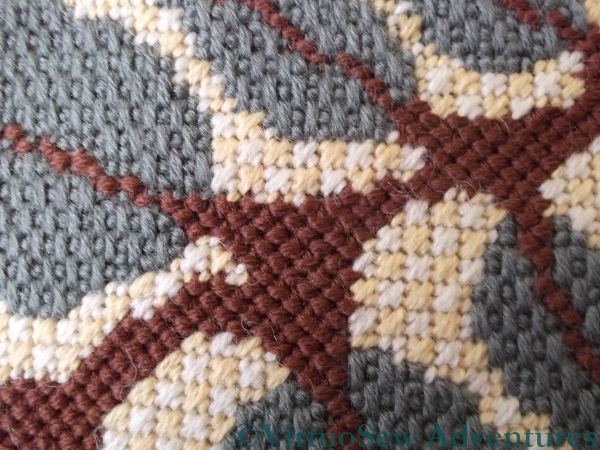
I’ve completed the top part of the footstool cushion using the Bargello pattern “Stones of Venice”. It grew very quickly, and although in the book it was described as an Advanced pattern, I found it fairly straightforward.
Each stitch goes across three, six, or nine threads, the stitches are grouped in threes, and the step between groups of three stitches is three threads. The most time consuming element, I think, was separating my wool and recombining one thread of each shade to create the heathered effect. Some of the other patterns mix up length of stitch, step between stitches, and groupings a great deal more, and must be much harder to keep track of!
However, now I need to stop and think. I need to stitch the vertical sides of the footstool cushion, and since I believe that wrapping the design around the sides will look awkward, I have decided to work each side panel separately. Now I just need a suitably Venetian border design that will work well with “Stones of Venice”.
It needs to be slightly smaller scale, I think, and I also need to allow for the fact that my stash of these colours is almost entirely depleted, and they may need to be supplemented, either by purchase or by using different shades in the borders.
Thoughts, anyone?
The Stones of Venice
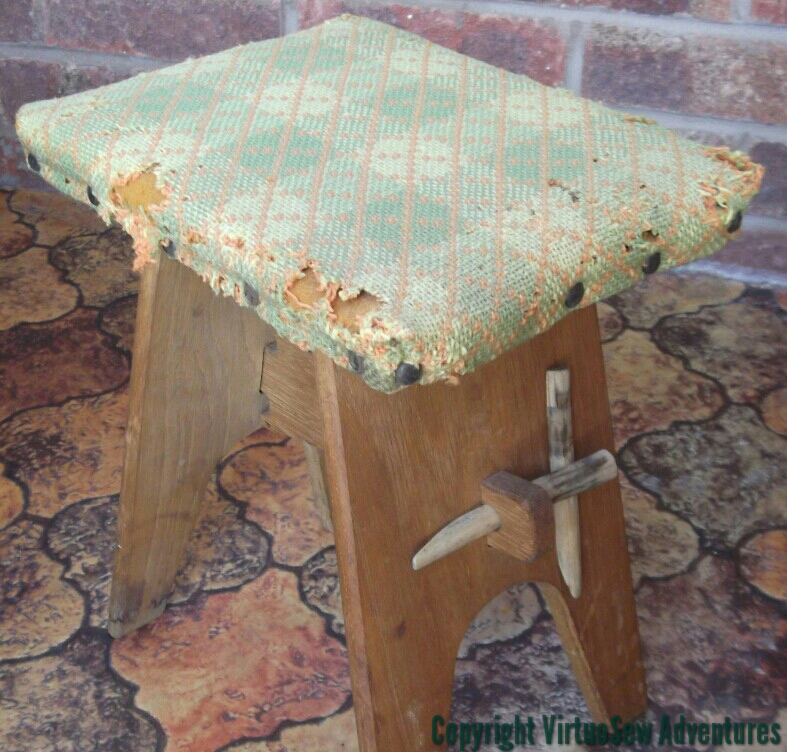
Moth Eaten Footstool
This rather sad specimen of a footstool – covered in now very moth-eaten Welsh tapestry fabric – was a constant part of my childhood. I can’t remember where it lived or what we used it for, but it’s always been somewhere around. When I realised that all my current stitching projects are very detailed and started casting around for something a bit chunkier, I thought that working a new cover for it would do nicely. Furthermore, if I chose threads I already had, it would make a good stash-buster.
Easier said than done. It took the combined efforts of my mother, my father, and myself to find a colour scheme. Even though I have a drawer full of wools, finding enough to meet the needs of the patterns we liked the look of required a great deal of swapping and changing. In the end, however, we picked a Bargello pattern shown in one of the craft books I inherited from my grandmother, “The Book of Creative Crafts”. The book was published in 1978, so the colour choices in the examples are sometimes a little unappealing to modern eyes, and there is also the fact that the top of the footstool is quite small – only 10 inches by 7.5. A couple of patterns that we liked, we felt were on rather too large a scale for the footstool.
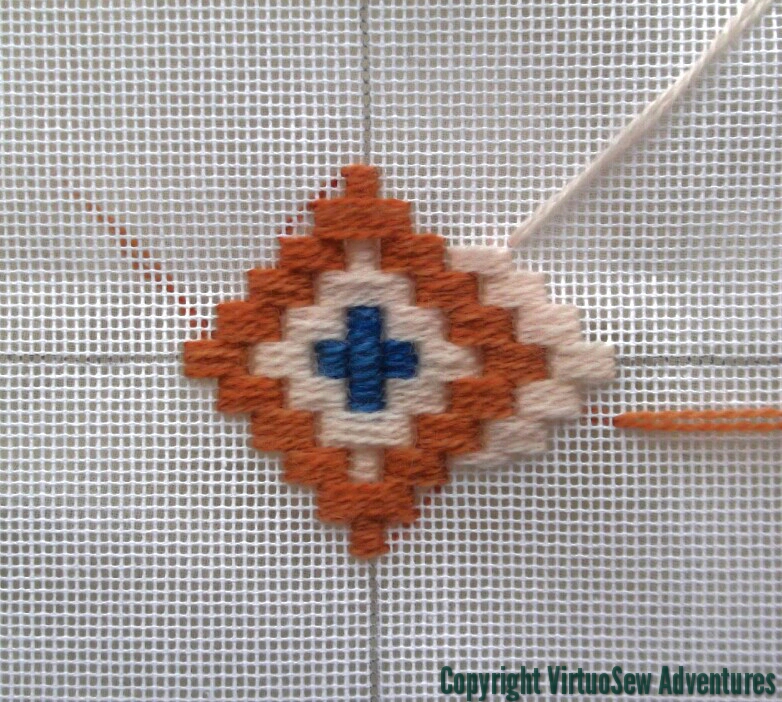
Starting Stones Of Venice
In the end, we chose a pattern called “Stones of Venice”, which is inspired by the brickwork of the Doge’s Palace. One of these days I must go to Venice, and see what I think of their version of it! Only three colours are involved, but as they are heathered, that allows me to extend my bundes of yarn, by using one strand each of two shades of each colour in my needle.
I’m using a roller frame with plastic extending sides which came to me in a bundle of stuff from a lady who was emptying her late mother’s house, and finding it a bit tricky to use. It seems to sag quite easily, and I’m unwilling to tighten the nuts any more in case they break the struts. It is the right size for the project, but other than that it is proving less than straightforward to use. Fortunately I suspect it won’t take long too work this piece!
Finnish Embroidery
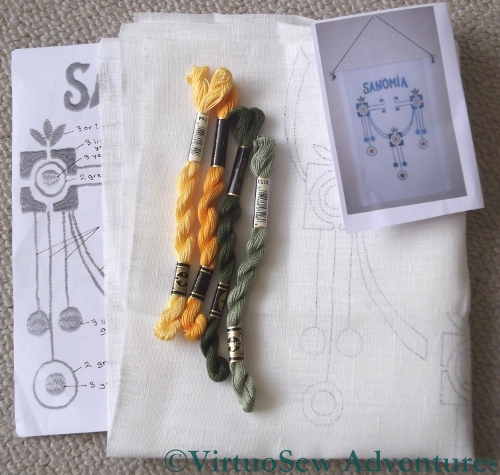
Finnish Embroidery Design
A few weeks ago, my husband the Australian was speaking at a conference in Turku, Finland, and the organisers were kind enough to allow me to go too. We had a marvellous time – the Finns are terrifyingly good linguists, so we had no language problems, and because the conference was about Science and Art, and how they feed off one another and contribute to one another, the conversations were very wide-ranging, full of sparkle and fun.
I didn’t have much time for side trips, but I did find an embroidery shop, and asked about local rural Finnish embroidery. I picked a design I liked the look of, and they agreed to prepare a tracing for me and send it on. It seems to be in a combination of stem stitch and Bokhara couching, but when I’ve had a closer look at the stitch diagrams, I will be able to tell you more.
This is what the lady in the shop told me about the design:
You also asked for some information about the pattern, we have a book that tells a brief history of where the pattern was found. Of course, the original designer of the pattern is impossible to trace.
The pattern was originally embroidered on a bag or pouch, that was hanged on the wall, where people put smaller newspapers and magazines into. That’s why the pattern is called ”Sanomia”, it means messages or news in finnish. The word was also embroidered in the bag. We copied the model ourselves to other products, such as runners.
The ”Sanomia”-newspaper bag was found in the Kankaristo house, in country village of Mynämäki.
The bag, that was found there, was sewn by the lady of the house, Helli Kankaristo, born in 1902. The story tells that she was taught to make embroideries by her very skillful teacher at school, and Helli passed her skills also to daughter Inkeri, born in 1928.
The Elephant Doorstop is Finished.
Finished Doorstop
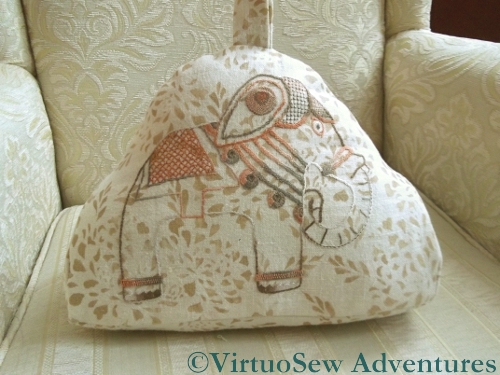
At last – after some months of puzlement, delay and confusion – and with considerable help from my mother, who was, after all the client, and knew what she wanted! – the Elephant Doorstop is finished!
We decided to make the dorstop vaguely teacosy-shaped, with a flat base, so that it wouldn’t fall over, and a loop to pick it up by so that no one is tempted to pick it up by the embroidery and abrade all that painstaking stitchery.
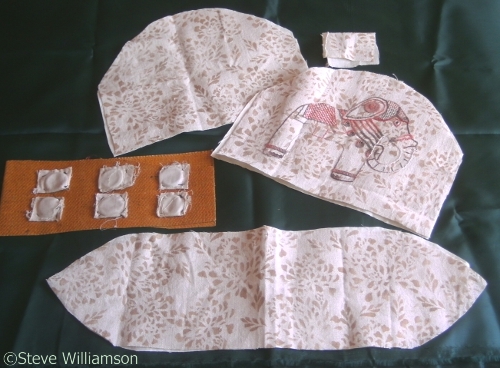
Pieces Laid Out
Once the pieces were cut out, my mother took a picture so you can see what we eventually decided upon. You will notice that there is a piece of buckram to flatten and stiffen the base, and it is being weighted with curtain-weights – small circles of lead held in their own fabric pocket. It’s easy to sew the fabric pocket into a curtain lining, or indeed, onto a piece of bukram, and it is less likely to catch and go astray than if the lead is sewn on like a button or a shisha mirror.
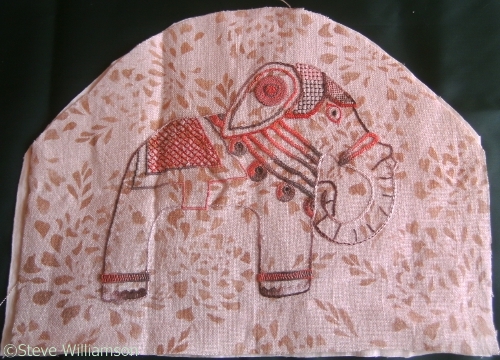
Elephant Finished
I’ve decided to call him “Kala Nag”, after the elephant in Rudyard Kiplings’s story “Toomai of the Elephants”, in “The Jungle Book”. He’s in ceremonial harness, rather than the working harness of the story, but I think he’s a very grand fellow, and I’m really very pleased with how the embroidery turned out. The variegated threads allow him to disappear slightly against the background in places, which makes for a more visually interesting piece than if he’d been stitched in the same tones throughout.
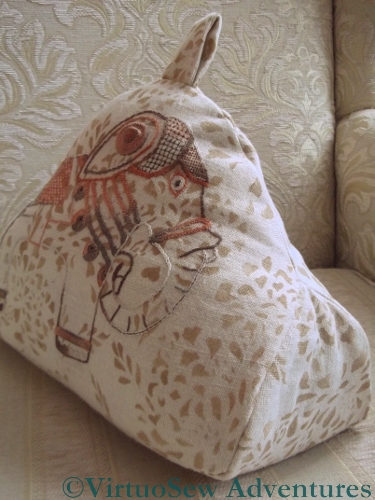
Side View
I propped the finished doorstop up on one of the living room chairs to take some more photos. This one gives you a better idea of the finished three-dimensional article, firmly stuffed with cotton linterfelt and ready to keep doors from swinging. He does a good job, too – those six small pieces of lead are just enough weight to keep him where he belongs.
And when he’s off duty, he sits on a bookshelf, conversing amicably with his older brother, The Elephant of Considerable Charm.
The Finnish Table Runner is Finished!
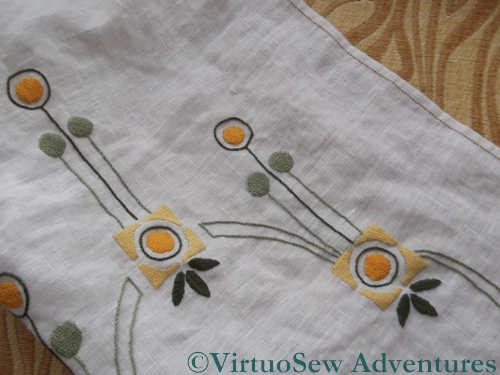
Table Runner Hemmed
At long last… I have finished the Finnish Table Runner!
The embroidery itself is very simple – Bokhara Couching and Stem Stitch, with the darkest leaves worked in nested Fly Stitches. I used two shades each of two colours – a greyish green, and a golden yellow.
The couching stitches of the Bokhara Couching are carefully arranged to create a basketweave effect, and I worked harder than usual to make the stem stitch regular with an even twist to it. Real simplicity is hard work, because the simpler the tools and effects you are using, the better-executed they have to be!
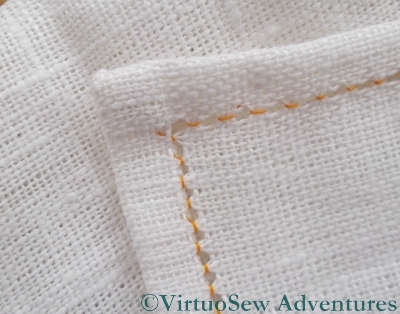
Antique Hemstitch - Corner Front
So I have taken particular care to stitch evenly. This was not entirely straightforward, in fact, as the fabric is a plain weave (one thread over and one thread under in each direction) but is not a square weave (warp and weft threads equally spaced). Since it is also a linen, and the threads are a little slubby, sometimes the effect is exaggerated. This became especially clear when I worked the hems.
Incidentally, I’ve no objections at all to the fabric not being a square weave or to the threads being slubby – these are just factors that sometimes influence how something is worked or the effects that are achievable.
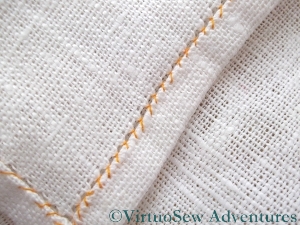
Antique Hemstitch - Corner Back
When I hemmed the piece, I chose to use Antique Hemstitch (at least, that is what it is called in Yvette Stanton’s Right Handed Embroiderer’s Companion). This leaves only a small stitch on the front of the piece. I withdrew a single thread for each hem (the instructions usually suggest at least two, but I wanted a narrow line down the edge and not the dogtooth effect of hemstith on only one side of the withdrawn threads), and then grouped four threads in each stitch. If you look hard at the photos, you will see that in one direction the stitches look longer than the other, although they group four threads in each case.
Since the table runner is about a metre and a half long, and nearly half a metre wide, that’s about four metres of hemming, which for some strange reason I enjoyed enormously, even though I’m really not good with repetition. I used ordinary sewing thread, but decided to use a golden yellow to add a bit of colour along the edges.
When my mother saw it first (half-done), she told be I was being a little show-off, but I think she meant it as a compliment!
The Chairs Are Finished!
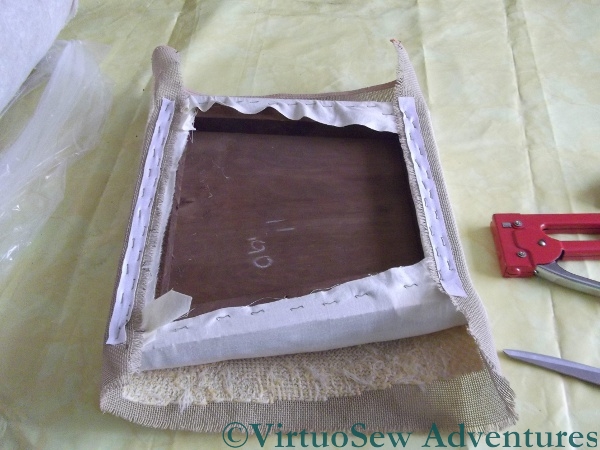
Using The Staple Gun
You may recall that I decided to finish off the canvaswork seat covers for the dining room. That entailed, removing the existing corded velvet covers, so I decided to increase the padding on the seats while I was at it. So I added a couple of thick layers of cotton linterfelt, and covered it with calico.
I’ve had some real upholstery done recently, and the upholsterer told me that staple guns cause less damage to the wood than nails (obvious, when you think about it), so that’s what I used.
First Pair
Second Pair
The staplegun has a kick like a mule, so the job had to be spread out over a couple of days. Getting the tacks out of the last set of covers took a day all by itself, so I have stapled it through some cotton tape, to prevent whatever I may use in the future catching on the threads of the canvas.
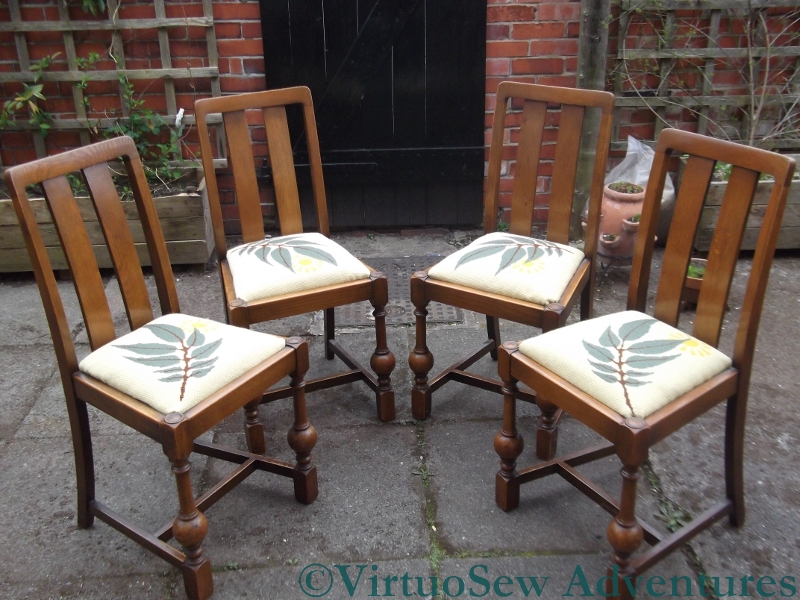
Finished Chairs
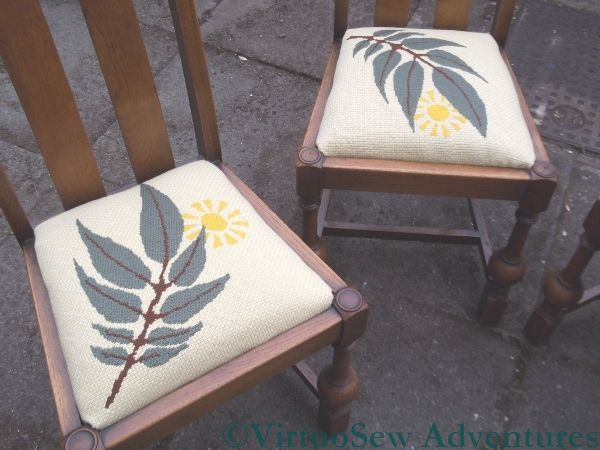
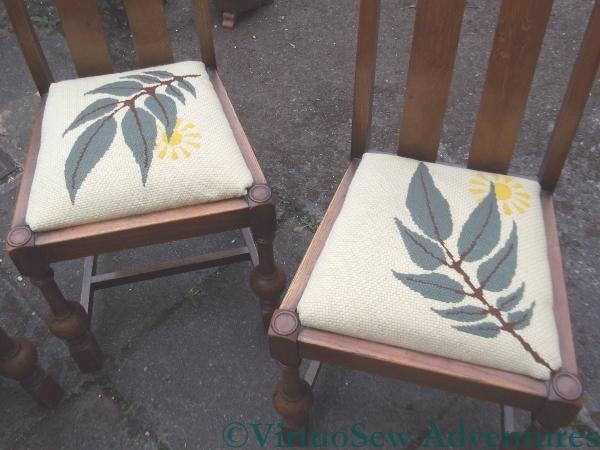
Eucalyptus Leaves in Canvaswork
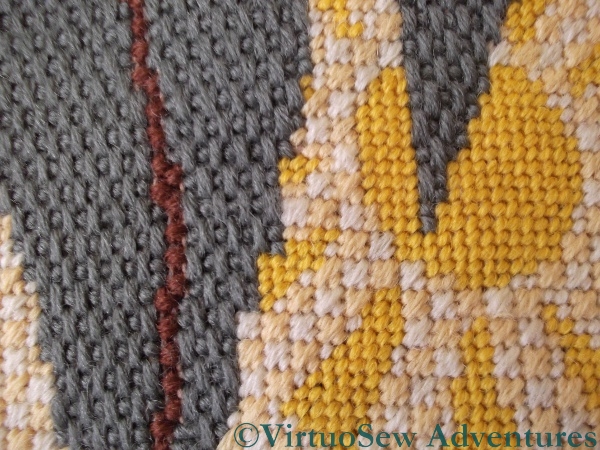
Close Up of the Sunburst
I believe I have mentioned before that our house is rather Arts & Crafts flavoured. I’ve been working on our dining room almost since we moved in. It’s north-facing, and our predecessors had painted it pale blue and papered the ceiling turquoise with gold stars. We felt we were dining inside an iceberg!
That may explain why when I repainted it, the ceiling turned white and the walls sunshine yellow. Above the picture rail, I stencilled a eucalyptus leaf frieze (in deference to my husband The Australian). When in due course I inherited my Grandmama’s dining room table and chairs, I decided to work needlepoint covers for the seats.
Close Up of the Leaf
Fortunately there are only four of them, but even so, I had to ask my mother to work on them as well, or they’d never have been finished. She helped with the stencilling as well – also an exciting challenge!
Unfortunately when they were finished I discovered some marks on some of the background. I was so dispirited that I couldn’t face unpicking them and so I stowed them away for several years. Now, however, I have fished them out, and I am tackling the replacement of some of the rows of stitching, one row at a time.
I would be nice to think I could get the chairs recovered for Easter…
Progress on the Finnish Embroidery
Finnish Embroidery - Progress
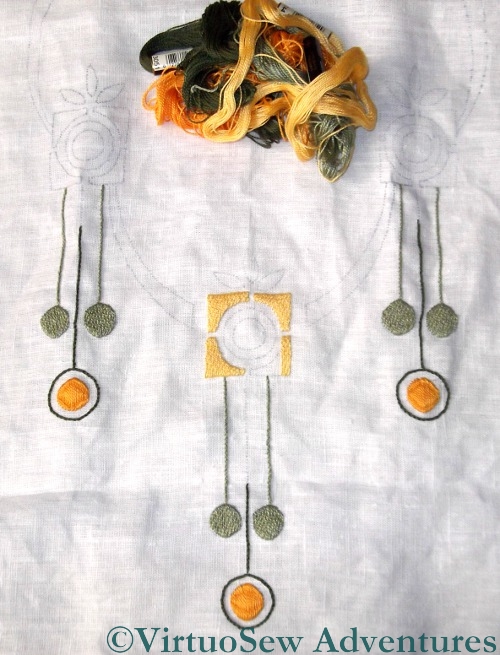
I managed to get started on my Finnish embroidery project at last. It’s going to be a table runner for our dining room, which is golden-yellow and decorated in a slightly Arts and Crafts fashion, so the design has been traced twice, back to back, to create a long design, and without the lettering shown in the photograph that accompanied the linen (see my first post about this project).
Following the model I saw in the shop, I’m using Bokhara Couching for all the solid shapes, laying the couching stitches in a sort of brickwork pattern to create texture. The deep golden circles will echo the sunburst in the eucalyptus frieze in the dining room, and the two greyish greens are close to the other colours in the frieze.
All the lines are going to be in stem stitch. I’m working this quite slowly and carefully to keep the stem stitch twisting neatly in the same direction and the stitch length more or less the same.
It’s some time off yet, but I’m planning to hand-hemstitch the edge of the runner. I take a slightly unexpected pleasure from hand-hemstitching, and even the six metres of hemstitching on the Piano Shawl haven’t put me off. There’ll be about three metres of hemstitching on this, and I’m rather looking forward to it!
Further Adventures In The Abstract Garden

The Finished Cushion
You may recall that I worked an abstract piece of canvaswork inspired by a vegetable garden. When I’d finished it, I didn’t like it very much, and really didn’t know what to do with it. However, my cousin (who comments here occasionally as Action Ma’am) did not suffer from the same problem. Not only did she like it, she knew what to do with it. I’ve asked her to write up what she did, and here’s what she wrote:
Having commented how the abstract garden canvas reminded me of my veg garden, I was delighted when Rachel offered it to me. I knew exactly what to do – it had already told me it wanted to be on a cushion for the armchair in the conservatory. My guess that the red of the canvas was the same as the red of the upholstery was spot on.
Close Up Of The Corner Trim
I don’t have a sewing machine, so Fiona my curtain-maker agreed to put the cover together for me. Not having done any needlework for many years, I was quite alarmed at the prospect of “getting it right”. Rachel and I had an email discussion about how to straighten the canvas and apply it to the velvet, handstitching it in place. To emphasize the garden theme, I had chosen some gimp braid to cover the edges of the canvas. The loops of the braid echo the hoops of the iron edging you sometimes find around borders in posh parks and gardens. I also chose some green fringe to define clearly where the cushion ended and the chair began.
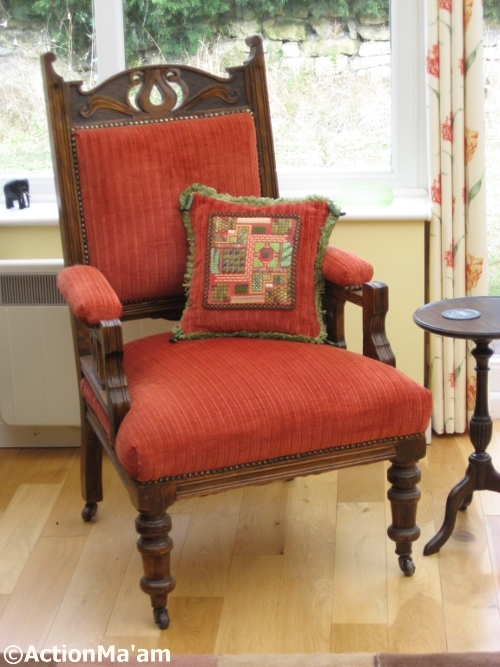
The Cushion On Its Chair
Whilst I was still thinking about getting started, Fiona phoned to say she could deliver a bedspread she had been making for me the next day. This was too good an opportunity to miss. I took the afternoon off work, a deep breath, gritted my teeth and leapt in. The stripes on the velvet helped in getting the canvas straight, the braid hid the edge of the canvas, and two hours later, it was ready for Fiona.
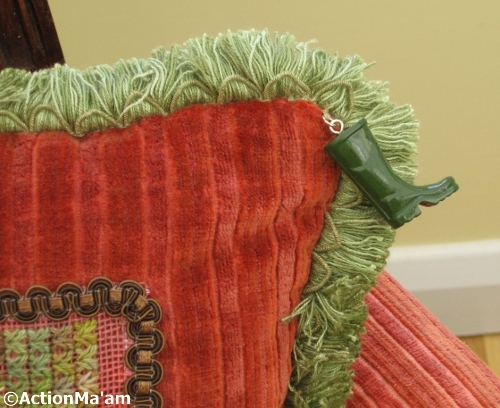
Whilst the cover was away being made up, I found a necklace in an accessories shop, with a green wellington boot charm on it. I bought four as a finishing touch.
The abstract garden canvas is now a happy cushion, nestling into the crook of the chair arm, and kicking its welly-booted heels in the air. I don’t think the chair intends letting go of it any time soon!
Close-ups on the Elephant Doorstop
Close Up - Spiral Trellis Stitch
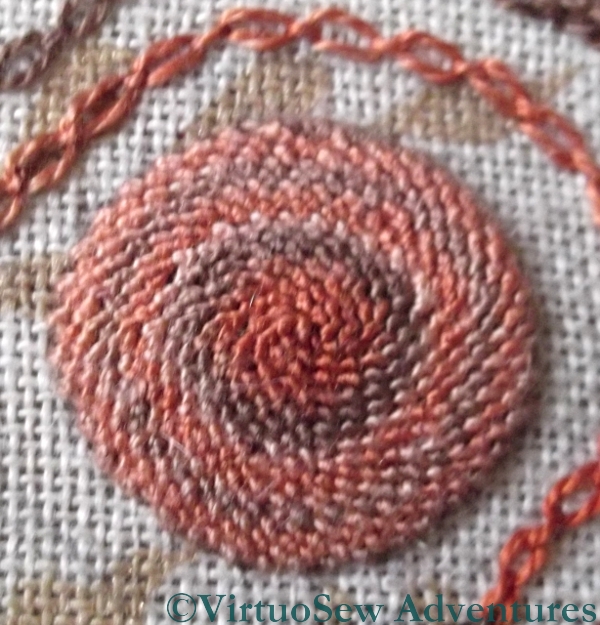
I’ve been asked to provide a few close ups from the Elephant Doorstop, so here goes.
This close-up shows the spiral trellis stitch medallion on the Elephant’s ear. I love this stitch – it creates a lovely nubbly texture! It’s about three quarters of an inch across.
The silk perlé I am using was in ready cut lengths, shading from orange to brown, and when I brought a new thread in, I started with the colour I’d just finished, so that the colour sections would be slightly longer and denser.
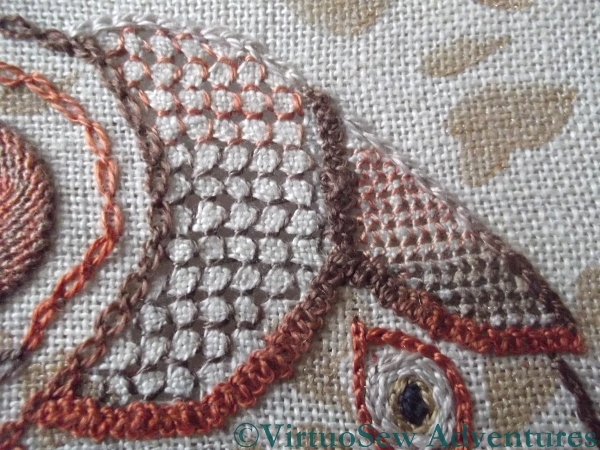
Close Up - Two Sizes of Four Sided Stitch
When I thought about working four-sided stitch on the Elephant’s headcloth, I was originally intending to work some other pattern over the top, so the background grid would modify the fabric and the pattern on the top would be the most visible thing. However, I couldn’t decide what size would be best and worked one section in each size, and now I’ve decided I like it just as it is. It recalls the Trellis Couching on the saddlecloth, but at a different orientation.