
Tag: Needlepoint
Lorgnette Case Finished and Ready
The lorgnette case would have been finished more quickly had I not been using a corner of the same canvas I was doing the Fishy Experiments on!
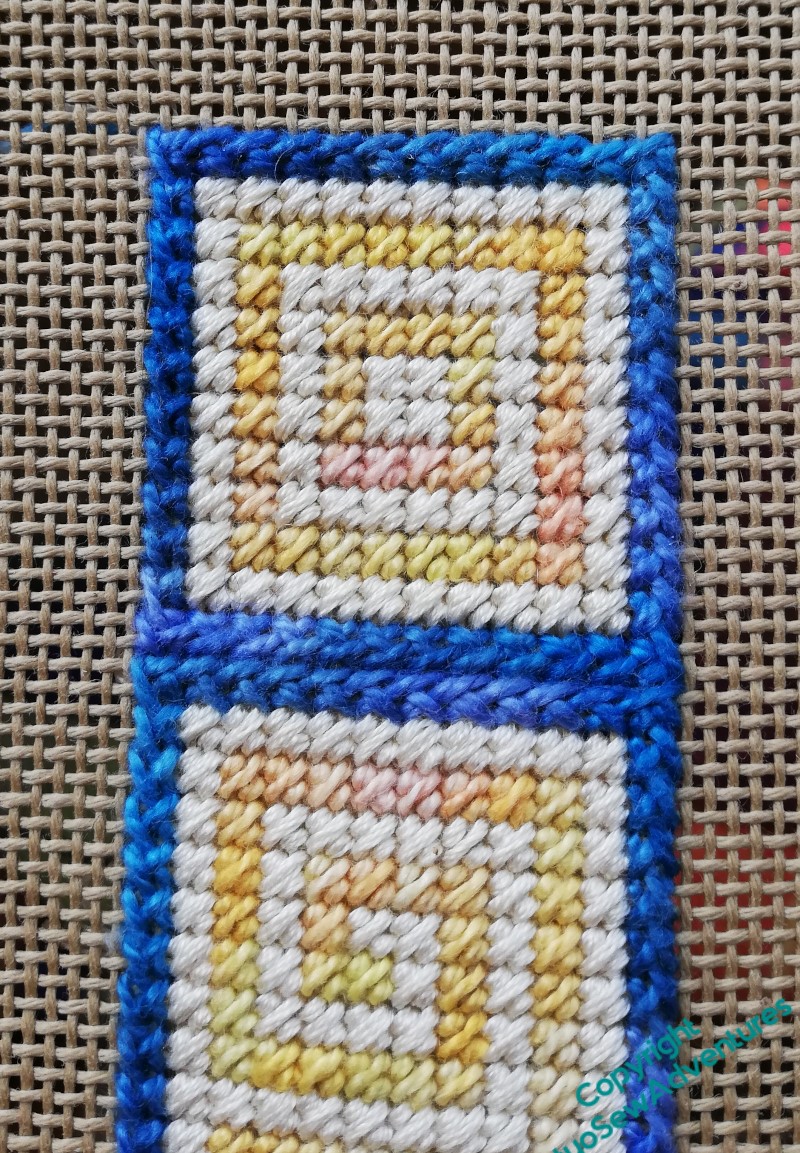
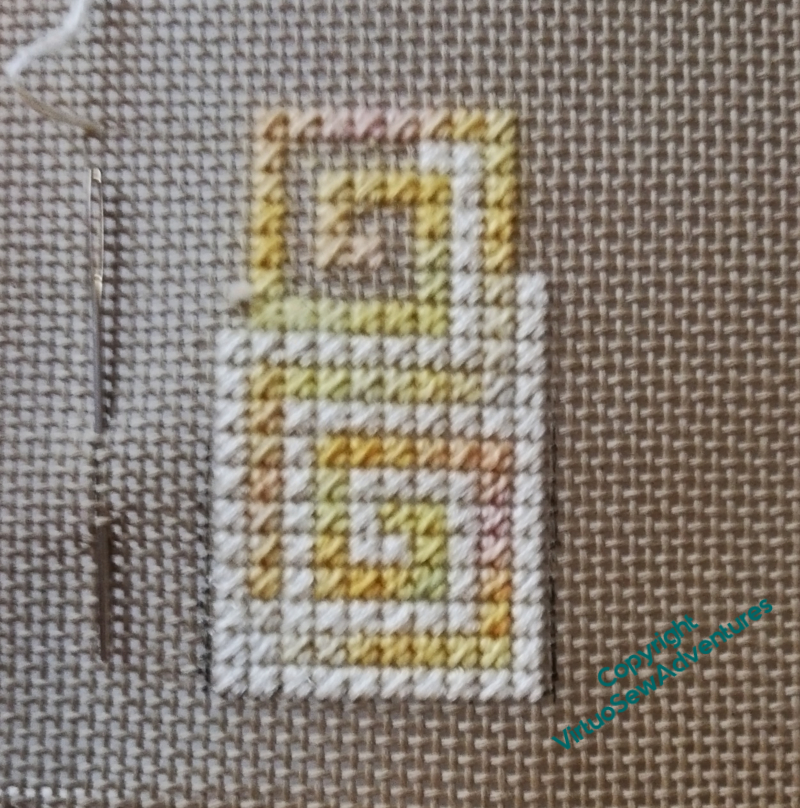
When I’d bordered the scroll pattern, using a long armed cross stitch, I thought that maybe it wasn’t quite long enough, and added a square section to the top to act as a closing flap.
The next task was to cut it out, turn in the canvas and catch it down, and then line the piece with felt so that the interior doesn’t scratch the lenses of the lorgnettes. This is always rather fiddly, but a very necessary stage. I certainly wouldn’t want to try to add the felt without catching down the canvas separately!
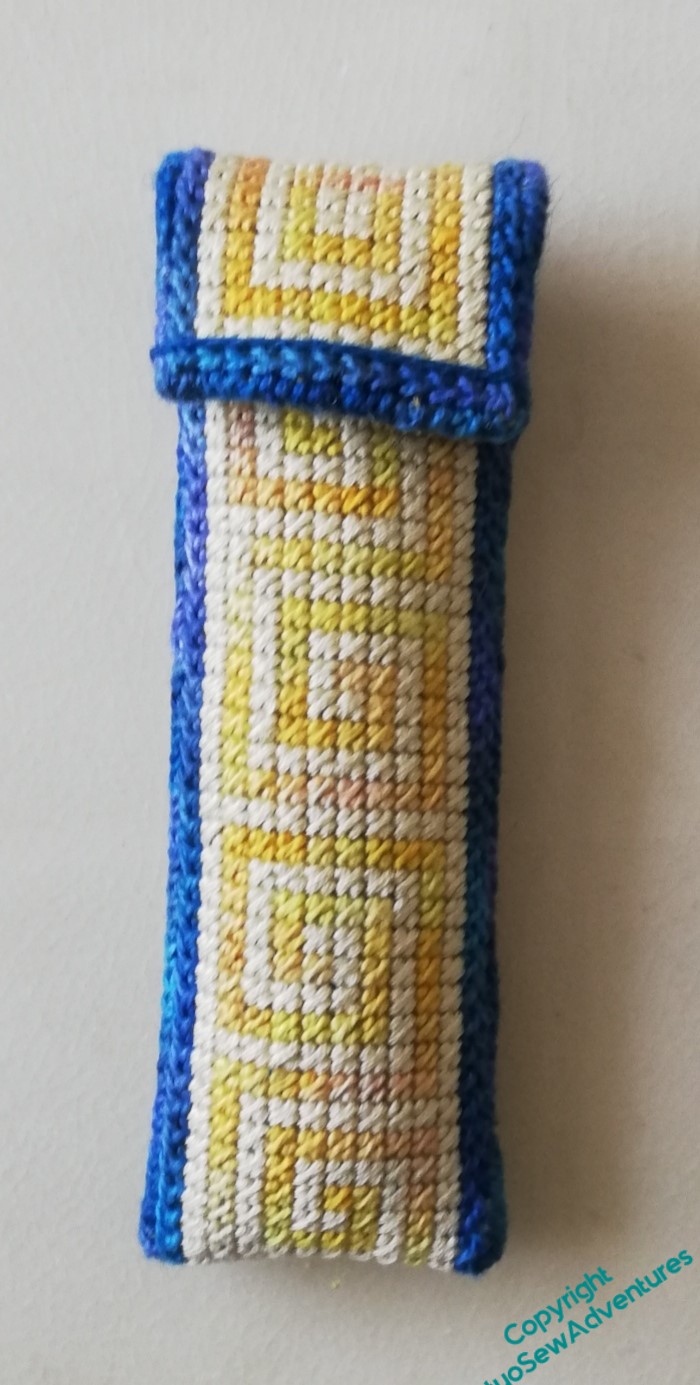
The next thing was to turn the lined strip into the case. I’ve used the same variegated pearl cotton as I used for the border, and in effect, the same stitch. It goes forward two and back one, so the finished stitching creates much better coverage than a straight overcast stitch. It has a slight fishbone pattern, and you can continue on from the joining seam to run around the edge of the flap without even breaking stride, as it were.
Since there’s already colour variation in the yellow and the blue, minimising the textural variation by edging the flap with the same stitch as the case is closed with makes the whole thing pull together nicely.

It only took an afternoon or so to finish the case and install the lorgnettes, so they are now ready for those Happier Times I mentioned, when Museums and Menus are a regular part of life once more.
I should add that while I was at university, I was the girl who wore white gloves with her summer frocks. None of my friends will be at all surprised to find me wielding a pair of lorgnettes – in fact, if at least one of them doesn’t ask me what took so long, I will be rather surprised!
And now, the final (for now) episode of Slow TV Stitchery, Episode 73, in which the slips are at last applied, and Tynemouth Priory is Finished.
Fishy Lessons
So now, having finished my two fishie experiments (there may have been a third in the pipeline, but I’ve forgotten what it was!), what can I say I’ve learnt?
First, canvaswork stitches against the freeform bargello. There’s a sort of stillness, almost a static quality to this fish, in spite of the flowing bargello.
The bargello works well, although now I look at it, I’ve not managed to keep it flowing from top to bottom. And it was remarkably difficult to keep track of the pattern across the fish.
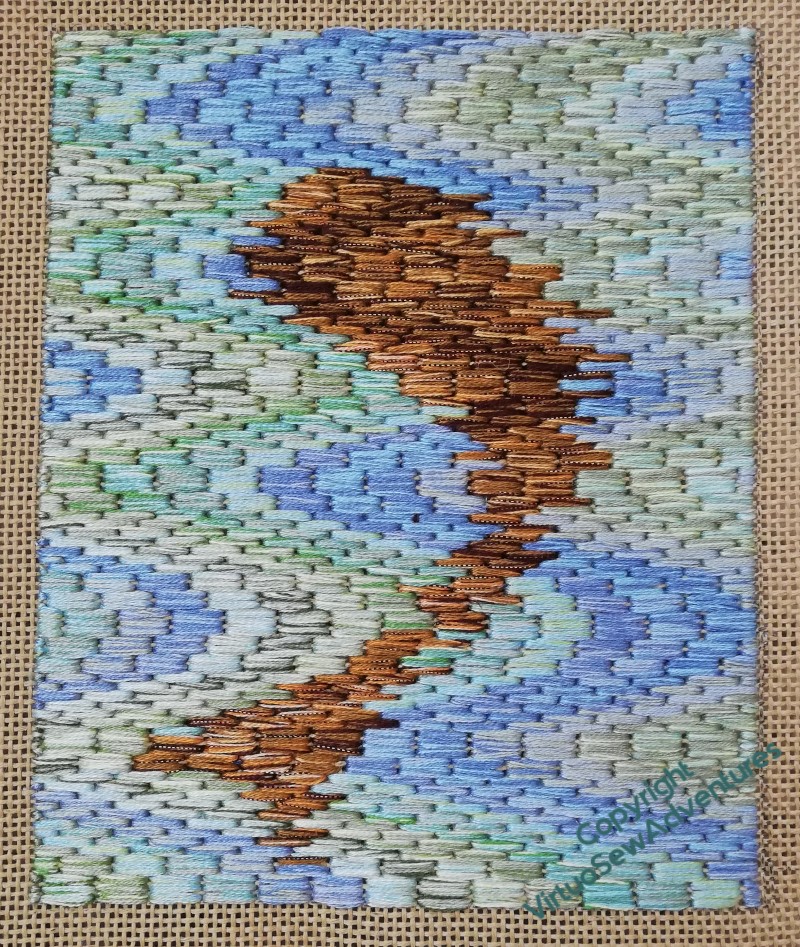
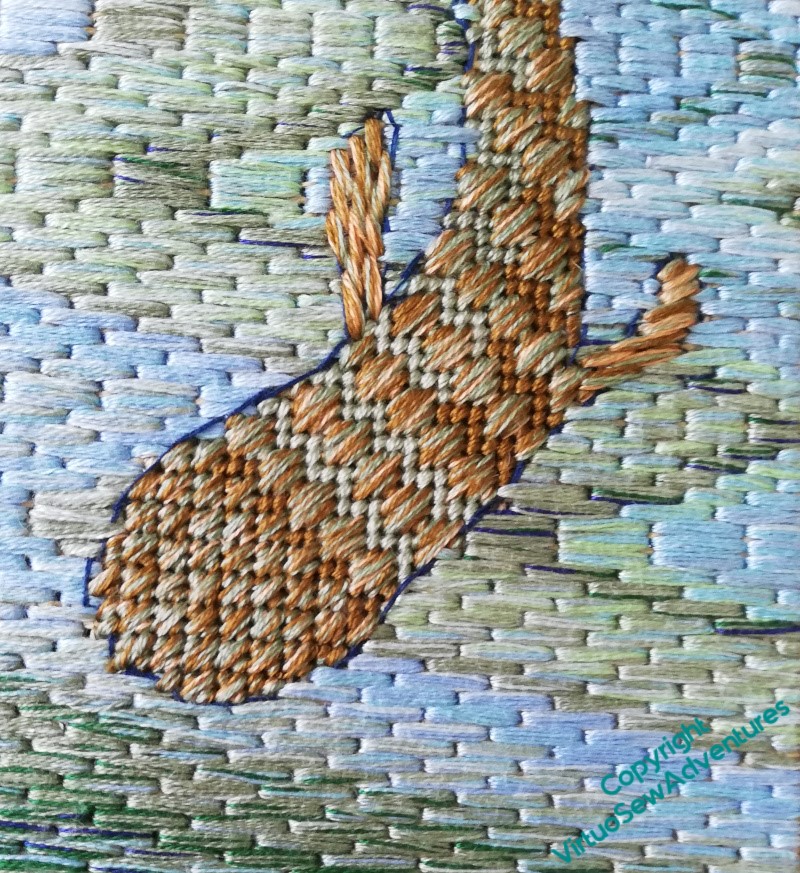
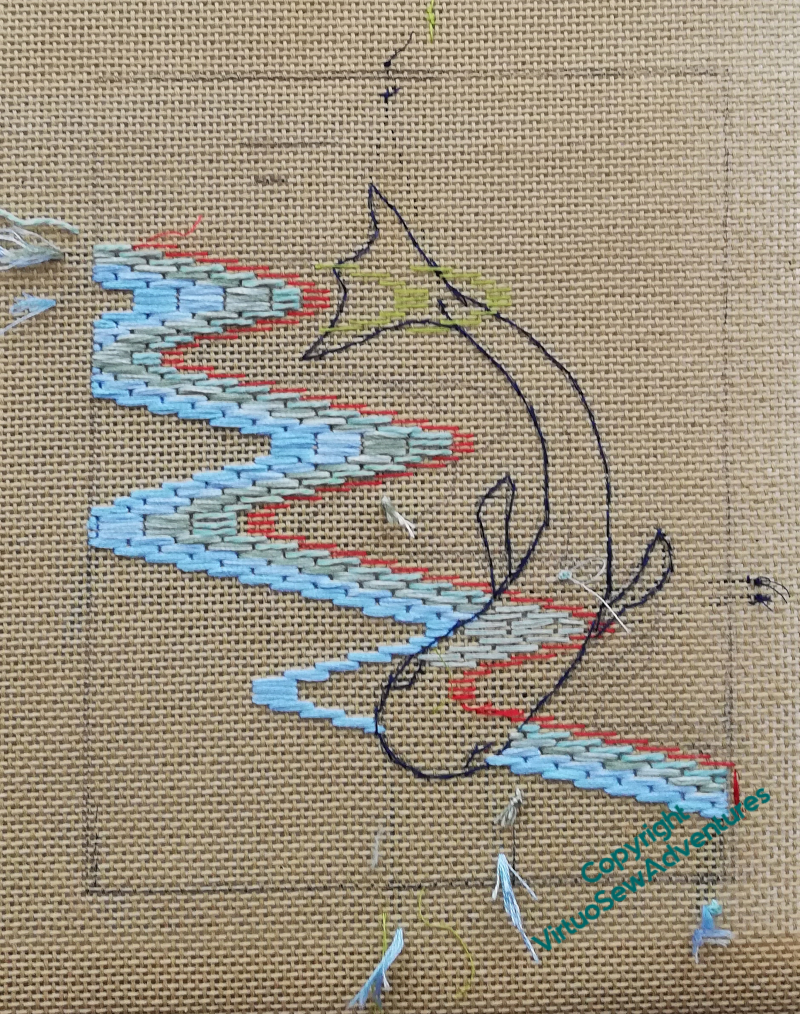
The second fish was an attempt to suggest the broken outline of an object seen through the interface between air and water. So this time, the pattern of the bargello ran through the fish, and I had to decide at each edge whether to stitch in the fish colour or the water colour. The pattern runs more successfully from top to bottom of the piece, but the whole thing looks a lot more active, maybe too active.
I think the colours are a bit too bright and swimming pool-like, but as these are experiments, using stash, I’m not too concerned about that. What does concern me is that even after these two, fairly substantial pieces, the appearance of a particular blend of threads as it was stitched was sometimes a surprise. It will be hard to pick the right colours to use if I can’t rely on my imagination of how the thread will stitch up.
So, I don’t know whether I will use this idea for the borders of Placidus, but I’ve got plenty to think about, haven’t I!
Episode 69 of Slow TV Stitchery is now live, on talking projects, the development of musical taste, and the challenges of suggesting wind over the water.
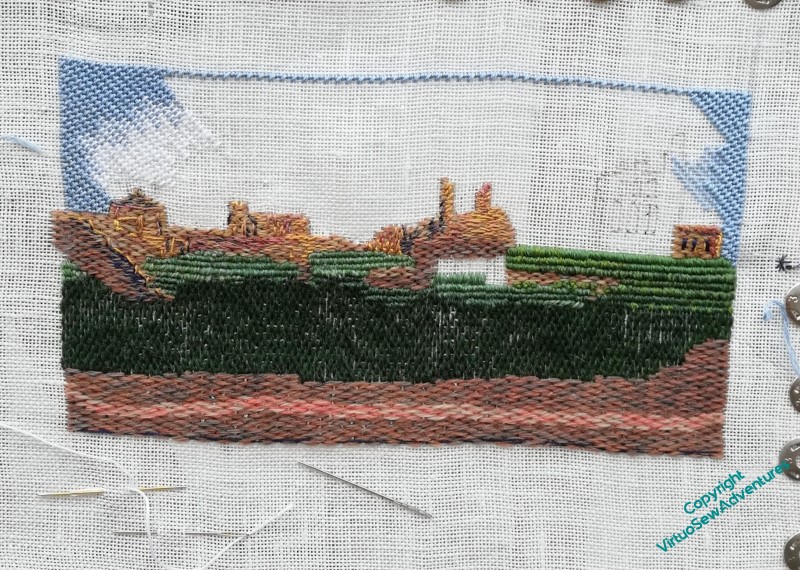
Tynemouth Priory
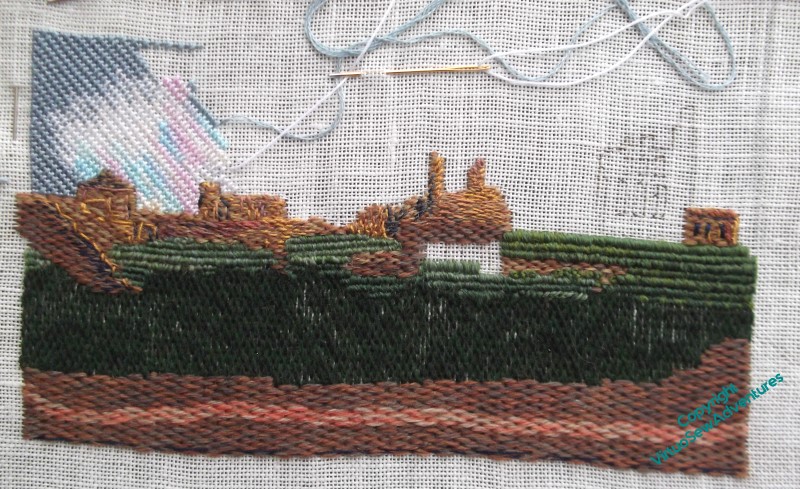
Now then, this is an old friend, and everyone who’s been following my SlowTV Stitchery will be aware that since this is the Year of Finishes, I’ve decided to finish it. This is the first “Tynemouth Priory”, which I started, only to decide that the colours were all wrong against the Flag Sunrise, and I had to start again. I’m glad I did, because the second version fitted into the complete “Leaving The Tyne, 1915” very much better than this one would have done.
However, when I came back to it and started stitching again, I realised that the variegated thread I was using in the cloud may have looked right in the skein, but it wasn’t right when it was stitched.
Sigh.
Time to channel my inner Penelope, and unravel at night everything I had worked during the day.
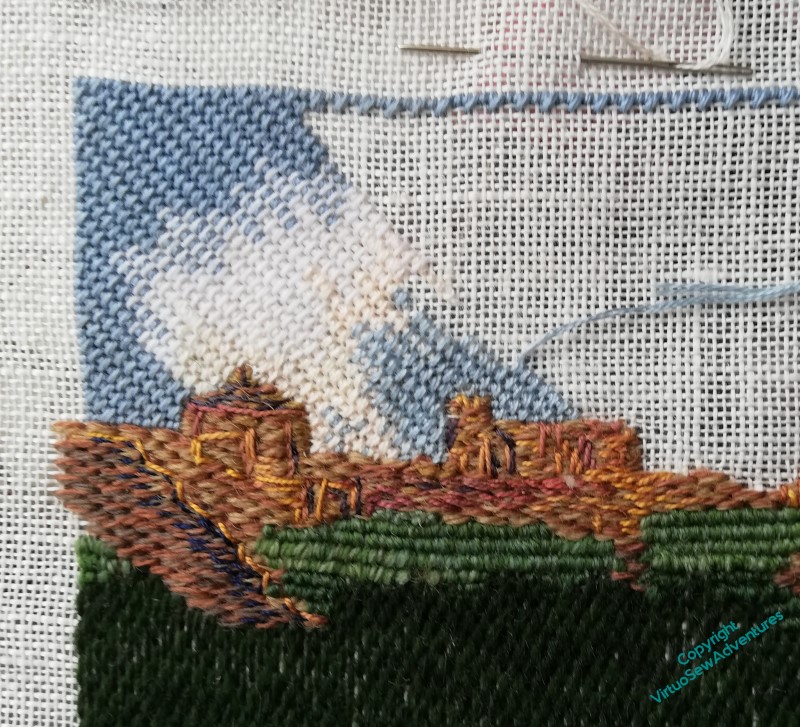
I picked out two slightly different pale cream stranded cottons to take the place of the variegated thread, and a stranded cotton in a slightly lighter blue than the coton a broder, to go near the horizon, and I’m now reinstating it, with interesting diversions to create cloud-like effects.
At this point I was still feeling very tentative, but I think the sky is improving as I progress across it!
Episode 60 of SlowTV Stitchery is now live. In which is considered making a virtue out of a necessity, arguments with the ghost of Miss Hunter, and a plea is made for an Introduction to the Picts, all supplemented with some meditations on literary sources for future projects.
A nice, soft case for my lorgnettes
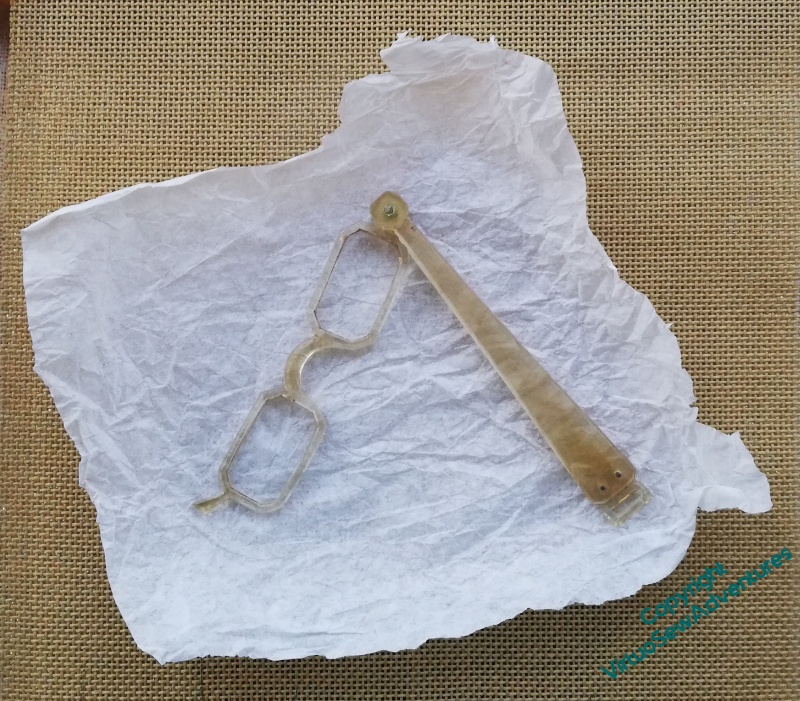
An old lady of my acquaintance once said to me, “Getting older is no fun, dear, but it’s better than the alternative”. Well, one of the effects of getting older – for me – is that I now need reading glasses. If I try to move while wearing my reading glasses, the results are sometimes disconcerting, sometimes positively disorientating.
I’d been wondering about what to do about this, until at the end of 2019, it occurred to me to channel my inner Lady Bracknell, and start wielding a pair of lorgnettes. I duly acquired some, with my usual impeccable timing (Ha!) at the beginning of March 2020.
Since then, of course, museums and menus have alike been out of reach, and I stowed the lorgnettes in my “Eve In The Garden of Eden” box in hopes of happier times to come. I’ve decided to get started on a case now, so as to be prepared for those happier times.
As I’m now dealing with the exhaustion consequent upon getting within sight of the finish on The Amarna Family Group (which has been going for nearly a year) and the Christmas Angel (begun around Christmas 2015!), I’ve been looking for small quick projects to reset myself, and this should be a good one.
This is a piece of 22 count cotton canvas I found lurking in my stash, and so far I think it will be very simple. I think six repetitions of the scroll will allow me to wrap the lorgnettes with a closing flap, and the light yellow (pearl cotton) and cream (stranded cotton) should make it eay to find in the depths of my handbag.
Episode 59 of SlowTV Stitchery is now live, in which we have almost recovered from the unpicking following last week’s stitching, and consider the particular delight of a fully-stitched fabric.
A Second Fishy Experiment

So, having learnt enough to be encouraged by the First Fishy Experiment, I embarked upon my Second Fishy Experiment.
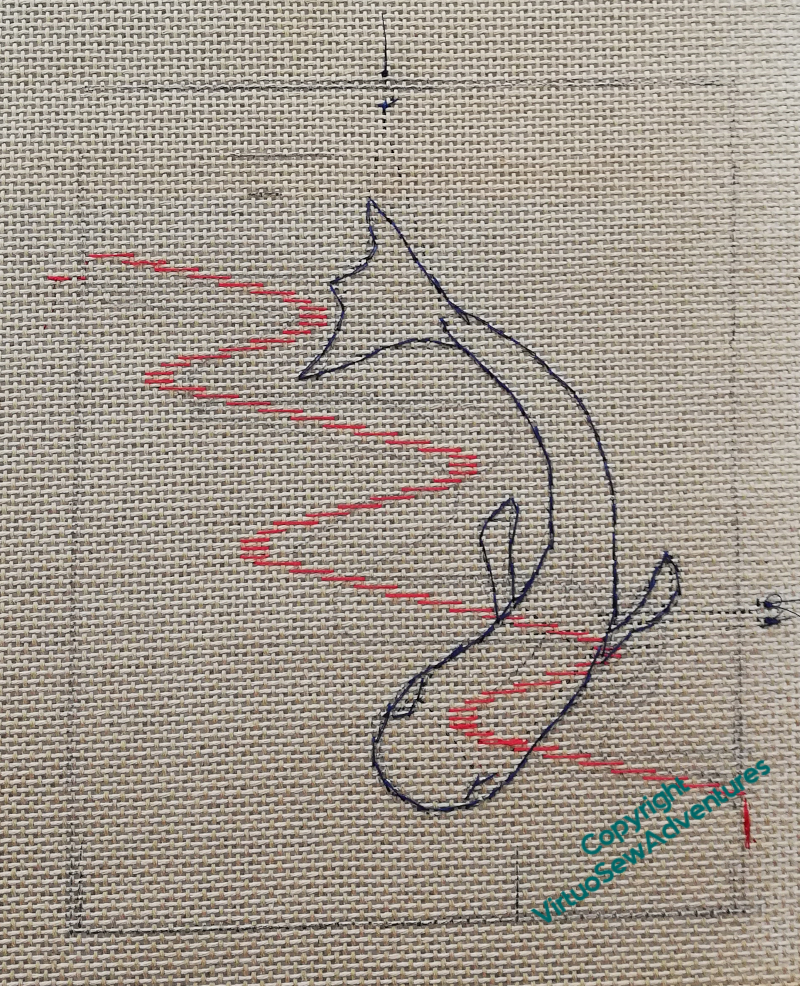
Again, I drew out the borders, tacked the edges of the fish, and drafted the line of the bargello pattern using coloured sewing cotton. You can see how many times I thought and rethought what I was going to do in pencil beforehand!
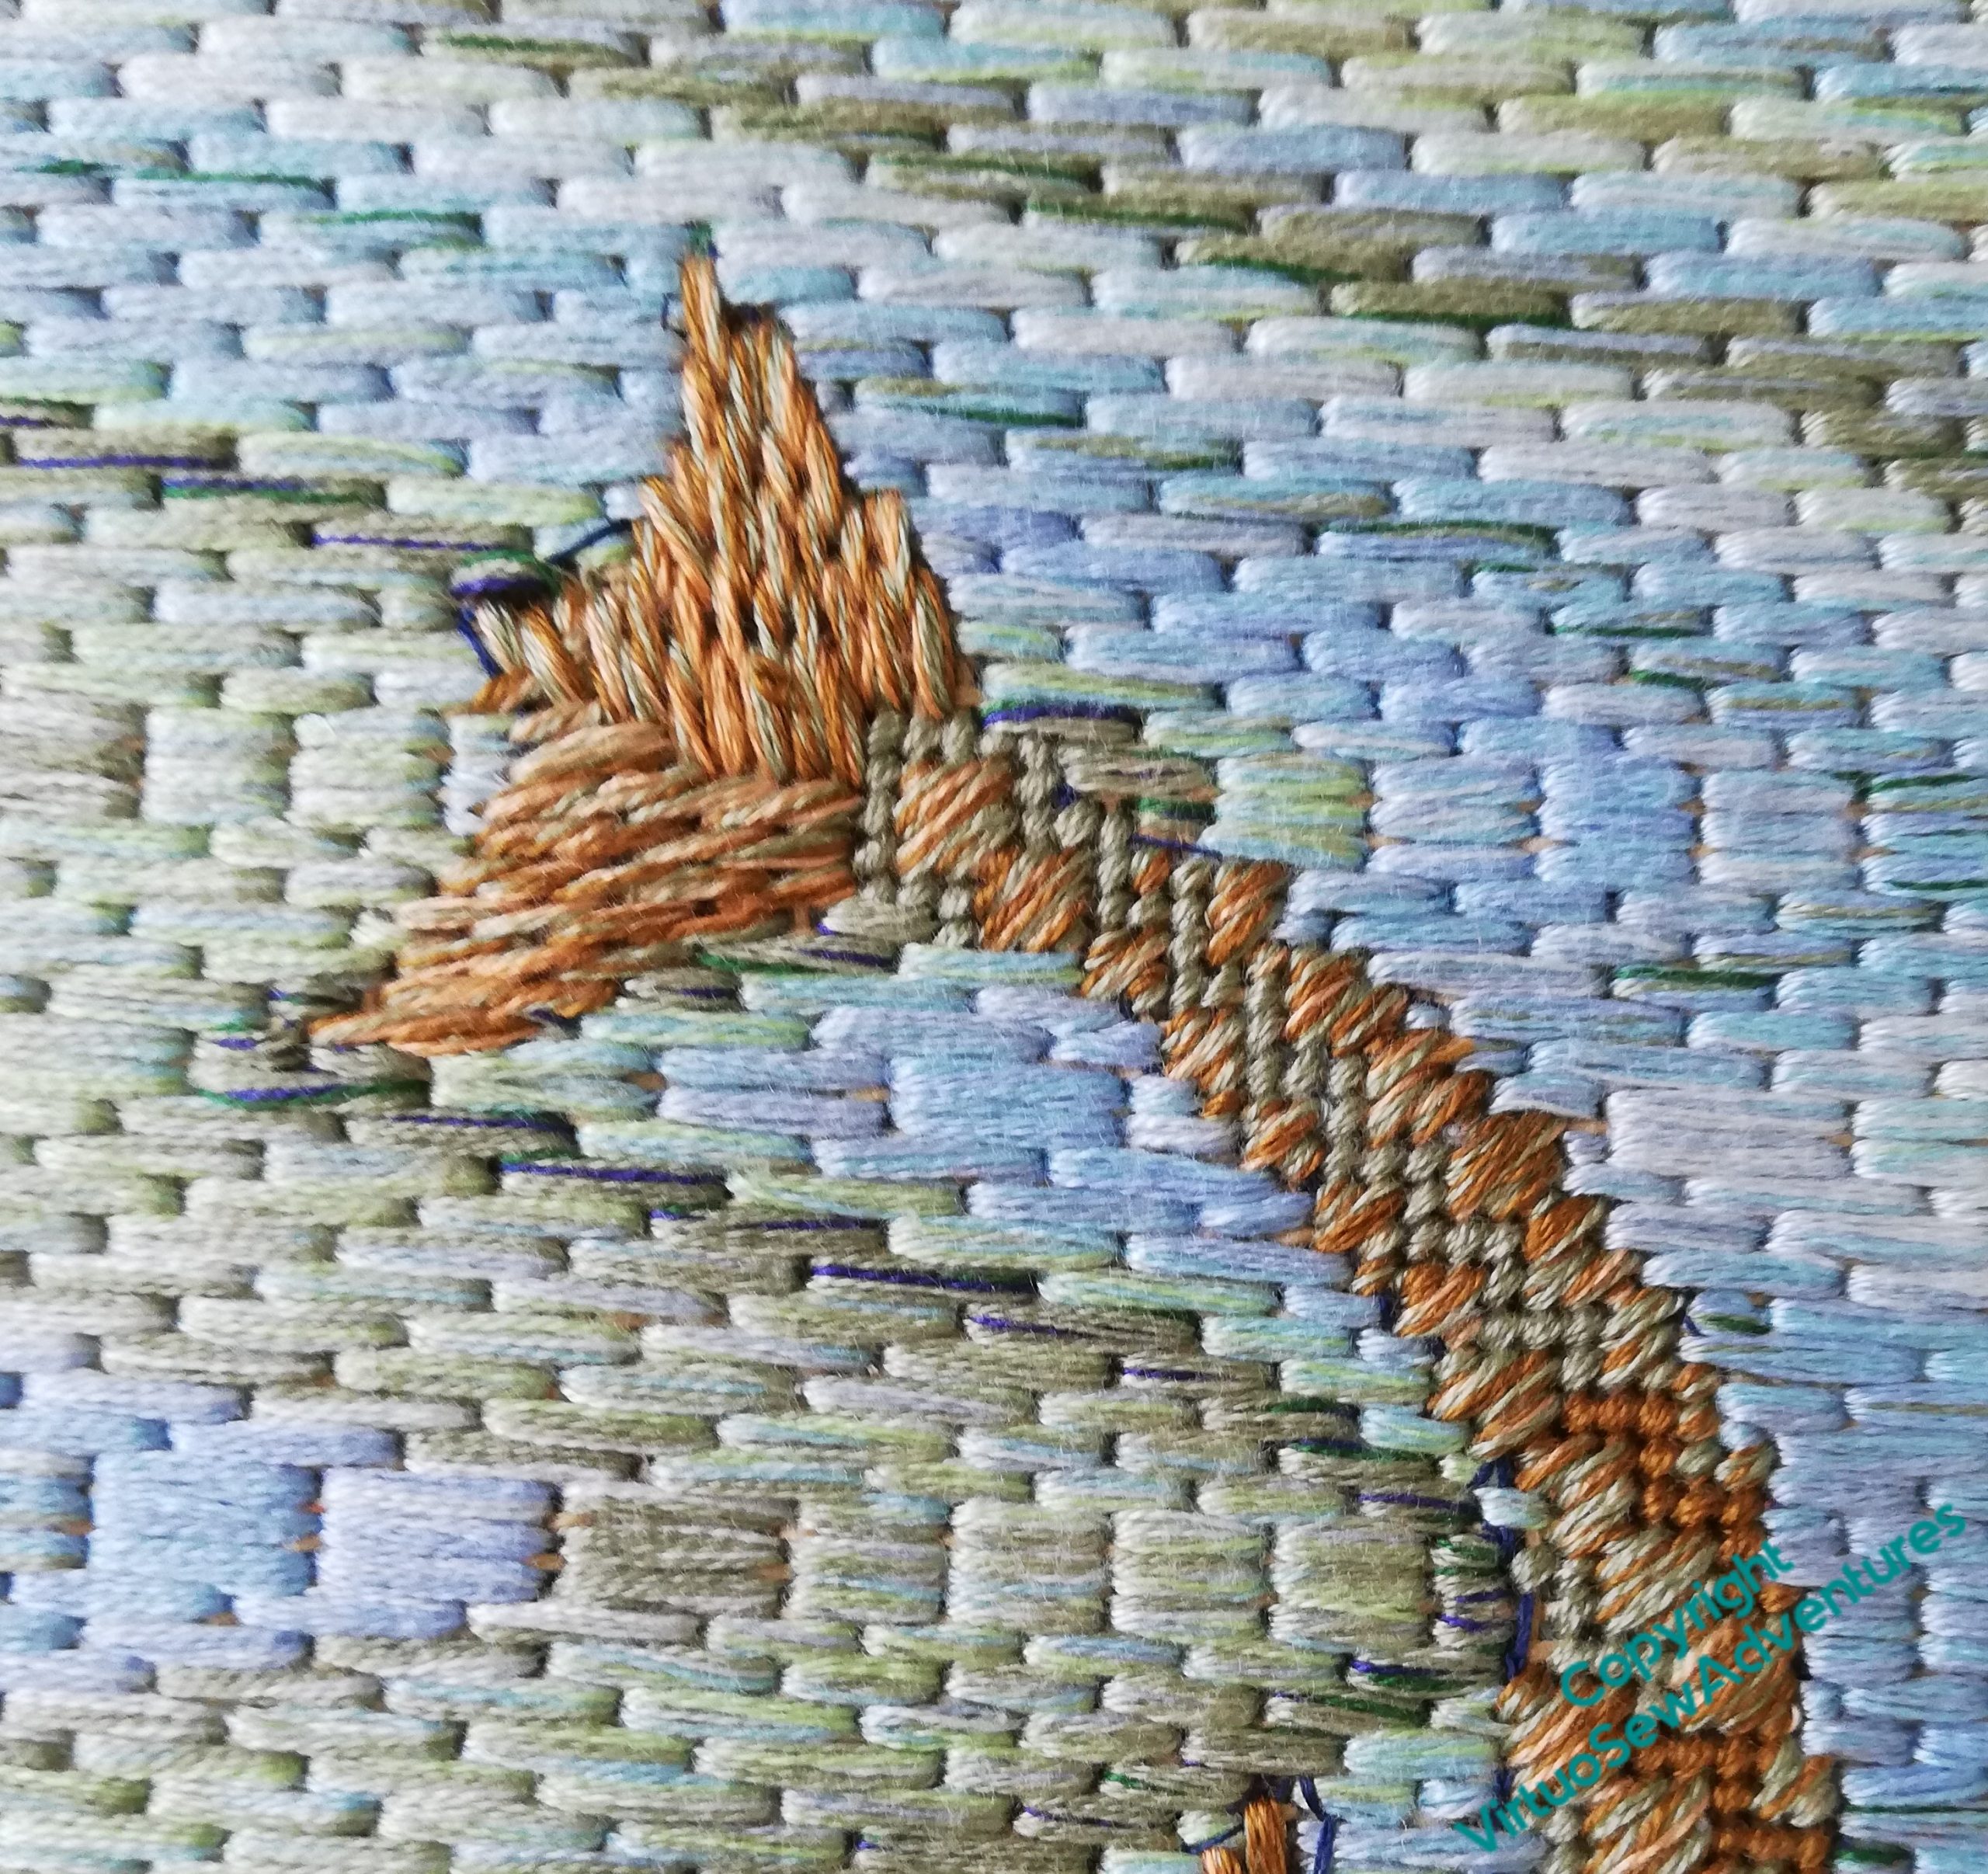
I’m using the same bit of leftover canvas, so again my threads will be blended using nine strands of stranded cotton, although I’ve added a bit to the fish by using a variegated metallic machine embroidery thread as one of the strands.

This time the experiment is to see whether I can create something of the effect of looking through the surface of water at the fish. That means making the edges of the fish uneven, rather than crisp, so rather than an entirely different set of stitch choices for the fish, and compensation stitches everywhere, I will use the same stitch pattern throughout.
That in turn means that as I approach the edge of the fish on each row, I have a decision to make about whether to use the water colour or the fish colour for the stitch that straddles the edge. Fortunately, this isn’t the sort of decision I find unnerving or difficult to make, and even here, I think you can see that this idea is rather likely to work!
I realise that the post about starting the Second Fishy Experiment somehow managed to end up well behind the videos. Episode 57 of Slow TV Stitchery is now live, in which we muse on the effects of blending colours in the needle, the demise of Scottish pearling, and the final “It depends!” moment.
First Fishie Experiment Finished…
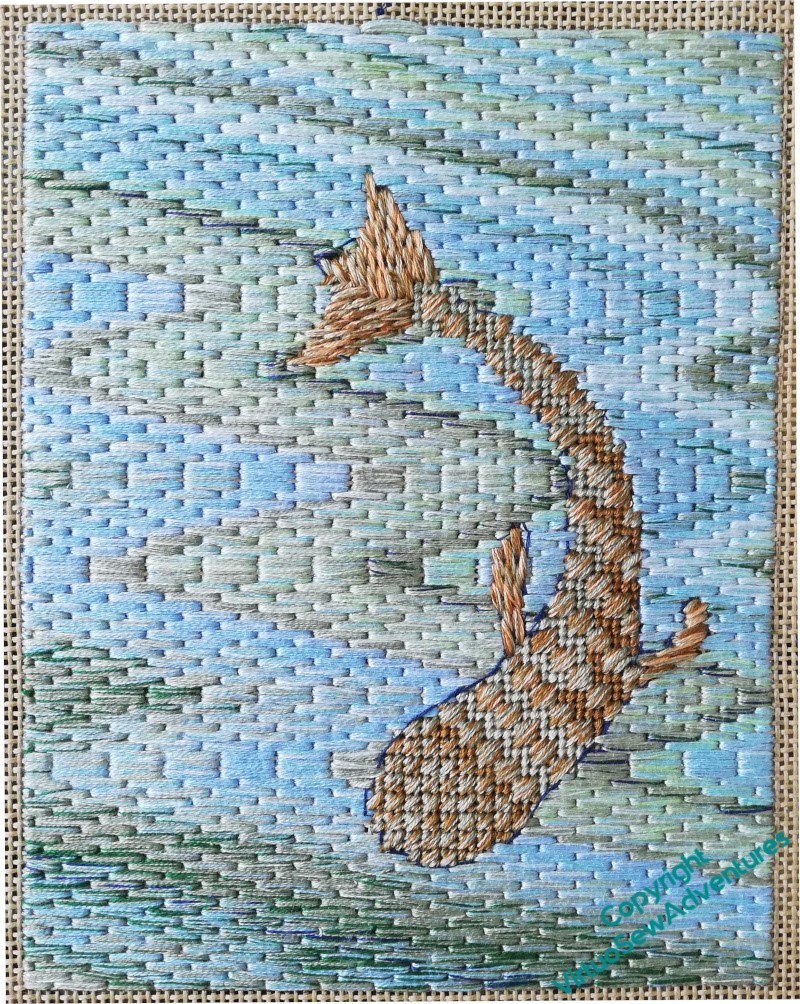
The background of freeform Bargello was rather entertaining to do. Working using nine strands of stranded cotton allowed for some subtlety in the colours, combining various blues and greens in different proportions and shading them into one another, sometimes gradually, sometimes stongly. I was surprised, sometimes, when progressively adding a particular colour, to find that it didn’t make as much difference as I expected – but this is why we experiment!
Once I came to the Fishie himself, there was a bit of puzzlement. I wanted to have a different pattern for the head, the fins and tail, and the body. I wanted a vaguely “scale-like” pattern, and I wanted to make sure that the stitches were at a different orientation to the water.
I settled on Moorish Stitch for the body, Mosaic Stitch for the head, and Encroaching Gobelins Stitch for the fins and tail. And I left in the tacked outlines. They only show in a few places, and I think they give the impression of sketched lines, which is quite suitable for an exploratory piece. I’ve also left out the eyes, since I’m looking from above.
Looking at it now, I’m pleased with the sense of flowing water that the bargello nearly creates, and the fish is interesting, but maybe not entirely successful. Some of the edges and joining points are a little clumsy – but that may be because this is an experiment, thrown together to see what I learn.
I’ve had at least one idea for another fishy experiment, so you will be seeing more of this sort of thing…
And indeed, Episode 54 of SlowTV Stitchery describes the beginning of the Second Fishy Experiment, in which I begin a second fishy experiment, this one attempting to give the impression of the fish seen through water, making some slight changes to the form of the freeform bargello, and anticipating tussles with my very leftoverish leftover thread.
An experiment for Placidus
Bear with me, please!
At the moment, the idea for The Vision of Placidus is that the main picture – the encounter between Placidus and the Christ/Stag – will be framed with a depiction of denizens of the natural world – underwater creatures in the lower section, bulrushes and dragonflies in the upright sections, and birds in the upper section. I’ve been thinking of putting the symbols of the Evangelists in the corners, to obviate the necessity of dealing with getting the design around those corners.
However, what I’ve not yet sorted out is the technique I might choose to use. This is going to be an experiment to see whether using canvaswork – a sort of freeform Bargello with embellishments – will create a pleasing effect.
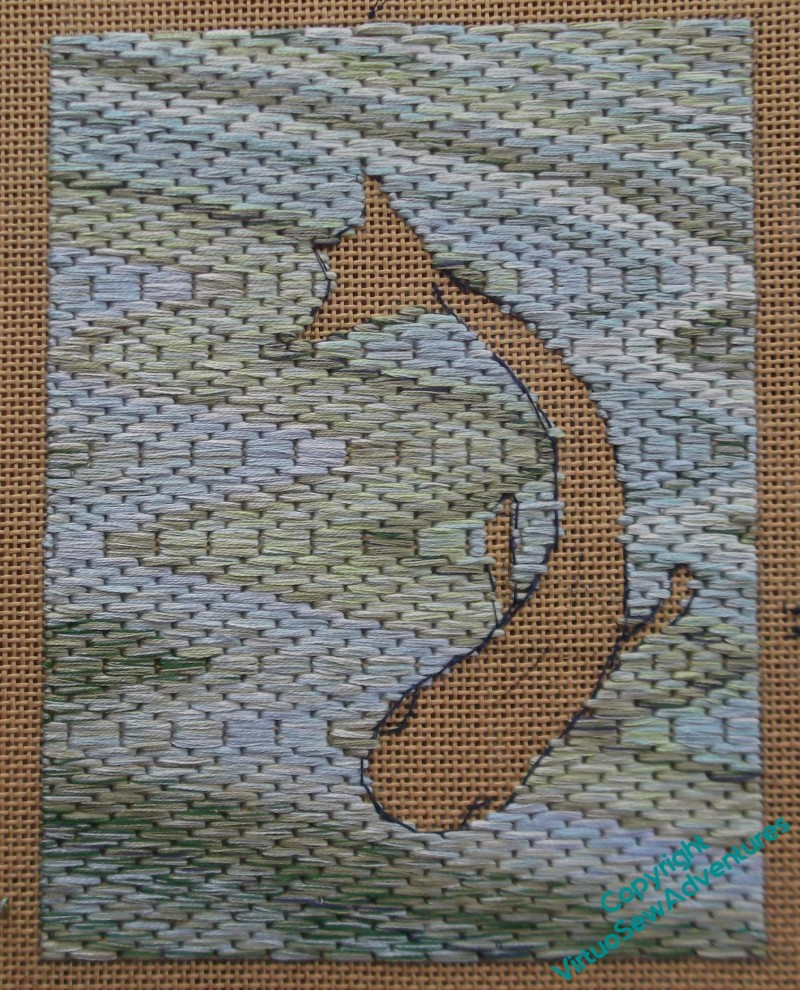
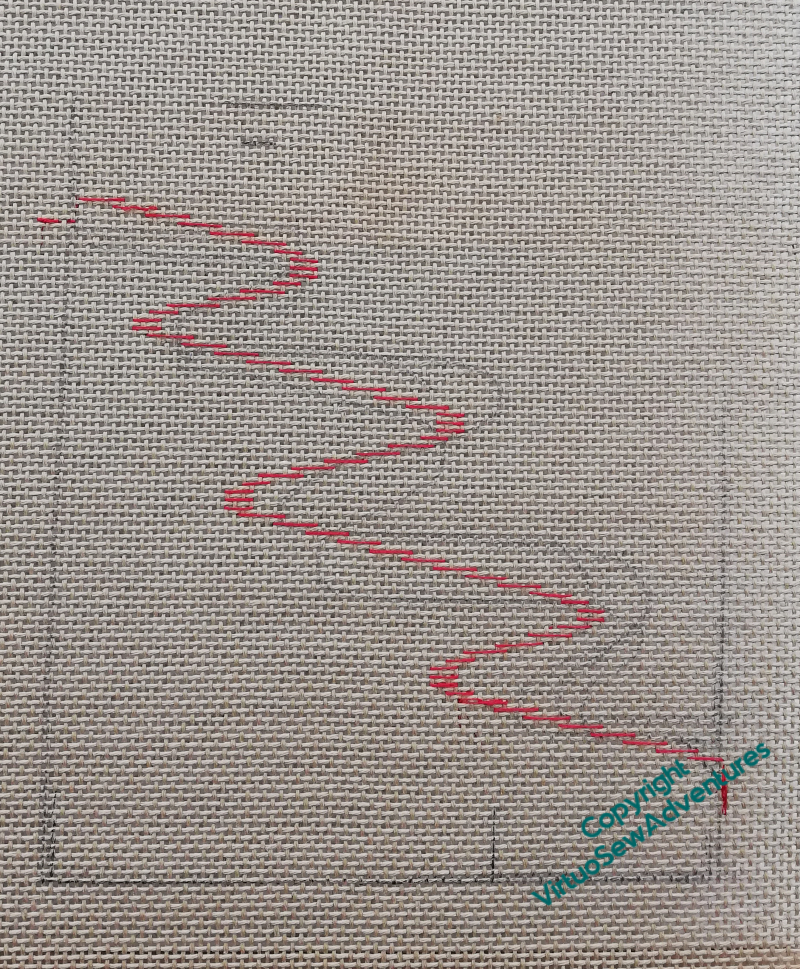
I was really very pleased with how quickly this came together when I began thinking about it. The red line is a guide for the freeform Bargello, representing the current in a stream, and the fish is simply there to help me test how to deal with the boarders between the flowing background and the motifs.
That might be easiest to achieve if I worked the fish, and then added in the background, but if I do that, I think it will be nearly impossible to place the background correctly on the far side of the fish. So this time, I’m doing the background first, putting in the stitches across the fish in sewing cotton, as a sort of “draft”.
I’m using stranded cotton, separated and combined to create blended shades. As it turns out, six strands are not quite enough for full coverage, so here I am using nine.
Episode 51 of Slow TV Stitcery is now live, including a comparision of bone and steel laying tools, consideration of two possibilities to experiment with for Placidus, and thoughts about taking sagas seriously.
Renovating Grandmama’s Footstool
Beginning Refurbishment
Having been working on the Heart, I was still thinking about Grandmama, and noticing that one of the footstools she made was getting a bit shabby and buckled, I decided to renovate it…
It’s worked in tapestry wool on binca (that strange cotton matting fabric that stitching happened on at primary school – does anyone else remember it?). I think I still have, somewhere, Grandmama’s draft of the pattern on squared paper, but the best I can do for putting my hand on it is to say it is Somewhere In The House! Since I don’t have a workroom, I put the footstool in a plastic tray, which I seem to remember is sold for cleaning oven trays. I use it for wet felting and to contain messes when I’m doing things like this. The blued-steel flat-headed nails were very hard to get out, and indeed, some of them lost their heads (!) and didn’t come out. In due course they were hammered firmly back in, instead!
Repaired Stitching
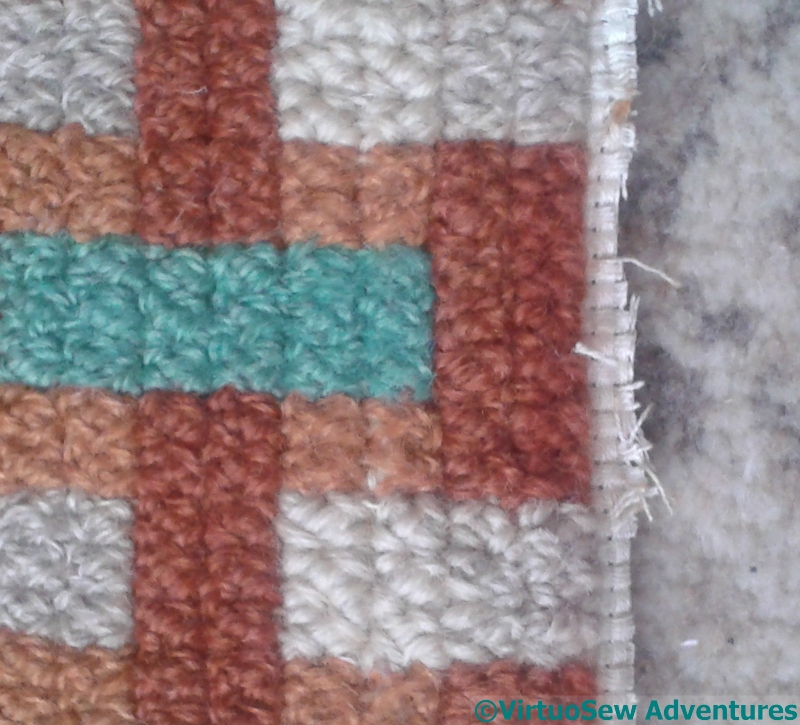
The binca around the edge was badly mauled by the nails, so I knew I would have to do something about that, but in the meantime, there were sections of the canvaswork that needed to be reinstated. First I washed and dried the whole thing (by hand) and then spent some time looking very hard at the stitching. More than fifty years of use have worn a few small sections, and the stitch took some identifying, but in the end, I decided it was Rice Stitch, and found a pale oatmeal tapestry wool that didn’t shout its’ newness too loudly.
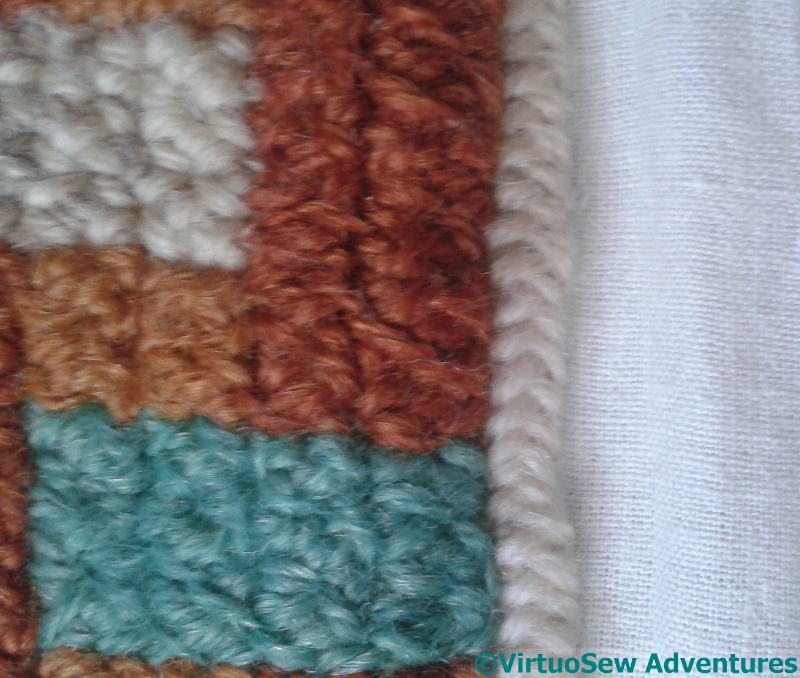
Attached To Calico
Then I attached the binca to some calico and covered the join with one of the long-armed cross stitches. I wasn’t absolutely sure I had enough of the plain oatmeal colour so I alternated a needleful of each all the way around.
In the end, I had plenty left over, but I’ve said many a time before that when ekeing out assorted supplies, the trick is to Make It Look Deliberate!
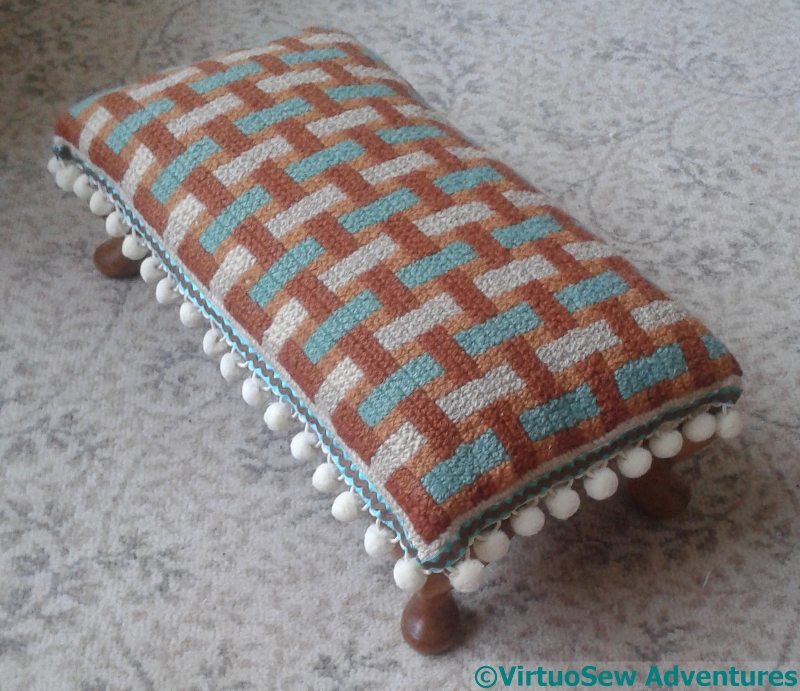
Finished Footstool
I had to do that with the trim as well. Nothing in our local needlework shop was even remotely suitable so in the end I took some bobble fringing, a length of ribbon and some ricrac, and made my own!
There are one or two infelicities in the details, but it’s certainly got a good few years left in it now.
Thank you, Grandmama.
The Second Worktop Bin
Stage Four
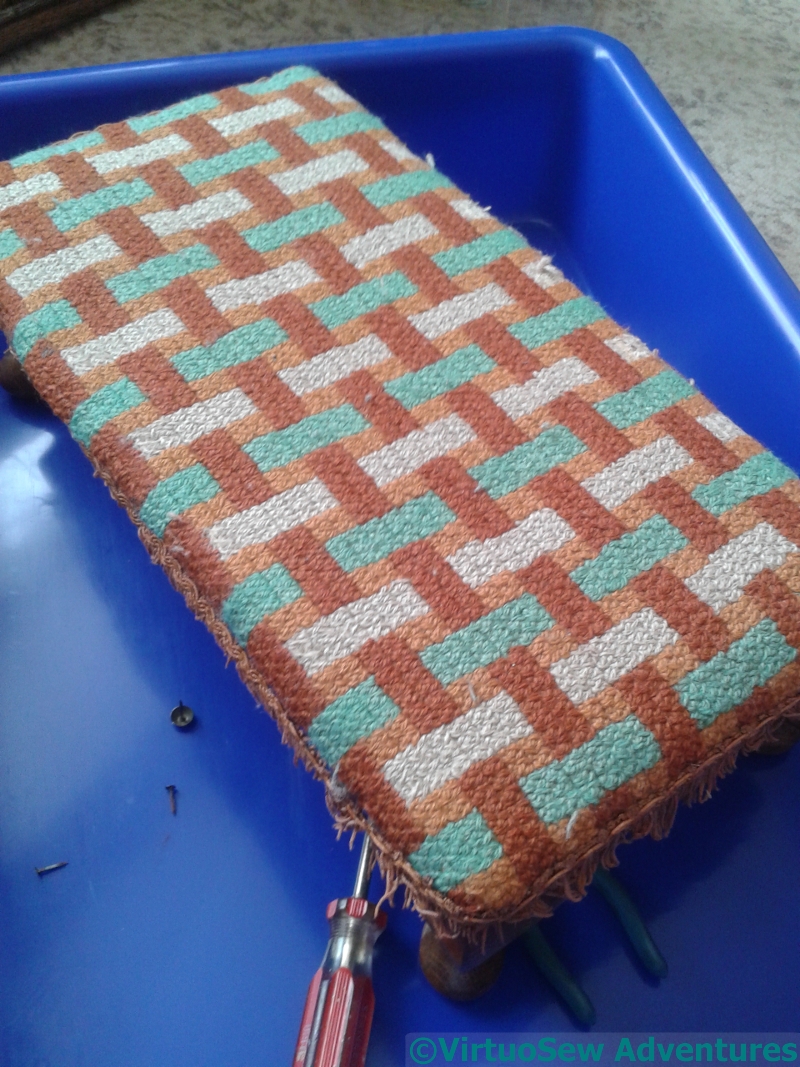
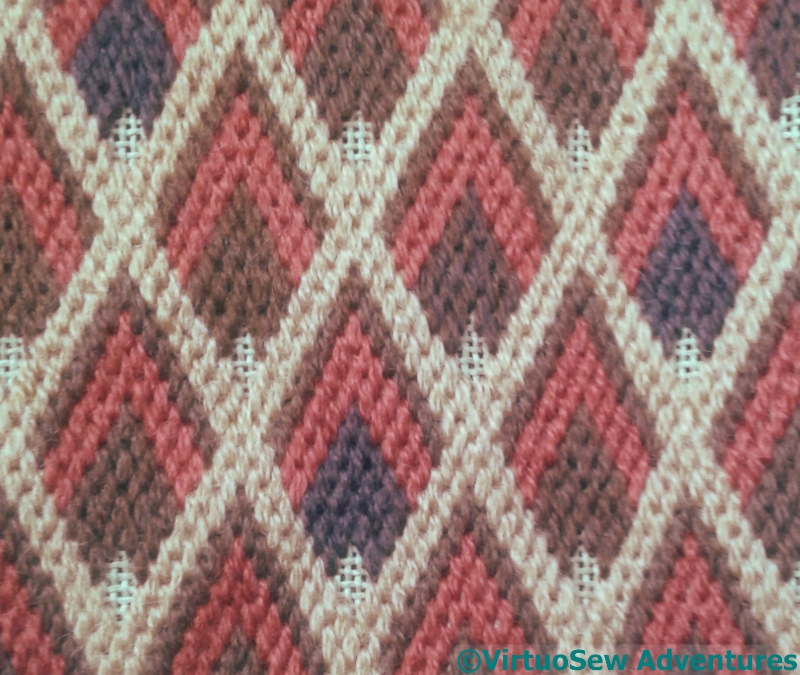
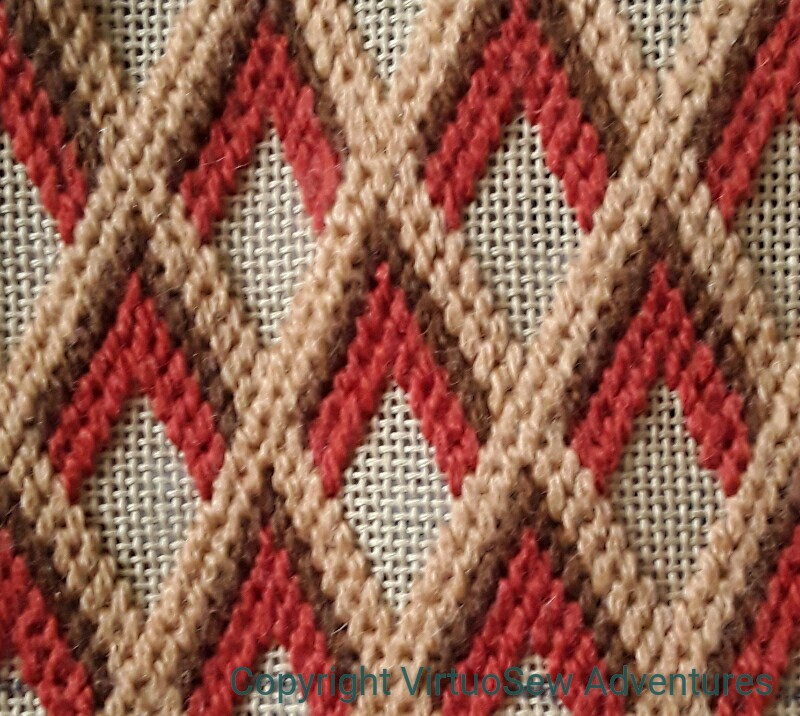
I did indeed find myself mixing and blending a lot of different browns to fill in all those brown sections.
Remember what I said about stash busting being “an inexact science”? Well, the trick about dealing with that (in this context) is to make the various infills and changes look deliberate. I scattered the different shades in a random looking pattern across all the different diamonds. There are four or five different blends, and outside the central section there are only two of each shade in any one row.
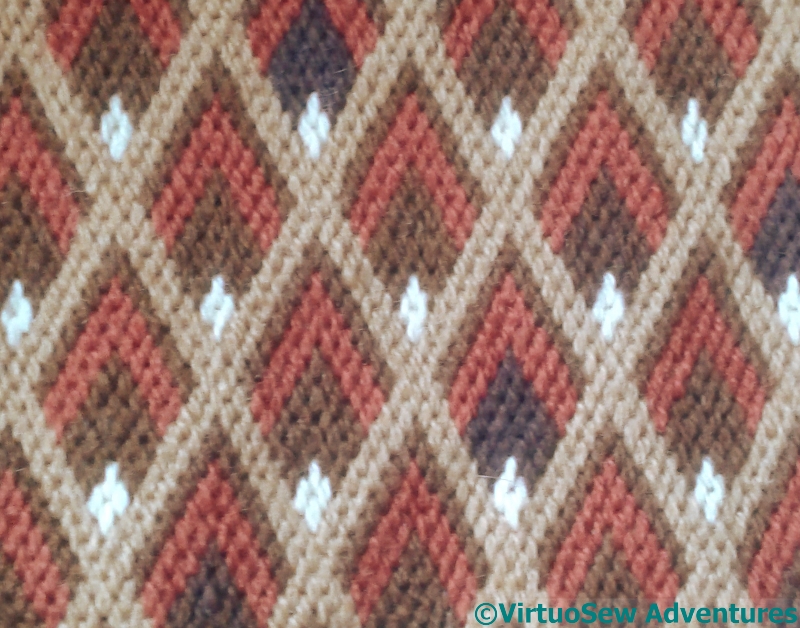
Stage Five
The central section has brown diamonds all the same colour because I was using the central section to help me lay out the trellis pattern, and I simply kept going. In fact as I look at the canvaswork while I write this post, the central section blends beautifully into the outer sections. It really does look deliberate.
The tiny diamonds that lift the whole effect are in a very light cream. Fortunately I didn’t need much of this one, and I had enough!
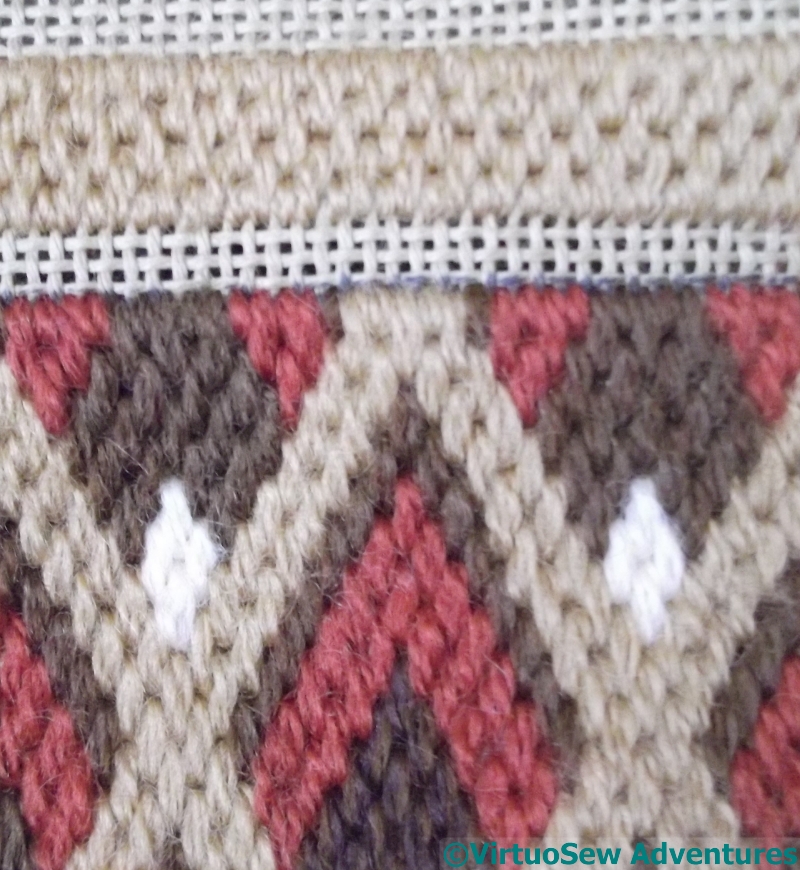
Inside Top In Place
I profited from the experience of making the first little worktop bin, and instead of stitching the inside section after I’d folded back the top and stitched the rim, I worked it while the canvas was still flat, which was altogether easier to do!
Although I confess, I was wondering whether I would have enough of this beige to complete it, or whether I would have to take it out and use a different colour entirely…
Another Worktop Bin
Diamond Framework
The first worktop bin was such a success that I decided to do another one.
This time the bin itself is a cardboard drum that used to contain chocolates. It’s rather bigger than my sawn-off milk bottle, and furthermore, the canvas is finer (I’m only using two strands of Paterna in the needle, not three), so the canvas is going to take a little longer to do.
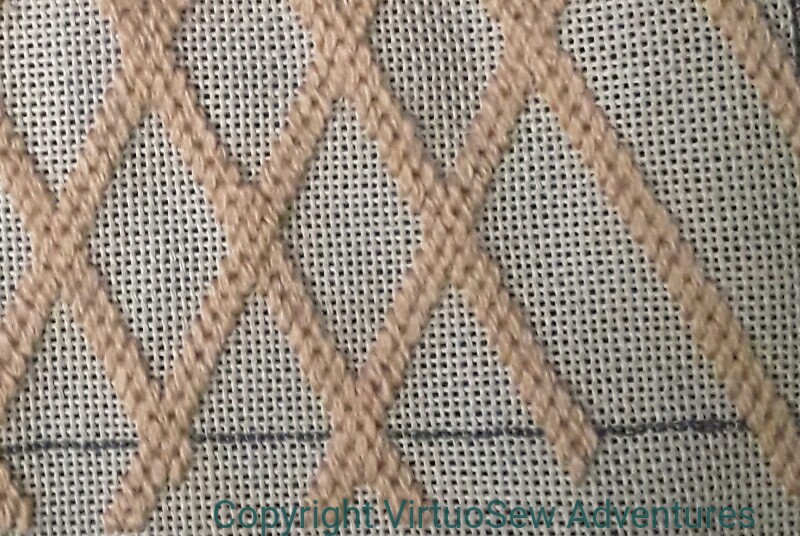
Stage Two
I’m staying with browns, and with diamond patterns, and starting with this diamond lattice pattern. I’ve had enough of the creamy beige wool to work the framework, and since it is only two strands, I should have enough of it to work the edging and seam as well.
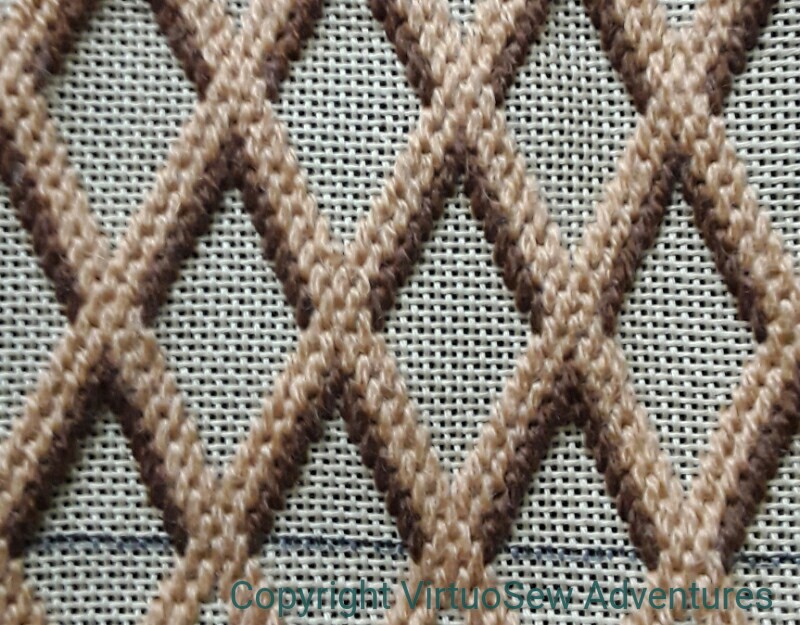
But there is a lot more dark brown to come and I may very well find myself combining threads to stretch my varieties of dark brown to fit the pattern. Never mind, I will then have made some Stashbusting Progress!
Stage Three
Has anyone else noticed what a very inexact science stashbusting is? You embark on a project, full of hope that it will consume vast stores, only to find that the Stash in question has shrunk not at all…
Right up until the project when you rely on that happening….