
Lorgnette Case Finished and Ready
The lorgnette case would have been finished more quickly had I not been using a corner of the same canvas I was doing the Fishy Experiments on!
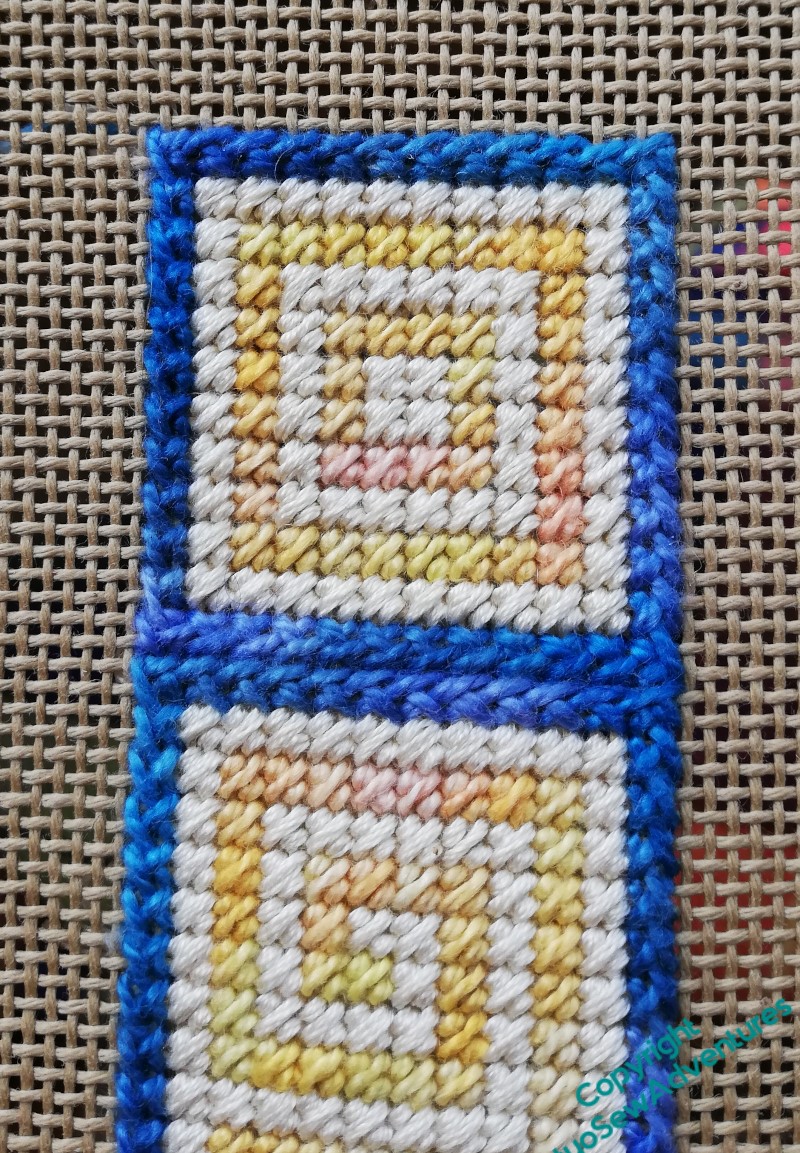
When I’d bordered the scroll pattern, using a long armed cross stitch, I thought that maybe it wasn’t quite long enough, and added a square section to the top to act as a closing flap.
The next task was to cut it out, turn in the canvas and catch it down, and then line the piece with felt so that the interior doesn’t scratch the lenses of the lorgnettes. This is always rather fiddly, but a very necessary stage. I certainly wouldn’t want to try to add the felt without catching down the canvas separately!
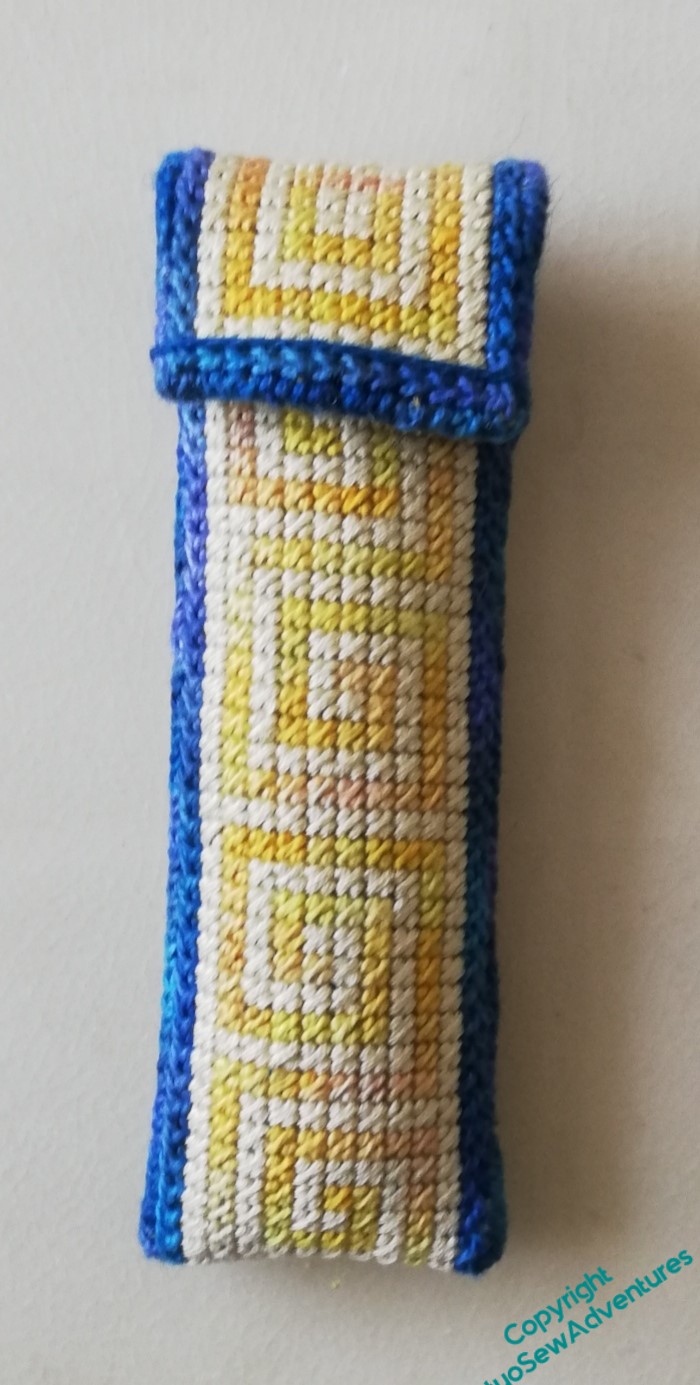
The next thing was to turn the lined strip into the case. I’ve used the same variegated pearl cotton as I used for the border, and in effect, the same stitch. It goes forward two and back one, so the finished stitching creates much better coverage than a straight overcast stitch. It has a slight fishbone pattern, and you can continue on from the joining seam to run around the edge of the flap without even breaking stride, as it were.
Since there’s already colour variation in the yellow and the blue, minimising the textural variation by edging the flap with the same stitch as the case is closed with makes the whole thing pull together nicely.

It only took an afternoon or so to finish the case and install the lorgnettes, so they are now ready for those Happier Times I mentioned, when Museums and Menus are a regular part of life once more.
I should add that while I was at university, I was the girl who wore white gloves with her summer frocks. None of my friends will be at all surprised to find me wielding a pair of lorgnettes – in fact, if at least one of them doesn’t ask me what took so long, I will be rather surprised!
And now, the final (for now) episode of Slow TV Stitchery, Episode 73, in which the slips are at last applied, and Tynemouth Priory is Finished.
Very nice! Just wondering if you’ve read “A Single Thread” by Tracy Chevalier? Finished it last night – very good. Great description of thread and stitches and stitching by broiderers.
I can quite imagine you clicking them open when needed. You have the style to carry it off.
The case looks sturdy and long-lasting. Long armed cross is effectively what I seam and edge my plastic canvas stitched boxes with – because it works well for sides at 90 degrees, too – not much build-up on the inside of the seam, and it folds nicely. (I tend to use three-steps-forward, two-steps-back on the open edges, because it makes a firmer edge – which isn’t needed here.) You’re right about not wanting another contrast colour – which would distract the eye. Seams are best kept quiet on this sort of thing.
You’ve seen my favourite stitching headwear – it not half so elegant, or so very portable, but it works. I tend to have a spare pair of stronger specs in my bag for museums, etc, and will happily wear them on top of my usual pair if they’re not good enough alone.
I greatly look forwards to seeing your Lady Bracknell impersonation at some future meeting!
A nice finish. The Long Armed Cross Stitch is great for a sturdy edge. Now let’s hope Normal Times are here soon so you can whip out your lorgnettes from their fancy case at museums and restaurants.
Whatever works! Stylish case for when you need a flourish when you finally get to visit museums again. 🙂
Lovely finish and excellent idea to continue the long armed cross stich effect onto the edging.
I like the long armed cross stitch for your edging. A very successful project.
Beautifully finished and hopefully not too long before it is in use. xx