
About Rachel
View all posts by Rachel
Worked on a whim
Pincushion
Just before Christmas I was struggling with the “Dreams of Amarna” designs, but I still had itchy fingers from longing to stitch, and sore eyes from staring at “Eve In The Garden of Eden“, so I wanted something a bit less precise..
My Dad’s shaving cream comes in a rather nice wooden pot. There are refills, but sometimes the shop doesn’t have them, and consequently – since they’re much too nice to throw away – my parents have ended up with something of a stockpile. I’ve taken one of them off their hands, and turned it into a pincushion.
Coral Stitch
At the moment the lid is being used as a coaster, but I am open to suggestions for it!
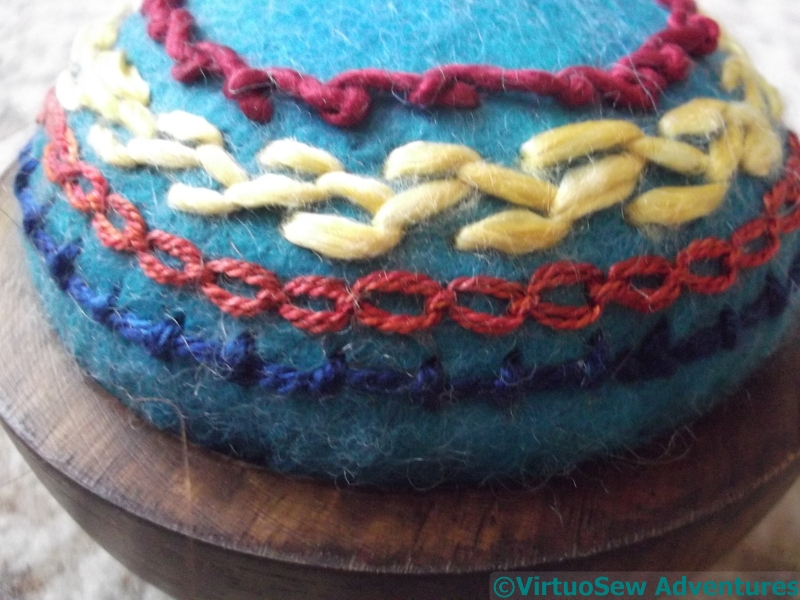
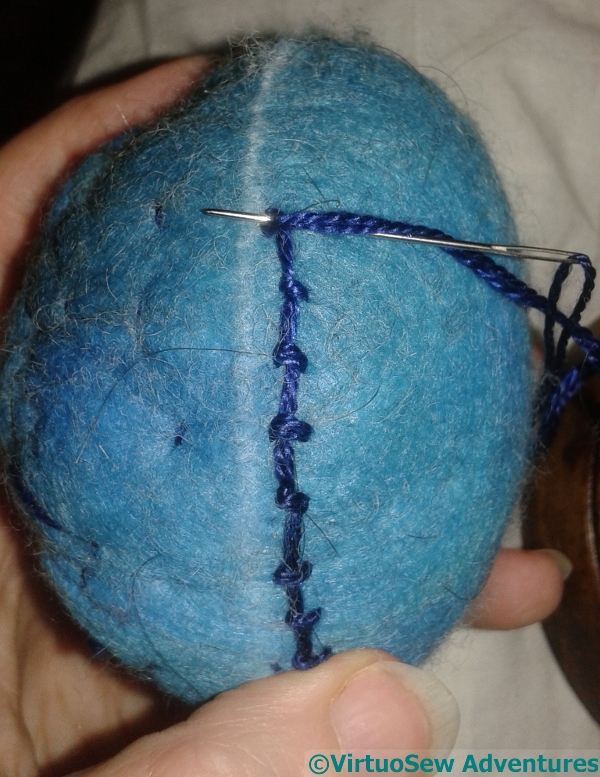
The threads are silks, bought at the Knitting and Stitching Show, worked on felt acquired at the same time. I created the shape of the pincushion itself with shaping stitches, stitching around and around the padding and the felt top layer, rather as doll and puppet makers do, and once I’d settled it into the bowl, I drew a chalk line around the waist, took the pincushion out, and started stitching.
Lucet
Coral Stitch, Cable Chain (do I ever do anything that Cable Chain doesn’t sneak into somehow?), Semi-Closed Feather Stitch, and Scroll Stitch, all stitched into the felt, catching as little of the stuffing as I could.
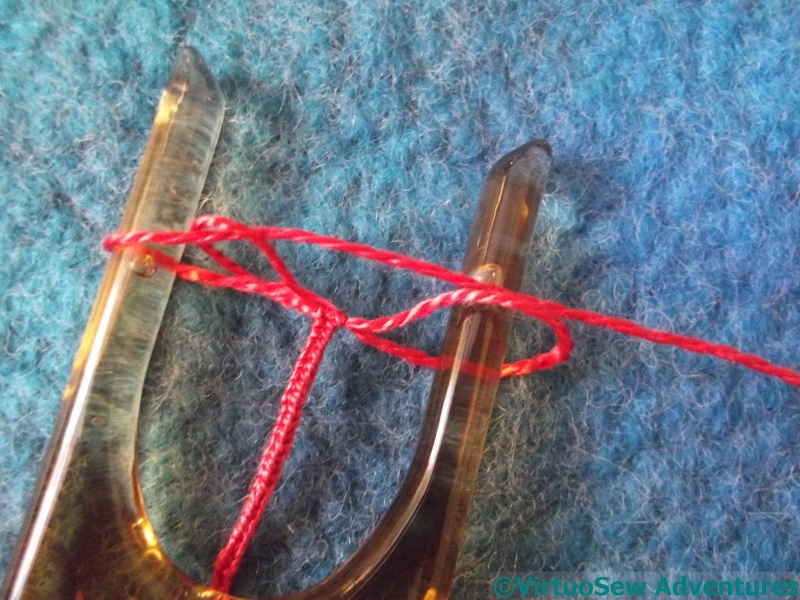
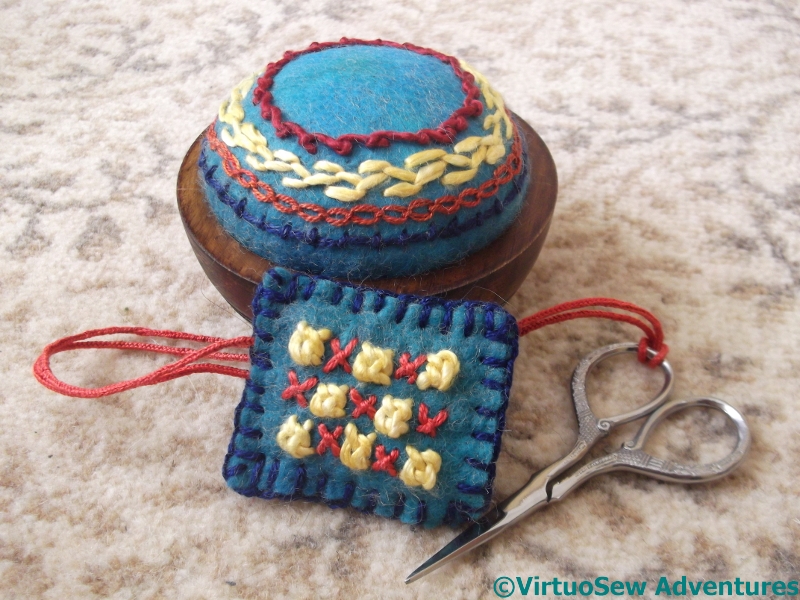
Then I decided to do make a scissors-keeper for my lovely Ernest Wright and Son Ltd scissors, so I started by using one of the threads, and my lucet, to make a cord for it. I’d forgotten some of the knack of lucetting, but it came back gradually, and it’s ever so satisfying!
Finished Pair
The stitches on the scissors keeper are Sorbello Stitches (another favourite of mine) and Tied Cross Stitches, and the the pieces of felt are stitched together with ordinary blanket stitch. In silk!
Don’t they look good…!
Great Lady’s Magazine Stitch-Off – 2
Medici Yarn
Gumnut And Filament Silk
Sigh.
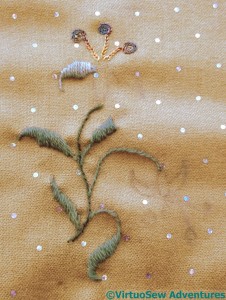
The pashmina, when it arrived, was a lovely caramel colour, with rather unanticipated silver spots on it, and it was a good deal flimsier than I was expecting. The others I have are all in fairly sturdy twill weaves. In truth, I’m not sure that would be easier, and if I ever finish this one, I may choose to find out..
Regular and long term readers of my blog will be aware that I have a thing about scale – scale of thread, scale of stitch, scale of weave. I’ve even discovered – much to my surprise – that the dreaded Plaited Braid Stitch isn’t always easier when it’s stitched wider and longer. So it will be no surprise that I spent a bit of time playing with various different threads to see what I thought of them, before settling on a final choice.
Silk – Filament And Stranded
Gumnut And Appletons
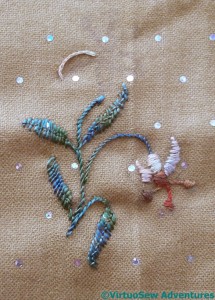
Scale isn’t the only concern, either. The right texture and sheen matter as well.
In the end I have settled on silks. The Medici yarn might have worked if I had had more of it, but I don’t think it is even made any more. The Appletons crewel wool was too heavy, and the Gumnut yarns (although I love them) somehow didn’t settle in comfortably.
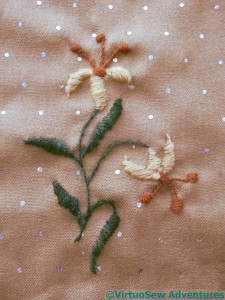
Now I have to unpick my experiments and get started. I already have a newfound respect for any lady of the period who embroidered her muslin dresses, or her silk gauzes. There’s a story that Jane Austen embroidered a muslin dress with satin stitch spots, and the mere idea gives me cold shivers!
Although I doubt they had to contend with stuck-on paillettes!
The Great Lady’s Magazine Stitch Off
Rummaging around on Twitter, I found a most intriguing idea. A research team at the University of Kent, headed by Dr Jennie Batchelor (@jenniebatchelor on Twitter), is investigating the content and development of an eighteenth century periodical, The Lady’s Magazine. The magazine was sold with pull-out song sheets – and pull-out designs for embroidery. Generally speaking, they don’t survive, having been pulled out and used as they were intended to be.
But recently, a bound volume of a half-year (1796) came to light, with some patterns included. A little more discussion, the idea arose of scanning those designs for modern stitchers to play with, and The Great Lady’s Magazine Stitch-Off was born. For more on that, visit the project’s blog post on the subject.
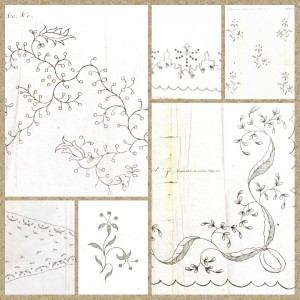
StitchOff Patterns
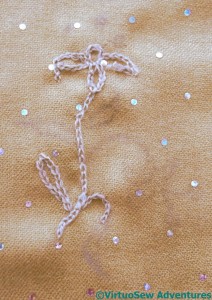
I couldn’t resist the idea. I’ve downloaded the first five designs, and started to stare at them thoughtfully. The project suggests that stitchers might like to work modern versions as well as in some cases working versions which are as historically accurate as possible, so there is going to be quite a variety to look at.
I’ve decided that I’m going to work the designs on a pashmina shawl, and while I am waiting for it to arrive, I’m contemplating what I might choose to do, from highly modern needle-felted versions, to more or less classical embroidery.
I wanted to share it with you before I started stitching, because the vagaries of the post may substantially delay my first stitch, and a few of you may want to join in. Do let the project know if you do, they’re really enjoying what they’ve been seeing!
Update: They have recently posted their first round-up of Stitch Off contributions and planned contributions.
A Box Of Delights
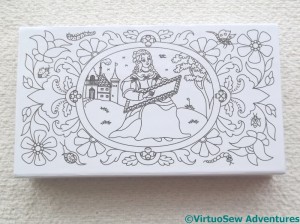
Frostings Box
First View
Tricia, at Thistle Threads, has launched the Frostings Club, which is a thread club specifically concentrating on reconstructions of historic thread. She explains on the page I’ve linked to why she did so, and although historic embroidery isn’t my primary focus, thread is one of my deepest interests. So I joined up for the first session, partly because I want to contribute to the project, and partly because I expect that I will find a whole host of non-historical uses for them.
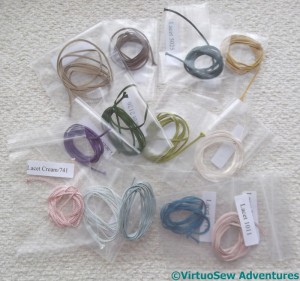
Lacet Threads
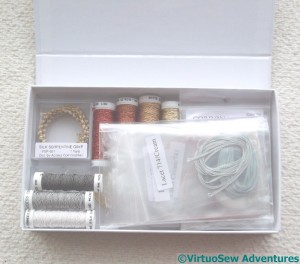
My first box has arrived – after a frustrating hold-up in Heathrow when I knew it was in the country and it wasn’t getting any closer to me! – beautifully packaged in a very solid cardboard box with a magnetic closure. I’ve been having a lovely rummage, puzzling over what I find and thinking about what I might choose to do with it when I get the chance…
I’m not at all sure what Lacet threads are, or what I might do with them, but Tricia has promised to release some designs and suggestions, so if I can’t think of something for myself, there will be suggestions a-plenty.
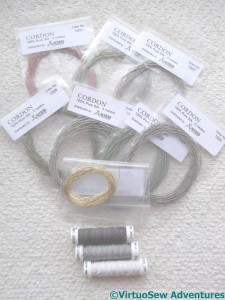
Cordon And Gimp
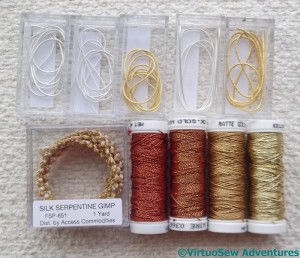
Metallic And Metal
The Cordon, Gimp and Metal and Metallic threads are possibly a little easier for me to make plans for. The metallic threads have fortuitously turned up in colours I was thinking of using for the wings of the Christmas Angel, so I may have in immediate use there.
But then again, once the Angel’s cape is in place, I may change my mind and who knows what will happen…?
Not one of mine…
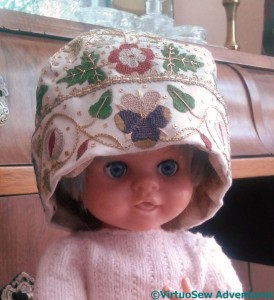
Mandy In The Cap
I’ve already mentioned that I’ve inherited my tendency to devise complicated and multi-element projects from my mother. She’s just finished one – she’s published a book (The Bridges of Dee – do go and look!) and I’m quite insanely proud of her for that – but once the bulk of the work was done on that, she looked around for something else.
Do you remember Mandy, last seen modelling the Glittering Gentleman’s Nightcap? Well, we’ve still not quite worked out what we’re going to do with her, but at the same time we found Topsy, who was my mother’s doll before she was mine. Topsy is made of papier mache, and jointed with elastic bands to hold her together, and in form she’s much closer to a newborn. So my mother decided to make her a layette, decorated with various forms of bobbin lace. So, over to you, Mam…!
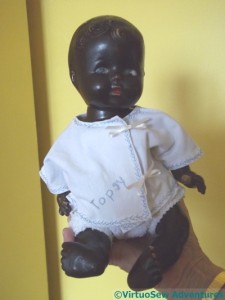
Topsy
Meet Topsy. Her looks belie her age, since she was “born” just before the Second World War, 1939 or thereabouts. I cannot remember a time when I didn’t know her – too young to read “Uncle Tom’s Cabin”, so Mam must have named her for me. She is made of papier-mache, with her head and limbs attached by means of a internal rubber band, renewed many times over the years. She has survived numerous house moves, and somehow I could never persuade myself to give her away. About two years ago, she came down from the loft during a general clear out, but still tugged at my heart strings. I decided to treat her to some new clothes (she being naked at present) and let her rest in honour on the spare room bed.
She is a baby doll, practically newborn, so I began by making her a baby vest such as I, and my daughter, wore at this age. It’s tied with ribbon bows at the front as getting a singlet over a baby’s wobbly head is awkward. It is made of fine knitted cloth with the turnings retained with feather stitch, very wobbly feather stitch, looking a bit like the tracks of a drunken spider (can spiders get drunk?). It’s a long time since I stitched, the cloth is unstable, the size of the garment small; excuses, excuses, I know, but I’m enjoying the work. Then I embroidered her name in backstitch. Her nappy is cut from the lone survivor of my daughter’s nappies, so nostalgia is in high drive.
Thinking about The Conversion Of Placidus
I still believe there is a lot to do for the Dreams of Amarna, but at the same time, when I have moments when I know what I am doing and have brain power to spare, I am thinking about the Conversion of Placidus panel that I’d like to do, inspired by Elizabeth Goudge, Pisanello, and La dame a la licorne.
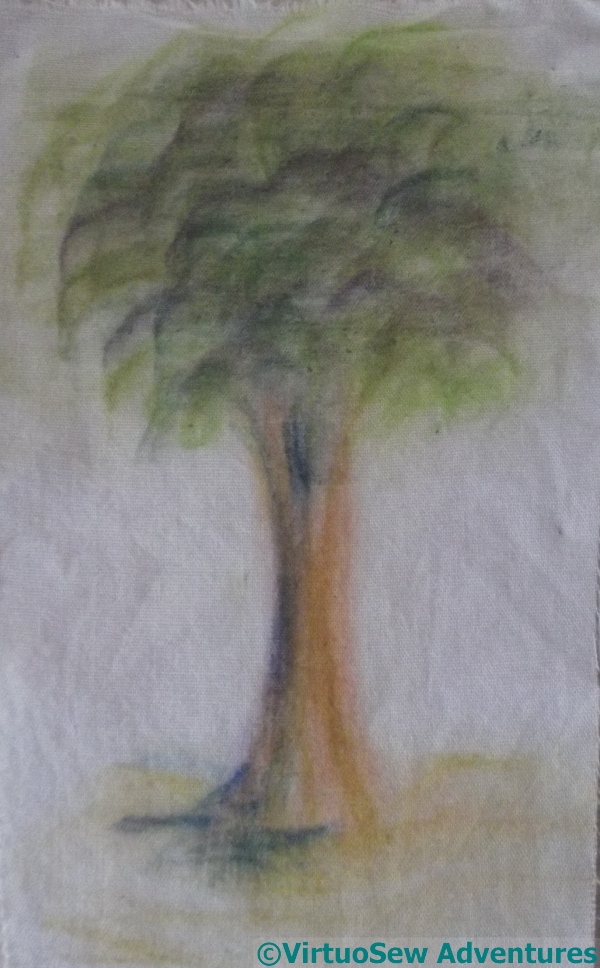
Testing the Inktense blocks – Before Washing
In fact I’ve already bought some calico for the base layer and I’m wondering how to get the design onto it in a reasonably stable but not intrusive fashion. Inktense blocks have been suggested, and when I bought some I was told that once the pigment has been washed over with water, it becomes permanent.
So I found a scrap of cotton and sketched a rather cotton-wool-ball-on-a-stick sort of tree on it, using all of the colours in my selection.
Then I painted over it with water, allowed it to dry, and ironed half of the picture.
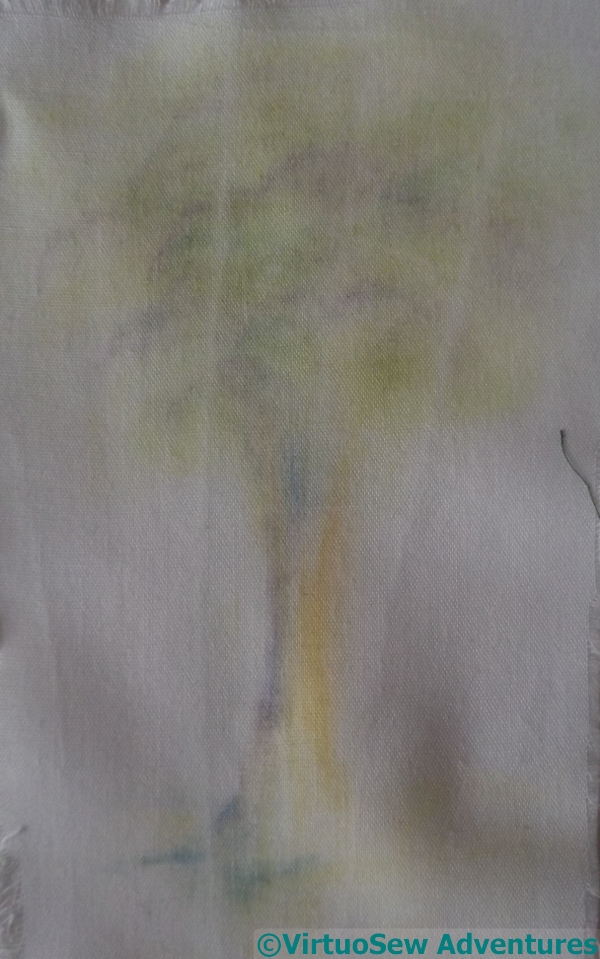
Testing the Inktense blocks – After Washing
Then the scrap went into the washing machine. I’m not expecting to do this to Placidus, by the way. It’s just that I assumed that the abrasion would be a good challenge even if the detergent wasn’t, and it will certainly be subject to abrasion when I’m making it!
As you can see, the ironing made no difference at all!
A lot of the colour has gone, but I think this is in fact enough for my purposes. Most of the panel will be applied to the calico, one way or another, so however I get the design onto the calico, it will only be a sketch map to keep me on the right track.
I do know about textile medium, by the way, but my supplier of the Inktense didn’t have any!
The Cartouche of Nefertiti
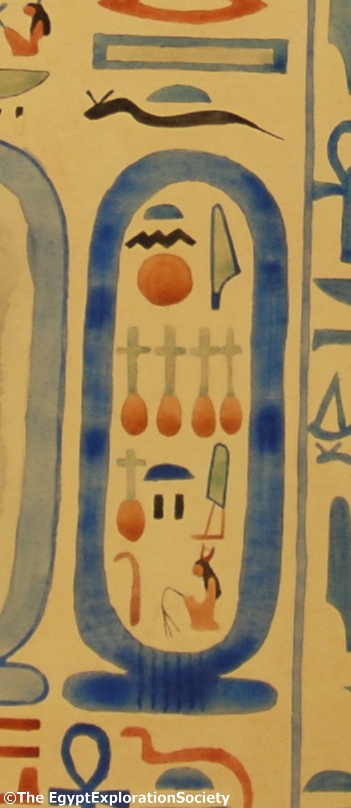
Cartouche of Nefertiti (Copyright The Egypt Exploration Society)
Akhenaten and his Great Royal Wife Nefertiti are prominent characters in Mary Chubb’s imaginative response to the city they built, so I feel they need to appear more than once in the embroidery as well. The trick is to balance the story of the archaeology and the archaeologists with the story of the ancient inhabitants..
The gauze overlays I plan will give the sense of the Pharoah and his Great Royal Wife brooding over their city, but among other things I want to include their cartouches.
A few weeks ago, I attended an evening lecture about woven patterns discovered by Howard Carter in Tutankhamun’s tomb (more on that another time!) at the Egypt Exploration Society, and spoke briefly with the Director, Chris Naunton, who has been very helpful to my research in the past. I mentioned that I would like to do at least one set of cartouches in colour. There was a thoughtful pause, then he said “I think I have the very thing – send me an email to make sure I don’t forget, but it is just a matter of finding the file!”
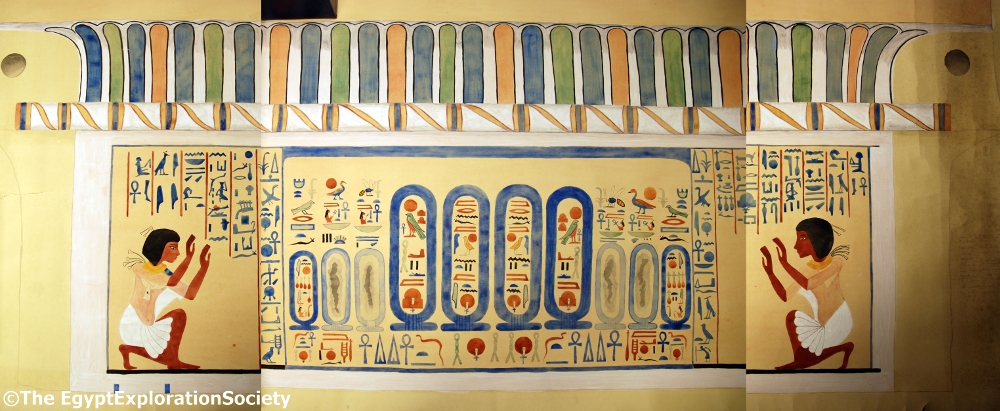
Drawing of Hatiay’s Lintel
by
Hilda Pendlebury
(Copyright The Egypt Exploration Society)
I hadn’t even arrived home the next day when an email showed up in my inbox. The image showed a composite of watercolours by Hilda Pendlebury, depicting Hatiay’s Lintel. This was a carved and painted door-lintel discovered in the very season Mary was writing about, and what’s more, mentioned at some length in the book. It was both archaeologically and historically interesting (two of the cartouches were scratched out in antiquity), as well as providing a challenge to transport, being large, heavy, and because of the embellishment rather fragile.
My current thought is that I will work a version of the cartouche of Nefertiti, either in cottons or silks, either directly on the pale faience coloured linen or maybe on the fabric I used for the Faience Hippopotamus, which would help to balance him slightly. I’ve been reassured that I won’t give any Egyptologists apoplexy if I tweak the colours slightly….!
Spinning
Drop Spindle And Yarns
I don’t usually go to workshops at the Knitting and Stitching Show, but since I’ve taken to going to the Thursday evening opening as well, I thought I would have time this year.
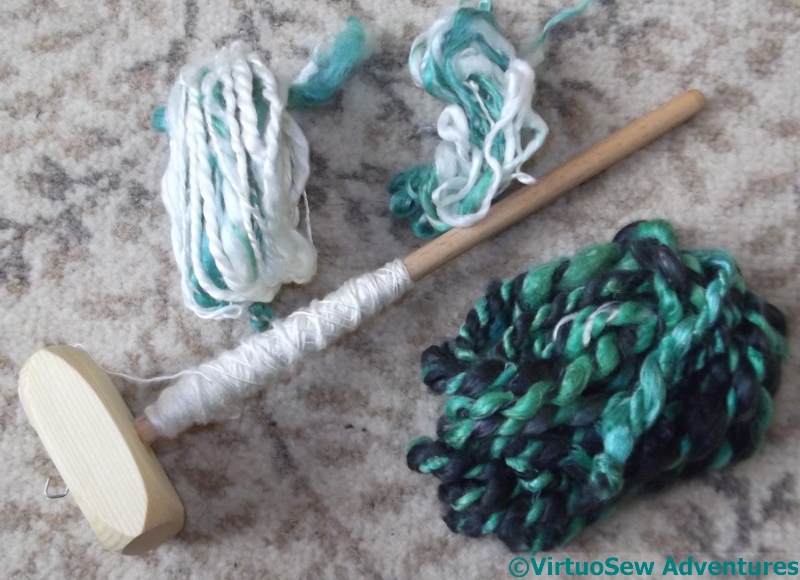
And I did. I went to a workshop on Spinning Silk Mawata with Ruth MacGregor, and came back with my very own drop spindle to play with.
First of all I’ve never been to any fibre related workshop at which there were tubes of handcream on the table! Secondly, although I have – literally! – written a book about spinning, I’ve never held a drop spindle in my life and I had no idea what to expect. My book is about industrial spinning, and the machines always did the difficult stuff…
It turns out that silk mawata is a web of filament that can be drafted (stretched) and spun fairly easily – it’s a forgiving material, and because silk is so strong and the filaments are so long, it’s easy to draft and create fine threads. Of course, that means that spinning heavier threads is going to take a bit more thought and care.
Spinning Supplies
Or – since Ruth taught us how – there is always the possibility of twisting two threads together to make one. In the photo above you can see my early efforts. The two light ones are both fairly simple plied yarns, but speaking as a fancy yarn specialist, the dark one is a slubbed gimp yarn. I just wish I could claim that that was exactly as I designed it to be!
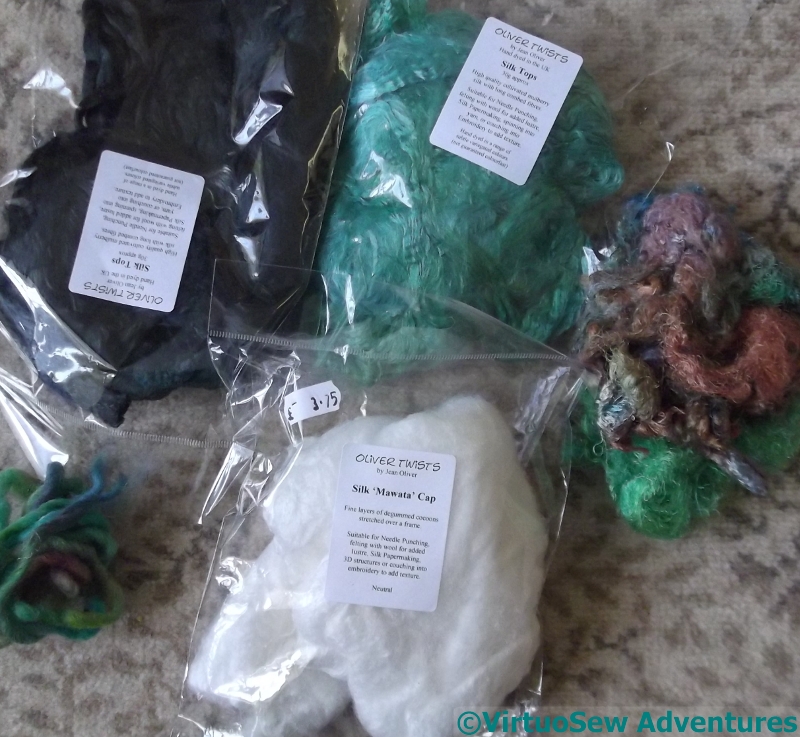
So I came home with a packet of silk mawata caps and some silk tops, so I can play and learn to make the thread I want to make.
Eventually I want to be able to spin in both wool and silk, and use some of my yarns in the Vision of Placidus panel…
The Faience Necklace
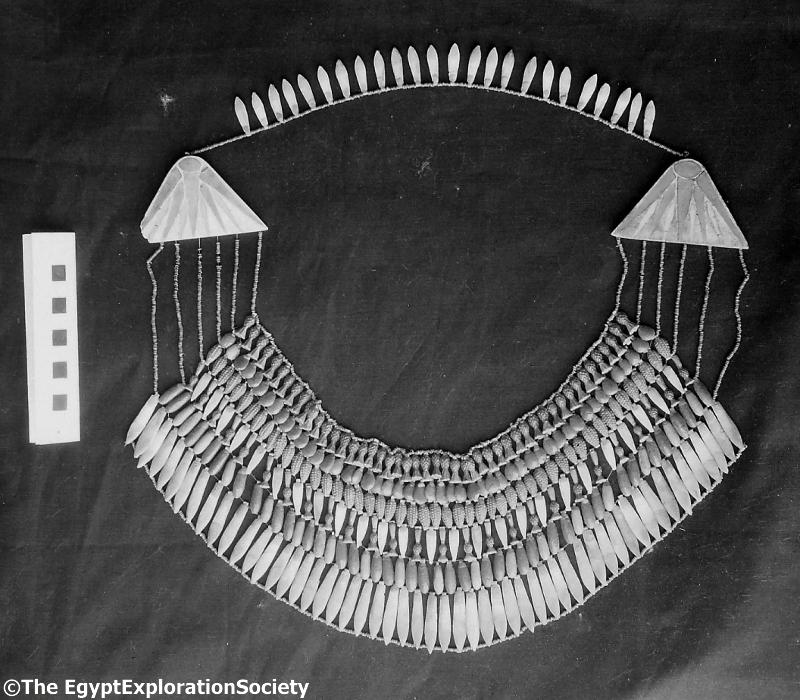
Faience Necklace
(Copyright The Egypt Exploration Society)
After Mary Chubb had her moment of epiphany with the tile fragment I reinvented for The Fragment of Tile That Started It All in that Bloomsbury basement, she returned to the office, and her first task was to re-type a recently-arrived Director’s report, since it arrived in no state for publication (“Typed on camelback in a sandstorm“, as she described it).
The first item described in that (shockingly mis-typed) report is a necklace of faience, made using rows and rows of faience shapes in different colours, shaped to depict fruits, leaves, and flowers.
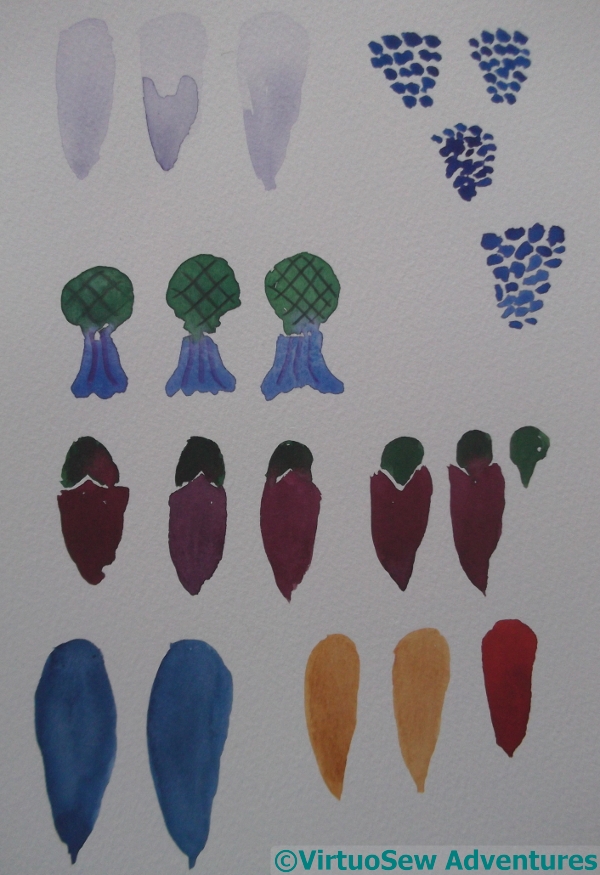
Watercolours of the Faience shapes
Naturally, I want to embroider a piece that will recall that necklace. Equally, as you can see in the photograph, if I were to attempt to embroider the whole thing, it would either have to be huge, or it will risk being tiny, cramped, and not doing justice to the enchantment she describes.
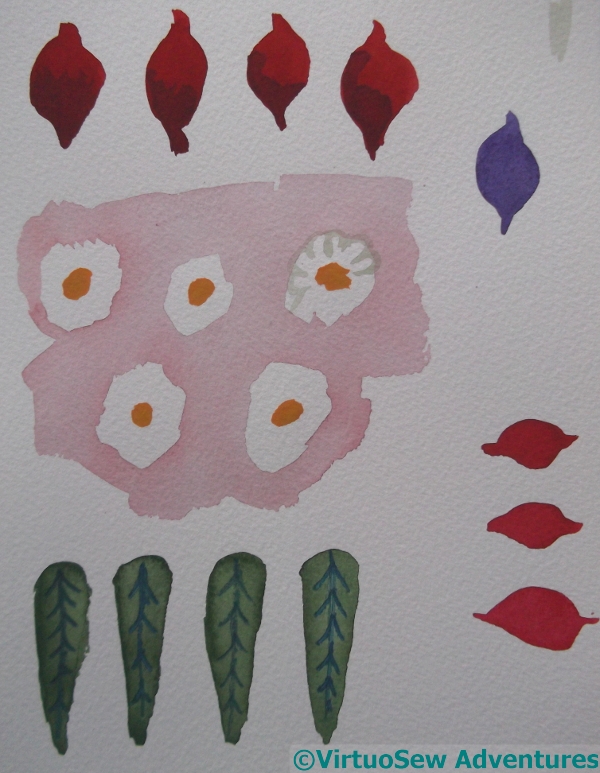
More Watercolours of the Faience shapes
So I have decided that I am going to create a design that shows only a segment of the necklace. So far that has been hard to do.
I have tried several draftings and redraftings, and these watercolour fragments are the beginnings of the fourth (or is it the fifth?) attempt to devise something reasonable. I am trying to learn the shapes of the various elements – lotus petals, bunches of grapes, cornflowers, dates, palm leaves.
What happens next is for another time. I may well be back once more to primary school, cutting out and sticking down pieces of paper.
I’m so keen to use all my shiniest threads to depict the faience that I’m becoming very short-tempered with myself…!
A Christmas Angel
Testing Canvaswork Patterns
While I am still trying to work out how to do the Chorus of Angels, I’ve decided to work a single Angel from the Chorus in an entirely different medium – needlepoint. The original idea was to have it done by Christmas, but I’m becoming aware that that isn’t very likely now.
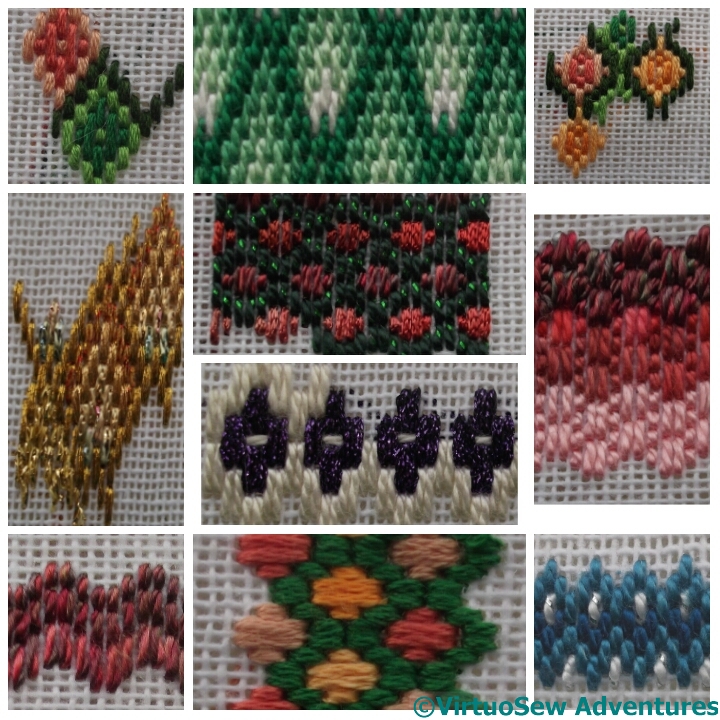
Once I’d made that decision I had a lot of fun playing with bargello patterns and trying to choose something suitable. I’m using a fine canvas – 18 count, I think, although as it came, unlabeled, in among that collection of supplies that included several frames, I’m not sure. It’s full of size and is going to be rather a trial to stitch, I fear.
Gown Done
I’ve decided to use the gold pattern on the far left (slightly altered) for the background, to give an effect a little like the patterned gold background of an icon. The lines of this panel are so simple that I can afford to use some quite complicated patterns, I think.
In the end I settled on the green and red spots in the upper middle for the cape, although choosing the colours hasn’t been quite straightforward. The wings are still puzzling me.
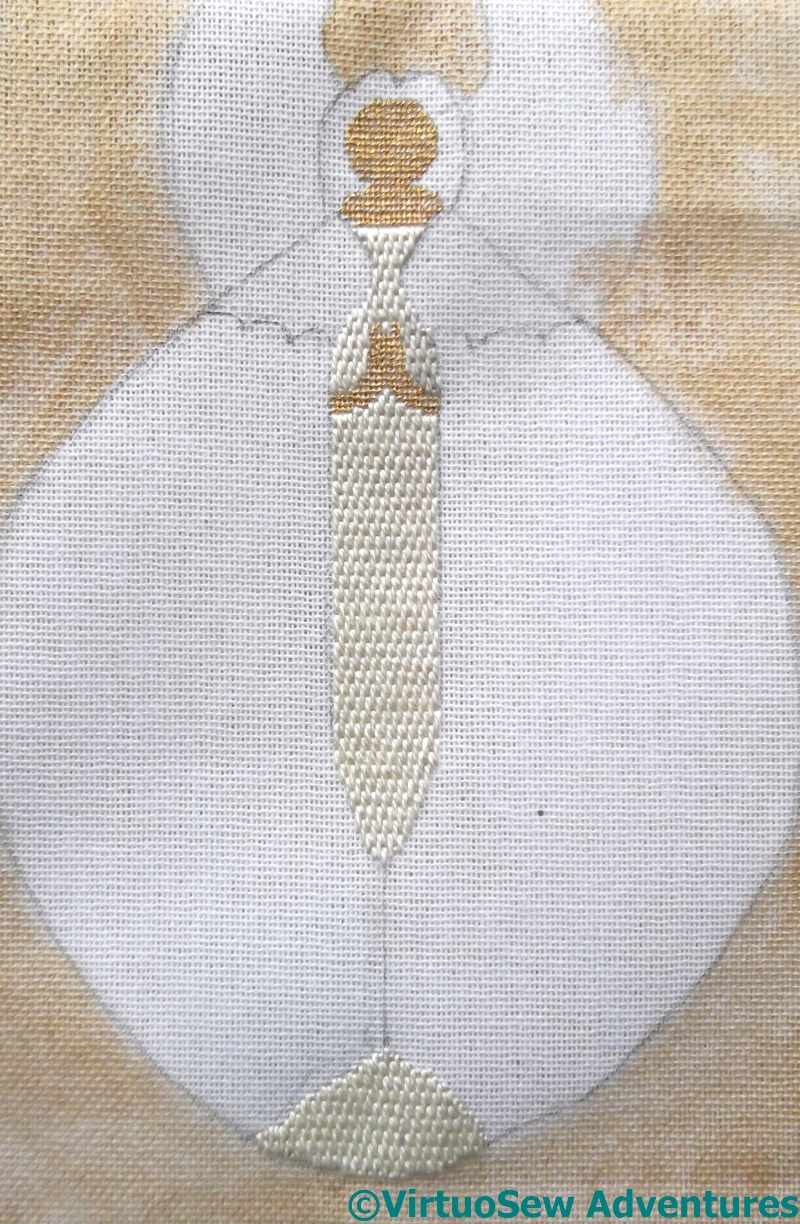
Since I have decided on a gold background for the angel, I decided to paint the background canvas gold as well. That will help to boost any thin coverage.
I’ve worked the gown underneath the cape very simply, in cream brick stitch, and the face and hands using gold tent stitch. None of the variants of flesh colour seemed right, and the gold does at least belong in the design.