
Month: April 2014
The Crazy Canvaswork Cushion – Part 5
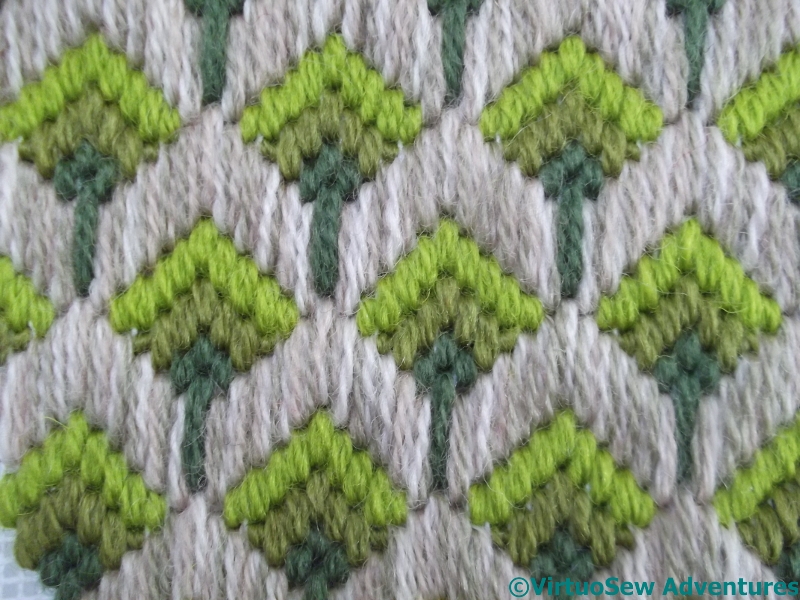
Tree Pattern
This tree pattern is one I’ve been looking for an excuse to do for quite some time. The book in which I found it suggests using it for small pieces like spectacle cases, but I’m not sure I agree. I think it might make for a rather overpowering pattern if not contained by something else. That same book said it was easy, and I’m not sure I agree with them about that either – I had to unpick all the trees the first time I did them, because I’d repeatedly got one element of the stitch placement wrong, in a rather unfudgeable fashion!
Section Seven
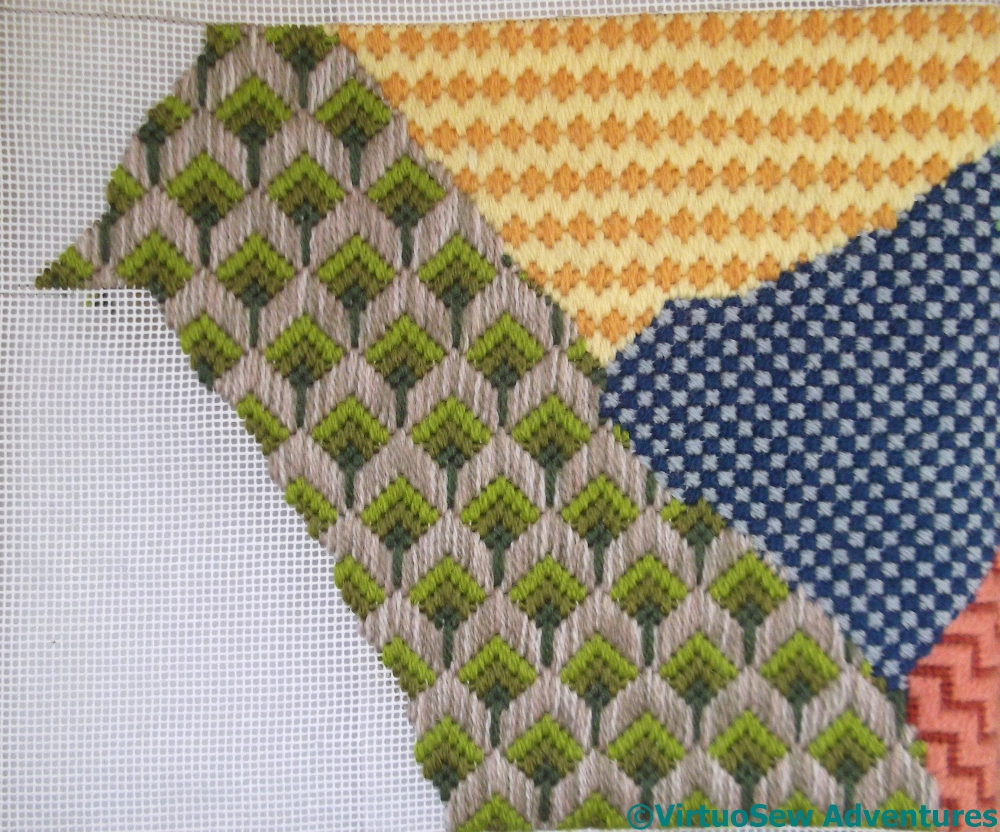
Section Seven covers – just – the whole width of the cushion, and makes a good interruption to the rhythm I’d built up.
It occurs to me that it might be a good candidate for a single colour design, one of these days, especially a light colour that will allow the ends of the stitches to cast shadows and build up the pattern.
As though I don’t have enough plans swirling in my head!
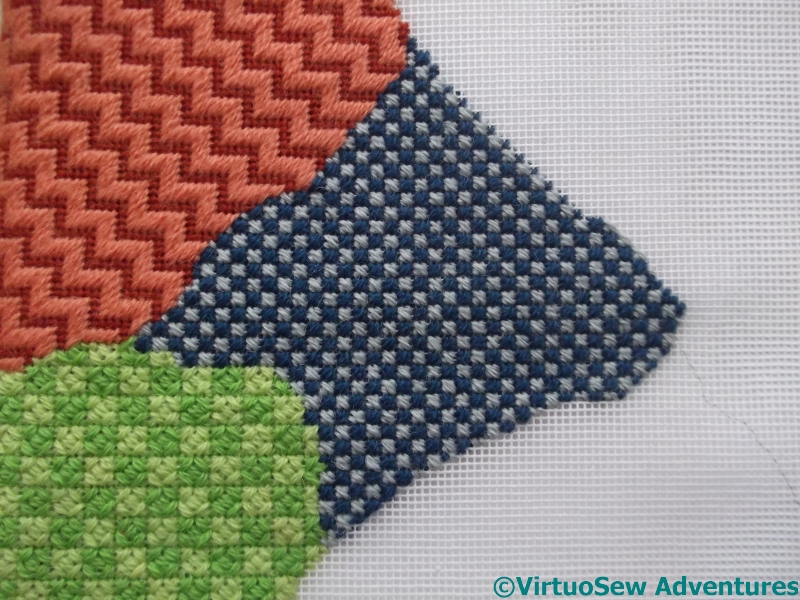
Section Eight
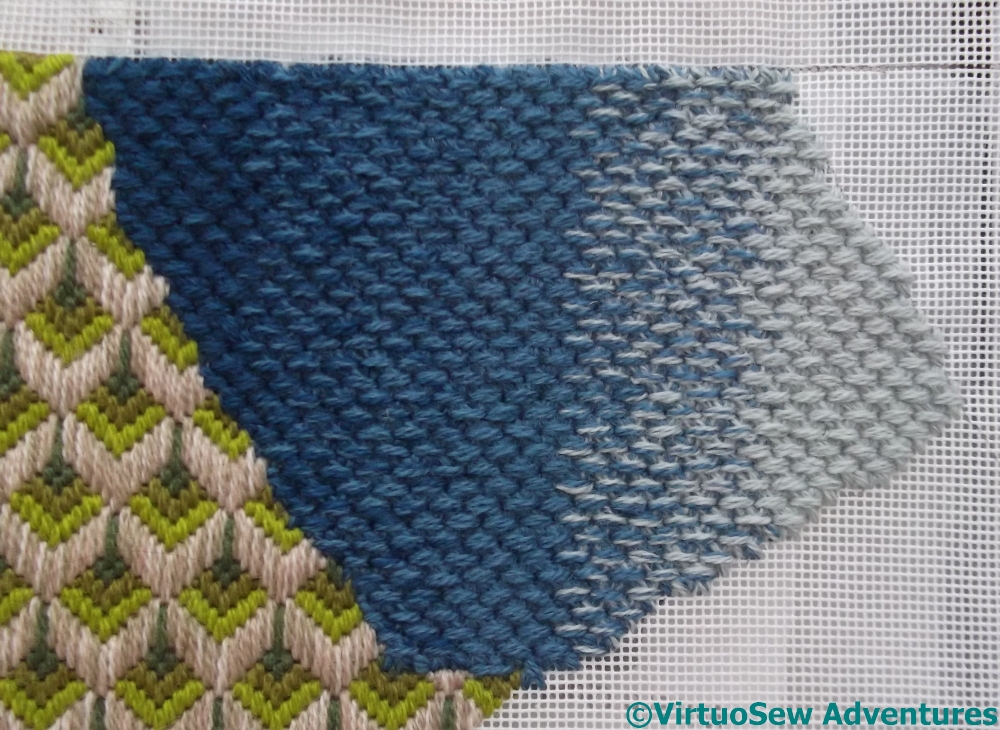
It turned out that the next section was rather tricky to pick a colour for, until my mother suggested blues, to help reflect the pattern around Section Seven.
I decided to create a shaded effect on Section Eight. I used three strands of wool, which meant that I could create a fairly subtle graduation starting from three dark strands, and progressing through 2 dark and 1 medium, 1 dark and 2 medium, 3 medium, and then 2 medium and one light, 1 medium and 2 light, then finally 3 light.
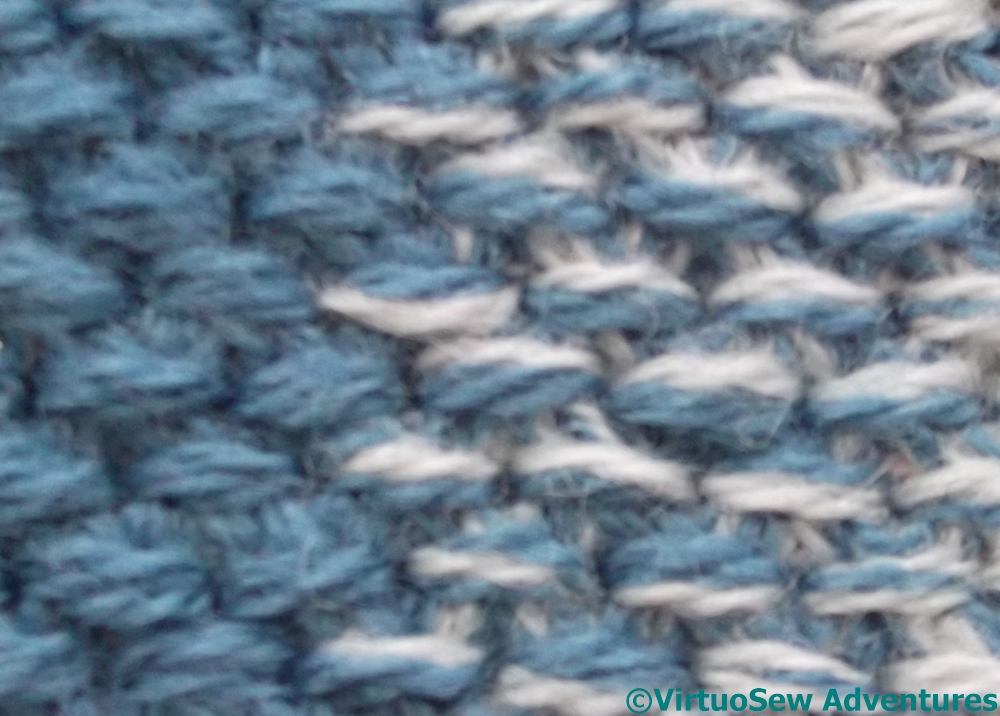
Dutch Stitch
The stitch is Dutch Stitch, found in Mary Rhodes’ Dictionary of Canvaswork Stitches. It is a condensed, closely worked crossing stitch. In fact it is so condensed as to be quite an effort when worked in three strands on this canvas!
Still, I expect it will prove a hardwearing stitch, and the texture is a good contrast with the smoother textures of the straight stitch patterns.
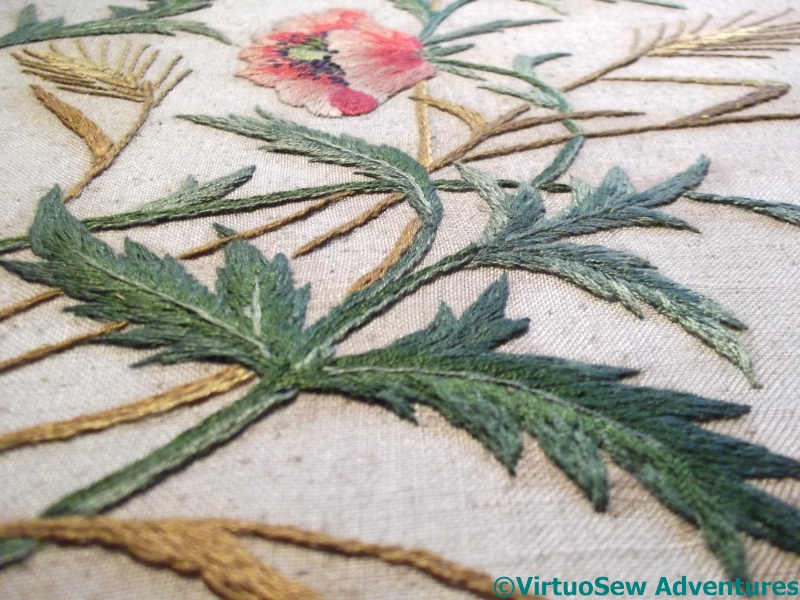
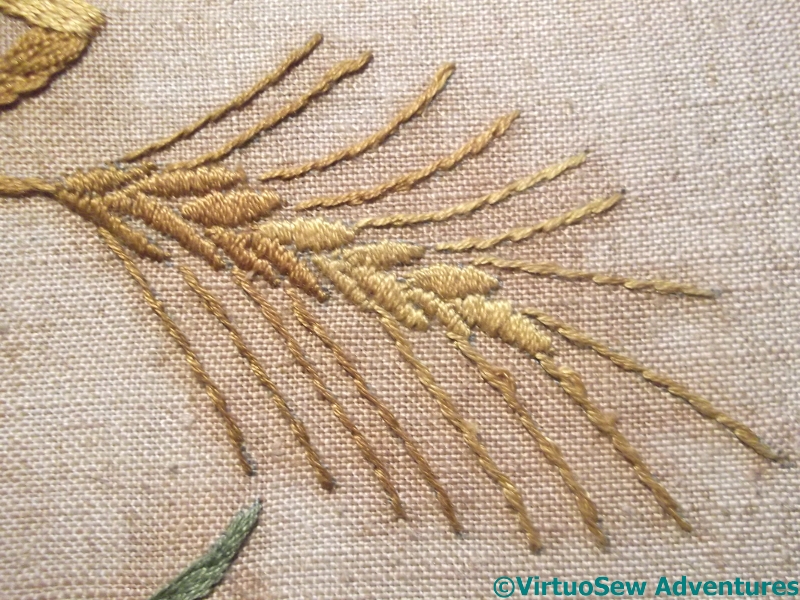
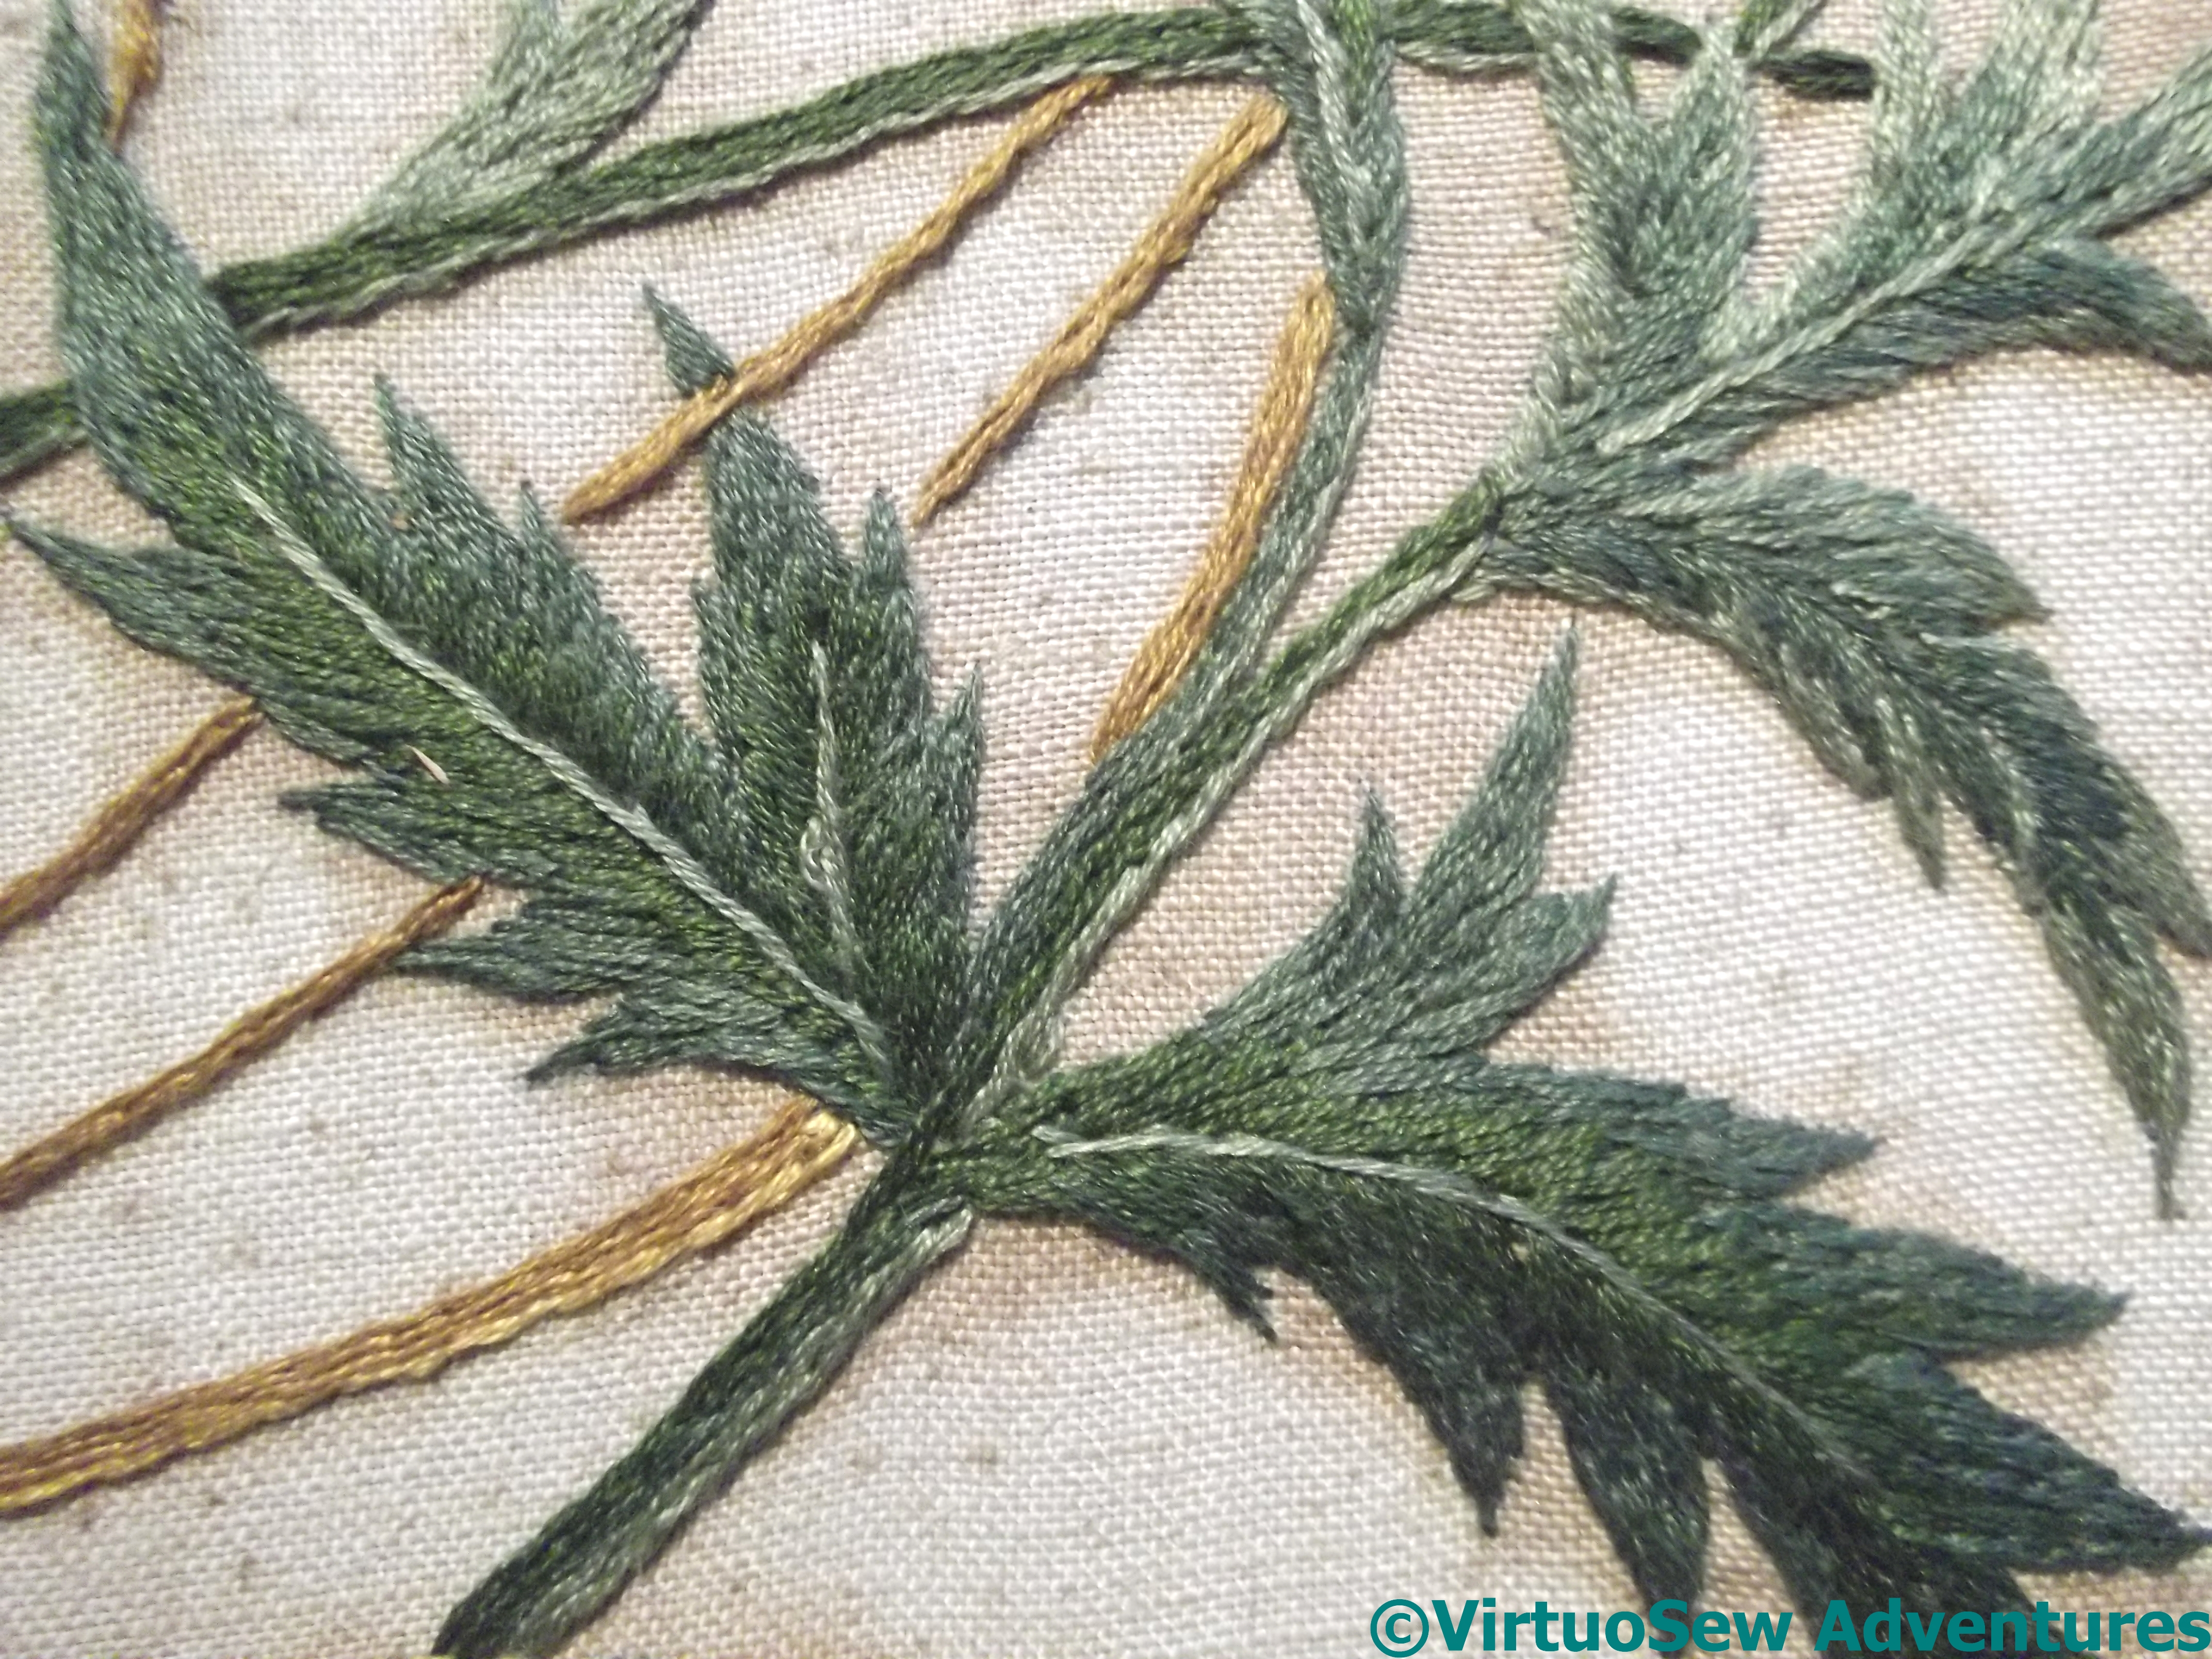
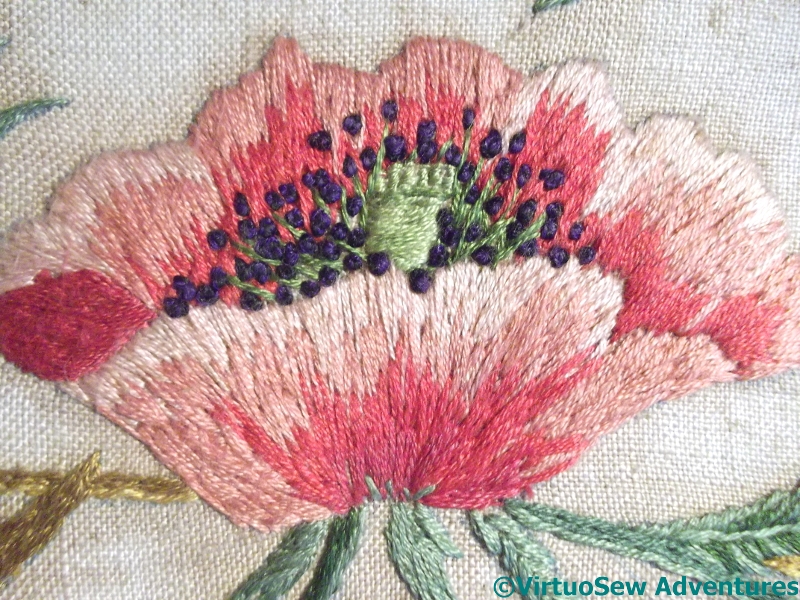
Poppies and Wheat – a closer look at Grandmama’s embroidery
 When we took the tray to pieces to remove the embroidery, we had a Nasty Shock.
The fabric was glued to the backing board and cut off flush with it. So much for our blithe expectation that we would be able to remount the fabric – carefully, of course! – and then get it properly framed to advantage.
In retrospect, we should maybe have guessed from the staining around the stitching that maybe some glue had been involved, but since I always mount over padding, it would never have occurred to me that Grandmama’s framer would have done anything else, still less that the legendary Miss Hunter would have presided over all that beautiful embroidery and then permitted it to be mounted onto any old piece of board using any old glue that happened to be to hand!
The embroidery is worked in long and short stitch, satin stitch, stem stitch, and French knots. I think Grandmama used two strands of stranded cotton throughout, and as it was wartime I’m impressed that she managed to gather ten different colours of thread for it.
It’s a salutary reminder to me that a riot of ornamental stitches and overdyed threads isn’ t always the very best way to achieve a striking result.
We are going to ask a textile conservator to have a look at the piece as it is, glued to its backing board, and give us some advice about the next step. Grandmama would be in pleats with laughter at the idea of any of her embroidery going to a conservator, but I hope she would be secretly pleased as well…!
Glittering Nightcap – Embroidery Finished!

Silkwork On Brim
Finally!
It has been a very long haul, but at long last the silkwork on the brim of the Glittering Gentleman’s Nightcap was finished. That in turn meant that I could get going on the goldwork, of which there isn’t really very much – only the stems, and the centres of the pansies.

Goldwork On Brim
In fact, it took rather longer than I expected, because the gold thread was rather more tender than I remembered, ravelling and fraying if I so much as looked at it. It’s the same thread as I used on the crown, so I can only imagine that either I have forgotten how it behaved last time, or that the tail end of the spool has loosened slightly in the time I’ve not used it. I can quite believe that would happen, since it’s over a cotton core, and natural fibres can be rather sensitive to atmospheric conditions.

Spangles On Brim
Once the goldwork was done, I could put the spangles on. Continuing my slight alterations to the instructions, I’ve used rather fewer spangles than on the crown. I’m hoping that that, too, will help to provide contrasts of light reflectance and texture.
Of course, now I need to gather both courage and wits to put the thing together!
All these pictures are clickable so you can look at them in more detail, but I will take some more close-up pictures to compare the brim and the crown. In particular, I want to see whether there are obvious differences between the Detached Buttonhole Stitch with Return that I worked on the crown, and the Bordered Detached Buttonhole Stitch with Return that I worked on the brim, and if so what they are!
The Crazy Canvaswork Cushion – Part 4
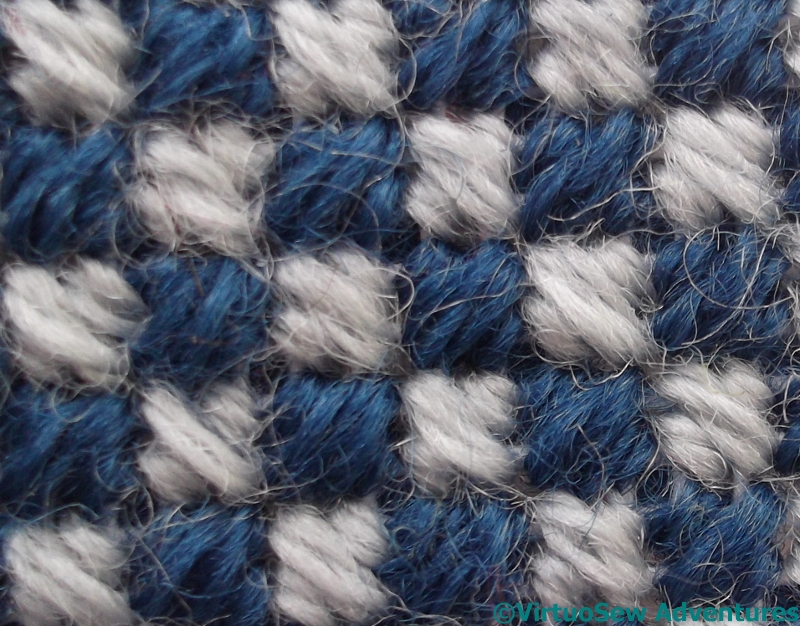
Reversed Mosaic Stitch
Section five needed to be worked in something that would help to calm down the acid green of section four.
I chose two shades of blue, and Reversed Mosaic Stitch, which at this scale is a small, neat pattern. The dark blue stitches are at ninety degrees to the light blue ones, hence the term “Reversed”. It also echoes to some degree the orientations of Brighton Stitch in the very first section. Just as in good script writing for a series, odd references may be made to incidents several episodes in the past, in designing large pieces of embroidery, references of colour, style and stitch help to give some cohesion to the overall item.
Section Five
I am a little concerned, in fact, that this pattern has calmed everything down too much, that it is looking rather grey and dull – which in turn means I need to take some time and effort to pick the next section, both stitch and colours.
I have even braced myself (reluctantly!) for the possibility that when the whole thing is finished and unrolled, I may look at this section askance and rip it out!
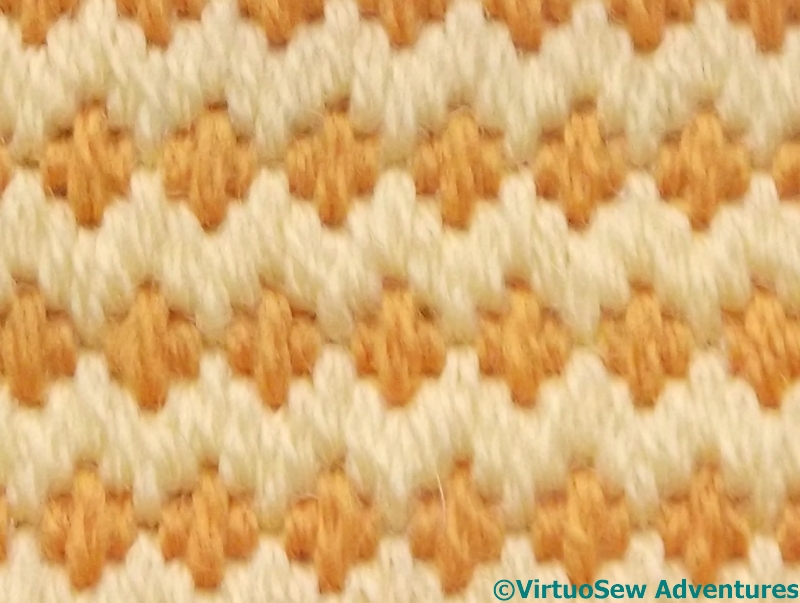
Hungarian Grounding
Moving on to Section Six, I wanted to choose a warm colour again, to counterbalance the warm colours of the Jacquard stitch, and eventually picked out two shades of warm yellow for the Hungarian Grounding Stitch. This is one I have wanted to do – I haven’t the faintest idea why! – ever since I found it, but have never had the right project to put it in. It’s a particularly useful one because it’s stripy, but at the same time spotty, so it reflects and recollects several different stitches.
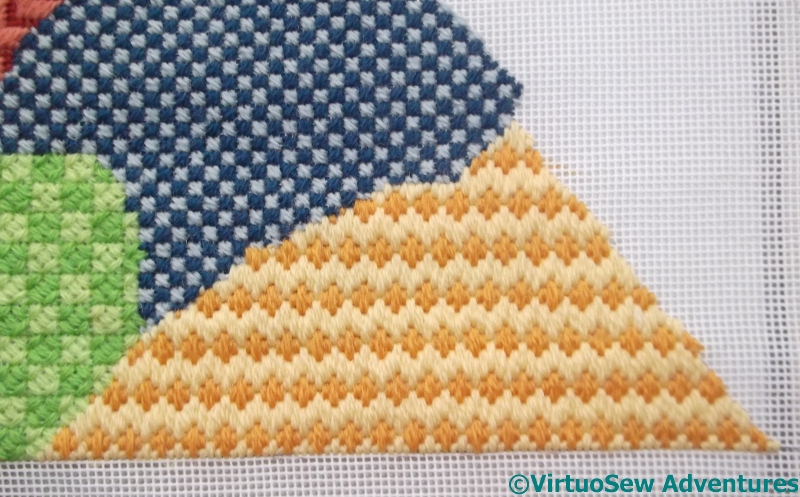
Section Six
Seen from a distance the effect is stripy rather than spotty, but since the finished cushion is probably destined for my mother’s studio, it will be examined close up as well as from a distance!
The next pattern I choose will be much larger, and involving more colours. I am now far enough towards the centre to move on to the more multi-coloured sections, for maybe four sections before moving back to two colours. Some heathering will be involved, as well. Although my stash seems extensive it’s completely unstructured, being the leftovers of several of my own projects as well as inherited bits and pieces, and heathering will allow me to extend some of the colours to fill the elements I need them to.
I hope!
Embellishing the Circles Skirt – Part Four

Shell Chain

Wavy Chain
Some of the suggested stitch variations in Edith John’s books have worked very well for the Circles Skirt, others rather less so. I think these two samples might help to show why.
Shell Chain Stitch worked beautifully. In the pearl cotton thread I used, there’s a nice, crisp sense of the stitch pattern, but the stitch is still flexible enough to curve around the circular shape I wanted it to, whereas Wavy Chain stitch, a variation upon it, is a very “stiff” stitch. It is wide, but each group of stitches stems from the same point, and even using a much finer thread and shortening the stitches really doesn’t make it any more flexible.
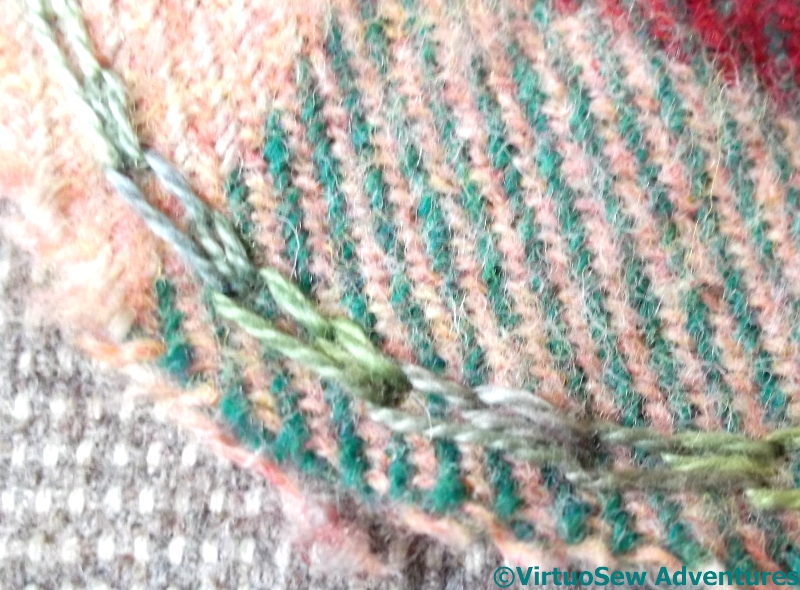
Shell Chain On Tweed
So here is Shell Chain on the skirt. It runs neatly around the edge of one of the checked circles, and although now I have worked the sample as well I might have preferred to shorten the stitches, it was fun to do, and easy to alter to match the curve.
I tried Wavy Chain several times in various places without managing to make it follow even the gentlest of curves, and eventually decided to give up until I’d thought it out some more, and maybe even done some practice.
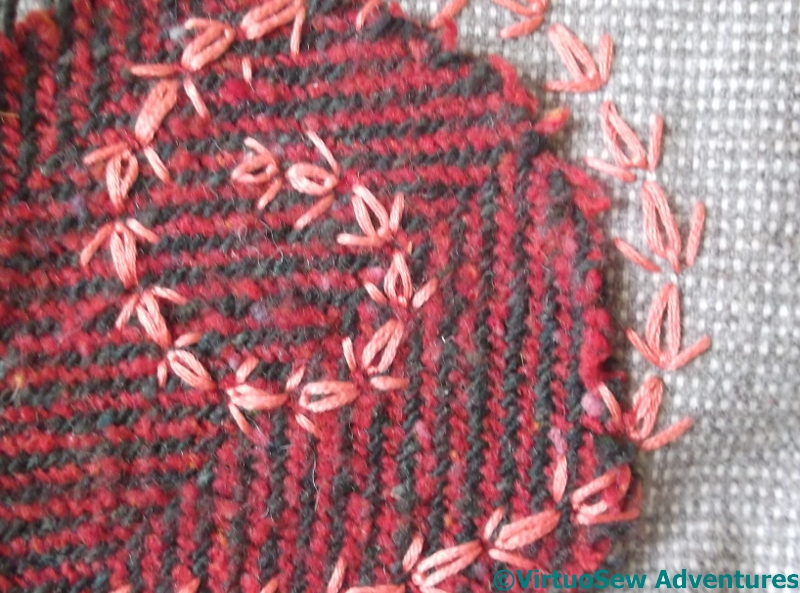
Wheatear Spiral
The Wheatear Spiral more than made up for my frustration.
It was a joy to do – the stitch itself is easy and effective, and the coral thread sings against the red and green tweed. Offsetting the spiral in comparison with the tweed also makes the whole thing more interesting, helping to connect the ground fabric and the embellishment. Maybe I should have swung the spiral further out over the base fabric, but this is what my needle wanted to do!