Tag: apparel
More elements on The Little Jacket
I’m using a lot of variagated threads, of course, and leaving stranded threads un-separated. Furthermore, since all washability is clearly lost here, I’m picking thread for colour and texture, rathere than paying attention to the fibre or considering colourfastness. I can, after all, replace the stitching with something else if I need to!
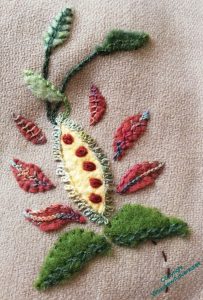
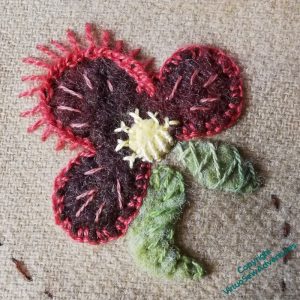
Basque Stitch edges the brown petals here, and triple chain stitch forms the spine of the yellow one. If you click on the picture to enlarge it, you will see that the green calyx is held around the edge with coral stitch and then a blanket stitch which is highlighted with detached buttonhole in a pearl cotton.
I’m really very pleased with how this element has turned out, although I may choose to lighten the stems on the leaves at the top, once I have everything in place and know what I have to balance of the overall impression.
I’ve looked quickly through the posts for the Coat of Many Flowers, and I was much more definite about stitching all around almost every shape for that, except the small teal leaves. For this one, I seem to be stitching a lot more veins and spines, or edging only one side of a piece. If I become anxious about pieces coming away, I can always add some stitches!
This element was more floral in previous incarnations, but here, I think it has drifted more in the direction of a seedhead. The “seeds” are isolated oyster stitches in sock yarn!
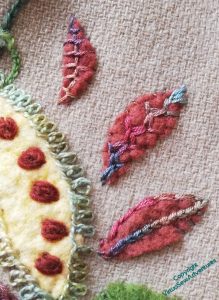
I unified the brown petals by using the same thread to embellish each, but made them more interesting by using different sitches. I’m particularly taken with the feathered zigzag chain on the middle one. The other change, compared with the Coat of Many Flowers, is to have turned some of the edging stitches around: last time, when I used rosette chain stitch, it was more like blanket stitch, with the “vertical” stitches pointing in to the centre of the shape.
And now, Episode 68 of SlowTV Stitchery is live. In which I discuss the alarming adventure of a Watermill Stitchery, remind myself to include the slips when I finally assess the success of Swirl Stitch (not yet, alas), and note that the skill of choosing the order in which to experiment is unheralded and undervalued.
Getting Started on the Little Jacket
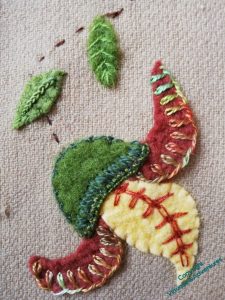
The basic technique I’m using for the Little Jacket is the same as I used for the Coat of Many Flowers, so the block colour comes from pieces of felt cut to shape. Most of them are the light and lofty felts I use with my embellisher, but this dark brown is slightly denser and more variable in colour. The variations aren’t as clear in photos as they are in real life, and I have a faint hope that if I wear it enough some of the lighter colours will fade a little more than the dark ones, and pull out the contrast a bit more.
This is the first of the motifs I worked on. A long-legged variation on chain stitch on the central petal is set off by neat paired blanket stitch edgings on the outer petals. I’ve decided that the yellow is to be an accent colour, and I’ve ensured that I have small bits of it it scattered across the whole jacket. In this case I’ve not used contrast colours to stitch it down. I’m not sure about the whipped blanket stitch on the lower half, but I needed something to contrast with the single twisted chain stitches on the uper half, and I don’t think I will continue unhappy with it once the whole jacket is finished.
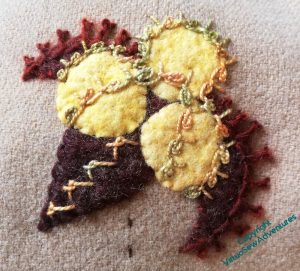
By contrast, I’m not at all happy with this one, and I don’t know what to do with it.
I like the crested chain edging on the brown petals, and I like the odd combination of rosette chain and blanket stitch in the yellow-green pearl cotton, but not how I’ve placed it or the effect it is creating. The stitch running in a spine down the lower brown petal is called “Wing Stitch” in the book I found it in, and again, I like it, but not what it is doing here.
I can see some unpicking in my future!
However, episode 66 of SlowTV Stitchery is now live, in which we consider the state of progress on Tynemouth Priory and plans for the sea, learn from Granny Weatherwax, and start planning more Watermill Stitcheries.
More Upcycling – a little jacket
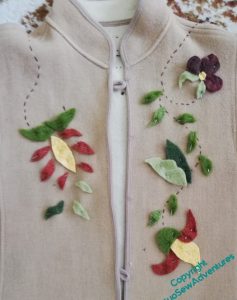
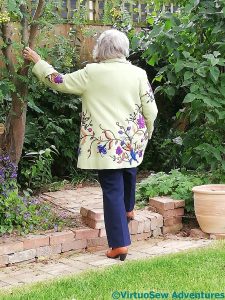
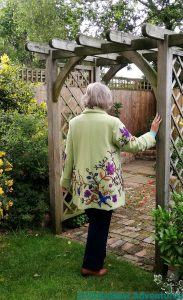
This little edge-to-edge woollen jacket was inherited from a great aunt. She was much smaller than me (I’m not tall, but my great aunts were all tiny!) so, among other things, she’d turned up the sleeves to create cuffs, which has resulted in rather unattractive, and potential life-limiting (for the garment) wear patterns. Naturally, I’m not in favour of that. Nor do I especially cherish the look of me in unadorned beige, especially since the arrival of my “corona wings”, which otherwise I rather like. So the jacket is going to be jazzed up.
In fact, it probably won’t know what’s hit it, by the time I’ve finished!
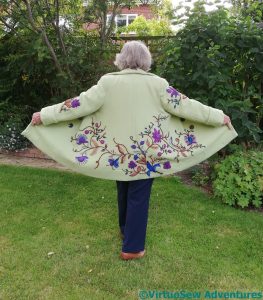
I am returning to the motifs from Grandmama’s tablecloth, which I also used on the Coat of Many Colours and the Jacobean Firescreen, so at least some of what you see over the next few posts will be familiar, but whereas the design for the Coat of Many Colours stretched across the skirt of the coat, the design here trails over the shoulders and down the arms.
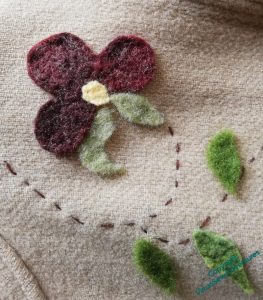
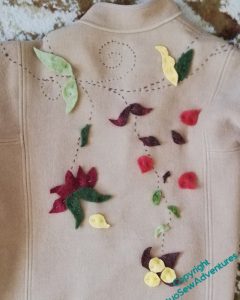
And whereas the design for the Coat of Many Flowers was planned in advance, with some care, the design for this one was put together in a series of adventures. First, my mother put the jacket on and I drew trailing stems around and over the jacket. Then I tacked them in with a single strand of Appletons Crewel Wool (then I won’t need to take them out!) and pinned cut out paper patterns of the motifs in their place.
Then the paper cutouts were replaced with felt cut outs. You can see from this picture of the back that I missed out some necessary stems here..
I wonder whether it’s luxuriant enough?
Meanwhile, in other news – Episode 64 of Slow TV Stitchery is now live, in which we discuss Impressionism in stitches and an Announcement is made..
Finally, completely finished!
More progress on SlowTVStitchery – Episode Eight is now up. It contains intimations of dilemmas to come… Enjoy!
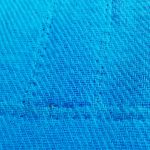
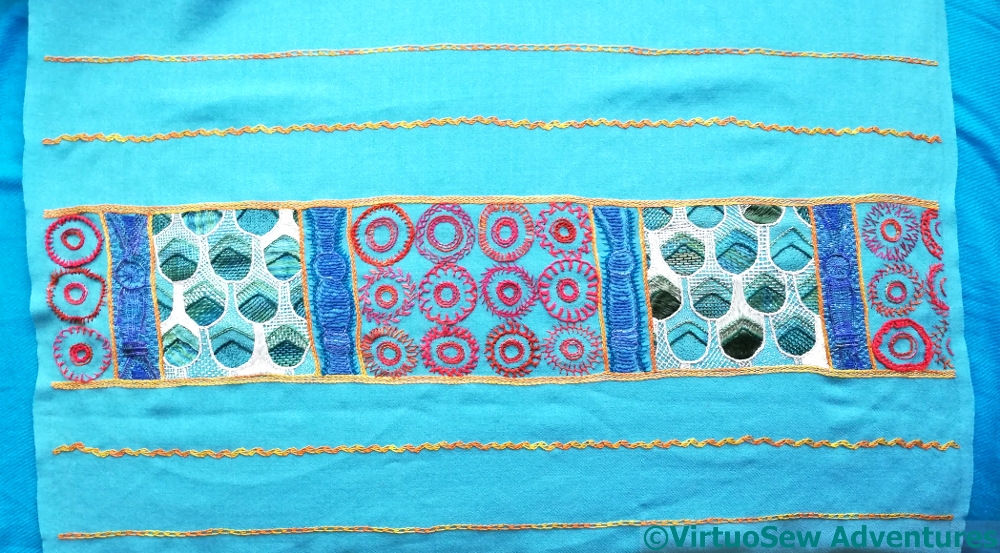
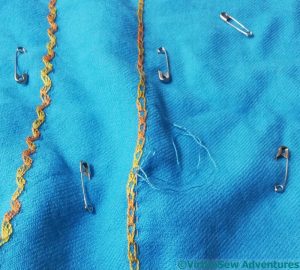
After washing the pashmina for the lining several times (it dyed the water bright turquoise the first three times at least, with no discernible fading in the fabric), ironing both of them, and pinning them together with safety pins, I settled down with my turquoise silk thread and ran simple running stitch quilting along all the gold lines of the design. This was easiest to do, I found, by cutting the thread to a little over the width of the pashmina and starting in the middle of both the thread and the shawl. Once the main lines were in place, I went back to the polychrome band and added the extra lines of stitching to delineate the frame.
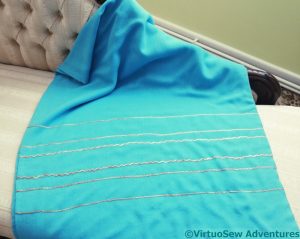
It’s not easy to see, although I’ve done my best with this photo, but I’ve worked several rows of variegated golden lines across the pashmina on the otherwise undecorated end. I felt, when I finished the polychrome band that the whole thing looked a little unbalanced, and needed something to prevent the impression of something just fading out. I used Wavy Chain, Shell Chain, and Cable Chain, which are used on the other end, too.
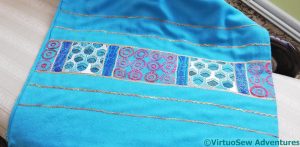
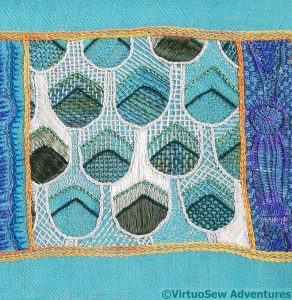
And here is the polychrome band. You can see that the proportions aren’t quite perfect, but it is very much in the spirit of the StitchOff that the pashmina was originally bought for, in that it is intended to be worn and enjoyed, not stuck up on a wall. It wasn’t quick to do, but that is the fault of my own talent for over complication!
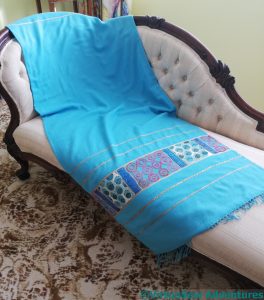
At long last, the Nefertiti Shawl is finished and lined, the lining has been controlled with lines of stitching, and the whole thing has been pressed. It should be seriously cosy – the lining is another cashmere pashmina, and it clings slightly as I wrap it around myself. It’s not an easy piece to photograph, hence the languorous drape over the sofa!
Last details on the Nefertiti Shawl
Well, at last!
As you can see, I didn’t perfectly centre my sketch of the design when I put it on the pashmina, but once it’s swept around my shoulders, I doubt very much whether anyone will notice!
I’ve also put a narrower set of gold lines on the other end. I didn’t want to work the whole thing again, but I felt that a little extra colour would nevertheless help to make the whole this look a bit more thought-out. Or at least, more completely evolved!
However, I did decide that in the interests of not spending all my time on maintenance, I was going to line it, and I found another turquoise blue pashmina with which to do so. It is slightly narrower (so I turned in the selvedges of the embroidered one to meet it), slightly longer, and doesn’t have a fringe. So I could line just the fabric length, and cut off the excess.
How to control the fabrics while I was doing so gave me a little trouble, until I remembered seeing quilters use safety pins to “tack” fabrics together. That worked beautifully!
I spent a couple of evenings working running lines beside each of the gold lines. Just straight running stitch – in the case of Wavy Chain, I simply offset the line a little, rather than trying to follow the zigzags.
SlowTV Stitchery continues – Episode Four and Episode Five are both now up to view. Enjoy!
Nefertiti Shawl – Green Panels finished
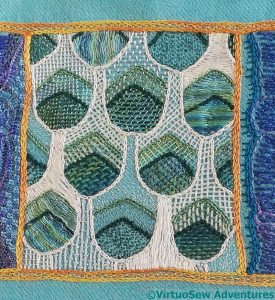
So here is the first of the green panels.
I’ve used stranded and floss silks, in variegated and plain colours.
The stitches are Woven Stitch, Bokhara Couching, Trellis Couching, Burden Stitch, and Darning Stitch, and wherever it’s possible to use two different threads in a stitch, I have done so, usually contrasting a plain with a variegated colour, or (sometimes and) a stranded with a floss silk.
Oh, I forgot – there was stitch orientation, too – vertical, horizontal, right-facing diagonal, left-facing diagonal!
Okaaaay. That made the “duality” idea a tad daunting, but not half so confusing as starting without any plan at all!
Anyway, the result is that the areas of high stitch density and high reflectance have been moved around a bit, and the details of the patterning have changed a bit, too.
I’m going to drape the panel somewhere I can see it for a couple of weeks, to be sure I’m happy with how it’s turned out, and then I’m going to line it with another pashmina. I’m planning to stitch in self-colour along all the gold lines, which will provide a slightly quilted look, and control the fabric a bit better, too.
Not to mention, making for a seriously cosy shawl!
Nefertiti Shawl – an excursion into duality
Having completed one green panel, I decided that I wanted the other green panel to be not quite the same, and I couldn’t work out how to approach keeping the family resemblance and maintaining some sense of balance.
So I asked The Australian, who you may remember is also a mathematician. He looked at me in some perplexity for a while. In fact, as I explained the layers of patterns I’d created, he eyed me more than a little askance, and then went very quiet for a while (you’d think he’d be used to it by now…).
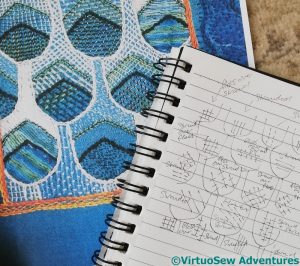
Finally, he suggested I think about duality. Now, this isn’t a philosphical thing – it’s quite tightly defined, in the geometrical sense, at least – see this Wikipedia page – so after some discussion over lunch, we decided that if I were to regard the elements of the two green panels as duals of one another, it would give me a systematic way to approach the second one, rather than flailing around randomly.
Now I had to decide what was what’s dual….
For example, in the first panel, I chose between floss silk or stranded silk, and in the case of stranded, between solid colour and variegated; then in terms of stitch orientation (going clockwise), between vertical, diagonal, horizontal and the other diagonal. In this context, I’m not sticking to the idea of a binary choice, so for example with stitch orientation I will go to the next 45degree angle around the clock face, while with the thread, I’m going to pick some ordering of variegated stranded, plain stranded and variegated floss and then move along to the next in that sequence.
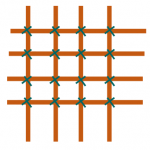
In terms of the stitch choice, essentially there are four: Jacobean trellis, darning stitch (rows of irregular running stitch, in effect), Bokhara couching, and Woven Stitch.
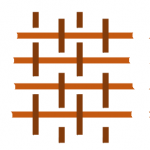
I can choose to make Bokhara Couching and darning stitch each other’s duals – that will move the heaviest stitching to different places in the panel.
The other two will be each other’s duals, with the added complication that they have each involved two different threads.
Have I simplified my life or complicated it?
Nefertiti Shawl – partial panels
There are partial red panels at the edges of the Shawl, and as I want the colours to run the whole way across, clearly I have to stitch them. While I was mulling over the blue panels and the green ones, I carried on with those partial panels.
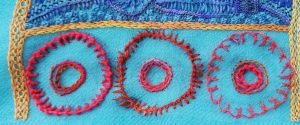
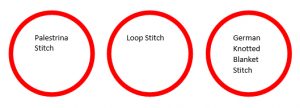
The central circles in all cases are in chain stitch and stem stitch, but I wanted a variety of effects in the main circles. That wasn’t as easy to achieve as you might think, for all my extensive repertoire of stitches! I found “German Knotted Blanket Stitch” in Barbara Snook’s “Embroidery Stitches”, and Palestrina and Loop Stitch are old friends, but by this point I’d managed to rack my brain into remembering most of those..
I was beginning to be at my wits end for stitches, and spent some time rummaging in Edith John’s “Creative Stitches” and “New Stitches for Embroidery”. Many of them would be easier in a slightly stiffer thread at a slightly larger scale, so I find myself wondering what Miss John devised her stitches for.
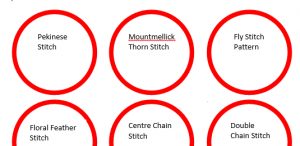
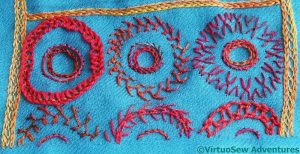
The full circles here are in stitches which are old friends, but the partial circles are some of hers. Floral Feather is a feather stitch with an upside down blanket stitch beside it, and I quite fell in love with it. I’ll be looking for another opportunity to use that one!.
Centre Chain stitch alternates single chain with fly stitch, starting each chain stitch within the previous one. That might be a way to vary textures with Wheatear Stitch, while still keeping the overall pattern. And Double Chain Stitch places a chain stitch and an open chain stitch side by side, alternating the ordering to create a checked effect.
Nefertiti Shawl – the second pair of blue panels
You may recall that I wasn’t entirely happy with the the first two blue panels. I’m still not entirely sure why, but I decided that I would work the second pair rather differently.
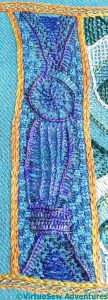
The outline of the pillar like shape, this time, was in Vandyke stitch using a Stef Francis variegated silk. Tricky, on such a mobile fabric, but I liked it enough to keep going, and moved on to a background using Sorbello Stitch. I rather like Sorbello Stitch – I used it for the villages on the Map of Amarna – and because I was working it at a tiny scale, the mobility of the fabric wasn’t a huge problem.
On to the internals of the pillar like shape, and I started with a Ceylon stitch wheel. This is a needlelace stitch, and even with the fabric in a hoop, tension was an interesting challenge…
I’ve also made the background a chequerboard of Sorbello Stitches in two shades of blue. I must have really enjoyed myself!
Finally, I filled the rest of the body of the pillar with Ceylon Stitch. Tension was even more of a problem here, and I may have to come back to this and tweak it, restitch it, or even change my mind again. We’ll see!
In the meantime, however, I have to do another one on the other side of the panel.
Finished, made up and being worn!
There’s not much to say here, except that the Jacobean Coat has been re-christened The Coat of Many Flowers (thanks to Sue at Tortoise Loft for the inspiration!), and is a great success.
It’s double-breasted, slightly shorter than three-quarter length, and lined with a nice figured satin to slide over woolly jumpers if necessary.
And if it doesn’t stop the traffic when Mam next strolls into town, I shall be vastly surprised!

