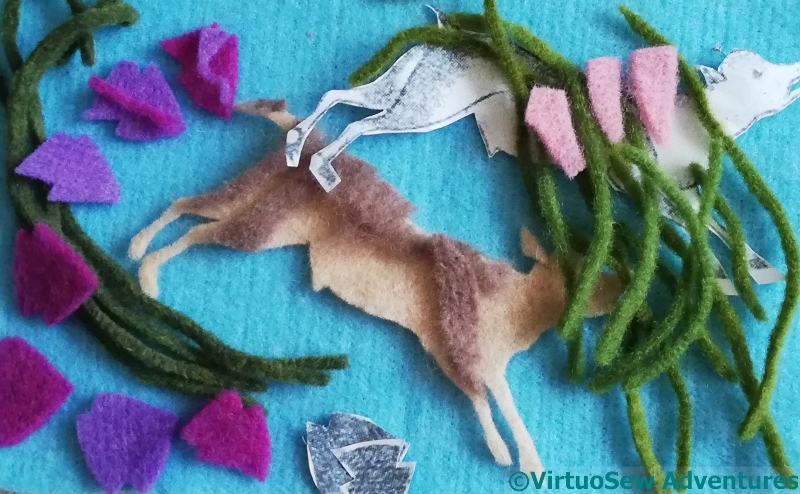
In among my image sources, I found a really joyful image of a calf bounding through vegetation, kicking up its heels. I decided it would be fun to do another felted piece. Like the Two Princesses, there will be stitchery, too, but it’s a change of pace and scale compared to Akhenaten, and I try to have more than one project on the go so that I can think about tricky bits of one while doing easy bits of another…
Hexagonal Net
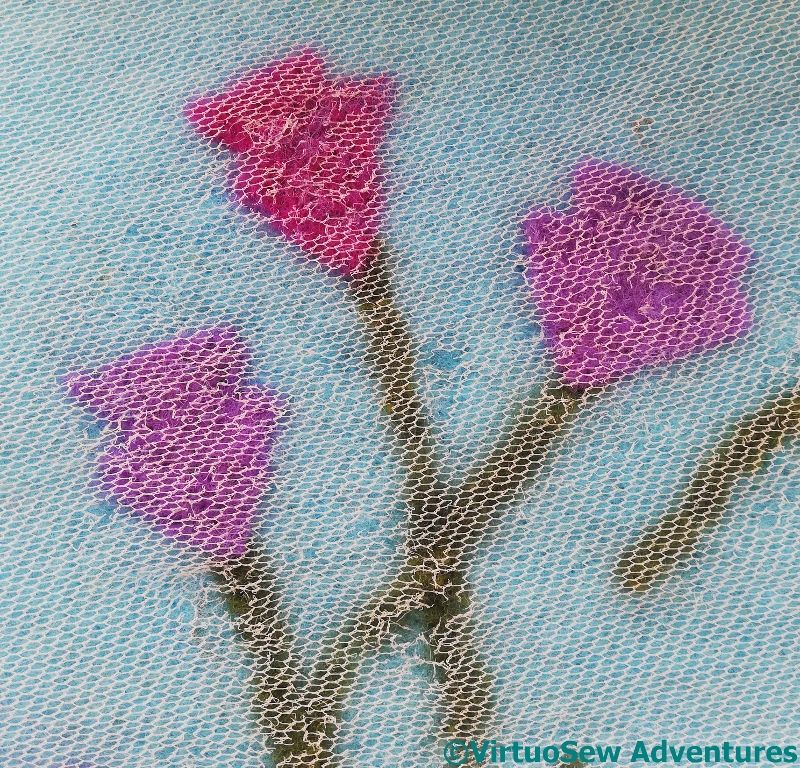
When I first bought my embellisher, the lady demonstrating them told me about using hexagonal net to control pieces of felt and wool while running them under the embellisher. So I bought several yards of cheap hexagonal net, and I’ve found it very useful indeed. It doesn’t get felted in, or at least, not to the extent it can’t be picked out with tweezers, and you can see through it to what you’re working on. So I begin by laying out the pieces I want, hand-needlefelt it roughly in place, and then lay the net over the top and run the embellisher in little moving circles to attach the layers properly.
Midway Stage
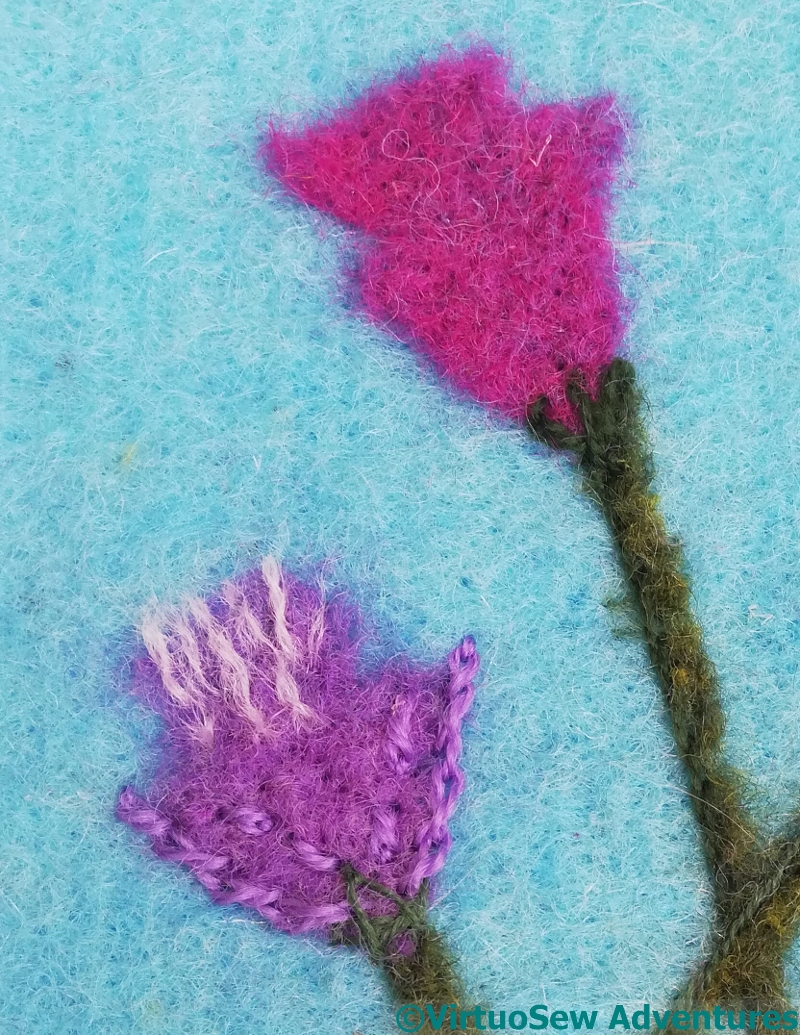
Once the initial felting has been done, I can start adding stitchery. In this case, I’ve stitched a dark line down one side of each of the stems, and twisted chain down the edges of the lilac flower. I wanted a slightly ruffled effect to the mouth of the flower, so I’ve hand-needlefelted some detwisted yarn into place. I’m not quite sure that I’m pleased with it as it stands. Still, more to do!
The pink flower is still entirely un-detailled. I don’t want to use the same stitches and processes for those, so there’s more thinking to come…
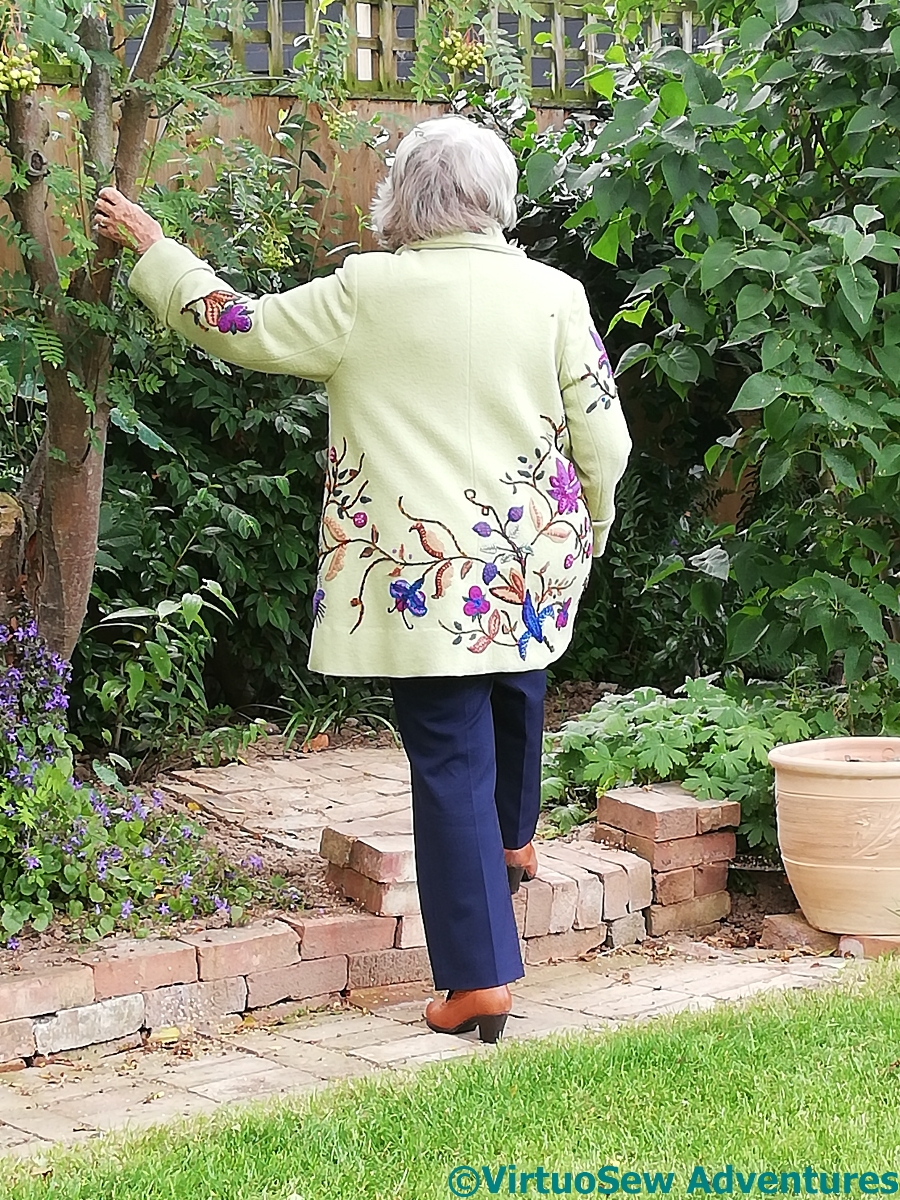
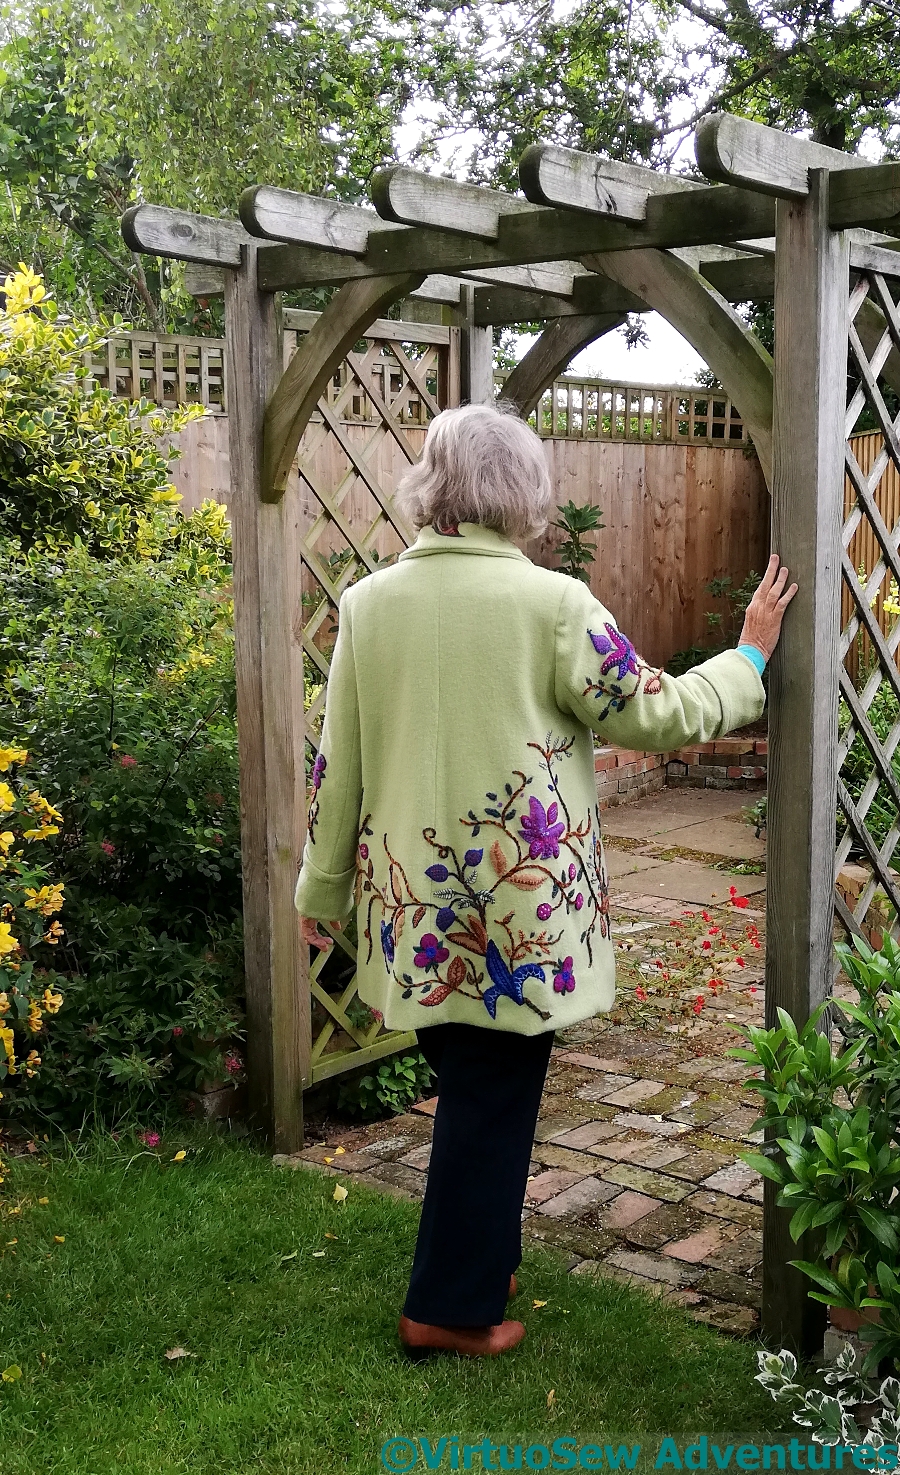
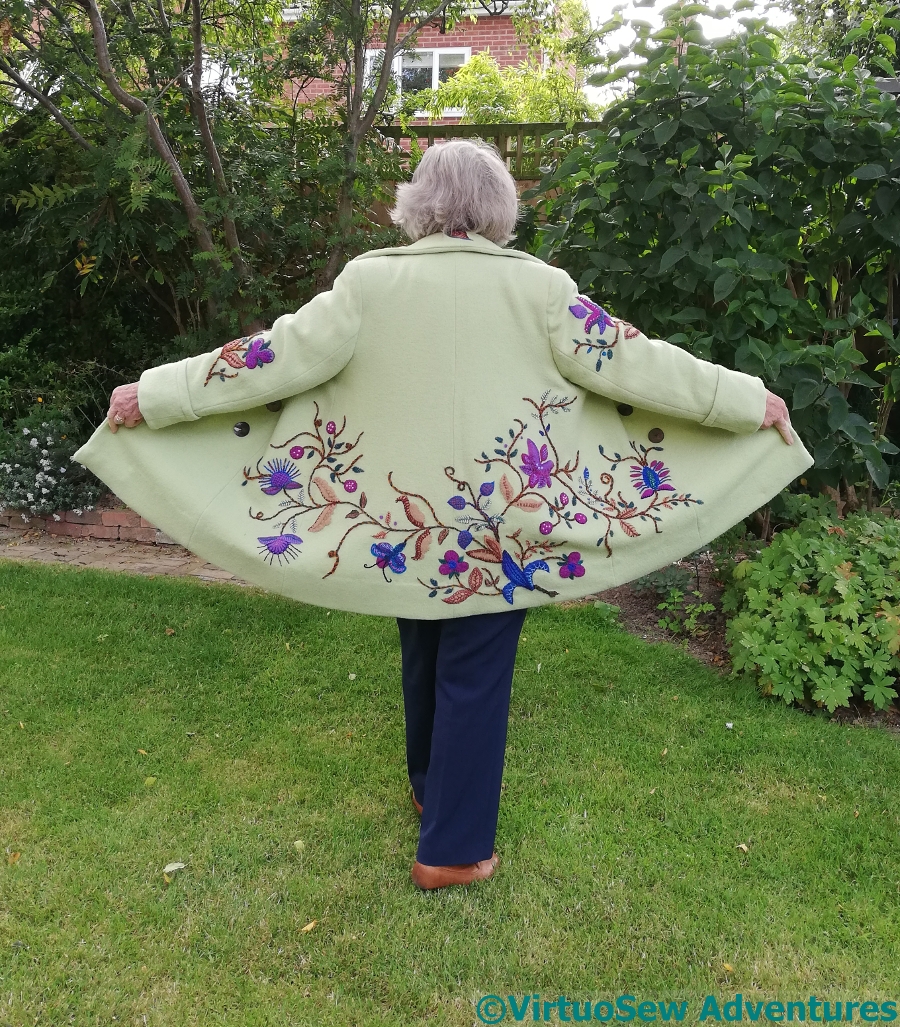
There’s not much to say here, except that the Jacobean Coat has been re-christened The Coat of Many Flowers (thanks to Sue at Tortoise Loft for the inspiration!), and is a great success.
It’s double-breasted, slightly shorter than three-quarter length, and lined with a nice figured satin to slide over woolly jumpers if necessary.
And if it doesn’t stop the traffic when Mam next strolls into town, I shall be vastly surprised!
You may recall that I had some trouble with the armlets the first time I was working on them. Now, as I’ve come back to Akhenaten again, I’ve decided that the gold kid I’d settled on isn’t at all right. Off it came, and after some puzzling, I attached the brass mesh instead.
Only to decide that no, that looks dull, doesn’t capture the effect I’m after, and even edged with a flattened gold spiral, doesn’t stand out enough against the silk.
Coloured Purl Armlets
My next thought was to do some patterned chipwork. I chose a rather gorgeous, very ancient-Egyptian-looking blue, and a sort of diagonal basketweave pattern which is not a million miles removed from some of the patterns I have seen on ancient pieces.
The blue did at least help the silk to show something like true colour, but when I looked at the whole piece, I found the blue too bright, and the pattern altogether too much of a good thing.
I thought that was strange. The alternating directions should have echoed the beard and helped the two sit nicely together, and there is so much personality in the silver purl loincloth that you would have thought nothing could have been too much!
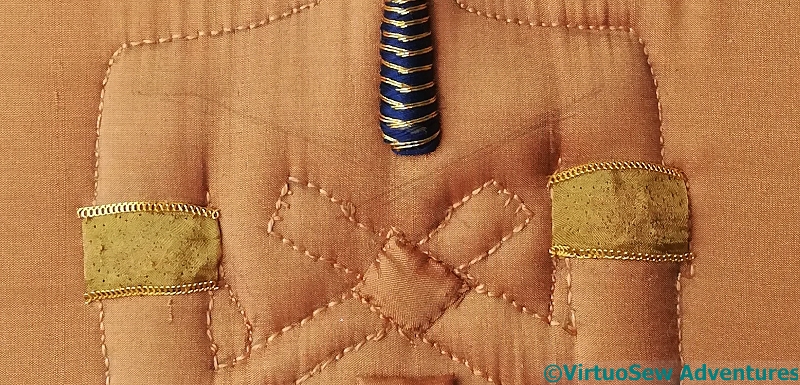
Armlet Trimmed With Silk Wrapped Scallop
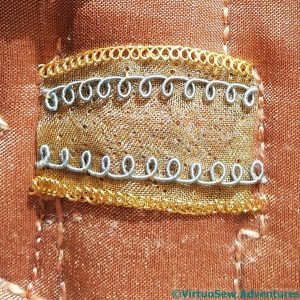
Then I had a thought – the kit for the Stuart Silk Purl Flower contained some bonus silk-wrapped wires and purls, and fortuitously, when slightly overstretched, there was just enough of one of the turquoise ones to do top and bottom on each armlet.
At this point I decided, somewhat tentatively, that maybe I’d got this bit right, or at least right enough to move on.
After a morning’s stitching, I realised that all the details I had added were on the wrong side of the felt base, with the result that the wings were facing the wrong direction for the composition.
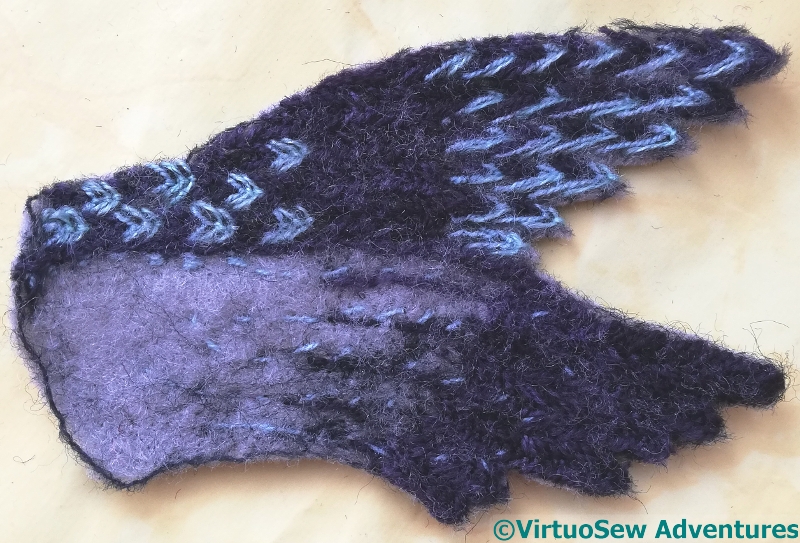
So here you see a start on the second pair of wings. I learnt from the first attempt, and the difficulties I’d had around the edges, and left the wings as part of the fabric as I worked them, using rows of fly stitches for the pinions.
Second wings
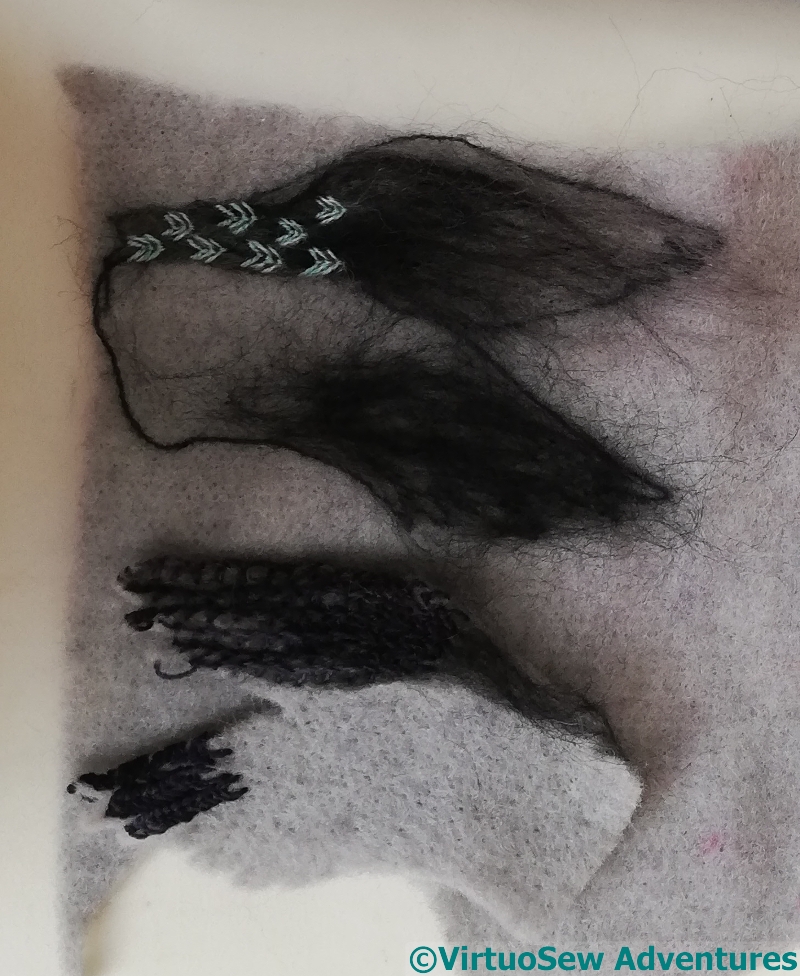
After working over the wings with the embellisher to reduce the potential for stitches unravelling, I cut them out, with as much precision as I could. But I’m really not happy with them.
They are dark, heavy and clunky, too densely stitched, and much too sombrely coloured. No bird will soar on wings like this.
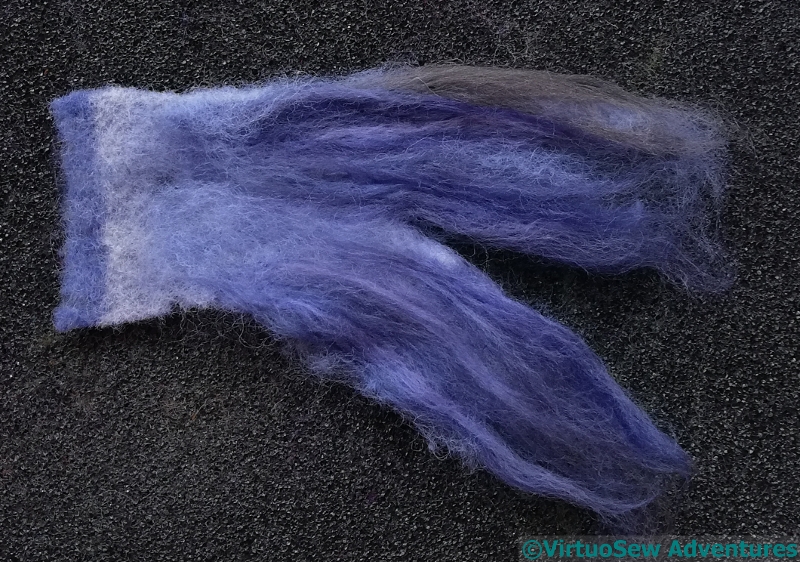
Third Wing Attempt Begins
So, the third attempt begins. I used a fragment of felt as the leading edge of the wings and then added lengths of fibre. I’m outlining the wing shapes using a single needlefelting needle, and I’ll try to creep up on more successful wings, learning from all my past mistakes.
Just when I thought I had no more to do, suddenly my mother asked, would I add a something-or-other to the back of the coat collar.
We thought about it, and decided that since I’m going to do a Morse Code signature that looks like a caterpillar, and there’s already a butterfly, I could maybe add a snail…
The tacks top and bottom show where the seam allowances and turn of the collar leave space for Something. I drew a snail on a bit of tracing paper (loosely based on the one on the Jacobean Firescreen), and tacked on the outline.
A miss-step
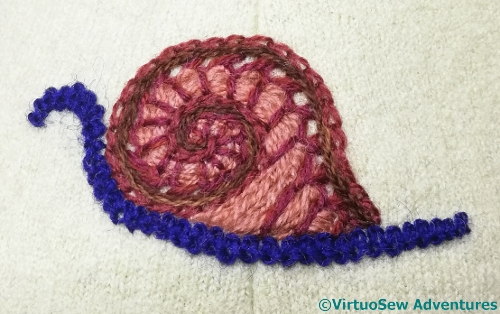
The shell itself came together easily, two rows of reverse chain stitch, then a row of half-cretan stitch which was then threaded with wool to create a slightly raised effect.
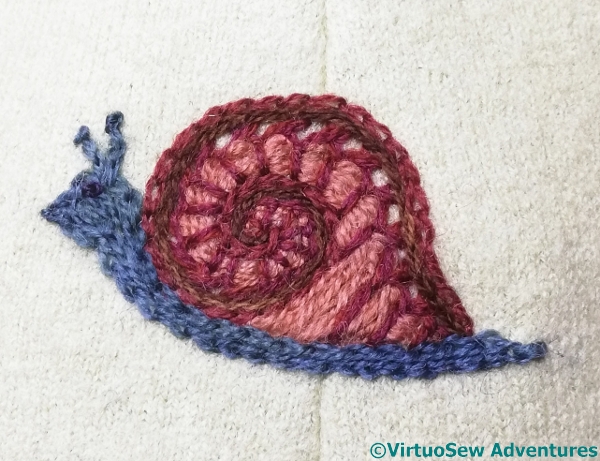
Inspiration briefly halted when I came to the critter himself. I tried several shades from among the ones on the coat, and two or three different stitches, and was underwhelmed by all of them.
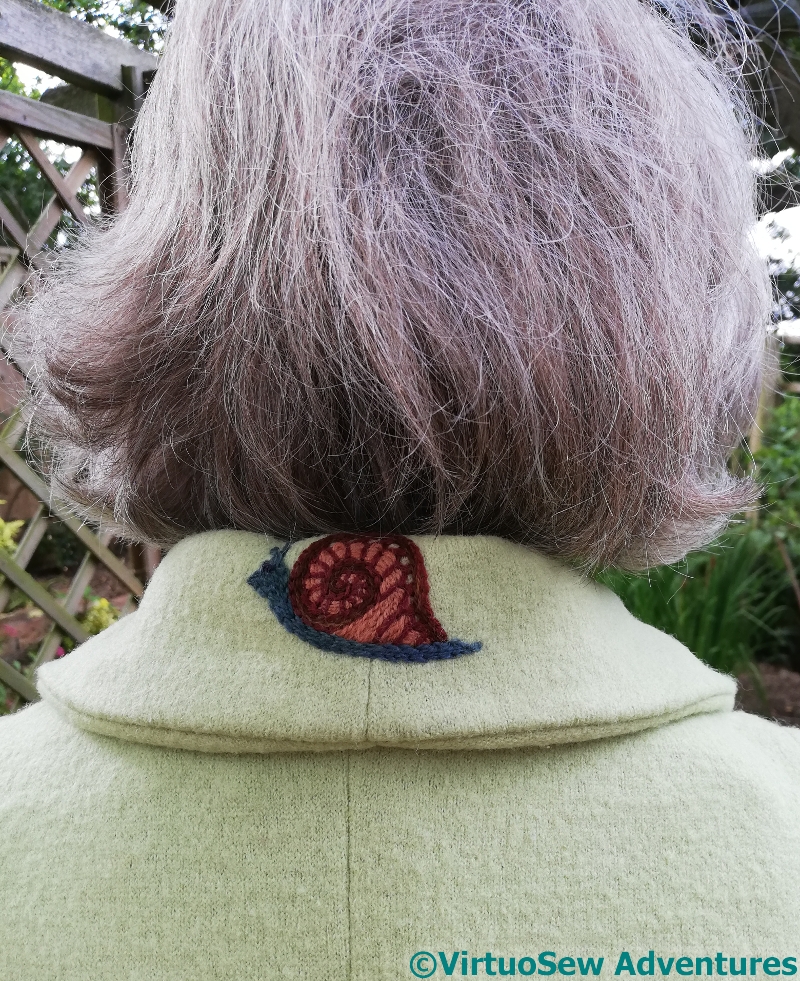
Finished Snail
Finally, I picked the right colour (a middling shade of teal) and the right stitch (chain), and he came together beautifully.
Two tiny antennae, a French knot for an eye, and hey presto, one cute little snail to add the final embellishment to the coat.
Now it’s over to my Mam to sew the whole thing together…
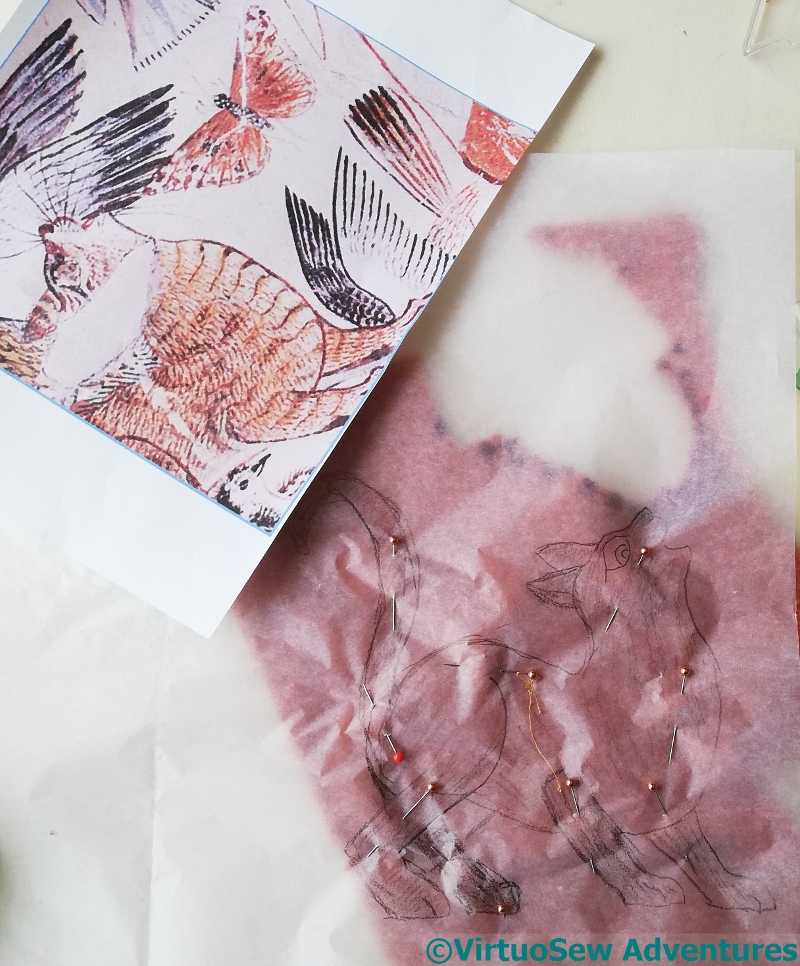
I was leafing through my image sources, looking for some relief from the concentration of Akhenaten, when a fragment of fresco caught my eye. I’d not really registered it before, but it’s full of vitality, and I thought it might give scope for more Fun With Felt.
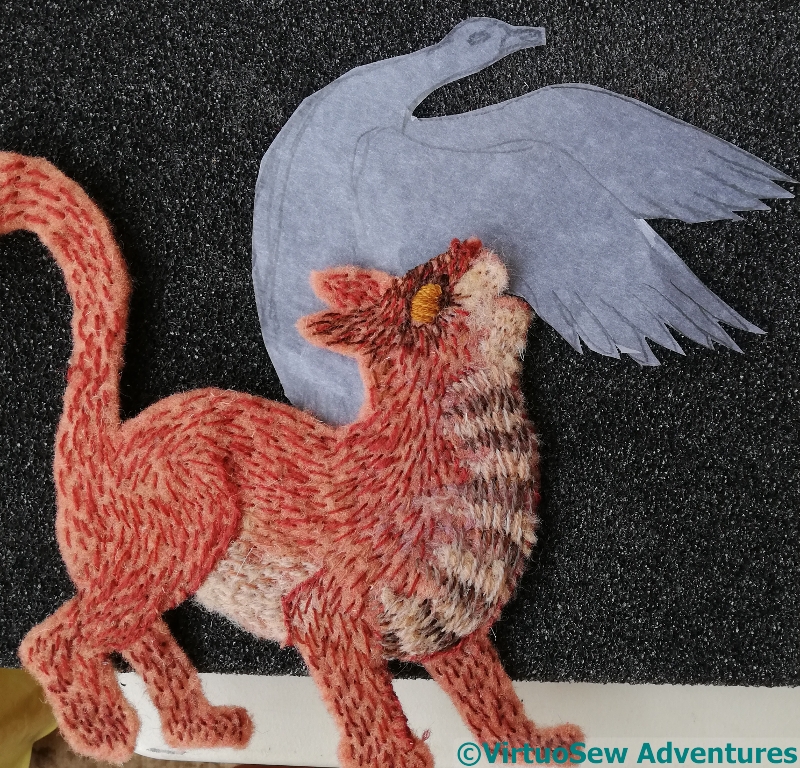
I may simplify – or complicate – my ideas as I go along, but since I wanted to include the whole cat, the first thing I did was spend some time looking at pictures of cats on the internet (which just goes to show that one can find a research excuse for almost anything!) to see whether I could draft some suitable hindquarters to replace what my source didn’t show.
Beginning the felted underlayer on the cat
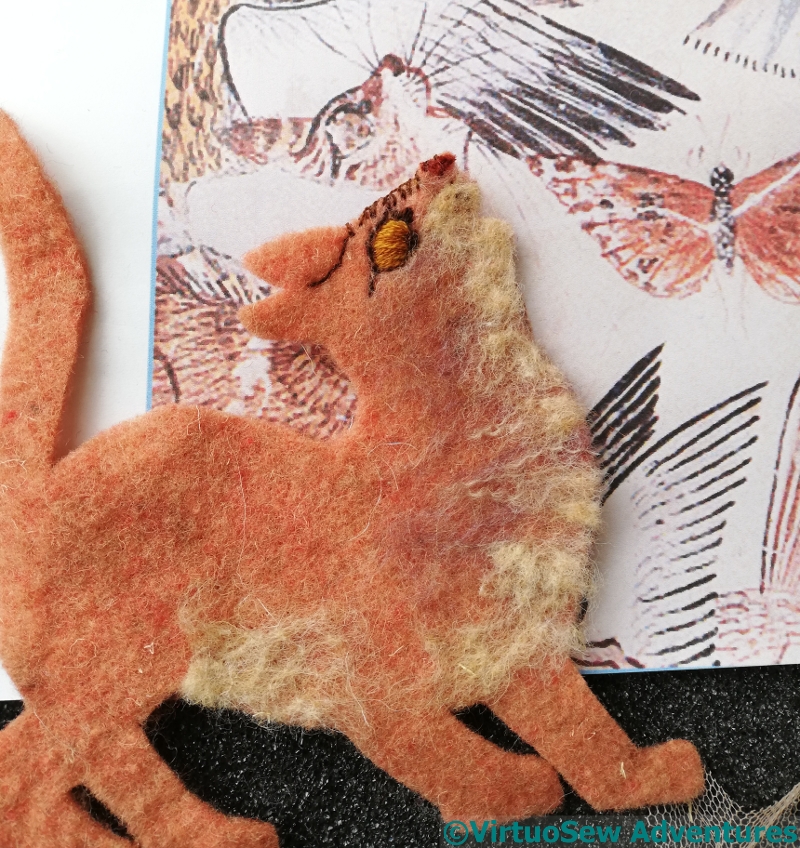
I’m sure my cat isn’t quite the way the Egyptians rendered him, but as ever, I’m aiming at a “reinterpretation” or “realisation”, not a photographic rendering. As it was, I had to tug at my felt and give thanks that there’s no grain in non-wovens to get it to fit at all. Especially since I had decided to make use of the leftovers of stitching for the cushions for the Two Princesses to give me a head start on his nose.
I began with a few lines of stitching, and a golden eye, and then needle-felted fragments of felt and untwisted plies of thread onto his neck and chest (for some reason I feel as though the cat is a very young boy cat!).
Trialling prey placement
The next thing to do was to do an initial layer of stitching all over my cat. I’ve just used simple straight stitches, to echo both the cat’s fur and the simple brush strokes of the ancient Egyptian painter. When the cat is needle-felted onto the eventual background, that will blur the stitches into the felt, and created a softer effect.
I had to draft a body for the bird as well. This might be less successful, but I think it will do..
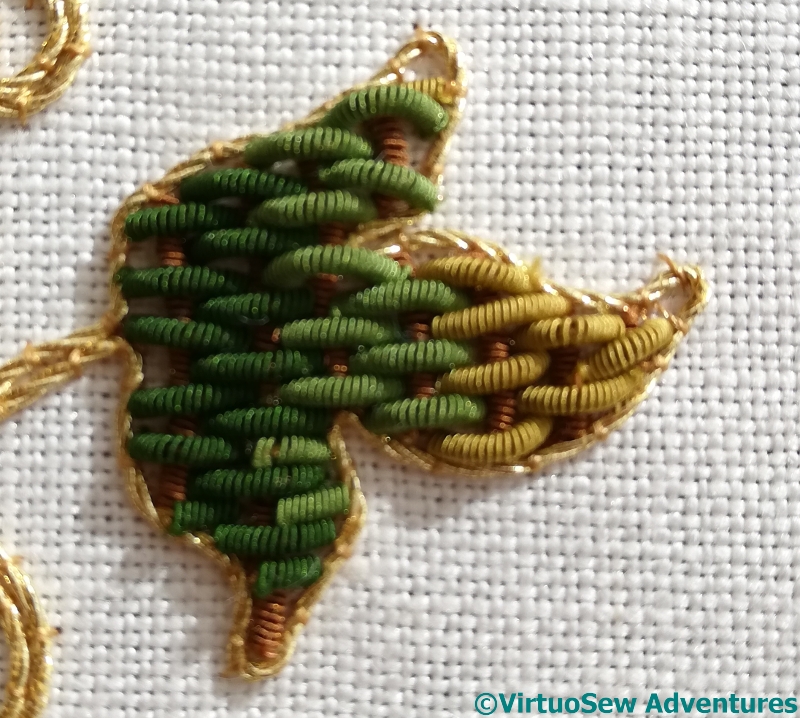
The small leaf was rather “meta”, in a way, because long “stitches” of silk purl were couched down with shorter ones. I’ve likened it to Burden Stitch, or even the couching form used in some opus anglicanum, and it includes colour changes as well.
All of these techniques have been simple enough in concept, but the execution isn’t simple at all. Spacing, angles, and cutting the lengths are all, as The Australian would say, non-trivial (mathematician-speak for “quite tricky”) and practice may make perfect in the end, but it hasn’t done so yet!
More Silk Purl Textures
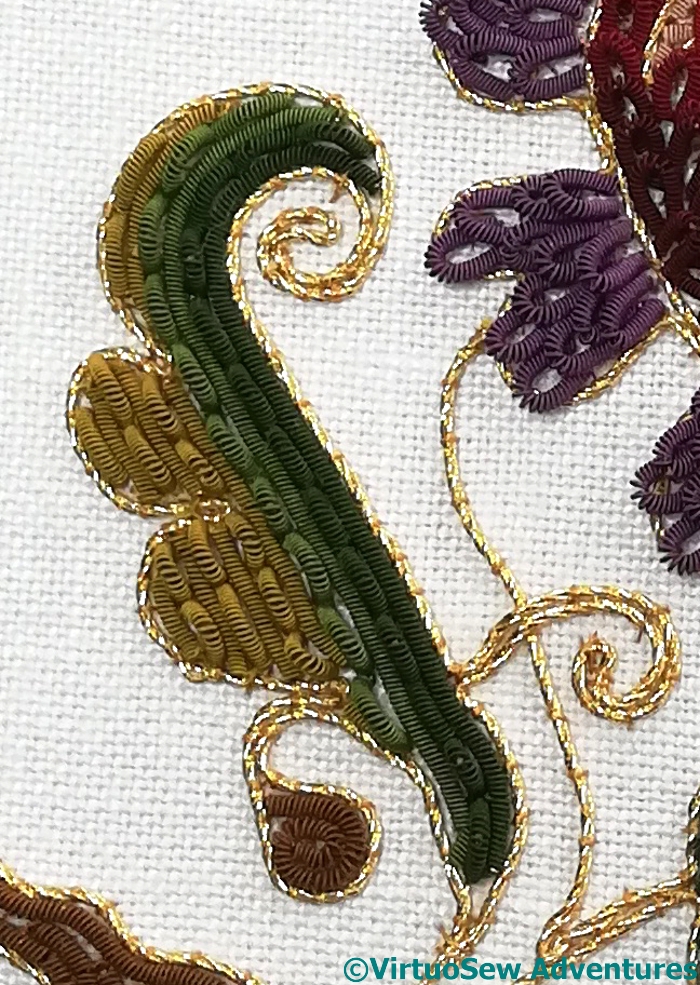
The final leaf was worked by alternating the hummocks and simple couched techniques of earlier months. In a way this shows that it is possible to create new textures by “layering” or “overlaying” techniques, so the only limits are in the stitcher’s imagination.
It creates an interesting ribbed effect, although with all my care, the raised hummocks aren’t all raised to the same degree. That said, I defy anyone looking casually at the real thing to notice the fact – at only about three inches by five, that would be a lot of detail to be able to distinguish!
And there are other dazzlements in store…
All spangles added
The final detail is to add spangles, which are reliably confusing and dazzling to the eye.
Just imagine all that flickering in the candlelight and shadows of the silk purl textures casting mysteries over each other!
I’ve thoroughly enjoyed this Online University course. Now I only need the time to sit down and read the extra information and watch the videos!
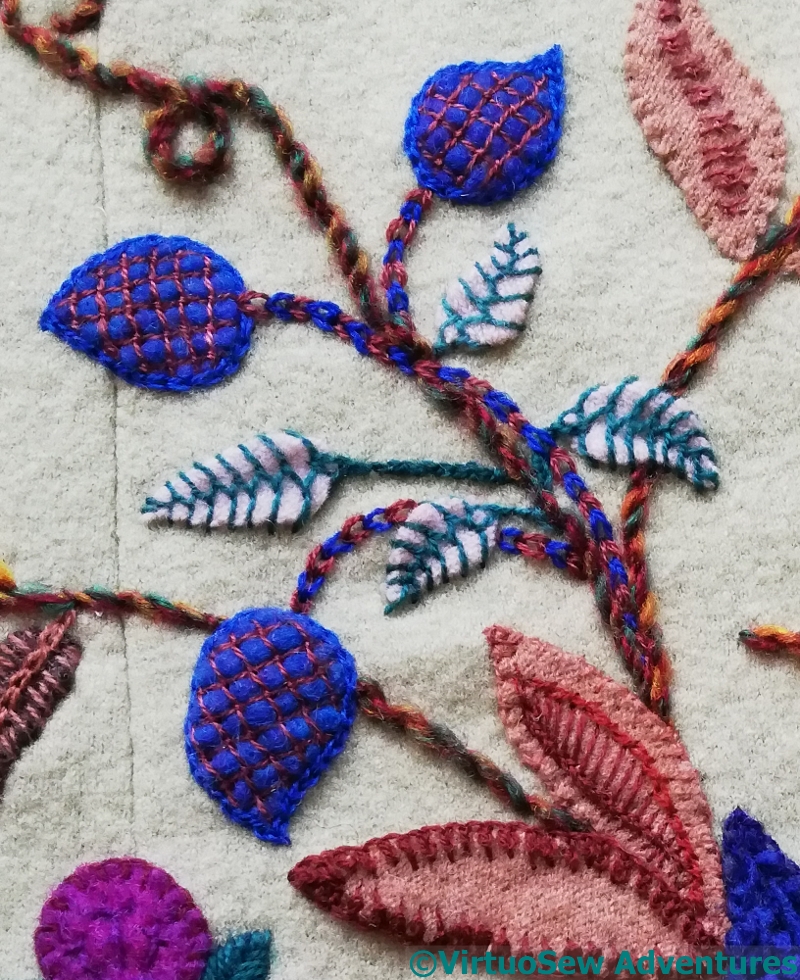
The blue buds are outlined in Chain Stitch and decorated with Trellis Couching, and then, in a final bit of frivolity, the stems uses Magic Chain Stitch. I’ve often wanted to use it, and never really had the space before. Achievement, unlocked!
The cream leaves (from some felted gloves!) are couched with Open Cretan Stitch, and the stem – where there is one – is in Portuguese Knotted Stem Stitch.
You can also see the final version of the two leaves at the bottom, which are just above the blue ones. I’m not quite sure what stitches I used in the end, because I was beginning to create odd little mash-ups of my own!
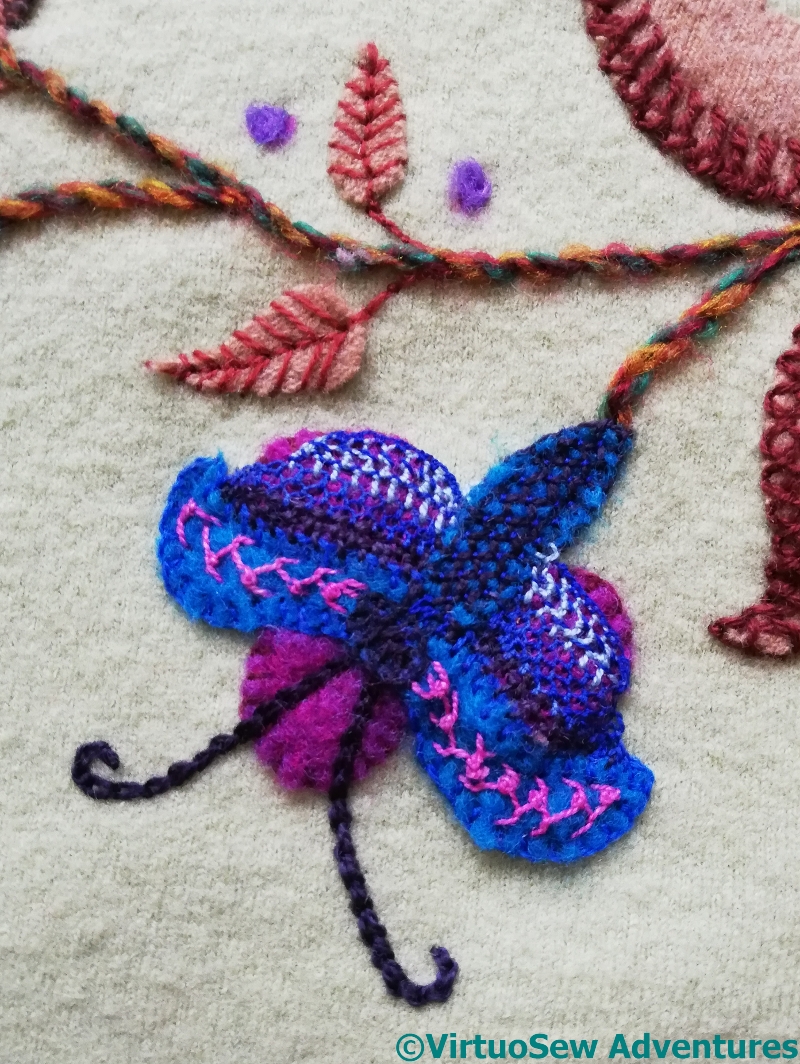
Butterfly
We’ve assumed that the odd element on Grandmama’s embroidery is a butterfly perching on a flower, so that’s what I’ve made it into here, tweaking and altering the pattern as I worked.
The upper wings, in felt, are ornamented with one of the knotted feather stitch variations – I think, Mountmellick Stitch – but then, I simply started to play with needlelace stitches to create more interesting and varied effects.
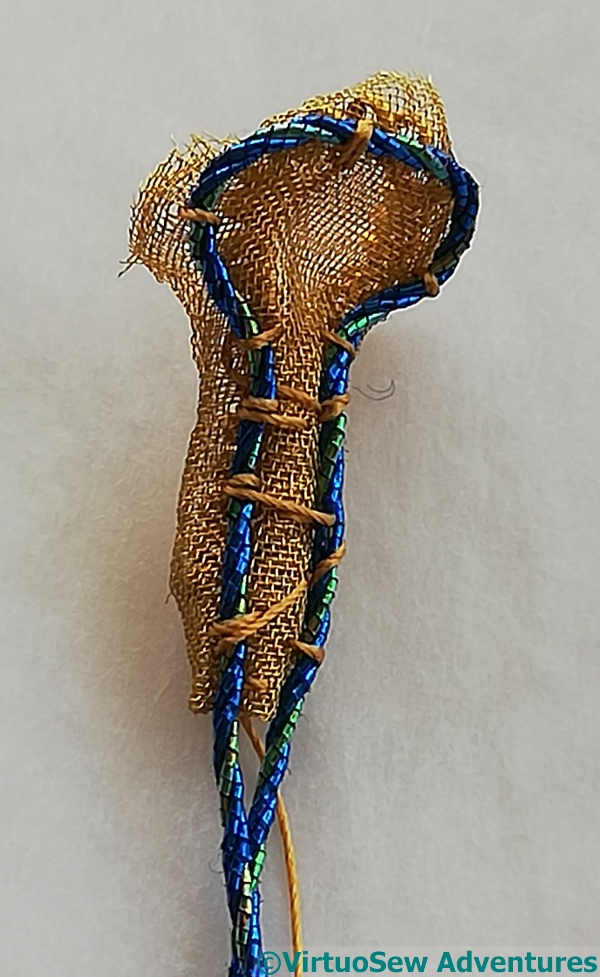
Having decided that all those delicious manipulations of brass mesh weren’t going to help in this case, I cut out the shape of the cobra’s hood from the brass mesh, (not getting too close, in case I cut the thread attaching it!).
At this point I realised it wasn’t quite strong enough, and attached the bent piece of pearl purl from the first attempt to the back in order to provide more support.
Bending back the brass mesh helped to conceal the supporting pearl purl – although whether anyone will be able to notice it is a moot point!
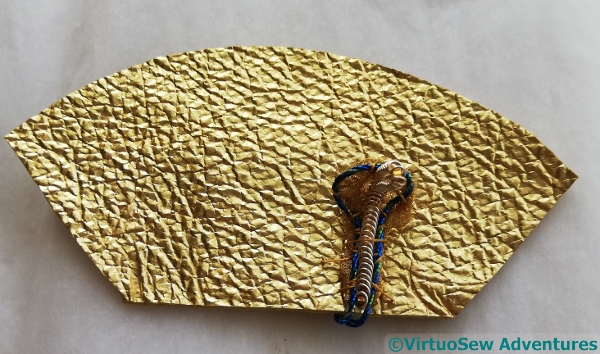
Cobra In Place
The final stage of the cobra was to attach the same piece of silver spiral with gold band to take the place of the snake himself, in front of the hood and to a new piece of gold kid. This time I looked again at some pictures of cobras, and made sure the hood was set back a little from where the mouth would be.
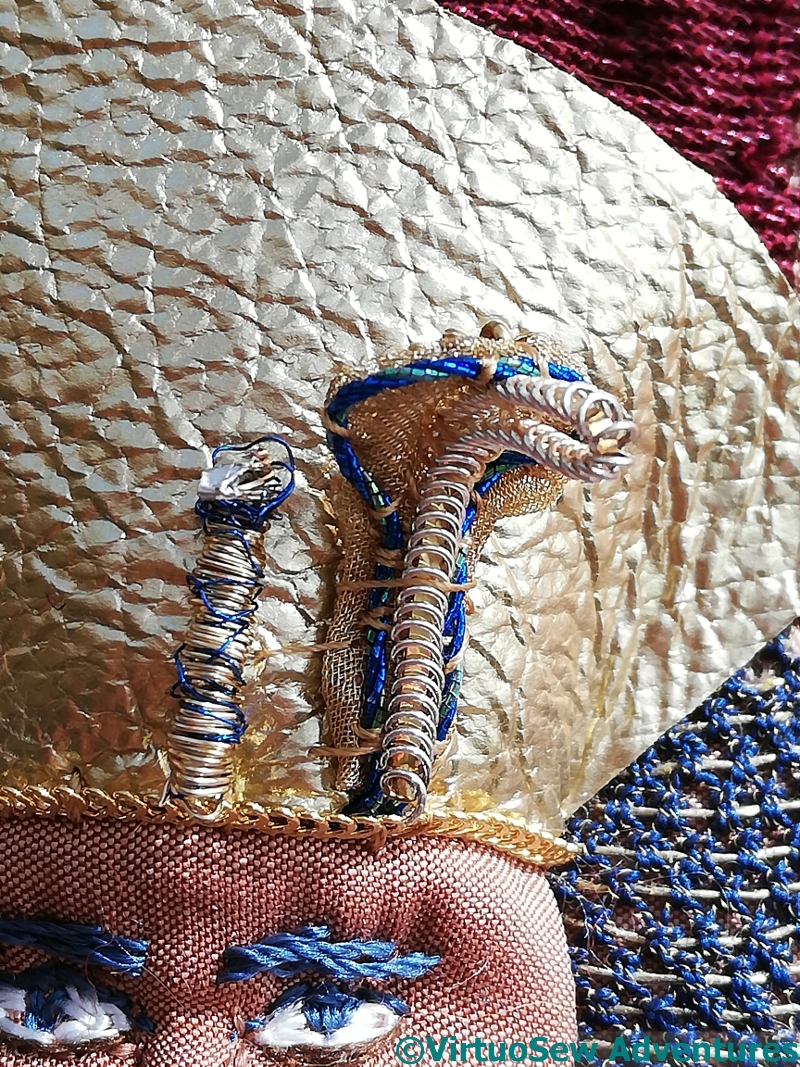
Cobra and vulture heads in place
I used the same “vulture’s head” as last time, but helped it to stand out slightly by winding some blue wire from a tiny bit of blue purl around the large gold rope I used for the vulture’s neck. You can see how small it is, but it’s surprising how much difference it makes to the final effect!
Once I’d attached the gold kid, I could cover the bottom edge with gold spiral, and then trim the upper edge to create the shape I wanted. This is the stage you see here. However, I then decided that the upper edge needed a trim, so at some point I must tie myself in knots to attach some sort of trimming to a curved shape stretched over a padded base.
Having settled on a smaller circle, but still worried about the stability of the fabric, I paused for thought.
I’ve used tear-out fabric stabiliser underneath the fabric, and placed a circle of it over the previous overcast stitch ring so as to leave trimming out what isn’t wanted until the last moment. It’s now enclosed between two layers of stabiliser, so I shouldn’t catch my needle in it.
And this is definitely a case for using a hoop. Most of my Amarna pieces have been worked in slate frames or bar frames, and the Jacobean coat is being worked in the hand, but a table-sized piece of fabric of which a small element is the focus requires a more limited approach!
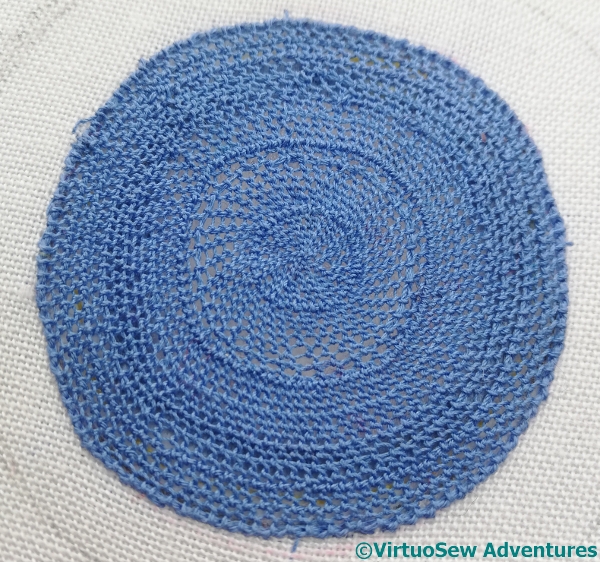
Needlelace completed
I decided in the end to use simple cloth stitch for the needle lace, but of course, choosing to work it in a circle rather complicated matters! I had to use several lengths of thread, so it became a matter of concern to make sure that firstly, there was no chance of it coming undone, and secondly, weaving in the ends made sense!
It was also important to bear in mind that while classical, straight cloth stitch has a free “return” stitch, I couldn’t expect to keep control of a “return loop” in my circular variant. So instead of that, I whipped the base of the stitches to create the heavier line.
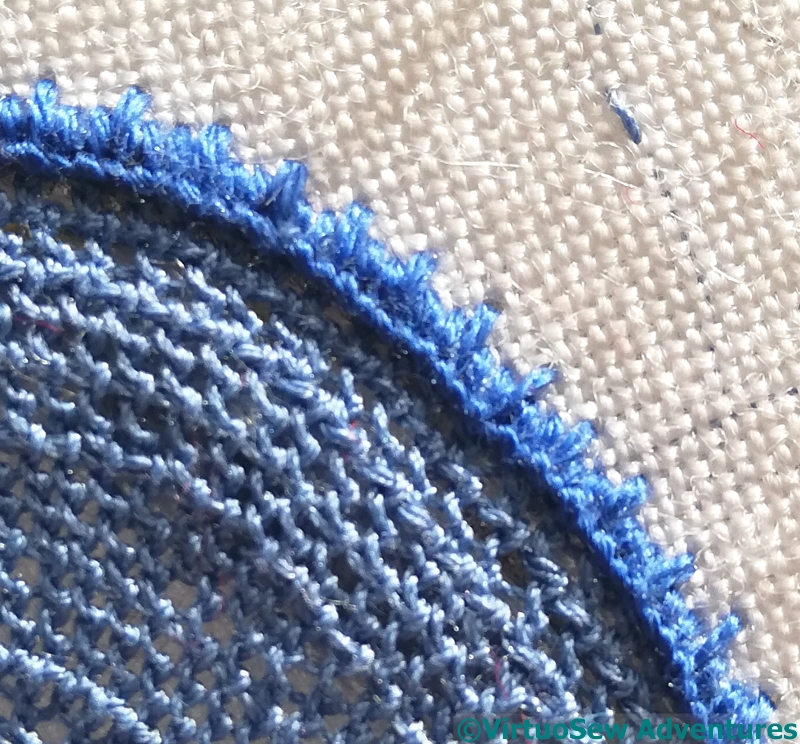
Patterned Buttonhole Stitch
Once the needlelace was finished, I had to consider the edging. The whole aim of this exercise has been to cover the hole in the tablecloth in a manner that looks considered and deliberate – not just a mend, but a thoughtful mend. So the edging had to be thought about too.
In the end I chose to work a pattern in the buttonhole stitch – the uprights of the buttonhole stitch covering the split stitch and the edge of the needlelace alternate one long with two short. I also considered enlivening the needlelace with some daisies in white, reversing the blue on white of the main decoration, but decided that that was going a bit too far!