Finishing Akhenaten this year has left me rather wiped out. It’s not helped by the fact that he needs to be got off the frame and mounted somehow and that is proving Not Entirely Trivial, as The Australian would say, so I’ve been getting a 1000-watt glare every time I enter the room.
So I thought I would tackle something smaller and friendlier over the holidays, something that would help me gather my thoughts, and give me a change of scale and emphasis. Tanya’s gorgeous laid and couched work hounds seemed just the thing. I lost my heart to them months ago, when Tanya first showed them, but Akhenaten was such a dog-in-the-manger that I didn’t buy a kit.
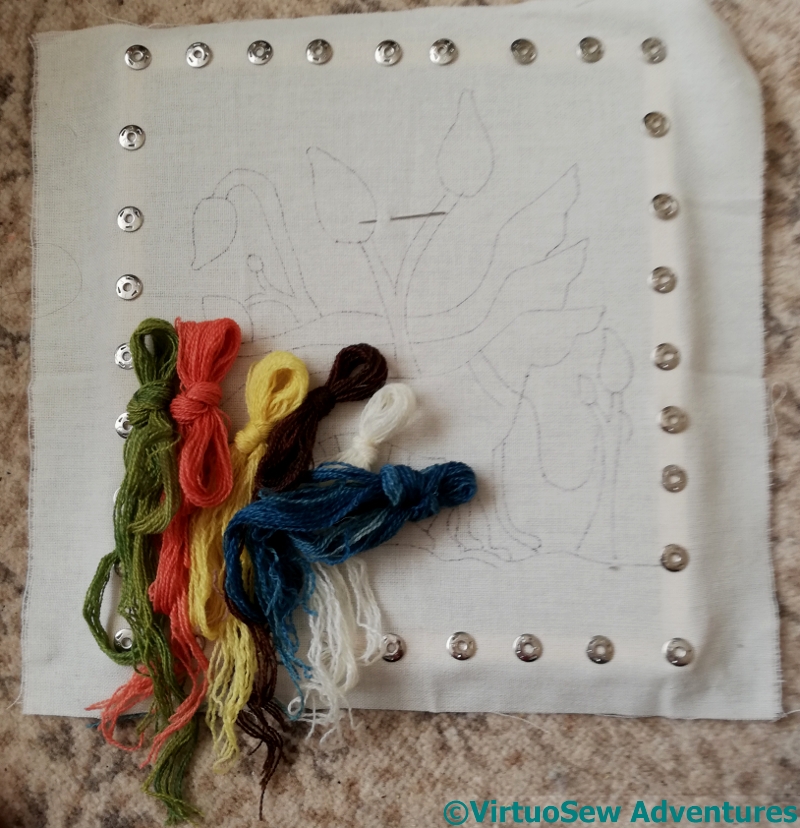
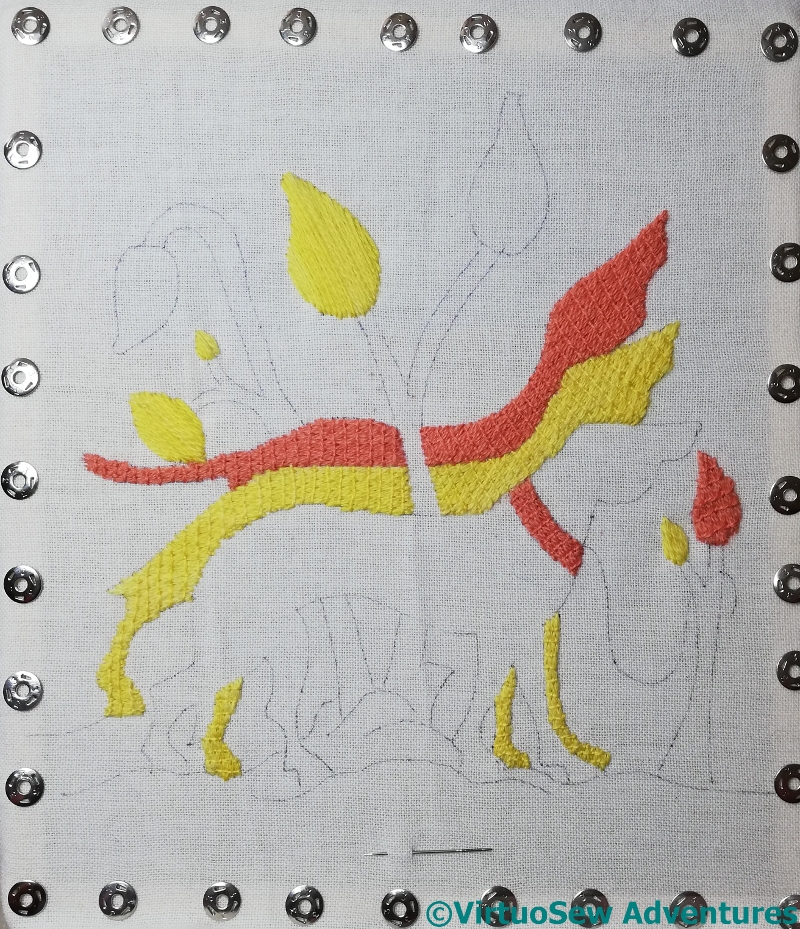
Starting The Hounds
However, by the time I went to Harrogate, he was finished, so I decided he didn’t have a vote any more, and indulged myself. After metal threads and silk, wool is a lovely change, and the medieval habit of using the direction for the lower layer that makes for the longest stitch on the surface means that each section is slightly different, and stops me worrying about what I’m trying to represent. Which is also a lovely change.
I’ve decided that they are called Caspar, Melchior, and Balthazar, in honour of the season in which I am stitching them.
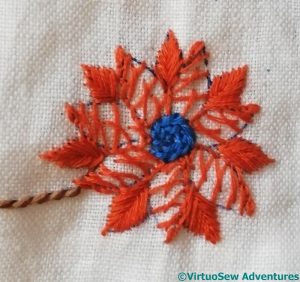
I like Basque Stitch – it has a family resemblance to blanket stitch, and recalls chain stitch as well, so it’s a good stitch to pull together a piece that includes both.
The inner petals are closed herringbone stitch. I’m determined to nail this stitch one of these days, but this is not that day. It was a constant battle, and it looks a bit raggy.
Although not raggy enough for me to unpick it!
Blanket Variation
I unpicked and tried several variations for this one, and I’m still not sure of it.
The centre is a spiral of stem stitch, and the blue is the one from the tulip in the previous post.
The outer petals are in fishbone stitch, and the inner petals are in another blanket stitch variation. I think I may have got this one from one of Edith John’s books, and I’m pretty sure it will look much better once the transfer has been washed off. If not, I may have to re-stitch yet again!
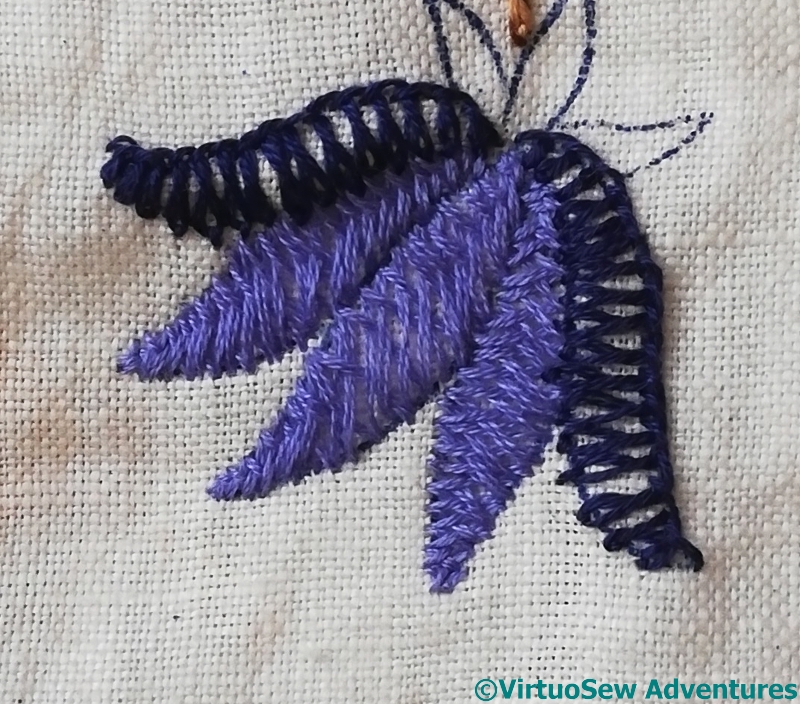
Vandyke Stitch
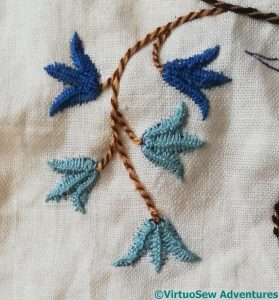
I think I suggested these might be harebells, or something similar. They are worked in Vandyke stitch, and although they do create a strong effect, it may be a bit busy.
Whatever else it is, this will be a wildly colourful tablecloth!
It’s that time of year again, and usually I try to do my Harrogate Report over the weekend when I’ve come back. This time, however, I went straight from Harrogate to help with the MathsJam Gathering, and didn’t really get home until Wednesday.
The two pieces of silk are to give me choices for the Faience necklace, the Sheepjes Whirl and pattern are for the next trip to see The Australian’s family (I don’t know when it will be, but I’m ready!), and the figured organdy matching silk and silk thread are honest stash: I fell for the organdy and got the others on spec. I’ll think of something to do with them eventually. Yes, really. I’m determined to!
I met up with Elizabeth of Sew In Love Stitch Art (always great to have a coffee together, and a wander through the halls), and met in person for the first time Georgina and her lovely goldwork animals, and Tanya and her modern medieval embroidery, inspired by the Luttrell Psalter. I bought her kit of Hounds to help me reboot myself over the holidays. I fell in love with those hounds months ago, but Akhenaten wouldn’t let me buy them. He doesn’t get a vote now I’ve finished him!
Two Workshops
I also got Katrina Witten’s new book – signed by the author, no less. I’ve always loved what Katrina does, and there are ideas percolating in the back of my mind.
There are two reasons for going to the Show over two days, firstly because it makes the buying a little calmer and more methodical, and secondly because it means there are opportunities to attend the workshops without everything else becoming crowded and stressed.
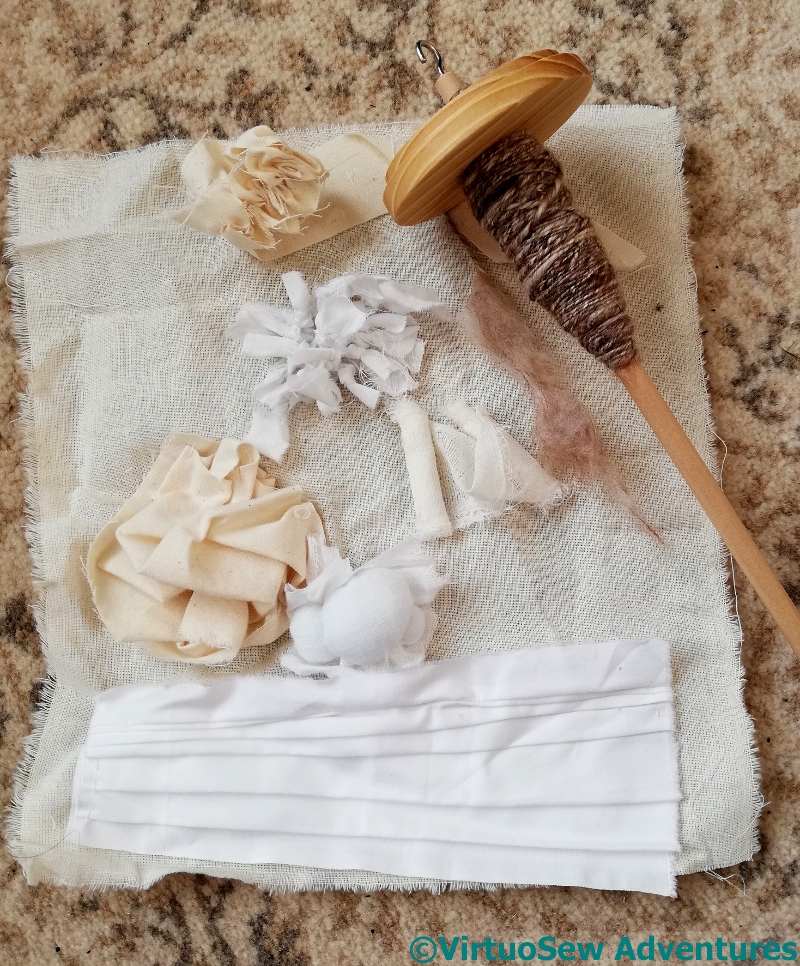
This time, I investigated “Contemporary Fabric Manipulation” (I’ve no idea what, if anything, I will do with that) and “Drop Spinning”, using an absolutely gorgeous blend of baby alpaca, baby camel, and silk. I don’t know what I will do with it, but it’s lovely!
Acquired At MathsJam
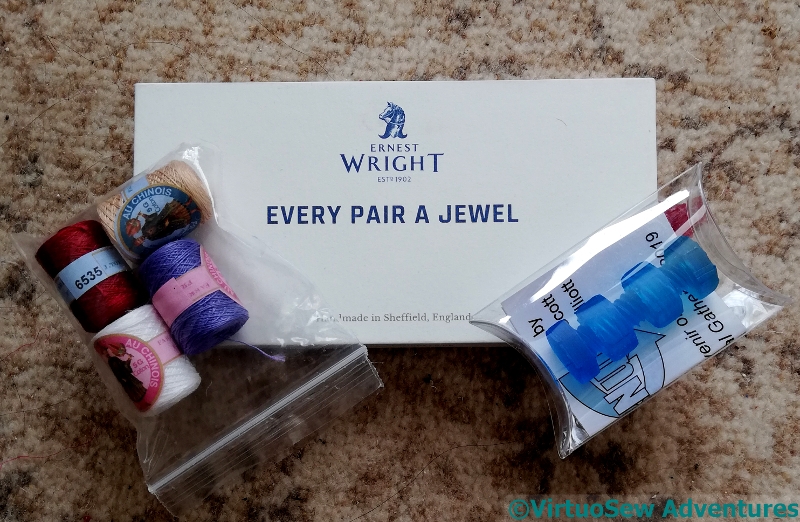
Then when I got to the MathsJam, an old friend popped up with a small box, which turned out to contain a gorgeous pair of Ernest Wright “Stork” scissors (pretty sure he doesn’t read the blog, but just in case – thank you!), Sue of TortoiseLoft appeared with some rather nice Sajou threads I’ve never seen before (thank you!), and Scott Elliot gave all of the attendees one of his very newest puzzles (thank you, too).
So, what with one thing and another, I have many new things to play with!
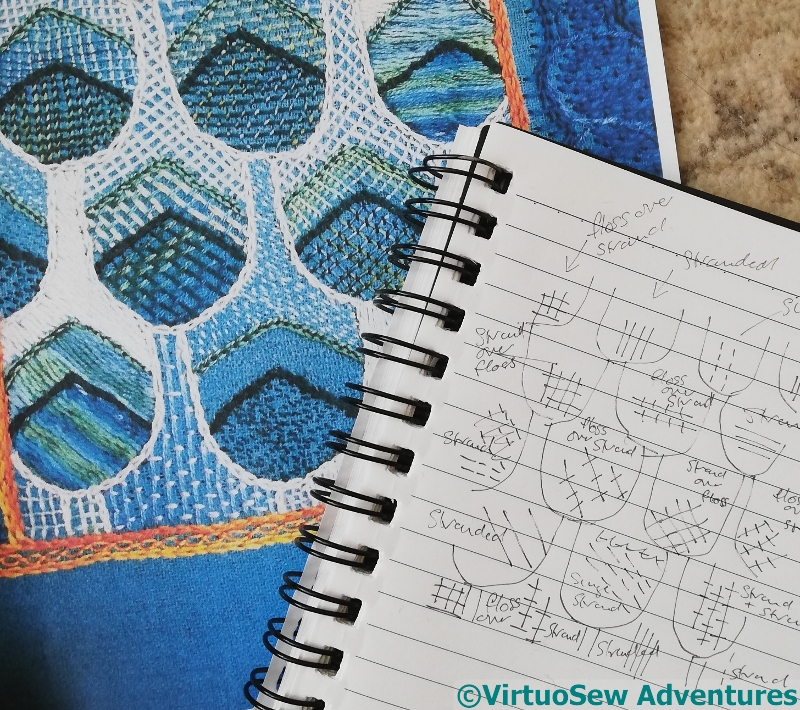
Having completed one green panel, I decided that I wanted the other green panel to be not quite the same, and I couldn’t work out how to approach keeping the family resemblance and maintaining some sense of balance.
So I asked The Australian, who you may remember is also a mathematician. He looked at me in some perplexity for a while. In fact, as I explained the layers of patterns I’d created, he eyed me more than a little askance, and then went very quiet for a while (you’d think he’d be used to it by now…).
Finally, he suggested I think about duality. Now, this isn’t a philosphical thing – it’s quite tightly defined, in the geometrical sense, at least – see this Wikipedia page – so after some discussion over lunch, we decided that if I were to regard the elements of the two green panels as duals of one another, it would give me a systematic way to approach the second one, rather than flailing around randomly.
Now I had to decide what was what’s dual….
For example, in the first panel, I chose between floss silk or stranded silk, and in the case of stranded, between solid colour and variegated; then in terms of stitch orientation (going clockwise), between vertical, diagonal, horizontal and the other diagonal. In this context, I’m not sticking to the idea of a binary choice, so for example with stitch orientation I will go to the next 45degree angle around the clock face, while with the thread, I’m going to pick some ordering of variegated stranded, plain stranded and variegated floss and then move along to the next in that sequence.
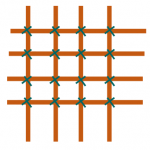
Jacobean Trellis
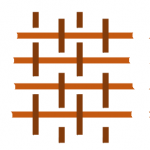
In terms of the stitch choice, essentially there are four: Jacobean trellis, darning stitch (rows of irregular running stitch, in effect), Bokhara couching, and Woven Stitch.
Woven Stitch
I can choose to make Bokhara Couching and darning stitch each other’s duals – that will move the heaviest stitching to different places in the panel.
The other two will be each other’s duals, with the added complication that they have each involved two different threads.
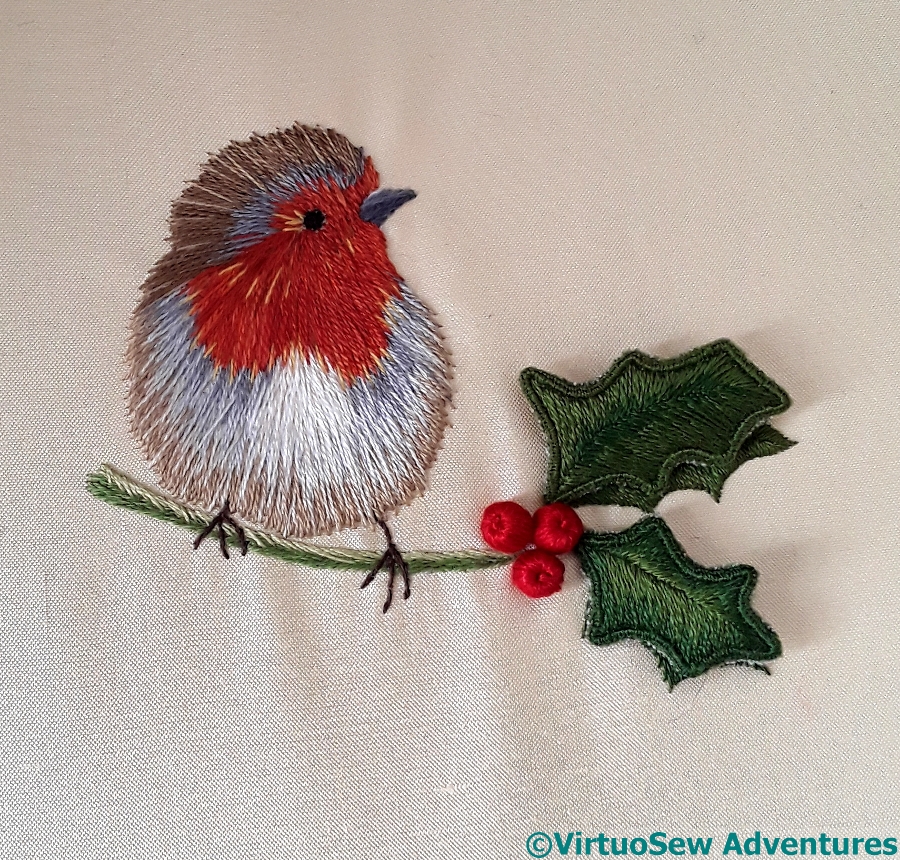
You may vaguely recall the little robin with stumpwork holly that I worked a couple of years ago. I mounted him on a circle of card and then didn’t make any more progress..
Starting Backing Panel
But I have now!
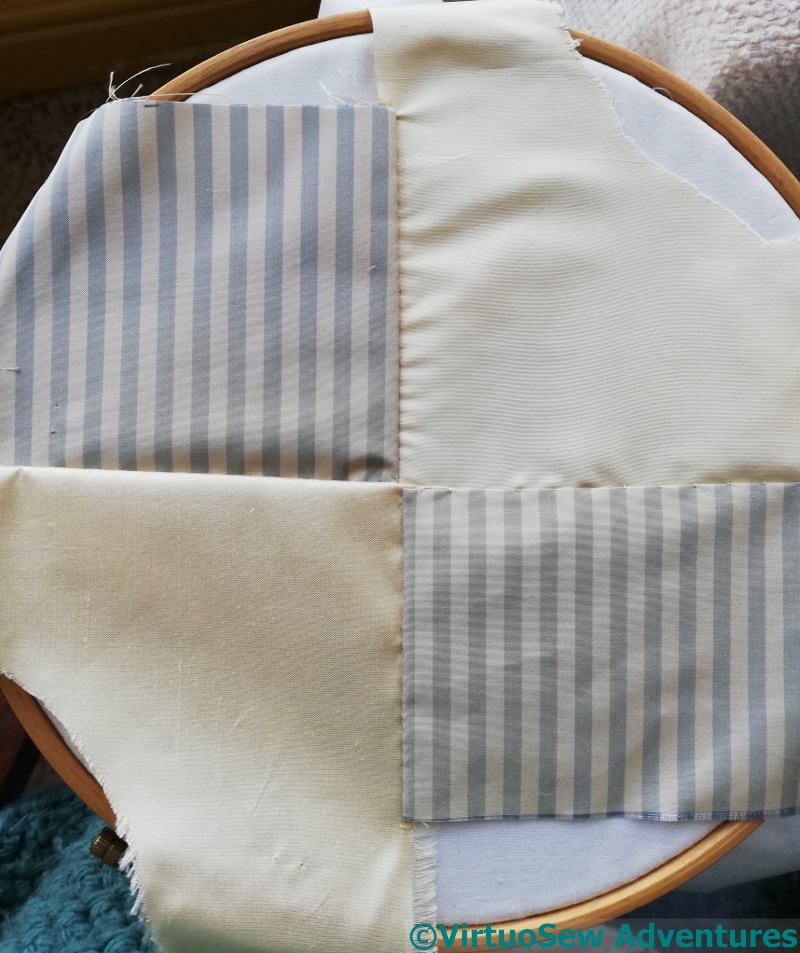
I’m using leftover fragments of silk from various Thistle Threads courses to do a rather tame crazy patchwork circle to cover the padding for the back, and then he can hang or be propped in a corner somewhere, looking cheery. I’ve settled on a simple quadrant arrangement, so I have four seams to deal with.
Seam Treatment 1
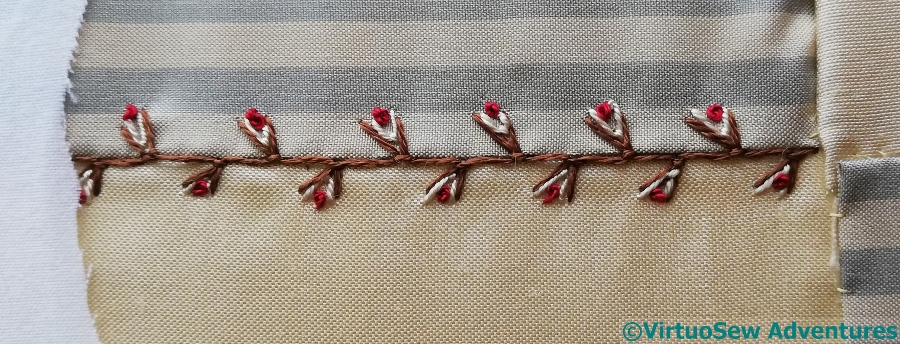
I said, when I found “Floral Feather Stitch” that I’d be using it again, and here it is, tweaked and embellished with a Fly stitch and a French Knot to emphasize the “floral” element. I really like this stitch – a simple, but extremely effective variation. Or maybe a stitcher’s “mash-up”!
Seam Treatment 2
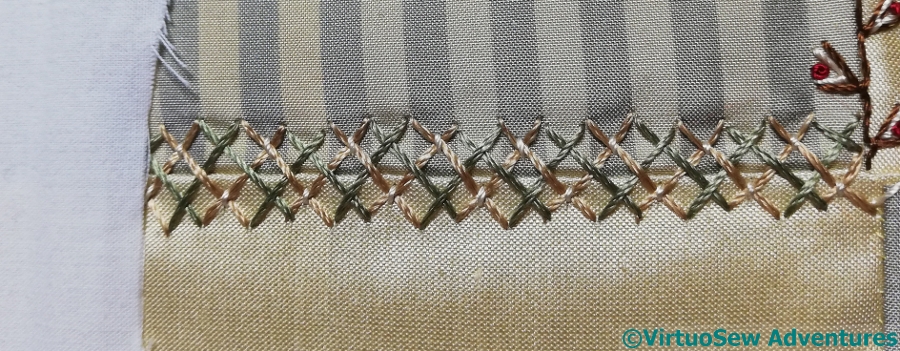
The second uses Interlaced Herringbone Stitch, with the second pass interwoven with the first and then tied down with short straight stitches. This one is maybe a little monolithic, but the first one is so simple, I didn’t want to unbalance the appearance with anything broader.
Seam Treatment 3
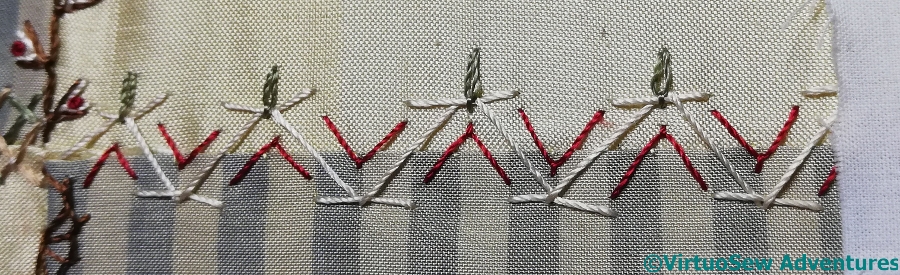
The third is Chevron Stitch, embellished with alternating Fly Stitches and Detached Chain Stitches on the “top” edge. This one went a little ragged, but I still think it works.
Seam Treatment 4
The final one has alternating Half Buttonhole Wheels with Straight Stitches filling the gaps. Again, this could have been expanded and extended, but I thought there was quite enough for the purpose!
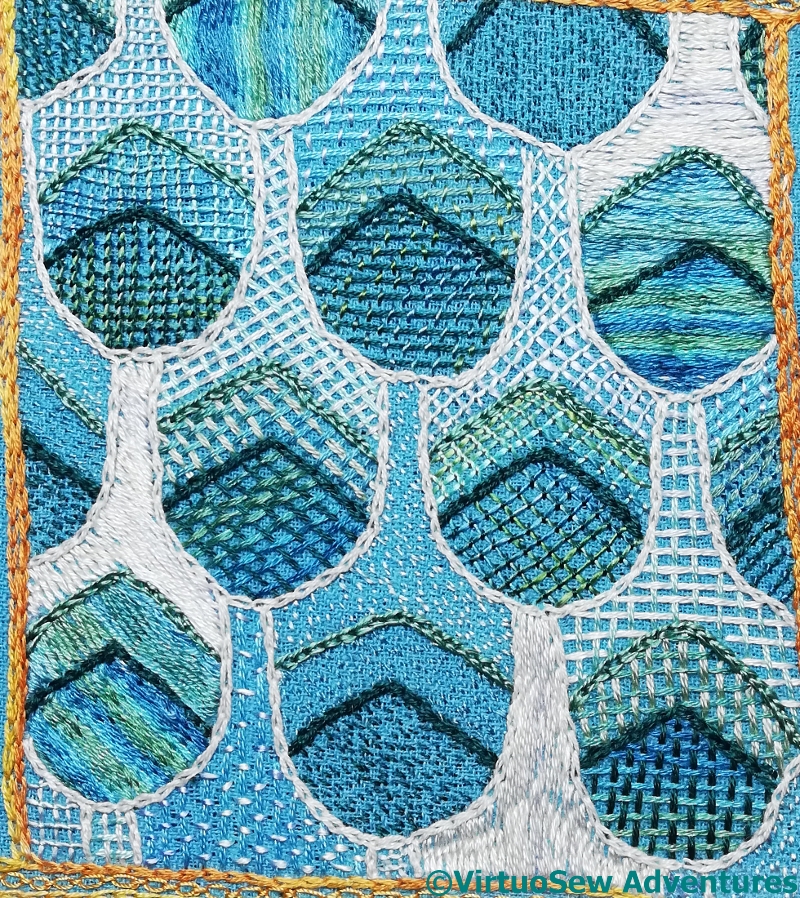
There are two green panels in the design of the Shawl, which is based on the polychrome panel around Nefertiti’s famous (and unique-to-her) headdress, and they’ve been giving me no end of trouble.
If I’m completely honest, in fact, this whole piece has been giving me no end of trouble. The fabric is particularly mobile (although not quite as bad as that other pashmina I did!), and it’s been hard to find stitches that work comfortably. Originally I was working it in the hand, and that made it even harder.
Close Up Of Progression
In the end I outlined the design sections with chain stitch, and then picked a few stitches and threads. I tried to get some sense of variation in stitch density as well as colour. So there are complete coverage sections (using Bokhara Couching) and almost-no-coverage sections (using darning stitches) and almost everything in between (everything else)!
I’ve also changed and counterchanged between variegated and solid colours, and between floss silk and stranded silk. This is one of the reasons I ended up needing The Australian’s mathematical eye to help me keep track of the pattern I was building up in my haphazard way!
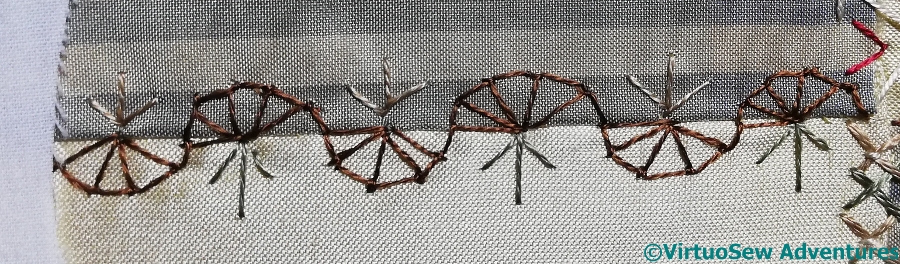
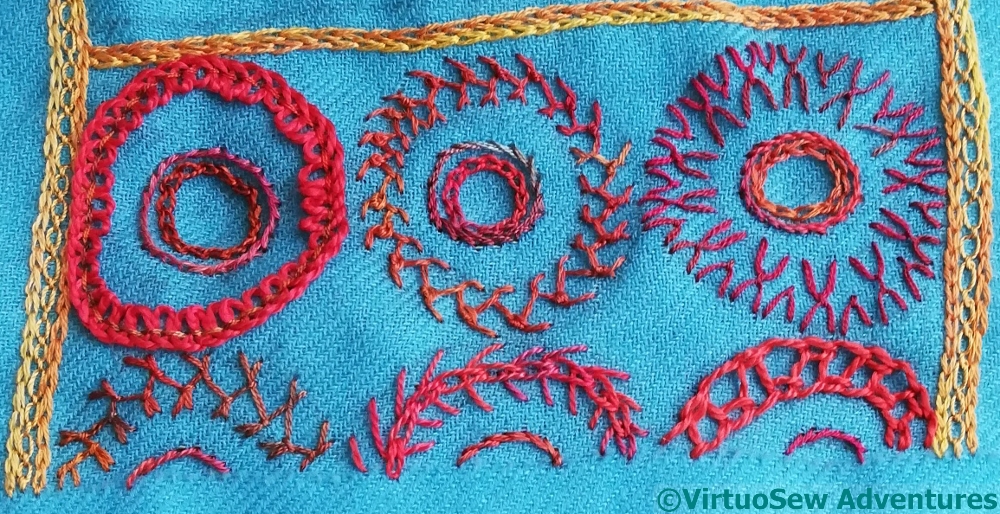
There are partial red panels at the edges of the Shawl, and as I want the colours to run the whole way across, clearly I have to stitch them. While I was mulling over the blue panels and the green ones, I carried on with those partial panels.
Stitch placement diagram 1
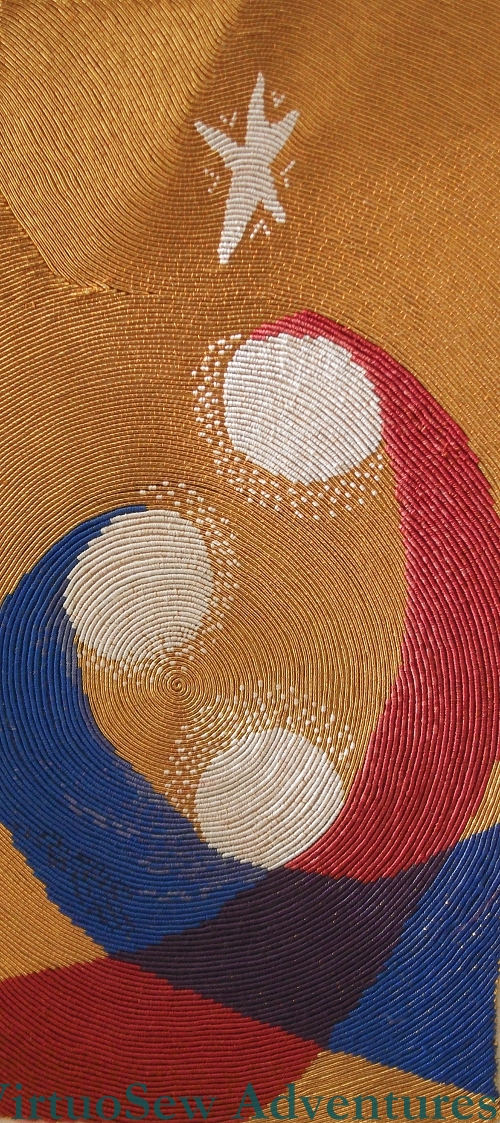
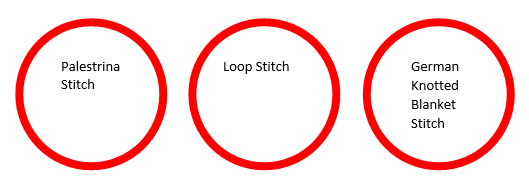
The central circles in all cases are in chain stitch and stem stitch, but I wanted a variety of effects in the main circles. That wasn’t as easy to achieve as you might think, for all my extensive repertoire of stitches! I found “German Knotted Blanket Stitch” in Barbara Snook’s “Embroidery Stitches”, and Palestrina and Loop Stitch are old friends, but by this point I’d managed to rack my brain into remembering most of those..
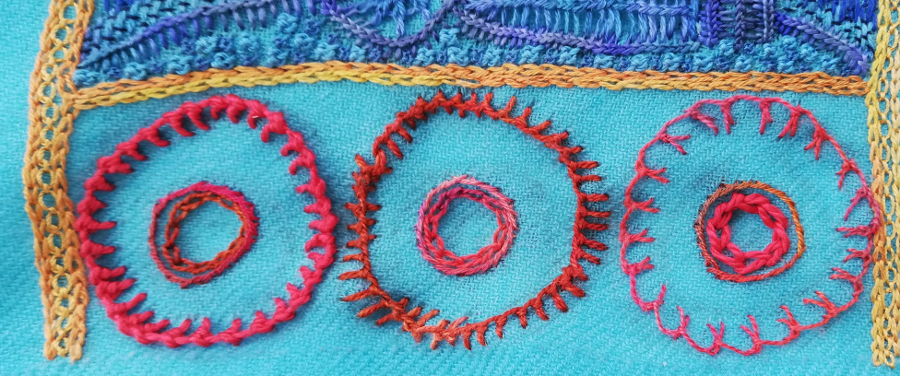
Edge Panel in red
I was beginning to be at my wits end for stitches, and spent some time rummaging in Edith John’s “Creative Stitches” and “New Stitches for Embroidery”. Many of them would be easier in a slightly stiffer thread at a slightly larger scale, so I find myself wondering what Miss John devised her stitches for.
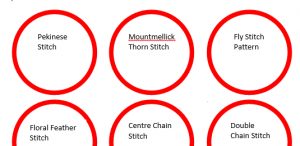
Graphic of stitch choice
The full circles here are in stitches which are old friends, but the partial circles are some of hers. Floral Feather is a feather stitch with an upside down blanket stitch beside it, and I quite fell in love with it. I’ll be looking for another opportunity to use that one!.
Centre Chain stitch alternates single chain with fly stitch, starting each chain stitch within the previous one. That might be a way to vary textures with Wheatear Stitch, while still keeping the overall pattern. And Double Chain Stitch places a chain stitch and an open chain stitch side by side, alternating the ordering to create a checked effect.
Well, that was a surprise. I’m only vaguely aware of competitions and awards at the best of times, and with a good many things in my offline life distracting me and a good deal of embroidery swirling around in my head, I wasn’t in the least prepared for an email asking whether I would accept a nomination in the LoveCrafts Blogger Awards “Stylish Stitching” category. And having accepted the nomination – just you wait until you see the company I’m keeping! Wow! *cue music: “If they could see me now, that little gang of mine….”*
I suppose I should say “Vote for me!“, and I do, but really, go look at everyone’s blogs, have a rummage, and see more wonderful, delightful ways of using needle and thread to create magic than you ever imagined!
On to #WhyIMake…
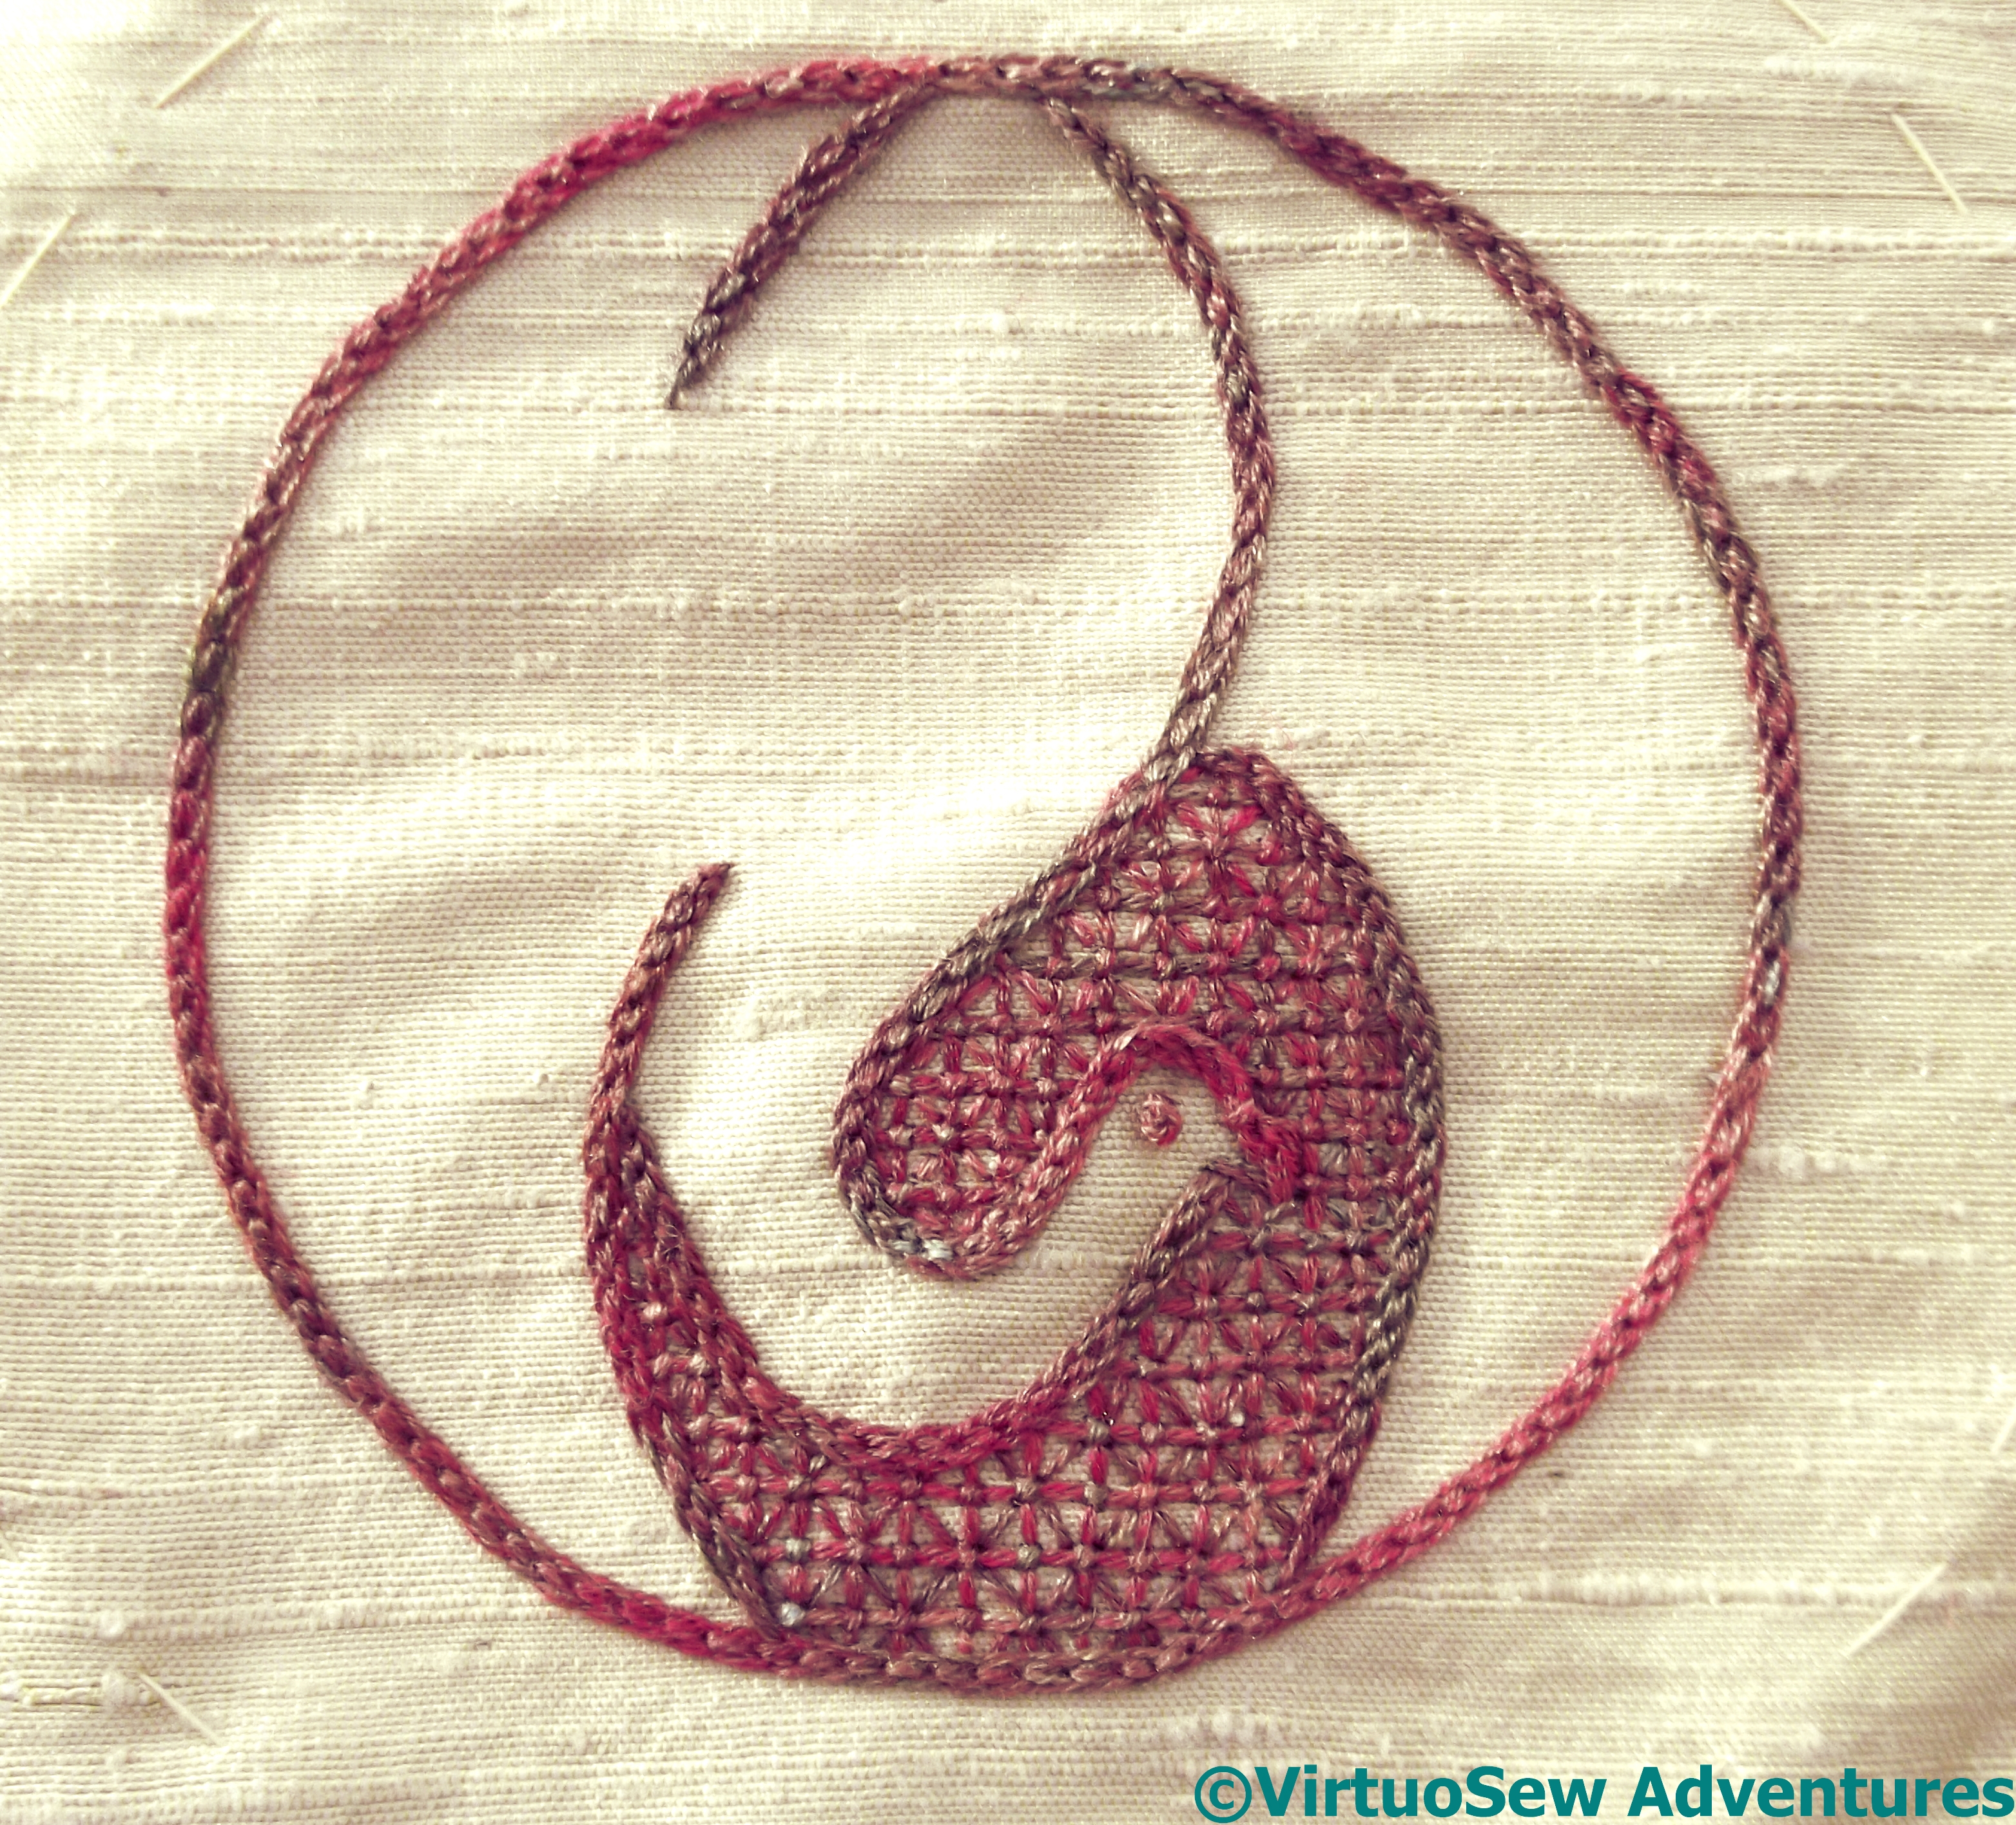
Japanese Crane Design
Why do I make? To tell stories in stitch. Really, I think it is as simple as that.
Sometimes the story is purely one of delight in fabric or thread or stitch.
The Japanese Crane here was worked purely because I love Hungarian Braided Chain stitch, which I’d just discovered. It’s variation on broad chain stitch, and the intricacies are particularly well suited to showing off the colours in the variegated thread.
Leaving The Tyne 1915
Sometimes the stories are much more complicated and emotional.
“Leaving The Tyne, 1915” relates to my Swedish Great Grandfather, and his service as a merchant seaman during the First World War, but elements of the design and stitching, and even the choice of that story to tell, are all part of my own response to the world around me now, the demonising of “migrants” or “others”, who yet contribute very greatly to our life and culture. I don’t think I’m a political person, but in this one, however subtly, I’ve nailed my colours to the mast.
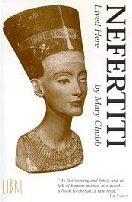
Cover for the book “Nefertiti Lived Here”, by Mary Chubb
And as for “Dreams of Amarna” project that has been taking my mind for the last ten years, nearly – that’s a response initially to a book I read, called “Nefertiti Lived Here”.
It’s an enchanting book, about a dig in Amarna in the nineteen-twenties, seen through the eyes of the secretary of the dig, who was also a student of sculpture. Her sympathetic imagination peoples the site with ancient Egyptians, and her interest in everyone she met, the local labourers, the Gufti excavators, Museum officials and her colleagues brings life to everything she encounters. My embroideries seek to convey the delight she found there, and that I found in her book.
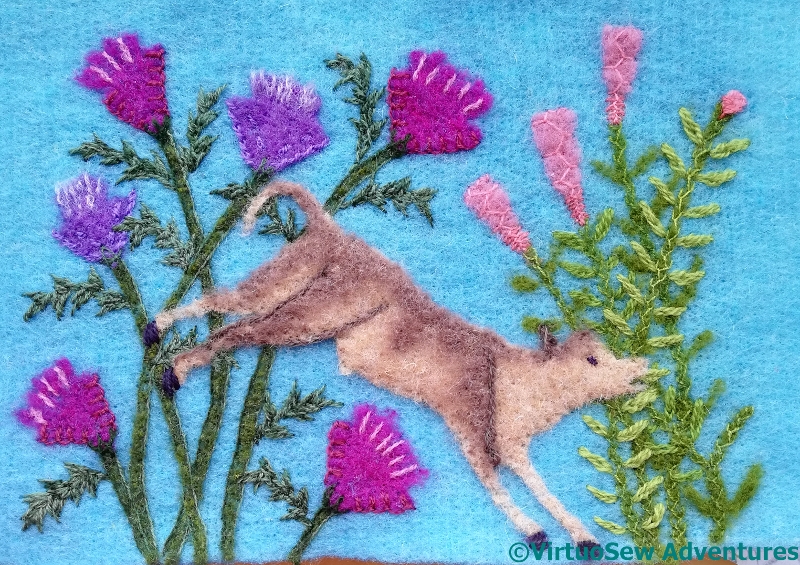
I ran the embellisher over the whole thing, to knock back the colours and the stitches a little, and tugged at the fabric to even it out. Then it was on to the calf, cut out separately and given darker patches on his back and legs. I’ve attached him using single-needle needlefelting, by hand. His ear is sharpened with a twisted chain stitch, his eye is a tiny chain stitch and his hooves are straight stitches.
Finished Frolic
I intend to cut an irregular shape and attach it to a padded wool felt background stretched over a frame, as I did with the Two Princesses. I mustn’t forget to sign it at that point!