
Transferring Designs
Any book on embroidery will usually tell you about methods for transferring designs to the fabric. In fact, I think some of them are guilty of plagiarism – although from whom, in the best traditions of the circular firing squad, it would be hard to know.
Last week there was a discussion on Twitter relating to the Great Lady’s Magazine Stitch Off and particularly concerned with transferring the design once you’d chosen it, and I suddenly realised that not one of my shelf (ahem, shelves!) of embroidery books actually suggested which method might be most appropriate when, or what hazards or difficulties they present.
So I thought I would pull together what I’ve picked up and found out over the years…
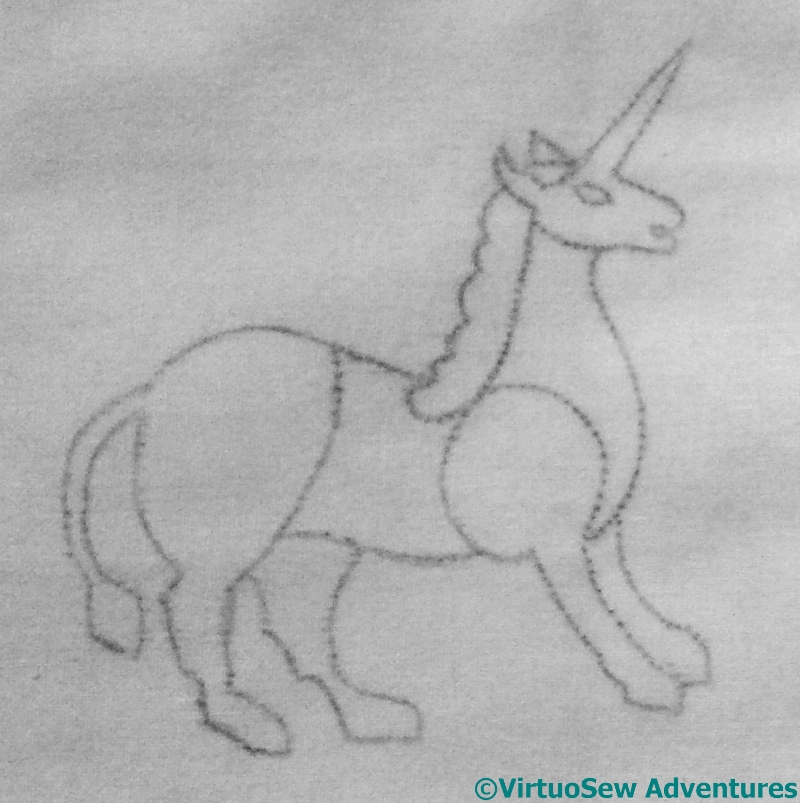
The Unicorn
First, Prick and Pounce. This is one of the oldest methods – almost certainly the only one available to the Lady’s Magazine subscribers. I’ve come to it relatively recently, but I use it a lot. It’s not good when my tennis elbow flares up, because pricking holes in the pattern is a slow and repetitive business, perfectly designed to produce a repetitive strain injury. It’s also not good – as I discovered with the pashmina for the Stitch Off – with a mobile fabric which is a little widely sett for the thickness of the constituent yarns. I had to reinstate the lines with a dressmaker’s chalk, which wasn’t nearly as precise as I would have liked!
Glittering Gentleman’s Nightcap – Month One
Next, the Light Box method. Actually, not having a light box, it’s a “tape it to the window and do your best” method. I did this with the Gentleman’s Glittering Nightcap, and it worked fairly well, but it’s limited to the size of your window or lightbox, whereas Prick and Pounce is limited by the size of your table! I also become nervous when using indelible ink such as the (recommended and provided) Pigma pen. I’m always terrified of inadvertently drawing a line somewhere I can’t cover it.
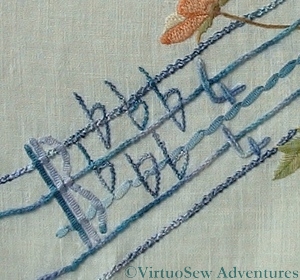
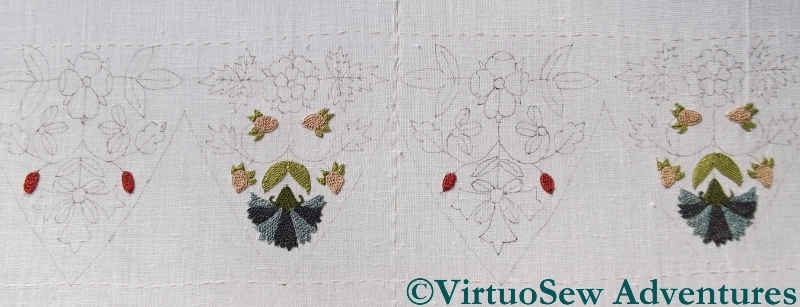
Five Flats on the Piano Shawl
Which leads me on to a caution. I’ve used quilter’s “disappearing” felt pens instead in the past, and had one of the scariest embroidery experiences I’ve ever had. First of all, the lines didn’t last quite long enough for a hand stitcher, and then…
When I washed the piece, the lines reappeared, and what’s more, they kept coming back. I can’t remember what it took to be rid of them, but certainly some prolonged soaking in detergent was involved.
Hair-raising doesn’t begin to describe it, and as mine is nearly a yard long, that’s no joke!
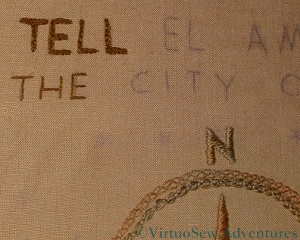
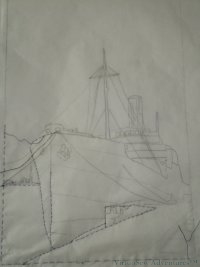
A Corner Of The Map Of Amarna
I used a Transfer Pencil for the Map of Amarna. This works nicely – provided you remember to reverse the pattern if it needs it! – if the fabric is a natural fibre. However, it can be hard to keep the transfer clean as you make it, and then there is a risk that you will transfer indelible smudges to the fabric.
I’ve also found that the lines sometimes spread as they transfer, which may or may not be a problem, depending on how detailed the design, and how much unembroidered fabric may be showing. As it always says on the packaging – test the whole process on your fabric before using it for anything important!
Transferring the Design
In the case of a really tricky fabric, such as the velvet for the Camberwell Panel, Running Stitch through tissue paper works really well. It’s rather time consuming, but then, I don’t think any method is especially swift.
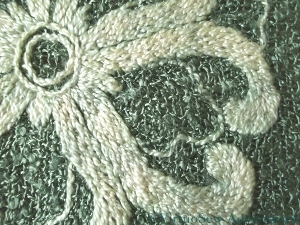
Scarf Motif – CloseUp
There are soluble fabrics which I know many stitchers recommend, but I’ve only worked one piece using it, and the design drawn on the soluble film was hard to see, so I can’t describe it as an unalloyed success.
In truth, a stable natural fabric such as linen will probably happily accept anything thing you do, and the fragile, “difficult” ones will each require a different response. The trick is to remember to pause before starting, to make sure you pick a sensible method for the fabric and the design!
I never knew embroidery was so complicated!
thanks for all the info on the different methods, I used a light box for St Michael and a pigma pen, a nightmare when I wanted to change my ideas half way through
I’ve had the same problem with the image re-appearing time after time and/or disappearing too quickly. I don’t remember the brand, but it certainly makes for a traumatic experience!
A useful round up, Rachel. Thank you.
My go-to method is pencil (on a lightbox if I need it), or a pigment pen if pencil isn’t suitable. (I like the Mitsubishi ‘Uni Pin’ black pens, which I know don’t bleed – I use them for ink and wash drawing, too.) I’ve used a white gel pen on dark/busy material when I’ve known I can cover the lines, but it does rather gum-up the fabric and you can’t get very fine detail. On fuzzy stuffs like wool and felt, it’s helpful to iron the fabric firmly, just before transferring/tracing, so the fibres are as flat as possible.
Dressmaker’s carbon paper is good too: comes in pink, blue, yellow and white and doesn’t need a lightbox. But the sheets are quite small. Older dressmaker’s marking pens wash out well, it’s the ‘disappearing’ kind that cause so much grief. But the old ones are light blue: if you can see them on the fabric, you can probably see pencil, anyway, and get a finer line. The wax pencils used to make your own iron-on transfers leave a permanent dark blue line and it usually spreads a bit – good for bold stuff, but not so suitable for fine work. Also any pencil ‘crumbs’ on the paper pattern outside the design lines are a nightmare if they get transferred.
Traditionally, prick and pounce was finished by joining the dots with watercolour and a fine paintbrush, or with ink and a mapping pen. So it isn’t necessary to make too many holes – just enough to be able to get your drawn lines in the right place. One other useful (but destructive) method, good for big designs and awkward fabrics, is to use paper or thin card templates for the shapes and draw around them: cutting them back, or pricking to get to any essential inner details once the main outlines are down.
Some people try to transfer every little detail to the fabric, which is rarely necessary and risks leaving marks showing here and there after stitching. You need sufficient guidelines for things that have to be exact, of course, but with a few ‘clues’ marked you can stitch a lot of designs pretty-much freehand, using the pattern or a practice sample as a visual aid.
This was a very informative post — I’ll be keeping it for future reference. During my Punch Needle ‘phase’ I bought a used light box. I love it. I always use Pigma pens BUT I have to be cautious that the ink doesn’t show through (either because I didn’t stitch inside the line or was careless. Thanks for sharing all the techniques.
Oh the joys of transferring a design. I have used all of the above although with the prick and pounce I use a dressmakers tracing wheel to make my holes, then I turn the paper over, line up the holes again and trace back the other way. This makes the pouncing part a lot easier and the wheel makes all my holes at an even distance, one from the other. This is the only thing that I use this old tool for these days. Back in the distant past I did use it with dressmakers carbon paper to trace my dress patterns onto the fabric and even when I was drafting patterns. But that was a long time ago.
Great post Rachel, thank you! It’s really interesting reading the responses to this.
I trace – because I’m really lazy, and I treated myself to a good light box a few years ago, which is now really helpful in my class. I’ve used Pigma and Zig Millenium pens, but my favourite are Faber Castell Pitt Artist Pens with archival ink in sepia or sanguine, never black. I always use brown tones as they are much softer – if you do make a mistake it’s much easier to deal with. They respond really well to fabric and there is a variety of nib widths, depending on the project.
For dark fabrics I use a Sakura original Gelly Roll 08 ink pen in white. This is the only white pen I’ve found which gives a clean, clear line, will stand up to being wet – and won’t come off while you are stitching. My embroidery class ladies, (although many do initially panic at the thought of tracing and making a mistake) absolutely love these pens and find them extremely easy to use. I wish I was on commission. We’ve used them to trace onto different fabrics and for several techniques. We used tissue/tacking for a goldwork piece on crushed velvet – but that’s the only time they’ve been defeated!
A lovely post. My experience with quilter’s pen was also not so good.
I have seen the ”vanishing with water pens” cause horrendous stains on the work of other people. I never use them….
I’ve used a variety of these methods. When using my lightbox for my Hungarian duvet the fabric got caught up around the lightbulb and started to burn. It was only my sense of smell that stopped the whole thing from going up in flames. Quilter’s pencil didn’t show up on my fabrics when I used it. And finally, the Christmas tablecloth that I’m working on at the moment is pre-printed and much as I try, I can’t hide the blue outlines. I don’t suppose they will fade in washing either…
Your blog is always inspiring and very informative. Even I’m new I can learn from your post.
What a great informative post! I like that you cover different methods. Best of I like the way you remind us to pause and think before starting.
[…] wrote an entire post about transferring designs, but again, drawing was an expected and widespread skill. Many of the readers may have simply […]
Thanks! That was a good analysis, and I’ve tried those methods, too. I’m somewhat lazy and generally do what is easiest, but then I also generally work on linen or cotton, so it works out alright. I appreciated reading what you had to say on the subject.