
About Rachel
View all posts by Rachel
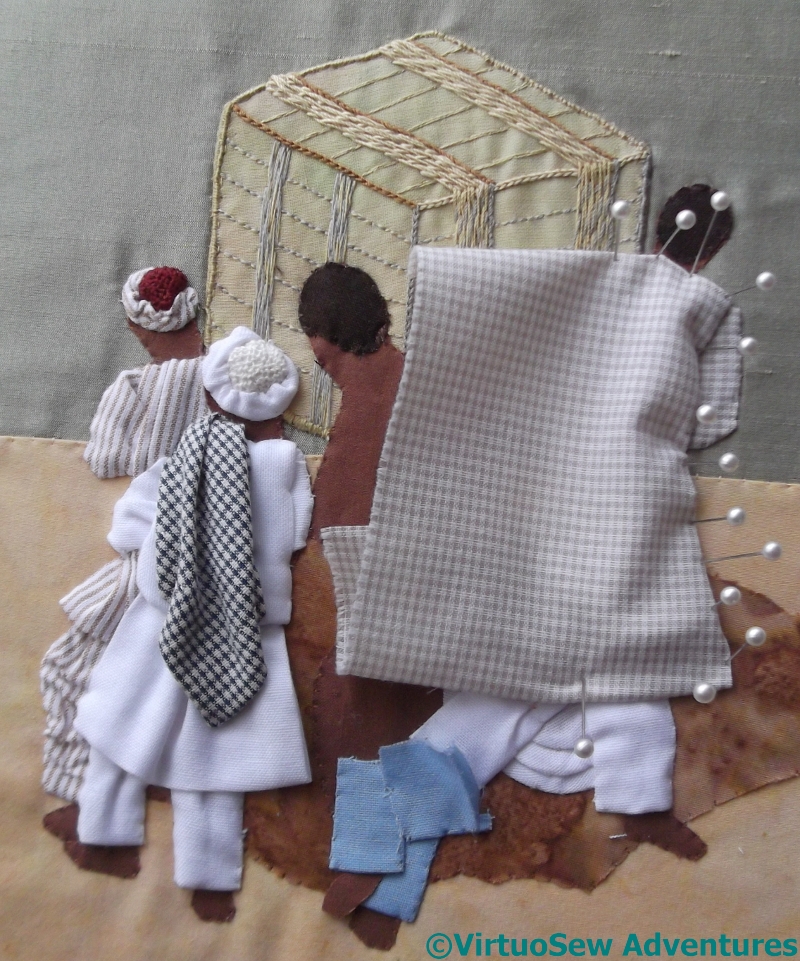
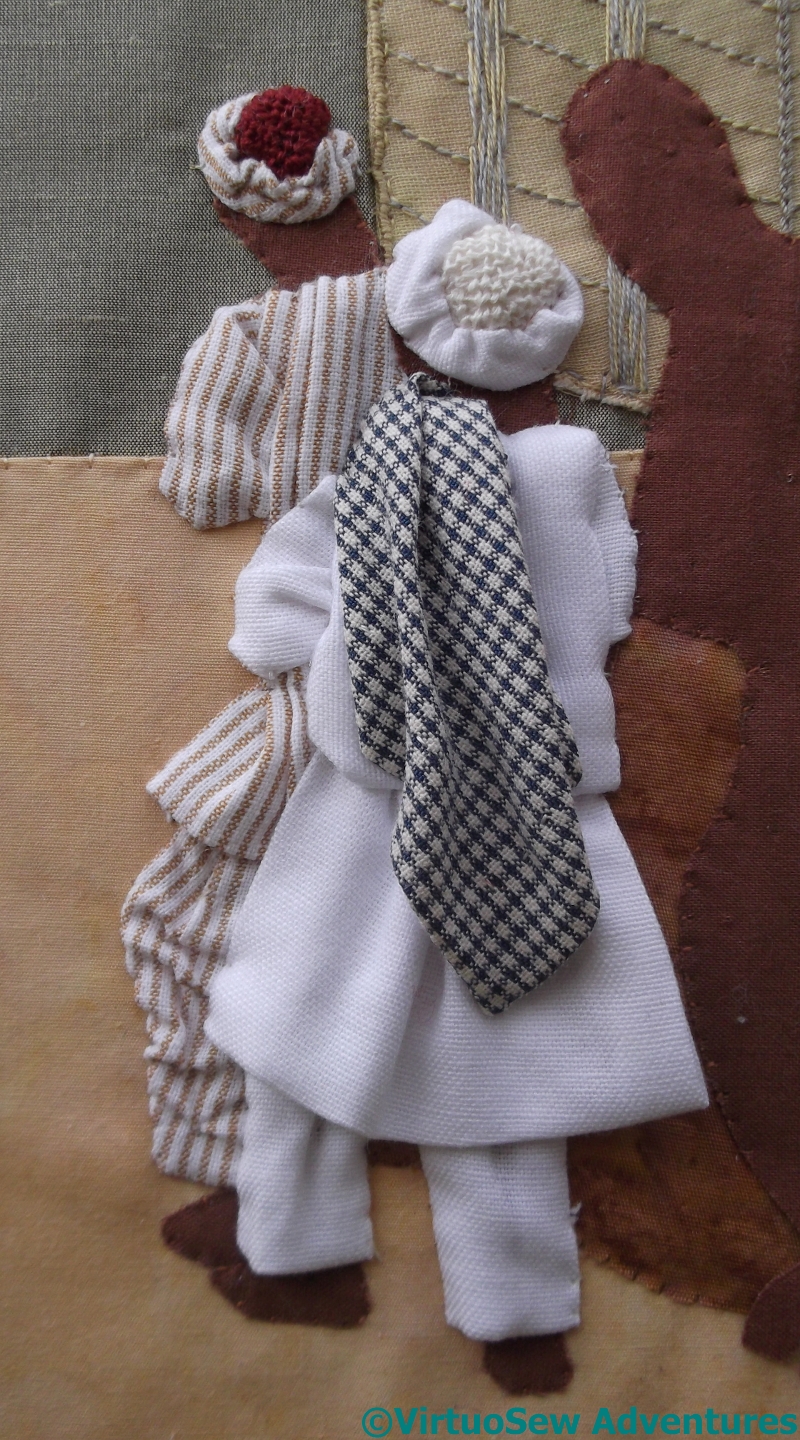
The Third Labourer
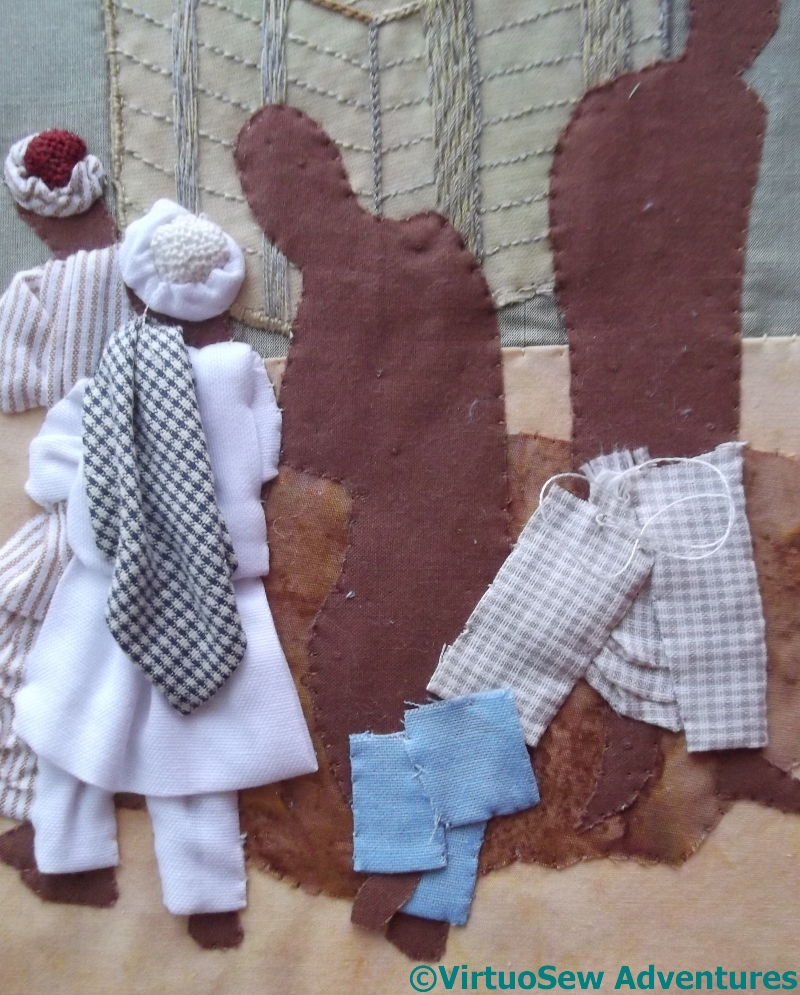
Beginning The Third Labourer
The mini-iron has been very helpful in turning and pressing the edges of the fabric pieces – sometimes before they’re applied, and sometimes afterwards, but at first I was very surprised to find myself wielding it left-handedly, more often than not. Then a little further thought, and it made sense – the difficult part is controlling the fabric, so naturally I would use my better hand.
First of all I started on the middle figure, forgetting that he is the nearest to the camera. So I stopped working on him – leaving his trouser bottoms in place – and moved on to the figure on the right.
Then the pleated drape cause me a great deal of trouble. Then I wasn’t sure about the left leg. Then I realised that I’d used the checked fabric I was intending for the overshirt.
More unpicking. Grr!
Pinning Third Labourer
I reinstated the trousers and the drapery in white fabric and then started trying to fit the overshirt.
I’ve been making extensive use of that set of pins that Karen Ruane sent me (thank you again, Karen – they’ve been invaluable!) as I try to work out how to make the overshirt sit properly.
In this case, however, having pinned and stitched, and unpicked and pressed and restitched, I decided I still had some reservations.
Still more unpicking.
Grr yet again!
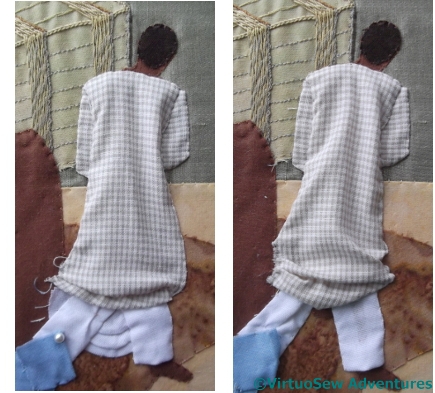
Spot The Differences!
So after much more puzzling and unpicking and re-stitching, I think I’m happier now. I’ve reduced the bulk in the left shoulder, removed the drapery, which is in the photo but didn’t “read” well in the applique, and reworked the overshirt.
Again.
None of the lower edges have been caught down, which I hope will help create the proper effect of garments that can move around a body. That does mean, of course, that I will have to be very careful not to crush the final piece when I’m storing it, but I do think it will be worth the effort!
Dressing the Second Labourer
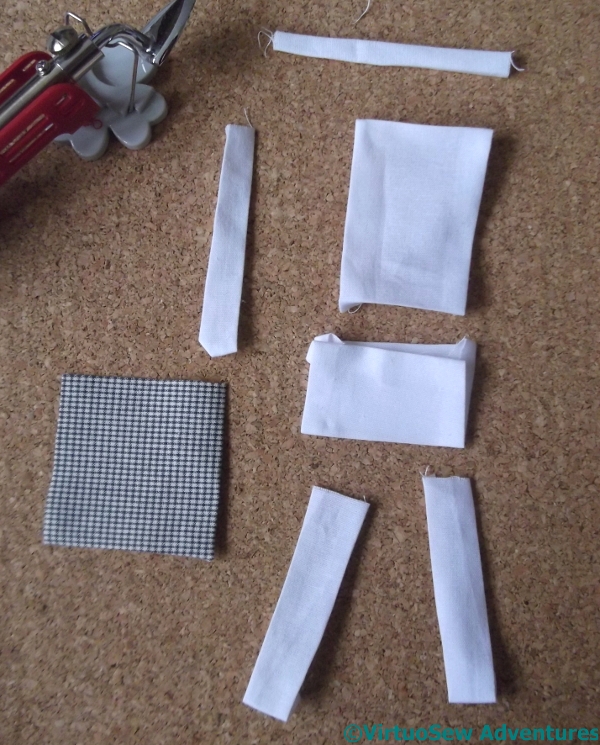
Using The Mini-Iron
Since I decided after dressing the first labourer that using rectangles of fabric was the way to go, when I started on the second I began by cutting out every bit that I expected to need.
That meant:
two pieces for the legs, a piece for the body of the top, a piece for the section of the top below the waist, a piece for the turban, a piece for the sleeve, and a piece for the cloth thrown over the shoulder.
I bought myself a mini-iron to make the job of folding in the edges easier, lighter, and less perilous. Fortunately there are two more labourers to dress, so I will have plenty of time to improve my skill!
Two Labourers Clad
The trick to a successful applique is the order in which the elements are layered.
So in this case, the first pieces are the trousers. They are stitched down each side, and tweaked in the middle to create some impression of a body underneath. The bottom edges aren’t held down, so in storage this piece may be a bit delicate.
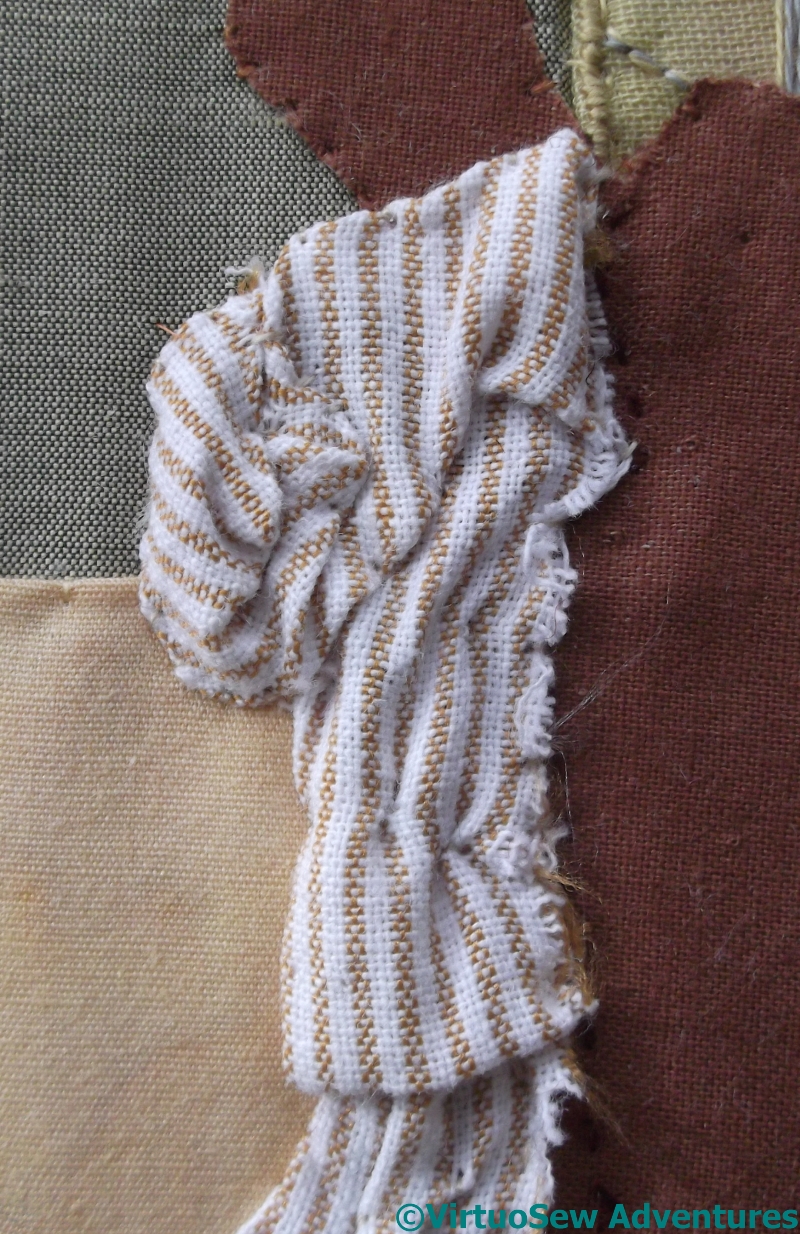
The turban is done in just the same way as the first one, but this time I used a cream linen thread for the central disc.
The sleeve was next, and then the “skirt” of the top, which is gathered to give it a sense of bulk. It is tethered by the underlayer, but not attached at the bottom edge. The right-hand edge isn’t tethered, either, because in due course the Third Labourer’s clothing needs to fit underneath..
Finally, there was the body of the top, and the fabric thrown over the shoulder. I don’t understand why he didn’t use it to pad his shoulder against the packing case, but the photo says he didn’t!
Crazy Canvaswork Cushion – Part 10
Section Sixteen
The last section, Section Sixteen, gave me a lot of trouble. I suppose that is partly because the end was in sight, and I wasn’t quite as focused as I could have been!
I was originally looking for a crossing stitch, but every single one I tried either looked wrong, or simply failed to cover the canvas. I sent several tweets enumerating my trials, with one or two strands being too fine, and three strands too heavy, and in the end I abandoned the crossing stitches entirely.
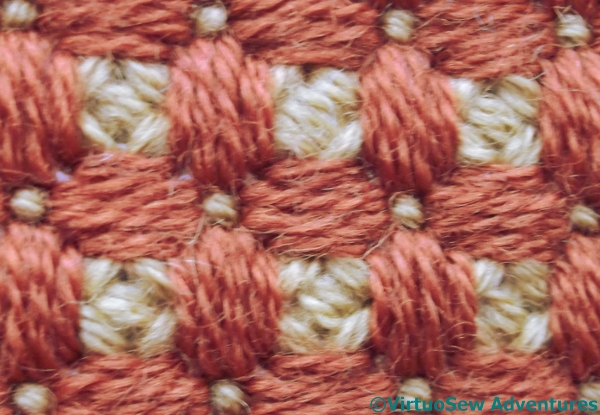
Framed Triangle Stitch
In fact I devised my own variation on Triangle Stitch, which I’ve called Framed Triangle Stitch. I rather like the way it has turned out. It is a bit of a trial to stitch economically, but since I am attempting to reduce my stash, that is scarcely a problem!
Although I like the pattern it creates, I’ve been somewhat concerned about the scale of the pattern, which is perhaps a little too similar to the blue pattern of Section Thirteen.
However, I now have the challenge of unrolling the whole piece, blocking it, and working out how to finish the cushion.
As they say – watch this space!
Dressing the First Labourer
Unsuccessful Attempt
Having stared thoughtfully at the people, I cut out some clothing shapes out of one of my pieces of quilting cotton, and started trying to create folds in them as I attached them to the fabric.
The trousers were tricky, but not impossibly so. The jacket, or top, or whatever it is, brought me to an abrupt halt.
Dearie, dearie me.
That didn’t work at all, did it.
The bulk and the folds are all in the wrong places. He’s certainly crumpled, but it isn’t the right sort of crumpled! And don’t even get me started on how difficult it was. I felt as though I was all fingers and thumbs – it was almost as bad as working with glue!
Cue much muttering, unpicking, and rethinking.
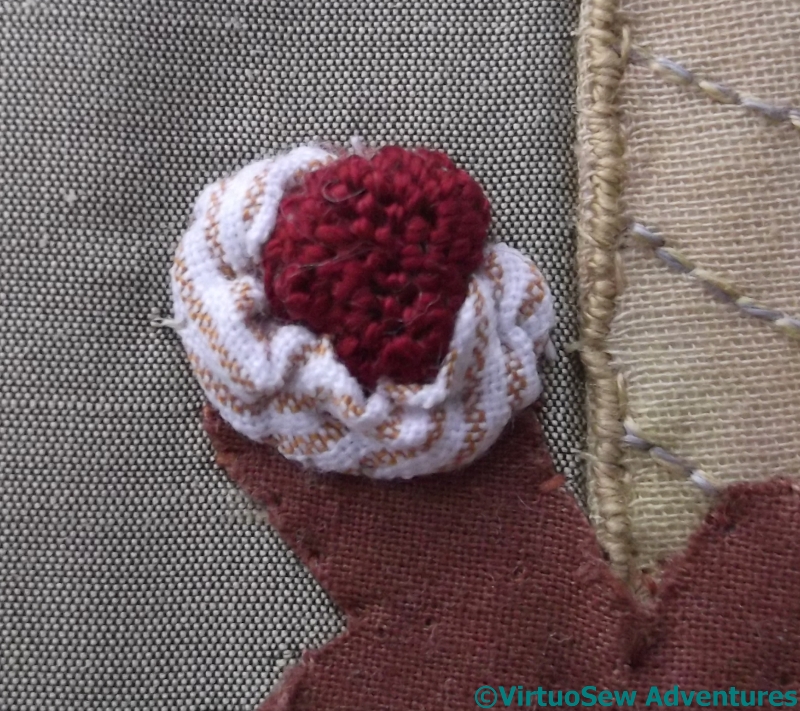
Turban Completed
While I was thinking, I had a go at the turban.
The textured deep crimson is a circle of trellis stitch, a densely knotted needlelace stitch I’ve used a lot in my various Thistle Threads courses. The thread is silk, from a bag of “odds and ends” from Mulberry Silks. I cut out a circle of the fabric I’d stitched and gathered it to create a crimson bobble.
The cotton around it is a narrow tube of the fabric I was using, tucked under the crimson bobble at either end, and held down with odd little stitches to create the effect of folds.
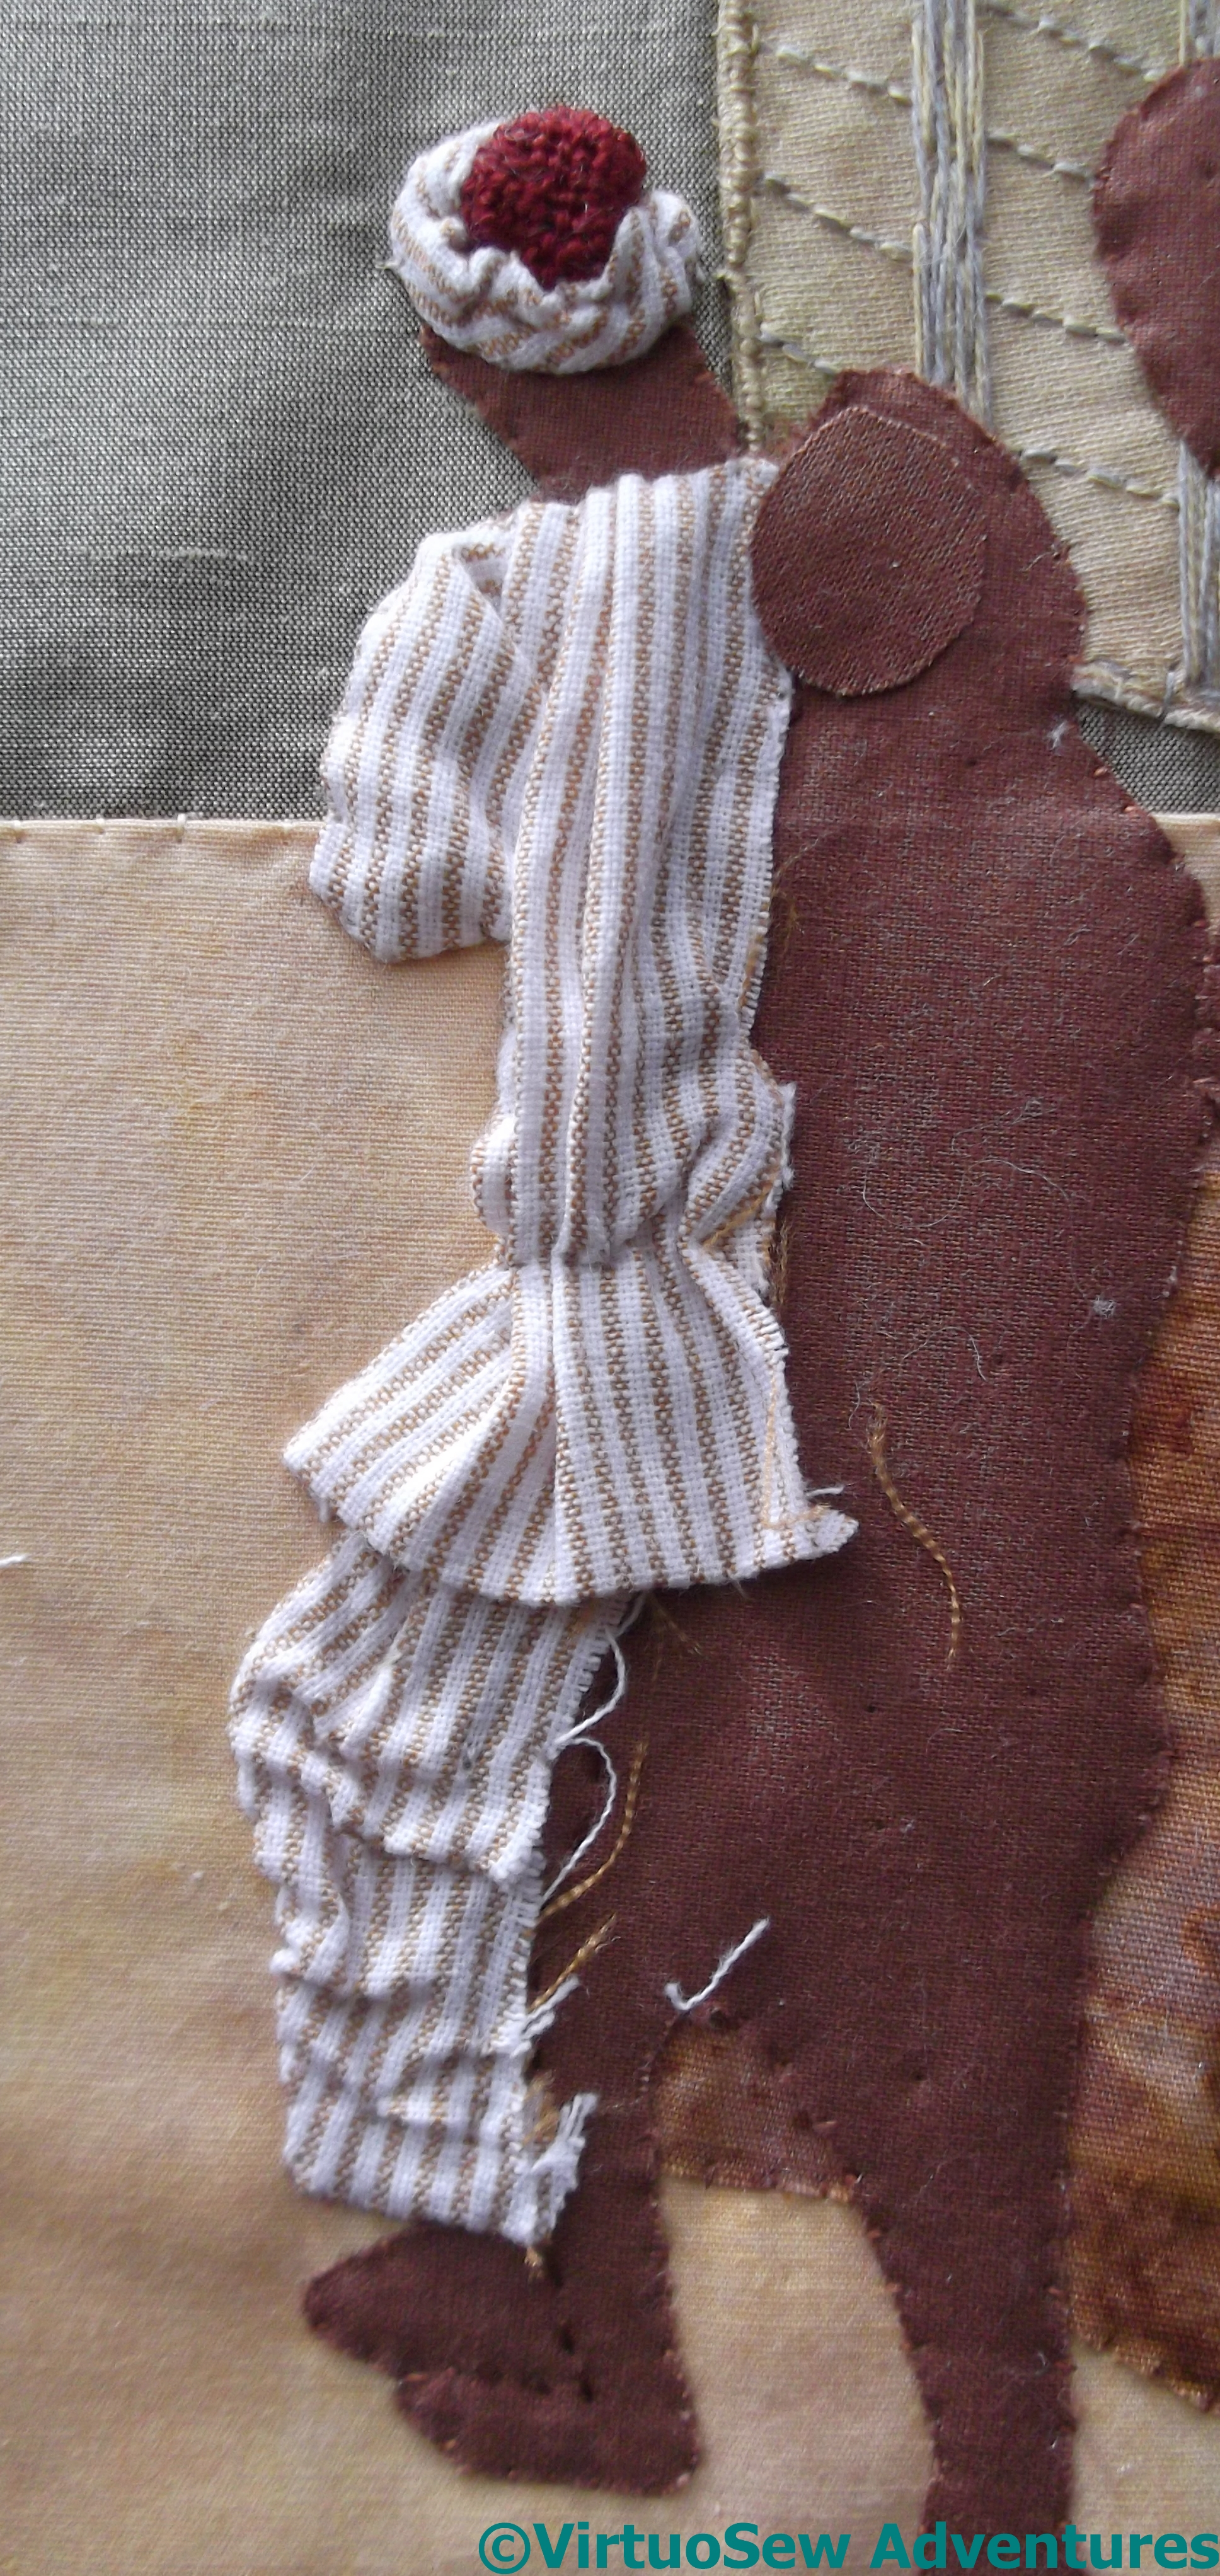
First Labourer Clad
That worked. It also gave me a thought. There seems to be very little shaping in the garments we see in the photos from the dig – not least, in such a hot climate, loose, airy, voluminous clothing is likely to be a lot more comfortable!
So the next version of the labourer’s clothing was made, essentially, by cutting out a series of rectangles and applying them separately. In this case, there was only one rectangle for the sleeve, and then another for the body. It’s been gathered in to create a loosely bloused waist, and left flat and unfinished on the inner side where it will be covered by the next labourer’s clothing.
I think this has worked a great deal better. I might even be able to bring my imagined picture almost fully to life!
I’ve also added another layer for the face of the second labourer. There won’t be much of it visible, but the first labourer’s clothes are supposed to be behind it, so the addition was necessary.
More Experiments!
Back Of Sample
You could be forgiven for thinking that I had finally lost all common sense. We’re all interested in fibre, fabric, and stitch, but even so, expecting you to take an interest in a photograph of a plain piece of felt seems a little extreme.
Especially a very ordinary, single-colour, and entirely unadorned piece of felt.
So what am I up to?
Mischief, of course!
Does it help if I tell you that it’s really quite a thick piece of felt?

Front Of Sample
Or does it help if I tell you that this is the front?
I bought an “inspiration pack” of threads, and this thick square of felt at “Sewing For Pleasure” a while back, with absolutely no idea of what I expected or intended to do with it.
While I was wondering about it, I remembered reading about a medieval satchel that had been made by sewing the pieces together within the thickness of the leather. I didn’t feel quite willing to attempt something structural, but it gave me the idea of trying to work a sampler of stitches without the back showing.

Detail Of Sample
I even managed to work some of my favourite stitches.
I originally began with a wavy line of Shell Chain stitch, and then built up the design from there. Some of the threads were too heavy to use in this context, and there was a wonderful heavy slub that I couldn’t find a use for (never fear, I will!) but I had great fun alternating texture and shine, space-filling and line, and just playing.
I have absolutely no idea what I’m going to do with it, but I’m rather pleased with how it turned out!
Beginning the People
Stabilising the People
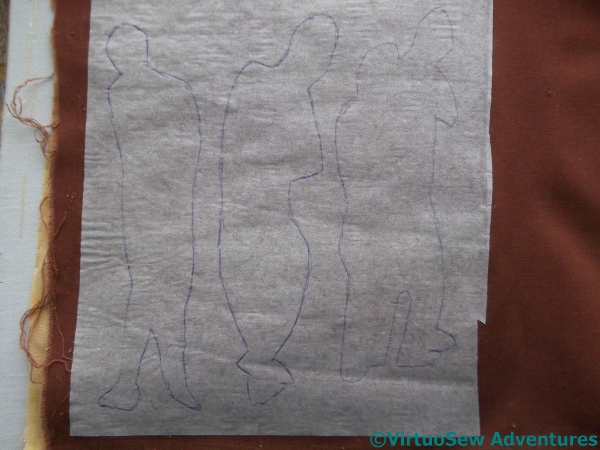
Once the packing case was in place it was time to put the people on. I’ve used iron-on transfer adhesive to stabilise the cotton fabric for the people. It isn’t likely that I will make use of the adhesive, but at least the tracing paper on the back allowed me to draw outlines of the people to cut out.
There was a brief pause while I made quite sure that I had traced the people the right way round to ensure that when I put them on, the fabric side would be uppermost and not the glue side, then I cut them out..

People Attached
Attaching the people was fairly straightforward, using single strands of silk pulled from a bundle of odds and ends. I even tacked them in place with silk – which just shows how cavalier I have become since working with metal threads and Gilt Sylke Twist!
Very little of these cotton people will show once I’ve dressed them. They are there for two reasons – because I felt that it would be easier to do that dressing if I had some sense of the bodies beneath, and because I know from working on the Camberwell Panel that small bits are hard to place precisely, especially in conjunction with other small pieces. Since the people are inside their clothes, putting the heads and feet on last would put them out of kilter in comparison with everything else.
I have cut and left unattached one foot of one of the people because I need to put a trouser leg behind it, and roughly stitched a line between the two people I’ve cut out as a single piece of fabric. That should help me to ensure that when I dress the furthest of them, I don’t use more fabric than I need, or create a finished, turned edge that adds thickness where I don’t want it.
Now I need to stare thoughtfully at the photograph for a while and work out just how to approach the next stage.
Still that Packing Case
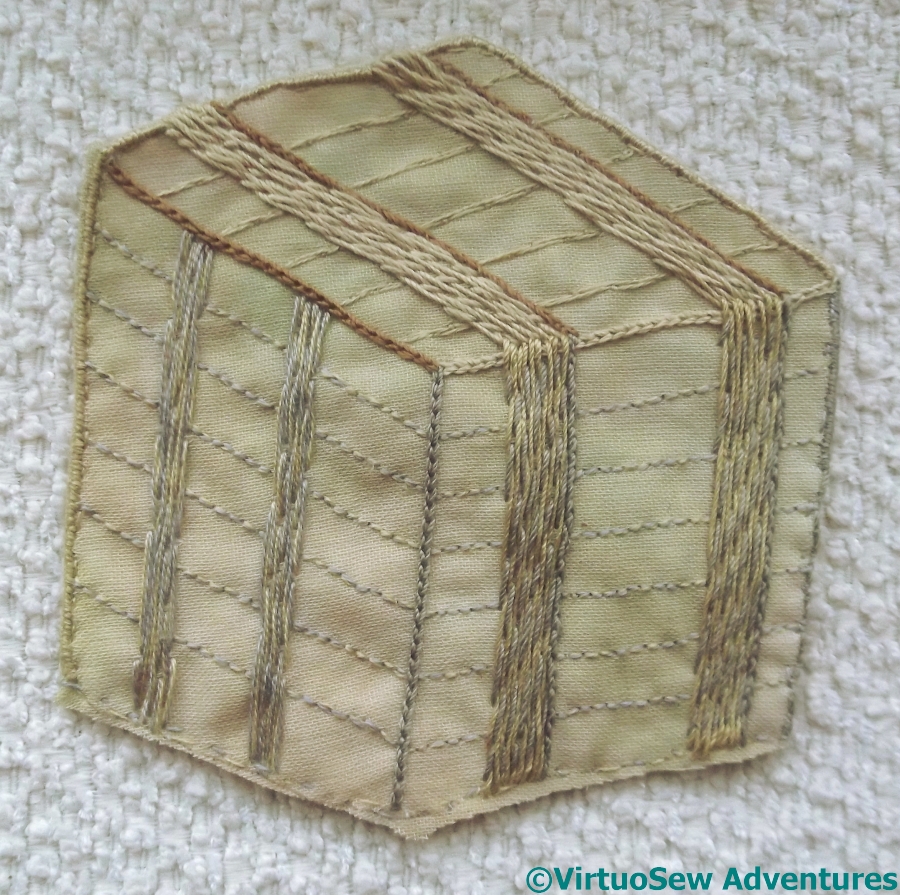
Stitching Done
I’m rather afraid you’ll be fed up with this packing case. It’s caused me no end of thinking and re-thinking, stitching and re-stitching, but now I think I’ve done as much as can be done while it remains a separate piece. I may add more stitched details to the final piece, but that will be after I have everything else in place.
So the next job is to turn it into that separate piece which can then be attached in place on the background, and then itself become the background for the main adventure, which will be dressing the figures.
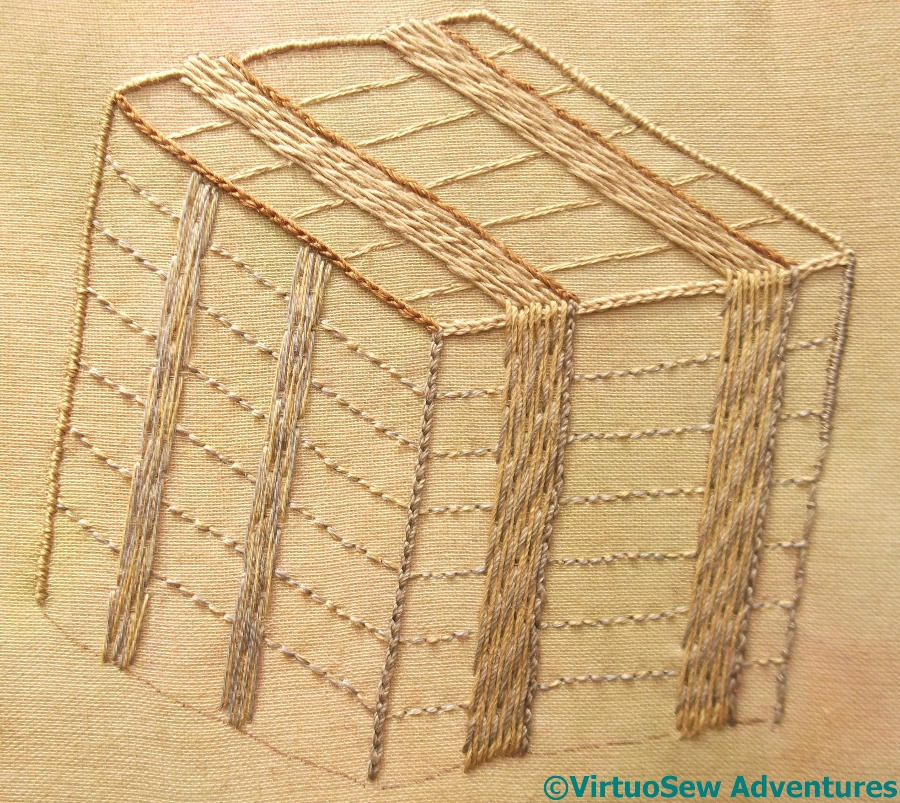
Trimmed Packing Case
And here it is. I have left the fabric around the edges attached and folded it back to provide a little padding.
I’ve used single strands of stranded cotton to hold the extra fabric in place, and trimmed the unbound edges close.
None of the planks run quite true, but since the whole thing is a wild experiment that may go dreadfully wrong, I’m not going lose any sleep over that. If it looks wrong when it’s finished, I’ll unpick those bits and put them right. If it looks right in spite of wonky planks, I shall pretend it was meant to be that way..
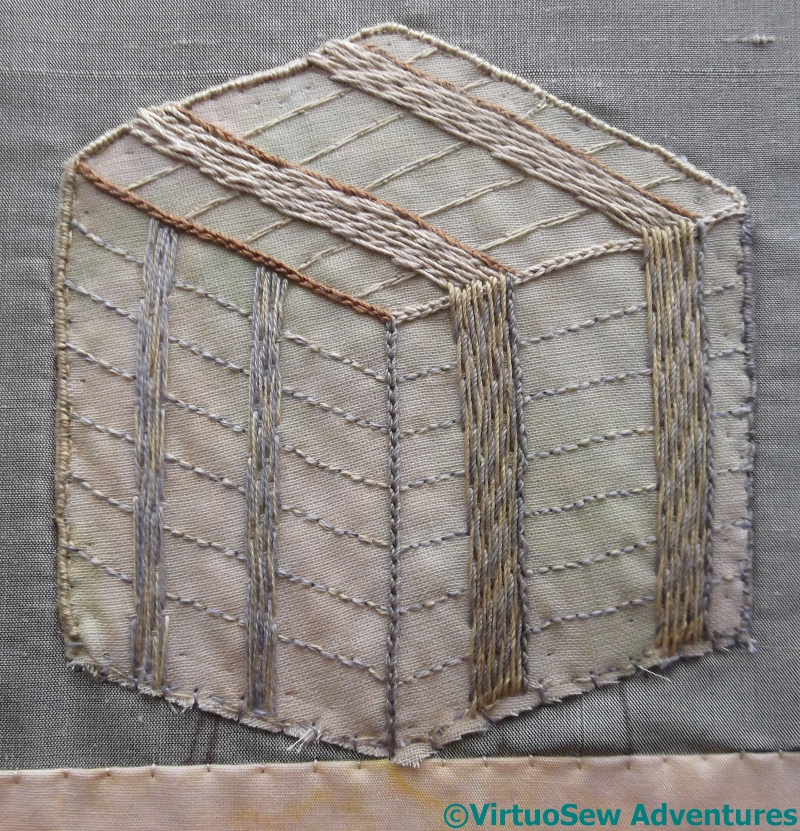
Packing Case Attached
Thank goodness I marked a couple of points to help me put the packing case in place. I double checked the placement with the tracing paper people, then went around the edges catching them down with small stitches and a sharp needle.
As far as possible, I stretched the packing case as I was attaching it. It puts the turban cotton under some slight strain, but with all the support underneath, I think it will be fine. I would be much more worried if this were to be applied to a garment…
Crazy Canvaswork Cushion – Part 9
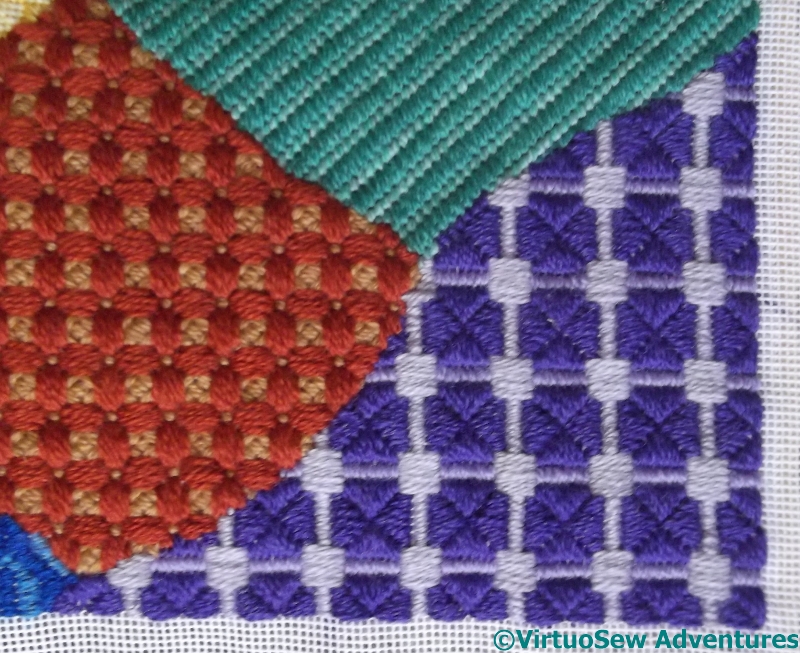
Section Fourteen
As I mentioned in Part Eight, I gave myself a framework for the patches, alternating crossed, diagonal, and straight stitches.
Looking at the photograph now, there is a slight look of Victorian floor-tiles about the combination of the blue and yellow of the previous sections, and the brown and beige of this one. The proportion of brown isn’t correct for Victorian floor-tiles, but still…
It occurs to me that we might have a lot of fun looking at this cushion when it’s done, looking for other things that it reminds us of!
Caged Rice Stitch
I chose a Rice Stitch caged with straight stitches. I suppose this could be regarded as a combination of crossed stitches and straight stitches, which may throw my scheme slightly off-balance. I like it, though – the straight stitches look nicely padded, even though they aren’t, and the rice stitches add texture. I can imagine it looking “floral” in some colour combinations, but in this version, I think it emphasizes the “Victorian Floor Tile” feel I mentioned before.
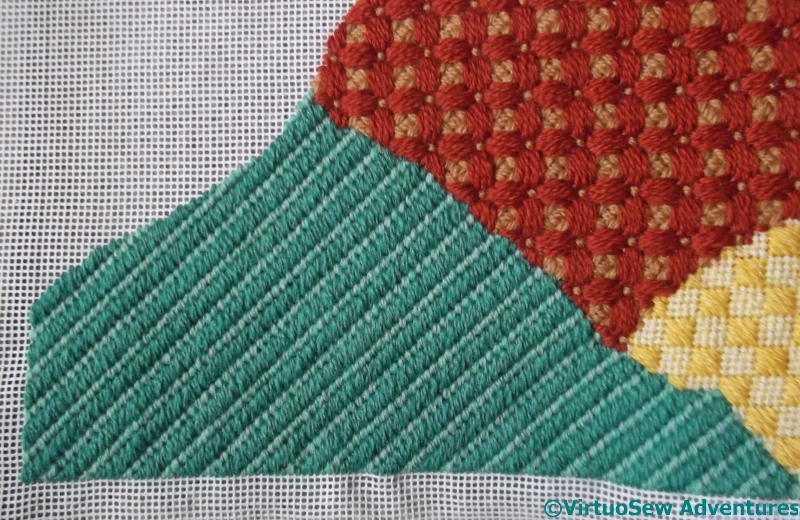
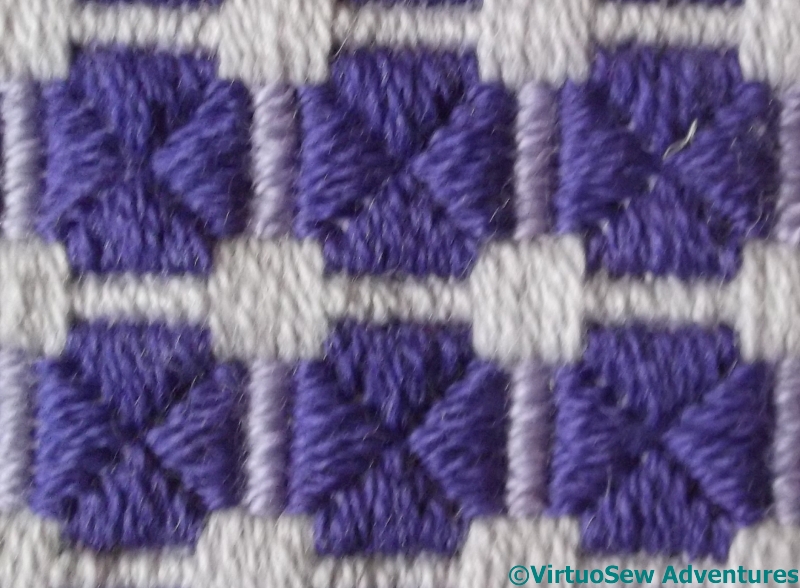
Section Fifteen
I am getting really close to the end now – Section Fifteen is the last but one, as you can see by the square corner. Since I didn’t work on this project over the summer, I’m a bit surprised by that. I wish the project had been as good at stash busting as it has been at growing!
You might have noticed that teal is one of my favourite colours and wondered why you haven’t seen more of it, but my stash is partly inherited and I don’t have very much of some colours.
Double Twill Stitch
After the complexity of Caged Rice Stitch (which, while fun, is on the complex side!) I went very simple indeed for Section Fifteen – Double Twill Stitch.
So now I need to work out what colour – and what stitch – to use on the last section. And then how to finish the cushion…
Easy, right?
Still More On The Packing Case
Bands In Place
When I came to work the bands on the “back” surface of the packing case, I felt that the slightly darker yellow silk thread was still too bright, so I worked the Bokhara Couching in two colours – the yellow as the long stitch, and the grey as the diagonal couching stitch. That shadows it nicely, I think.
I’ve only worked the trailing satin stitch edging at the back for about twice the distance I think will be visible. I believe there will be enough layers of fabric over the top, representing the clothes of the figures, that the trail won’t show through – but there is no point making life too difficult!
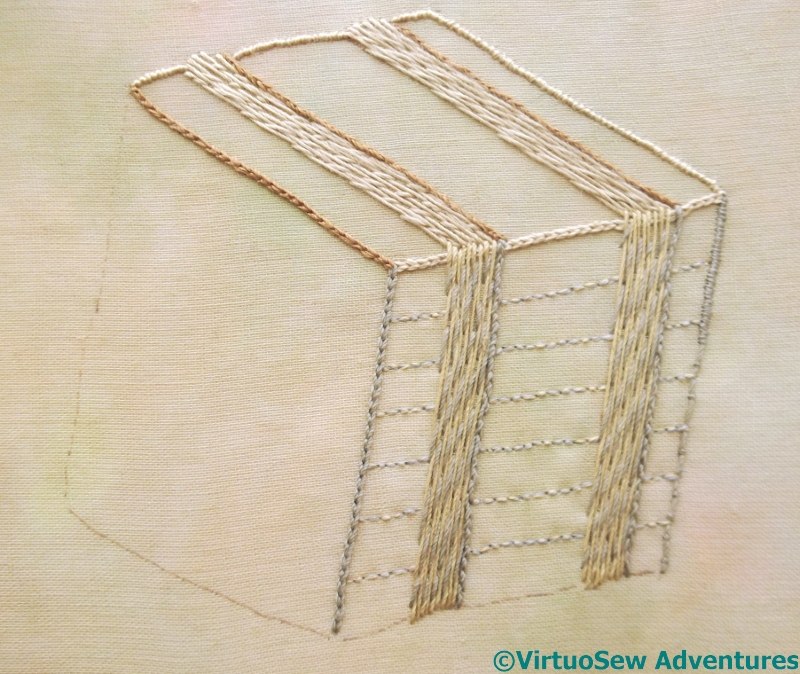
Planks On Side
I want to give some suggestion of the planks making up the packing case, but the silk thread is too heavy for that purpose. Fortunately I have some stranded threads that match the silk very closely, and using one of each colour breaks it up, as does using back stitches.
I used quilter’s disappearing pen to sketch approximate planks. It disappears so quickly that sometimes I’d lost my guideline by the time I was half way across!
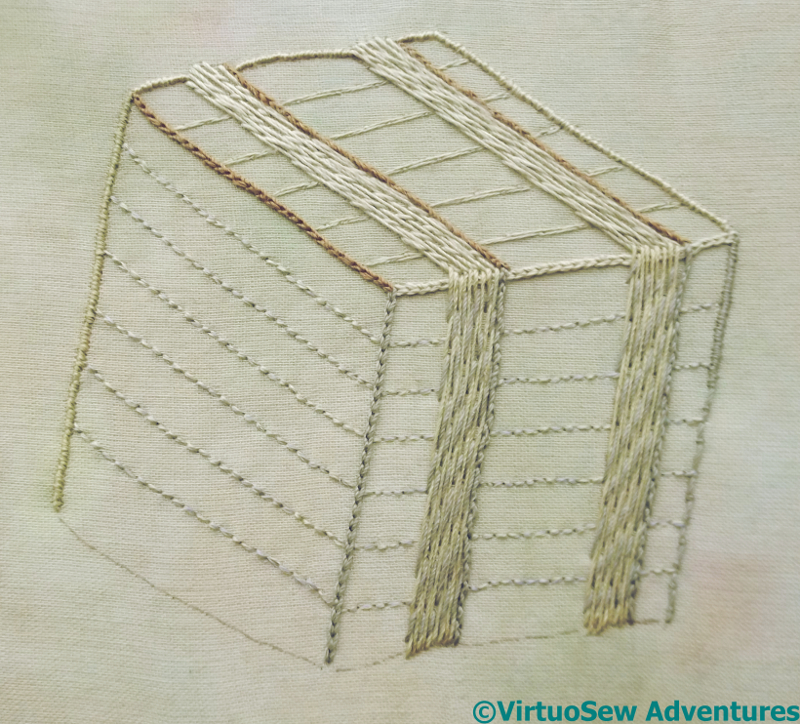
Packing Case
I used a slightly different technique on the top. I’ve laid two strands across on each plank-line, and then couched down each strand individually in a brick pattern, It creates a less spotty effect, and I am now wondering whether I should take out the backstitch and use this other technique instead.
I’ve done the trailing satin stitch on the back edge, because I am fairly sure about that, but the planking still leaves me in a quandary. Have I used the right technique? Do I need to do more, to differentiate shadow from sunlit? Dare I leave it as it is, put it in place, and add any other details later?
So I am now, once again, at the “Stare at it and think” stage.
More Kumihimo
There were so many intrigued comments about my Marudai and the braids it made, that I thought I would show you some more of the braids I’ve made.
Kumihimo is a traditional Japanese technique. The braids have a lot of traditional uses in Japan – in fact, an opera singer friend of mine tells me his Samurai costume for his part in a brand-new opera about a crucial part of Japanese history was correct down to properly made kumihimo braids in all the right places!
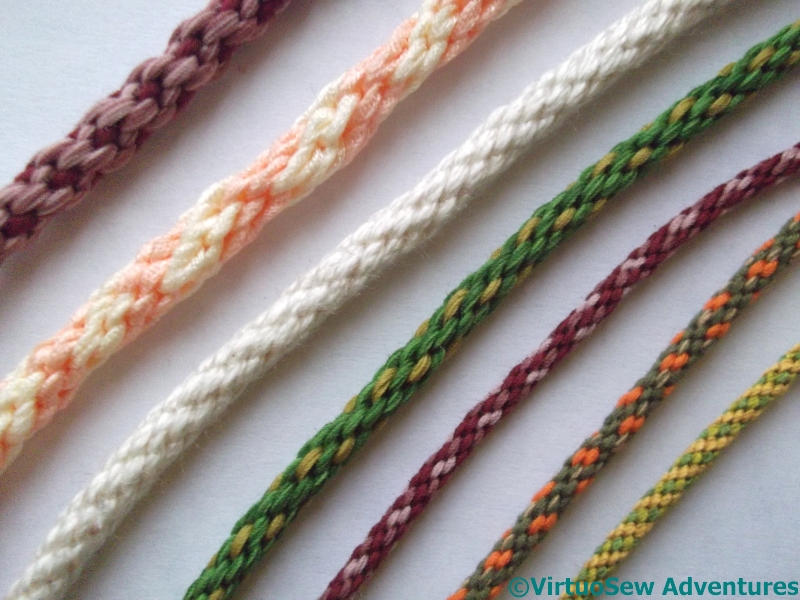
Kumihimo Braids
If you search for Kumihimo on eBay, what you will find, by and large, are bracelets. Now, I’m really not a bracelet sort of girl. I have a few chunky, “statement” bangles, which are worn specifically, explicitly and only when I’m planning nothing more strenuous than lifting a knife and fork. Cord bracelets – no.
However, I do have a lot of heavy, dramatic pendants, and the idea of making cords to point up the colours in the pendants – yes, definitely. I’ve found that sewing machine thread makes a wonderful material for these purposes – it comes in a huge range of colours, and it’s fine, supple and strong. It also lends itself well to heathering – combining several colours in a single strand – and best of all, it’s relatively inexpensive.
Yellow and Green Silk
The fine green and gold cord is silk, made using some of the thread from the Tudor Rose kit – I used it to trim the Tudor Rose panel.
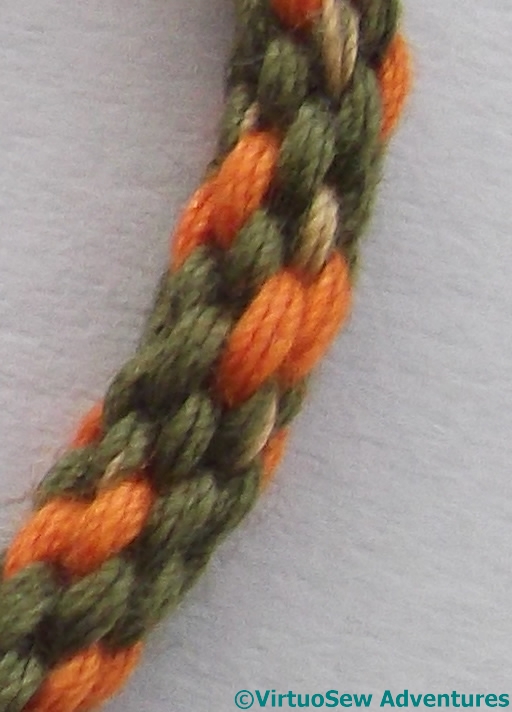
Orange and Green Cotton
The next three, and the top, chunky pinky-maroon, are all necklace cords made using sewing machine cotton, although the maroon mookaite pendant I made the two maroon ones for has spurned both of them with scorn. I’ll try again, because I enjoy kumihimo.

Greens (cotton)
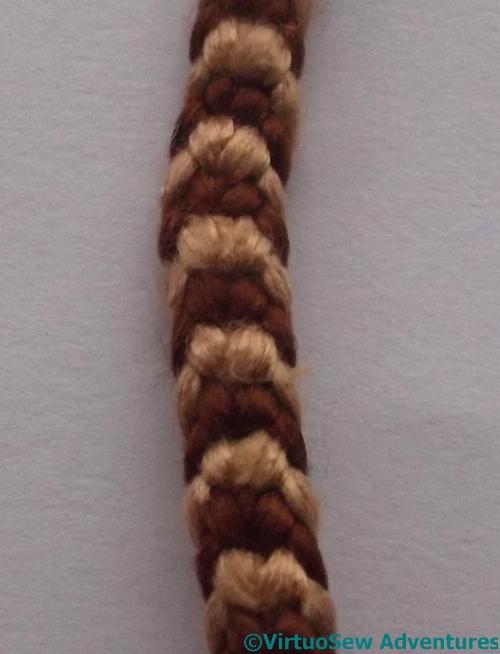
The white one is silk, to go with a pearl-mounted enamelled cross pendant given to me by an old family friend, and which I wore on my wedding day. The cord I used then has become grubby over the years, so this one will see me through a few more. The cream and peach usually carries a glass pendant. It’s one of two I’ve tried for that pendant, in fact – but this “making things match” is never quite as easy as we hope, is it!

Apricot Cotton
Two Colour Silk
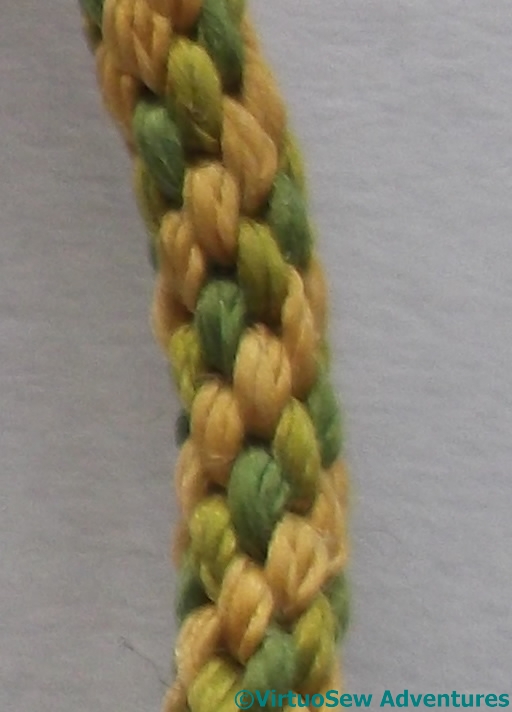
The round apricot rope is huge – about for or five times the size of the other round cords I’ve done. I might mount it with cord ends and turn it into a choker one of these days..
The stripy one is a fairly fine flat braid in filament silk. I worked this one as an experiment, changing the tension (more or less weight on the end) to see what effect it would have. In the end I came to the conclusion I wasn’t being dramatic enough with my experiments!

Flat Teal and Green
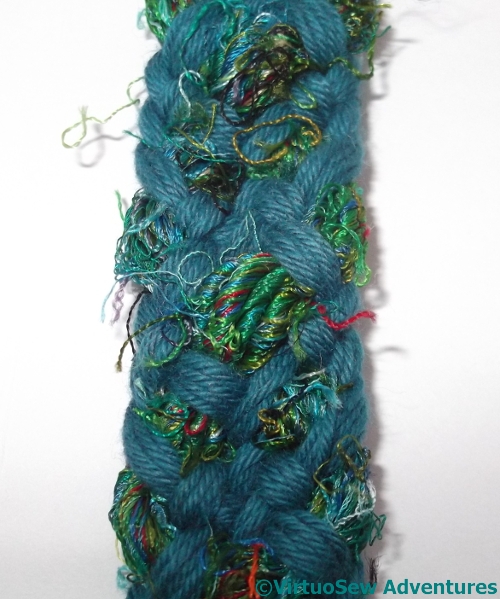
Textured Teal
These flat braids were given extra texture with saree silk knitting yarns. Again, they tell me that some of my experimentation needs to be a bit more dramatic. I was hoping to emphasize the different textures, but used too many strands of the cotton yarn, so there wasn’t enough difference between the strands.
There’s scope for endless experimentation here – and I haven’t shown you the miles of gold braid I’ve made…