
Tag: surface embroidery
Grape Hyacinths, 3
You may recall that I rediscovered the grape hyacinths some time ago, and, once I’d completed the leaves, I decided that the flowers were All Wrong, and took them out. A couple of weeks ago, I think, you saw a post about that, and about the further experiments I made.
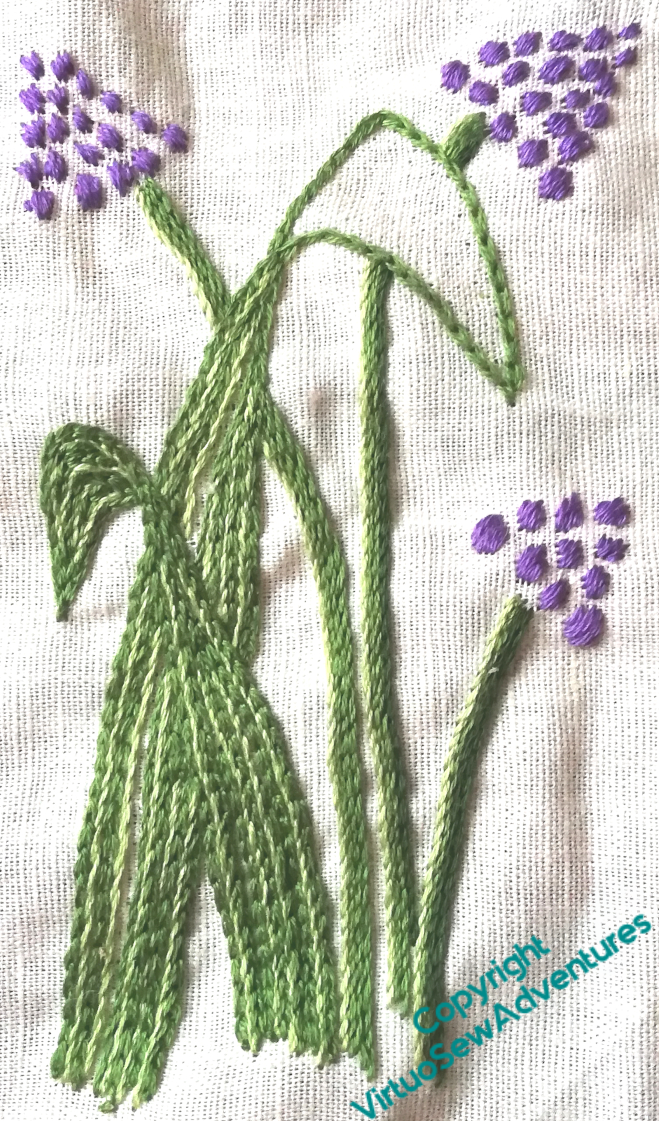
The little satin stitch dots were definitely a misstep, so I thought a little harder about what it was I thought so charming about the flowers, and decided it was the slightly ruffled edges of the florets.

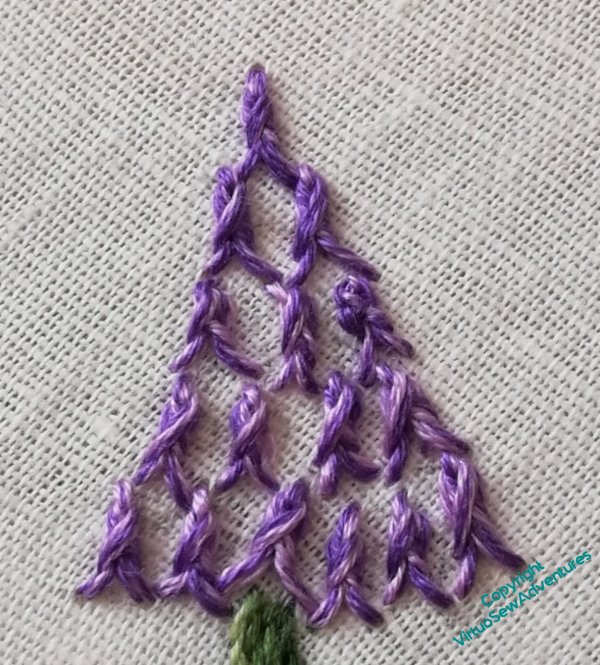
The resultant flower head, with dark stitches over light, seemed rather too much like a chequerboard, so the ones you see here use blended threads, but the same for both layers of the stitch. That’s better, although I still have some concerns…
I think the stitches may be a little too long, and I should perhaps make them rather more compact (remember my obsession with scale of stitch – it hasn’t figured at all while I’ve been concentrating on the Amarna Family, but it’s something that I’ve been aware of, and working on, for a long time now).
However, by the time I’d done all of them the second (third? fourth?) time, I was a little weary of the design. I’ve put it away with a mental note to try to find it again in the Spring, and see whether it’s easier to come to a decision when I have the real flowers in front of me!
And now, Episode 38 of SlowTVStitchery is live. It discusses shortness of memory, the Neanderthals, and and the terrors of yarn chicken…
Grape Hyacinths, 2
Having completed all the greenery and removed the satin stitch flowers, I had to put new flowers in. Naturally, that didn’t happen first time, either!
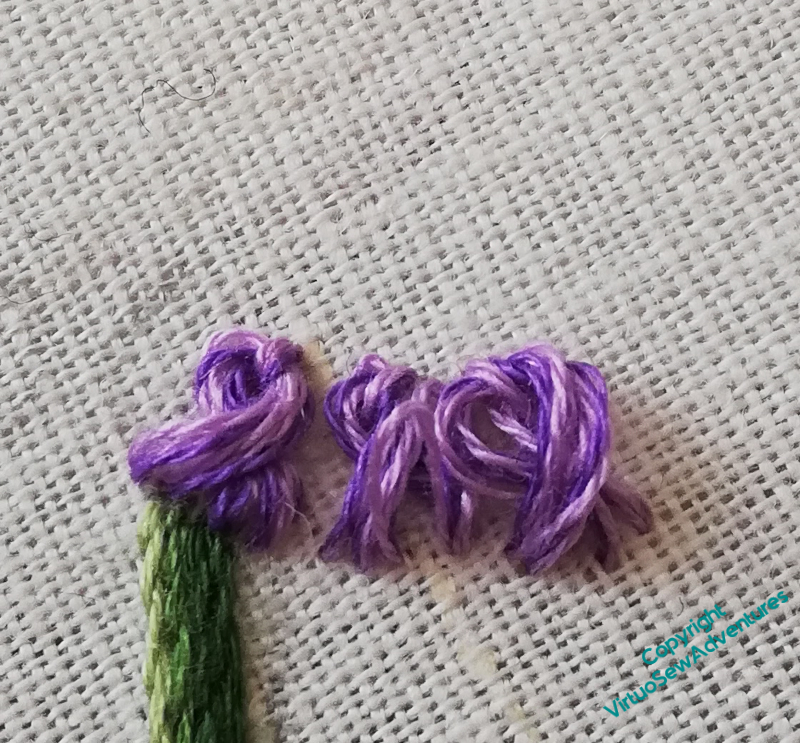
This was my first attempt at the individual flowers on the grape hyacinth flower heads – twisted chain stitches using several different coloured strands of stranded cotton.
I wanted to try something raised, to contrast with the flatness of the stems and leaves, but this, slightly full, version of twisted chain hasn’t really worked. It looks far too heavy for a spring flower!
Out it came, and I tried again.
And for my second try, I may have invented another stitch. Again!
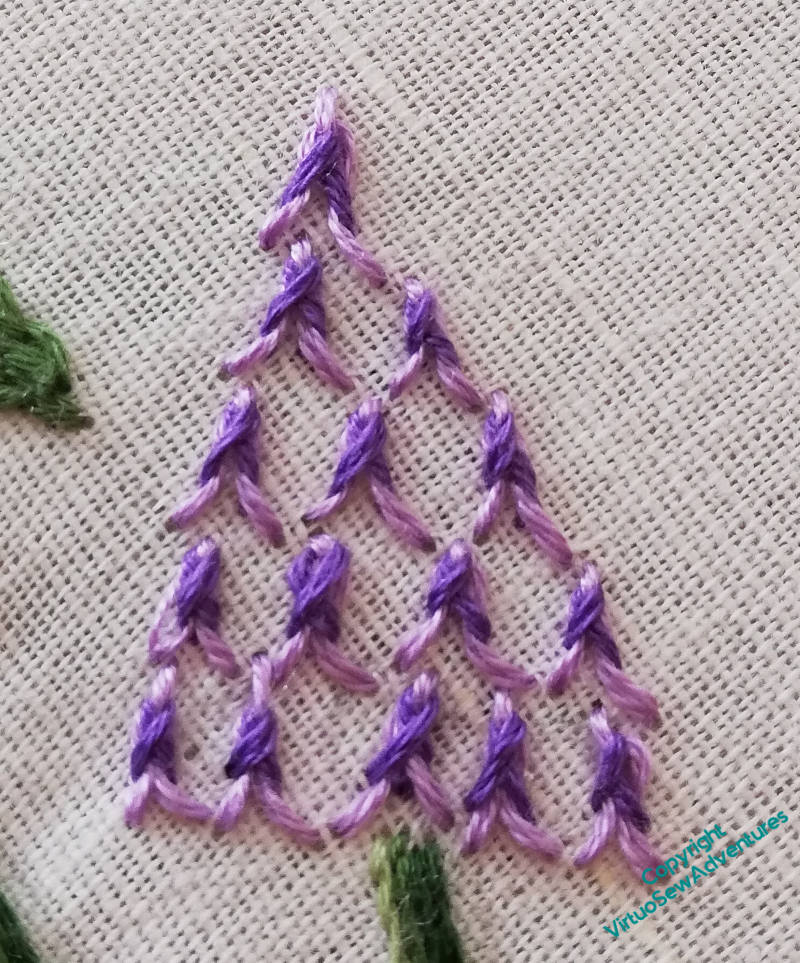
This is Fly Stitch topped with Twisted Chain Stitch. What I wanted to achieve was the slight sense of a ruffled skirt at the bottom of the individual bells, and this certainly works well enough for me to keep going, using this stitch, at least until I have a better idea!
All that admitted, I felt I’d ended up with too great a space between the stitches, and of course, I don’t want to try to fit more in, in case I lose the ruffles (as it were!). So I have filled in the gaps with single detached chain stitches.
Of course, I may yet come back and do somethign entirely different. but I decided at this point to leave this in place and continue my experiments!
The next SlowTV Stitchery is now live. Episode 36 tackles the difficulties of the canvas, Reynard the Fox provides a distraction, and there is some tackling of quandaries by changing tack..
A little box to embellish
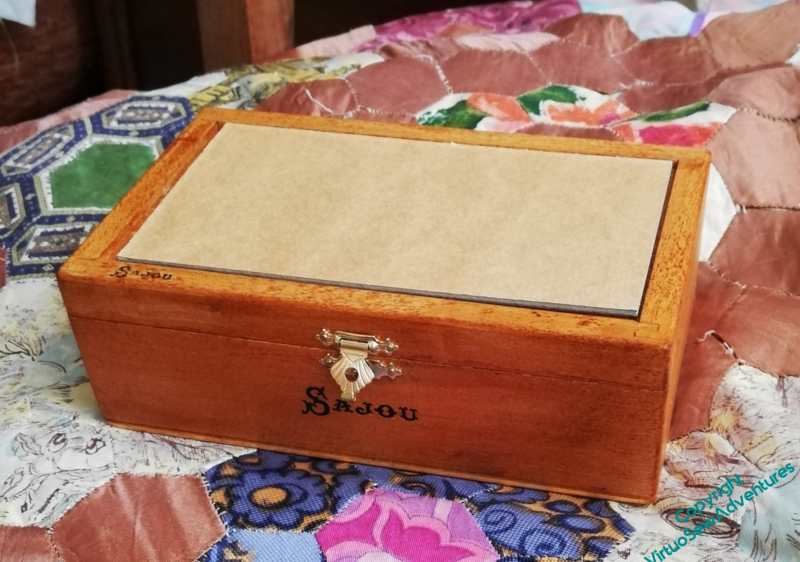
I can’t remember where I got this little box – probably eBay – but it was so long ago, I don’t remember what I had in mind, if anything. It’s about five inches by two inches.
I found it again, and decided it was about time I came up with something to do with it.
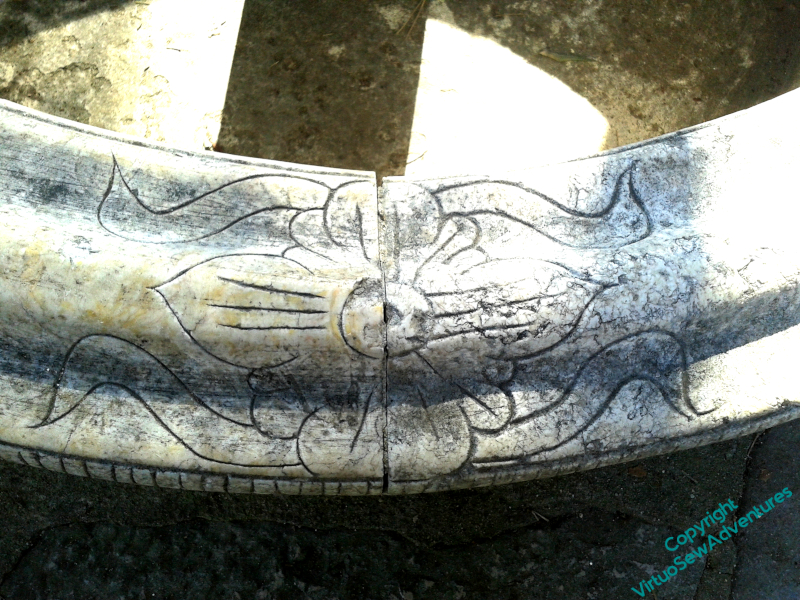
This is a bit of carved stonework I photographed in Lisbon. I should warn you that the finished piece is probably going to be really very unlike this inspiration, because, if you look at the rough ideas below, you will see it is already wandering. And when I started thinking about it, it was going to be surface embroidery, and now I’m thinking about silk purl and wire purl.
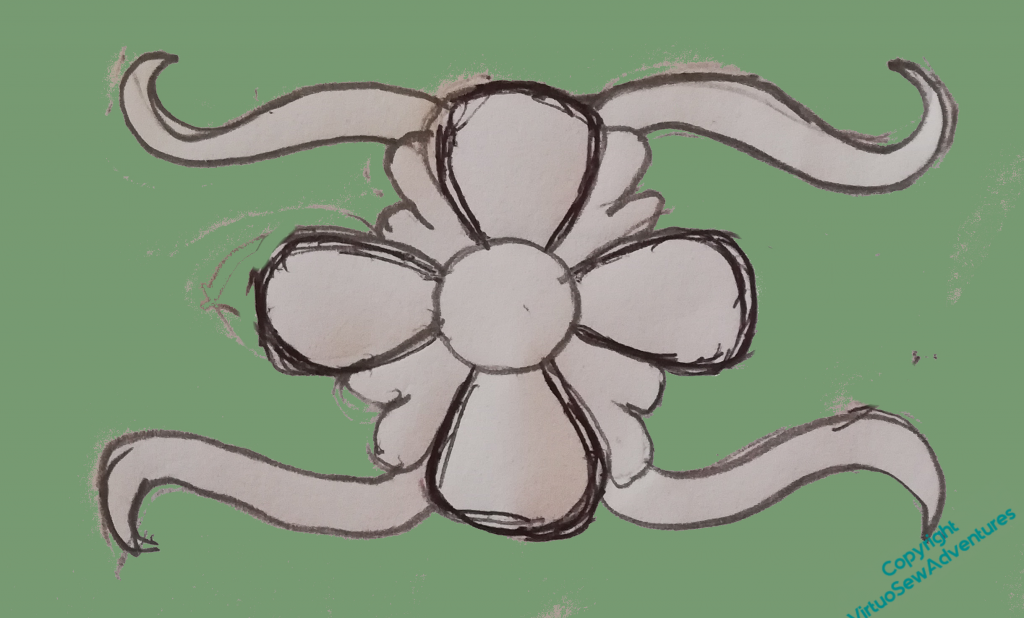
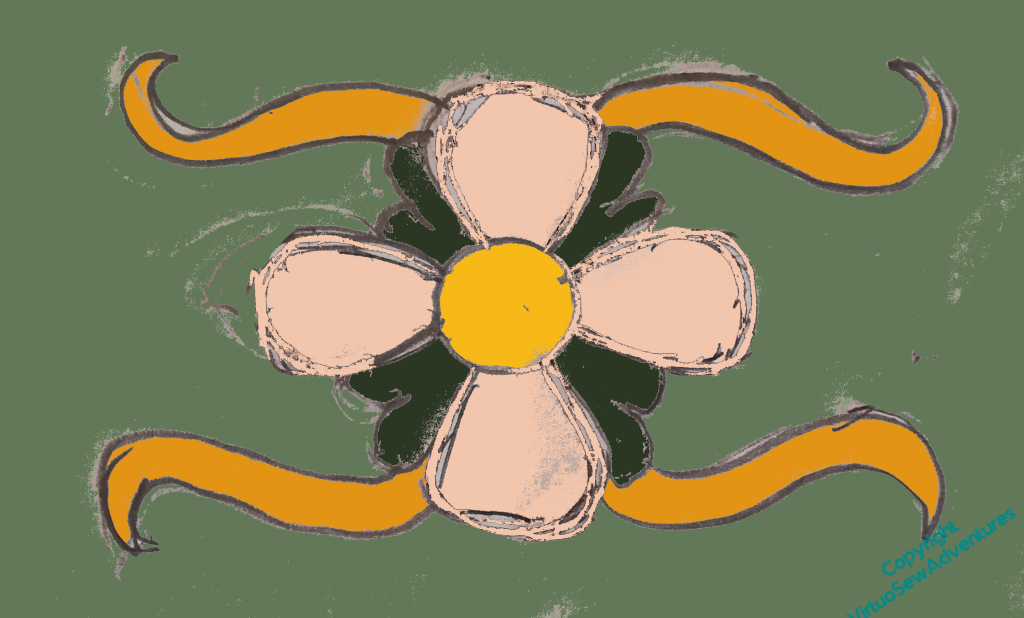
I think the ribbon things are going to change somewhat as well, although I’m not sure quite how..
In other news, Episode 33 of Slow TV Stitchery is now live, in which the penultimate corner is completed, and the contents of Autumn’s book stash is discussed.
Grape Hyacinths, 1
Now this is definitely a UFO (UnFinished Object).
It would help, of course, if I could remember why I was doing it – other than that I’ve always loved grape hyacinths!
Clearly the leaf needs to be finished, but looking at it again, I’ve decided that I don’t like the way that I originally worked the flower heads, and I need to unpick them and start again.
I don’t know how I’m going to do them, or what I’ll do with it when I’m finished, but at least I have a starting point.
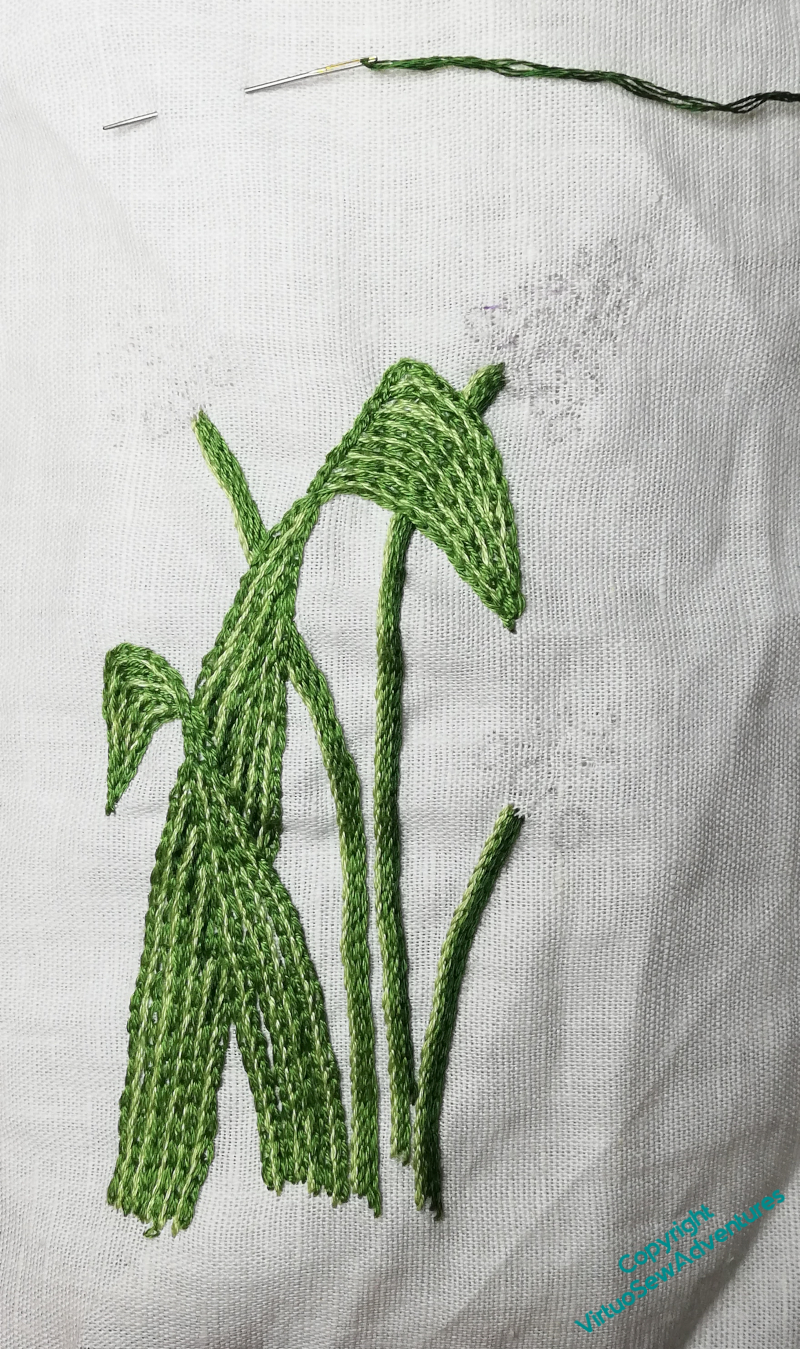
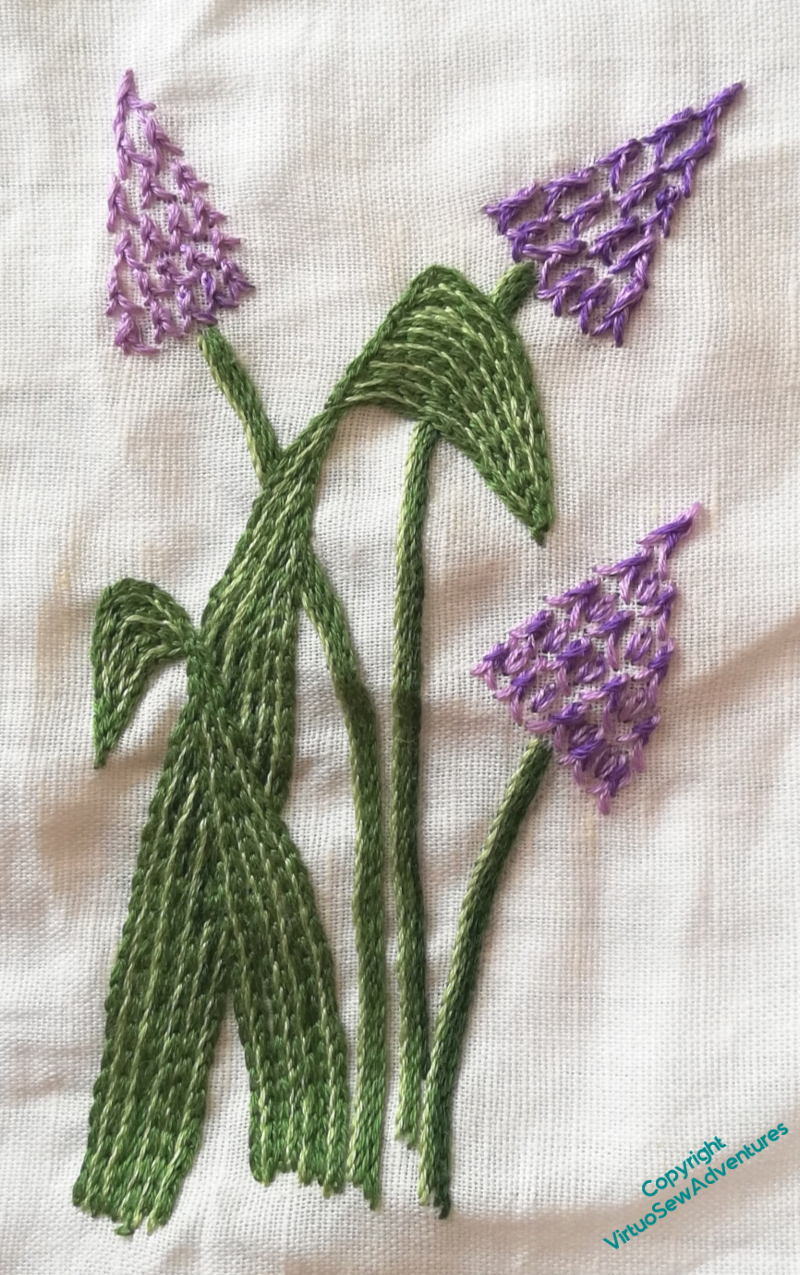
So here we are – the leaf is completed, with some added darker stitching to help throw the smaller leaf forward a little. The stitching is a mixture of chain and reverse chain, stem stitch and outline stitch, and I’m quite pleased with how it conveys the texture of the leaf.
Then, out with the scissors and much snipping and pulling out.
I’m still not sure how to do the flowers.
However, I’ve been keeping on with the Amarna Family, and the video – number twenty three, would you believe! – is now live. It contains musings on fabric to cover a stele.
Long Time No See
I’ve been hit by a fit of the tidy-ups and spent a couple of days rifling through some shelves to try to make more sense of them, and I’ve found a couple of things I’ve not seen in years…
Cornucopia Of Flowers
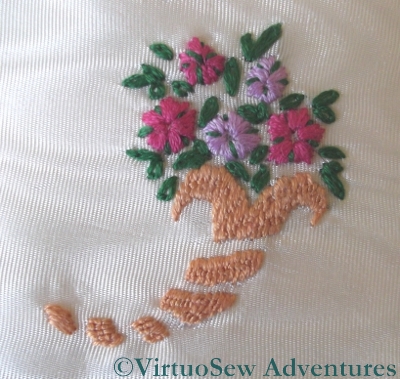
This little cornucopia of flowers is rather cute. I found it in a nineteen seventies book about needlecrafts, which is rather a surprise because I don’t think it is a very nineteen-seventies sort of design – and some of the others really were! I’ll try to find the book to tell you what it was called. It’s the same book that I found the girl and her doll described in this post about another forgotten project.
In a fit of masochism (I can’t think of any other reason!) I worked it on watered silk, which is very closely woven and was a severe trial. I had to use sharps rather than my usual embroidery needles! The flowers are satin stitch (I was gradually getting over my aversion!), the leaves lazy daisy, and the sections of the cornucopia itself are in Roumanian stitch, which creates just enough roughness of texture to be interesting.
I think that now I have found it again I shall mount it on a round or oval card (like the Glittering Snail) and add it to the winter decoration corner.
Finished Woolwork
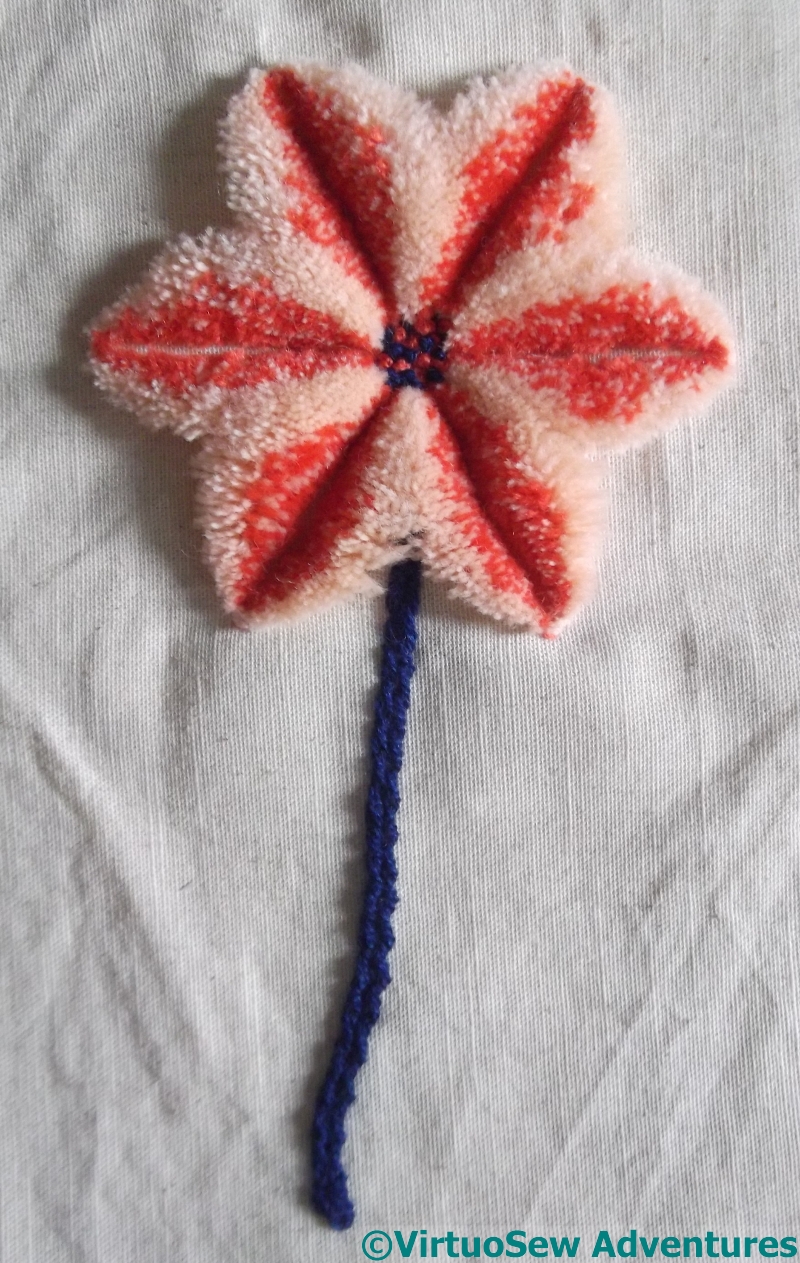
I wrote about this woolwork experiment in 2011, and the last time you saw it, the metal template was still in place. I found it in a box of fabrics that might make good backgrounds, but clearly all I had done was to fill in the centre, add a desultory stem, and sit back and stare at it. Unfortunately, I’m none the wiser as to what to do with the completed piece, or what I might do with the technique…
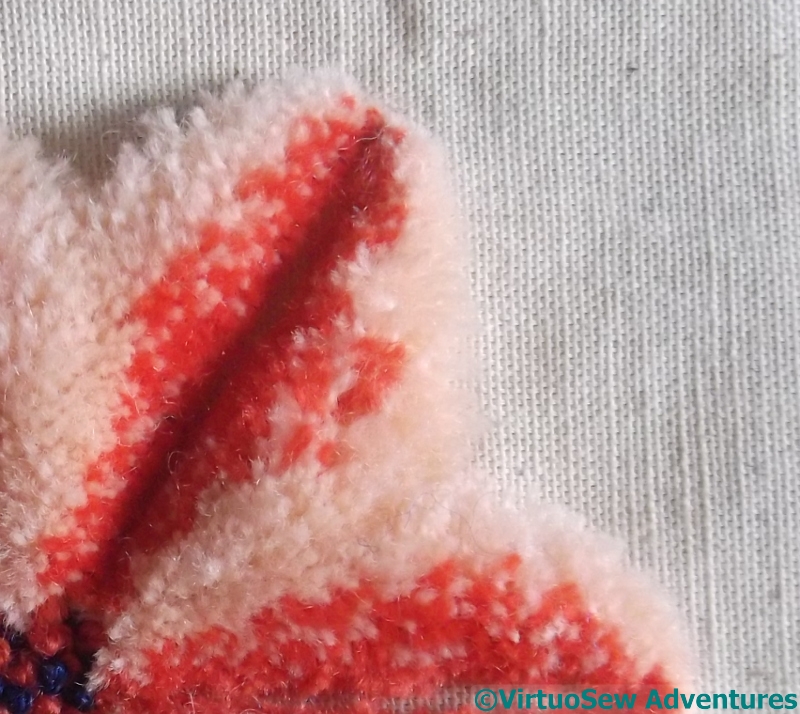
Close Up Of Woolwork
Doesn’t it look wonderfully woolly, though!
A Hug for A Handbag
Rose Hug
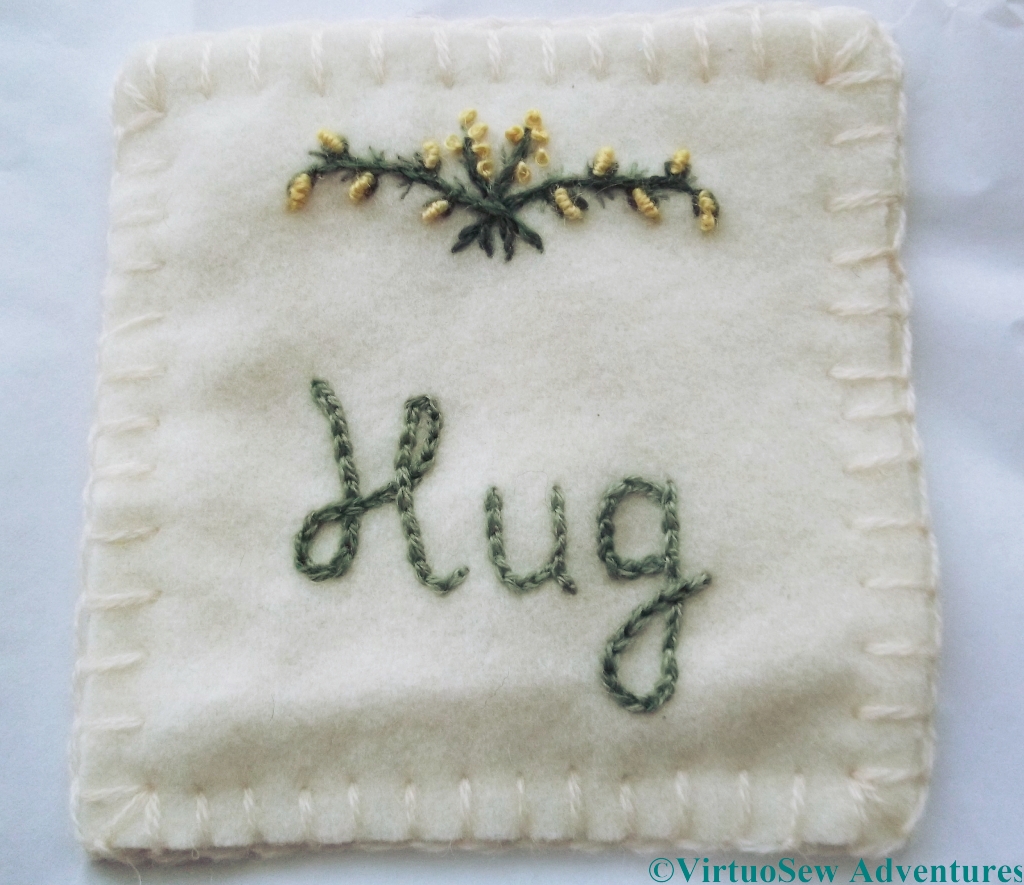
Gorse Hug
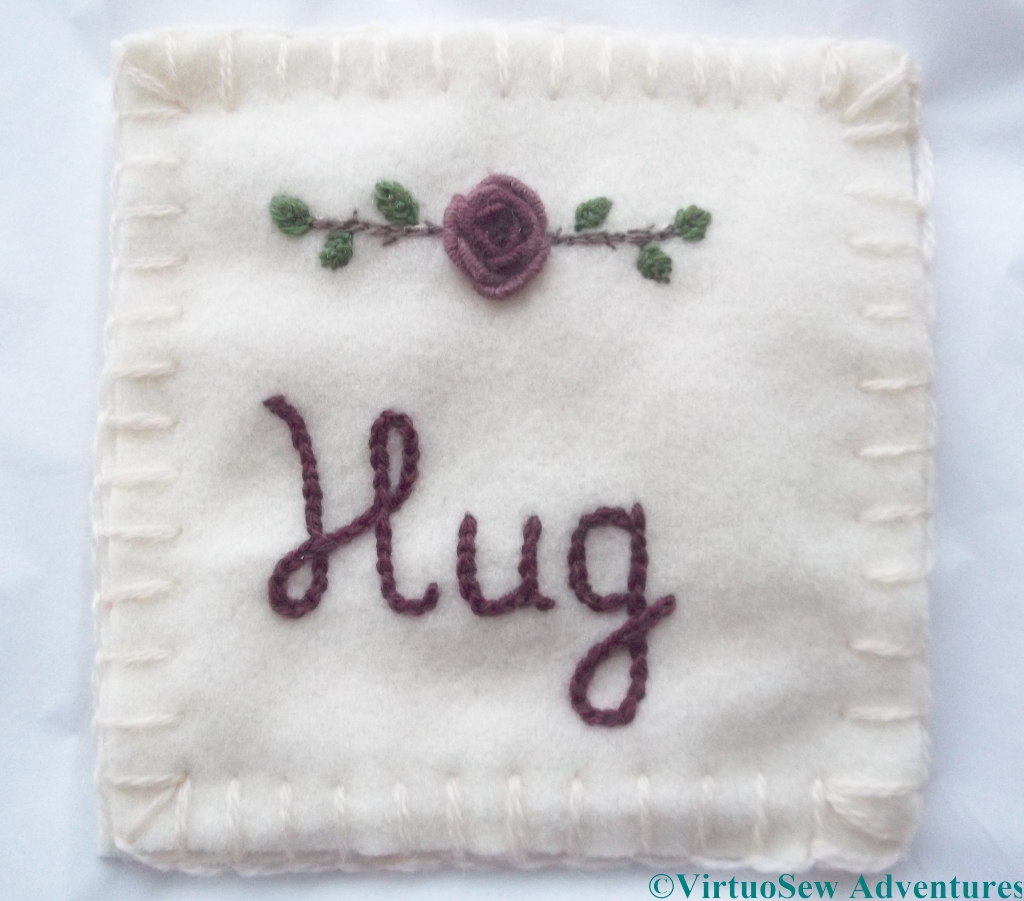
Sometimes there is nothing you can do for people but give them a hug; sometimes even that is rendered difficult, or even impossible, by distance. For those occasions, I’ve created a Hug For a Handbag. It’s a small square of snuggly cashmere blanketing, embroidered with the word “Hug” and with a small embroidered motif on the top. I have backed these with another layer of cashmere, to make them even snugglier.
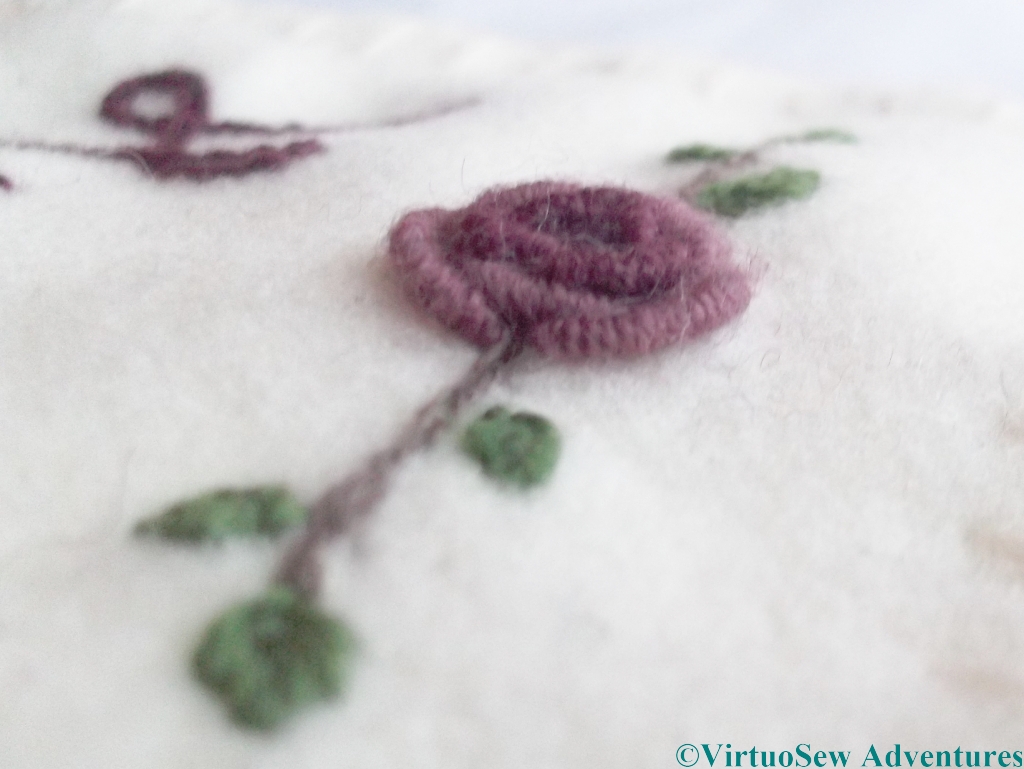
Rose In Profile
The rose on the Rose Hug is worked in bullion knots, which were not among my favourite stitches, but I’ve warmed to them because the rose seems to have worked so well. The inner knots are shorter, and worked using a single thread, while the outer ones are not only long enough to have involved a great deal of wrangling to get them to settle nicely, but worked using a double thread.
The leaves are worked in nested fly stitches, and the stems in stem stitch (of course!), with tiny thorns of straight stitch alternating with the leaves.
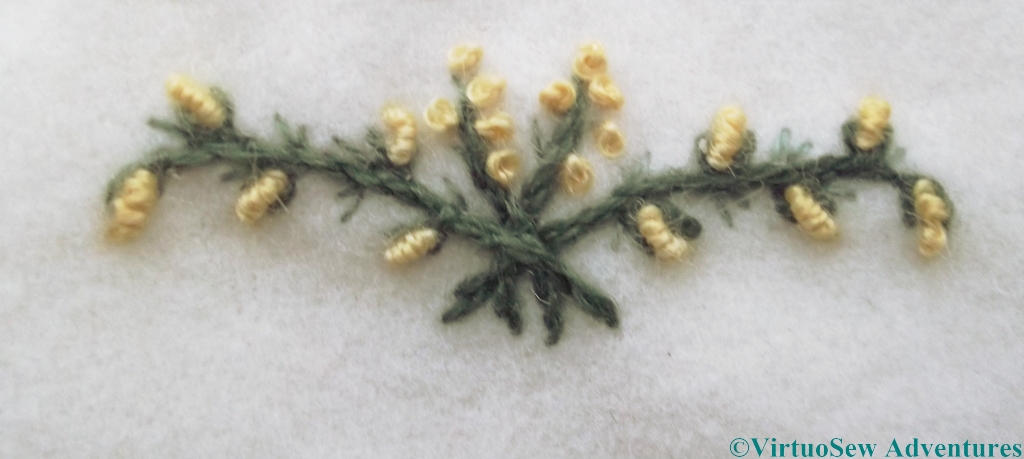
Gorse In Close Up
You can tell that I have warmed to bullion knots, because I used them for some of the flowers of the gorse on the Gorse Hug. The buds are French knots, and the thorns and sprigs are worked in fly stitches, using single threads instead of the double thread used for the stems.
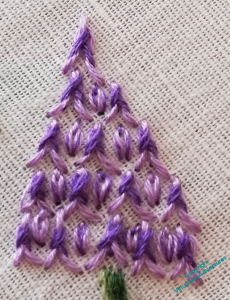
This is a wonderful use for some gorgeous woollen threads I bought somewhere in Pembrokeshire ten years or so ago (unlabelled, but they are so soft and lovely I wonder whether they came from Renaissance Dyeing) and some more, bought in Australia, which come from Gumnut Yarns). They have been a sheer delight to use. There’s a lovely misty blue in among them, too, so I am thinking of another design, of Lavender, to make up to have ready next time I need a Hug to send out.
But on the other hand, I rather like stitching a Hug with the recipient in mind. Maybe they’ll feel the hugs I was thinking when they receive the gift.
My Very First Appliqué

First Surface Embroidery
Rummaging in the archives is a very salutary experience. This indescribable piece of appliqué is the first embroidery I did without guiding holes in the fabric (like the little mat I described in an earlier post). I remember starting it when I was visiting a friend – it was a rainy day, and I think her mother was at her wits’ end with us. She sat us down with fabric, needle and thread, and (I suspect) prayed for peace and quiet..
Even though the stitches are dog-legged and the colour choices leave a lot to be desired, the piece still reveals things about Rachel-the-Stitcher that I recognise today. One side of the piece for the house is sewn down with blanket stitch, two with running stitch, and one with zigzag back stitch. You can take that two ways – either as evidence of my butterfly mind, never sticking to a single method, or as evidence that even then I was thinking about the implications of a stitch. Blanket stitch is a good “grounding” stitch, because of the combination of uprights and horizontals, and the zigzags are rather reminiscent of the wavy edges of some roof tiles.
The tweeds chosen for the windows and the pattern-woven braid for the door also show early signs of thinking about what I’m doing – the square patterns of the tweed recalling leaded windows and the pattern-woven braid creating a different texture for the entrance.
The braid edging glued to the frame is also symptomatic of a tendency to over-complicate, which I’ve not eradicated to this day. I think I keep it under control, but that is all I’ve managed to do…
Incidentally, like all those little girls of long ago, working on samplers with their governesses, unaware that students of social history and students of needlework would be poring over their work in the future, I noted on the back when I finished the piece – 30th September 1975. Unlike most of those little girls, I also noted – in so many words – that “It was fun.”
Another of Grandmama’s pieces
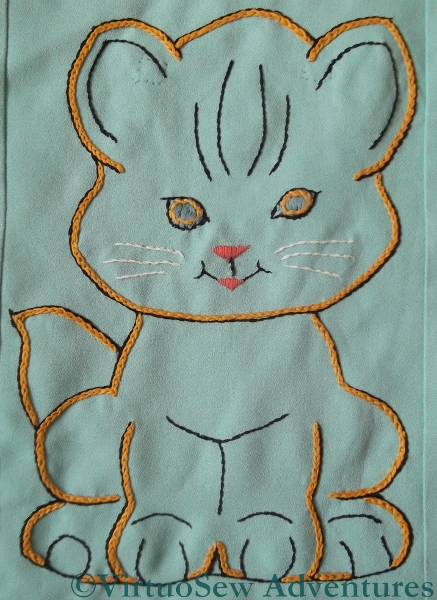
Pyjama Case
Grandmama must have worked embroideries galore for her assorted grandchildren. This pyjama case with a chubby kitten on the front was worked for me – I think as a birthday present – when I was about nine, and I’ve rediscovered it among a host of other reminiscences of childhood.
You can see the lingering “Make Do And Mend” ethos of the wartime years when she was bringing up her own family in looking at the whole thing, which is actually pieced together to create the final, full size of the pyjama case. It’s worked on a synthetic crepe, too, which many embroiderers today would tend to despise.
However, if you zoom in on the picture, you will be able to see the legacy of her teacher Miss Hunter in the beautifully even stitches of the embroidery (nothing complex – chain stitch, stem stitch, and satin stitch). That legacy is also apparent in the care that Grandmama took in lining it just as beautifully. She’s even sewn tapes to the inside of the case so that the strain on the press studs is reduced.
I’d almost forgotten about this piece and I was thrilled to find it again!
As from today I am going down to just one post per week. I’m planning a lot of work on the house, and I don’t want to be resenting lost embroidery time. Not least, the ultimate goal is to have a studio, or at least a studio corner, so eventually the work should result in a better life for my embroidery. I will still be embroidering, and still writing posts (I’ve found more of Grandmama’s bits and pieces, too!), but I hope at a slightly more relaxed pace.
Another ancient piece
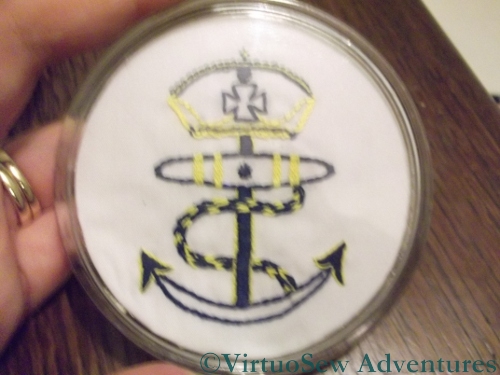
The Coaster I worked for my Grandfather
About fifteen years ago I was going through one of those periods of penury that we are all subject to, so Christmas presents and birthday presents became rather a challenge – usually solved by making something, with varying degrees of success.
This coaster was made for my grandfather, based on a version of the merchant navy’s Crown And Anchor symbol. It’s worked in ordinary stranded cotton (all I had at the time) and you’ll be surprised what stitches I managed to cram into it!
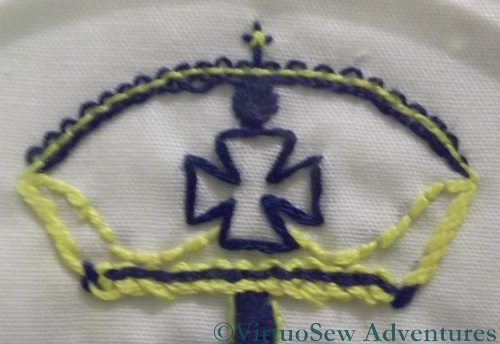
The Crown in close up
I don’t imagine that Grandad noticed (he only had one eye – the other was glass – and the working eye was short-sighted), but the top curve of the crown is worked in Pekinese Stitch, worked very small and tight, while the headband is worked with the colours the other way around and slightly larger and looser. The tiny cross on the top is a composite of an ordinary cross stitch worked over a slightly larger upright cross stitch.
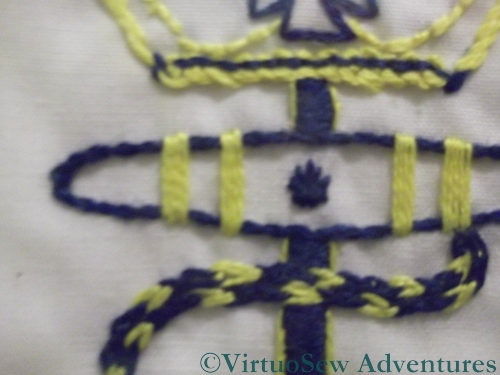
The Rope And Shank
The more conventional stitches of course included back stitch, stem stitch, and satin stitch. The cable that is wrapped around the anchor is worked in two rows of Magic Chain Stitch, purely because (if I remember correctly!) I thought it would be fun and had been twitching to try it ever since I had seen it diagrammed. It worked pretty well in the end, as it happens.
It’s not one of my most successful pieces, but it was fun to do, and it came back to me after my grandfather died and now lives beside the spare room bed, ready for glasses of water or cups of morning tea.
Quaker Tapestry kit – Cooperation is better than conflict
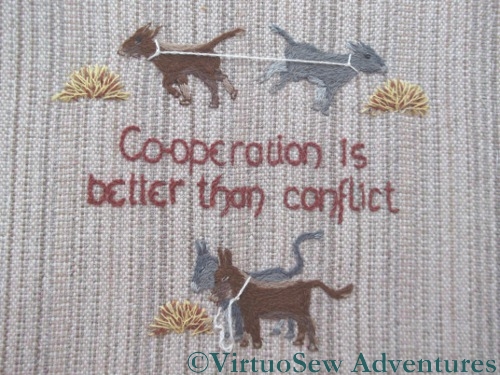
Cooperation is better than conflict
I suppose you could say I inherited this panel. A local embroideress died, and her daughter gave me (and I believe many others!) various bits of her stash. This was nearly, but not quite, finished. I’ve now finished it and haven’t the vaguest idea where to put it, as I’ve no wall space to spare!
It is based on one of the panels of the Quaker Tapestry, which is a fascinating piece of embroidery depicting the history and development of the Society of Friends. The woollen fabric was woven especially for the project, and the kit included not only the woollen fabric, but the cotton muslin backing that they recommend to stop the fabric puckering.
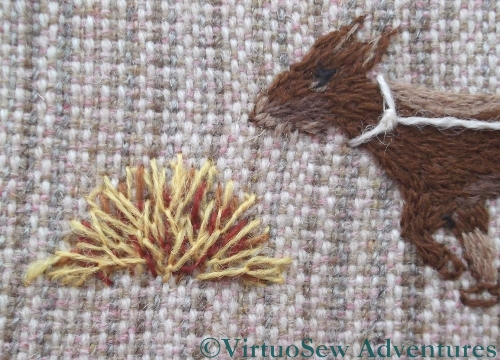
Fly Stitches For Hay
I was delighted that the lady was willing to give me this piece to finish, because we had seen the Tapestry (which, like the Bayeux Tapestry, is an embroidery!) during a visit to Kendal a few years ago, and I was fascinated by the variety of the stitches used, and very impressed by the general level of skill demonstrated, considering that it was embroidered by many groups of people.
In fact this kit doesn’t employ the whole variety of stitches used in the Tapestry, but I liked the use of Fly Stitches for the hay, and the use of the long taut straight stitch for the rope between the donkeys is just like my use of the same technique in the Camberwell’s rigging!