
Tag: Dreams of Amarna
Lotus Flower Coat – Difficulties!
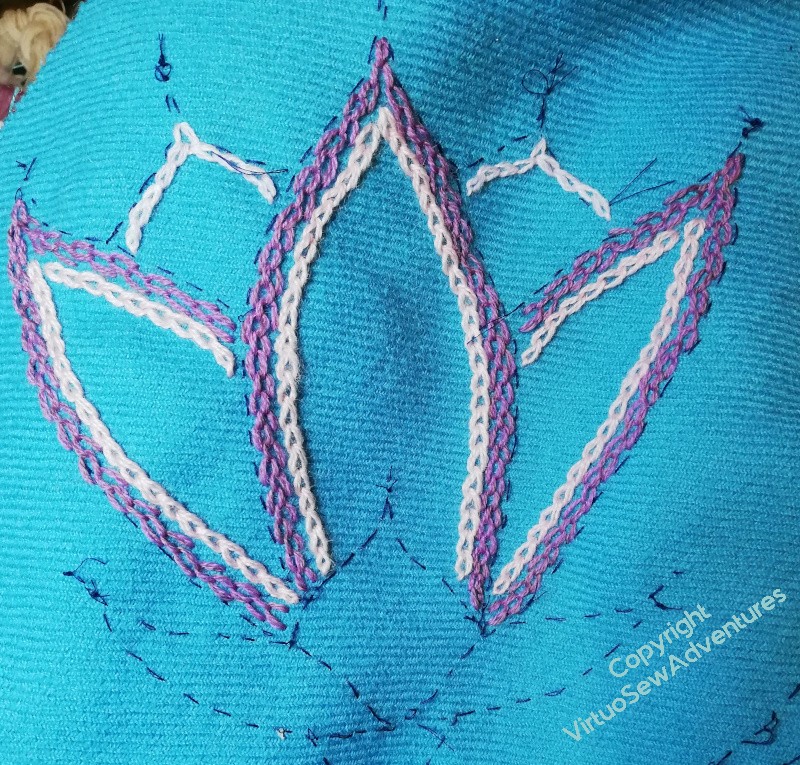
My idea for the stitching on the Lotus Flower Coat is that the petals will be filled with chain and feather stitch variations in a variety of threads and shades. White and cream for inside petals, white and cream with some lilac and pink on the outside petals and the half open flowers. I have plans for the leaves and stems, but we all know how my projects change under my feet!
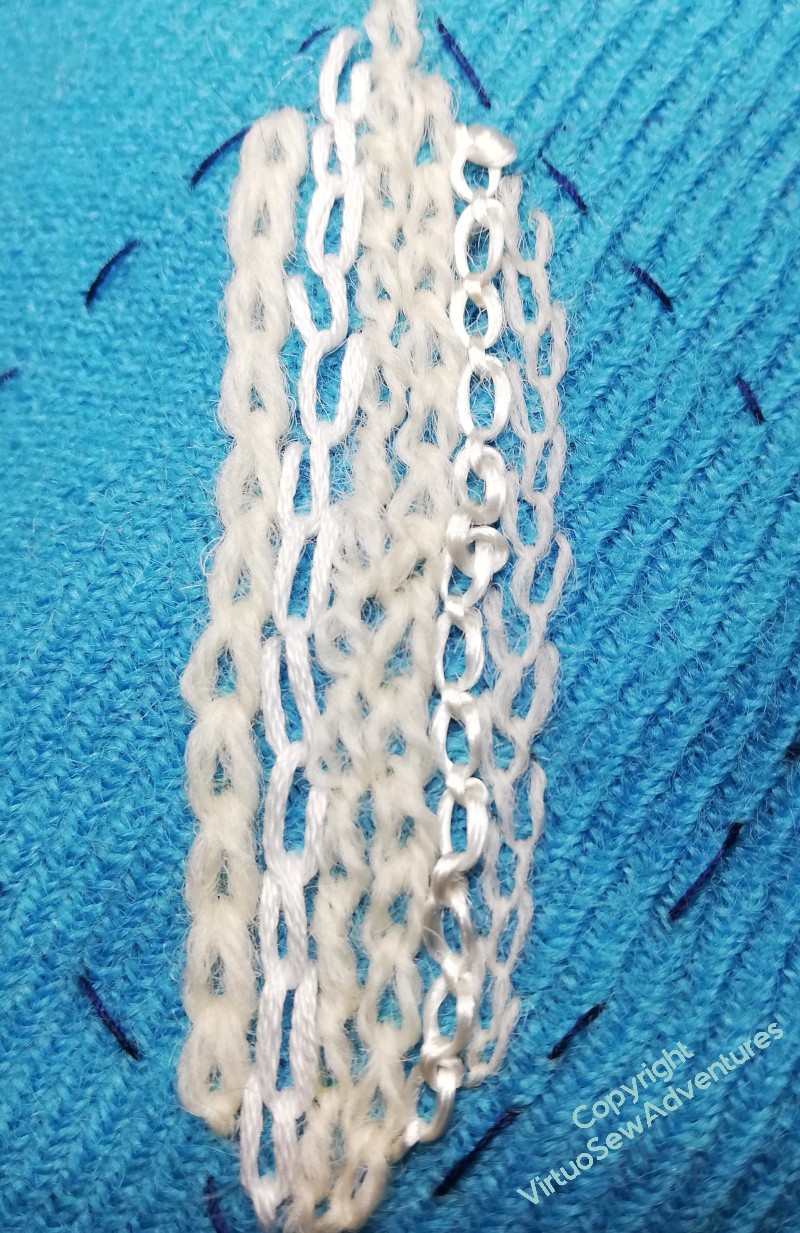
This – one of the small petal tips that show the inside – shows how this developed in the early stages. I think the tapestry wool is too heavy, so that’s coming out.
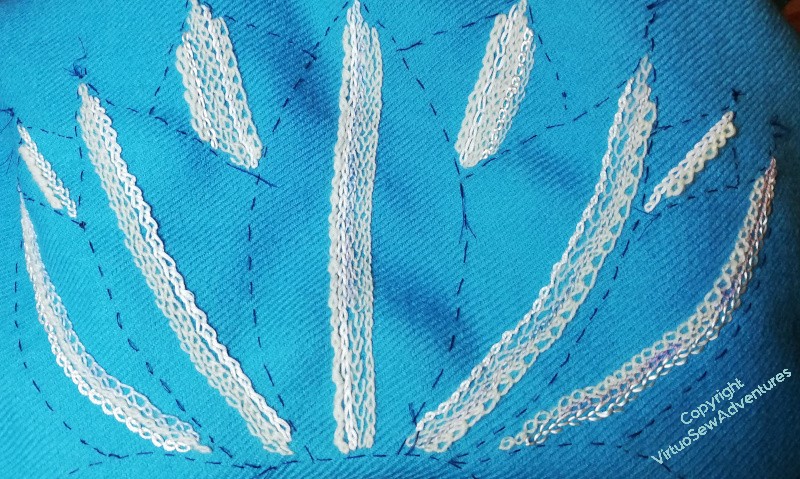
Mindful of the difficulties I sometimes have with repetition, I decided to work across the whole open flower at once, and at the point of writing, it had got to this, on the right. And at this point, I rather lost my nerve. I wasn’t sure what was wrong, or why, I was just rather unhappy with it.
So I decided to try an entirely different approach on one of the half open flowers, to see whether that helped at all.
It has. I don’t like this at all, heavy, clumsy, not at all conveying the sense of enchantment I have from looking at my assorted source materials, or the sense of enchantment Mary Chubb describes in her first encounter with the Lotus Tile Fragment.
Look, I said that Dreams of Amarna had come to a satisfying and coherent conclusion – I never said that it would never guide my needle again!
Made In Ancient Egypt
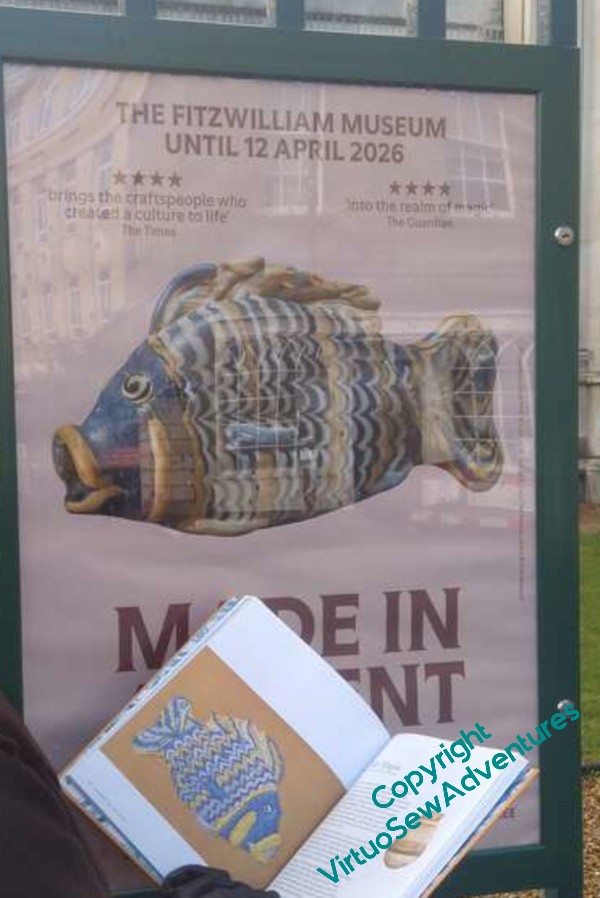
Another exhibition I’ve visited recently is “Made in Ancient Egypt” at the Fitzwilliam Museum, Cambridge. I hadn’t in fact heard it was on until we got to Cambridge for entirely other reasons, but at least I had a copy of my book with me so I could introduce it to some of the inspirations!
Not many inspirations, in fact, as the exhibition covered ancient Egyptian art and craft over many centuries, and the “Dreams of Amarna” project as it developed, I’ve concentrated, not just on the Amarna period, but on the Amarna period as it was known and understood in Mary Chubb’s time. This was necessary in order to give me some focus, and some sensible basis for my researches and ideas, but it does mean that now I’m not requiring myself to restrict my attention, vast swathes of time are shouting for attention!
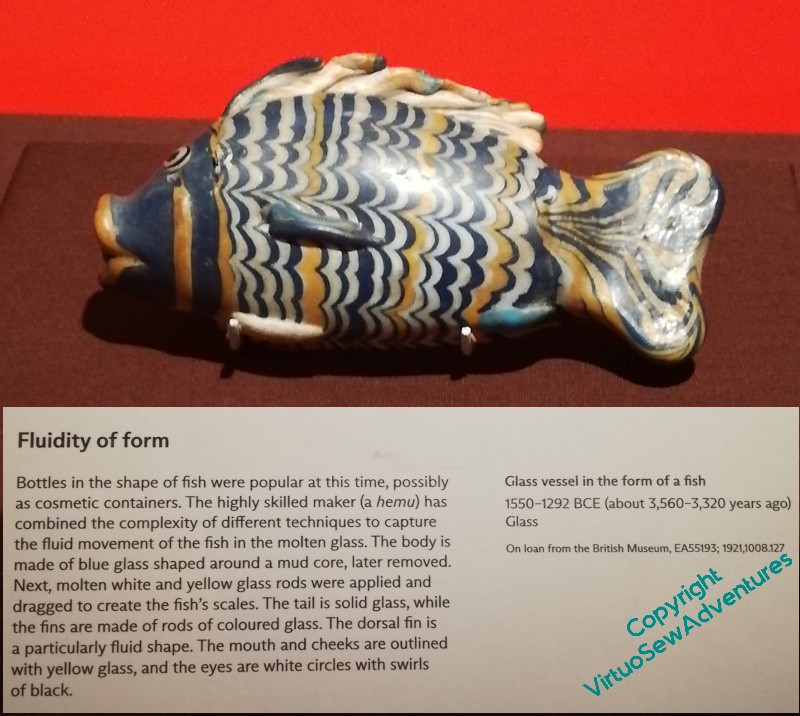

Mind you, I did find the original of the glass vessel in the form of a Nile Tilapia that I used to inspire my embroidery!
The original is even more enchanting in person, as it were, plump, crisp in outline, delightfully bright in colour. And having heard a modern glassworker speak to the difficulties of making one, it’s clear we shouldn’t underestimate the ancients!

That was very much the theme of the exhibition, in fact. It was illuminated, and illustrated, by some large reproductions of watercolours made by archaelogical recording artists such as Nina de Garis Davies showing extracts of tomb paintings, and by some translations of stelae showing quite clearly that those who erected them were conscious of, and proud of, their own hard won expertise and that of their ancestors.
The exhibition as a whole covered a huge range of skills, carving, faience modelling (and carving, which I had not known they did!), jewellery making, even textiles – there was a fine tablet woven sash, an old friend from Liverpool World Museum, a very familiar seeming linen dress, and some breathtakingly fine linen strips, which looked unused, still strong and ready to go.
I think the exhibition runs until April, and as it has gathered finds from many museums, not just in the UK, if you are interested, I thought it well worth both time and money.
News for this week
First Newsflash

A few weeks ago, I listened to the FiberTalk podcast episode with Tanya Bentham, and left a comment to say how much I’d enjoyed it. I had a reply quite quickly from Gary Parr saying “Thank you for your comment. I’ve just been looking at your blog, would you like to be on the podcast yourself?”. It seemed like it would be fun, so I said Yes.
It was fun!
Gary had clearly been rummaging on my blog to find things to talk about, and I think he found some interesting questions to ask. Certainly he gave me a great deal to think about!
You can find the podcast episode here on the FiberTalk website: https://wetalkfiber.com/2025/11/16/stitches-and-stories-with-rachel-wright
Or you can watch it here on YouTube: https://youtu.be/TGEJw_q8tOA
Second newsflash
I will be joining the Embroiderers Guild UK on their stand at Knit And Stitch, Harrogate, on Friday morning. I’ll be happy to talk about embroidery in general and Dreams of Amarna in particular, and I will have my pens all ready to sign copies of “Dreams of Amarna – Stitching An Egyptological Adventure”!
Another Egyptological Outing

In the spring, I went to a Study Day in Bolton, all about Mummification, and a few weeks ago, I went to another, this one about Egyptian art, artists and art materials.
Bolton has an extensive Egyptological collection, has been associated with the Egypt Exploration Society from the beginning, and is still very much so. What’s more, the Curator, Ian Trumble, wrote the Foreword for “Dreams of Amarna”, and did some sanity checking to make sure I wouldn’t give any Egyptologists conniptions!
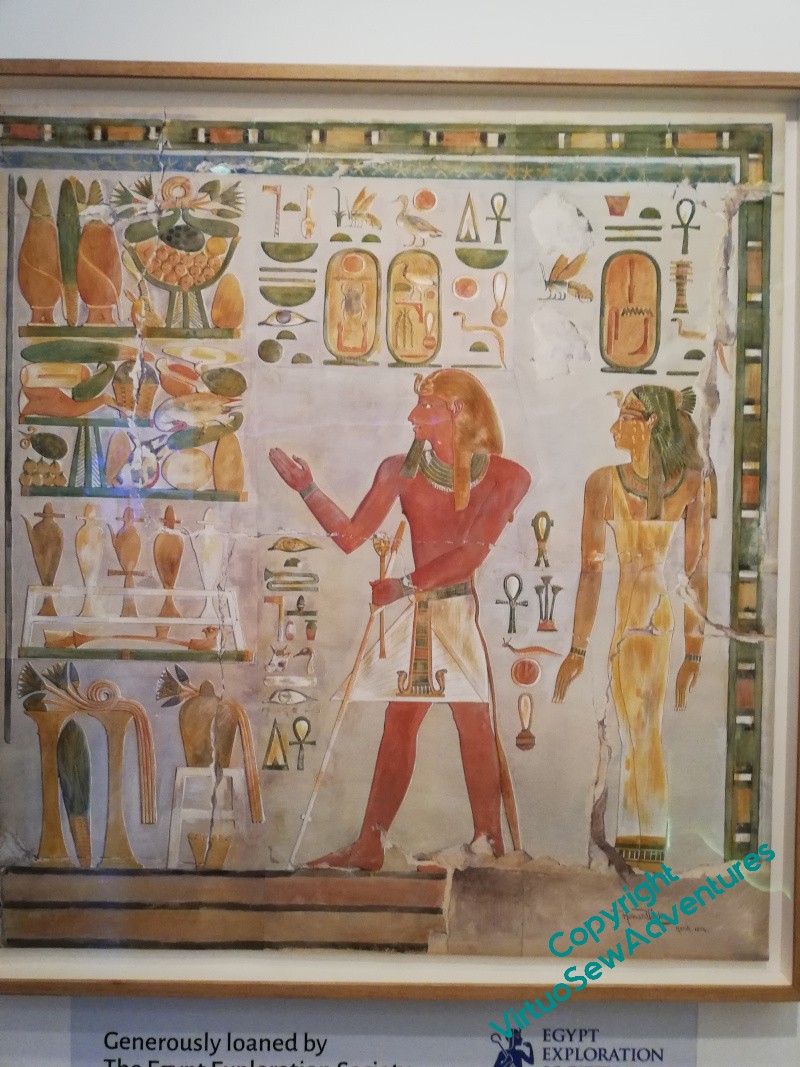
Part of the inspiration for the Study day was a temporary exhibition based around one of Carter’s watercolours, a record of a wall painting from Hatshepsut’s tomb, currently on loan from the EES.
We had an introduction to hieroglyphs, starting beside the painting and then touring the galleries, a handling session, and a workshop which involved some experimentation with pigments and paint. This is based on some research by Dr Stephen Buckley, who is a chemist with Egyptological leanings, and has been working on resins and oils and their usage in ancient Egypt. It’s astonishing to see how much our knowledge has exploded as it becomes more possible to analyse non-invasively.
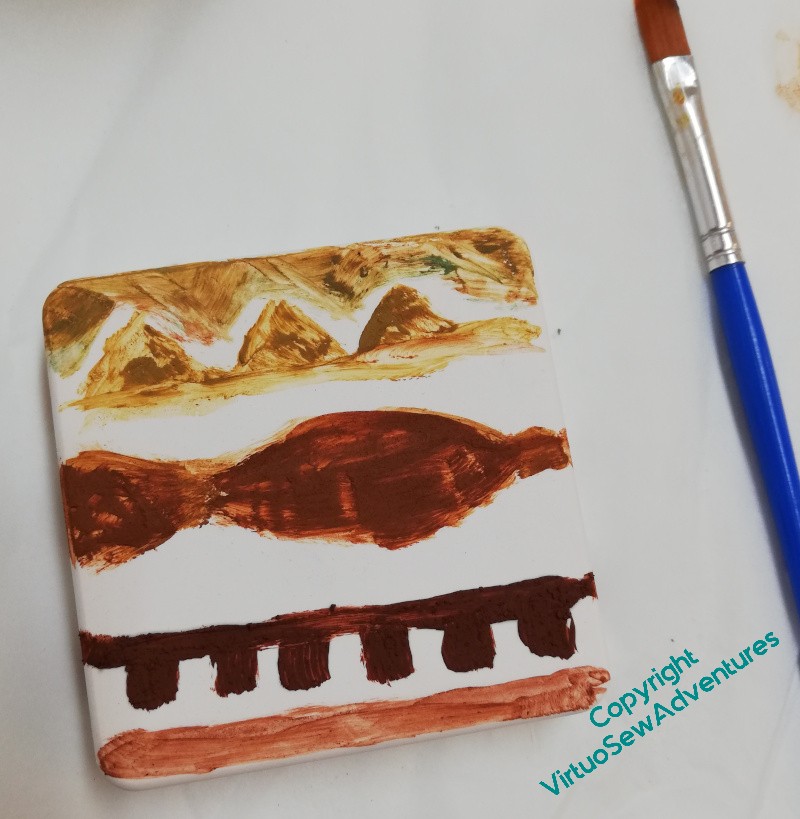
If you look at this little tile, you can see the top two lines of pattern are pigment and water, which is what a lot of people have assumed the Egyptians used to do their paintings.
You can see that the result is blotchy, and I can tell you from experience that it was really difficult to apply: it stayed on the brush, it clumped, it refused to stay where it was put, it was just dreadful. While we were struggling, Dr Buckley made us some paint from a recipe he’s worked out from an analysis of tomb paintings.
Well now, that was altogether better. It flowed, it stayed where it was put, and it diluted into something sensible and not into something blotchy. I was delighted with it to such an extent that I said audibly “Now this is a paint I could use!” and startled a grin out of Dr Buckley!
The day started however, with a lecture from Professor Joann Fletcher, who’s known to many from her TV appearances. She is just as authoritative and enthusiastic in real life, and she took us on a whirlwind trip from the predynastic period all the way through to the recording artists, like Harold Jones or Howard Carter, who were such an important part of the team in any excavation in the early 20th century.
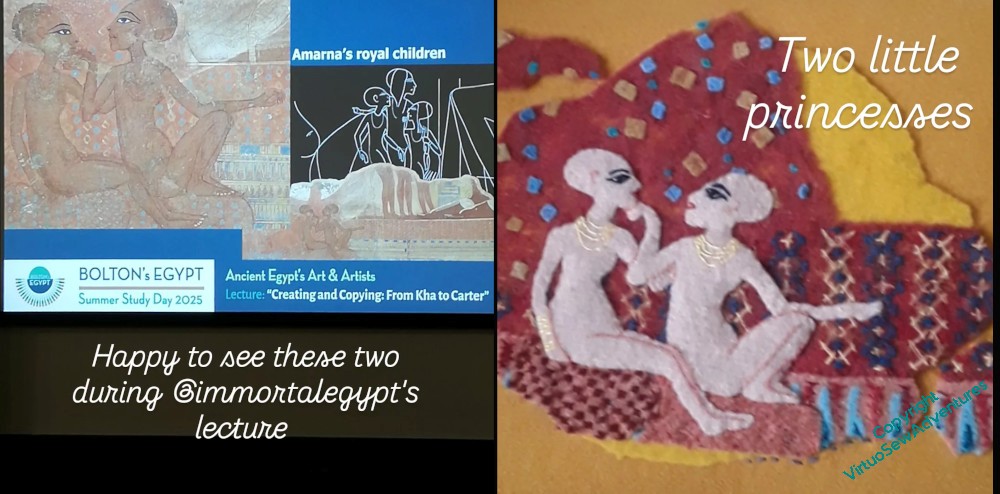
And look what came up to remind me of one of my favourite “Dreams of Amarna” pieces…
An Egyptological Outing..
Just because I have completed my Egyptological Embroideries (possibly not for ever…!) and have moved on to the early Roman period (Placidus) and the Early Medieval period (Aethelflaed), it should not be taken to mean that my interest in Egyptology has waned..
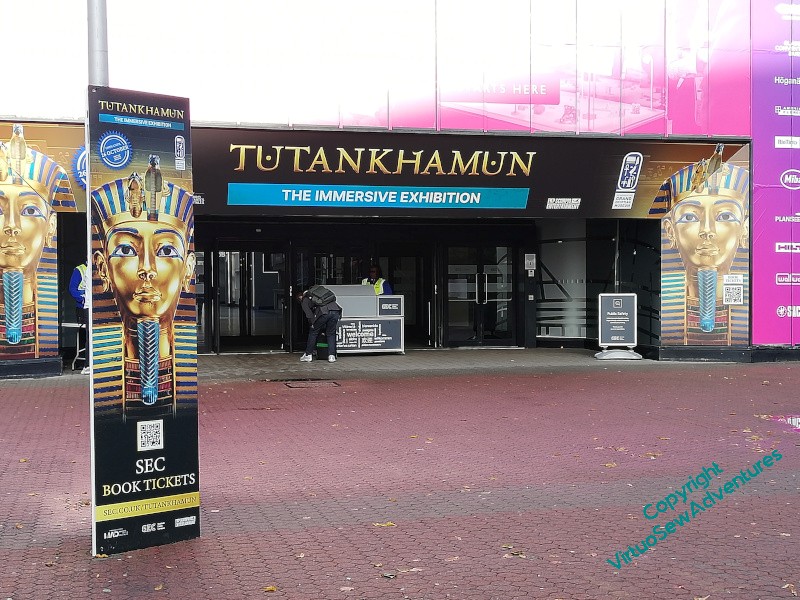
In fact, I heard of this Immersive experience from Alan Murphy, who helped me turn my manuscript and pictures in to a book, on behalf of the Embroiderers Guild. He and his wife saw the exhibition – Experience? – in London, and loved it. But they were there on the last day, and the next venue was to be the Glasgow Exhibition Campus. Well, that’s ok, there’s a train up the west coast that goes to Glasgow, and the Exhibition Campus has its own station on the local rail network. So off I went…
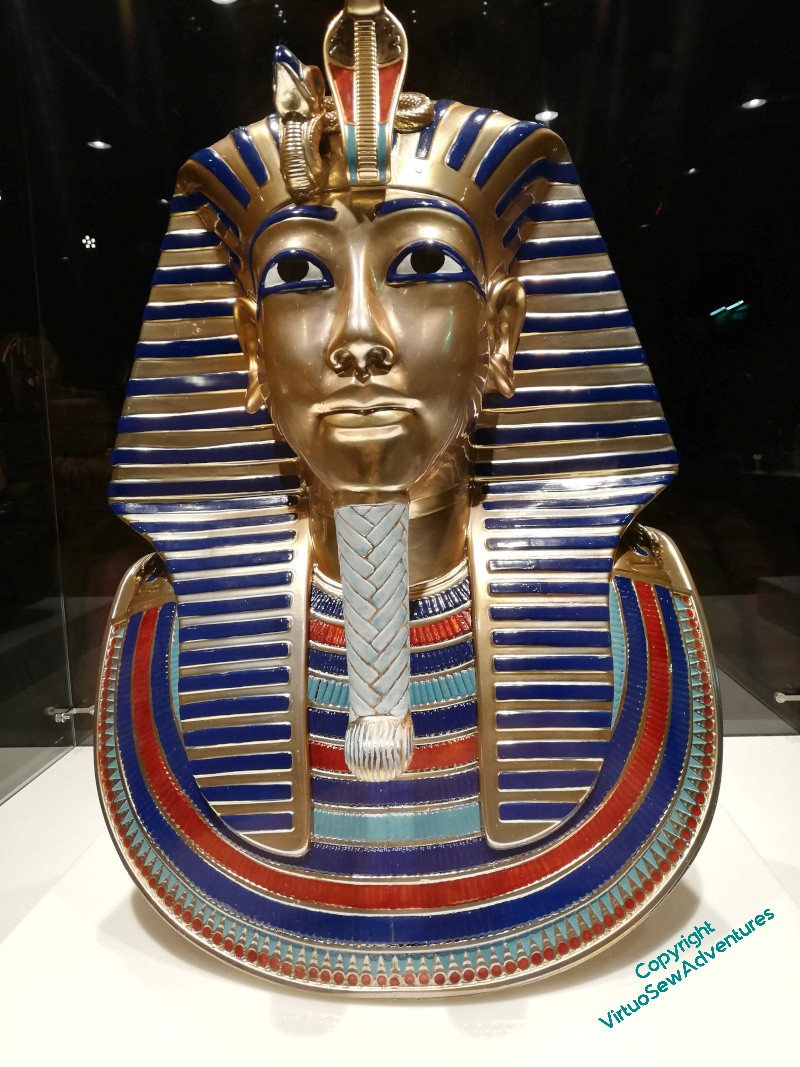

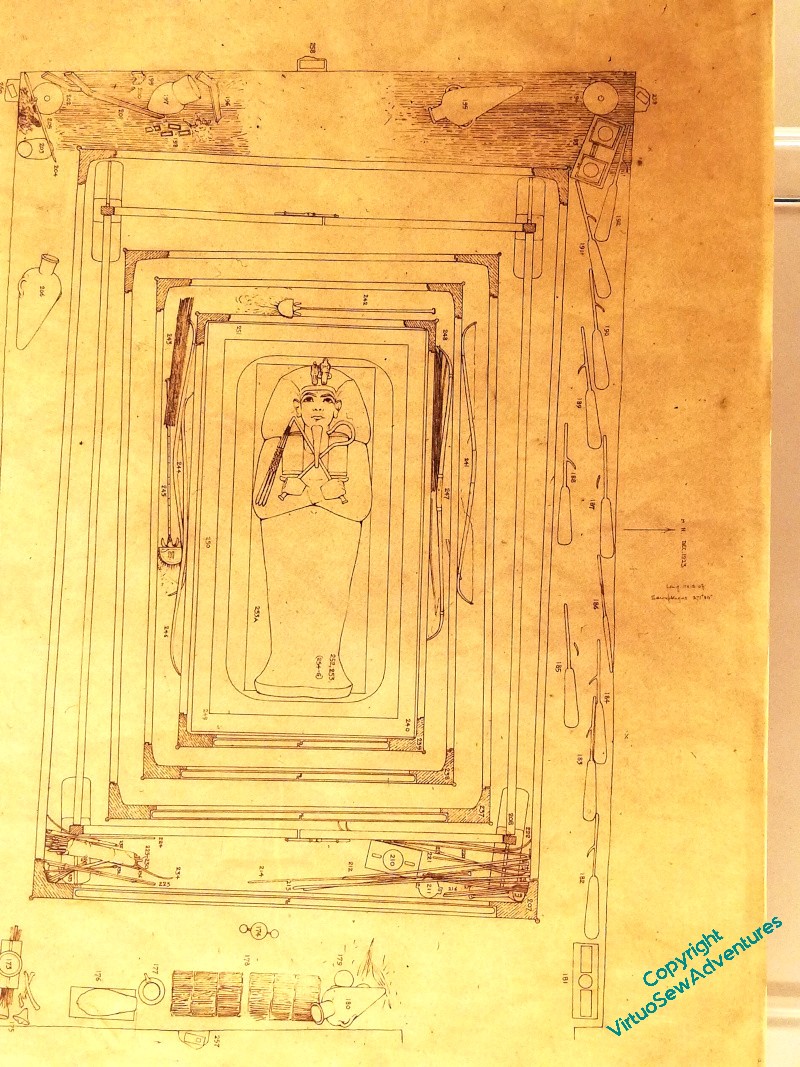
Like most of the major travelling exhibitions of this type, it began with a sequence of huge information boards, establishing context and ensuring that everyone has some similar understanding of the subject of the exhibition. In this case, that covered a canter through the history of Ancient Egypt, and the Eighteenth Dynasty in particular, and then a further exposition of Howard Carter’s career. Then, guarded by a spectacularly moody six-foot animated Anubis, pacing between a pair of mirrors, there were two rooms of reproductions of a variety of finds from Tutankhamun’s tomb, as well as some of the drawing and reports made by Carter at the time. All interesting, nothing I’ve not seen before in one or other exhibition over the last twenty years.
However, the finds were not really the point of this exhibition. That came from a huge hall on the walls and floor of which were projected a whole series of images and realisations, some relating to the excavation, some to the buildings and geography of Egypt, and some to Tutankhamun hiself.

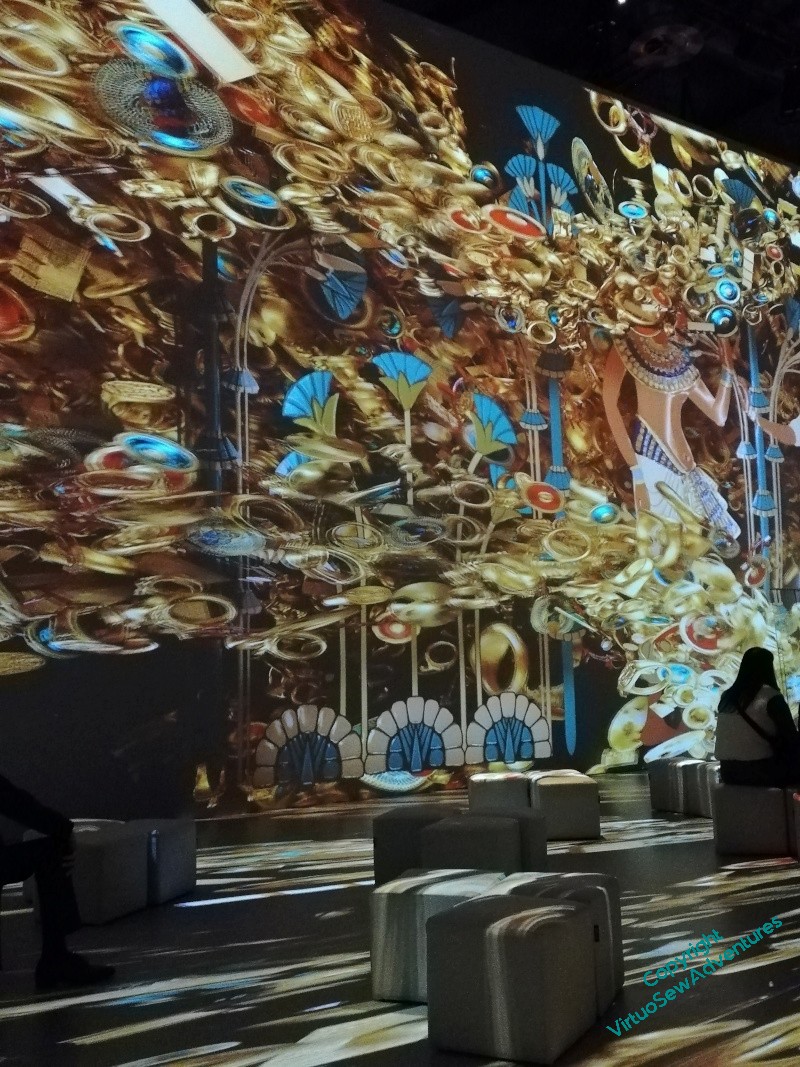
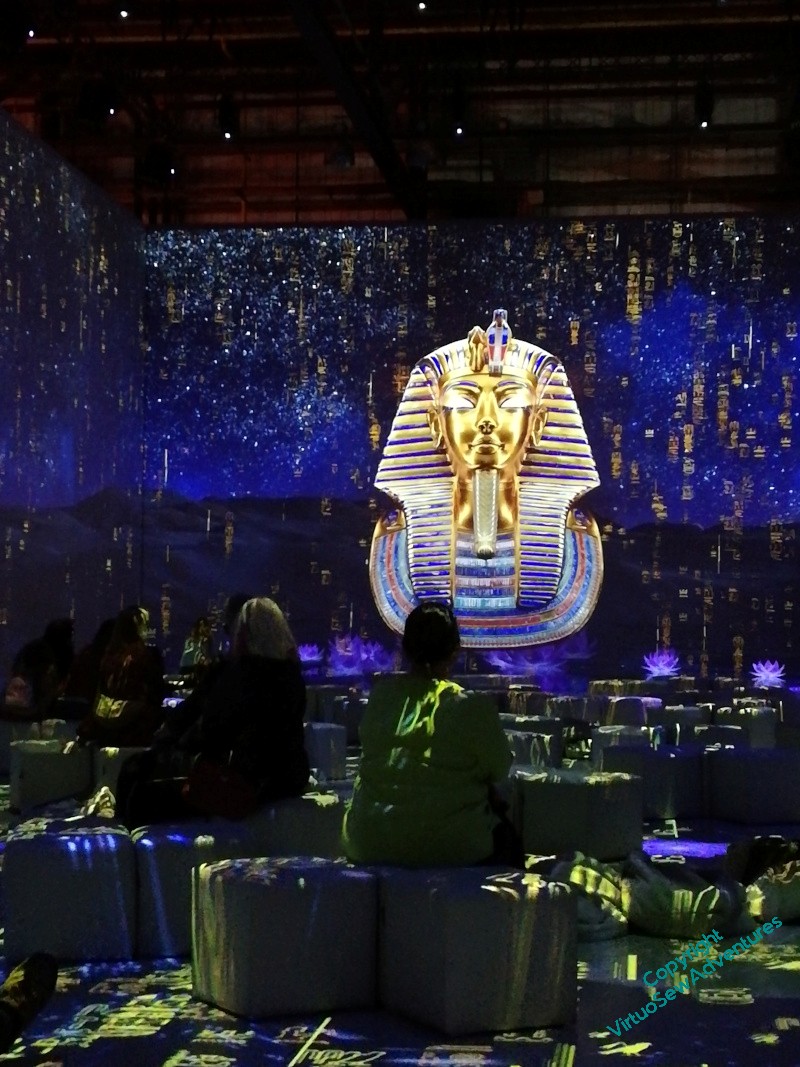


These were surprisingly magical, in spite of the occasionally rather overblown script and very tremendous music, and I happily sat through it all twice, before moving on to the next section, which I can’t show you, because it involved Virtual Reality headsets. Again, these mixed realisations of ancient Egyptian belief – the journey of the pharoah’s soul from his tomb to his judgment before the gods – with a tour of the camp where the Egyptologists were based.
Now, I’m not automatically an enthusiast for technological presentations, because it can be very hard to balance the technology and the story. The idea of the immersion in this created world is wonderful, but it’s easy to jolt the viewer out of it with anything slightly out of whack. By and large, that didn’t happen to me. I was enchanted by much of what I saw, entertained by almost all of it, and delighted to find myself able to raise a lantern in my hand as I toured the excavators’ camp.
And it gave me some more sources for the Lotus Coat, when I get around it, so you will probably see more of my Pictures From The Exhibition…
A website for Dreams of Amarna

The Dreams of Amarna book and project now has a website!
Not without some muttering and spluttering, I admit. Many years ago, I had some understanding of designing websites – quite simple ones, but still, I could do it.
That is no longer the case. There is altogether too much to deal with, too many different browsers and devices, too many changes of standard and best practice, not to mention technologies.
So instead, I used one of the templating services, said to provide an intuitive interface for developing a reliably working website.
I would argue that “intuitive” is entirely the wrong word, but after about five do-overs, I got there in the end.

It’s not wildly complicated, and it is no substitute for this blog, which will continue as before. It’s not meant as a substitute.
It is meant, in fact, to make life easier all round. For anyone specifically interested in the Dreams of Amarna, anyone who wants to help me plan and prepare the hoped-for exhibition, anyone who wants me to give a talk for their group – there’s a single point on the web where they can find me, and from which they can contact me.
I should probably have tried to get it ready earlier, but then, I hadn’t had Bernard Rose’s fabulous product and author photoshoot before…
Very Exciting News!
My most long term readers may recall that when I first started this blog, it was for accountability, in a sense.
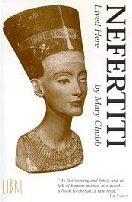
I had plans for a two-panel embroidery inspired by the book “Nefertiti Lived Here”, by Mary Chubb, and with Life the way it is for all of us, I thought the only way I would keep at it was if I’d said, in public, that I was going to do it.
Well.
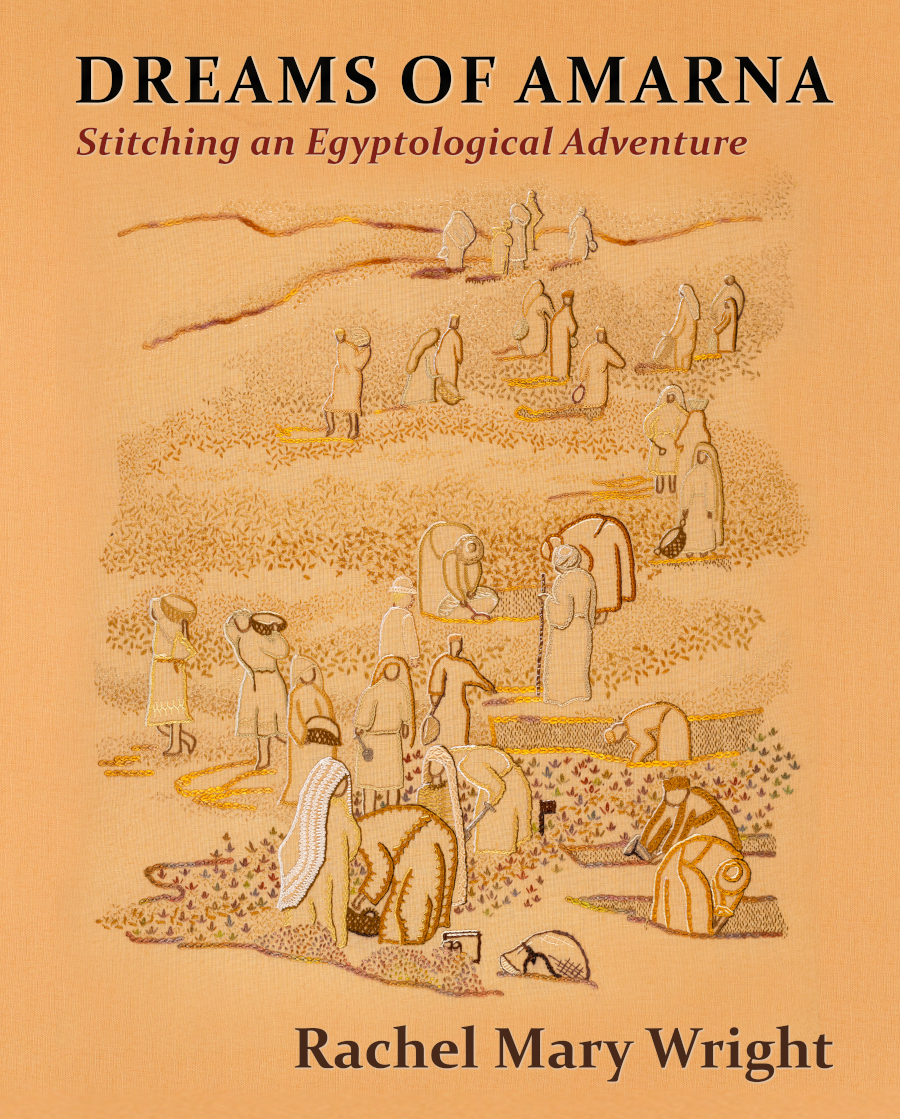
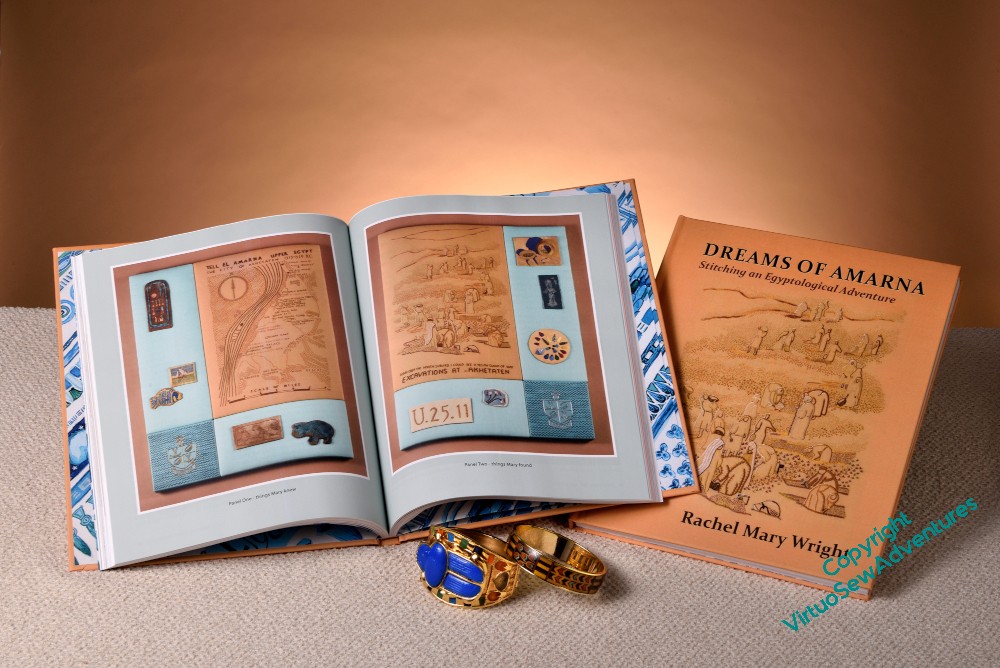
Some twenty-odd years later, that two panel project turned into 27 embroideries, 117 watercolours, and A Book!!
You may think I’d have nothing left to say, given how much I wrote on this blog as I was making the pieces, and when someone said “Why don’t you write a book?”, I rather wondered about that myself.
But it turns out that with the distance of having done a lot of other embroidery since, and a lot of painting, and a lot of thinking, there’s actually a lot to say. Not about the technical aspects; there are plenty of books of technique that as specialised books have the space to explain techniques in detail. But as someone who developed their own approach to design and design development, what I can do is share some of that approach.
The Embroiderers Guild have now published “Dreams of Amarna – Stitching An Egyptological Adventure”, and it is available to buy from their webshop now. It is copiously illustrated, with photographs by the wonderful Bernard Rose, showing embroideries and paintings, all done by me. I am thrilled to bits, and I hope you will love it, too!
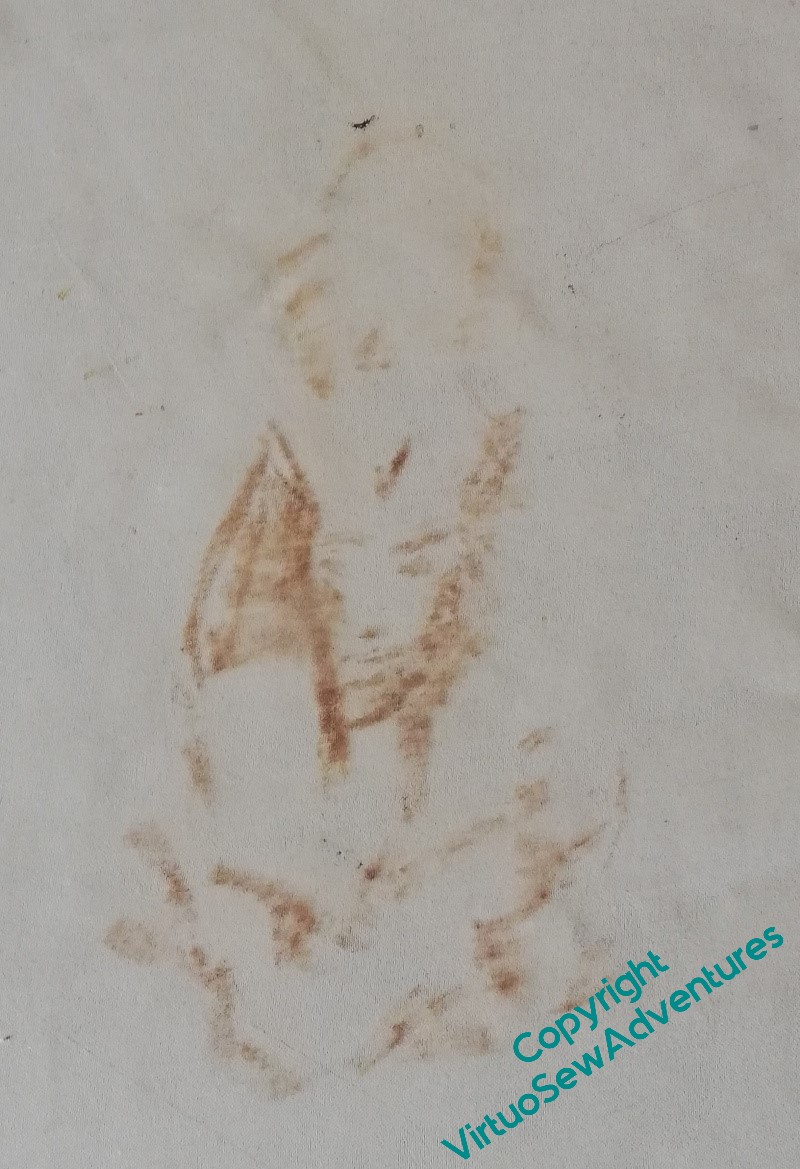
Overlay experiments
You may recall that I spent some extra time trialling other methods for creating the overlays. My original screenprint idea had long since been abandoned, partly because the past five years when I’ve been painting as well has given me much more confidence in myself, and partly because finding somewhere to make such big silk screens – as a one-off, what’s more! – was proving impossible.
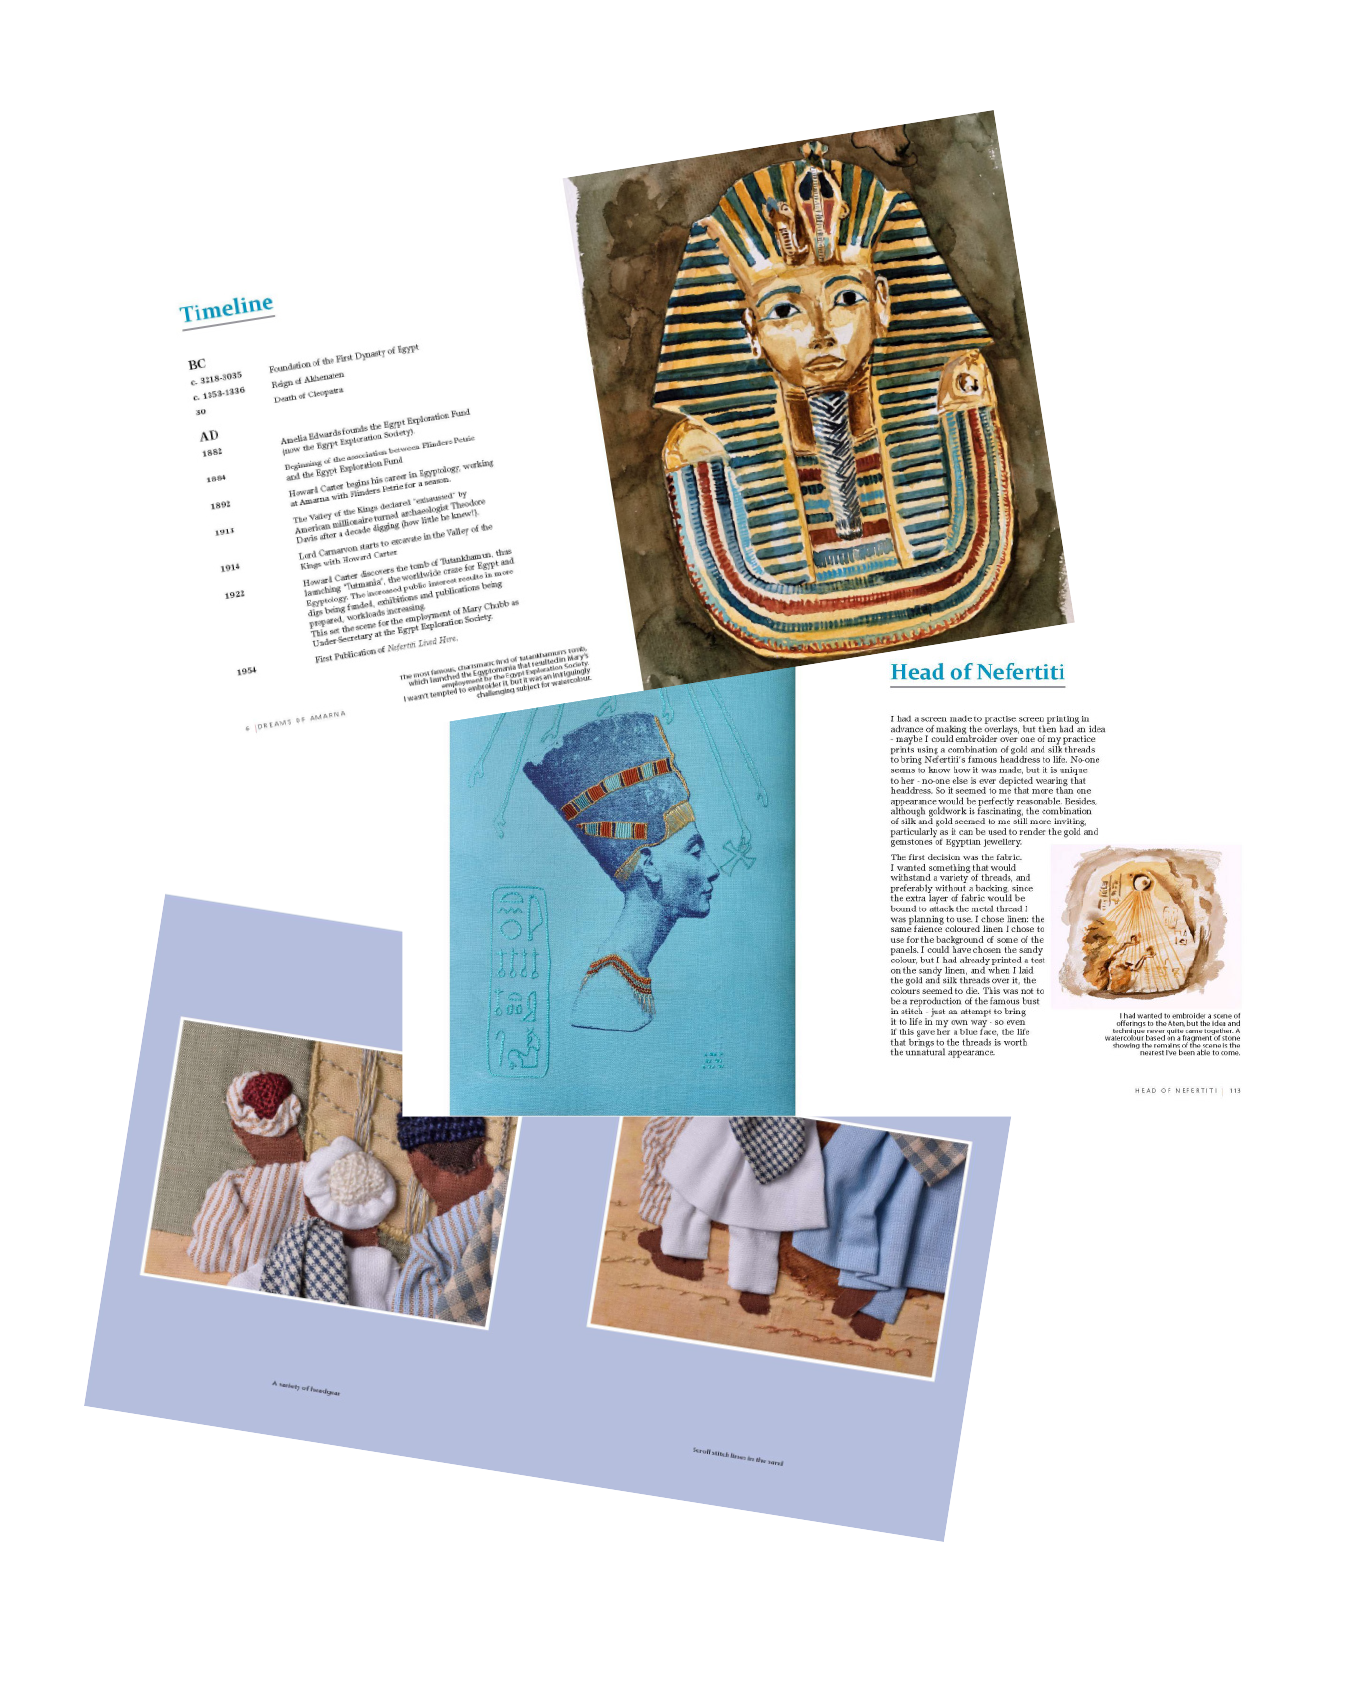
When I’d looked again at the first overlays I used in the first photoshoot, it was clear that they wouldn’t survive much longer, so I thought I would try with my acrylic inks. I cut stensils and dabbed, I used brushes and painted, I played with pre-wetted fabrics and with spraying the fabric with water afterwards.
In fact, I had several wonderful messy days.
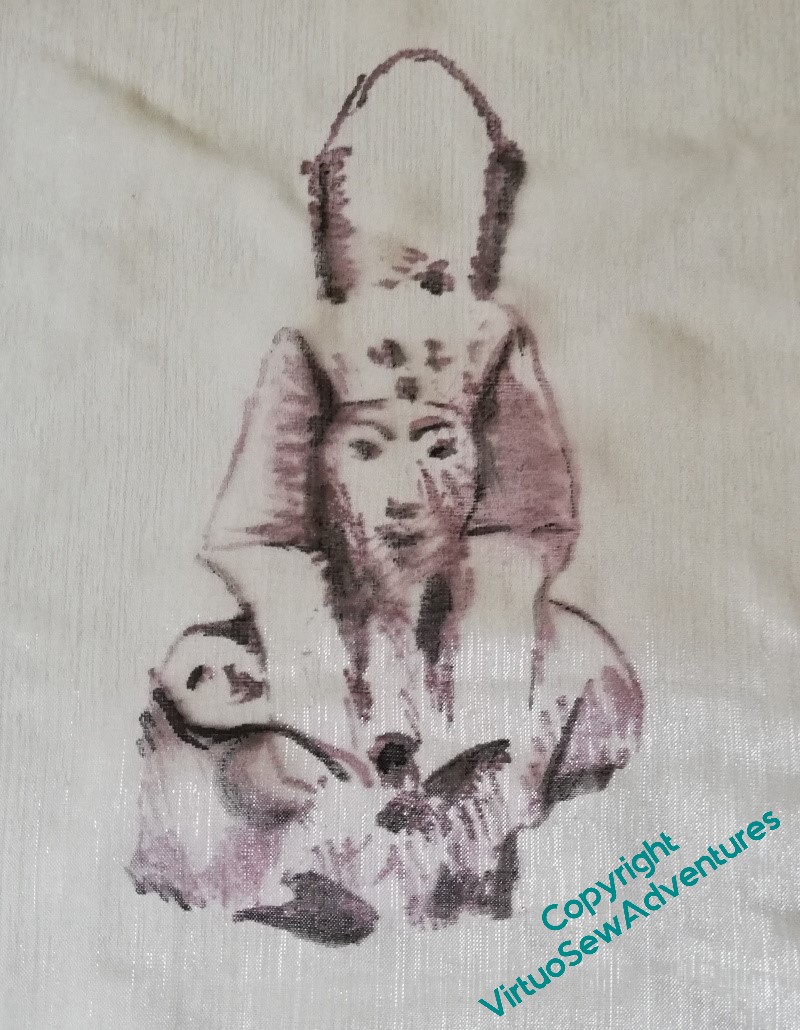
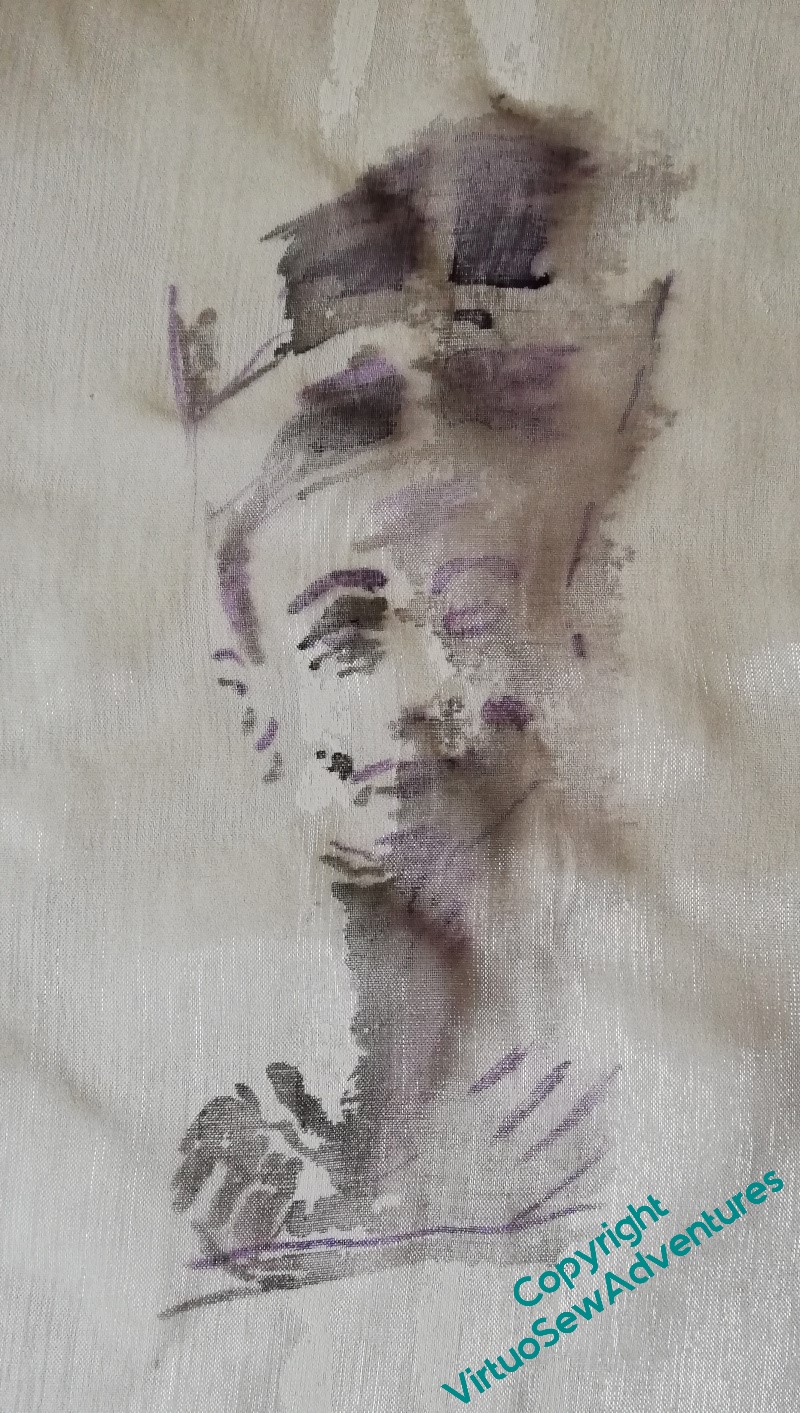
And as you can see, some of them were really striking, and wonderfully vague, and set against a plain background the washed out and tendrilly ones do create the appearance of decay and dissolution which is appropriate. The Amarna period was washed out of history in ancient times, and while Akhenaten has had the last laugh, for centuries his name and that of his Great Royal Wife were never spoken.
However, set in front of the embroidery, they confused the eye too much. The one on the left is too detailed, the middle one is seeping away before our eyes, and the one on the left has acquired spotches I never intended.
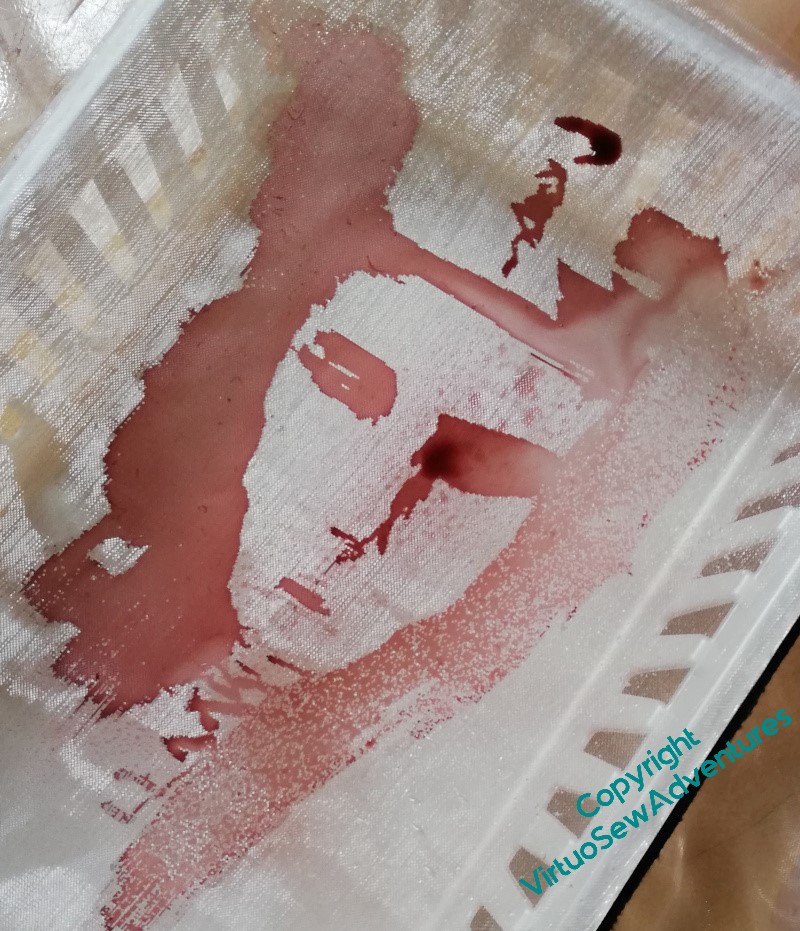
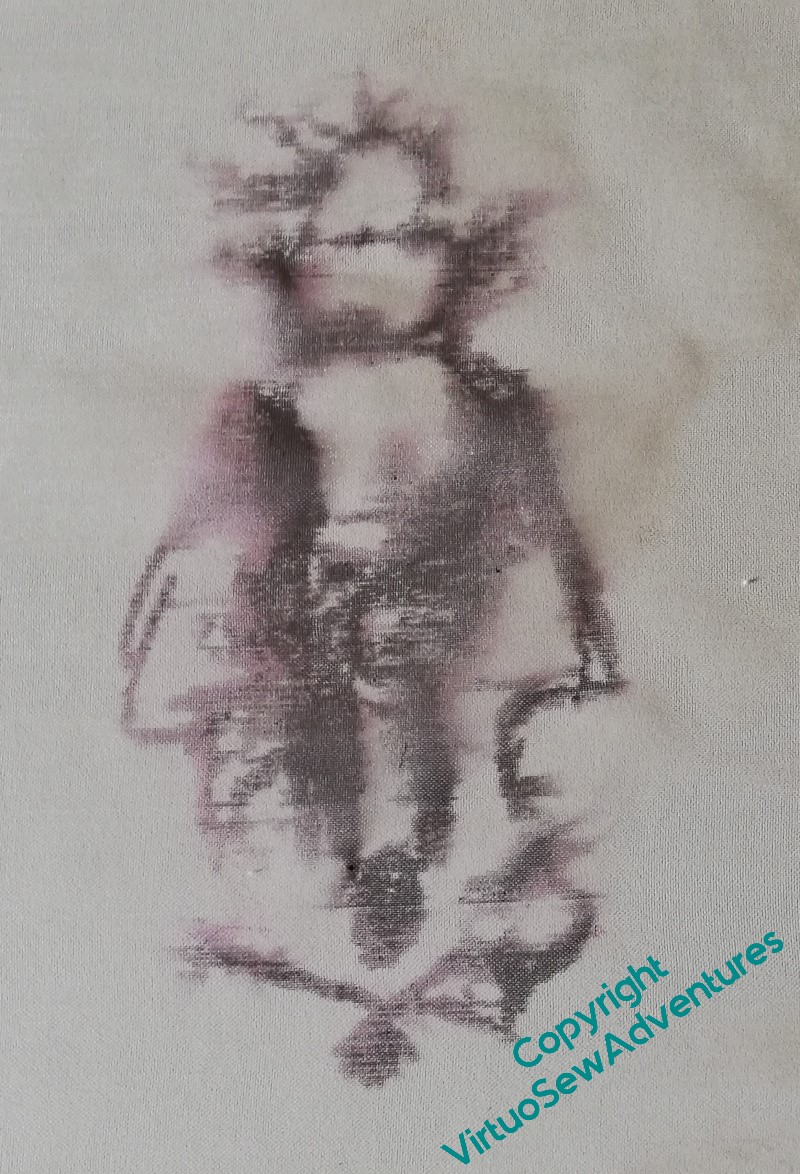
And then there was this one. I had thought that using a brown or sandy colour would aid the “there and not there” appearance.
It certainly nailed “Not there” – it didn’t really show at all!
So in the end, as I described, I went back to the inktense blocks, but with the added support of some pastel fixative. Since I’ve used the fixative, and the overlays are now stretched over frames and not subject to abrasion in storage, I hope very much that I did indeed find the best solution.
But if anyone tries to tell you that artists and designers get it right first time – don’t believe them!
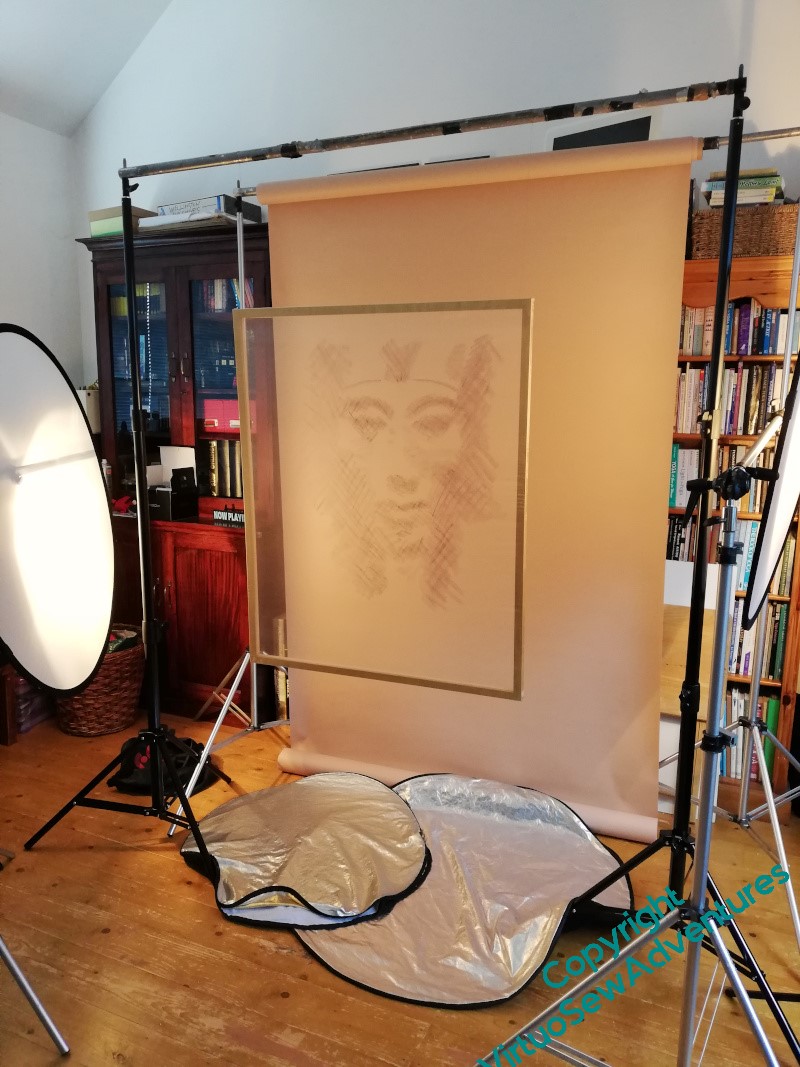
Another day of photography (second helping)
The complication of the overlays against the panels is introduced by the facts that the overlays are slightly bigger than the panels, they are transparent, and the overlays themselves are heavy. In any final display, the overlays will be screwed to the wall, but we couldn’t do that in Bernard’s studio!
When we took the original photos, the panels were put on the very edge of a table, tied using fishing line through that convenient gap between the lower panels and the higher ones to an extremely heavy tool box, and with the background hanging behind. Since I wanted to include the frame of the overlays, that wouldn’t do.
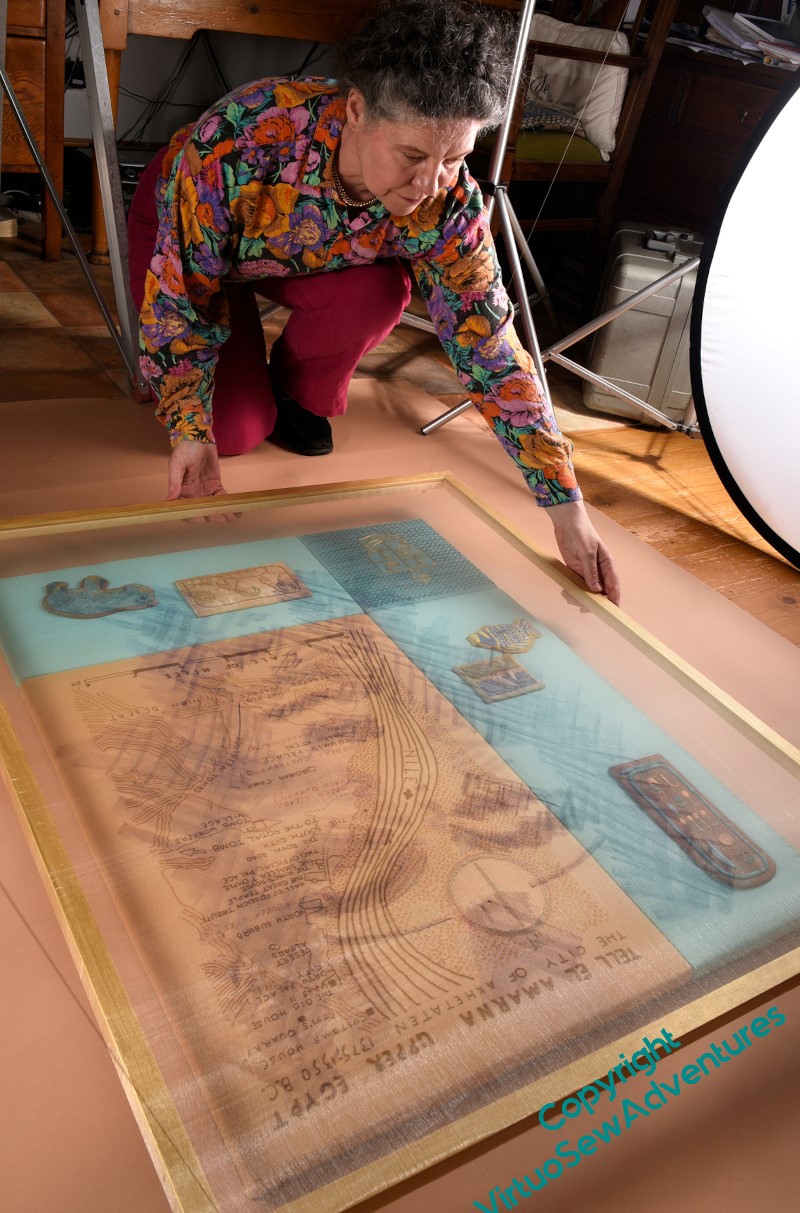
So here is what we ended up with! A section of background is laid on the floor, with the panel laid on it. Then we set up a set of tripods on either side, poles between them, and ran a length of fishing line from pole to through eyelets in the back of the frame. We get the shadow that reveals the overlay to be a separate thing, and several ways to adjust the whole thing until it works.
It did rather turn the studio into a low-budget version of that scene from the film Entrapment where the cat burgler is practicing avoiding a mesh of lasers with a mesh of strings with bells on, but that just meant a certain hilarity entered the proceedings!
It also meant the deployment of a ladder for the viewpoint to be high enough. It’s a proper ladder for the purpose, and it was sturdy enough – Bernard was happily standing on the platform at the top to take the final shots, which I wasn’t quite up for, as you see.
I do think the set up will produce the right photos for the purpose, but my goodness, photography really isn’t “Just Point And Shoot”. Bernard also tweaks the raw files to make sure that they bring out what he saw when he took the photos, which means that we have something really good to start from. Technology has improved immeasurably since Mary Chubb’s time, but even so, there are losses in quality as you add processes, and to have something decent at the end of a sequence of design, layout, and printing processes, you have to start with something really excellent.
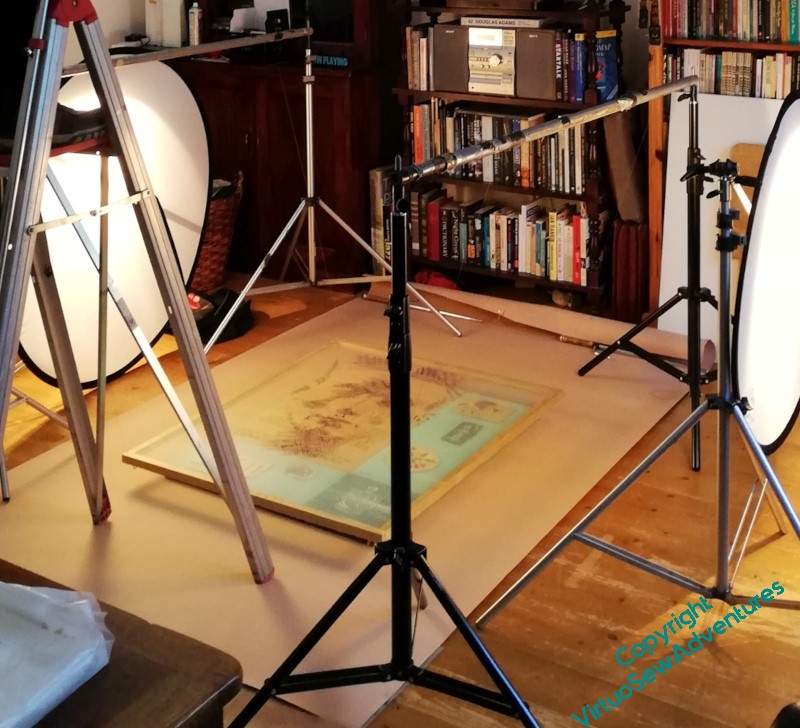
Another day of photography (first helping)
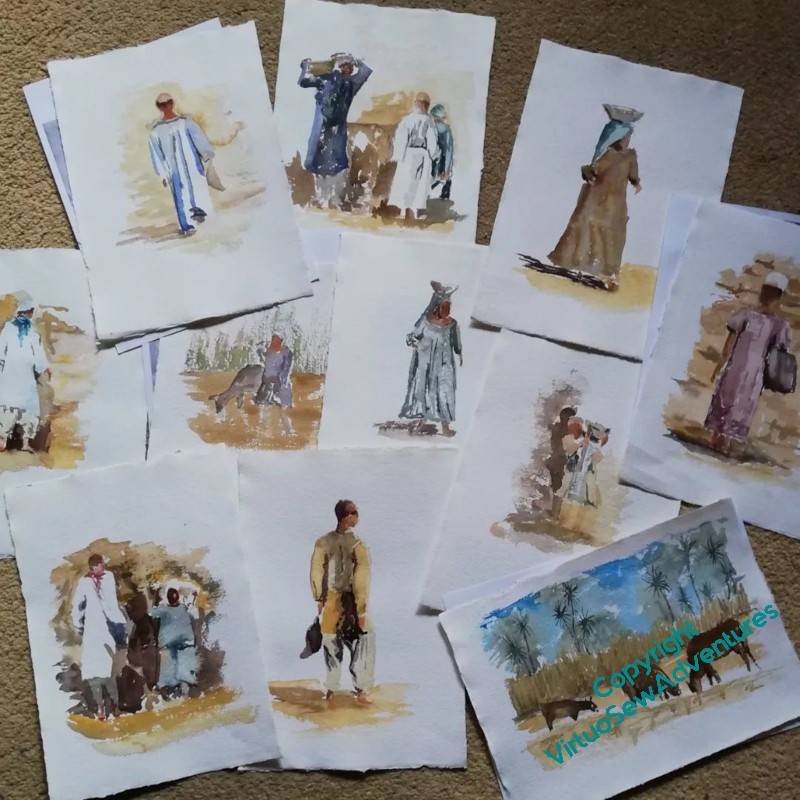
I’ve been working hard on the manuscript of the book I’ve written around the Dreams of Amarna, and one of the things I want to do is stitch the story together with pictures of the ordinary Egyptians working on the dig. They are honoured in the stitchery (View of the Excavation and Loading The Felucca), but that didn’t seem quite enough.

So I’ve been doing lots of little watercolours of labourers, basket carriers, and fragments of the dig and the scenery, and now I’ve sorted out the overlays (there will be more about my experiments with ink and inktense later), I bundled up the whole kit and caboodle and took it across to Bernard Rose Photography to see what he could do.
We rattled through the watercolours in fine style, as apart from occasionally flattening a piece of paper (I tend to paint a bit sloshy…!) there was little adjustment needed.
Then, however, matters became more complicated… The overlays are big, and the fabric is slightly shiny, and I hadn’t worked out how to hang them. So we started with the easy bit – overlays on their own, in front of a background. You get a hint here of the reflectors spaced all around, and just the general sense of engineering involved. There are two pairs of tripods with poles between them, one with the background, the other supporting the overlay, suspended on fishing line through eyelets. Then there are the tripods with the diffusers on, and out of shot, there’s the tripod with Bernard’s camera in place.