
Tag: repairs
Another Mathematical Patch
We discovered another thin patch on The Australian’s trousers..
This time I found a slightly darker grey marbled fabric, and got The Australian to write one of the equations I remember from maths lessons at school in chalk.
I’ve done the letters in Hungarian Braided Chain, the plus and equals signs in Coral Stitch, and the “2” in Cable Chain – so that’s several of my favourites all at once! – and then had a thought..
I’ve done the patch as a speech bubble, attached using varied length blanket stitches, and put a few little lines of stem stitch in the same green thread to suggest the speech bubble is moving.
Then I did a little stick figure, sitting on a yellow lounger, declaiming. I found three shades of grey, so make the figure a bit more broken up but still looking “drawn”, and did the head in ordinary chain stitches, the body and arms in Alternating Twisted Chain Stitch (so it looks like a woolly jumper) and the legs in Heavy Chain (a nice pair of jeans). The feet are ordinary chain again.
I hope The Australian’s trousers will survive without further patching for a while!
Final Mathstodon Details
Well, now, it turns out there was more to the Mathstodon than I had first intended!
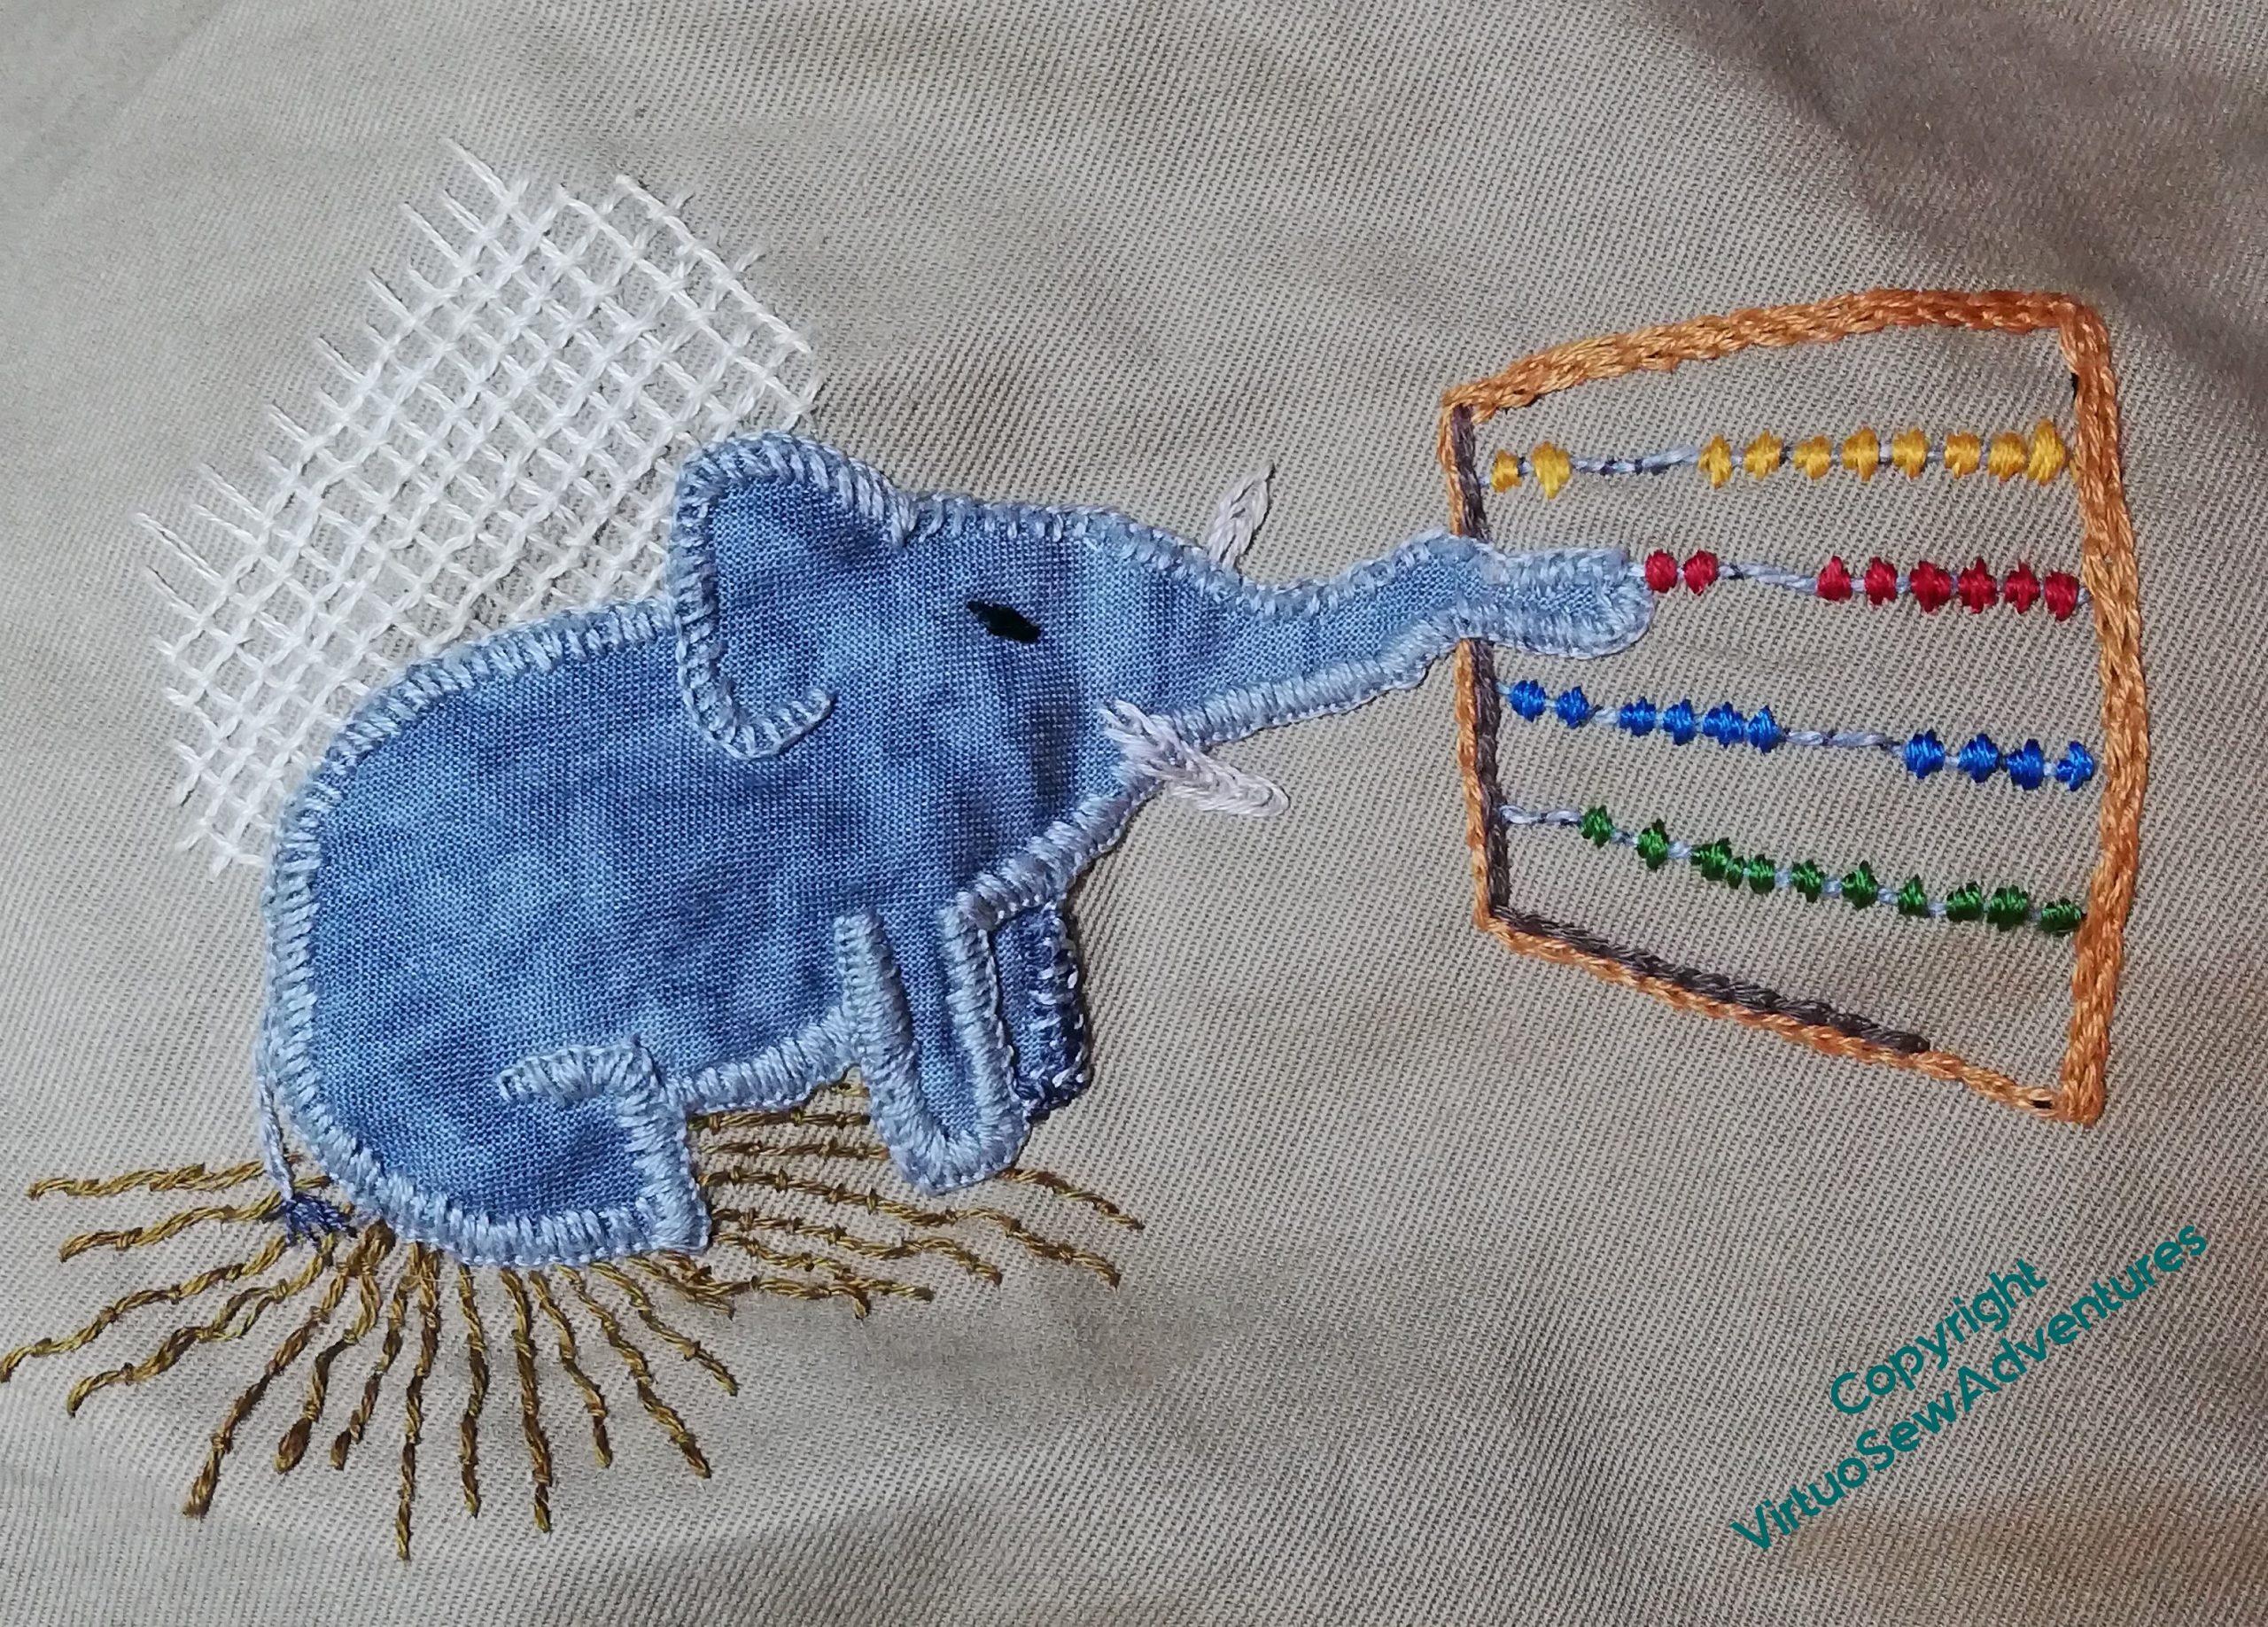
The mathstodon didn’t quite cover all the weakened fabric, so I added some trellis couching behind him to support the parts he hadn’t reached.
Then I felt he looked a bit odd with a wall but no floor, and added a floor in Bokhara Couching. Now I look at it, I feel it rather suggests the poor Mathstodon is heavier than the floor can take, which is a little unfair, as what I want to suggest is a Mathstodon happily using his counting frame for some mysterious purpose of his own!

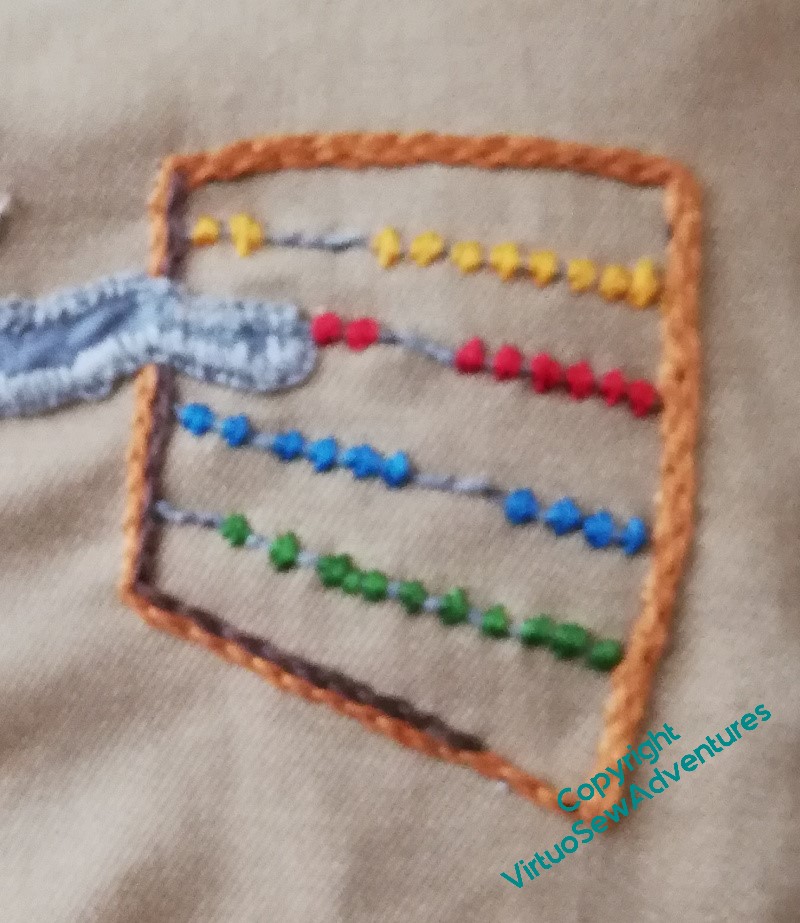
The counting frame is two lines of chain stitch all around, with “wires” make of long stitches in the linen thread I bought for “Leaving The Tyne”. The beads are made with satin stitches. I did think of making them indicate a significant number, but there were two things in my way – first, which number to choose, and second, I was using thread from my Odds and Ends box, and wasn’t sure I’d have enough if I tried anything too exciting!
But he is now finished and has gone toddling off with The Australian for his next speaking engagement!
More Mending with a Mathstodon
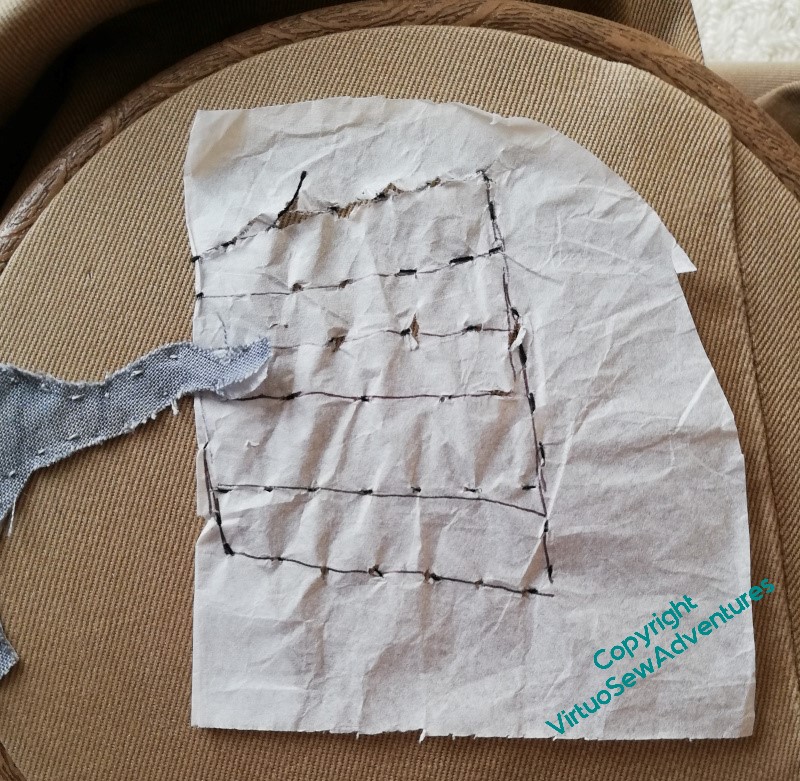
Since I’m not doing the entire design on a single patch, I decided to do the counting frame, not as a separate piece of fabric, but directly onto the fabric of the trousers. So, just to make everything slightly easier, I’ve tacked the outlines of the frame and wires onto the fabric through a bit of tissue paper, now torn away. This is one of the design transfer techniques I’ve come to use the most for this sort of design idea, where absolute precision isn’t at issue (when is it ever, with what I do?)
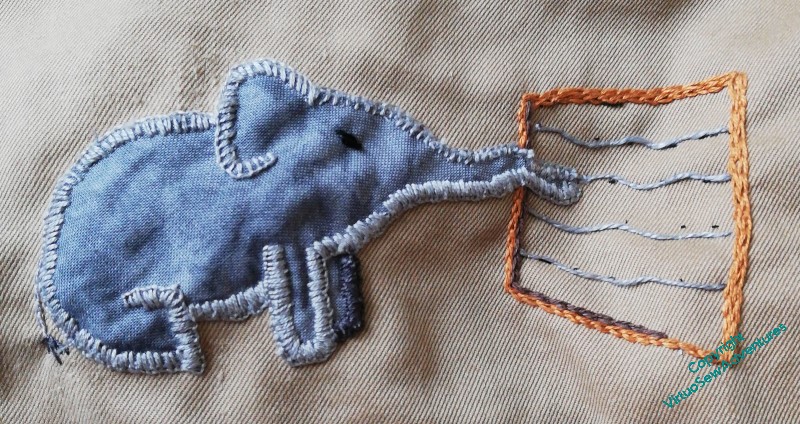
So, progress – the Mathstodon buttonhole stitched into place, and the bare bones of the counting frame in place, chain stitch for the outside, single long stitches held in place with small stitches for the wires. Don’t worry about the long floats, the satin stitch beads will keep them in place!
I do feel that I may have made the buttonhole stitch a bit chunky, at the speed The Australian moves when in full flow, the outlines need to be definite, or noone will make sense of what I’ve done at all!
I was still a bit worried about the fabric immediately above the hole, so I’ve given it a bit of reinforcement with some Trellis Couching in cream. The choice of stitch doesn’t relate to school maths exercise books – it was a matter of finding a stitch pattern that I thought would support the fabric of the garment!
Mending with a Mathstodon
We noticed recently that there was an unexpected hole in a pair of The Australian’s trousers. Unexpected, because above the knee, nowhere near a pocket, and the surrounding fabric was in better condition than the hole would suggest.
I am sure I couldn’t achieve an invisible mend on a fine cotton twill such as this, so then it became a matter of considering Visible Mending – making the whole thing look deliberate and considered, rather than pulled together any old how. So, I asked, what sort of patch would you like?
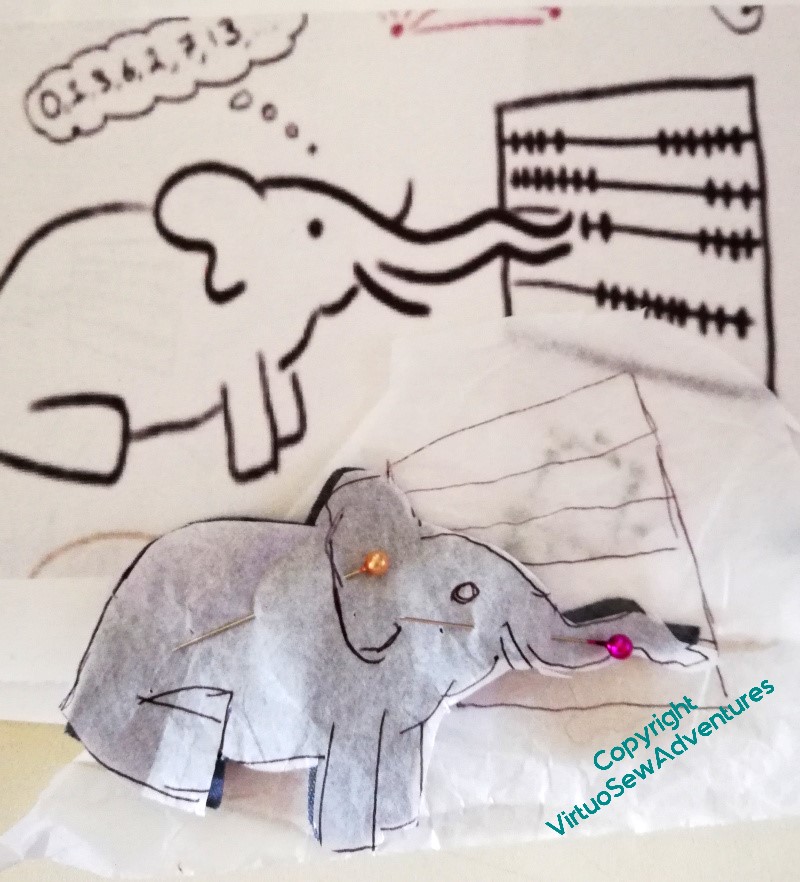
Which is how I came to be messaging The Australian’s co-moderator on the Mastodon instance, “Mathstodon.xyz”, to ask for permission to use the header/logo image he had sketched as the basis for an embroidered patch.
I did think of using the whole thing, embroidered on a larger piece of cloth, but I felt it would make the trousers a bit uncomfortable, so I am extracting the Mathstodon himself, and his counting frame, and I can always add more diagrams and formulae if the trousers wear in other places…

I wouldn’t normally use a hoop when I’m mending a pair of trousers, but it did make it much easier to keep track of where the darned bit was.
The Mathstodon himself is cut out of grey quilting cotton with a slightly marbled print, and I’m going to attach him conventionally over the darn, first held in place with small running stitches and then with buttonhole stitch around his edge, and a few extra details on the inside.
The Lady In The Garden – Progress
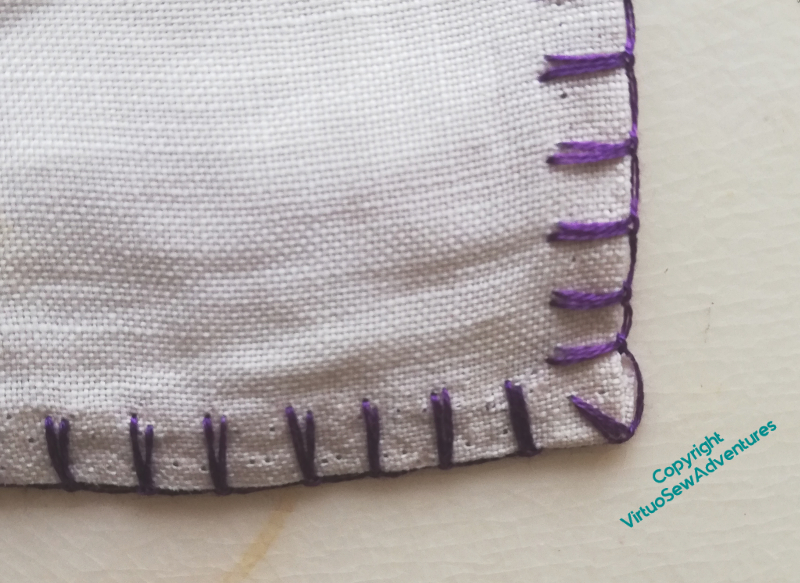
In a slight variation of what Grandmama did, I used Up and Down Blanket Stitch, which is one of my favourites, to work the purple section of the edging. It’s not as comfortable to work as an edging stitch as it is as a surface stitch, but I enjoyed it (as usual), and I’m pleased with how it looks.
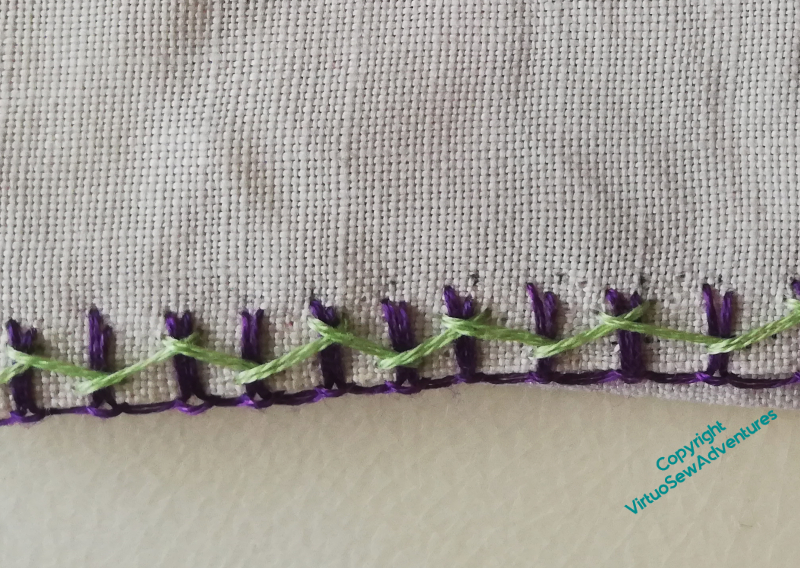
The second layer of the edging was in herringbone stitch, just as Grandmama worked it, but using a pale apple green instead of the pink. It will work much better in Mam’s room that way.
I’ve used two strands of cotton, which is what Grandmama did. I suspect that’s why the edging has collapsed in spite of not being used for decades!
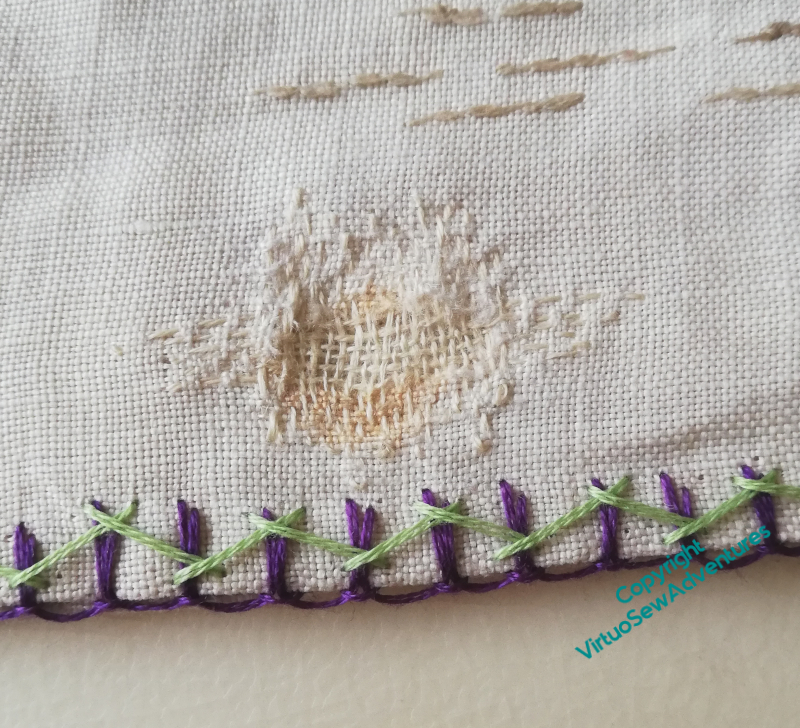
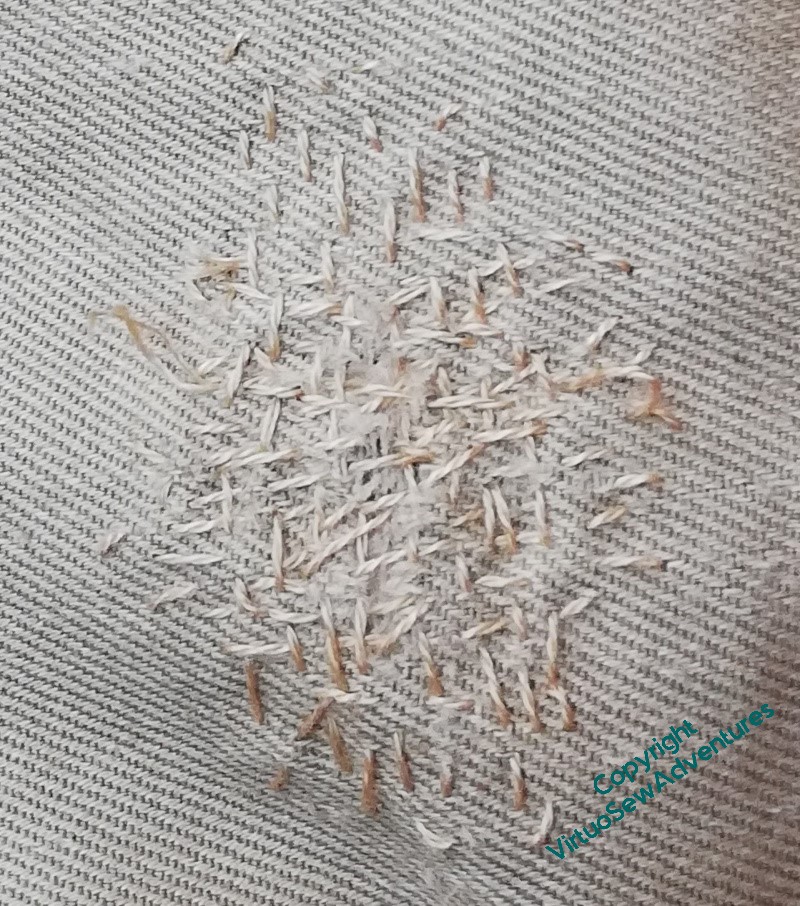
I’m not as satisfied with the darn, but I think it should stop the hole getting worse, and I’ve had a variety of suggestions for tracking down a suitable material to patch it with. At the best of times, that would be a tricky task, and in the current situation, it may well be years before I find something!
Progress continues in other areas, too – Episode Nineteen of SlowTV Stitchery is now up. It concerns, among other things, flyaway thread and the importance of writing things down…
Mending the Lady in the Garden

Grandmama worked this pyjama case for my mother when she was a little girl. It’s beautifully worked, but slightly faded now, and the decorative stitching over the edges has all but disintegrated. Mam has asked me to reinstate that stitching.
It’s a good thing that my collection of stranded cotton includes some of Grandmama’s threads and that of various great aunts. That gives me a chance of finding something not a million miles removed!

There’s some damage to repair as well. I’m not quite sure how I’m going to do so – there’s nowhere with spare threads to repair to attempt an invisible darn. So for now, I have outlined the area in split stitch, and I am going to concentrate – or try to concentrate – on putting in place a suitable border. The original was purple blanket stitch overlaid with pink herringbone, but we’ve decided that purple overlaid with green will work better in the room it will live in.

But we’ve already made a discovery. This slightly Art Deco looking border is the internal edging. It’s still undamaged, and I’m leaving well alone, but my Mam says she never remembers registering the detail here when she was a little girl!
We are pretty sure that the legendary Miss Hunter was involved in the stitching of this, so I’ve got a lot to live up to!
Meanwhile, in other news, Episode Fifteen of SlowTVStitchery is available, and concerns ideas for managing details, and the management of Very Long Projects.