
Tag: stitches
Hashtags..
The Georgette Heyer ReadAlong on Twitter was one of the few truly delightful offspring of lockdown. Through it, I met a host of funny, feisty, warm, and loving women, intelligent and well-read, but not inclined to take that as a sole criterion for worth. Their take on almost everything is worth reading, they combine charity of heart with a refusal to take any nonsense, and they have improved everything about my experience of Twitter ever since.

We ended up with an entire sub-language of hashtags and references, and when the readalong came to an end, we embroidered some of them and one of us collaged them together as a gift for the lady who started it all. These are my contribution.
“Hatboxes” appear frequently in adventures, being small and portable containers that someone too young to have luggage might be able to pack with a few necessities. Mine turned into a positive sampler of stitches. The lid of the pink one is Hungarian Braided Chain, there is Trellis Couching, Herringbone Stitch, Burden Stitch, Blanket Stitch, Stem Stitch and Back Stitch.

“Fainting In The Pavillion” refers to an incident in one of the books when the heroine, overcome with heat and repugnance, faints in one of the rooms of Brighton Pavilion, greatly embarrassing her host, the Prince Regent (he had it coming, waste no sympathy!). This one includes Cretan Stitch, Open Chain (looking neat and delicate for once), Fly Stitches, Stem, Chain, and Blanket Stitch.
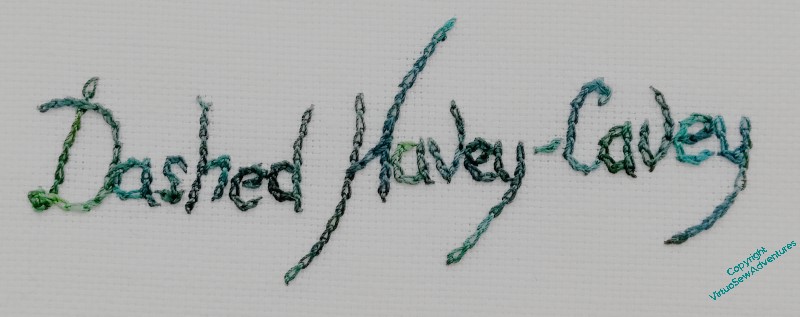
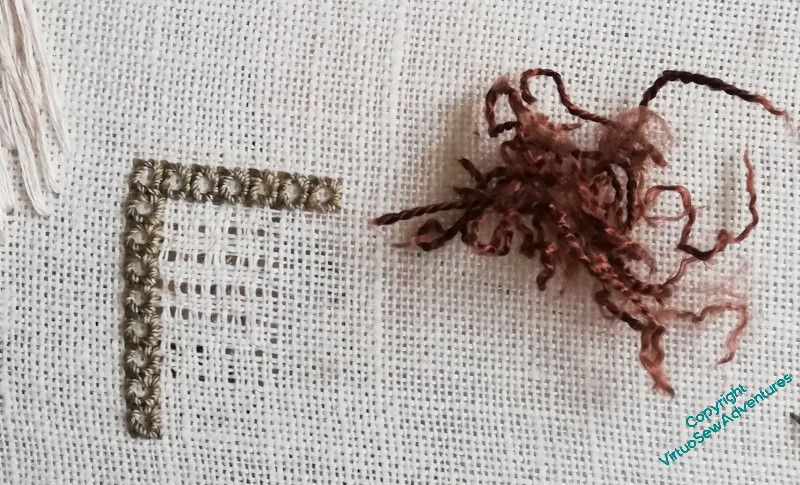
“Dashed Havey-Cavey” refers to suspicious and underhand circumstances, so rather than trying to illustrate it with a picture, I simply chose a dark and moody thread and put on my most pernickety mode of Reverse Chain Stitch.
The whole thing was enormous fun, both to take part in, and to stitch about afterwards!
After which delight, it seems rather unfortunate that the latest video in SlowTV Stitchery, Episode 77, should be a sad one, full of struggle, and as yet not crowned by success..
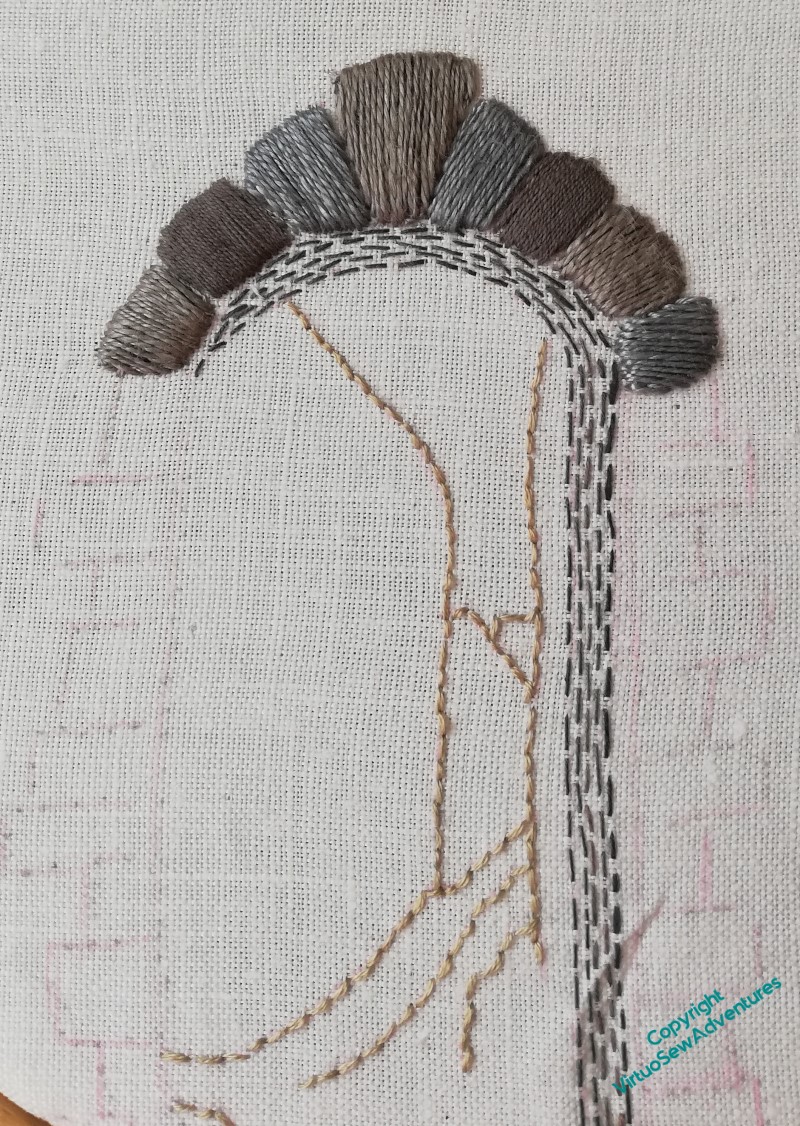
The fence by the cottage
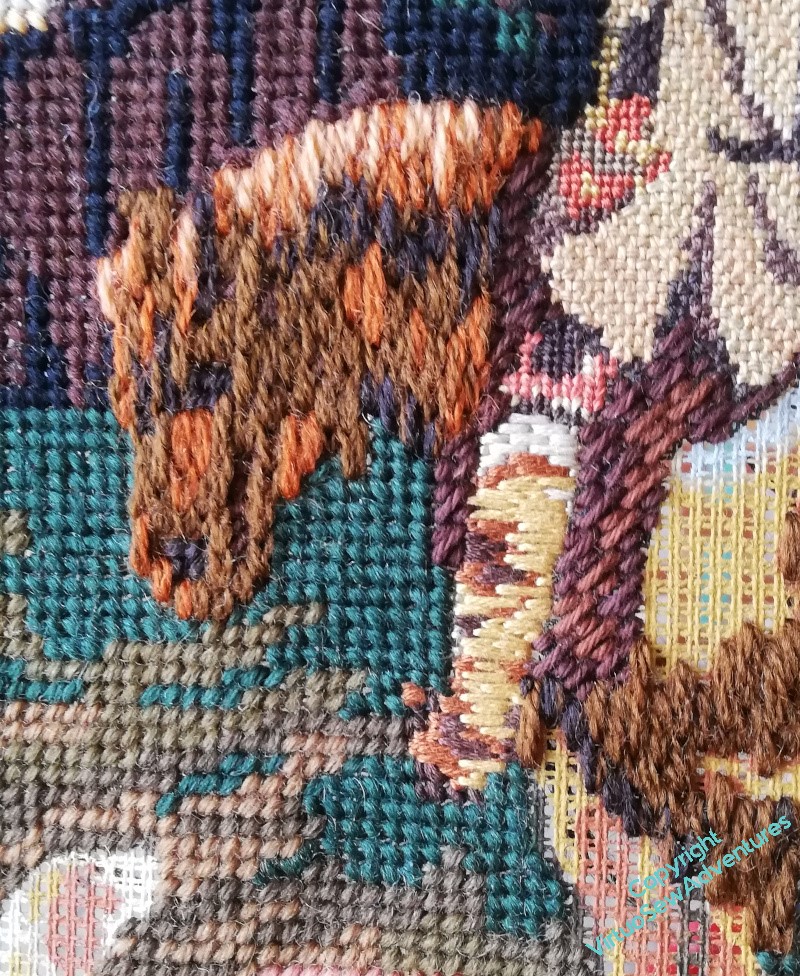
I intended to work the horse using Paterna, in something a little like long and short stitch, but having done his head, I looked at it and decided it needed a little more thought. It looks like some sort of unholy hybrid of horse and highland cow, and I wasn’t at all sure that it would look better when I’d done all of it. So I decided to divert my attention elsewhere and think about it for a little longer.
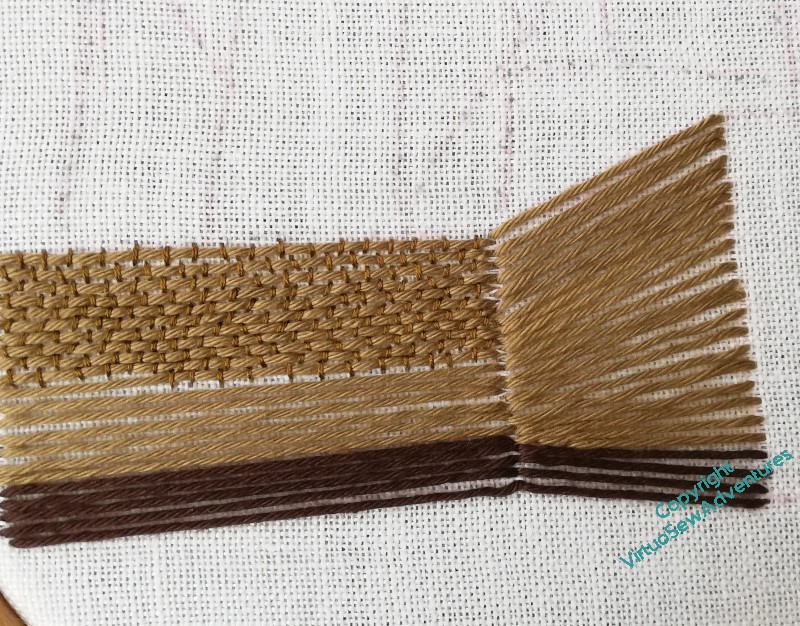
The most obvious element to tackle next was the fence, which is so far the only piece to be done in horizontal stitches. I’ve used soft cotton, which has nearly enough body to stand up to the tapestry wool, and slightly more sheen, which also helps. You’ve probably noticed that I haven’t extended my diversion to the broom, which looks a lot more like the birch besom my grandmama used to use in the garden. That’s likely to be last of all, as I want to raise it over the rest of the stitching.
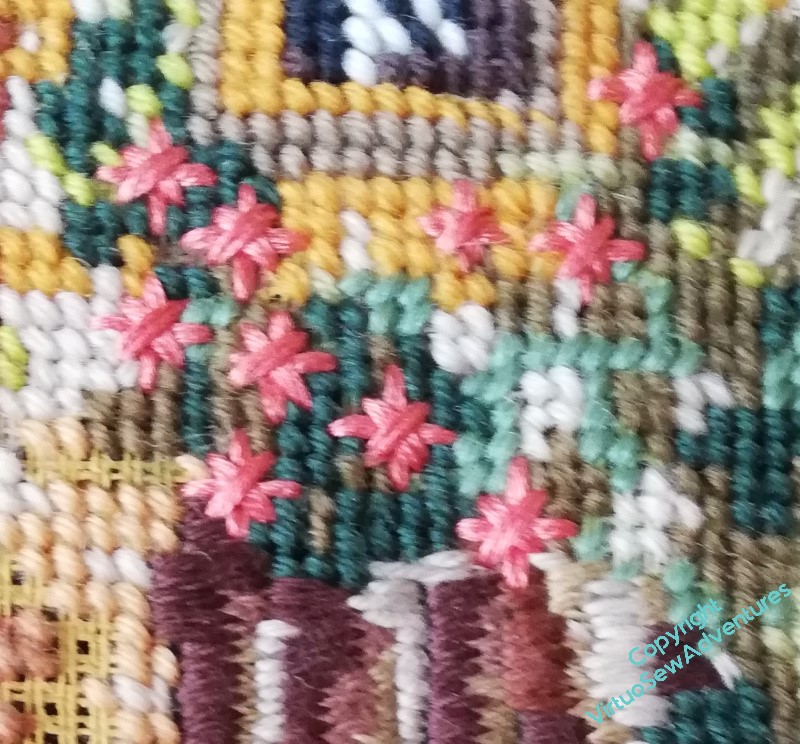
Since I was working at this size of the canvas I was reminded that I’d been leaving gaps for some of the flowers. Diagonal Double Cross Stitch makes for some huge flowers, which might very nearly be the size of dinner plates if scaled up and aren’t at all cottagey – more Professor Branestawmy, in fact! – but they do stand out nicely against all the tent stitch, and they’ve enough personality to live with the fence, too..
Watermill Stitchery – Convento del Carmine
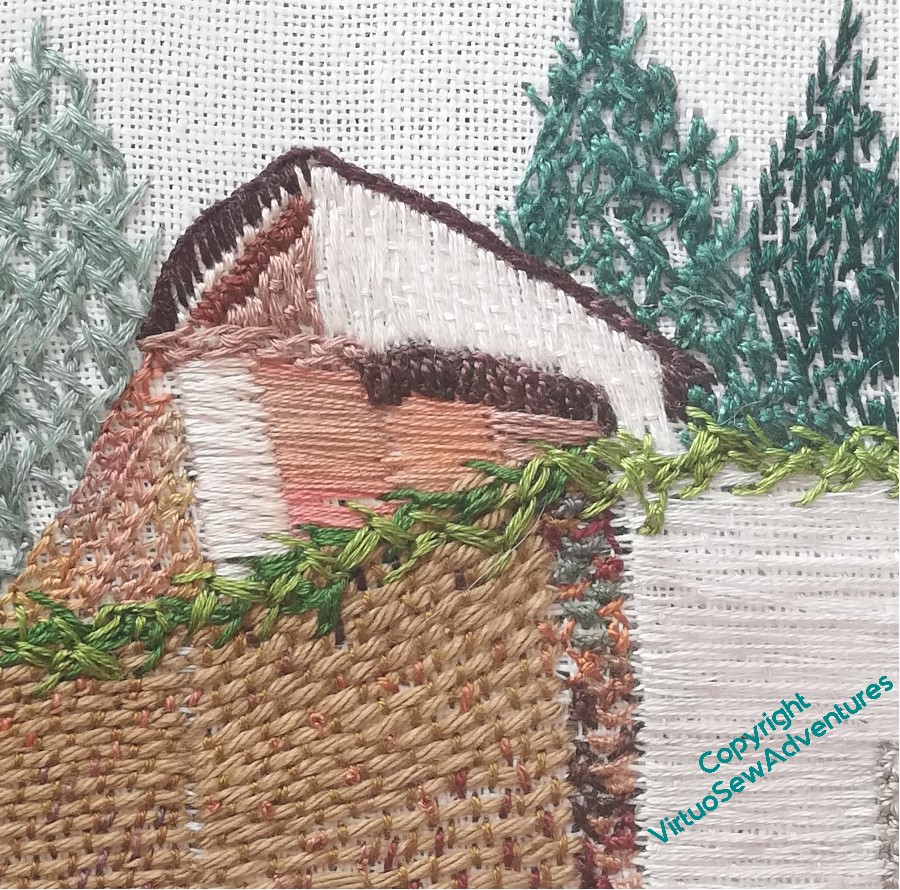
Once the walls were in place, I worked on the creepers.
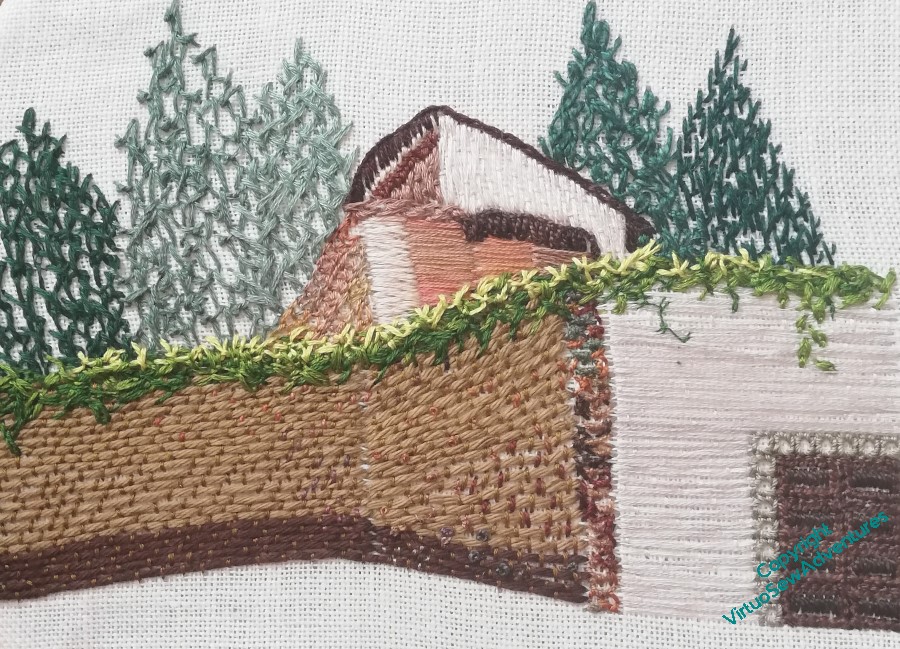
As you can see here, this involved not just more of the same, but a few extra tendrils, and some mixing of the number of strands and stitches used to create the right tangled effect. Feather stitch, floral feather stitch, feathered chain stitch, all layered up in a variety of shades, to increase the tangle almost to “Sleeping Beauty” proportions.
Yes, good so far.
Then I decided that it really needed the grass at the front to pull the golden green forward, as it was in my memory.
Not like this, however. I think the choice of irregular running stitch is right, but although I chose to use six strands for the lighter colour to help pull it forward and push the building back – which is a good, rational, thought-through reason – it hasn’t worked as I envisaged. Cue some muttering and unpicking!
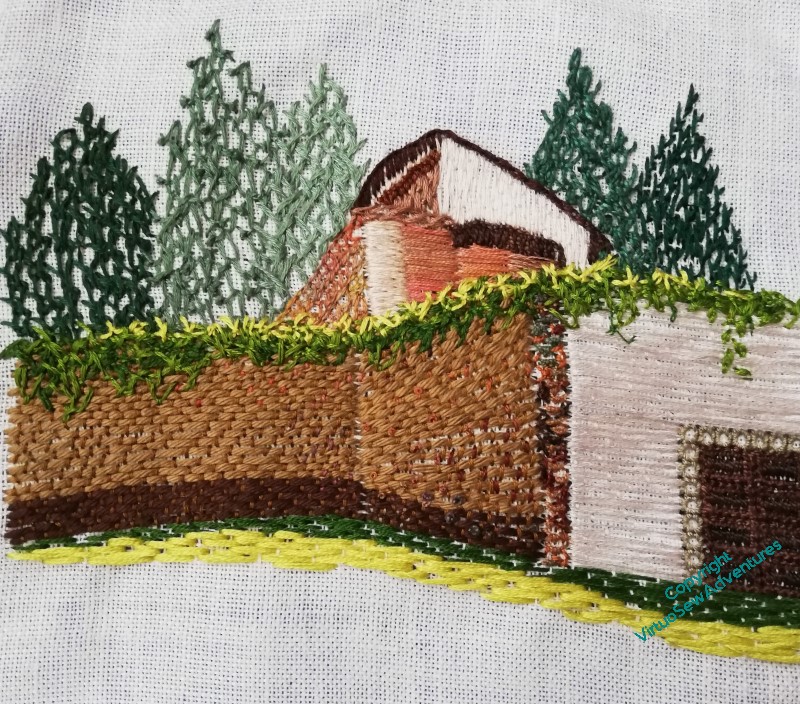
But I got there in the end…
In fact I’m very pleased with how this turned out. It allows me to demonstrate how to create different textural effects, even with a fairly restricted choice of thread – nothing exotic here, pearl cotton, soft cotton and stranded cotton.
I could add more details – roughen the stone further, add windows and doors to the walls in the shade – but I don’t think that the picture would be materially enhanced. And almost the whole trick with representative embroidery is the same as it is with painting: the finished piece is a new creation, not a copy of the thing it represents, so it is more important to end with a pleasing piece than an accurate report.
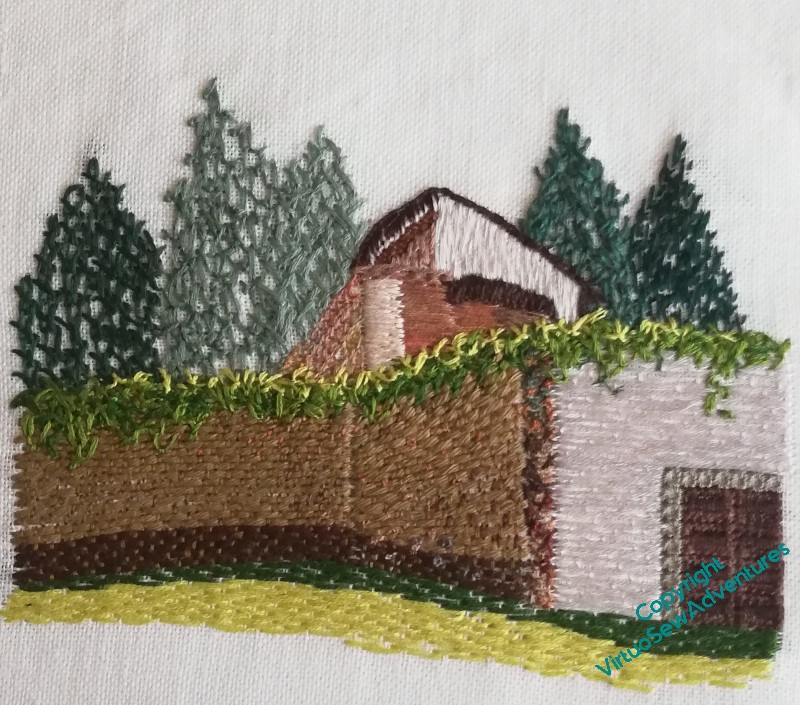
Watermill Stitchery – more progress on the Convento
I finally had a couple of inspirations for the rendered wall and the door. I used two shades of brown pearl cotton for the panels on the door, outlining them using long legged cross stitch, and filling in the panels with satin stitch. While I was doing that, it occurred to me that this was a good opportunity to demonstrate, again, just how different a stitch can look if you use different threads to stitch it with. So the render is rendered (sorry!) in Burden stitch, using two strands of light coloured stranded cotton, and already you can see how very different it looks in comparison with the soft cotton. It’s very satisfying when something works that well!
It was the golden light on the creeper that originally attracted me to this scene, so I need next to work out how to represent the creeper. I’m starting with feathered zig zag chain stitch, and I’ll use several colours of thread to create the variation of colour in the foliage.
I’ve added a few French Knots to the rough stone wall, to roughen it up a bit, and tweak the colour balance.
You can see here the start of the middle shade for the creeper, again using feathered zigzag chain stitch, and trying to zigzag the zigzags to vary how much of each colour shows.
You can also see that the facing light rendered wall is now done, and I have simply turned the Burden Stitch through ninety degrees. I think I may be beginning to be pleased with it!
Watermill Stitchery – continuing the Convento
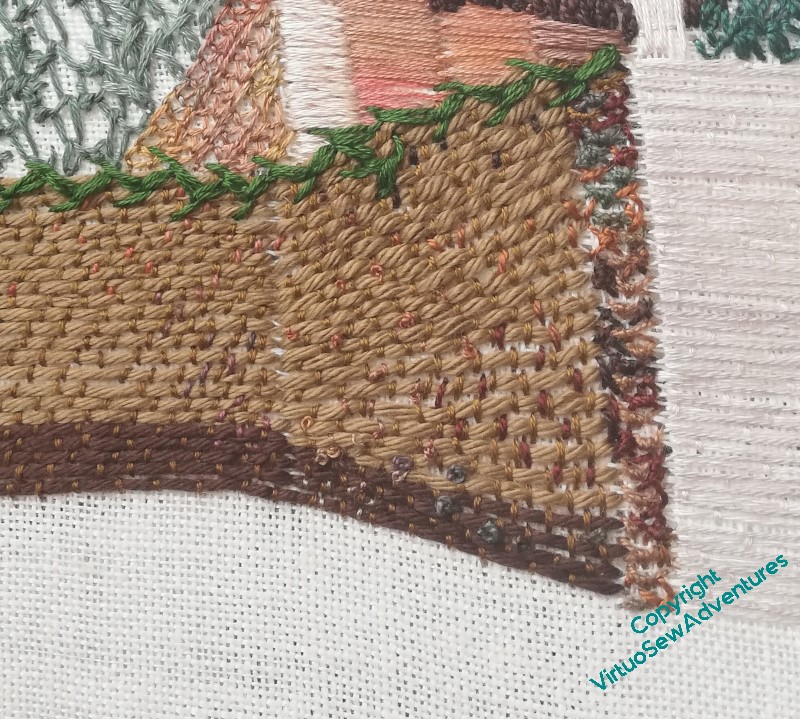
Burden Stitch does a good job for the wall – you can see it starting here. I’ve used Soft Embroidery Cotton for the underlying straight stitch and a mixture of single strands of ordinary stranded cotton with one of the slightly heavier and more tightly twisted threads from Caron Collection, which has a whole series of warm red and brown colours with some greenish ones to help suggest the variation of colour in the stone wall. I’ve used darker soft cotton at the base of the wall, where there will be deep shadows on the lawn to “ground” the building.
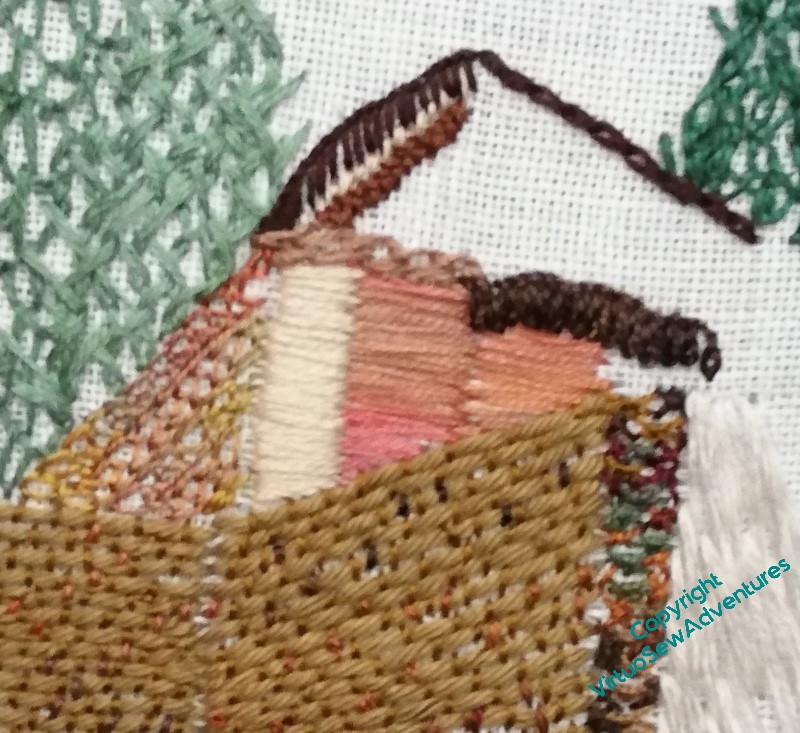
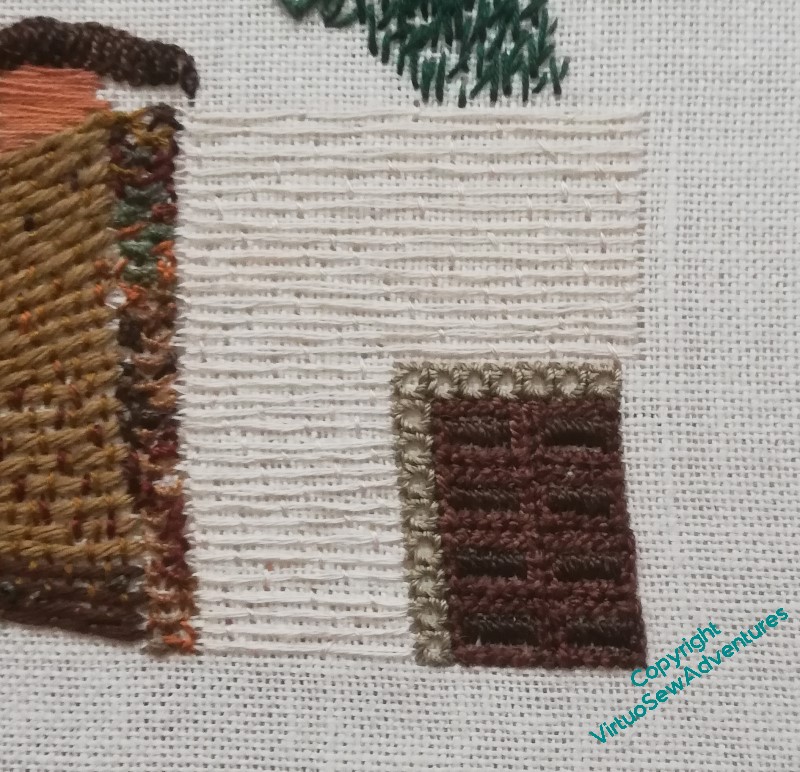
The buildings showing above the top of the creeper-bedecked wall are all rendered rather than rough stone, and I had a bit of fun trying to pull together stitches and threads to represent the tiled roof, shadows under the eaves, the render and the woodwork. How pleased I am with how this section work changes day by day, so I shall leave well alone, until I’m either Definitely Dissatisfied or Supremely Satisfied!
In the bottom right hand corner, you can see the first attempt I made to depict the render on the facing wall, and the rough-cast feel of the turn of the wall. I’m not happy with the roughly-done, diagonal encroaching satin stitch, but I’m very pleased with the multicoloured mixture of French Knots, diagonal cross stitch, and Danish Knotted Cross stitch.
While I was rethinking the render, I worked on the door, which again, was not without missteps. The door surround, I am happy with – it’s Squared Chevron Stitch (found in one of my Edith John books), worked as a counted stitch. I then tried alternating two versions of Herringbone Stitch, hated it, and unpicked it promptly.
Oh, well, second mouse gets the cheese!
Watermill Stitchery – Trees at the Convento del Carmine
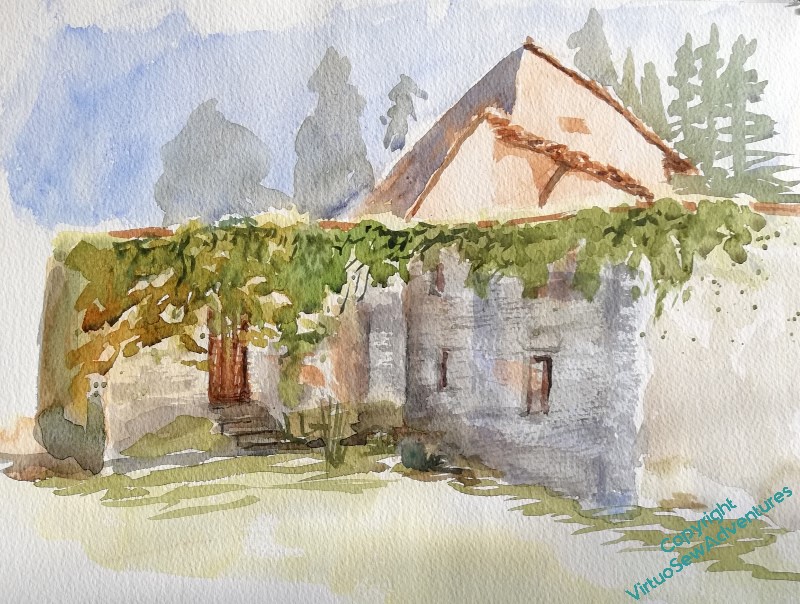
Very wisely, Bill and Lois, who run The Watermill At Posara, organise a variety of places to visit and paint, and in particular, the peace and quiet of the Convento del Carmine came the day after Excursion Day, which has people everywhere!!
I painted this watercolour when I was there, and in fact it shows something other than what I remember when I don’t look at it. What I mostly remember is dark foliage setting off the building in front, so for the embroidered version, that is what I intend to emphasize..
Now, remember, each of my Watermill Stitcheries is a sampler of experiments and ideas. I may or may not like all of them, but they should give my students points to ponder and places to start.
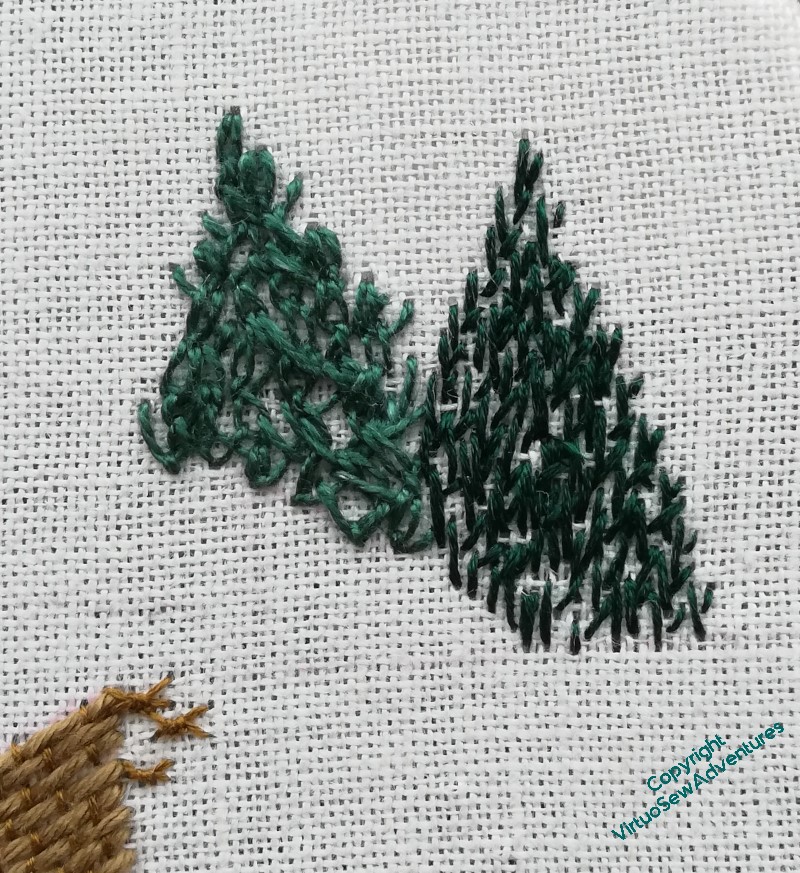
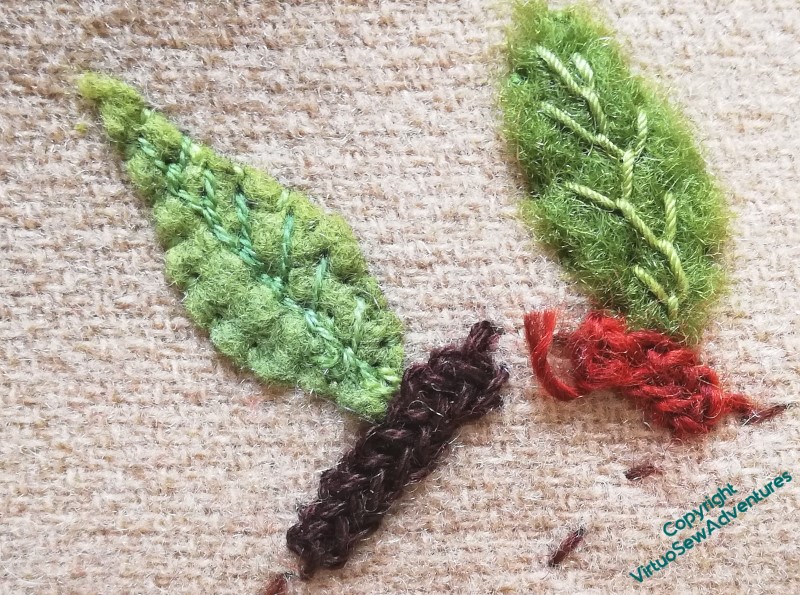
With that in mind, each of the trees is going to be in a different stitch. In each case I have worked vertical rows of the stitch, overlapping and interlocking them as best as I can to evoke the texture of the leaves.
I started, on the left, with Feathered Zigzag Chain Stitch. I’m quite pleased with this – you entirely lose the pattern of the stitch, but it evokes the movement of leaves in a breeze rather successfully.
I can’t say the same of Kerman Stitch, on the right. The breeze has stopped here, even if the impression of texture remains!
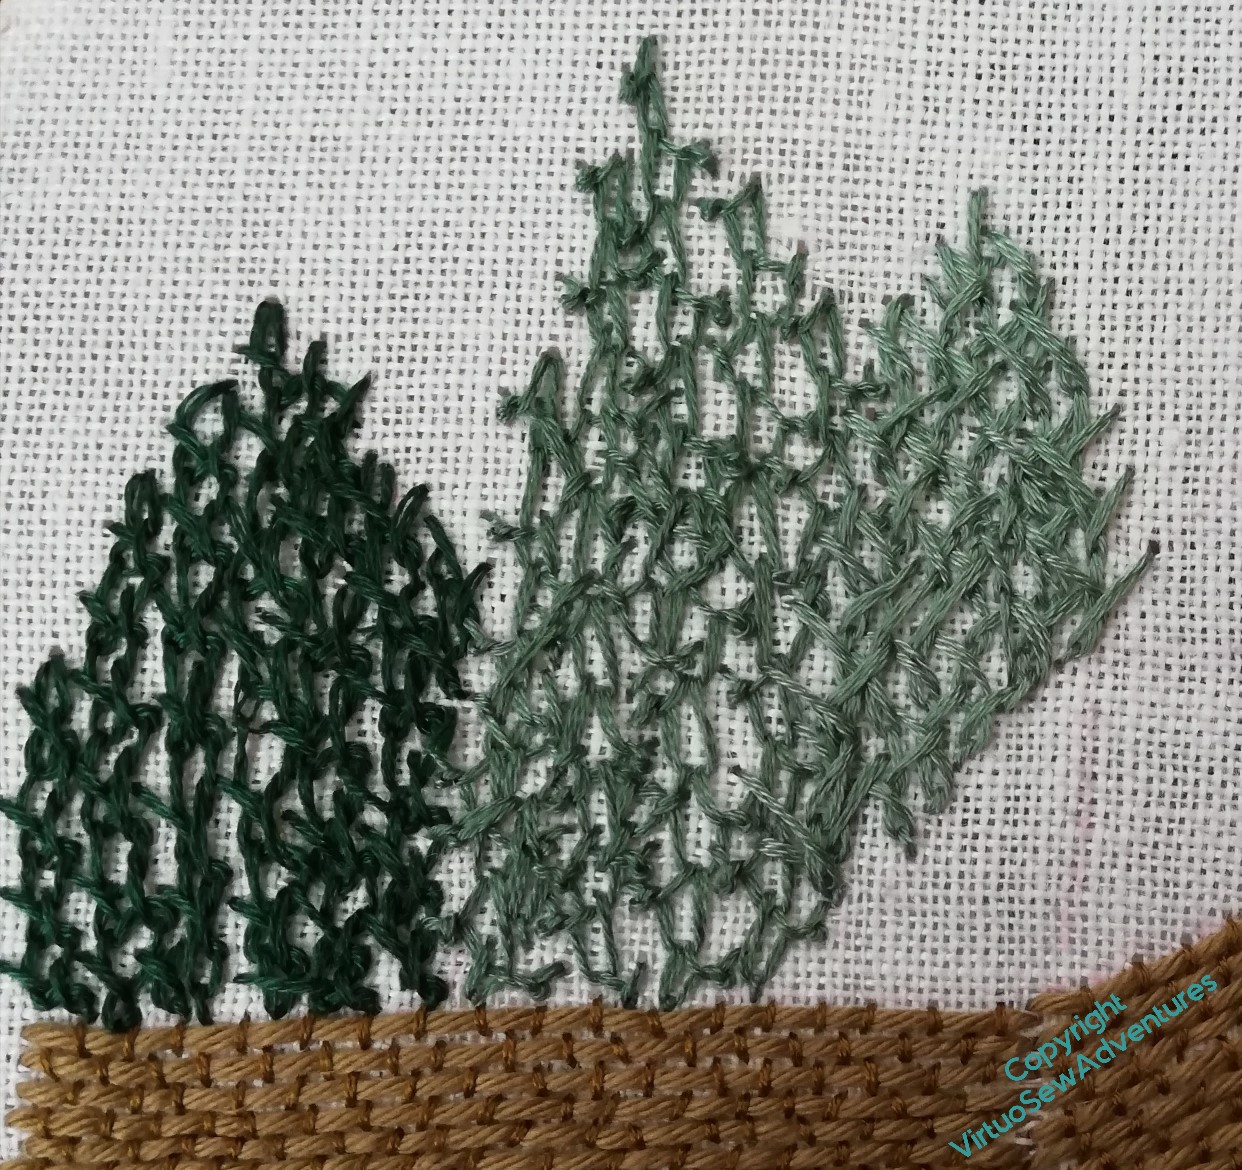
Working inward from the left, the first of these is Rabbit Eared Chain Stitch, found in Edith John’s “Creative Stitches”. This stitch is based on twisted chain stitches, which encouraged me to hope for a sense of movement again. I don’t think I quite hit the mark with it – maybe I never got quite comfortable enough with it – but I think it has possibilities.
The next one is Zigzag Crested Chain, again from Edith John. Crested chain is a stitch I enjoy but always find it moves under my needle. This time it ended up longer and thinner than I intended it to be – but maybe that was right for the purpose…
The final one is the slightly less peculiar Twisted Feather Stitch, and here, perhaps because it felt a little more familiar, more akin to the feathered zigzag chain I started with, I have my sense of movement and breeze back again.
I’ve begun the building in Burden Stitch, and now need to finish that, add more of the roof, and finally the creeper falling over the top of the wall. So watch this space!
Watermill Stitchery – Finishing Stones of Verrucola
You may recall that I was planning to use this design as a way to explore stonework in various forms, and to demonstrate stitches that might be chosen in each case.
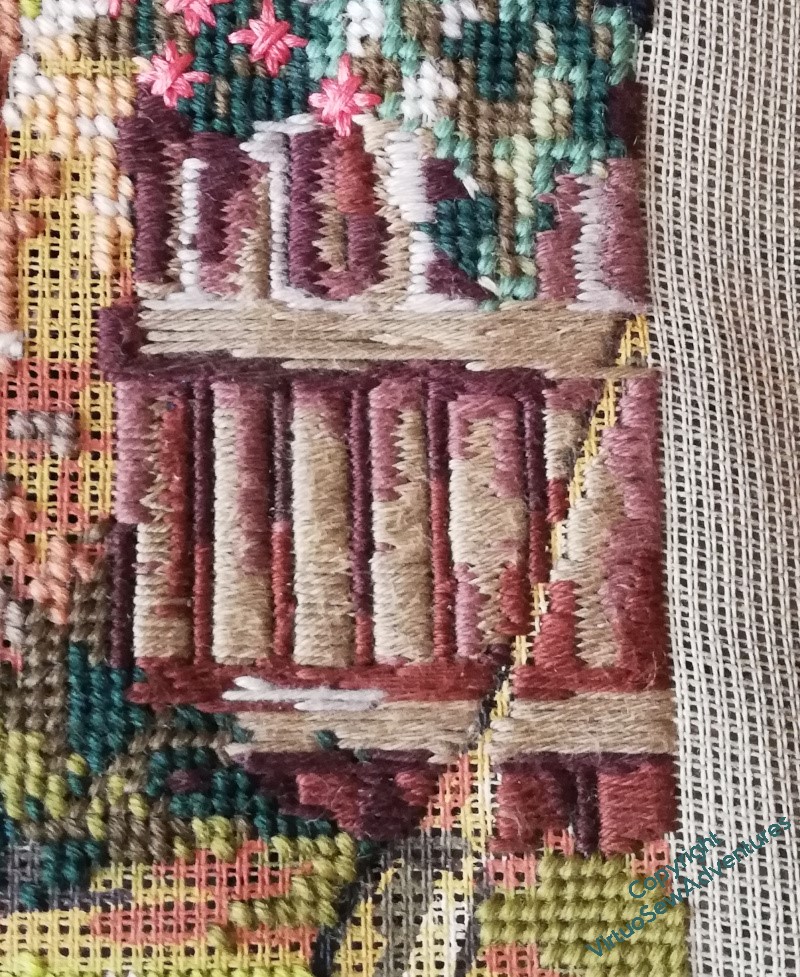
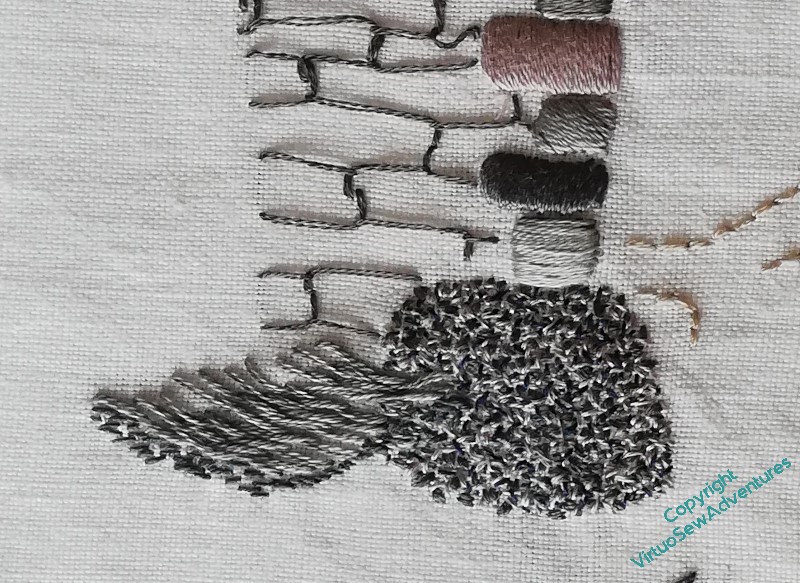
So here we have padded satin stitch for the cut and dressed stone of the arch, and seed stitch for the boulder beside it. The seat and the blocks of the wall around the arch are both in Cretan Stitch, the one spaced out and turned into a filling stitch of sorts, and the other compressed and set at a slight angle to represent the slightly dished stone seat.
This view shows the height of the padding on the keystone and the line of dark stitching under the tiles, which is a line of chain stitch feathered on one side only to get one crisp edge and one which suggests the darkness of the arch. You can also see from the shadows just how strongly raised the blanket stitched herringbone stitch appears.
The Cretan Stitch rows are carefully varied in length and depth to show how the rows of cut stone are not all the same height or length. This was a stitch much more easily worked in a hoop, where you can see the layout, than in the hand – even though I prefer working in the hand where I can.
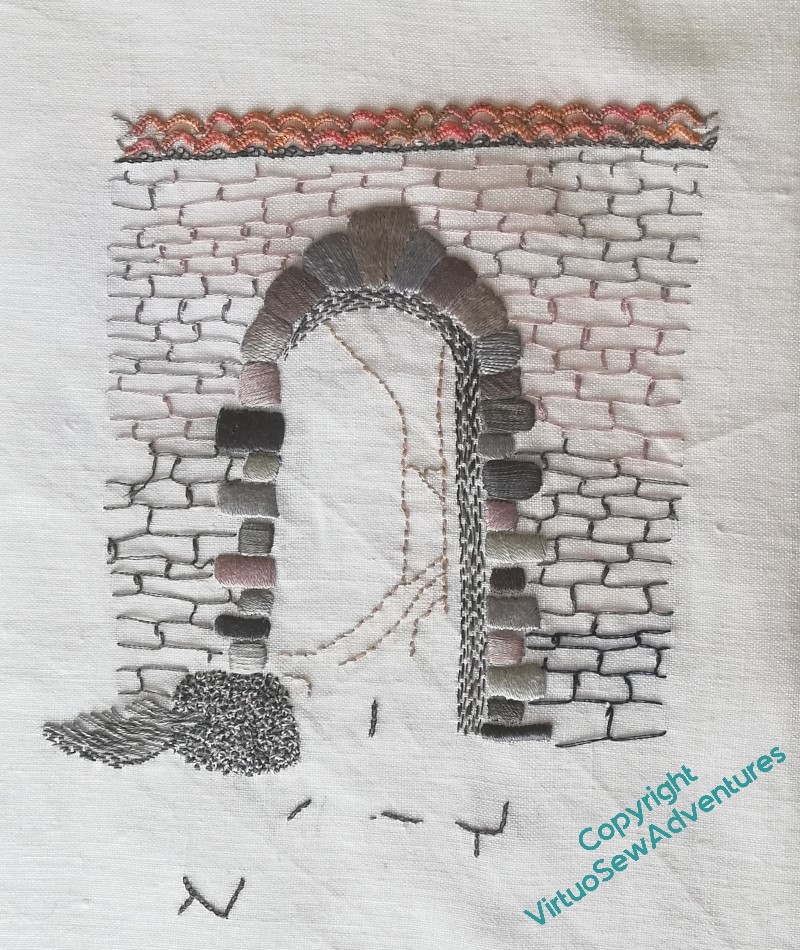
And here is the finished “Stones of Verrucola”.
There are some elements which work much better than others. The outlines through the arch and the chain stitch edges of the flagstones may not be necessary, and the shadow under the seat is a little too small.
The seed stitches could have been bigger, maybe even grouped, and maybe emphasizing one of the lighter colours more, but I am very happy that all of the different textures are truly differentiated.
Besides, all that I am seeking to do is to demonstrate ideas that the students can take on or not as they choose. If at the end of the week I have a classful of mini-mes, I will have failed. What I want is a group who’ve tried, experimented, and each of them produced, maybe even only a fragment, but still something that makes me think, “Goodness, I wish I’d thought of that!”
More progress on the Little Jacket
I decided that I was going to work all the major stems in one of the Braid Stitches, so I spent quite a bit of time revisiting Plaited Braid Stitch, the ordinary Braid Stitch, and others. For a while that was a little painful.
First of all, I was reminded that these stitches don’t stay in your hands the way (say) Feather Stitch does, and then secondly I was reminded that they are very thread-hungry. It’s (almost) all on the front, where you get the benefit of it, but metres get swallowed up in short order. And I knew there would be metres of whatever-stitch-I-chose. My stash doesn’t run to that sort of length, but having performed a few experiments, I realised that sock yarn would be perfectly useable, given the fabric I’m working on.
I finally chose to work Holly Braid Stitch, which I experimented with in 2014 when I was working on the Glittering Nightcap. I’d found it in Jacqui Carey’s book “Elizabethan Stitches”, and after some struggles it had worked pretty well. This time I tied myself in so many knots with it that I asked for help in the Historic Hand Embroidery group on fb, only to find that very few people had attempted it. However, those who did were very helpful, and several very intrigued people asked me could I video it if I got it to work…
So I have. What you see here is probably not enough to learn the stitch from without also following Jacqui’s diagrams and instructions, but I think it helps with the “workflow” of the stitch, which is not well represented in those diagrams, I suspect purely because, as a braidmaker, she thinks differently about the way a stitch works.
Once I had the stitch down pat, I bought a rather gorgeous sock yarn (Woodland Fire from The Yarn Gallery), and whenever I wasn’t sure about the details I wanted to add to a flower or leaf, I just kept on with the stems..
And on. And on!
And now, Episode 72 of Slow TV Stitchery is now live, in which we encounter difficulties in working a pattern backwards, experiment with French Knots, and recall “Leaving the Tyne”.
Watermill Stitchery – Stones of Verrucola
I’m continuing to explore ideas for the course at The Watermill in Posara, and this one is inspired by the first outing of the painting course I went on. Verrucola is a medieval village and fortress not far from Fivizzano, with a deep stream valley, some very impressive buildings – and a delightful trattoria just inside the walls.
I want to explore the different ways an embroiderer might choose to explore the textures of stone that a site like this afford – the living rock of the hillside, cut stone used for building, and the shaped and smoothed stone used for architectural features.
You can see in the first picture that I have just “drawn in” the street beyond the gate with back stitch and used darning stitch to suggest the shadow beneath the arch.
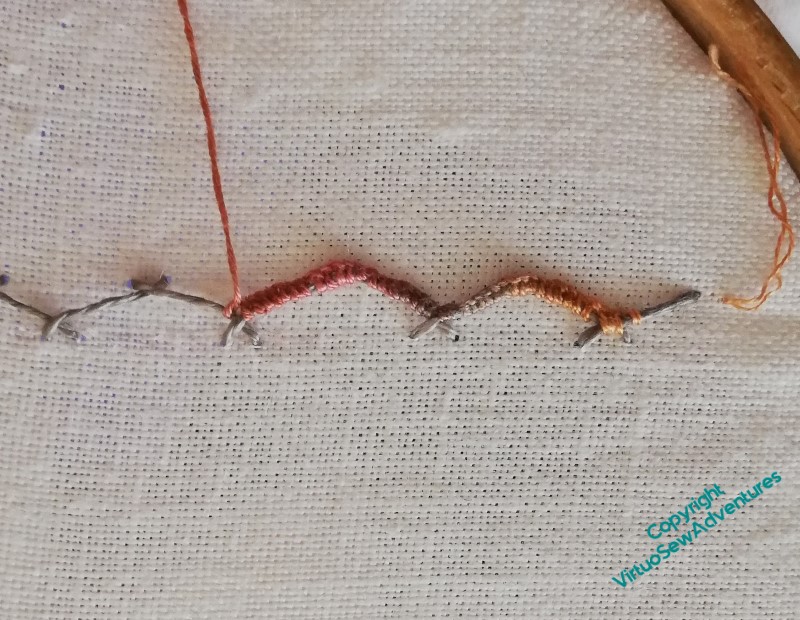
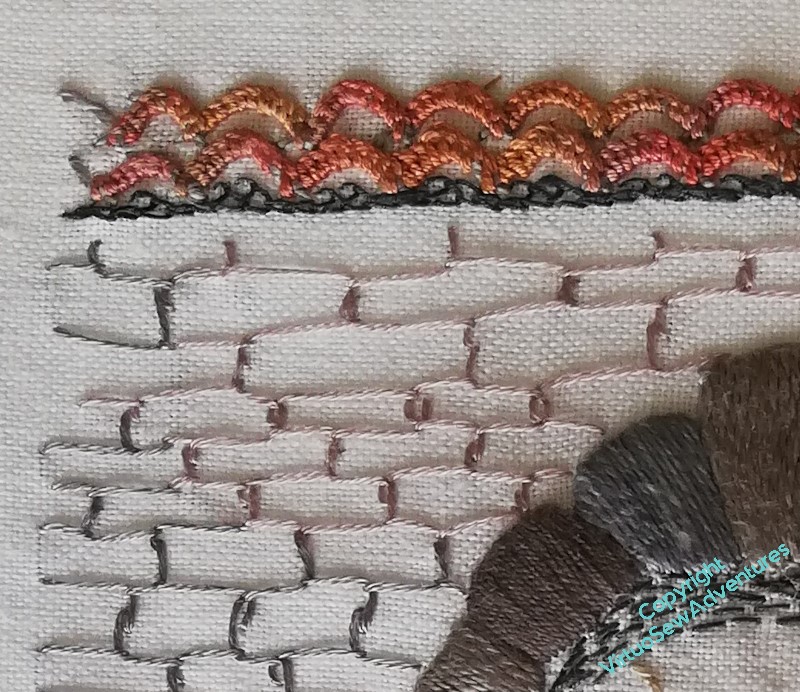
I’m using padded satin stitch for the cut and smoothed stone of the arch, but since I find that an exasperating stitch, I’ve alternated working on the arch with the tiles which cap the wall which is pierced by the arch.
I found buttonholed herringbone stitch in one of Sharon Boggan’s books, but as you can see, my first attempt didn’t really produce the effect of the curved roof tiles that are so much part of the scenery in Tuscany. The linen herringbone stitch is too stretched out, and the two strands of stranded cotton just look straggly.
I am going to have to emphasise experimentation in the course, aren’t I!
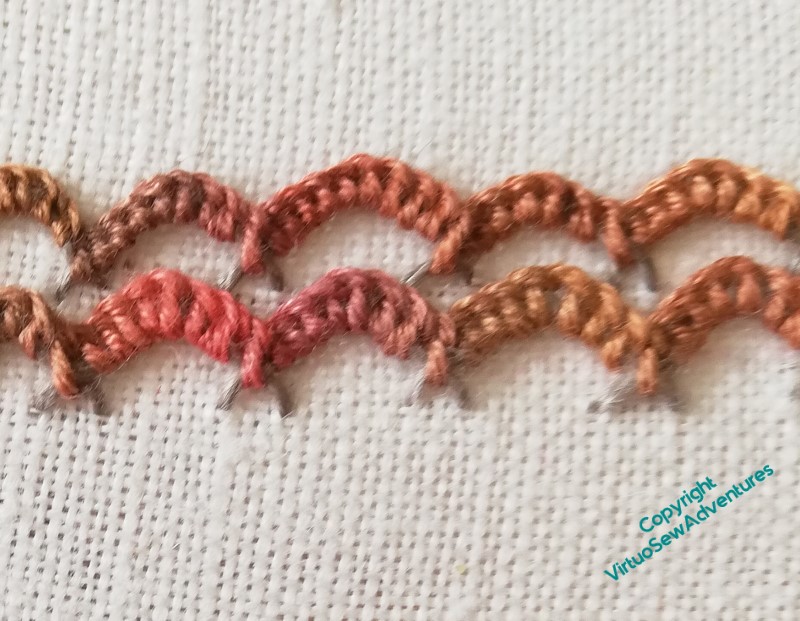
This version is much better – the shorter, higher herringbone stitch, just peering through at the base of the arches, three or even four strands of stranded cotton for the buttonhole stitch, and the stacked stitches create a good recollection of the tiled roofs I saw. I’m pleased with the way the variegation suggests the weathering on the tiles.
You will see that I have added a Page to the site which will make it easier to find and download details of the course if you are interested.
And also, Episode 71 of SlowTV Stitchery is now live, in which I experiment with the shore, and talk of plans for overland travel for Times To Come..
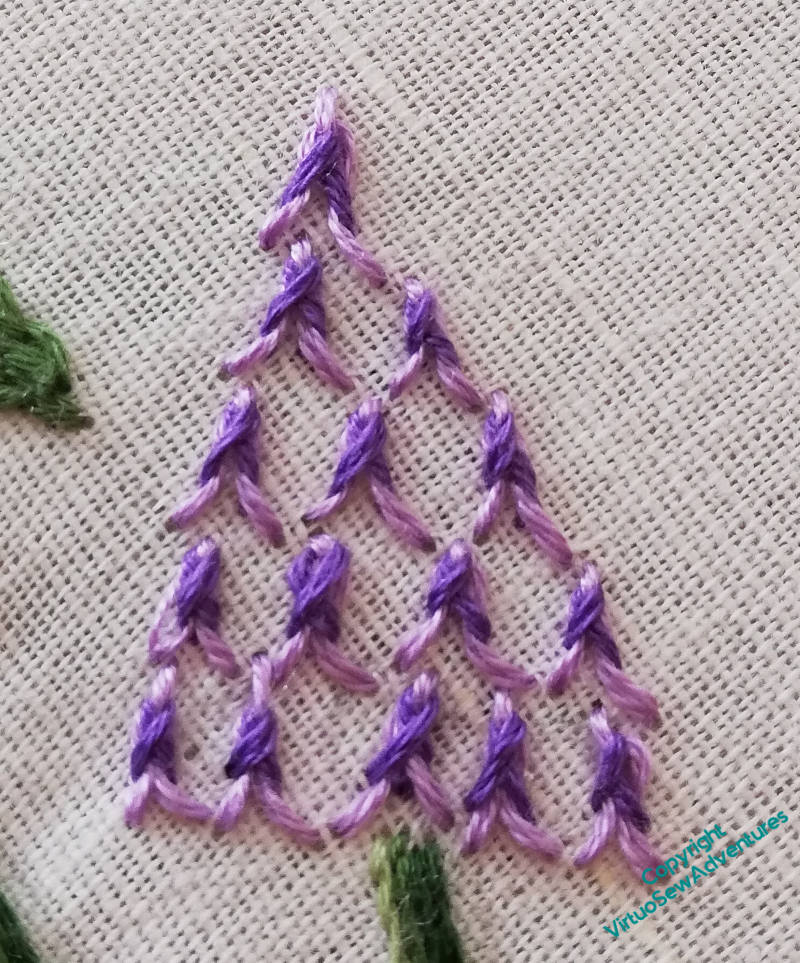
Grape Hyacinths, 2
Having completed all the greenery and removed the satin stitch flowers, I had to put new flowers in. Naturally, that didn’t happen first time, either!
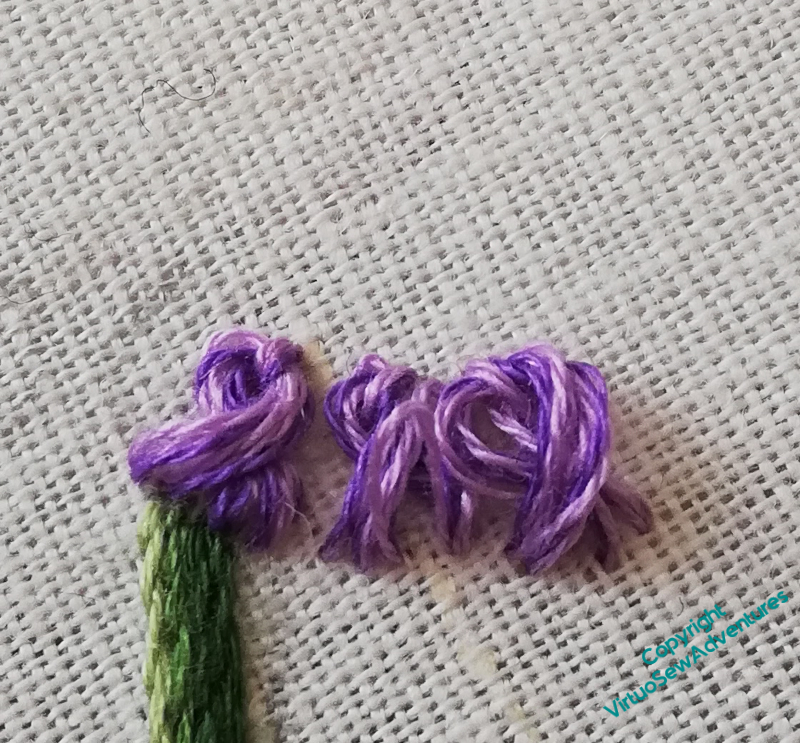
This was my first attempt at the individual flowers on the grape hyacinth flower heads – twisted chain stitches using several different coloured strands of stranded cotton.
I wanted to try something raised, to contrast with the flatness of the stems and leaves, but this, slightly full, version of twisted chain hasn’t really worked. It looks far too heavy for a spring flower!
Out it came, and I tried again.
And for my second try, I may have invented another stitch. Again!
This is Fly Stitch topped with Twisted Chain Stitch. What I wanted to achieve was the slight sense of a ruffled skirt at the bottom of the individual bells, and this certainly works well enough for me to keep going, using this stitch, at least until I have a better idea!
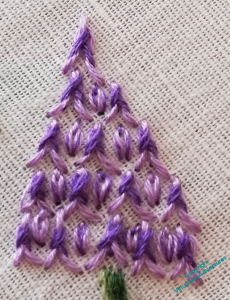
All that admitted, I felt I’d ended up with too great a space between the stitches, and of course, I don’t want to try to fit more in, in case I lose the ruffles (as it were!). So I have filled in the gaps with single detached chain stitches.
Of course, I may yet come back and do somethign entirely different. but I decided at this point to leave this in place and continue my experiments!
The next SlowTV Stitchery is now live. Episode 36 tackles the difficulties of the canvas, Reynard the Fox provides a distraction, and there is some tackling of quandaries by changing tack..