
Tag: canvaswork
The Stash Busting Canvaswork Footstool – Stitching Begins
Once I’d drawn out the size I thought I needed for the footstool cover, I needed to think about how to break it up and make something that looked deliberate.
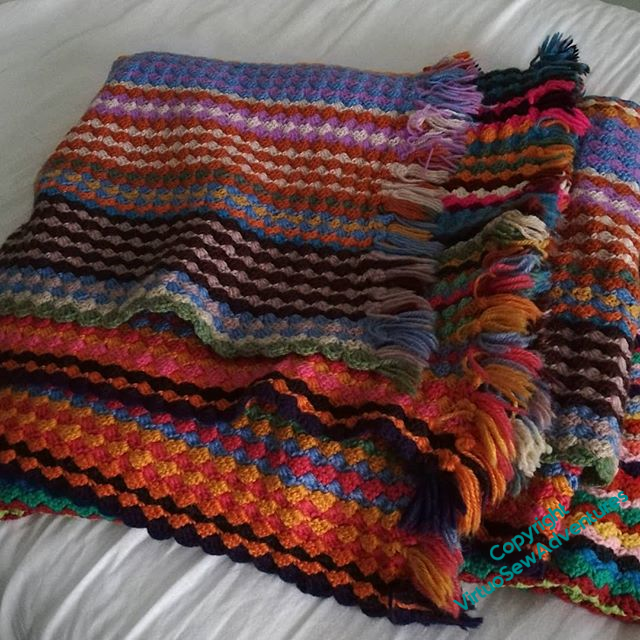
I could, of course, take inspiration from Grandmama’s everlasting crochet blankets, made, I think, purely to keep herself occupied in times of trial. But somehow, that didn’t seem quite right. Maybe the footstool area seemed too small for that to work properly.
I gave some thought to how to divide up the space, but compared with the Crazy Canvaswork Cushion, the idea fell together really quite quickly.
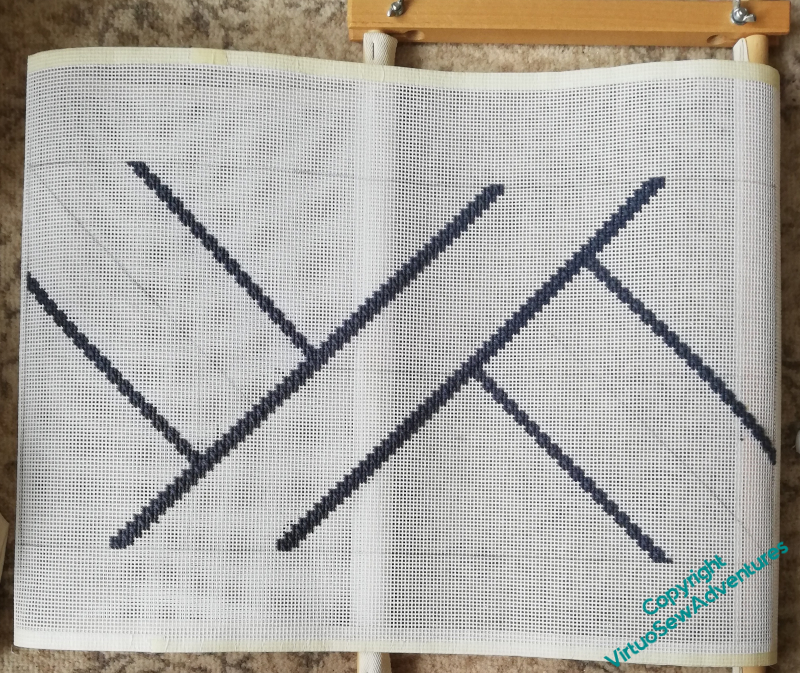
I divided the area into seven sections, one long diagonal and three on either side, and then stitched along those lines in grey wool, using framed mosaic stitch.
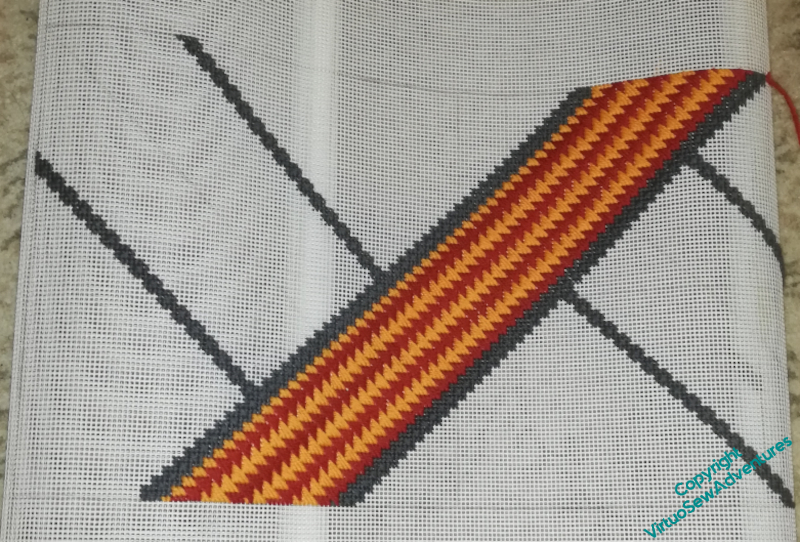
Then I started with the first section. The colour scheme was rather determined by what I felt I had a sufficient amount of thread for, and I decided after some experimentation that I was going to confine myself to diagonal stitches, and what’s more, that the diagonal stitches were all going to slant the same way. I’ve discovered that not all “Tapestry Wool” hanks are created equal, and some are distinctly thinner and sparser than others, so I really don’t need the added difficulty of making stitch directions mesh!
The next episode – Episode 37 – of SlowTVStitchery is now live. It considers the attraction of literary adventures, additional details on the Amarna Family Group, and the preferability of overcast weather for goldwork.
Another footstool
Remember this footstool?
It has a cousin, also worked by Grandmama, which has been working hard as the footrest at my mother’s computer desk, and the stitching of which is past recovery.
So the idea is that I should do a canvaswork panel for it, and Only From Stash. After all, where is the point of having a stash if you don’t make good use of it?
That is all very well – I do have some suitable canvas. Just!
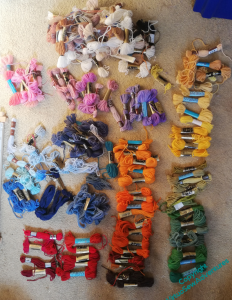
But much of my tapestry wool stash is inherited from others – notice the huge pile of neutrals! – and it might be rather a wild ride to get a 10 x 21 inch piece of sensible 10 count canvaswork out of this selection.
I had intended to do something with Clarice Cliff colours, but as it happens, I don’t have as much leftover of those colours as I thought I had. I’m pretty sure that the pinks won’t figure, and unfortunately the greens are too thin on the ground and too mismatched, as well. Much thought will be needed!
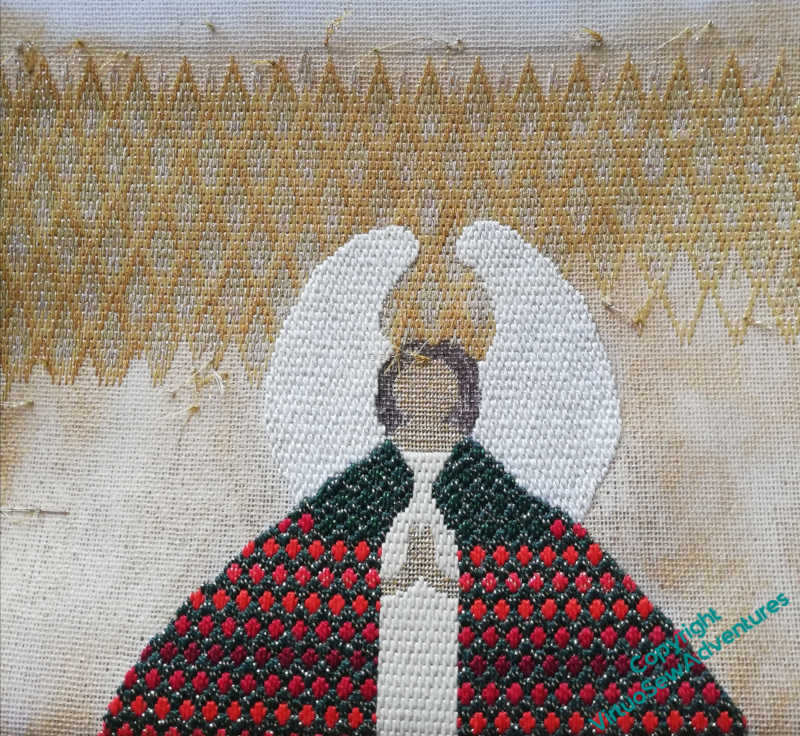
While I was thinking about that, however, I also prepared Episode 35, the first SlowTVStitchery video for the new project, the Canvaswork Angel, in which the Christmas Angel is introduced, and there is some discussion of the detrimental consequences of visual confusion and the delaying effect of Doubts.
Resurrecting an old idea
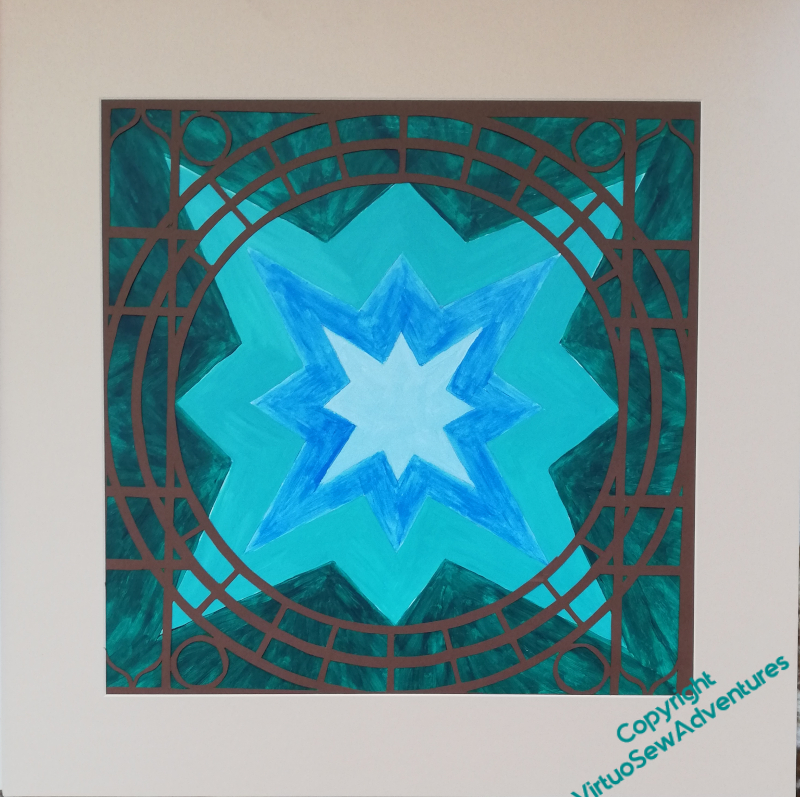
Aqua Angles 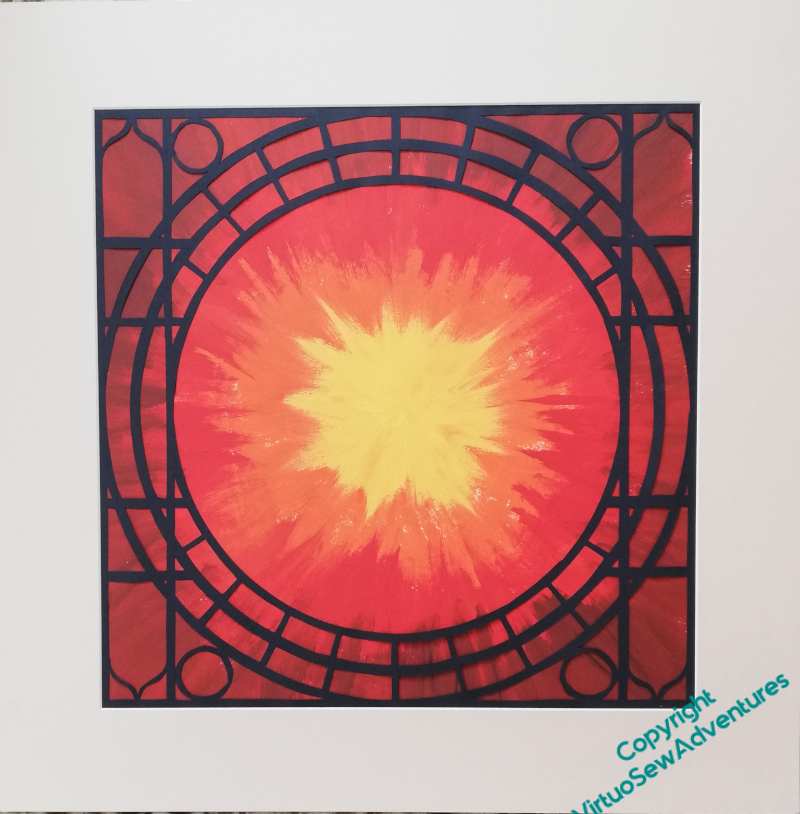
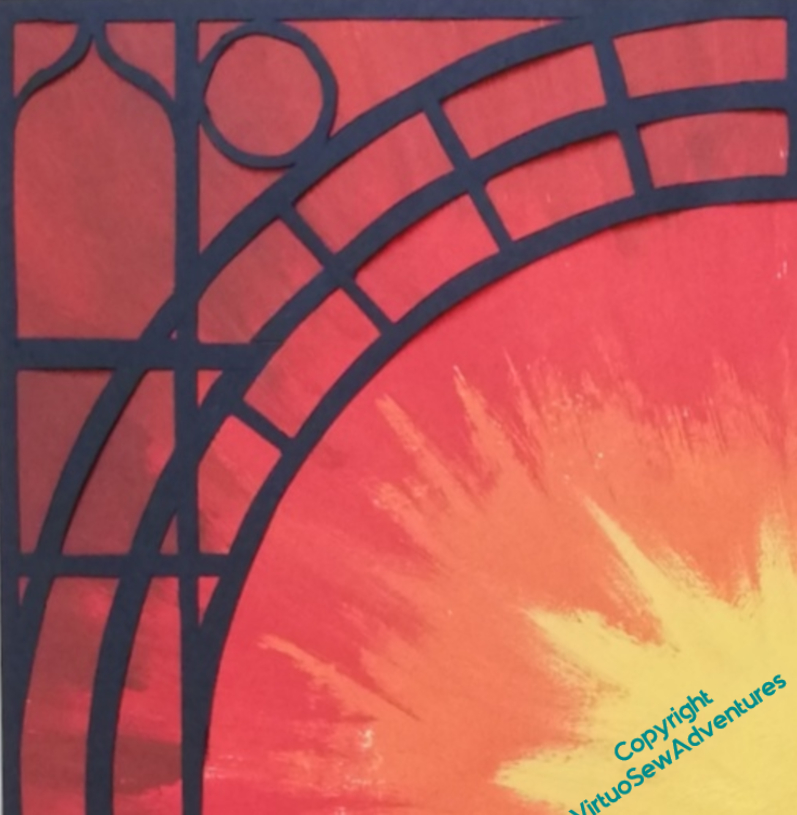
Orange Flare 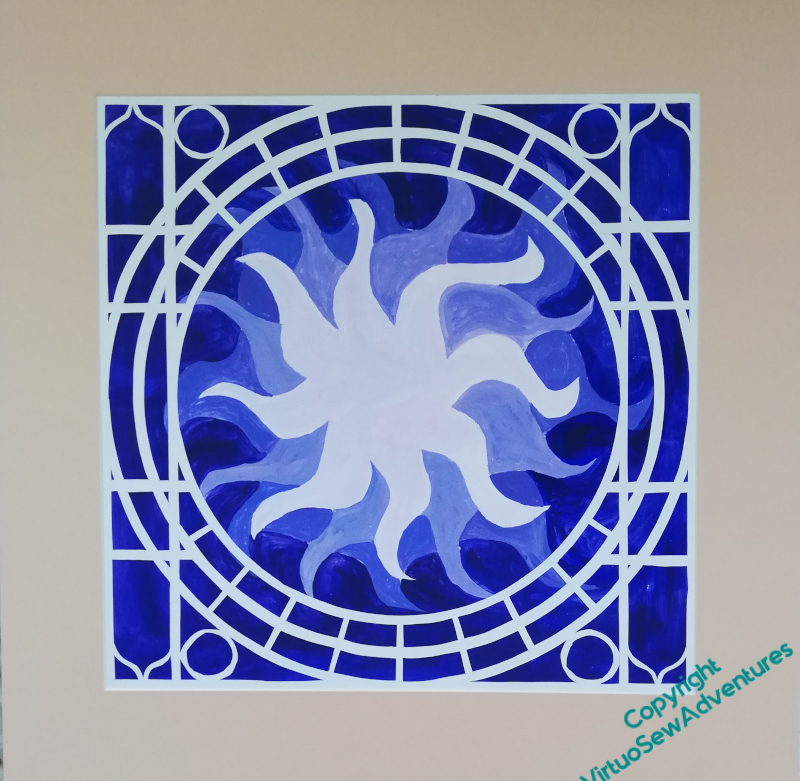
Blue Star

Philip James de Loutherberg.
Copyright The Science Museum
These designs were an idea from years ago, submitted to the Ironbridge Gorge Museum as a possible kit for sale in their shop. Hence the multiple colour schemes – although the orange one is inspired by that famous painting of Coalbrookdale by Night, by Philip James de Loutherberg. The Museum didn’t go for the idea, which is possibly a mercy, as I’ve had a thought since then.
I think it might look altogether more interesting if, instead of reflecting one side of the bridge around the compass to create the corners of a square, I use just one side to make a quadrant design.
My further thought is that, rather than using all tent stitch (as I suspect I would have suggested for a kit), I should maybe use a square canvaswork stitch throughout (maybe mosaic stitch, or cushion stitch) and maybe create a smoother gradiant of colour using several strands of thread in the needle.
However, when I went rummaging for the leftover length of antique cotton canvas I was sure I had left over from a previous project, it wasn’t there. So there is going to be something of a pause, while I work out how much I need, and find somewhere I can order it from.
But in the meantime, Episode 32 of SlowTVStitchery is up, in which details and the upholstery of a stele are considered, and the anouncement is made that Slow TV will continue.
Finally! Crazy Paving Canvaswork finished!
In fact, it was finished a long time ago, and somehow I didn’t get around to writing it up…
Not that there is much to say. All of the interest (almost!) was documented in the stitching.
The old form has been scraped, holes filled, sanded, and repainted, and the cushion is a simple shape, tidied up with piping cord.
Some of the interest, in fact, is in the backing fabric. It’s an unremarkable jacquard woven pattern in cotton on a synthetic warp, but the design – rather ironically, since I’m card-blind for all practical purposes! – is a design of suits I created during my MSc in Textile Design Technology. It’s clunky, and not well-differentiated, but it was the first time I designed a jacquard pattern. The only time, too, but it was fun while it lasted, and I’m glad I asked the technician to weave a half-metre for me instead of the 10 cm that was all that was needed for the module.
Renovating Grandmama’s Footstool
Beginning Refurbishment
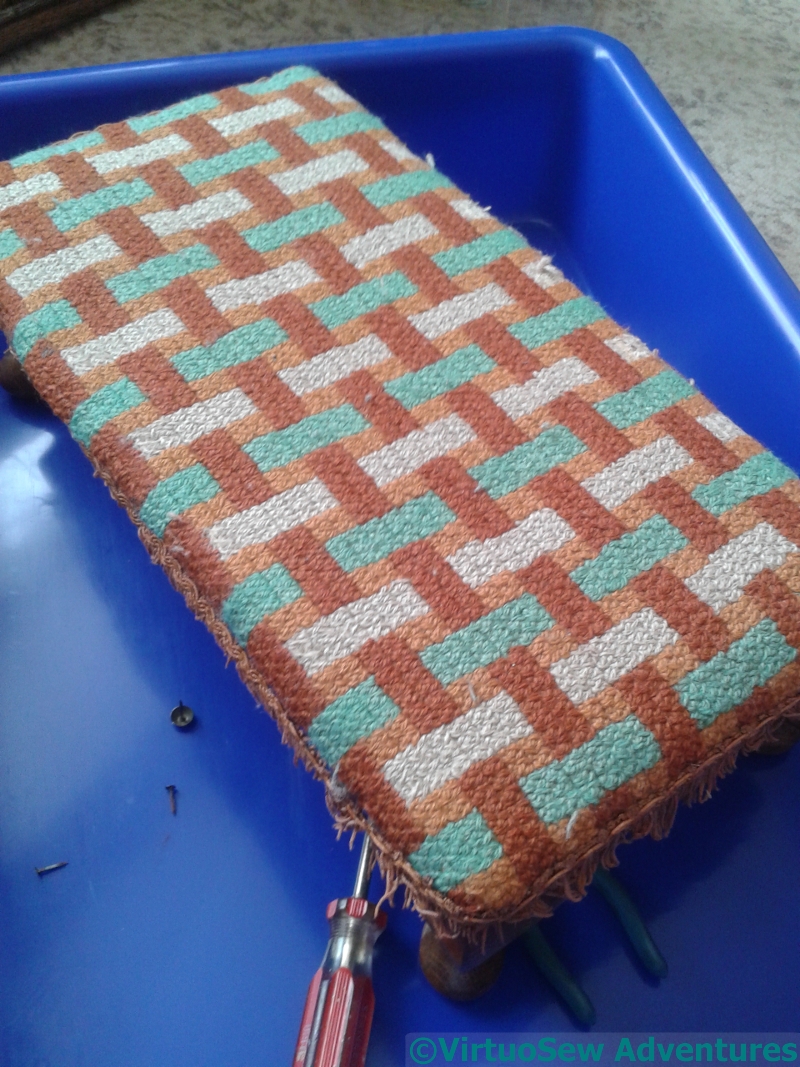
Having been working on the Heart, I was still thinking about Grandmama, and noticing that one of the footstools she made was getting a bit shabby and buckled, I decided to renovate it…
It’s worked in tapestry wool on binca (that strange cotton matting fabric that stitching happened on at primary school – does anyone else remember it?). I think I still have, somewhere, Grandmama’s draft of the pattern on squared paper, but the best I can do for putting my hand on it is to say it is Somewhere In The House! Since I don’t have a workroom, I put the footstool in a plastic tray, which I seem to remember is sold for cleaning oven trays. I use it for wet felting and to contain messes when I’m doing things like this. The blued-steel flat-headed nails were very hard to get out, and indeed, some of them lost their heads (!) and didn’t come out. In due course they were hammered firmly back in, instead!
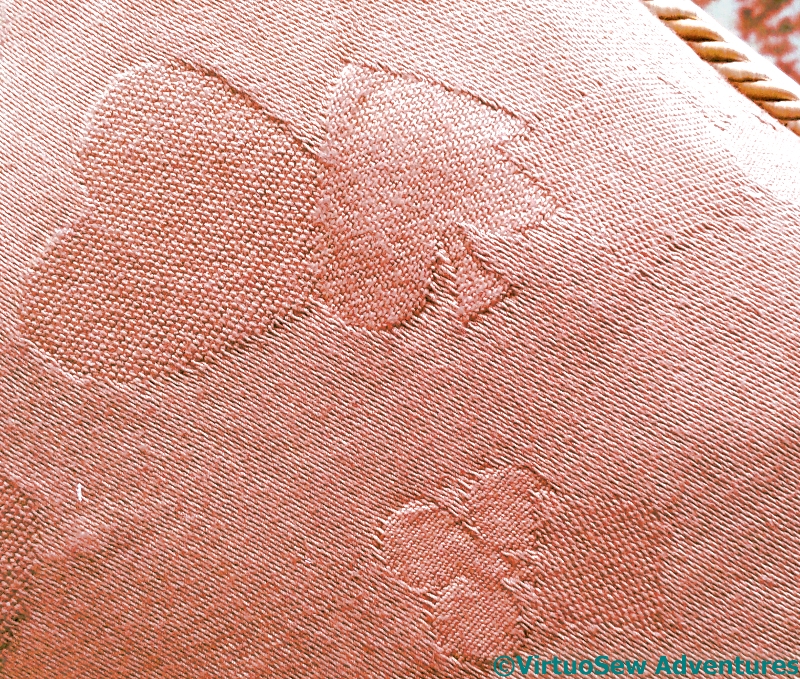
Repaired Stitching
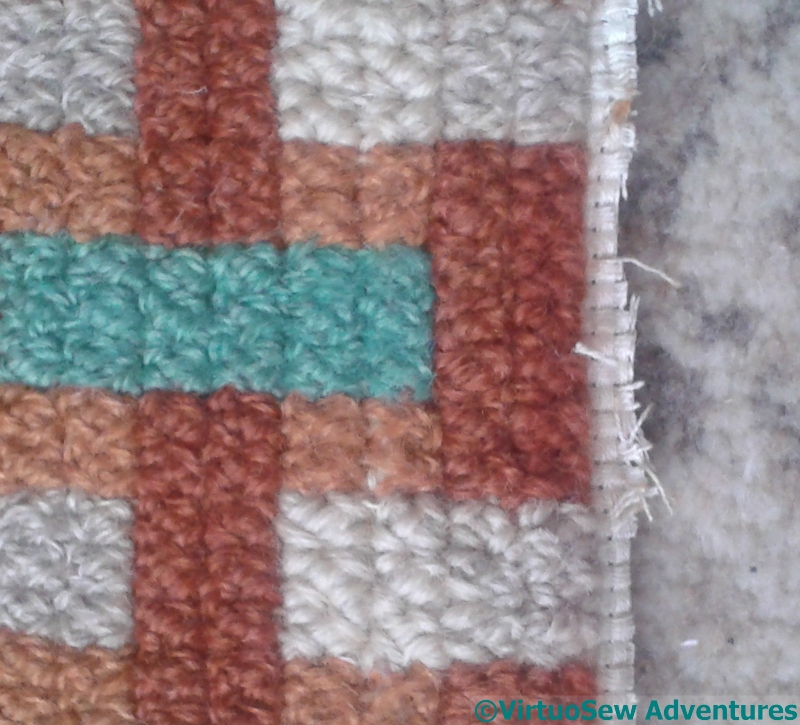
The binca around the edge was badly mauled by the nails, so I knew I would have to do something about that, but in the meantime, there were sections of the canvaswork that needed to be reinstated. First I washed and dried the whole thing (by hand) and then spent some time looking very hard at the stitching. More than fifty years of use have worn a few small sections, and the stitch took some identifying, but in the end, I decided it was Rice Stitch, and found a pale oatmeal tapestry wool that didn’t shout its’ newness too loudly.
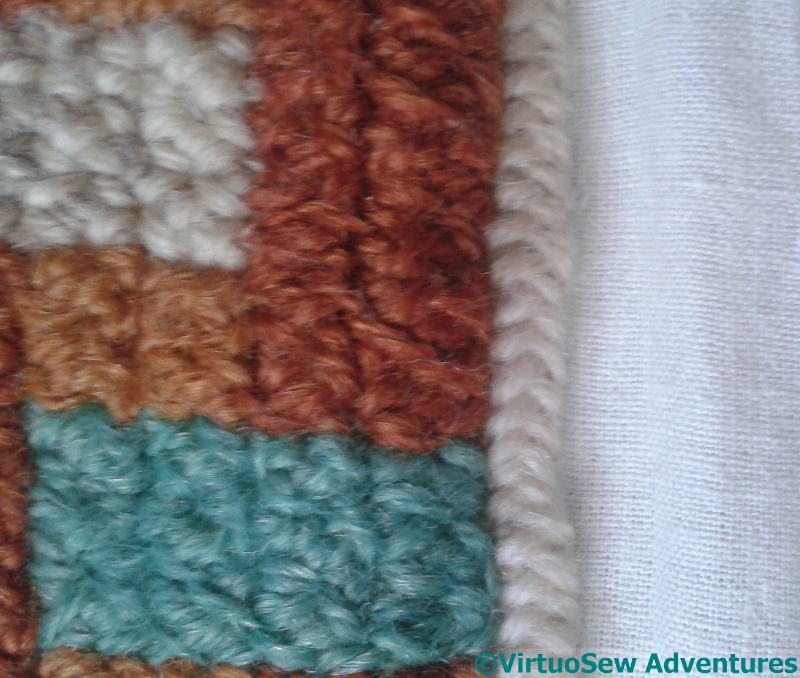
Attached To Calico
Then I attached the binca to some calico and covered the join with one of the long-armed cross stitches. I wasn’t absolutely sure I had enough of the plain oatmeal colour so I alternated a needleful of each all the way around.
In the end, I had plenty left over, but I’ve said many a time before that when ekeing out assorted supplies, the trick is to Make It Look Deliberate!
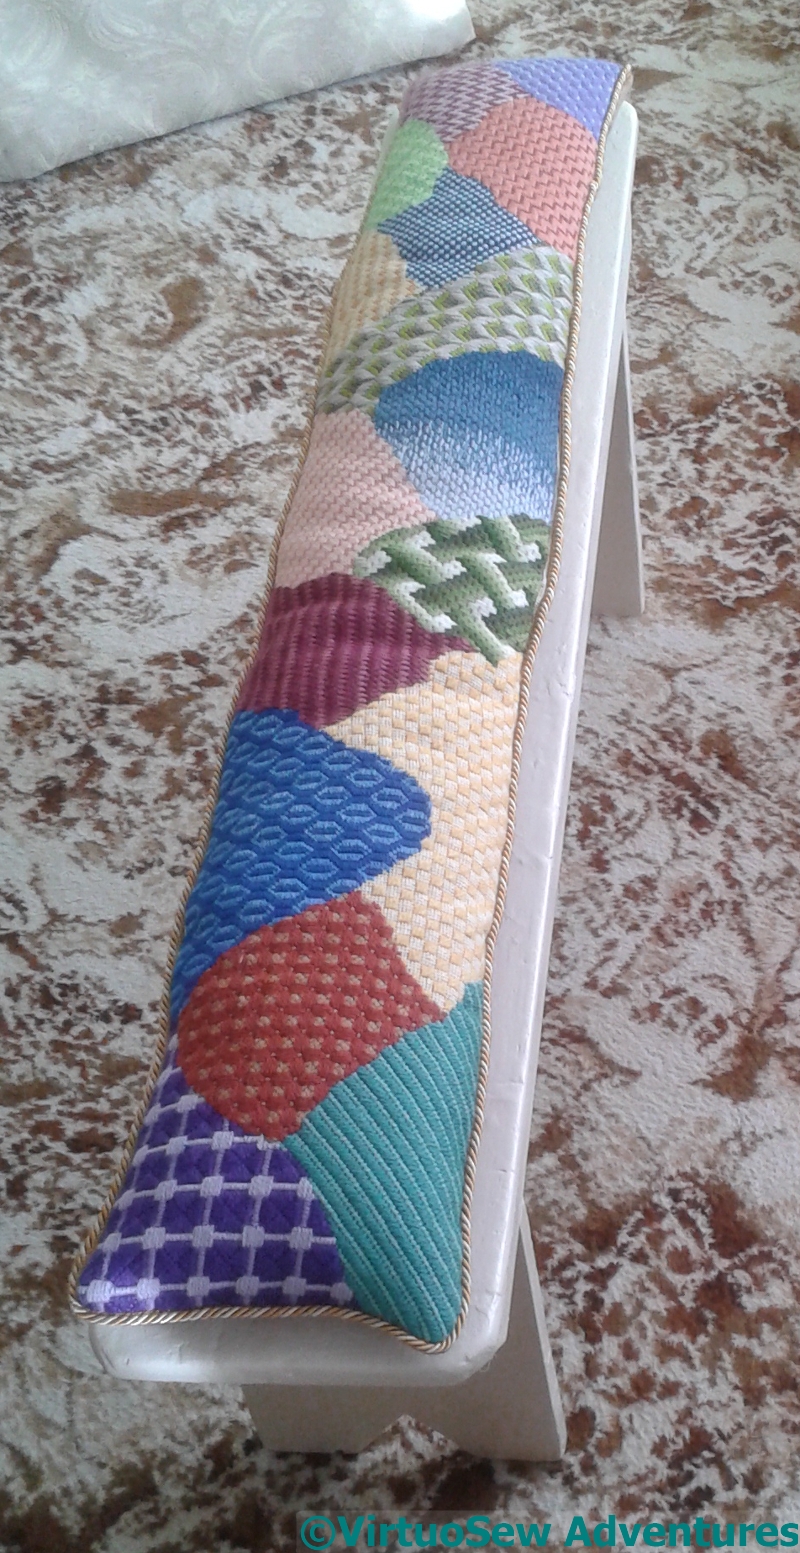
Finished Footstool
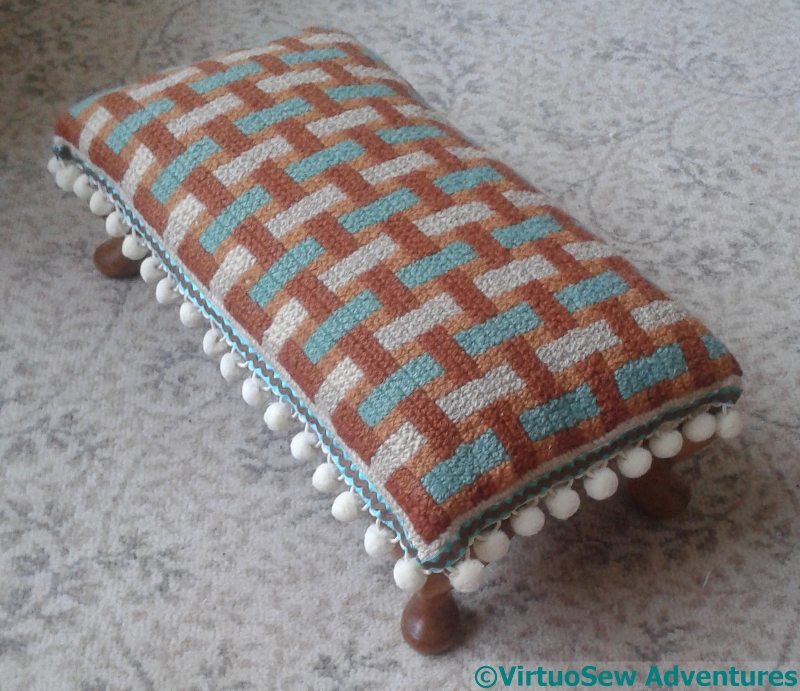
I had to do that with the trim as well. Nothing in our local needlework shop was even remotely suitable so in the end I took some bobble fringing, a length of ribbon and some ricrac, and made my own!
There are one or two infelicities in the details, but it’s certainly got a good few years left in it now.
Thank you, Grandmama.
Canvaswork again – The Lady By The Lake
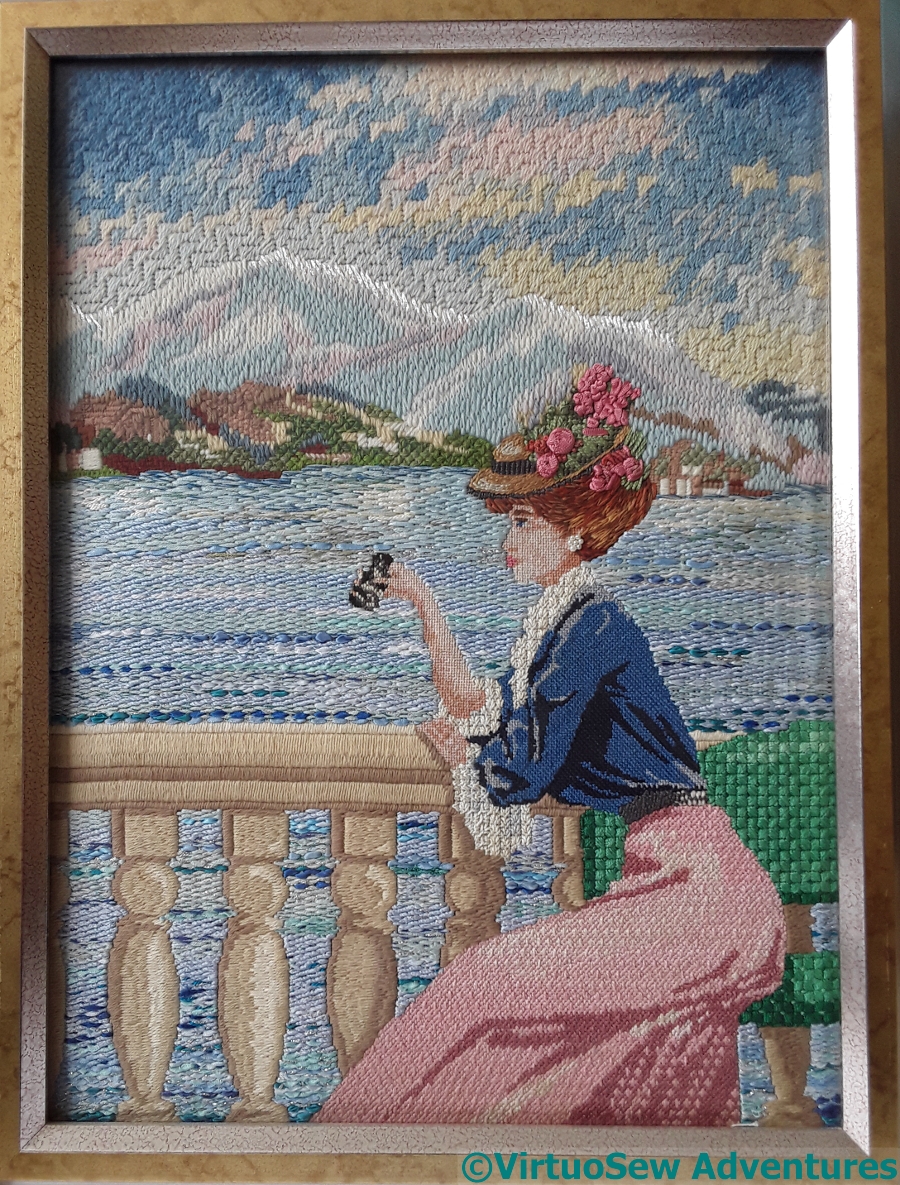
The Lady By The Lake
This is my second post of canvaswork for Catherine of Hillview Embroidery.
The Lady By The Lake has a much wider range of stitches and threads in it, including blends of stranded cottons, ribbons, and a variety of wools. The canvas is a double thread canvas which makes it possible to separate the threads and work some of the design in petit point.
I wrote a post about the Lady when I first started blogging, but I have a very much better camera now, and an incentive to take the picture down from the wall. Considering the canvas is still under glass I am very pleased with how the photographs turned out. There are enough different materials and textures in the scene to provide a good workout for thread and stitch selection muscles…
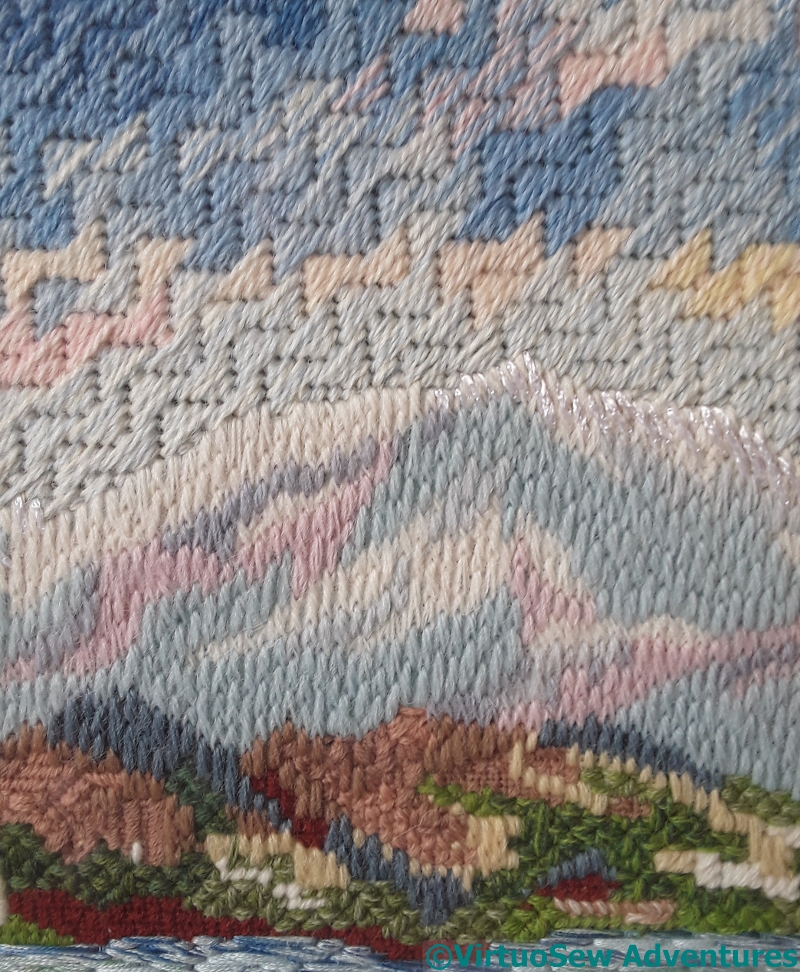
Sky And Mountains
The sky and clouds are all Milanese Stitch, worked in blended Persian yarns with three strands in the needle.
The mountains are in Gobelins Stitch in tapestry wool, and the lakeside hills with their forest and villages are a whole tangle of interesting variations of stitch and thread.
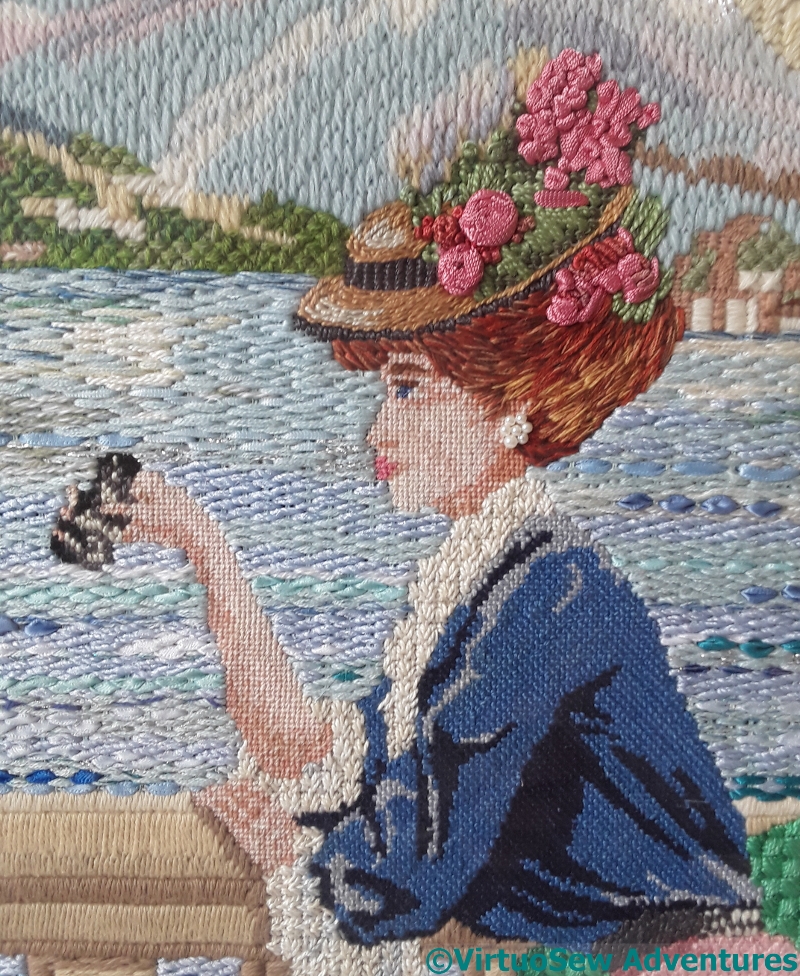
Hat, Face And Blouse
The face and arms were worked in petit point, separating the double threads to create single thread canvas, and worked in stranded cottons (blended). The hair (she didn’t have quite such glorious chestnut hair on the painted canvas itself) is also blended stranded cottons, worked in a sort of long and short stitch. The hat has spider’s web stitch roses on it, and she’s wearing large pearl bead earrings.
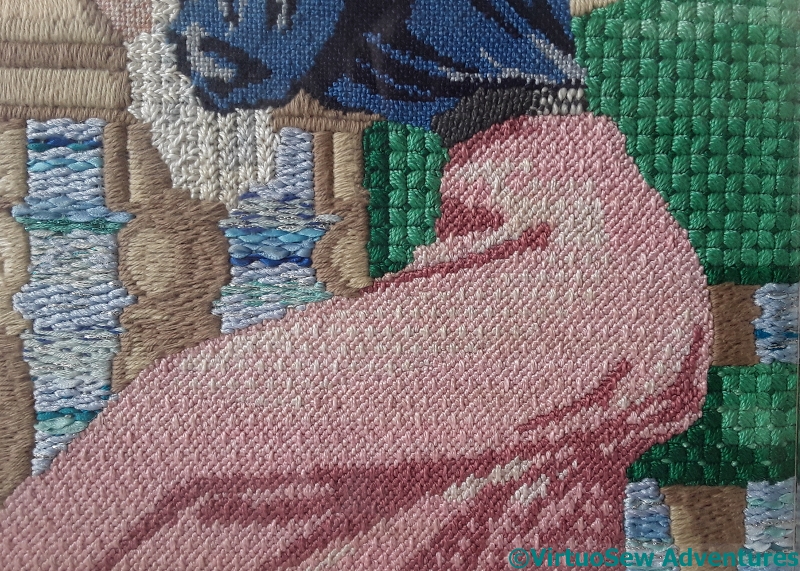
Skirt And Bench
It was the idea of experimenting with the skirt that attracted me. I used a bordered Hungarian Stitch, worked in three shades of pearl cotton and combining them to create the impression of five shades in the skirt. It worked!
The blouse is also pearl cotton, this time Linen Stitch, which is effectively the back of Basketweave Tent stitch put on the front.
I changed the wooden, slatted backed bench of the canvas into a padded one so that I could do the upholstery in Reversed Mosaic Stitch.
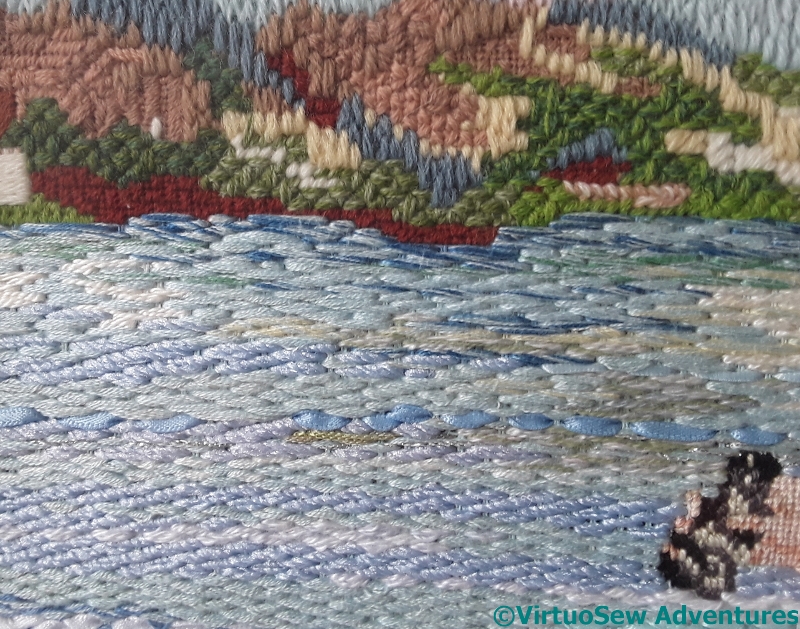
Lake And Town
The lake itself took ages to do – row after row of darning stitch using all sorts of ribbons and threads, including some truly ghastly double knitting acrylic yarn which would have made a dreadfully uncomfortable jumper, but made a very good lake surface, with that slight sparkle you get when there’s just enough breeze to move the water.
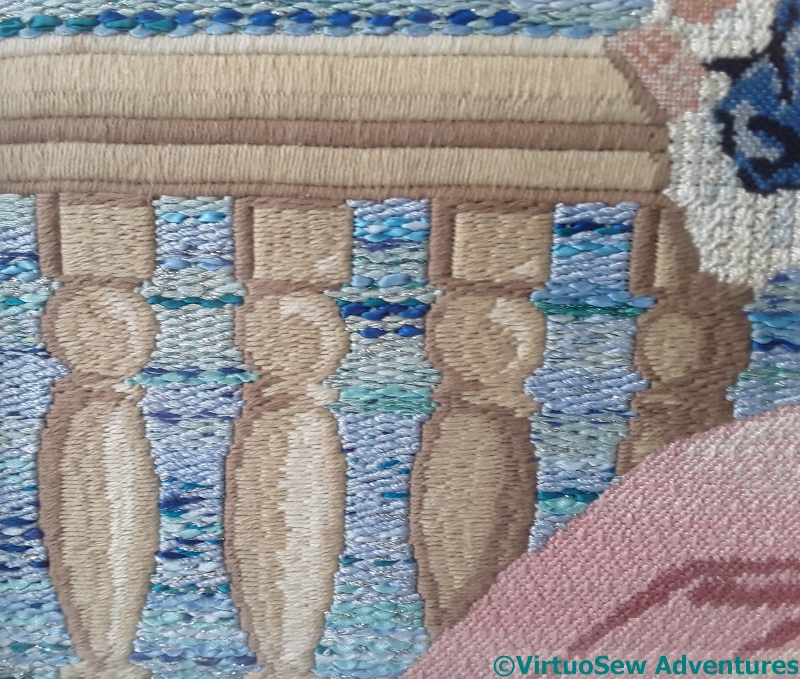
Balustrade And Lake
The balustrade was worked in Soft Embroidery Cotton. I assumed it was something like limestone, and not marble with a polished surface, so the thread needed to be dull to let other elements shine.
Again, click on the pictures to see more and have fun thinking about what I should have done differently!
Canvaswork – Sunset Study
Sunset Canvaswork
Catherine, of Hillview Embroidery, is doing an RSN canvaswork course at the moment, and commented in a recent post that the folder of photographs of the work of past students at the back of the studio has been really useful, partly for ideas, and partly just to practice analysing designs and stitches.
I have two canvaswork pieces that use ornamental stitches to represent the textures and colours they depict, both worked when I was a teenager. It’s much easier to analyse someone else’s work than your own, so Catherine, this post (and another, as yet unwritten) is for you!
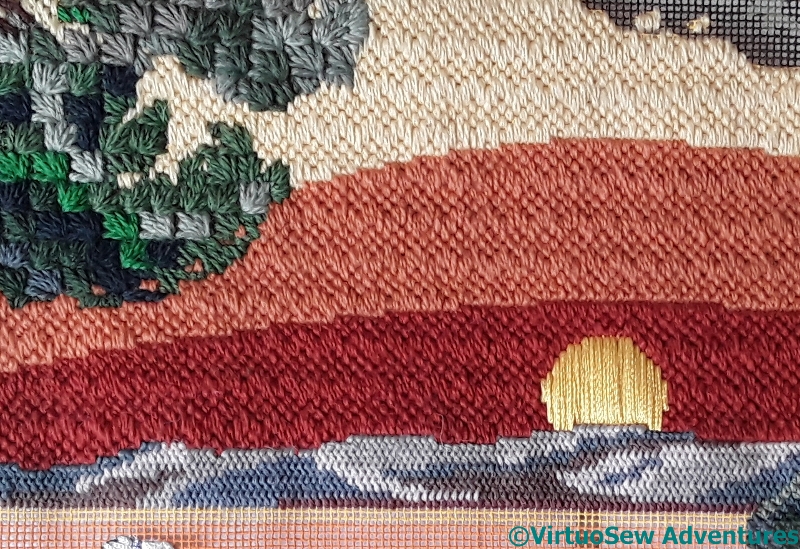
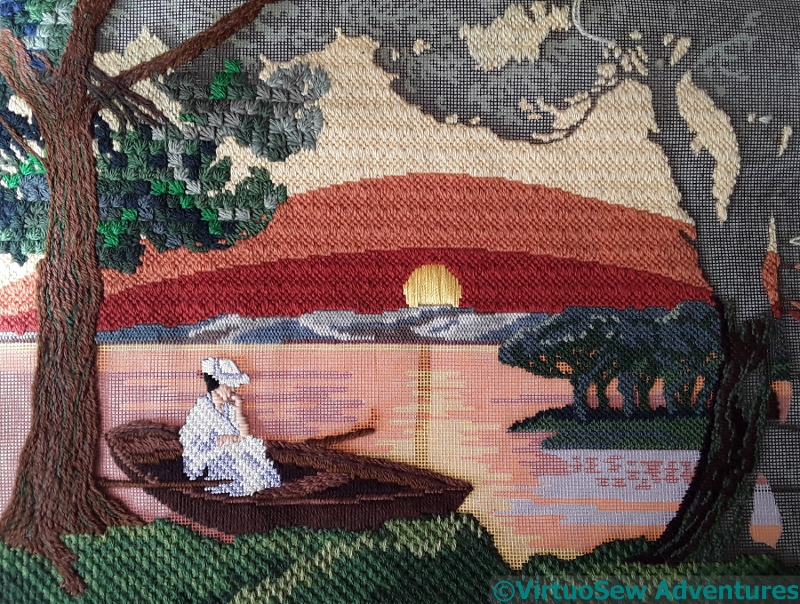
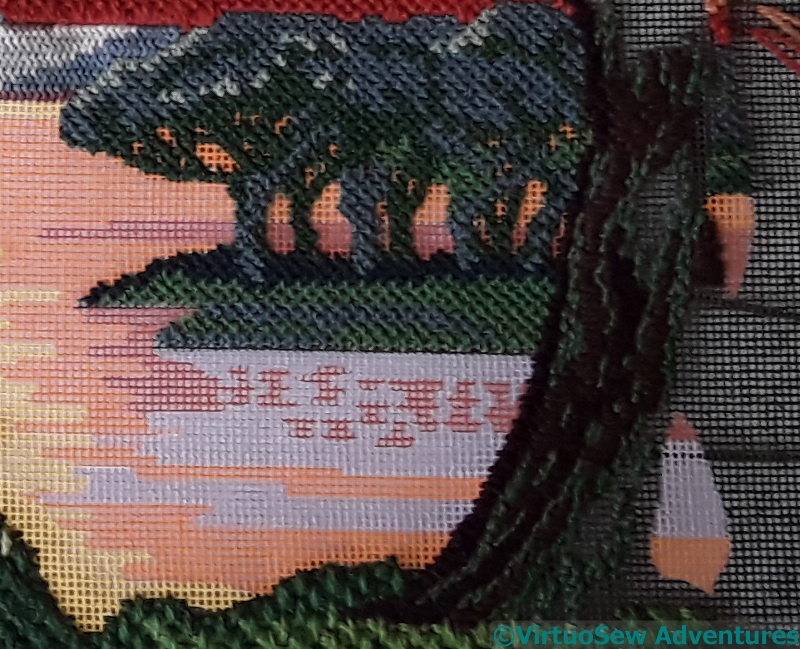
Sunset Sky
It was actually the sky that made me buy this particular painted canvas (this was long before I’d tried designing my own!). I think the stitch is Hungarian Point, and since the canvas had such a graphic feel, rather than being painterly, I was quite happy to leave the sky with those sharp colour changes. The pattern in fact runs clean through from bottom to top, but that those same colour changes mask the fact. The heather clad hills are in Plaited Stitch, worked small to help them recede. And the foliage of the tree is Ray Stitch. I do wonder whether I should have done the ray stitch facing downwards, but some of the pines have a slight upward curve, so they are staying as they are.
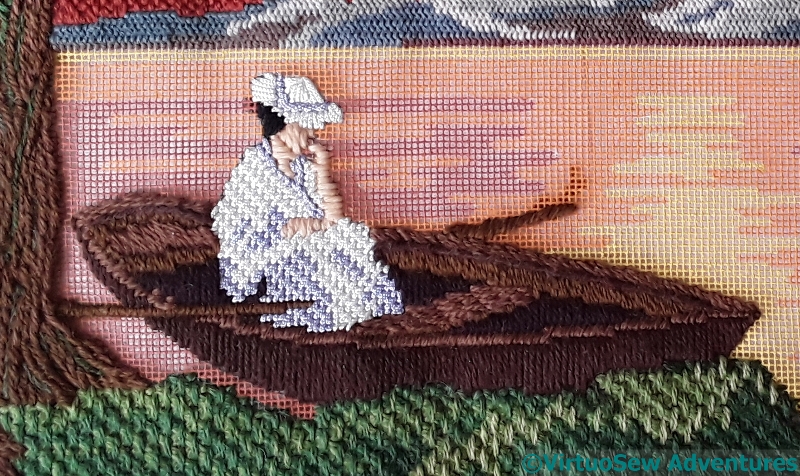
Lady In Punt
Almost all the threads in this piece were wool. It’s a fairly large gauge canvas, and again, there’s so much flat colour that blends wouldn’t really be suitable.
The lady in the the punt is Soft Embroidery Cotton for her skin and hair, and tubular synthetic for her gown and hat, and the punt is straight stitches in assorted browns. The tree trunk is effectively in stem stitch, and the bushes at the front are interlocking elongated cross stitches. They look surprisingly bushy, don’t they!
Trees And Bark
The trees in the distance are in Upright Cross Stitch, which makes a good intermediate texture between the bushes at the front and the distant hillside.
And that near tree? That’s one of the reasons I didn’t finish. I found that not only was I not enjoying the combination of stitches, I was running out of the threads and colours I was using. I threw it in the loft in frustration and disgust and only fished it out again after I’d read Catherine’s post.
The sea is another reason. I still haven’t worked out how to do it, and at the moment, I am still not at all sure I want to.
You can click on all the pictures to see them more closely, so Catherine, your homework is to look at them all, think about what you like and what you’d have done differently.
And if any of you have any suggestions for the sea – let me know!
The Second Worktop Bin
Stage Four
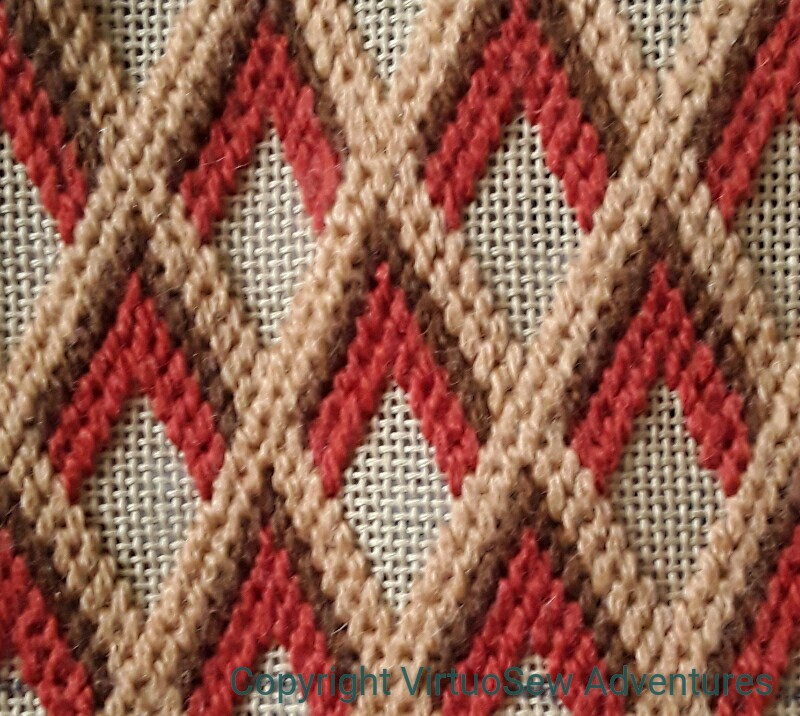
I did indeed find myself mixing and blending a lot of different browns to fill in all those brown sections.
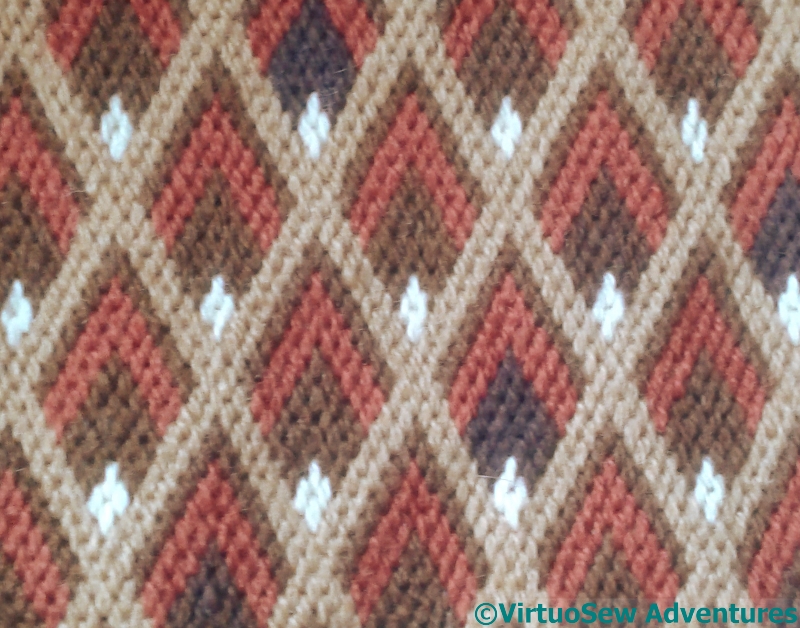
Remember what I said about stash busting being “an inexact science”? Well, the trick about dealing with that (in this context) is to make the various infills and changes look deliberate. I scattered the different shades in a random looking pattern across all the different diamonds. There are four or five different blends, and outside the central section there are only two of each shade in any one row.
Stage Five
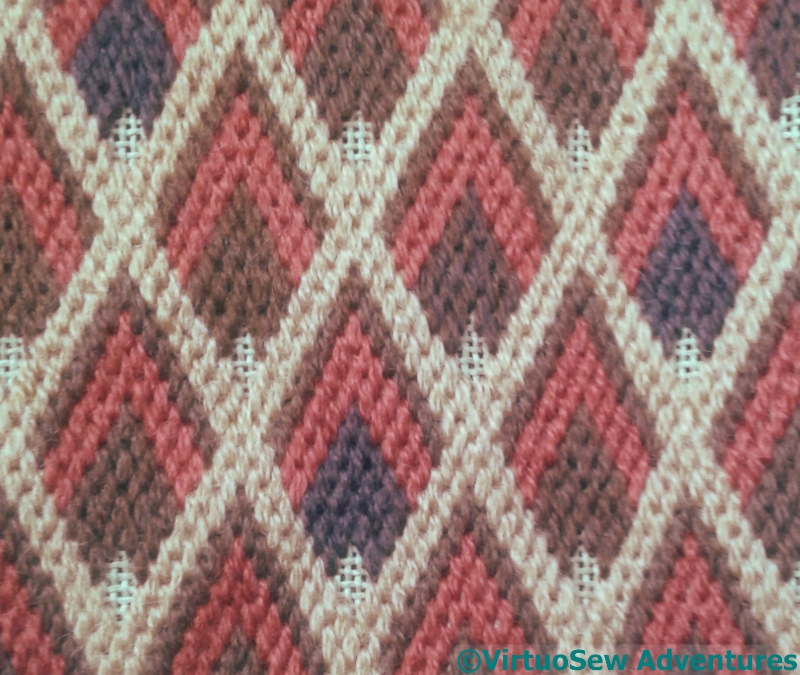
The central section has brown diamonds all the same colour because I was using the central section to help me lay out the trellis pattern, and I simply kept going. In fact as I look at the canvaswork while I write this post, the central section blends beautifully into the outer sections. It really does look deliberate.
The tiny diamonds that lift the whole effect are in a very light cream. Fortunately I didn’t need much of this one, and I had enough!
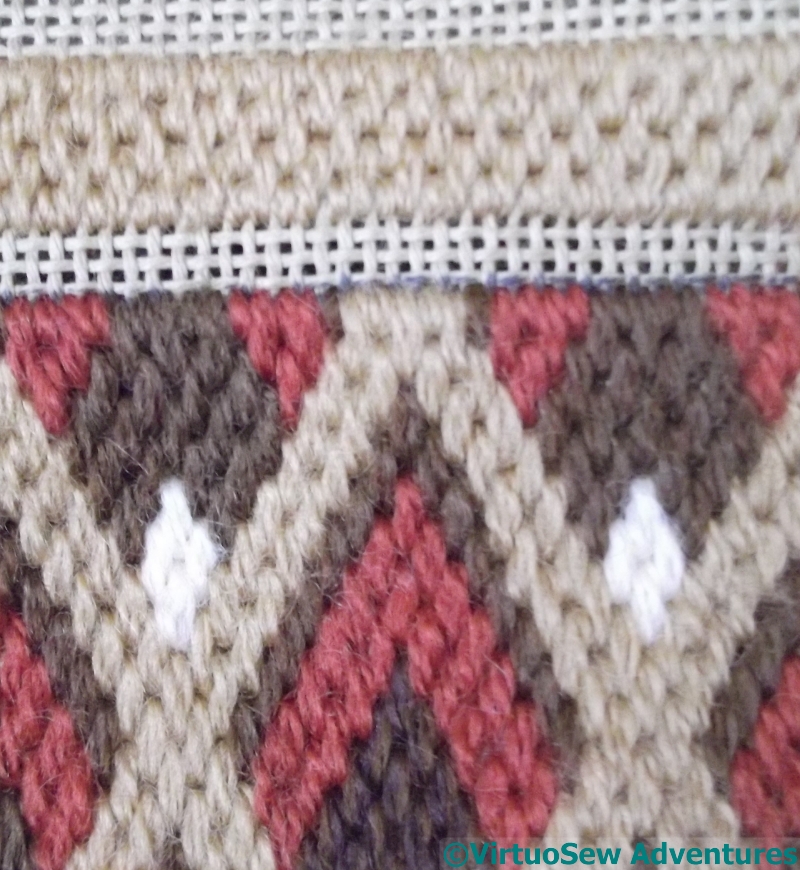
Inside Top In Place
I profited from the experience of making the first little worktop bin, and instead of stitching the inside section after I’d folded back the top and stitched the rim, I worked it while the canvas was still flat, which was altogether easier to do!
Although I confess, I was wondering whether I would have enough of this beige to complete it, or whether I would have to take it out and use a different colour entirely…
Another Worktop Bin
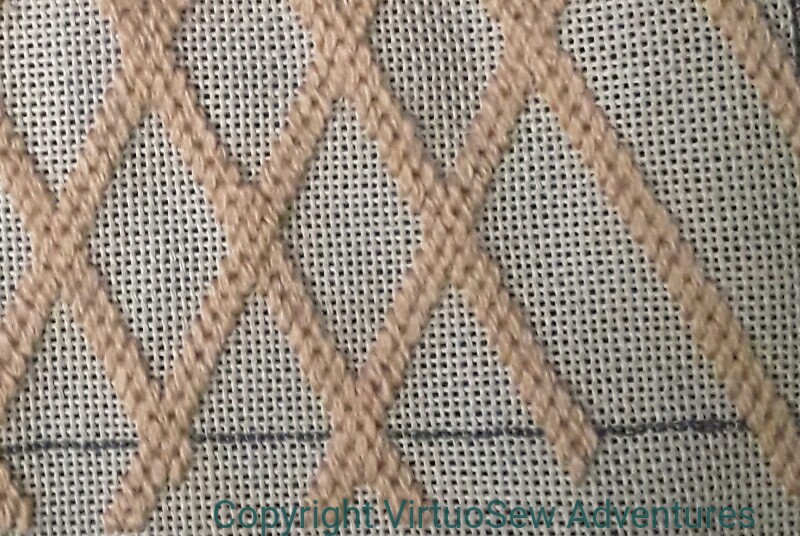
Diamond Framework
The first worktop bin was such a success that I decided to do another one.
This time the bin itself is a cardboard drum that used to contain chocolates. It’s rather bigger than my sawn-off milk bottle, and furthermore, the canvas is finer (I’m only using two strands of Paterna in the needle, not three), so the canvas is going to take a little longer to do.
Stage Two
I’m staying with browns, and with diamond patterns, and starting with this diamond lattice pattern. I’ve had enough of the creamy beige wool to work the framework, and since it is only two strands, I should have enough of it to work the edging and seam as well.
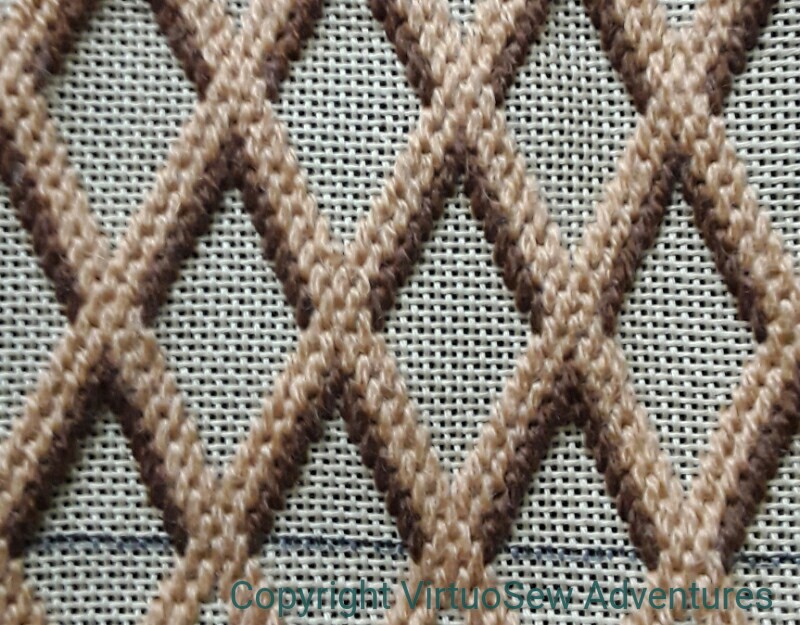
But there is a lot more dark brown to come and I may very well find myself combining threads to stretch my varieties of dark brown to fit the pattern. Never mind, I will then have made some Stashbusting Progress!
Stage Three
Has anyone else noticed what a very inexact science stashbusting is? You embark on a project, full of hope that it will consume vast stores, only to find that the Stash in question has shrunk not at all…
Right up until the project when you rely on that happening….
Finishing the Form Cushion – Stage One

Corner of the Form
When I’d finished the stitching of the canvaswork for the Form Cushion, it was a little puffy and warped, and badly in need of blocking, but being long and thin I had nothing suitable for blocking it on. Until I had an inspiration – use the form itself!
We covered the form with an old towel, and then worked on alternate sides of the form. I’ve put an old length of cotton curtain header over the canvas, so that when I come to remove the staples, it will be fairly easy to do.
In theory…
It took quite a lot of heaving and tweaking, and the combined efforts of my mother and myself (for a client, she’s having to put a lot of effort in here, isn’t she! – she’s started on renovating the form too.), but in due course we managed to get the canvas firmly attached, and stood back to look at it.
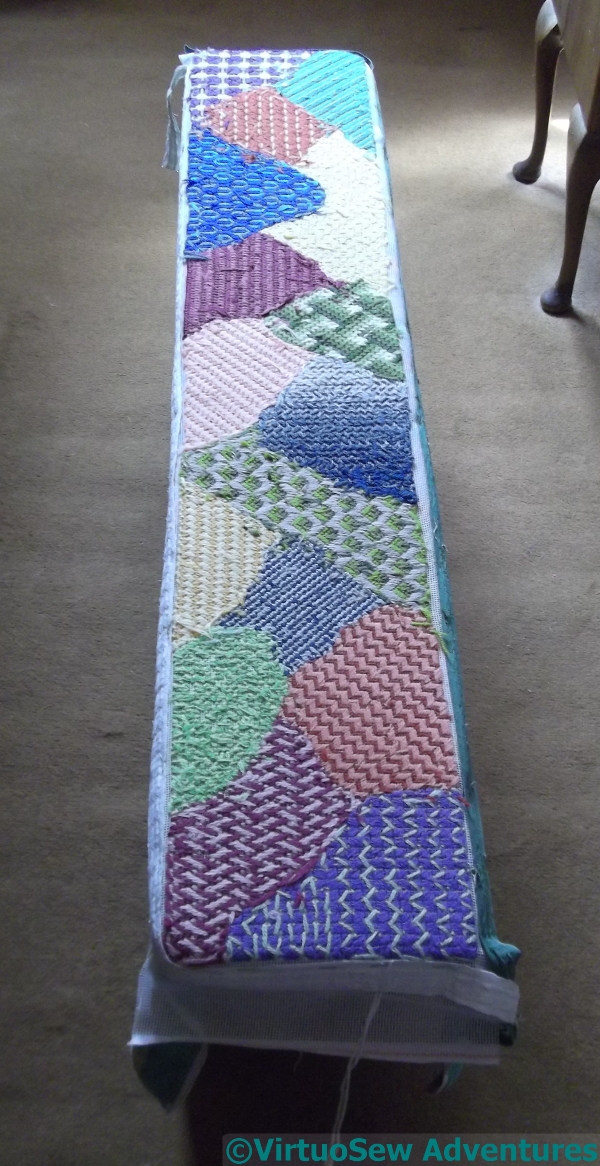
Taking The Long View
It didn’t look nice and smooth as it does here. It was bumpy and lumpy, and not very happy at all.
So I steamed it gently, using a steam iron but not letting it touch the wool. Very, very carefully, and slowly..
It started looking a great deal better (even upside-down), but then we set it aside, still stapled in place, for a few weeks. We wanted to be sure that it was very thoroughly dry before we moved on to actually making the cushion.
And besides, I’m not entirely clear on the type of cushion it will be!