
About Rachel
View all posts by Rachel
Made In Ancient Egypt
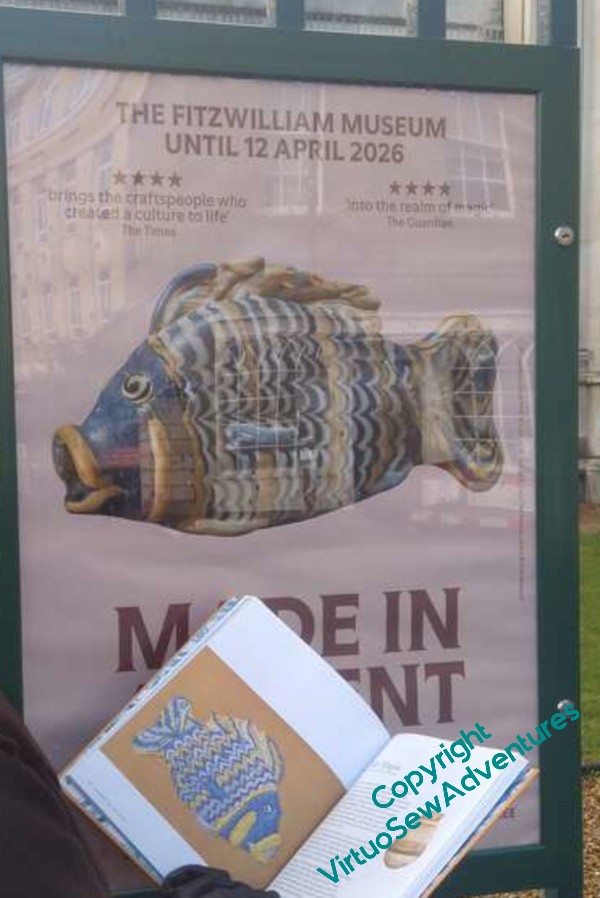
Another exhibition I’ve visited recently is “Made in Ancient Egypt” at the Fitzwilliam Museum, Cambridge. I hadn’t in fact heard it was on until we got to Cambridge for entirely other reasons, but at least I had a copy of my book with me so I could introduce it to some of the inspirations!
Not many inspirations, in fact, as the exhibition covered ancient Egyptian art and craft over many centuries, and the “Dreams of Amarna” project as it developed, I’ve concentrated, not just on the Amarna period, but on the Amarna period as it was known and understood in Mary Chubb’s time. This was necessary in order to give me some focus, and some sensible basis for my researches and ideas, but it does mean that now I’m not requiring myself to restrict my attention, vast swathes of time are shouting for attention!
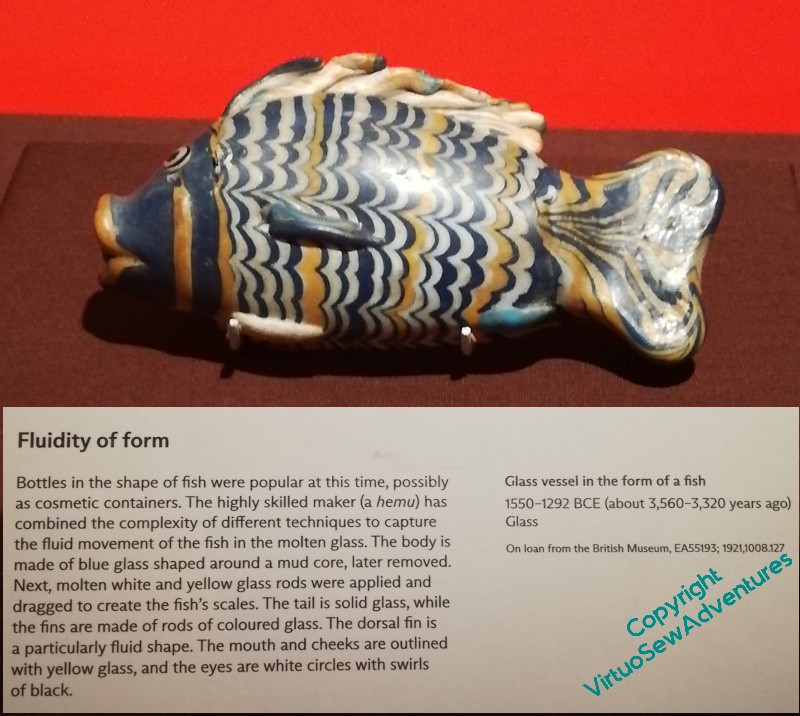

Mind you, I did find the original of the glass vessel in the form of a Nile Tilapia that I used to inspire my embroidery!
The original is even more enchanting in person, as it were, plump, crisp in outline, delightfully bright in colour. And having heard a modern glassworker speak to the difficulties of making one, it’s clear we shouldn’t underestimate the ancients!

That was very much the theme of the exhibition, in fact. It was illuminated, and illustrated, by some large reproductions of watercolours made by archaelogical recording artists such as Nina de Garis Davies showing extracts of tomb paintings, and by some translations of stelae showing quite clearly that those who erected them were conscious of, and proud of, their own hard won expertise and that of their ancestors.
The exhibition as a whole covered a huge range of skills, carving, faience modelling (and carving, which I had not known they did!), jewellery making, even textiles – there was a fine tablet woven sash, an old friend from Liverpool World Museum, a very familiar seeming linen dress, and some breathtakingly fine linen strips, which looked unused, still strong and ready to go.
I think the exhibition runs until April, and as it has gathered finds from many museums, not just in the UK, if you are interested, I thought it well worth both time and money.
Meeting Mary Linwood
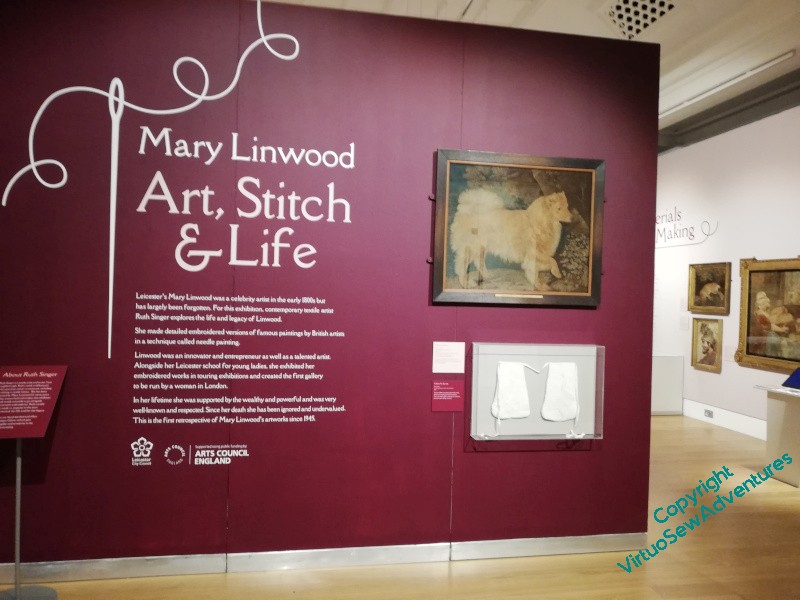
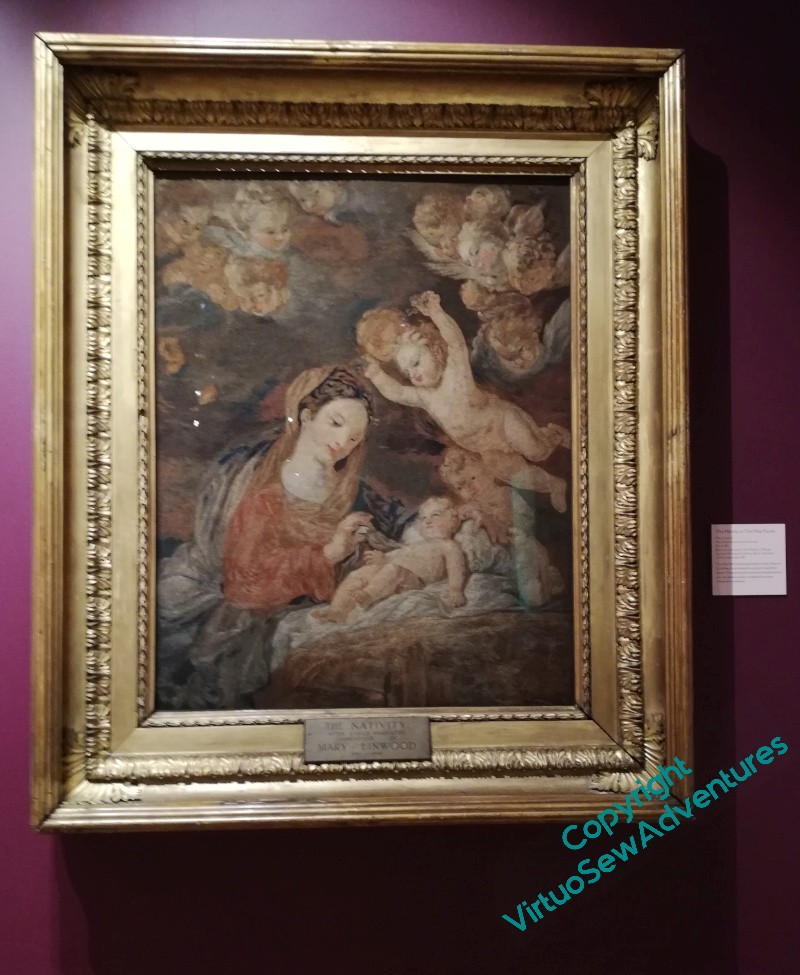
Just lately, I was able to take advantage of a cross-country journey to go – not much out of my way! – to see an exhibition of the life and work of Mary Linwood, an embroiderer and teacher working during the late 1700s and early to mid 1800s (she died at the age of 90 in 1845). The exhibition is in the Leicester Museum and Art Gallery, which is currently in the throes of a redevelopment – this exhibition speaks well of their ambition for the future.
She was very well known and much admired in her time, and owned a gallery in Leicester Square in London which exhibited her works, some of them “semi-staged” with the approach and surroundings designed to maximise their impact. In fact her gallery predates Madame Tussaud’s, making her as far as we know the first woman to own a gallery in Britain.
Unfortunately, by the time she died, she was not so fashionable or popular, and her works were dispersed, some to family and patrons, some disappearing completely.
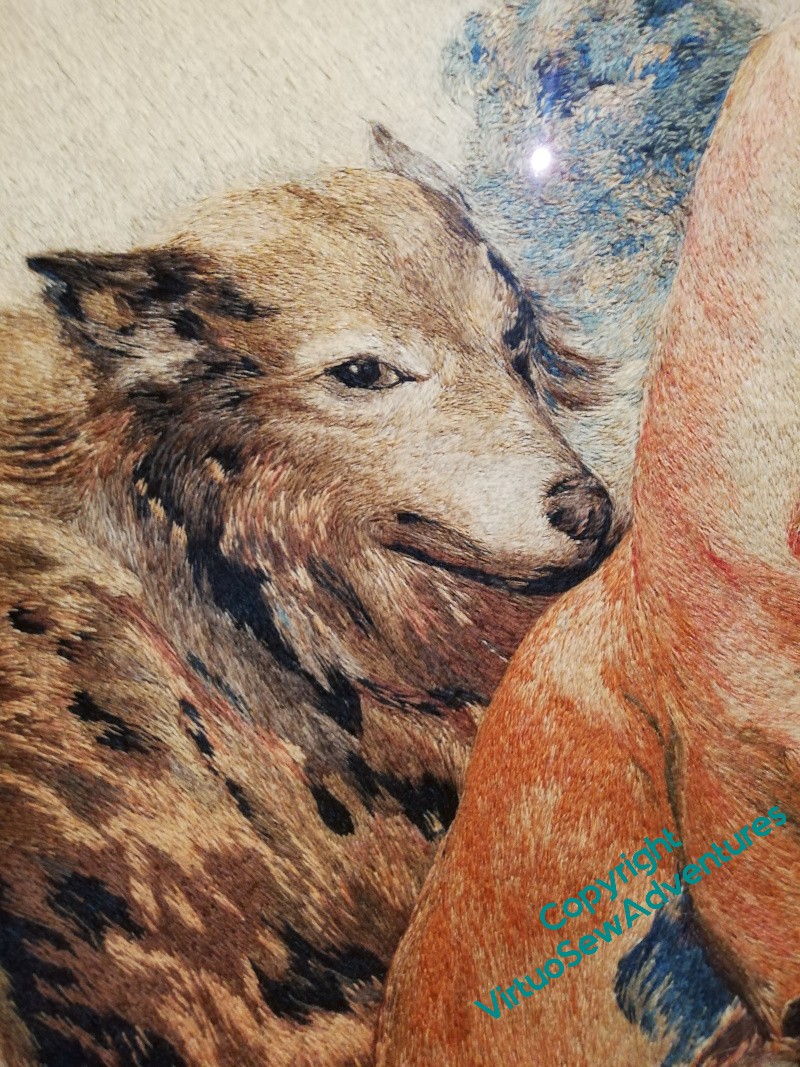
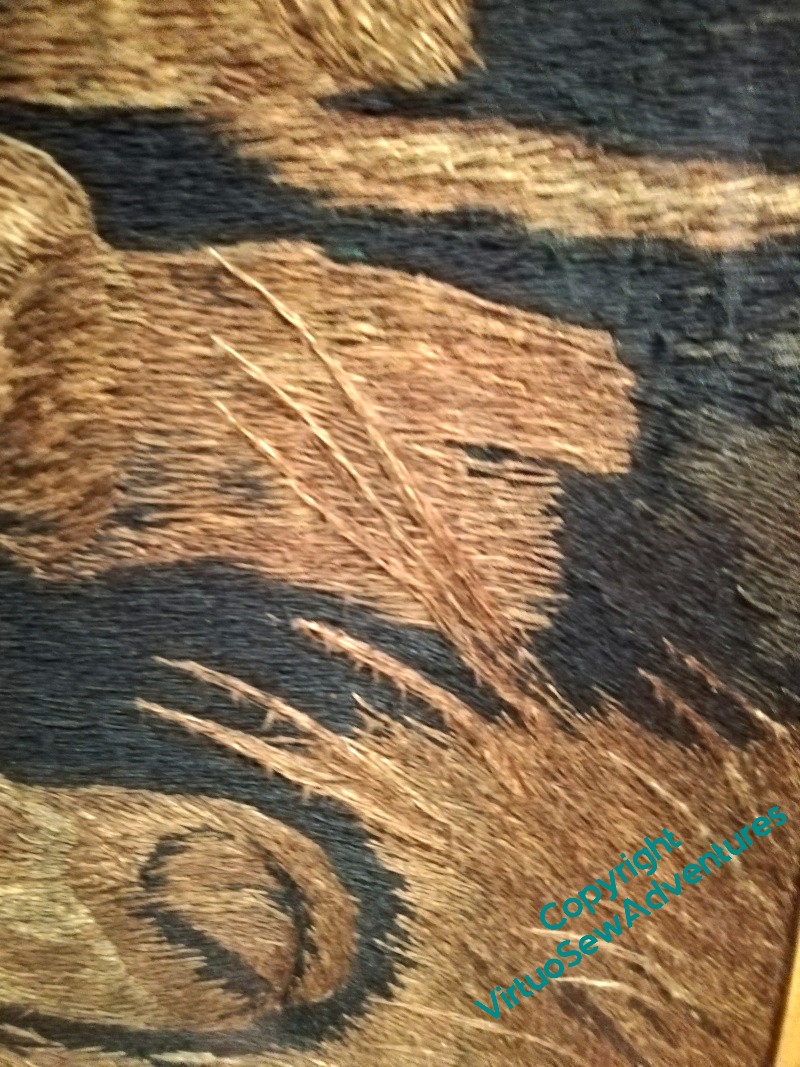
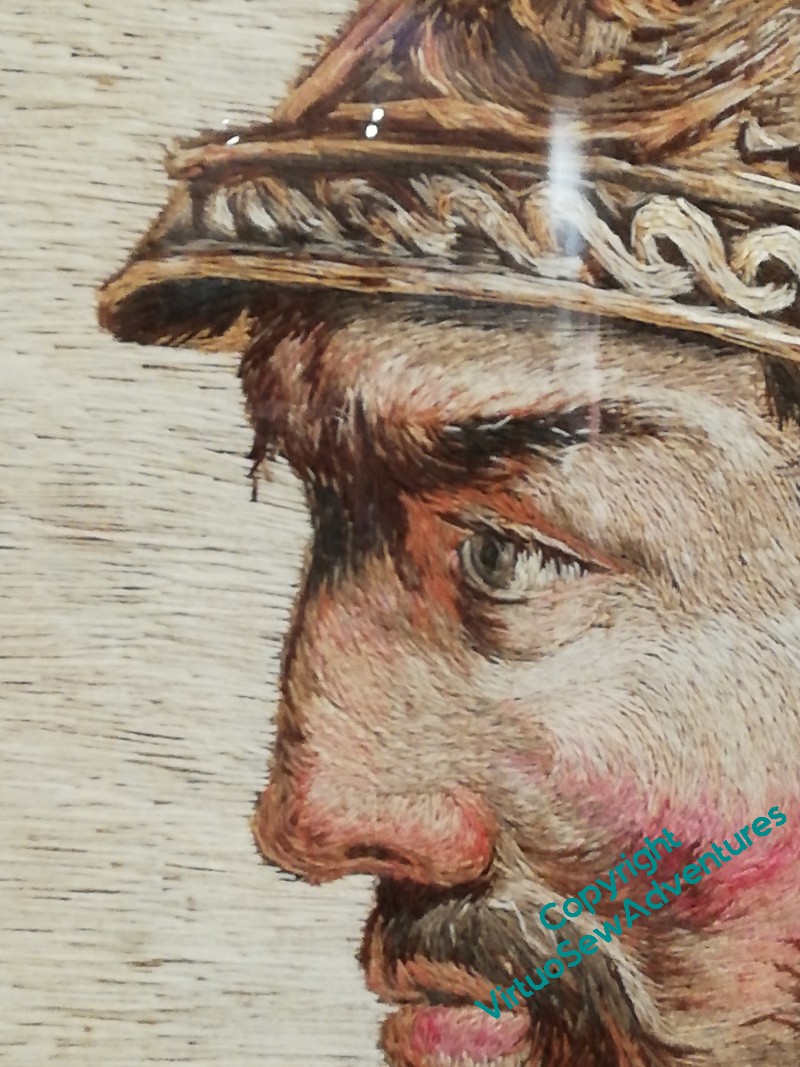
Most of her works seem to have been reproductions in stitch of the works of painters working at the time, which has allowed some critics and writers to say she was “merely a copyist” and “not an artist at all”.
I invite them to try to render any beloved painting in stitches without losing the life and the vigour of the original work. Going from paint or drawing that is not conceived with embroidery in mind to an embroidered rendering is difficult to say the least, and entails much care and consideration, not merely in the execution.
The exhibition runs until February 22, and I recommend not merely going, but taking a magnifier with you!
Mary’s work, although saddened by the fading of the naturally dyed wools she used, remains vivid and assured, textural and painterly both at once, and this exhibition, curated by the textile artist Ruth Singer, gives us a good sense of what she did and the surroundings and the context in which she worked. Some of Ruth Singer’s own work, and some collaborative projects she developed and lead while planning the exhibition, provide a modern response and context for it.
Stella’s Birds – continuing the basics
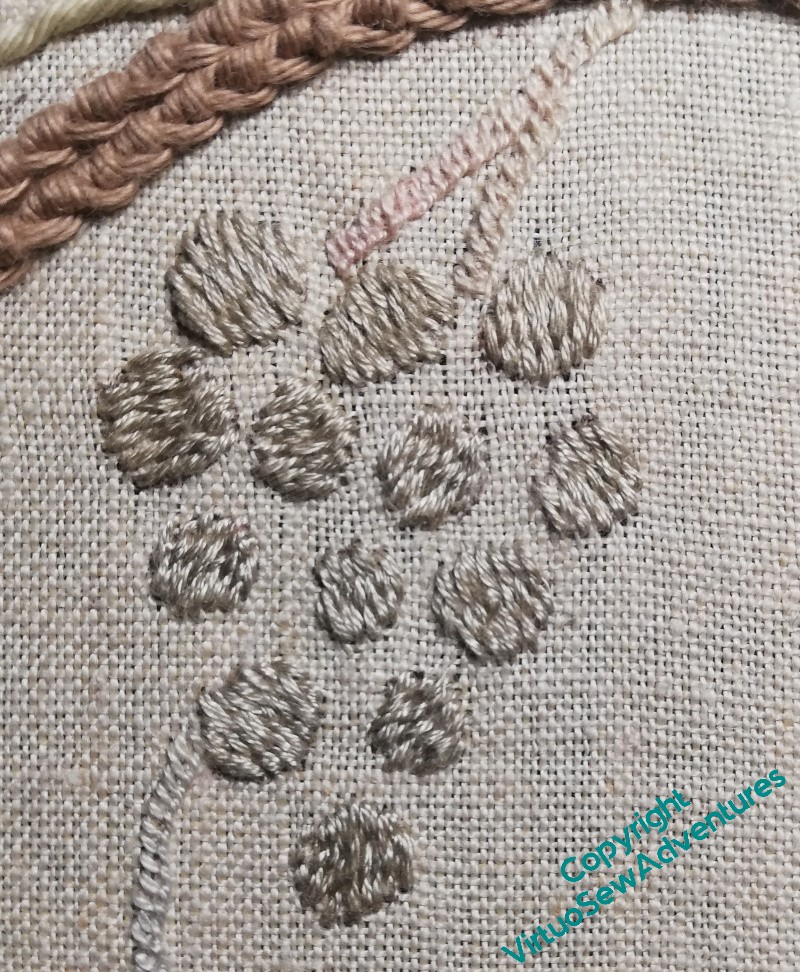
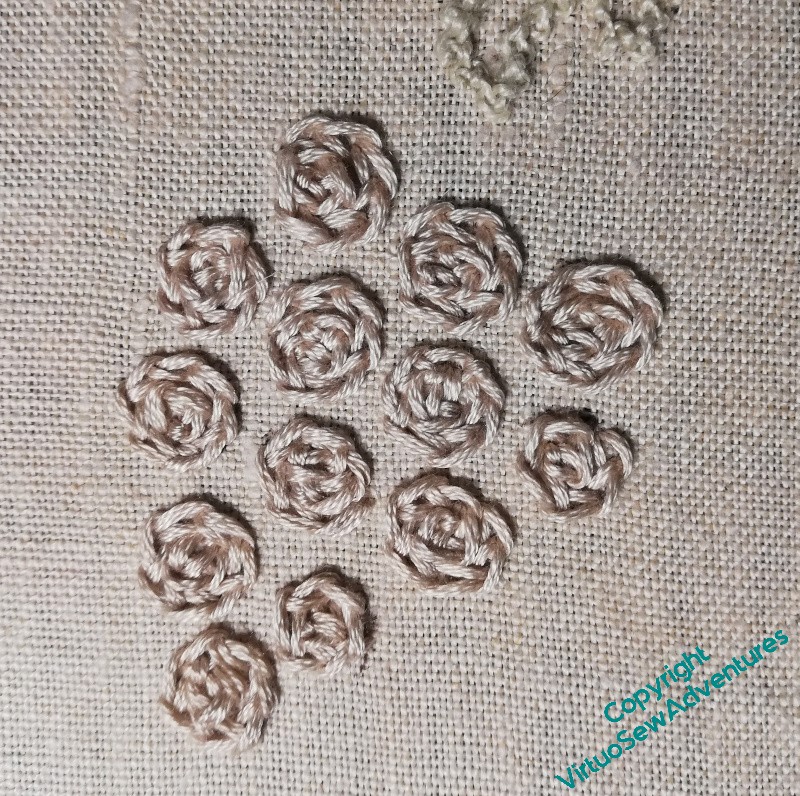
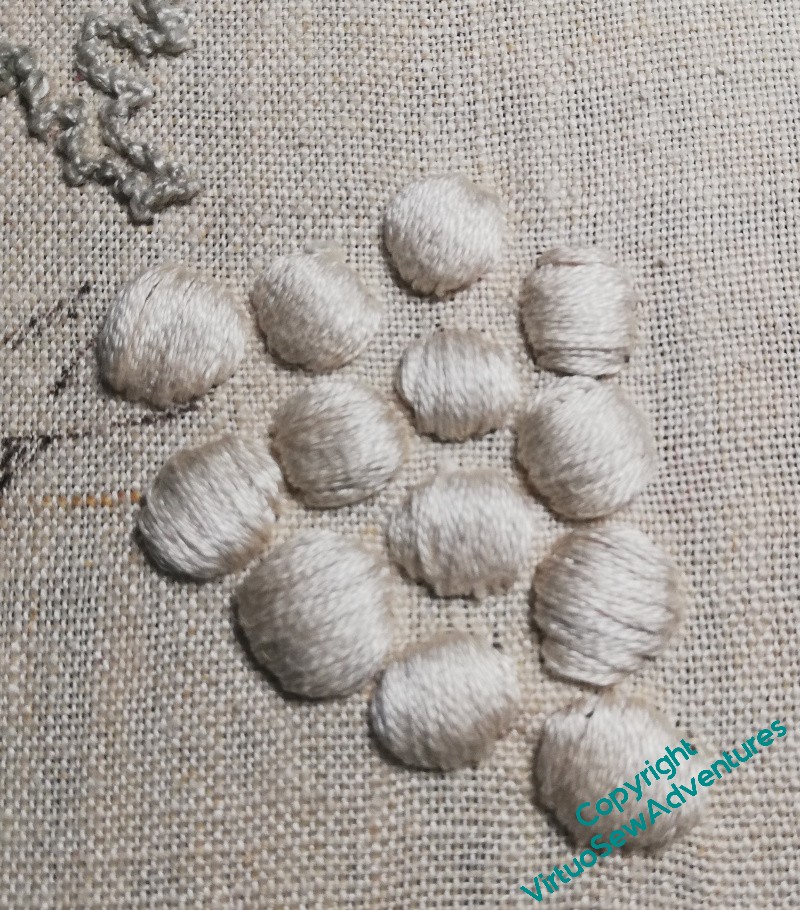

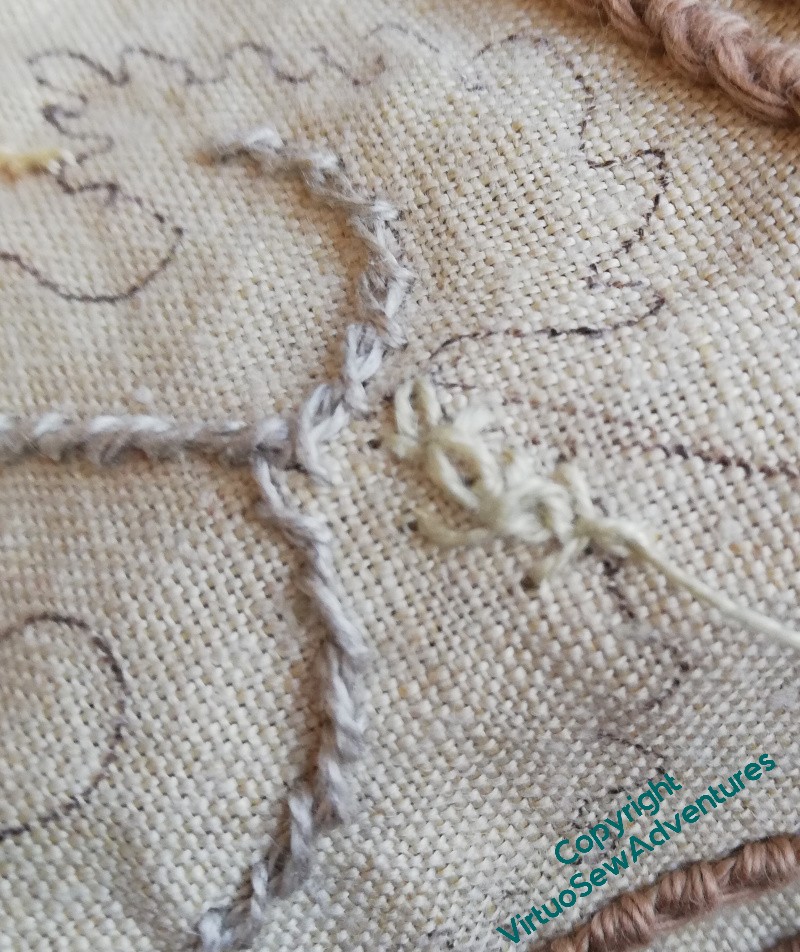
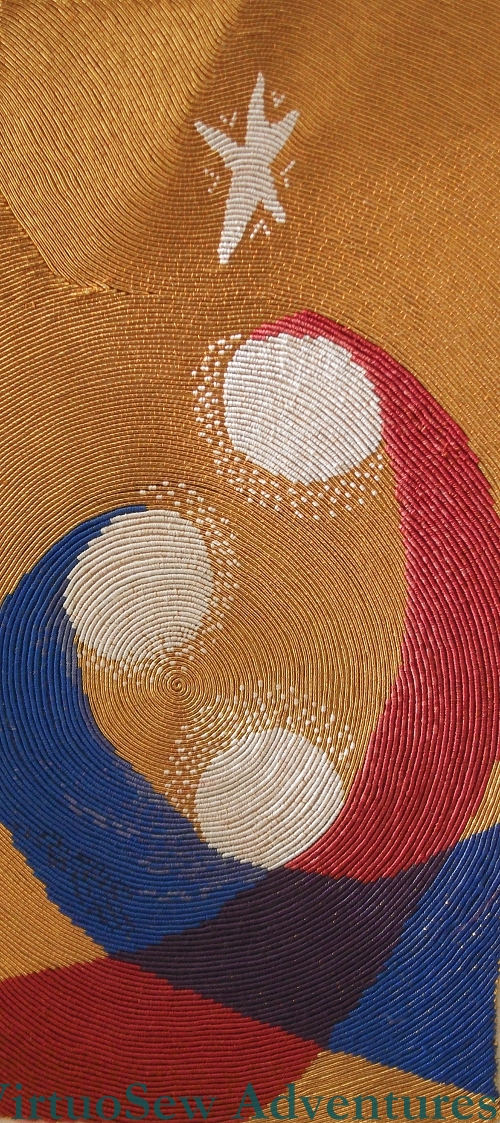
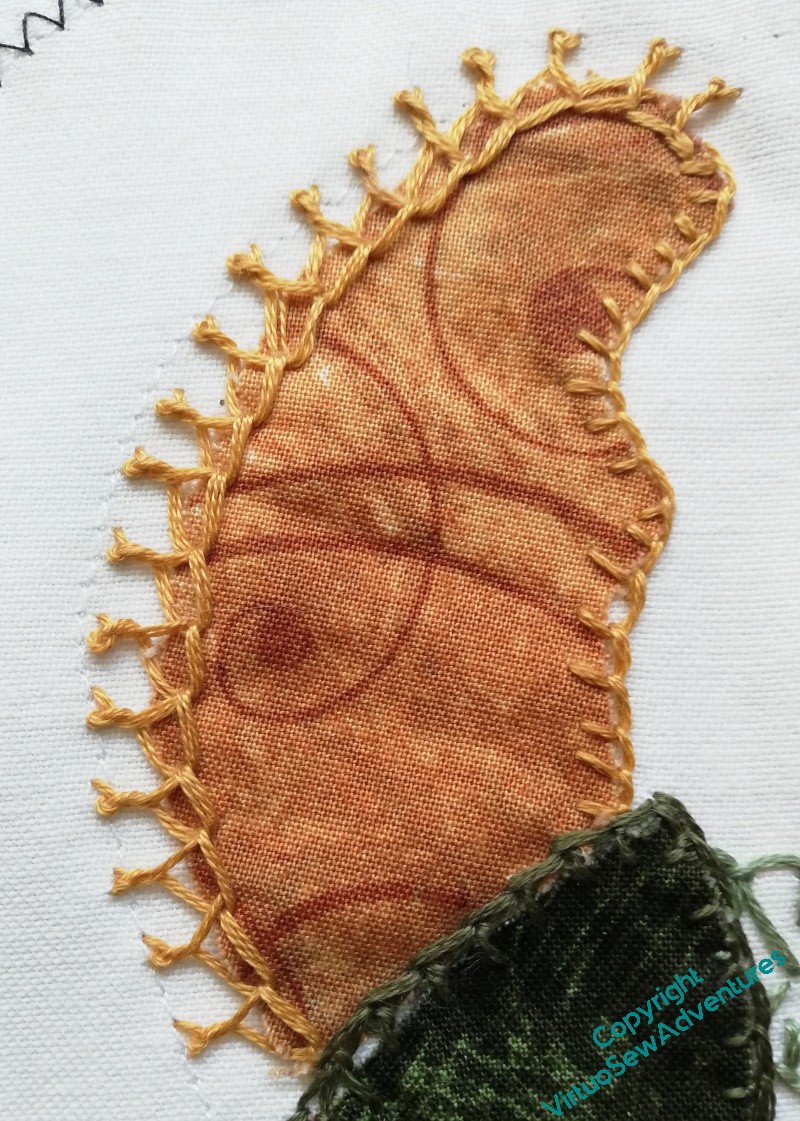
I wanted to raise the level of the grapes as they came forward – remember, part of the inspiration for this piece is carved wood, so I need to be channelling Grinling Gibbons! – so each set as I worked down the panel is more emphatic. Cretan stitch in a slightly greeny fawn at the top, chain stitch spirals in a more pinky fawn at the middle. And double padded satin stitch in a creamy colour at the bottom, light, reflective, strongly raised.
Yes, that works.
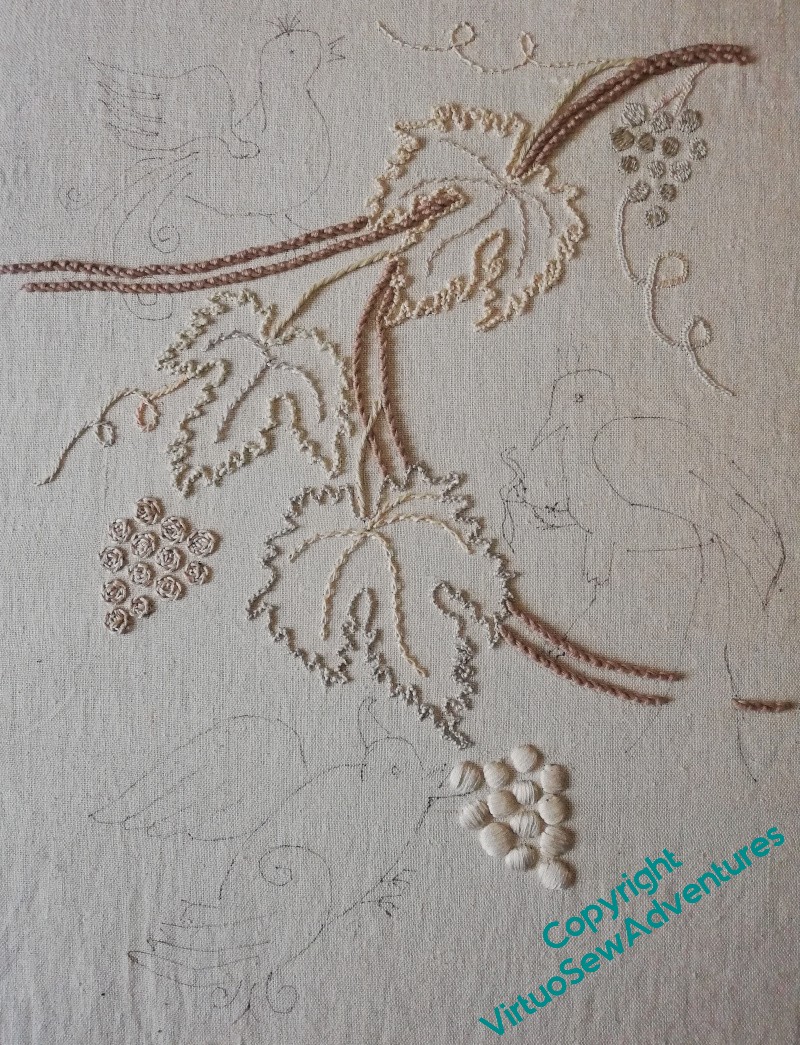
So, now I have my structure in place, it’s worth pausing to look at it.
The branches run through, knitting everything together. The leaves have a little variation in colour, but using the same stitches has kept them quite calm in spite of the strong texture. And the grapes becoming stronger and more emphatic helps to create the sense of a flow through the piece.
Time now to plan the birds a little more.
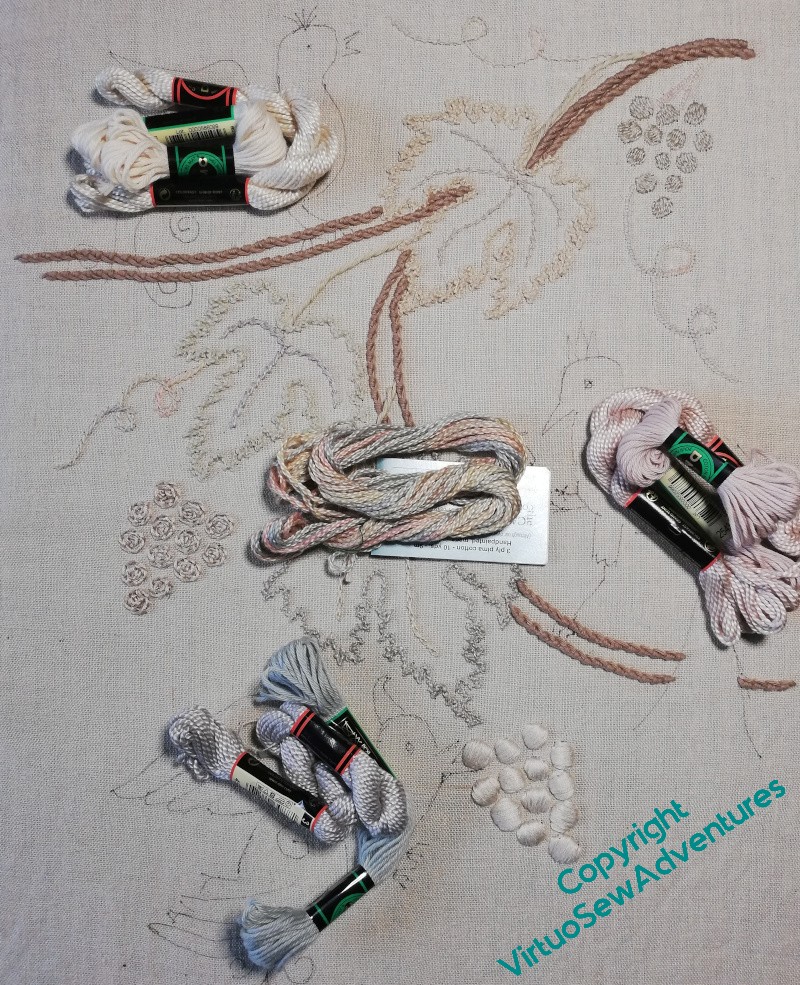
I started with a Caron Collection “Watercolours” that I’ve had for years. That will appear in all of the birds, giving the design some unity. Notionally, of course, in terms of the original inspiration from the novel “Gentian Hill”, it’s the same bird, an analogy for the soul of a person, but I want to play a bit more with pattern and form, so the birds informally known as Bitey, Stabby, and Shouty are quite different from one another. There are pinks, yellows, and blues in the “Watercolours” thread, so I’ve picked a pearl cotton and a soft cotton in each to go together to form the central part of the birds. Other threads to be added if I feel I need them…
The Cat Smith, nearly but not quite there
So, where had I got to?
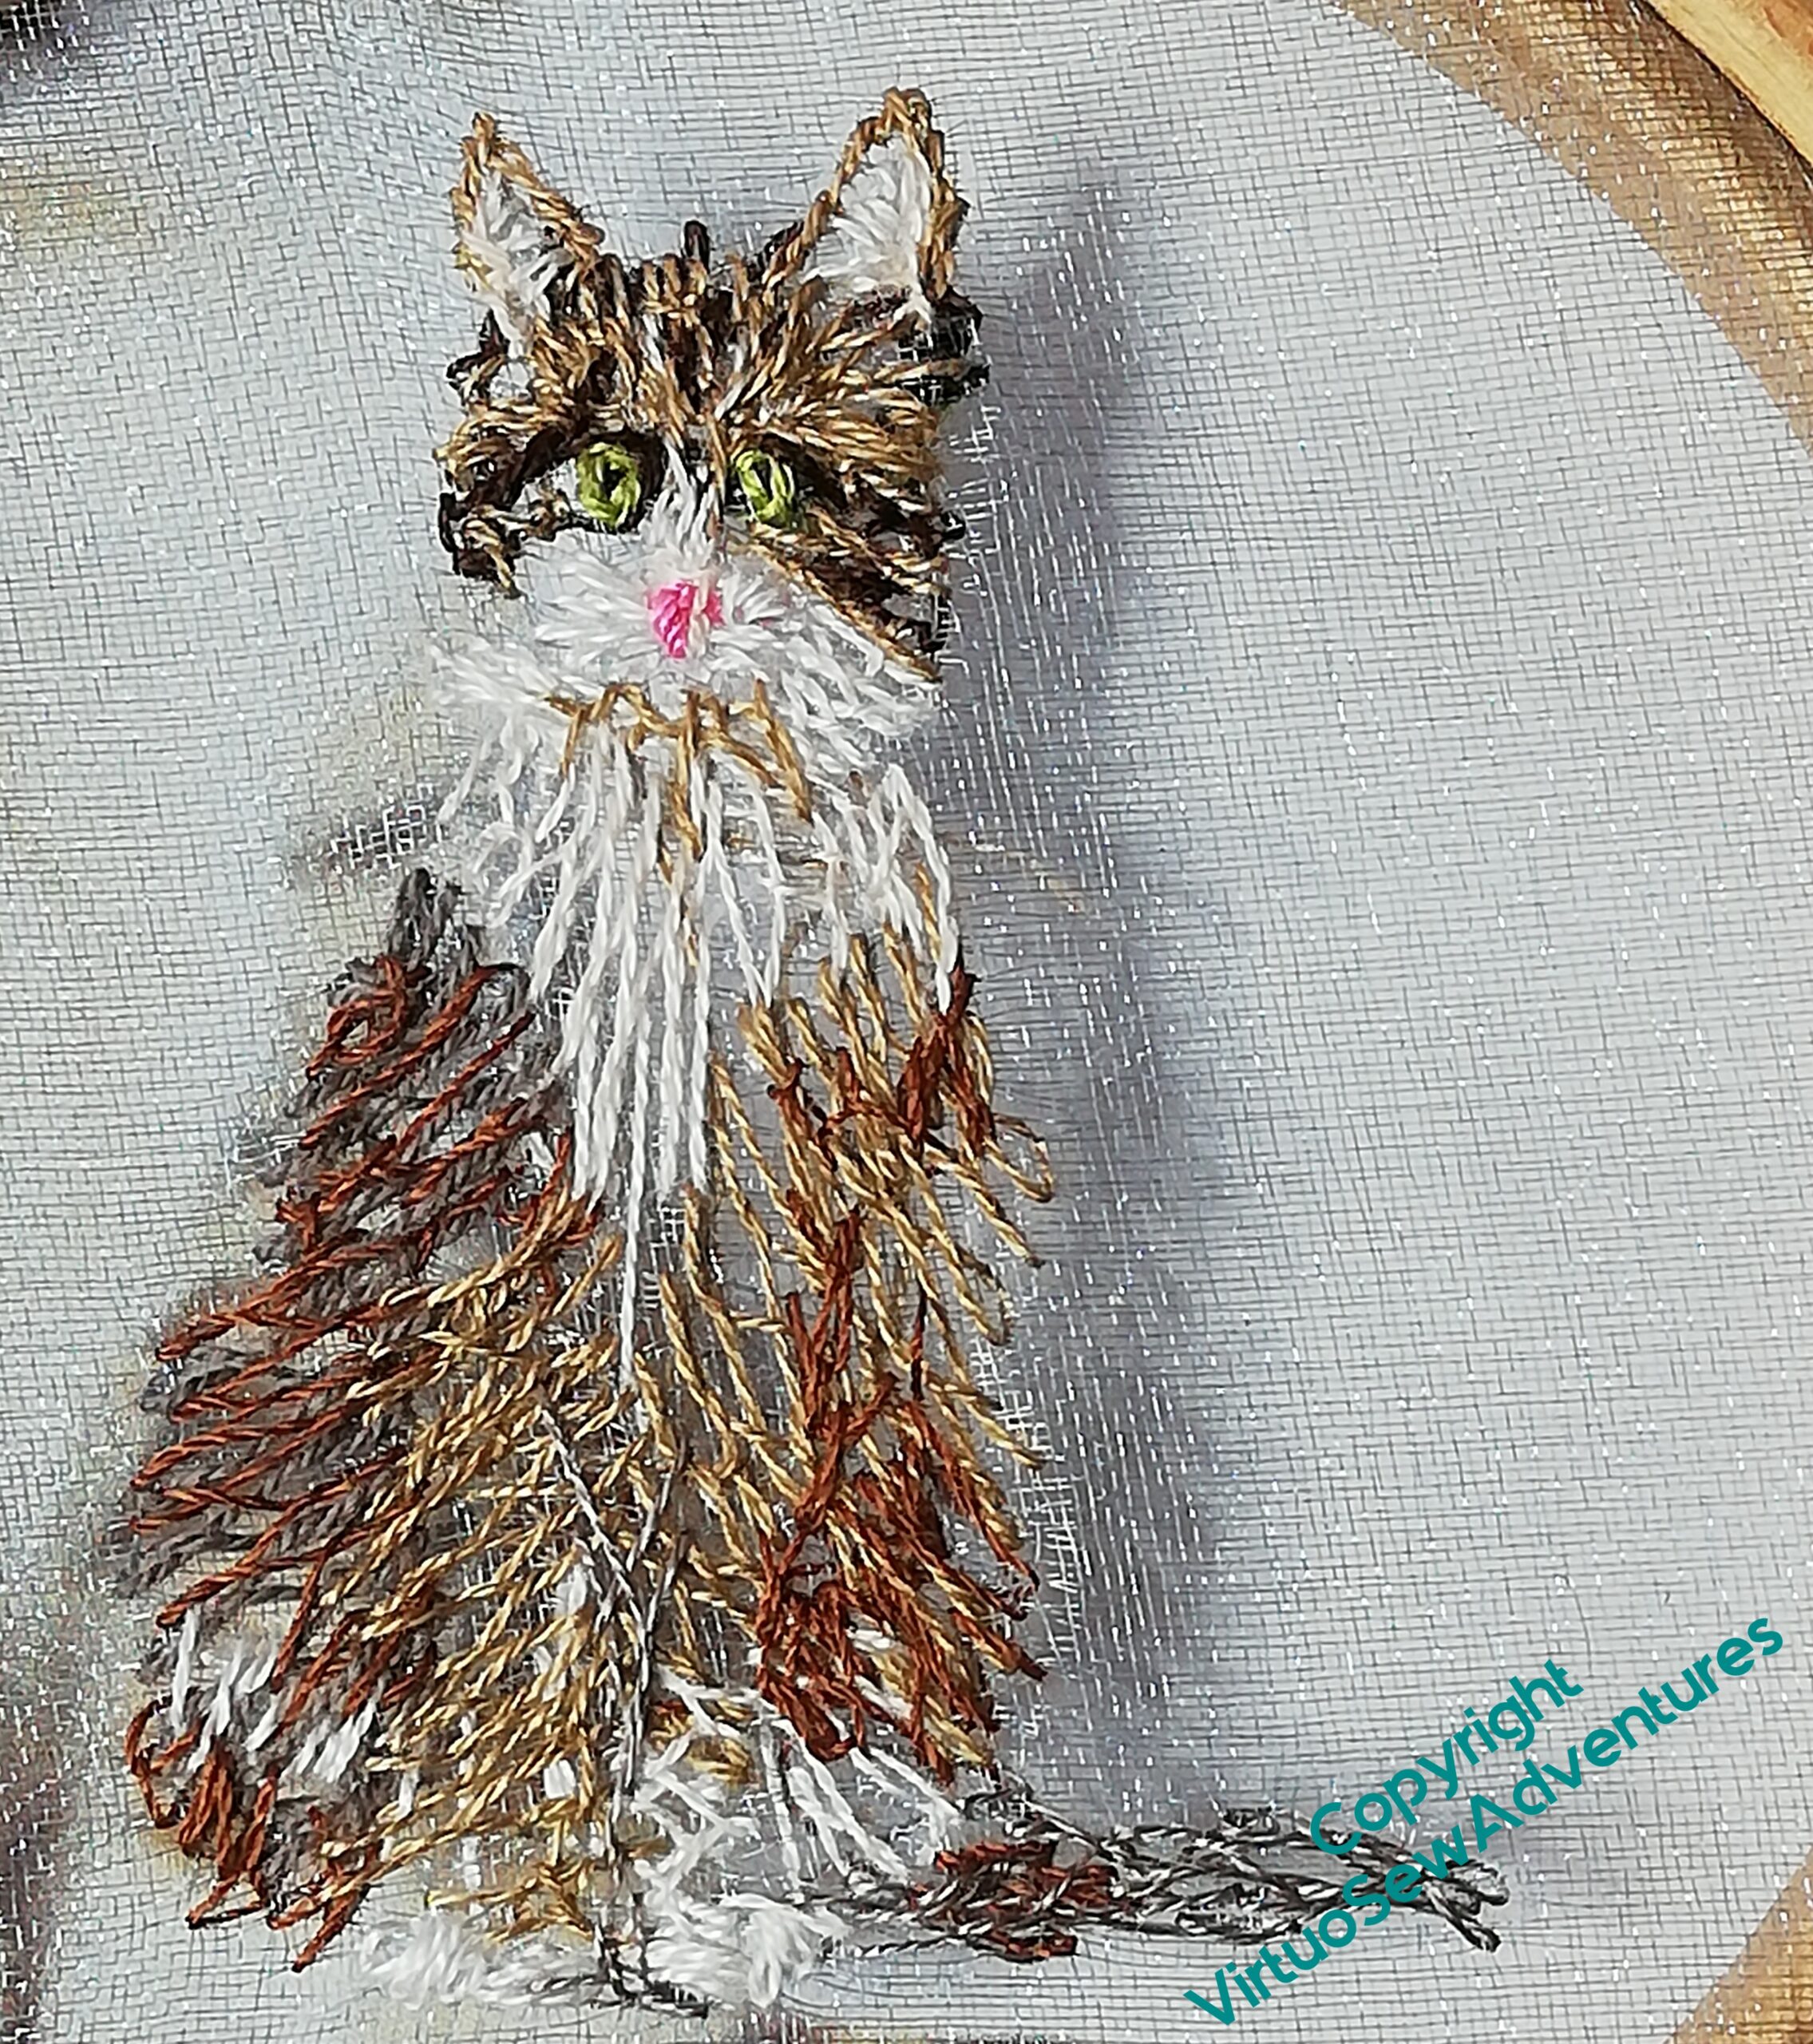
The first layers are in place, the underlayer of the tail included, so we have a genuine sense of the whole cat, sitting gazing seriously out at us. But you can see through the cat to the fabric beneath, and the board behind that, and I would rather the cat were solid, and properly marked.
More to do!

So the first thing to do was to thicken and extend Smith’s bib, place the mitten on his paw, and start adding more tangled layers of stitching to his fur.
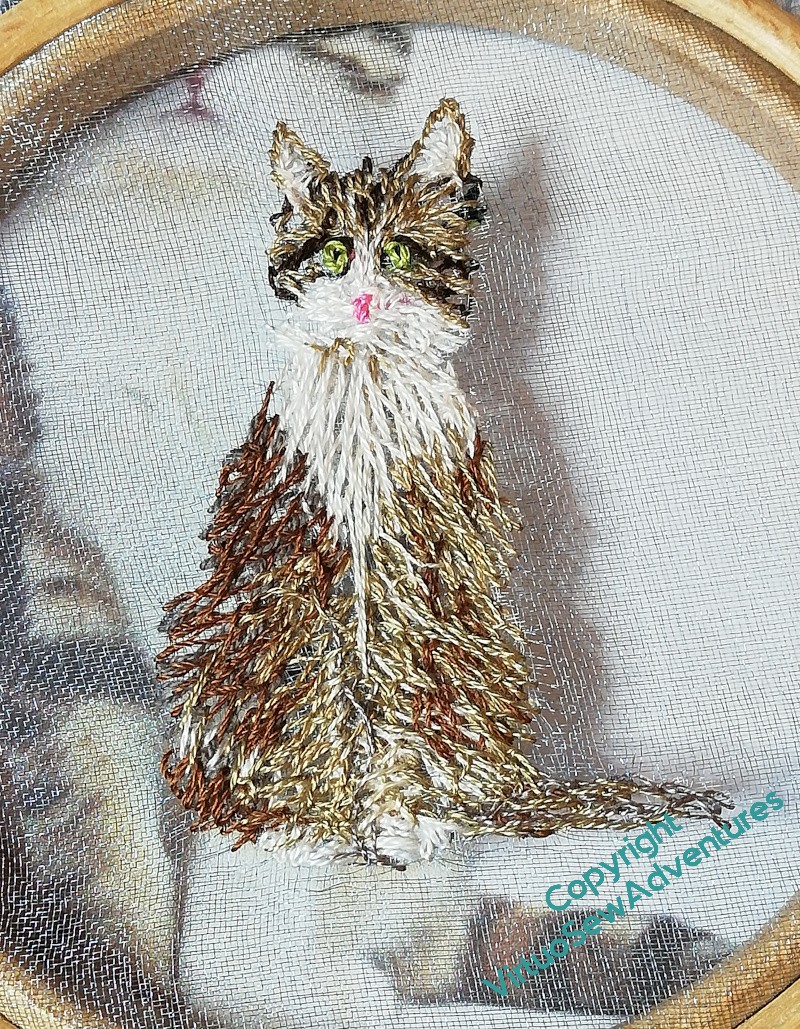
So you can see that the fur is thicker now. I’m not entirely happy with the point of the bib as yet, but I felt when I’d got to this stage that the next stage should be to put in more of the dark markings, hoping that that would help the other elements of the fur to settle into place.
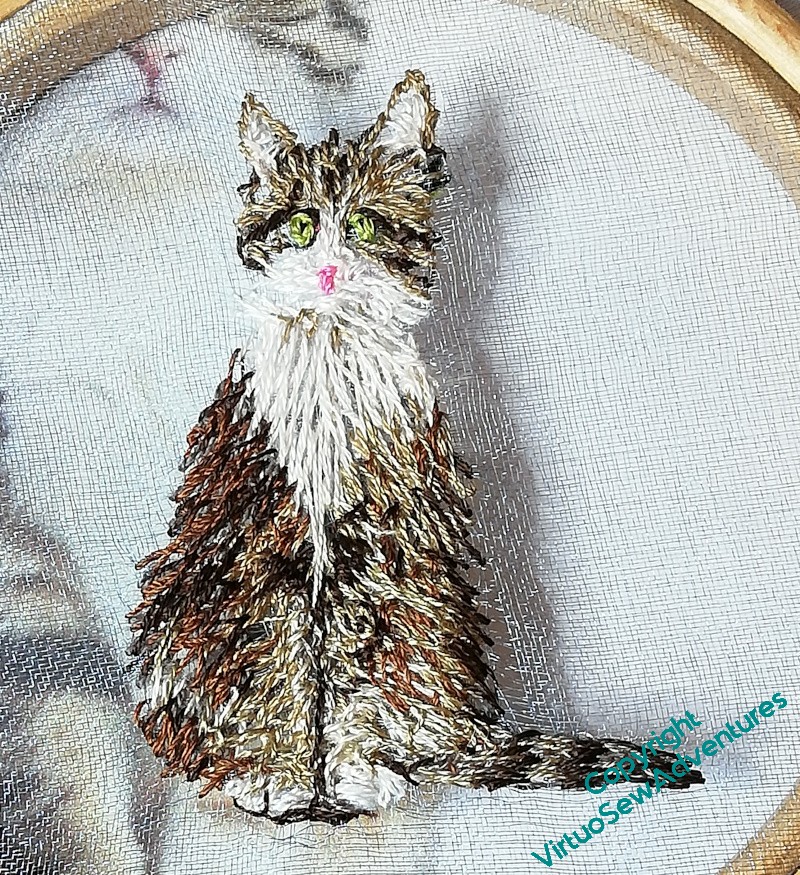
And I think it really has. The darker markings on fur and tail, the shadow between the two front legs and the shadow beneath the paws, all are helping to create a nice, solid, furry cat.
There are a few tweaks, I think, that need to be done, specifically something around the haunch and the tail, but I’m not quite sure what they are, so I need to settle down and stare at my source photo for long enough to load it into my head and find the last few stitches.
As I think about all this, I realise that, although this is very much a continuation of my usual practice of diving in and getting there eventually, the thing about the Animal Vignettes is that unpicking isn’t really possible, since the stitching is (deliberately) so tangled.
So until I get the necessary quiet to sit and stare, Smith is Nearly Finished.
Stella’s Birds – Doing the Leaves..
I started with a bit of a blind alley…
My natural tendency is to barrel in with glee and use a different stitch for every element, but I am learning (somewhat belatedly, it must be admitted!) that moderation is a virtue in design as in life.
So after a couple of blind alleys – wheatear stitch doesn’t sit happily with the crinkles of the vine leaf! – I have actually been quite temperate. There are three leaves in the design, and after some thought and experimentation I’ve settled on the same stitch combination for all three of them.
I’m using some of that gorgeous Studio Flax linen thread, which has really rewarding stitch definition, so it seemed as though more knotted and twisted stitches were in order.
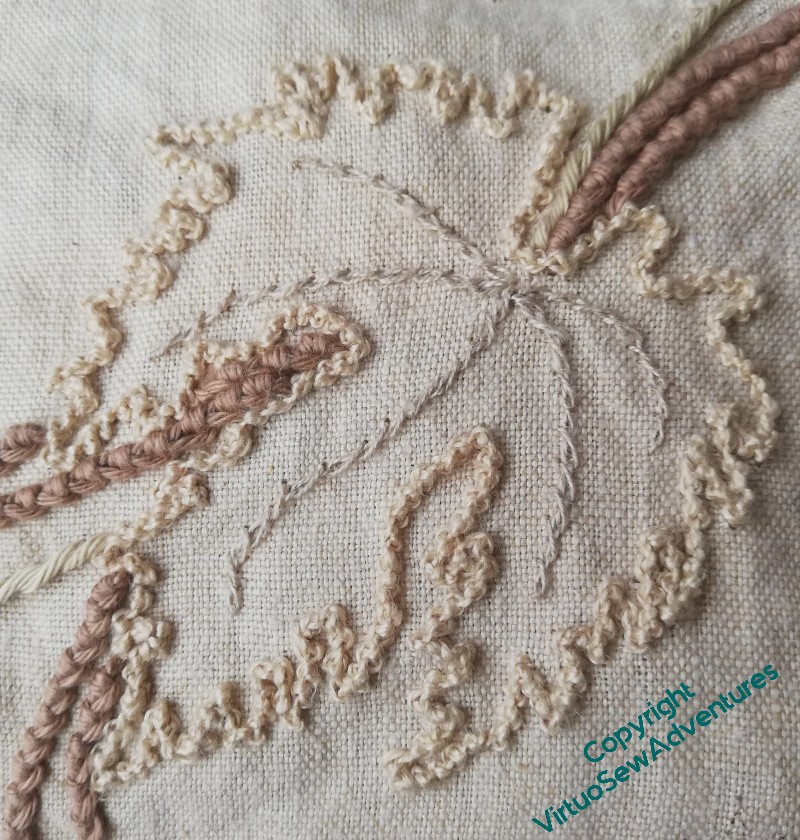
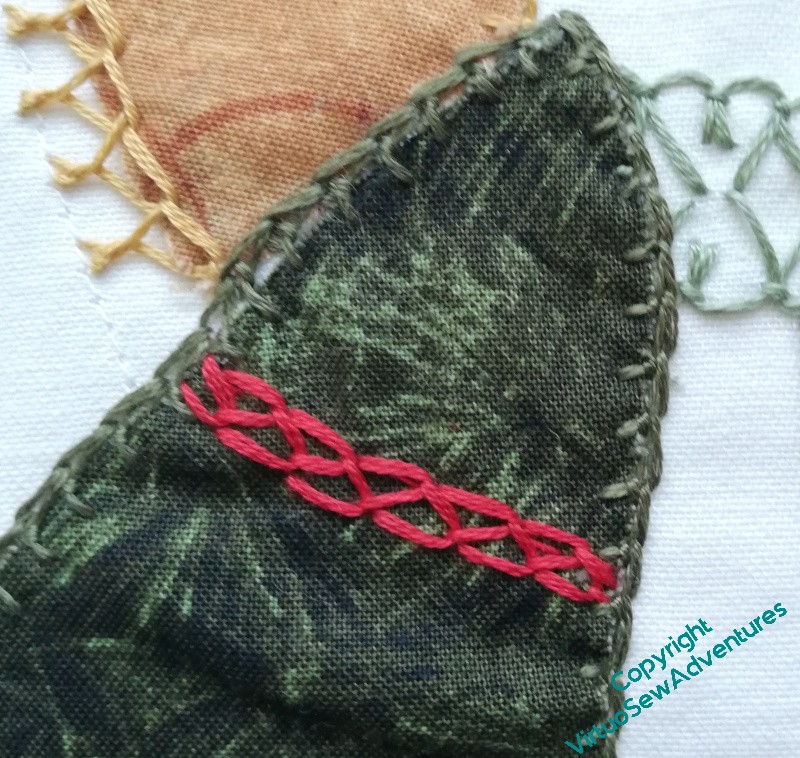
I chose to use Palestrina Knot Stitch (entered in the RSN stitch bank as Double Knot Stitch) for the outlines of all three leaves. It’s strongly textured, so it should stand up to that Portuguese Knotted Stem Stitch, and it’s flexible enough to follow all the crinkles of the vine leaves.

For the veins, I chose to use ordinary Twisted Chain Stitch, working it carefully to keep each chain stitch looking separate. Twisted Chain Stitch can be worked drifting towards Rope Stitch (this is discussed on the RSN Stitch Bank page) and indeed, in other parts of this panel I expect to use that variation.
Stella’s Birds isn’t going to be a sampler in any formal sense. But as I push/pull between throwing every stitch in my shelf full of stitch dictionaries at it, and restricting my stitch choice in the interests of providing a bit of calm at various points in the piece, I may find myself demonstrating some of the breadth of execution available in all of them.
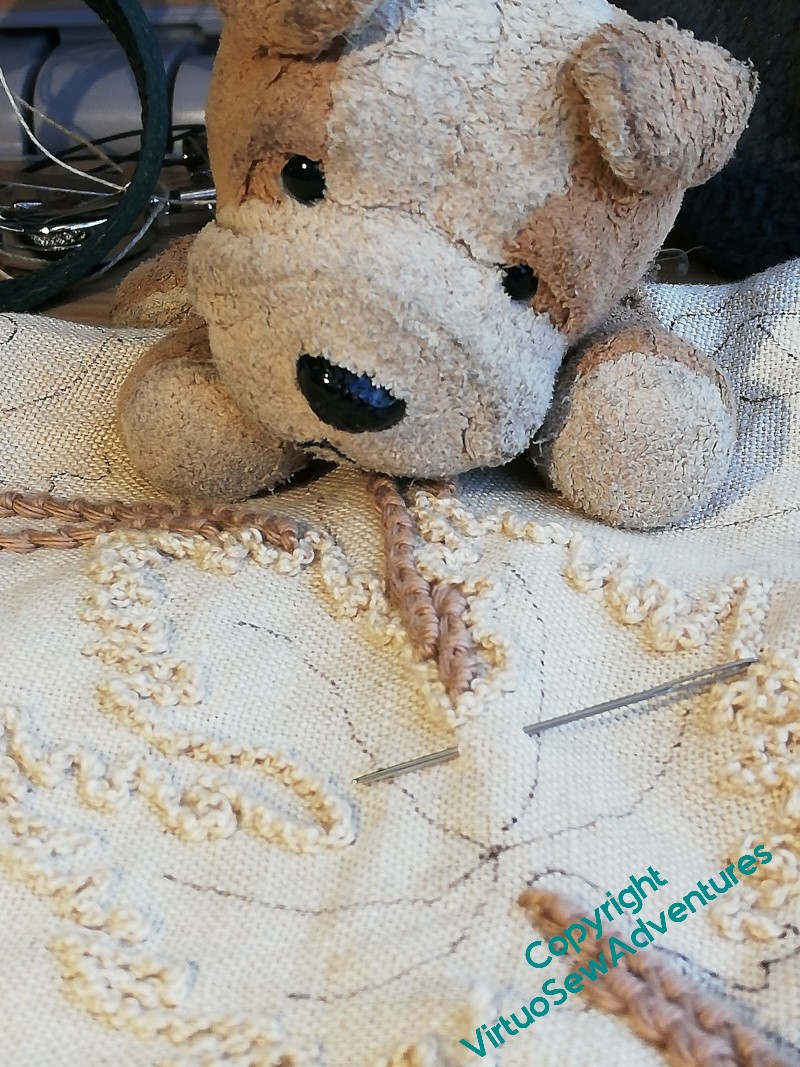
In all cases, however, Harry The Hound Of The Doleful Countenance has been overseeing operations!
Starting, at last, on the Lotus Flower Coat
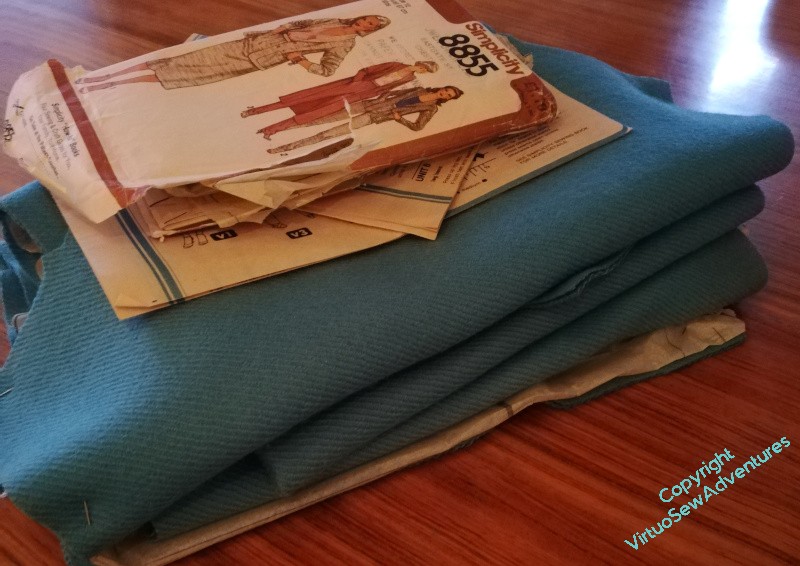
You might recall that a gorgeous piece of turquoise tweed came my way and provoked thoughts of a jacket or coat decorated with lotus flowers. So, not part of the “Dreams of Amarna”, but once you have an interest in something, or an attachment to a design style, it never really lets go!
And I didn’t find myself a Twixmas project, so rather than having a small pause, I’m moving straight on. It will be worked in the hand, so it fits the challenge of not needing the place the Christmas Tree lives, and to be honest, I’ve not been finding the last few months stressful in embroidery terms (in others, yes!) and I don’t feel I need a reboot. So, onward!
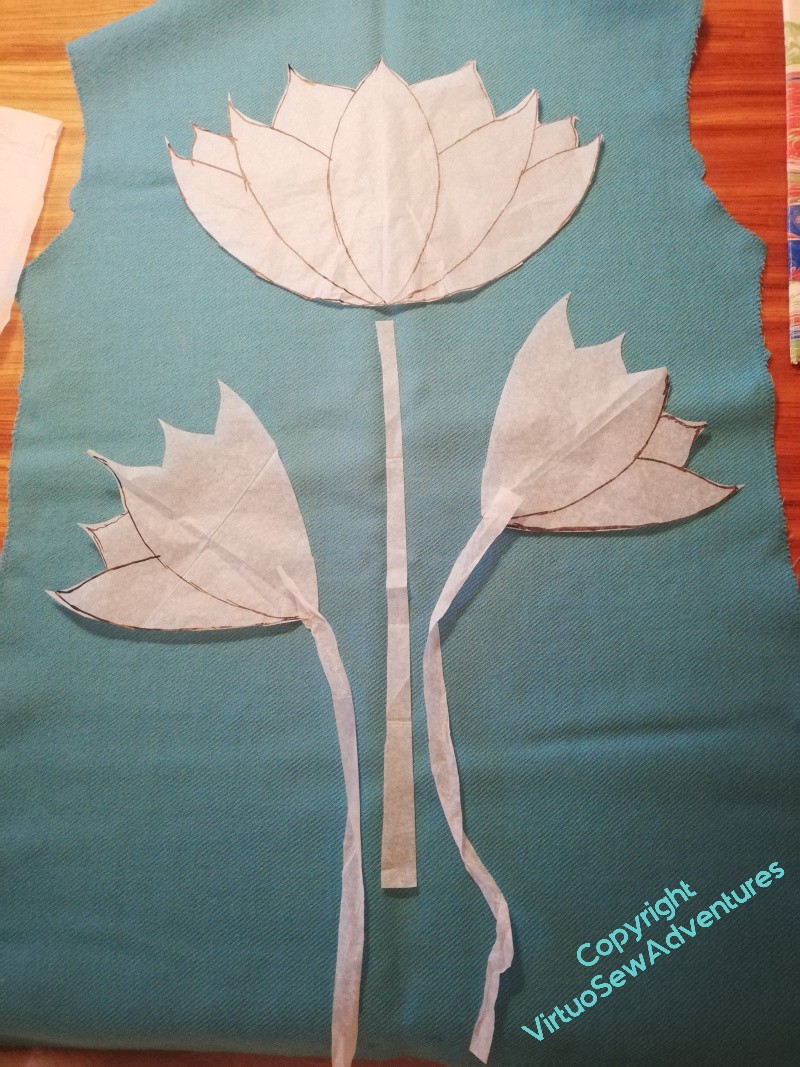
Anyone who attended the ThreadTalk I did for the Embroiderers Guild, or who was reading my planning for Stella’s Birds will be familiar with my paper cutouts by now! You can see that this isn’t quite right. It looks a bit too abrupt, the spaces are maybe in the wrong places.
This is altogether better. It’s not so abrupt, it’s paying heed to the botanical form while keeping to the stylised appearance of the original ancient Egyptian inspiration.
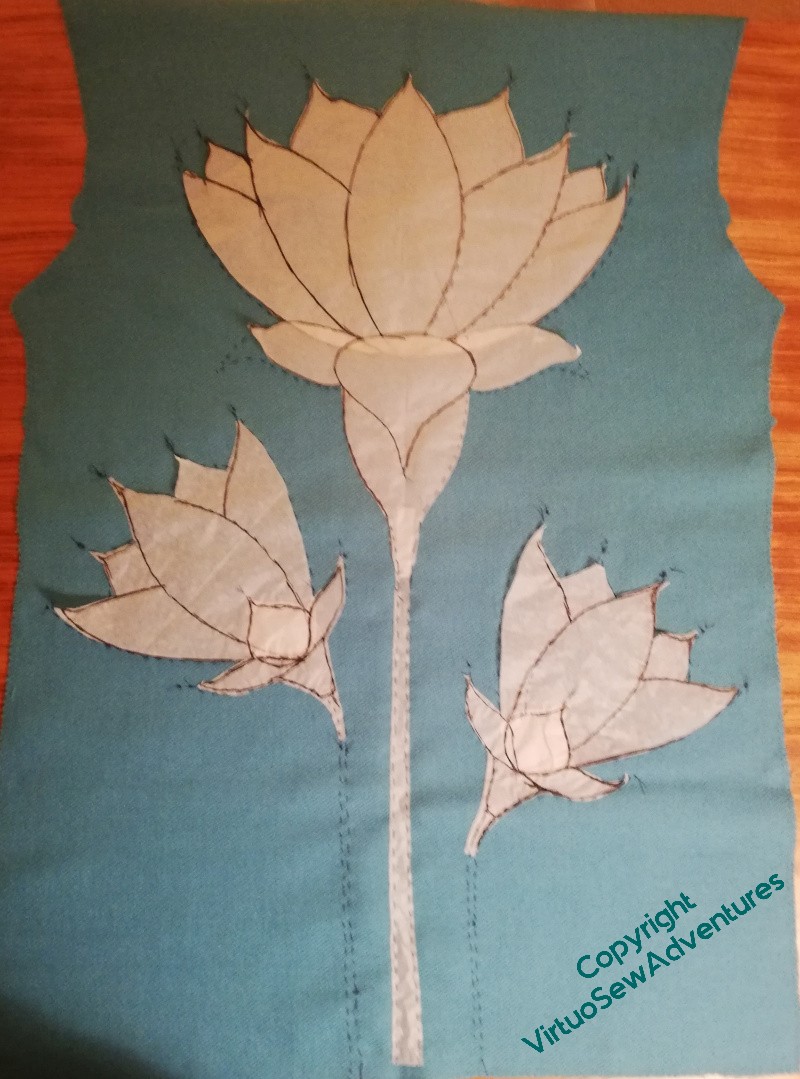
My intention is that the shapes will be filled with rows and rows of line stitches, chain stitch and feather stitch variations mainly, and at the moment I am planning to leave a line of untouched fabric showing around each of the elements. Once I have the thing finished, I can decide whether to fill in the gaps!
I’ll be using a mix of threads, too, wool, silk, cotton, some plain, some variegated.
A Merry Christmas to all who celebrate!
Stella’s Birds – Starting the Embroidery..
You have to start somewhere, don’t you!
Once I had finally become happy with the design for Stella’s Birds, I thought it was Time To Start.
And you may remember that I mentioned when I was working on the Jacket of Many Flowers that I have learnt, over the years, that when I’m working something like a spray or branch of flowers, leaves, and fruit, I need to start with the branches. In the past when I have started with leaves and flowers, the whole design has remained “spotty” and unconnected, and I don’t feel that I’m making progress.
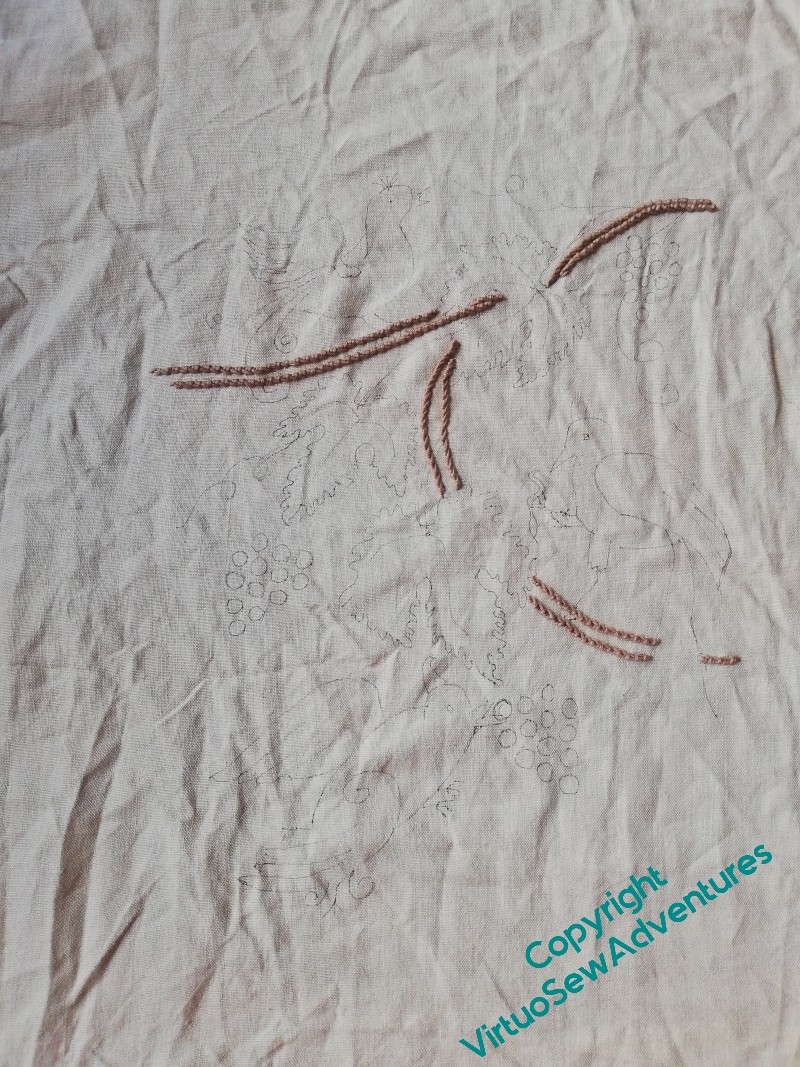
That’s so dispiriting that these days, I do the branches first.
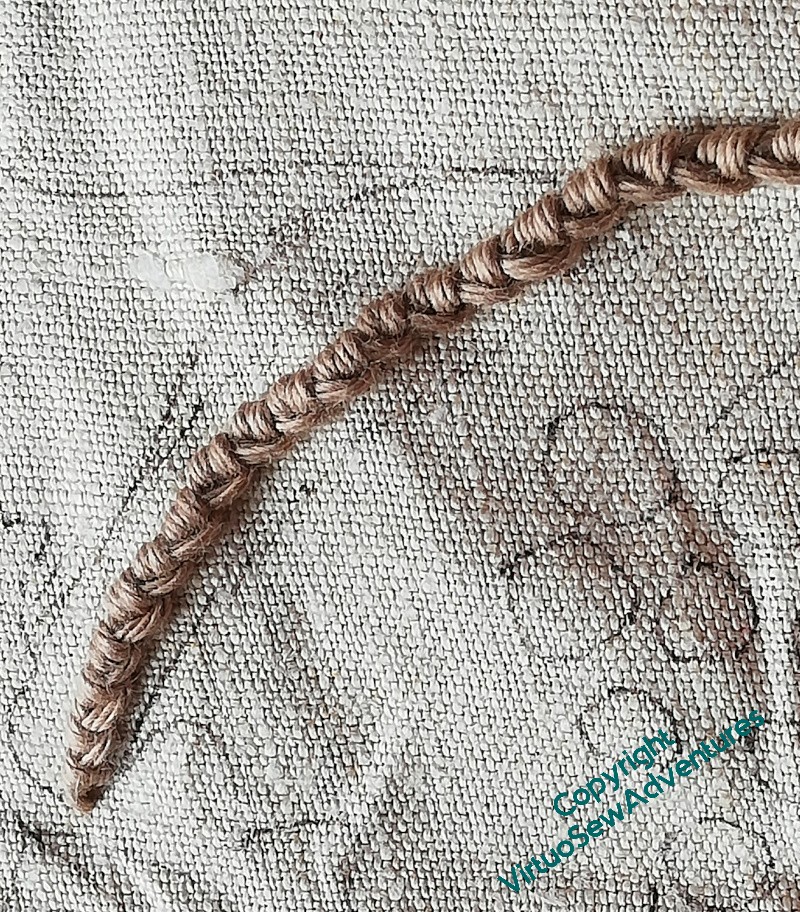
I’ve used soft cotton in a warm pinky-brown, and chose one of my favourite stitches, Portuguese Knotted Stem Stitch (link to the RSN stitch bank entry). It leaps forward very satisfyingly, so it didn’t take me long, once I got a chance to settle down to it, to get the branches done.
However…
I wasn’t entirely paying attention.
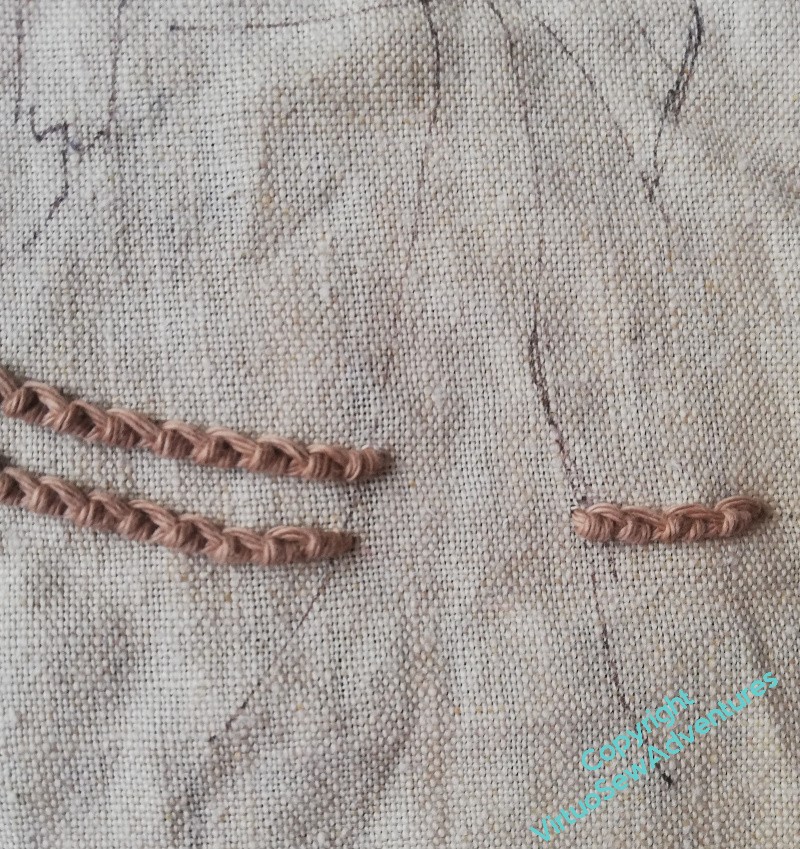
I remembered to leave a gap for one of the bird’s tails, but not the other. And as I look at my other choices of thread, this pinky brown has no other friends. So I may decide, at a later date, to remove part of the branch stitching to allow for tails and feet.
I have a slight fear that I may even have to remove all of it. I love Portuguese Knotted Stem Stitch, but it is full of personality, and if I don’t get the balance right in the rest of the stitching it might unbalance the whole thing!
Chorus of Angels Progress
You may recall that my mother and I have been doing some embellishments for a Christmas Tablecloth.
We have twelve angels (or is it eighteen?) to do. I don’t think they’ll be done in time for this Christmas!
However, I do feel quite pleased that we’ve got the stitch choices set, at least for the green angels (half of the angels have green capes, the other half have red capes).
The wings are edged with crested chain stitch, and the cape has a shoulder line of closed feather stitch, and another line of petal stitch. The dress is defined with a pattern of up and down blanket stitches, since it is actually the background fabric.
On that subject, the face wil also be part of the background fabric, defined by the hair. We’ve not come up with a good solution for that, yet. Or for how much face there will, in fact, be. With such a small area, if we misplace an eye or a nose, we’re careering straight into uncanny valley. And we don’t want to be there!
So, anyway, three complete. Onwards!

The Cat, Smith, creeping onward
You may recall that when you last saw The Cat, Smith, he was more or less tail-less, a situation which accorded not at all with his dignity, and could not, he assured me, be permitted to continue for so much as a minute.
Alas for poor Smith, shortly after that there was an outbreak of chaos, and he had to sit there on his little stub of a tail for three whole weeks before I could put it right.
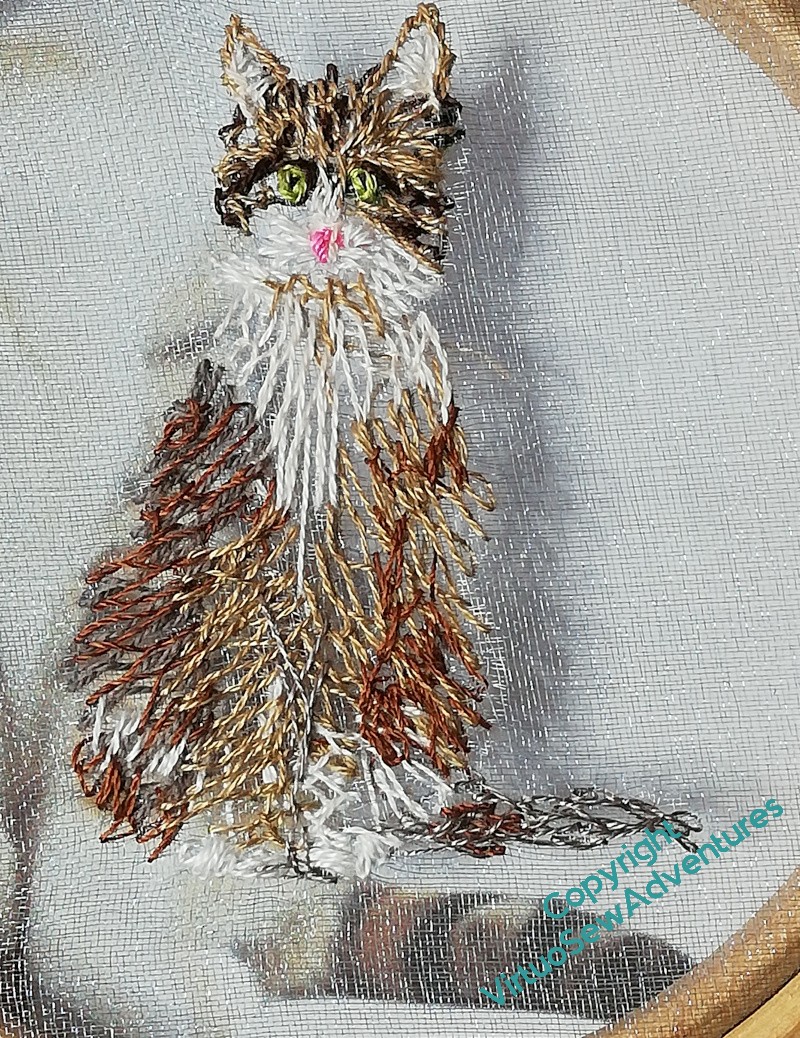
Still, here we are, at last, I’ve managed to get at least a first layer of stitching down all over Smith, including his tail.

As you can see here, I’m building up layers of stitches in single strands, trying to entangle the layers a bit, so that each layer modifies other layers, and I am beginning to try to separate out the front legs and hind paws.
The white of the cat’s bib reaches much further down than I had it originally, but of course, in the shadow it won’t be white. Finding the right shade to help with that is not entirely straightforward, it turns out.
At this point, though, I think he’s ready for me to start putting his dark markings on him. There will be some more of the various lighter browns to put in later, but I think I need to put the darks in to see whether I have got the rest of it right.
As always, now, I find that the way I work in stitch and the way I work in paint are beginning to blend together. In this case, the darks will help me find my anchors and mooring points across the design (yes, he’s small, but the smaller the design, the more important the waymarkers – trust me on this!) and that in turn will create a nice solidly, furry cat.