
Category: General Embroidery
Getting there at last…
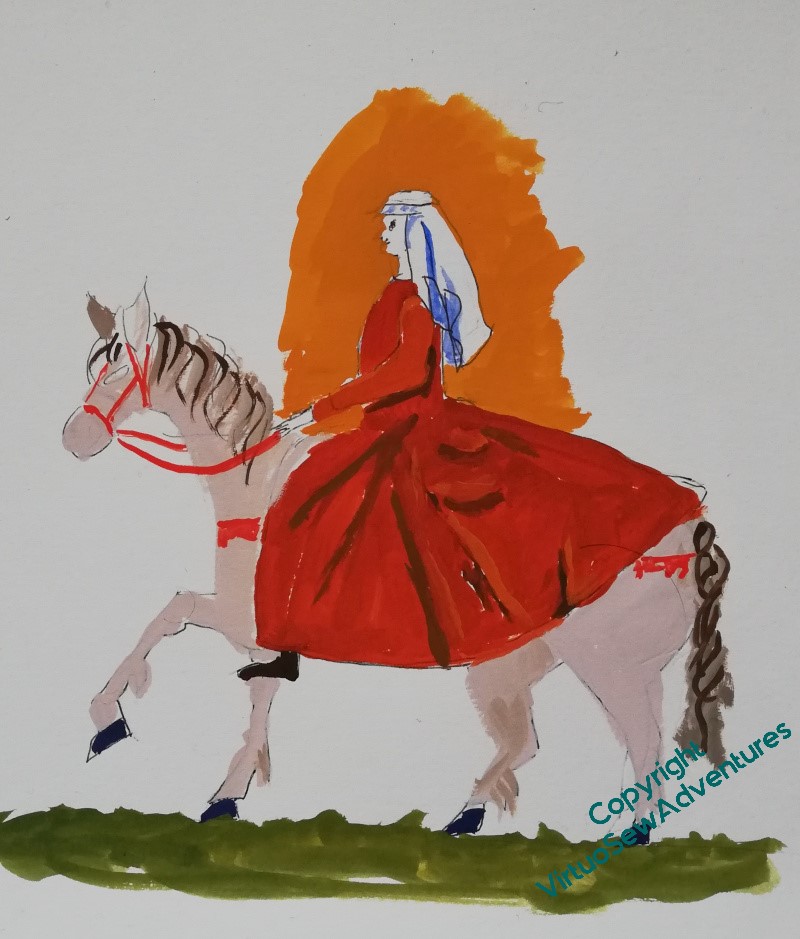
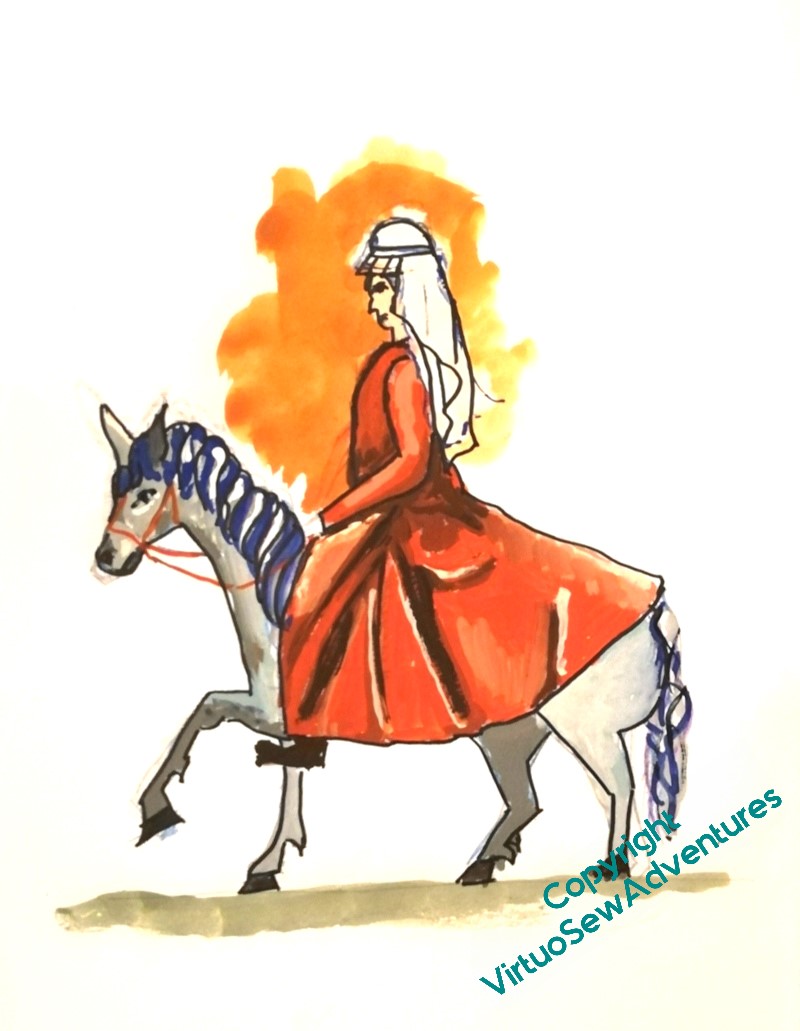
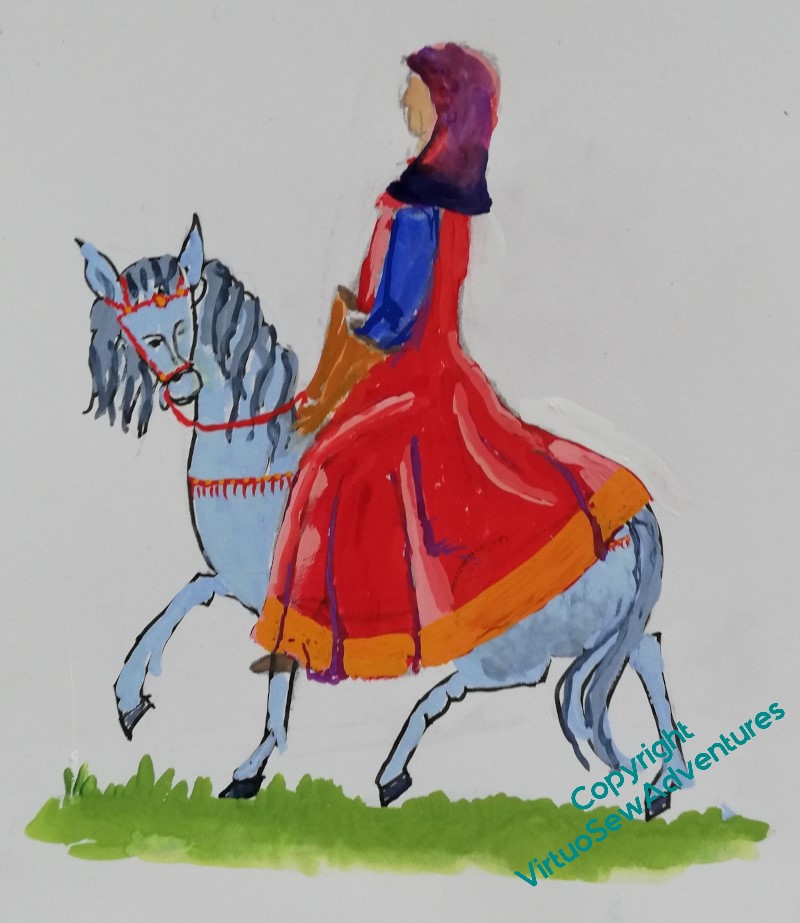
Definitely getting there now. The horse is madder (a bit), and shorter-backed. I think when I stitch it, I may give it a clipped, standing mane, instead of the flowing locks – another contrast with William Marshall’s horse Mars.
Aethelflad herself is taller, and the contrast is closer, in keeping with the idea of wearing a sensible woollen riding dress to visit a building site.
I’m not sure about the saddlecloth – that may be something I will choose not to include.
I wonder whether Prior Rahere and Mother Julian are going to take as many iterations?
I think I’ve got it now.
I’ve added a border, and decoration around the neckline of the dress, both of which have helped. And I’ve cut out the pile of building stone and Aethelflaed herself, and moved them around a bit to make a layout I’m happy with.
Gosh. It’s taken a while!
Second Trapunto Jewel
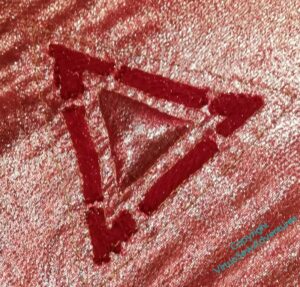
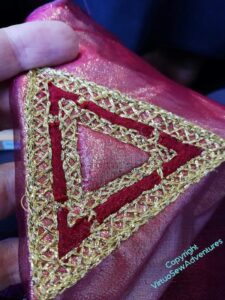
We left the second trapunto Jewel looking like this: crimson gauze over gold tissue, with red wool stuffing the outer, broken channels in the gauze, and something stuffing the central triangle from behind the gold tissue.
And it looks like a good start, doesn’t it?
But some of my more alert readers may be thinking, hang on, didn’t you say something about doing the narrow gold channels first?
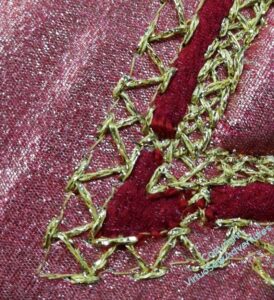
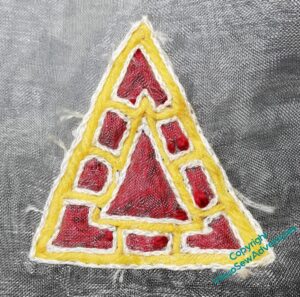
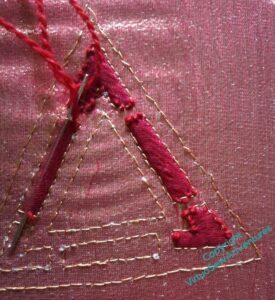
Well, yes, I did, but that was when I was filling the channels trapunto-style. I decided to try something else for this next one. I used a gold metallic chainette yarn – the same for all of the gold stitching – and after some thought, picked interlaced Cretan Stitch, to create some of the effect of punched or engraved gold surrounding the gemstones. At this point you can see I’ve only done the first part of the outer line.
I had to invent something for the short sections joining the outer and inner triangles!
Finally, I decided that the edge needed a bit of help and ran a line of chain stitch around the outside.
In terms of the effect, I think this is a great success. However, I’m not sure this is the right scale for Aethelflaed (in terms of size it’s an appreciable fraction of her finished size) and the gold chainette was a bit of a pest to work with. I was stitching in public, so no swearing.
There was, however, muttering…..!
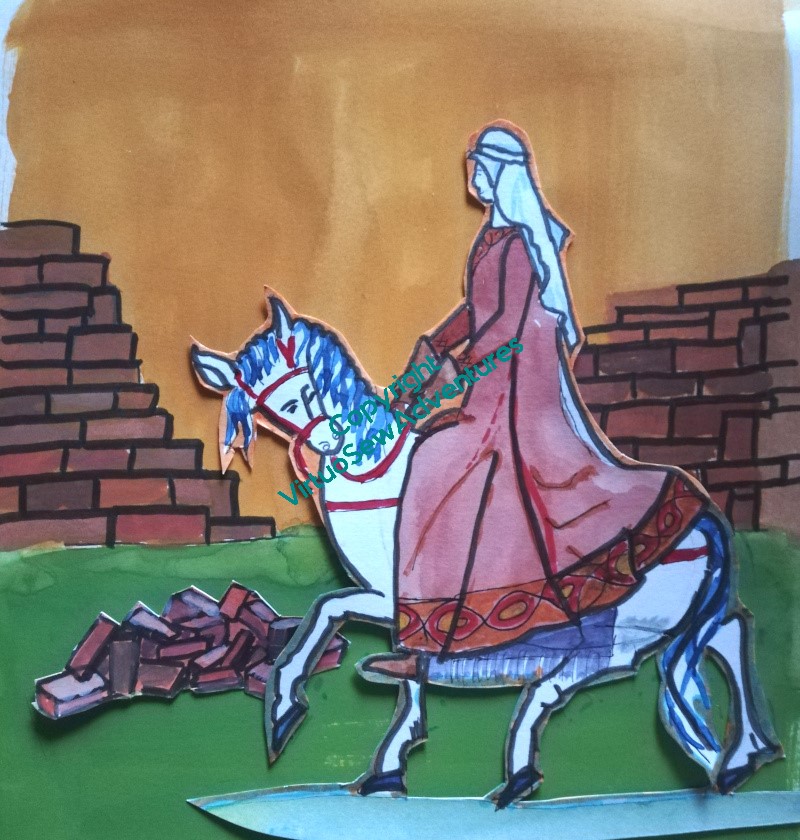
More Planning for Aethelflaed
As I have thought about Aethelflaed and begun to plan the design of her panel, I’ve also begun to plan what the background will look like.
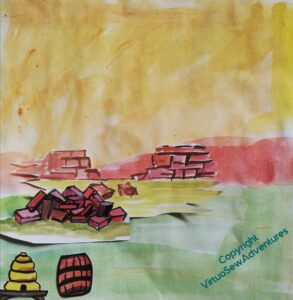
Brought up, as I was, in Chester, the obvious point in her life to choose is her defense and refortification of Chester. So the stone for the wall is the distinctive dark pinkish sandstone of Cheshire, and in reference the the beehives and boiling beer turned on the Viking assault, I have a barrel and a bee skep ready for deployment.
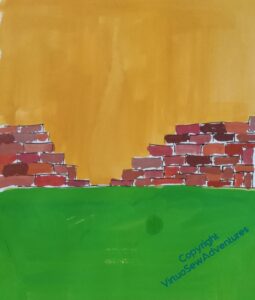
But I need something that I can try to place Aethelflaed against, and strong enough in colour to give me a start on picking her colours, so I’ve redone some of it to give me something to work with. Although I do feel that maybe the wall isn’t high enough.
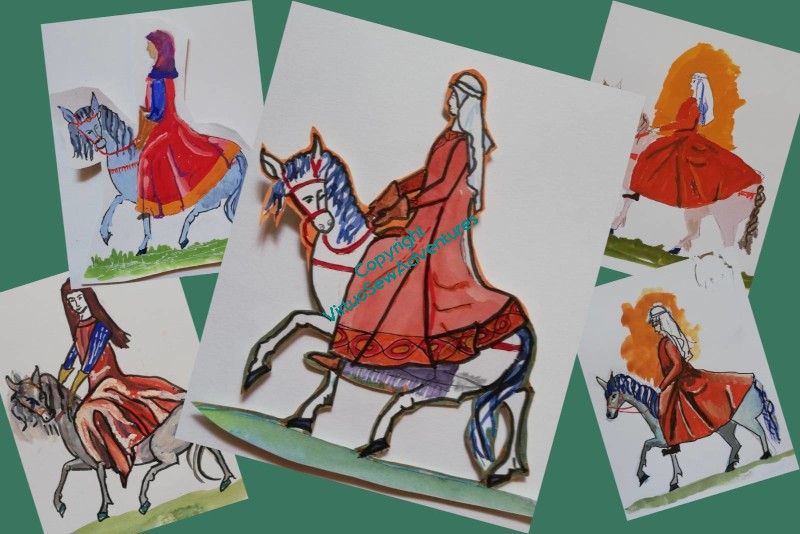
While I’m working on the walls of Chester, I also need to work a bit more on Aethflaed and her horse. The pair of them are proving much trickier than William, mostly because examples of horsemen aren’t hard to find in medieval art. I only had to decide on a few tweaks of presentation and insert the appropriate coat of arms. Aethelflaed is being invented as I go.
In fact, the invention, reinvention, and re-reinvention continues! I think the horse has become a little too long-backed, and needs to be a bit madder. And I’m not sure that Aethelflaed is in suitable proportion to him. What I might do is go back to the original horse, and indeed, the original lady, and then work forward (yet) again, using all the information I now have.
All this planning is keeping me from stitching, and I’m getting twitchy!
Another experiment in Trapunto..
Remember this?
I wanted to have a go at creating some Anglo Saxon jewels as a possible ornament for however I end up displaying Aethelflaed. It was enough of a success that I felt that, with some fiddling around, I might be able to produce something suitable. And since this one was very much thrown together from things I had to hand, there’s a lot of fiddling around to do!
And here you see some of it. I went looking for materials, this time, and thought it through a bit more.
So, crimson gauze laid over gold tissue, laid in turn over calico for support. The gold tissue may be a good idea for the effect in real life, but it is a complete nightmare to photograph, and I apologise in advance for the peculiar changes of colour the fabric will undergo!
I used back stitch in a single strand, rather than split stitch in two, but took more or less the same approach to the outer channels, filling them with woollen thread. I was a little inconsistent in how I did so, which is why you see little bits of wool above the gauze – something I didn’t want, but struggled not to do. There must be a trick to trapunto quilting without going permanently demented, but I’m not sure I have it yet!
I should probably also apologise for my photography..
Anyway, the next bit was why I wanted to include the gold tissue in my sandwich of fabrics. If you look at the Sutton Hoo helmet and some other Anglo Saxon items, you will see that in some cases the gems look lighter than others, and it has been determined that that is because they’ve been backed with gold foil. I’m trying to get the same effect here, but in the case of fabric by inserting the filling behind the gold tissue.
This was very nearly as unnerving a proceeding as when I was doing much the same thing at the beginning of Akhenaten. You’d think I would have learnt sense by now, wouldn’t you!
Experiments for the Chorus of Angels Tablecloth
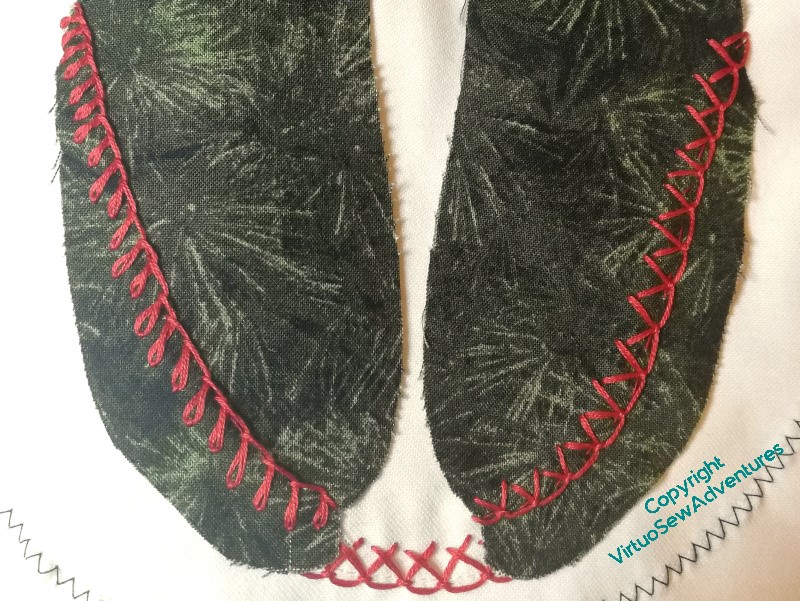
With sixteen angels to do, it seemed like a good idea to work out a plan of action. My first idea was to have green capes with red stitching and red capes with green stitching, so that was the first thing I tried. Red on green is certainly working, and looking at the comparison between petal stitch or an upward pointing stitch for the trim on the cape, it seemed to me that petal stitch was the clear winner, so I put that in place.
Yes, definitely, that works.
And I like closed feather for the trim around the shoulders, too.
The red neckline and hem – not so much. It looks like a failed attempt to link the trim on the cape, rather than a harmonious trim on a dress. Ugh!
Part of the problem, I think, is that the border is too narrow, but I was afraid of the red pulling itself forward too much.
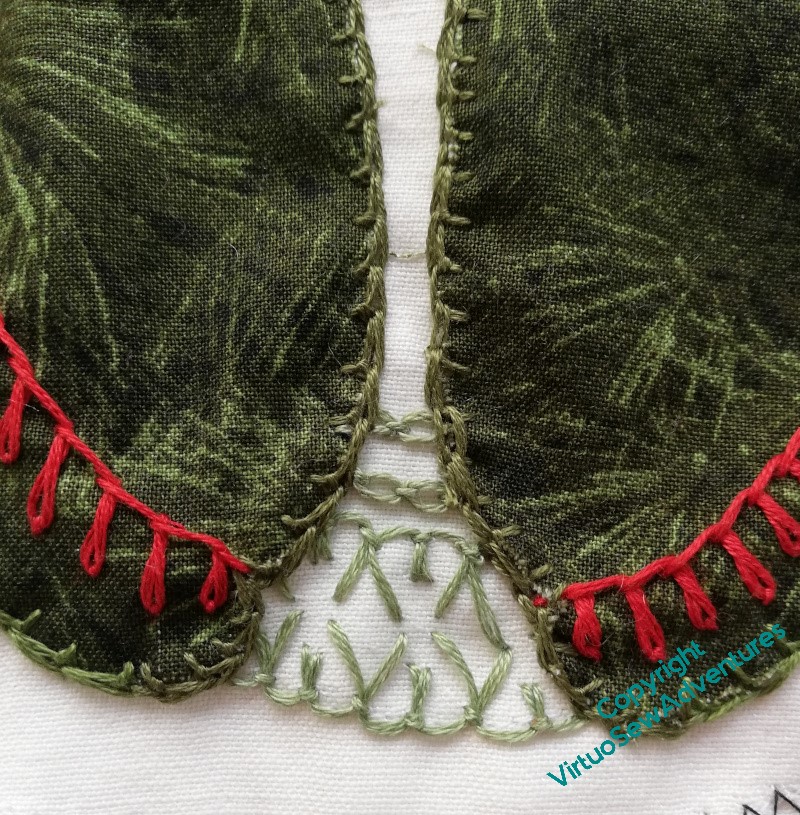
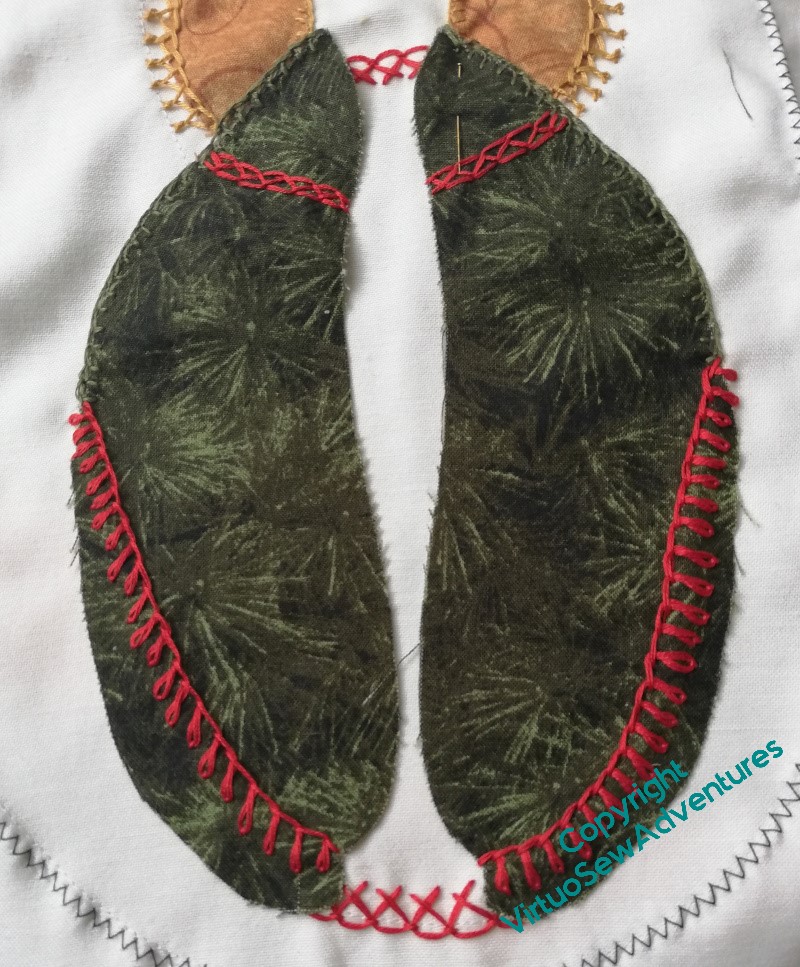
So, here’s what I’ve settled on.
The cape is edged with Mountmellick stitch, which makes a rather charming edging stitch. I think of it as a cross between blanket stitch and chain stitch, even though it’s not really, and wasn’t used as such originally. The dress edging is much broader than the first one, two rows of up-&-down blanket stitch face to face, and you will note that I’ve patterned them, with a V-shape alternating with a short pair of stitches. Then I’ve added two rows of cable chain stitch to broaden the edging further.
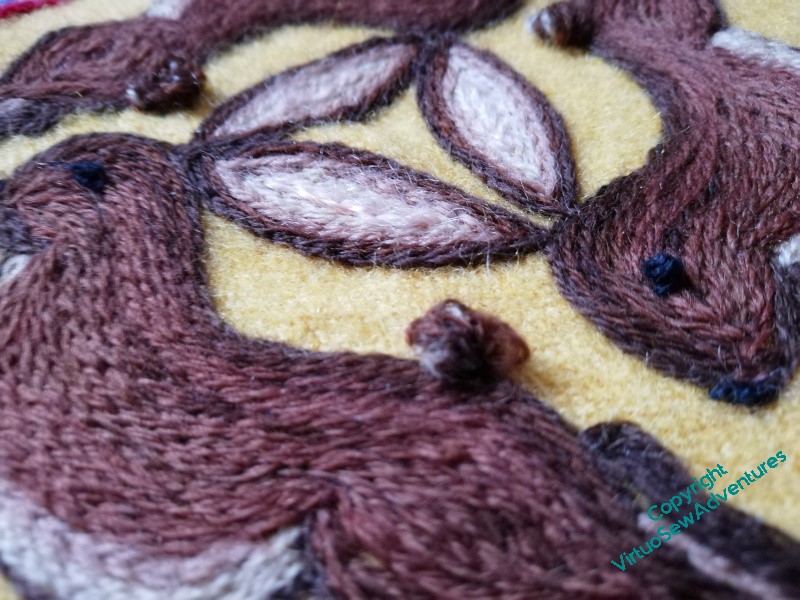
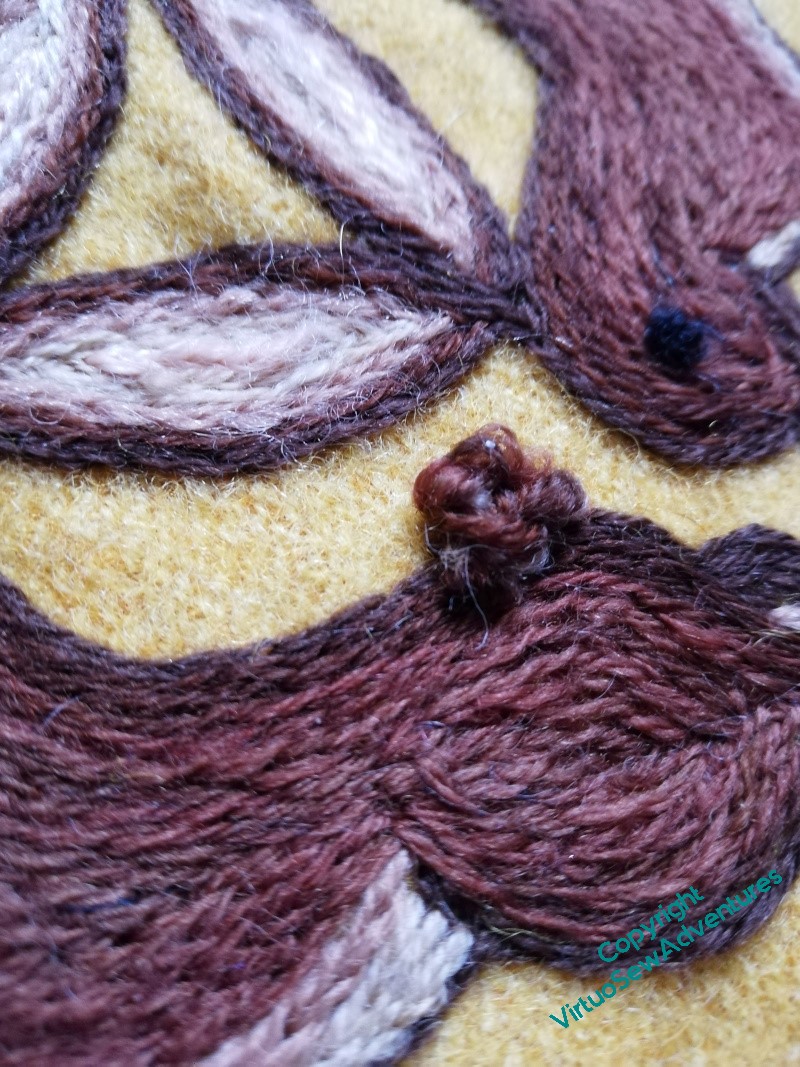
David’s Hares – close ups
I really enjoyed working the Hares, and I thought you might enjoy a few close up and oblique views. I think there’s not much to say, as I’ve already said it, but if you have questions, please use the comments section and I will do my best to respond usefully!
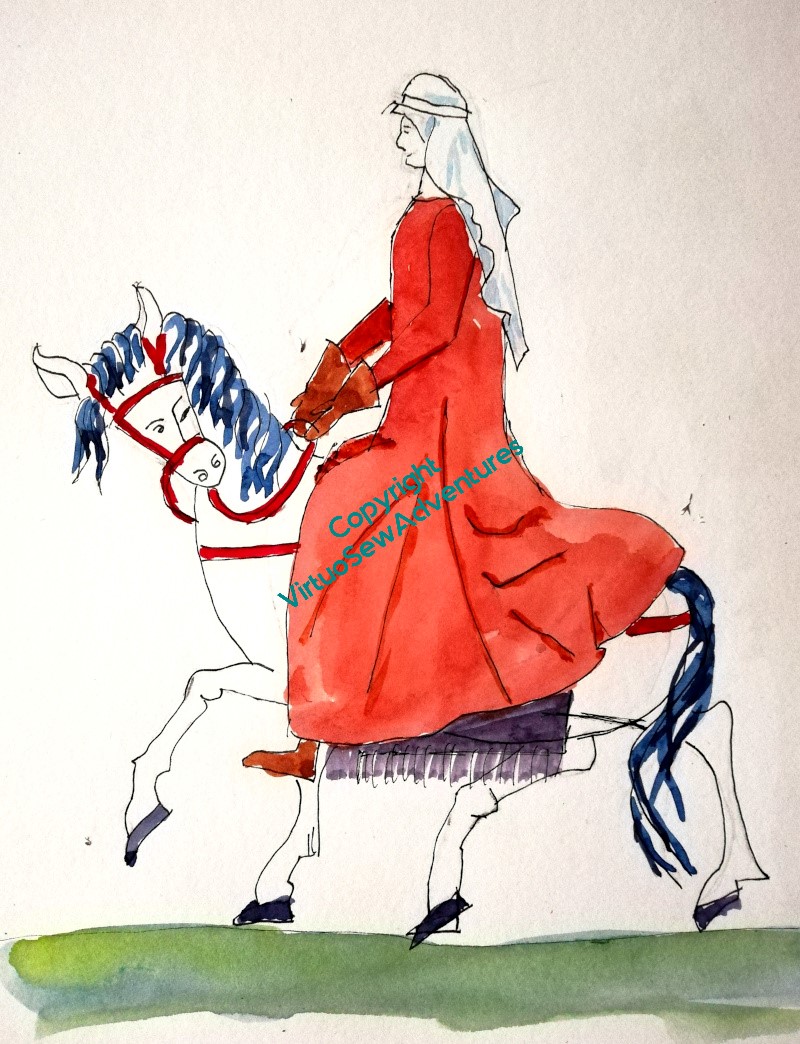
More on Aethelflaed
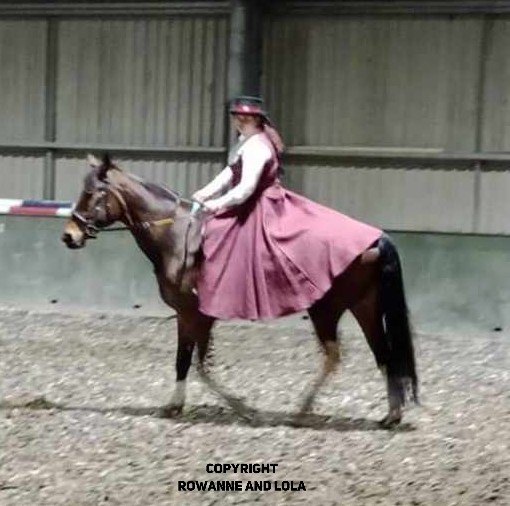
So, after my first two attempts at Aethelflaed, I had a fascinating day with my reenactor friend Vara, talking about the garments and decorations of the period, and she showed me this photo of her daughter riding astride, but in a modern riding dress inspired by early medieval garments.
Rowanne is apparently intrigued by what I’m doing, and has given permission for me to put this picture up, showing her and her horse Lola!
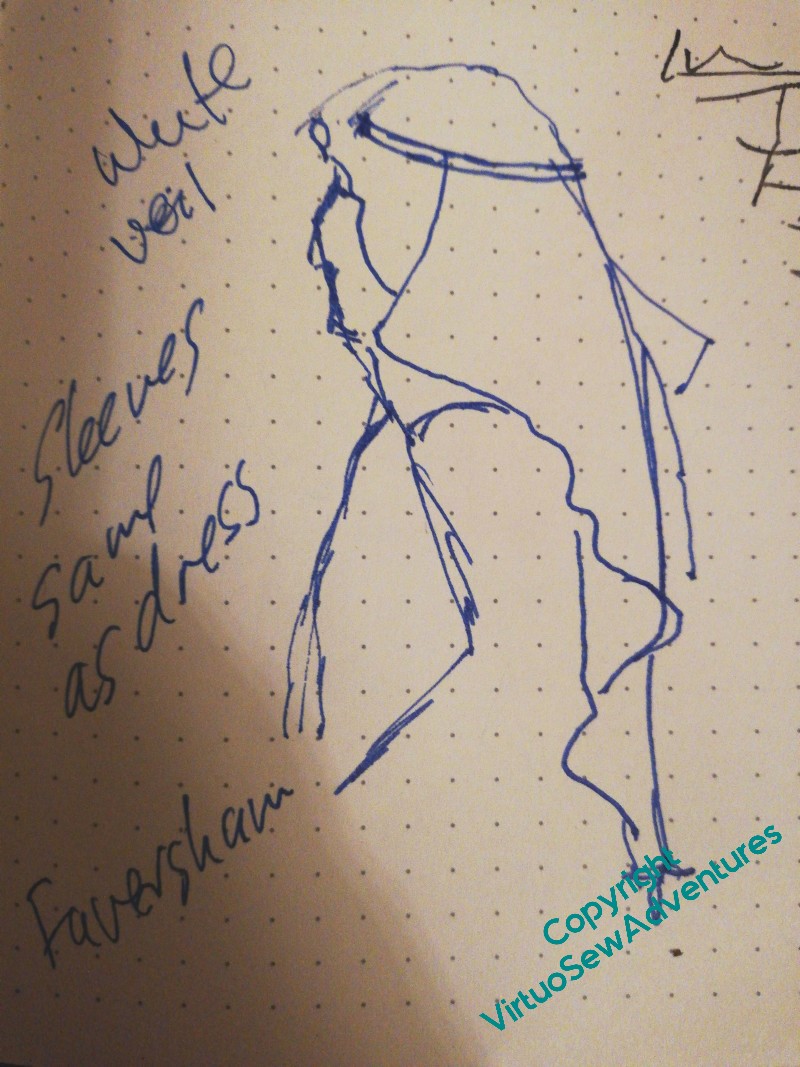
I also had a chance to do a sketch of a woman in profile, wearing the right sort of veil, complete with a fillet, with the added suggestion that Aethelflaed should be wearing a bright white veil, since that would be a sign of wealth and authority, and that sleeves would have been all in one with the dress.
So, I’ve had a bit more to work with, and had another go.
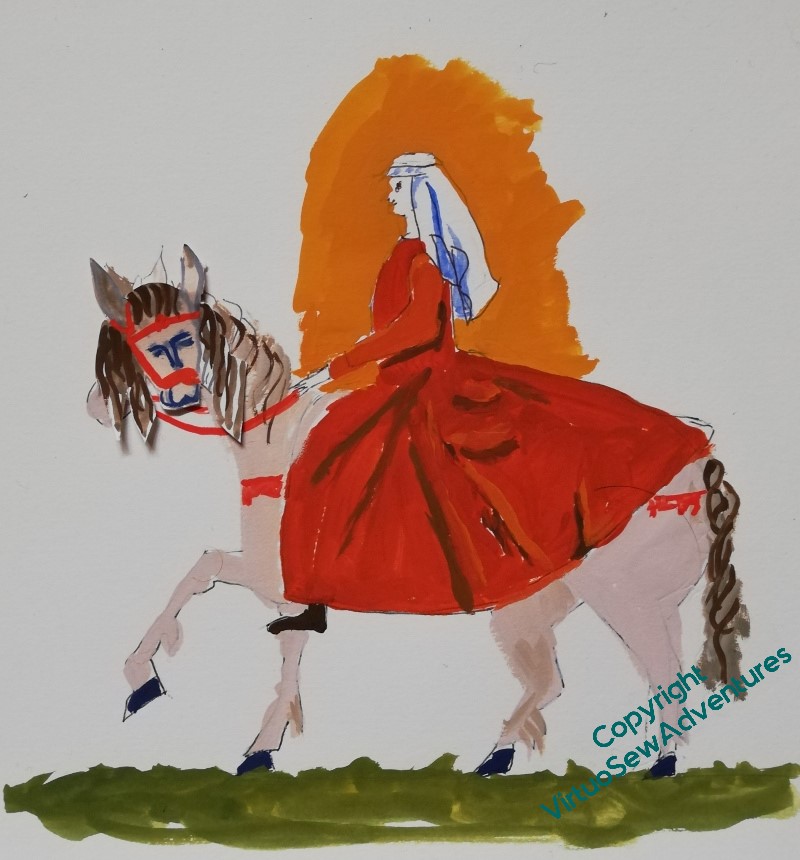
This is better, I like the straighter back, and the dress covering the horse’s rump. But my goodness, if you compare her with Rowanne and Lola, she’s much too long in the body. I need to shorten her somewhat.
Furthermore, I think the horse has got too tame – back to the cross-eyed one staring out at the viewer!
But then, I think, I might be able to start playing around with placing her on the background and choosing colours for her. Which, my goodness, will be About Time!
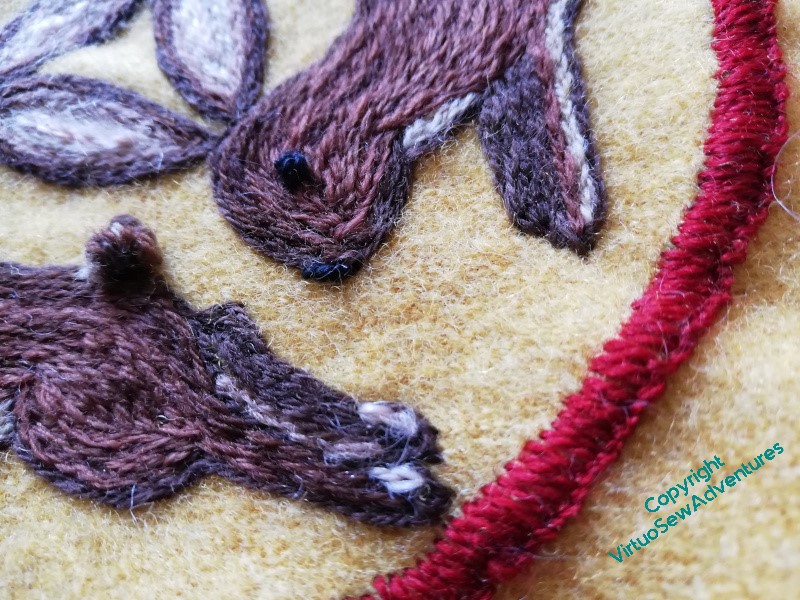
More on David’s Hares
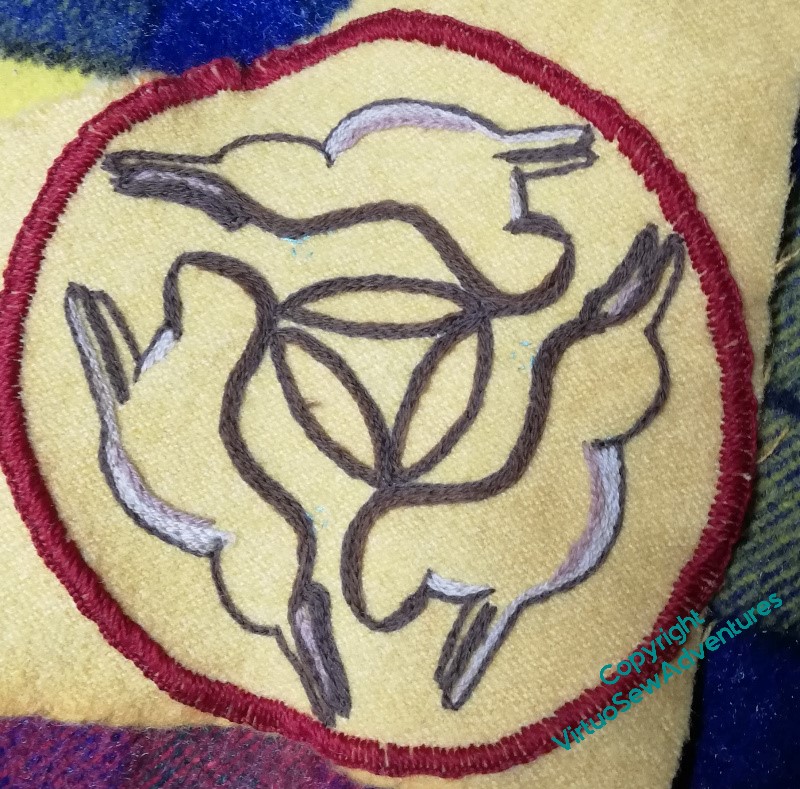
The yellow wool was really a lovely fabric to be stitching on, but being a bit mobile around the edges, I decided I wanted the circle of blanket stitch in quite soon, and didn’t keep it quite as neat as I might have hoped.
However, it looks lovely, the red contrasting nicely with the ground and will the brown hares (I keep wanting to call them bunnies, but hares have bigger ears, which must make it easier to share them!)
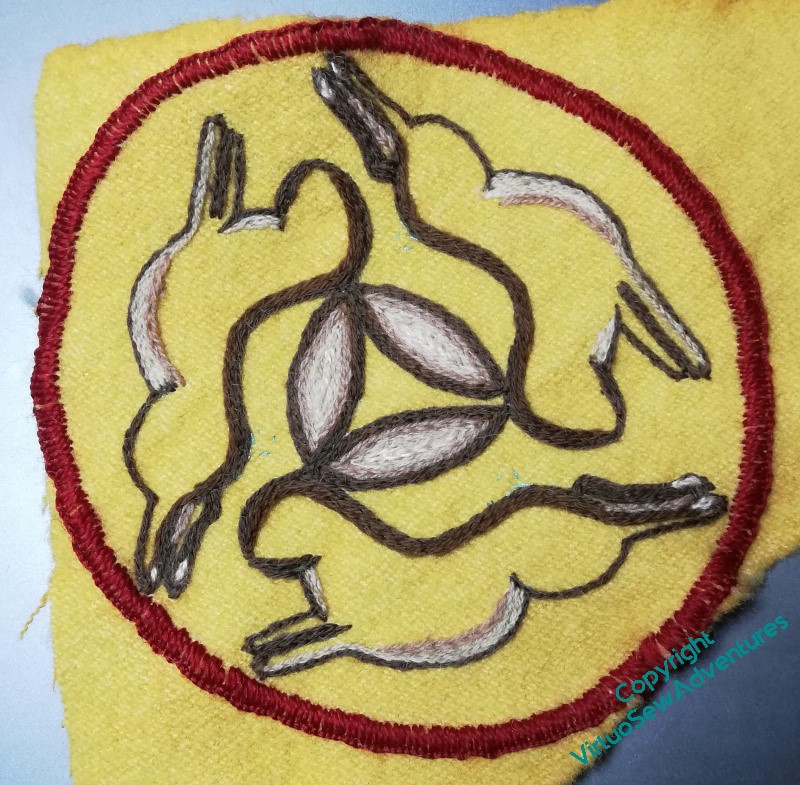
The innermost line on the ears is a pinky-cream mohair, and I’ve also used it for little pink pads on the hind paws. I’ve no idea whether this is accurate to life, but it gives the design a lift at the edges, and I think that has helped enormously.
You will note that I’ve kept all three Hares at the same rate of development all the way through. That’s made it easier to think of it as a single design, “David’s Hares”, rather than three versions of one hare. It also means that when I was working the progression of shades in the ears, I didn’t have to make notes, and while it’s true I’m a more note-taking-minded stitcher than I used to be, something like this is meant to be more freestyled!
I don’t know what I’m going to attach the Hares to, but I’ll think of something..
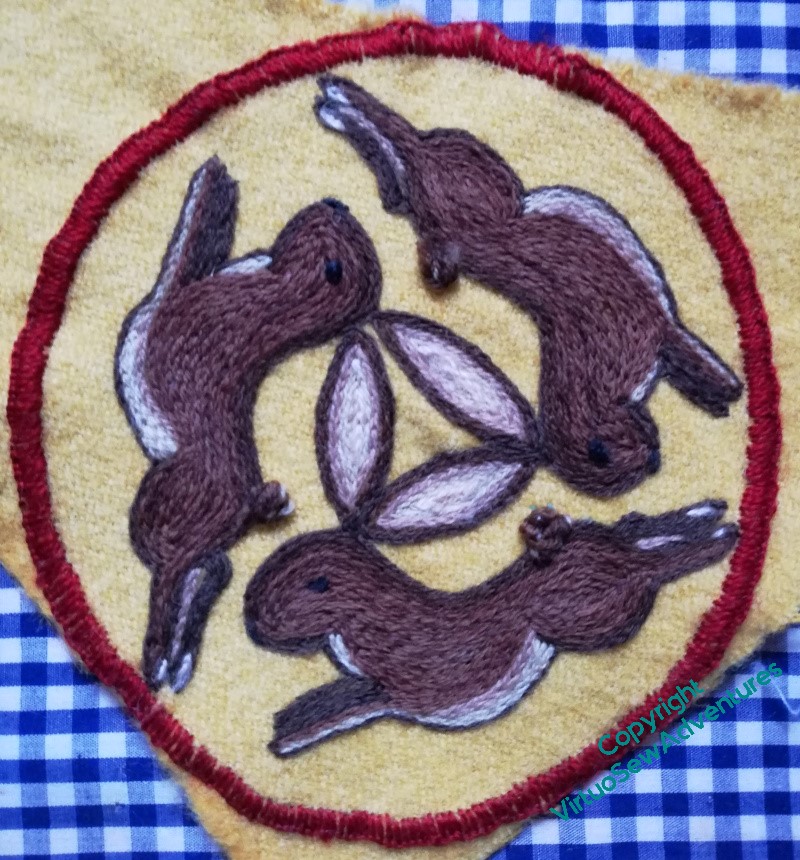
Here you see I’ve actually finished the stitching, including a pile stitch for the tails. I’ve not cut it, but left it soft and curled, which makes for a slightly stronger shape, and possibly more hardwearing too. But my goodness, pile stitches take more thread than you expect, even when you’re expecting it (if you follow me!)
Close ups will come in a later post, but in the meanwhile…
In Memoriam, David Singmaster, mathematician, metagrobologist, mischief, and friend. Thank you, David.
Chorus of Angels Tablecloth
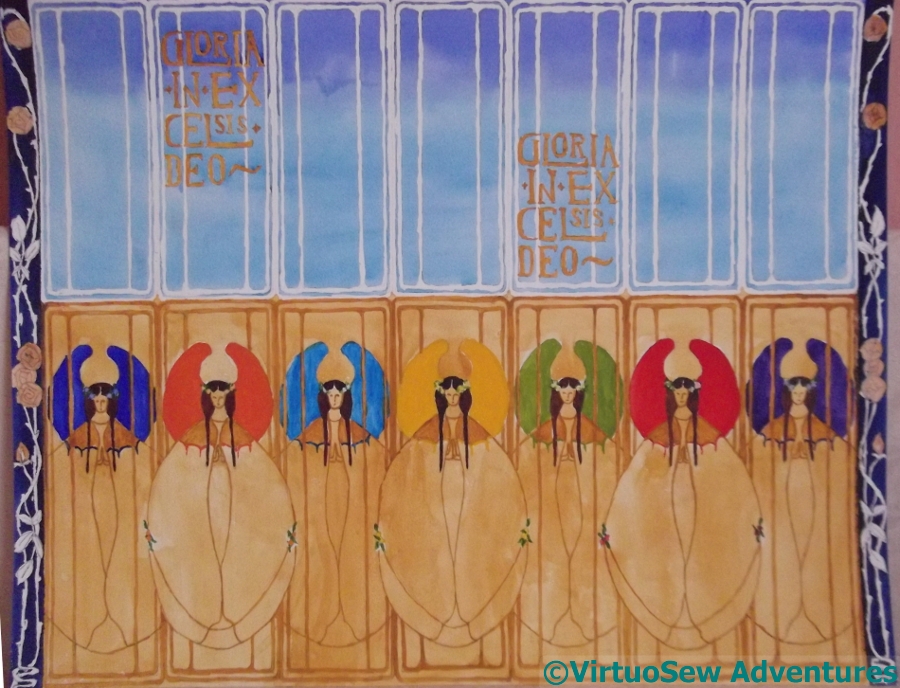
Some of you may recall this design, which Mam and I were thinking of developing into the background for the crib figures I inherited from one of my great aunts. I’ve not managed to think of a way to make it work in embroidery yet, so I keep on looking at it and thinking “No”, and moving on.
Sigh.
However, it has occurred to us that using the same angels as the basis for a design for the Christmas tablecloth might work quite nicely, and will give us another chance to play with the shapes and design.
So, sized for the purpose, planned out and tweaked. And we’ve decided, rather than embroidering directly on the tablecloth (if you’ve ever embroidered a tablecloth, you will have a fair guess why we aren’t!), we are going to prepare the applique separately and attach those to the tablecloth.

We’re using quilting cottons in red, yellow, and green, and we’ve got everything cut out and pinned approximately in place, and now we’re not sure what to do next!
So there are some experiments ahead. I’m thinking of restricting the colours to stranded cotton in the same red, green and yellow (as far as possible), and using a variety of interesting edging stitches. And we both have samplers of those in our embroidered Coat of Many Flowers and the Little Jacket!
Working on Aethelflaed
You may recall that the planning and designing of Aethelflaed is proving quite a long winded process, with a lot of repetition and rethinking going on.
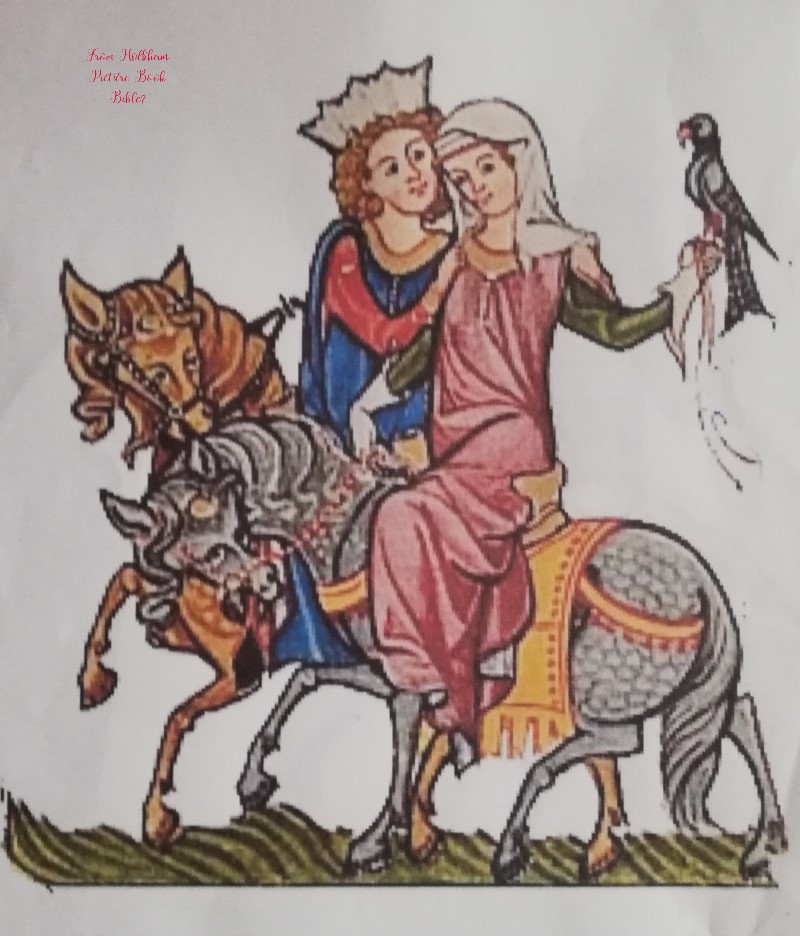
I’ve been looking for medieval women on horseback, because I want Aethelflaed under her own steam, as it were – not lead on a palfrey, but mounted on her own horse, with the reins in her hands.
The best I’ve found so far is this one, which I think was in the Holkham Picture Book Bible.
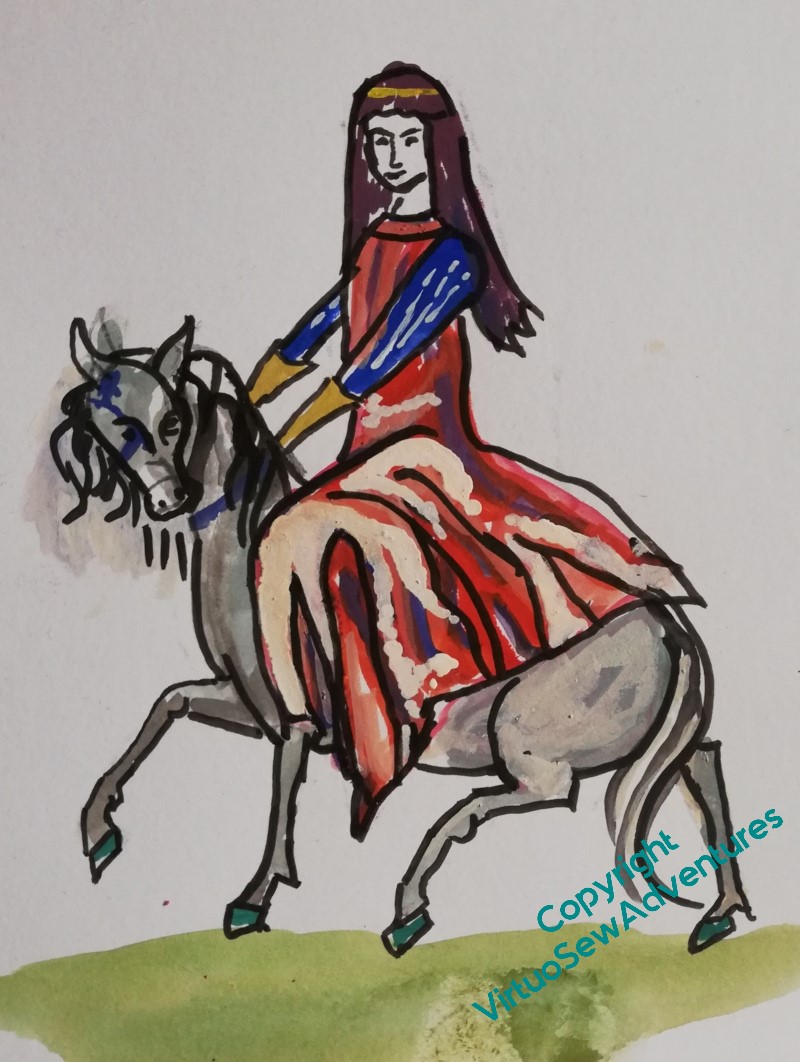
I started with the lady, and began some alterations. I want her horse to have some personality, so I’ve turned the head towards us, and lifted it a little.
I’ve extended the skirts somewhat, and given the rider a veil that flies a little, held in place by a golden fillet.
But the high contrast suggests a silk or brocade, and I want something that suggests a sensible woollen riding dress.
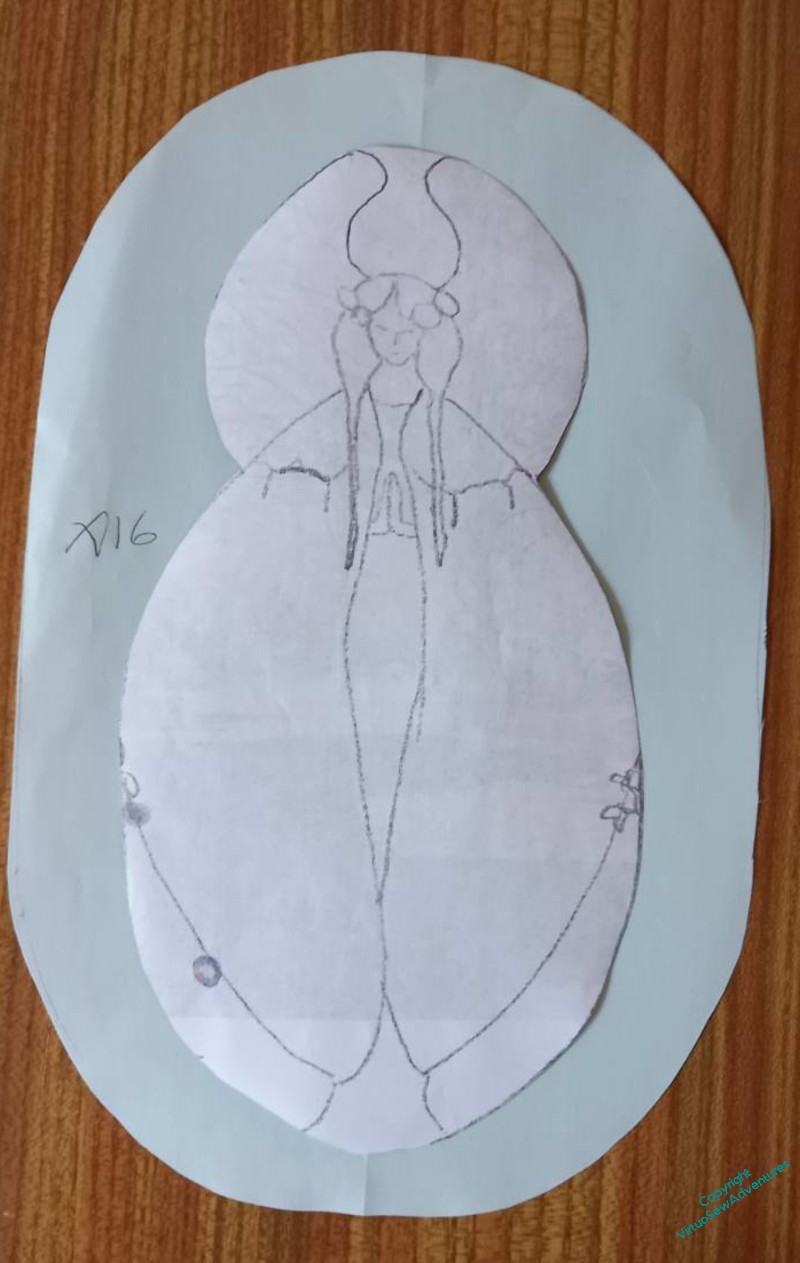
Then I found some Viking and Anglo-Saxon reenactors and talked to them. And goodness, that gave me food for thought. In particular, yes, riding dress was indeed a garment that an Anglo Saxon woman like Aethelflaed might have worn. But Anglo-Saxon dressmaking was not at all like ours.
In particular, whereas we tend to have pattern pieces that start with the widest part, and remove fullness by means of darts, pleats, or gathers, Anglo-Saxon dressmaking started with the narrowest width and added fullness by means of gussets and gores. In fact, an Anglo Saxon riding dress would have a full circle’s worth of gores inserted into the side seams, resulting in something roughly like this.
But not quite. I’ve actually been to talk to my reenactor friends, and there are a few bits which don’t quite ring true. I have some photos to work from, so there is more to come…