
More Needlelace Experiments
I wasn’t at all sure how to tackle the Oak Leaf Wreath Experiments, but as always, charging in head over heels is the most enlivening strategy!
Having toyed with the idea of these drawn plastic oak leaves as the support for fabric leaves, I thought the next thing to play with would be needlelace, using different types of thread and different stitches. I want to get some sense of how to tackle a very difficult shape, and I think that even if I choose not to use the plastic pen, I will have learnt a great deal from the different combinations I’ve experimented with.
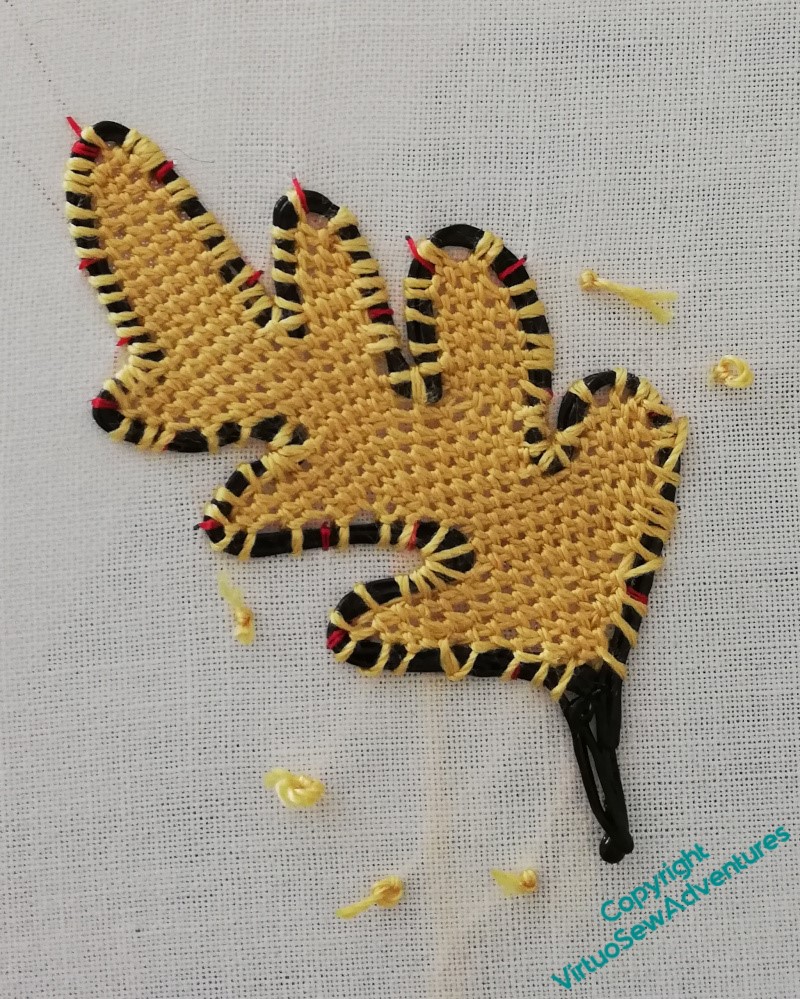
The first one uses a fairly heavy silk thread, not quite a perlé, but definitely not stranded. The stitch is the classic Corded Brussels Stitch.
I don’t think that this combination of thread and stitch leaves space to cover the plastic easily or neatly, and I can’t think of another way to tidy up all the ends I needed to use because of the uneven shape.
Also, my goodness, the plastic is slippery. Placement of rows might prove to be a bit of a challenge.
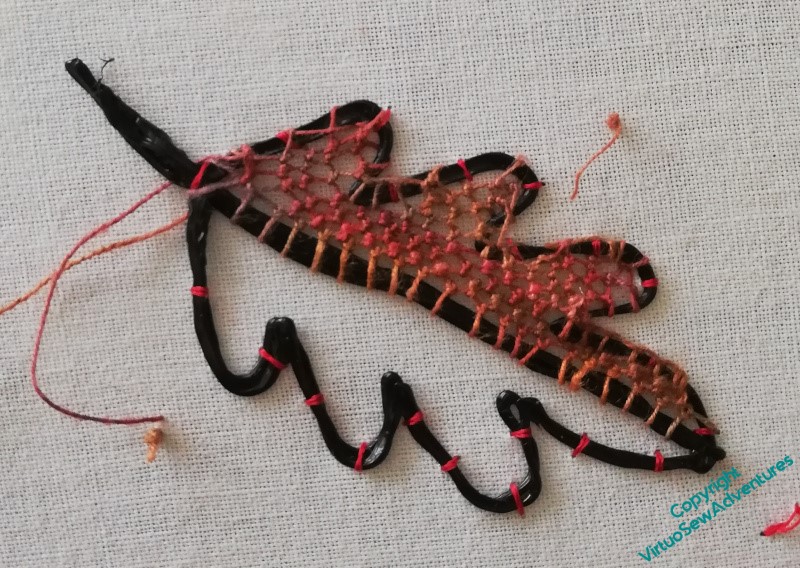
The next one is a rather finer linen thread, and I started from the extra line of plastic down the middle, which may have slightly simplified the stitching. There is probably enough space for a buttonhole stitch covering for the edge, but it was very hard to fit the needle around the more confined areas. Maybe I could devise some way to cover the edges once the leaf was off the backing?
The linen is a hard thread to work with, because the friction of the thread against itself it quite high, and since I chose a knotted stitch for this experiment, there was a lot of friction!
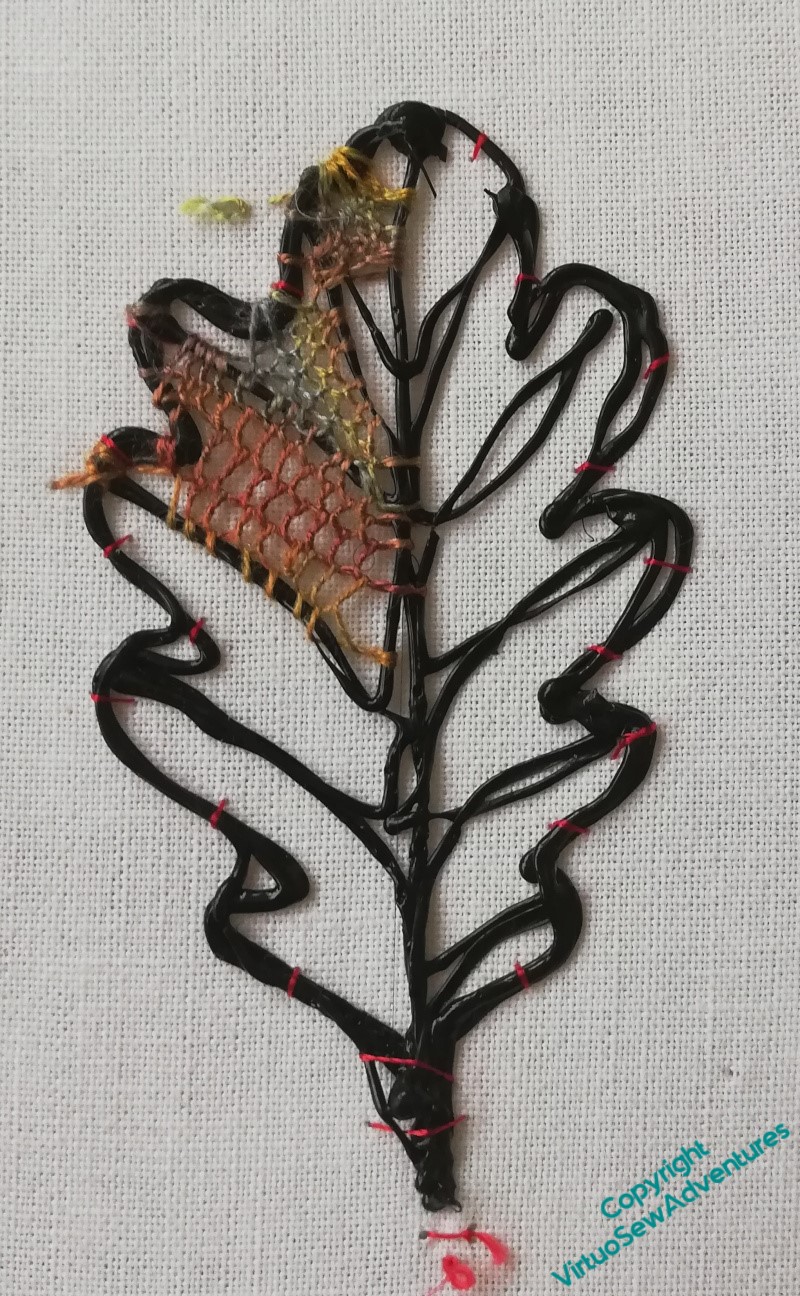
The final experiment for this week used a single strand of stranded silk. Caroline added veins to this one, and I tried to fit two different stitches around the veins and over the edges. Definitely not straightforward!
I found myself wondering about finding shorter needles for this project, maybe more like my Japanese needles, but blunt (the Japanese needles are super-sharp!). I’ve found the balance of the Japanese needles a bit challenging in the past, but fitting around the edges and corners of these shapes has also been a bit challenging.
What’s that saying about picking your battles?
And in the meantime, Episode 62 of SlowTV Stitchery is now live. In which we discuss Why The British Talk About The Weather, consider discoveries in the loft, and contemplate the placement of the needlelace slips.
It is interesting to see the different methods that you are using. I like the second leaf best – but it could be the colours
Looking good!
Always good to experiment. I like the second one best – some sort of buttonhole around the edge would look good. xx
Another vote for the second one. I love the stitching, but I’m not sure about the black plastic forms.
Fascinating! I always love it when people show things that aren’t perhaps working quite as they hoped – somehow it’s more interesting to see that process. What about covering the outlines in buttonhole stitch first? It would. cover the plastic and potentially give you a firmer surface to work into/on top of
I join the others in thinking the second leaf the most attractive. And I also think that buttonholing or otherwise covering those slippery slopes first would make your life very much easier.
You got very much better results than I expected with those outlines, anyway.
There’s a real challenge for you! I also think the second, and third, leaf are the best. Remember that an autumnal leaf is likely to have been nibbled on by insects, torn by the wind, shrivelled up or harmed in other ways. So any uneven stitching or areas not perfect will be very realistic.
Keep up the hard work.
What great experiments.