
Tag: Needlepoint
Parterre – no, these are the final stages!
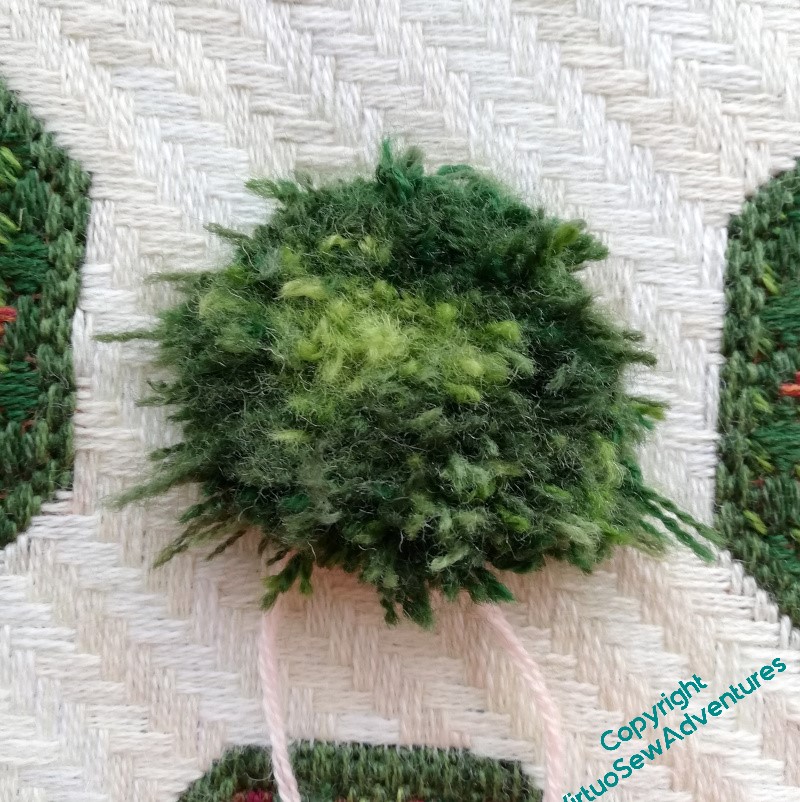
So you may recall that, when last seen, I was working the Surrey Stitch boss for the centre of the Parterre. This is something else that uses a lot of thread, so I had a nervous time wondering whether I would run out of the wool I wanted to use before I finished it. And because the stitches were pushed down for quite a while as I was working it, I tied some thread around the finished stitches for a few days to help them stand up to be trimmed.

Then I realised that some of those stitches were still loops and might not be standing up to where they should.
So the semi-final trim took a bit longer than I perhaps hoped, and is maybe not quite as short and trim as it should be. That’s because I don’t have enough wool to do it again, and I am absolutely terrified of trimming it too short!
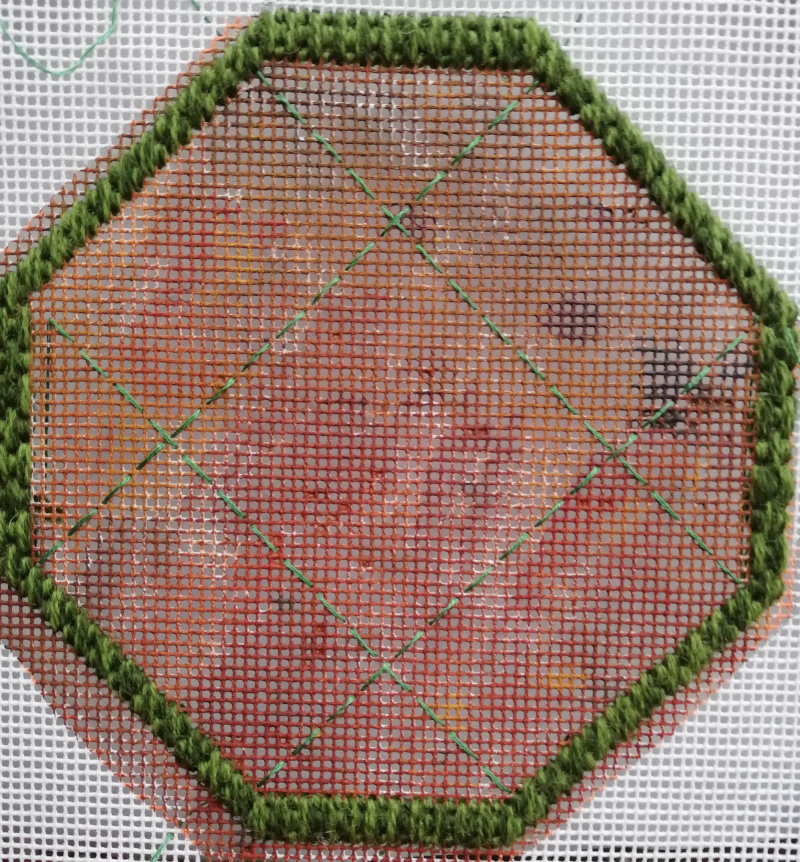
However, any further trim can wait – it’s something that can be done off the frame, and I wanted to see how the whole Parterre had turned out.
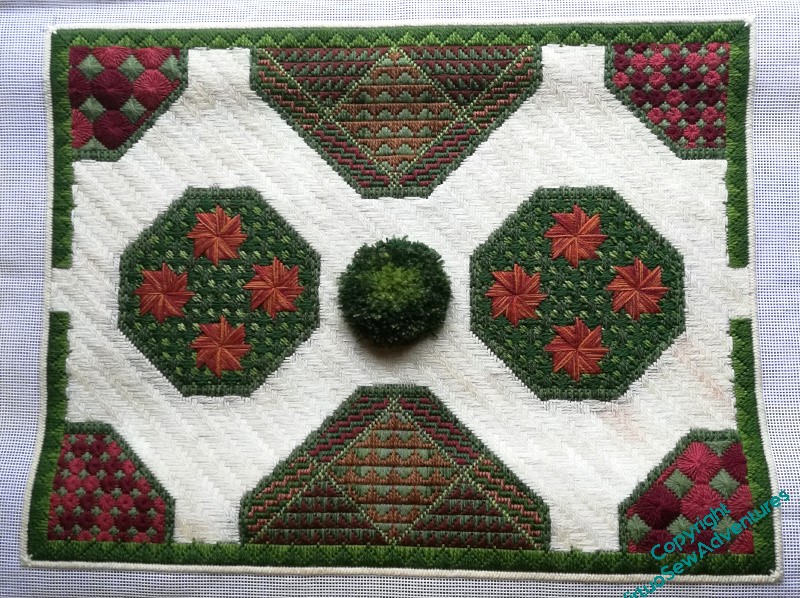
Pretty well, I think. It is squarer than it looks, I just need to block it a bit to take the frame-kinks out of the canvas!
Parterre – final stages
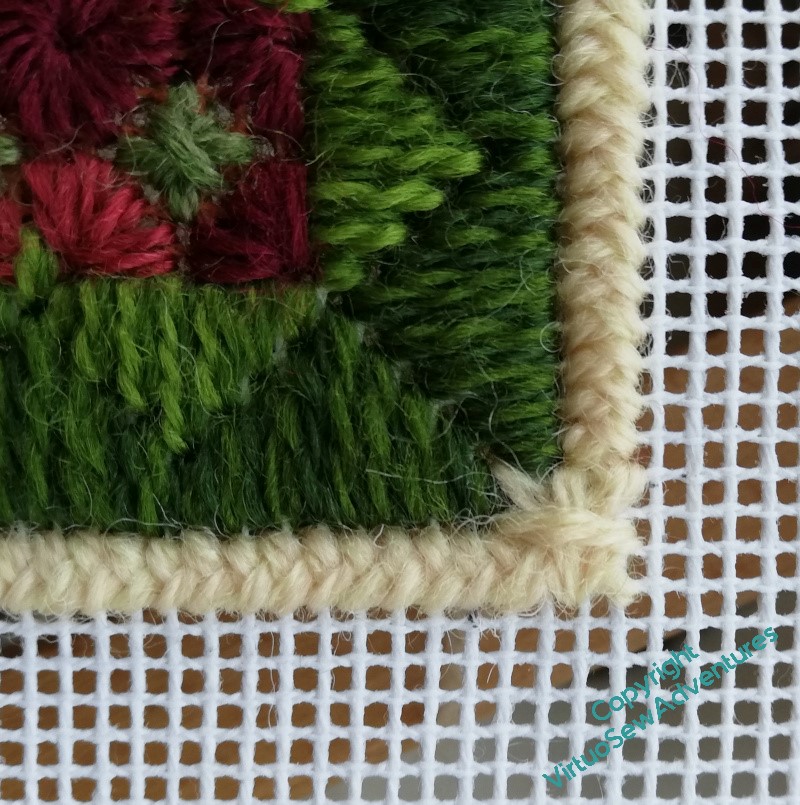
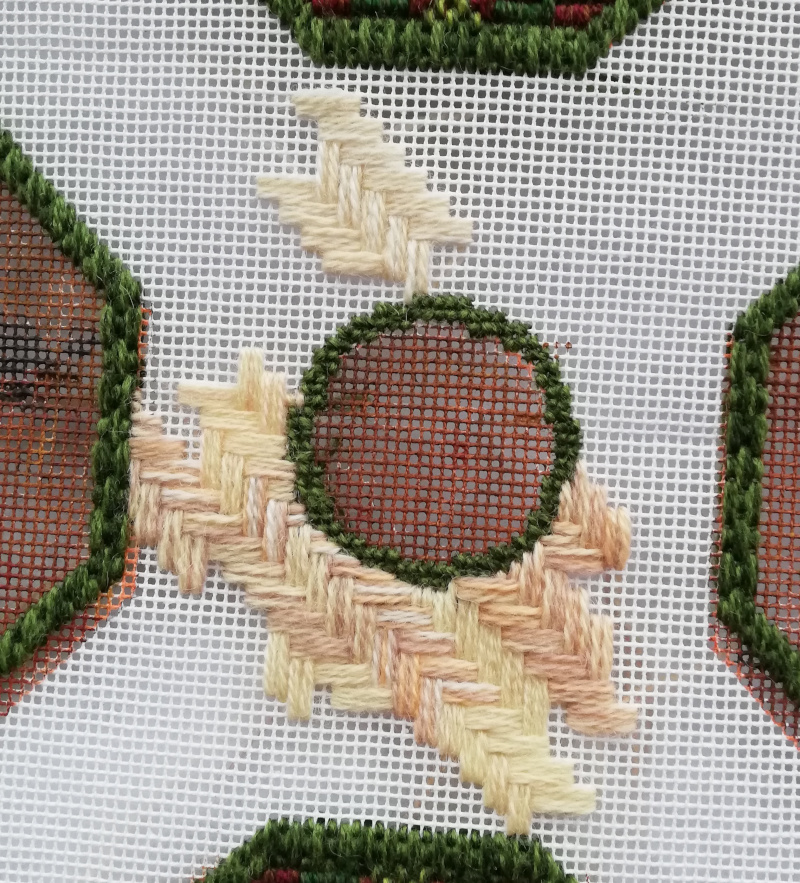
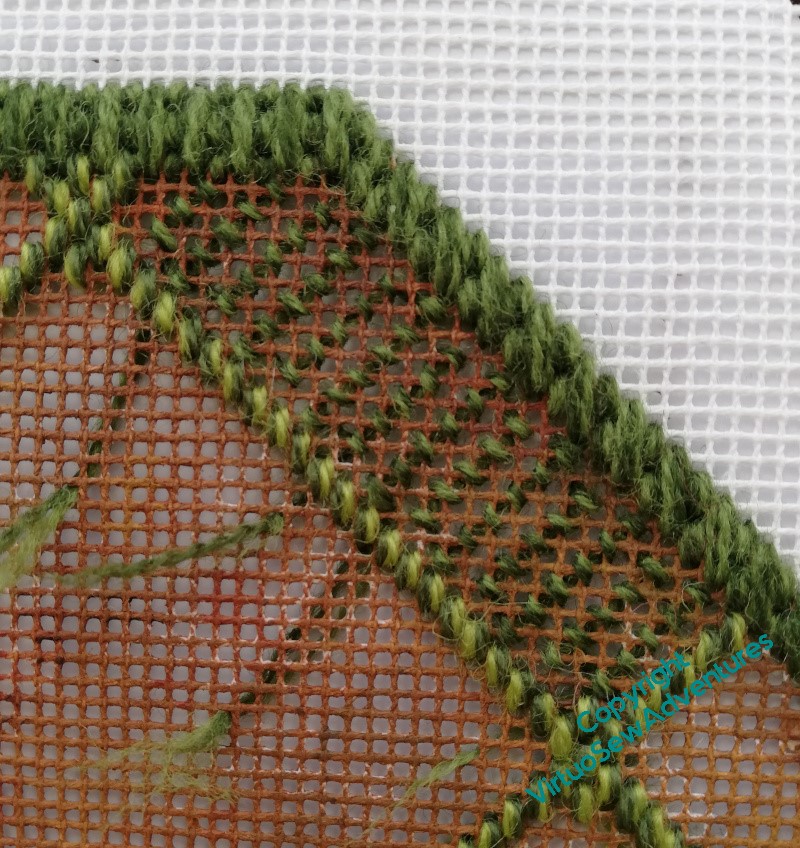
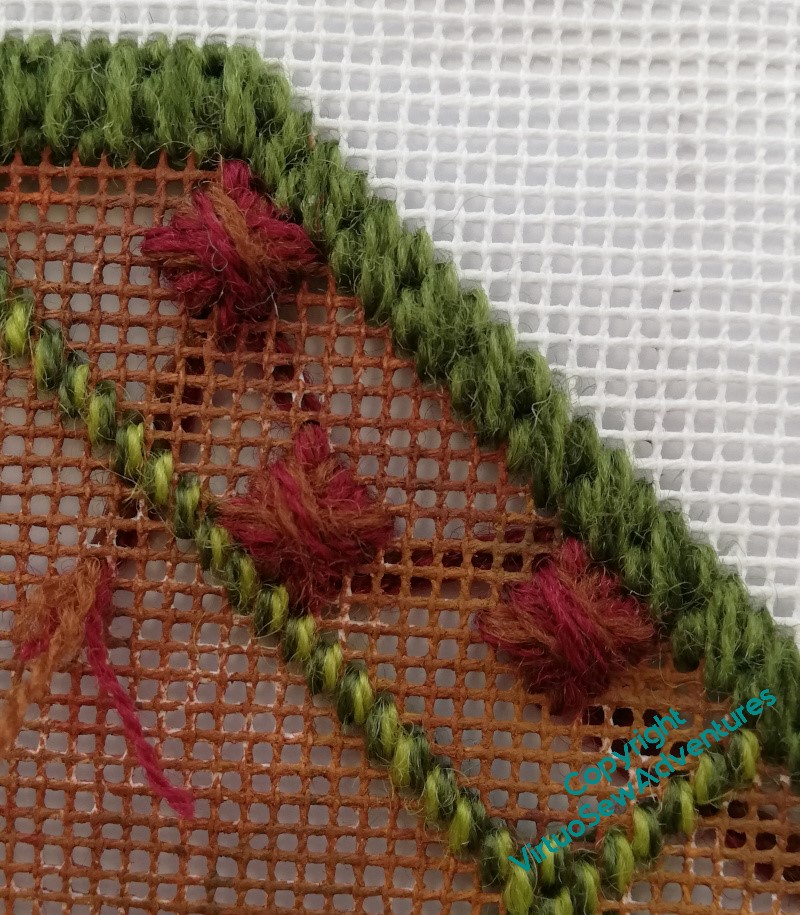
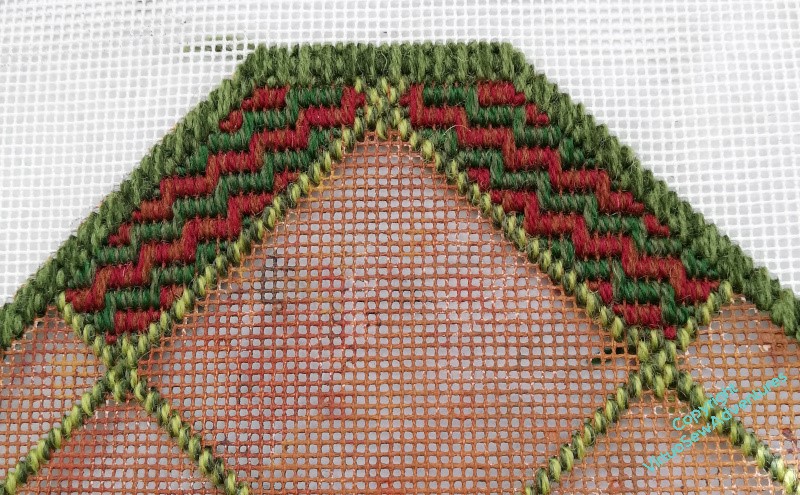
While I was stitching away at the limestone pavement, it occurred to me that I maybe needed to think of some way to “finish off” the edges. I’d left a corner space in the green border, being unwilling to go down to a straight stitch over a single thread, which rarely looks good.
I decided that the best way to to deal with the whole look would be to pull the inside and outside together, using the cream to run around the whole garden – limestone chippings to separate one garden room from another!
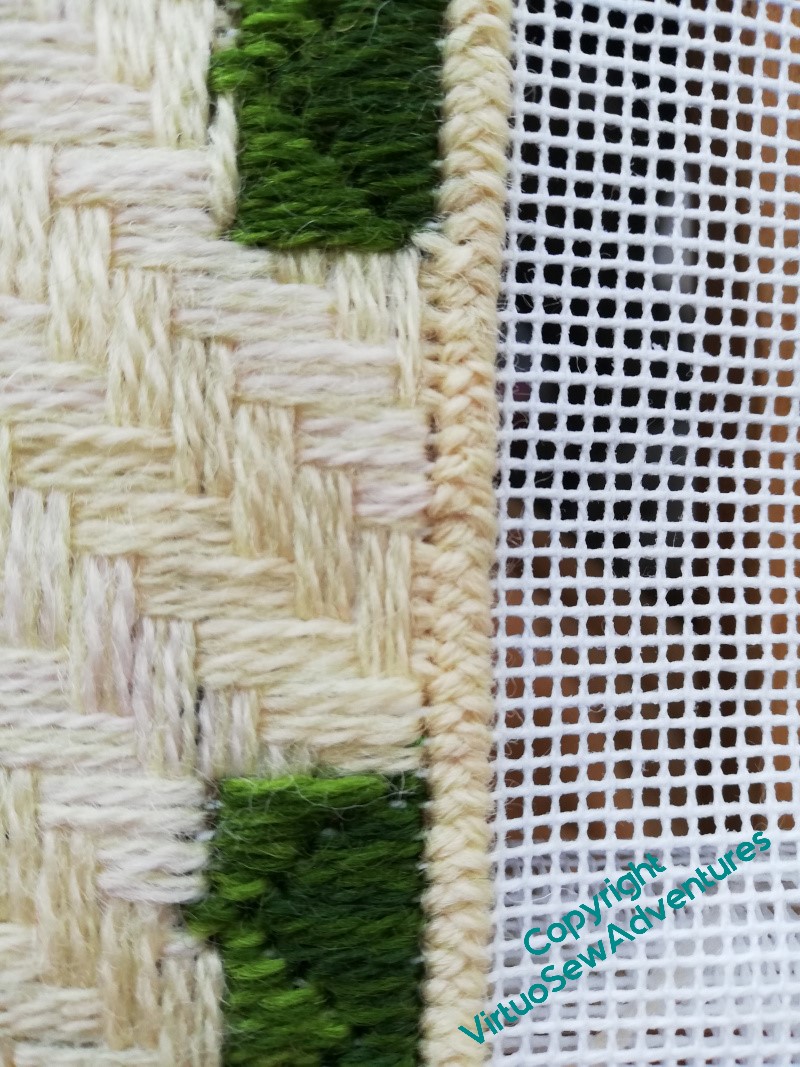
Using a double cross stitch boss in each corner seemed to work – just enough emphasis to put a full stop at the end of each run of the plait stitch.
The plait stitch also helped by tidying up the gap in the short sides. I left the gap because the “hedge” repeat didn’t fit into the short side neatly, and when I got to the edge with the limestone pavement, I wasn’t happy with the way it looked. I am now, though – I think the plait stitch worked well, stopping the pavement falling off into the view!
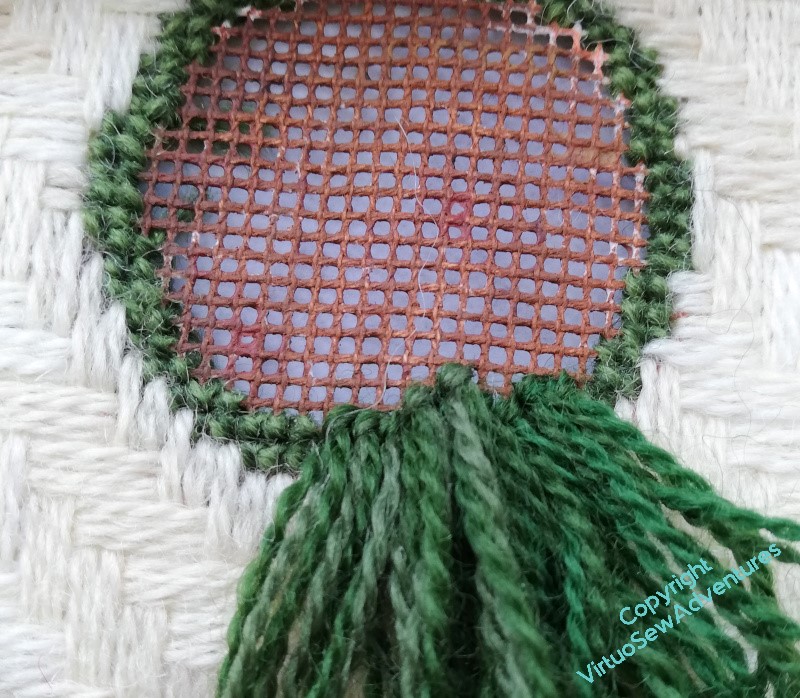
Once I’d got everything else done, I could start to work on the central boss. My book told me that Turkey Stitch, which I was intending to use, is Unsuitable For Mono Thread Canvas, which was a bit of a facer, but fortunately offered Surrey Stitch as an alternative.
So I got started on the Surrey Stitch – which turned out not to be as quick as I expected..
So, not quite the final stages!
Parterre Progress
Interior design involves balancing places for the eye to rest with things for it to look at, but having that happen at different scales and different distances from the eye means that you can have just as much visual excitement as you want.
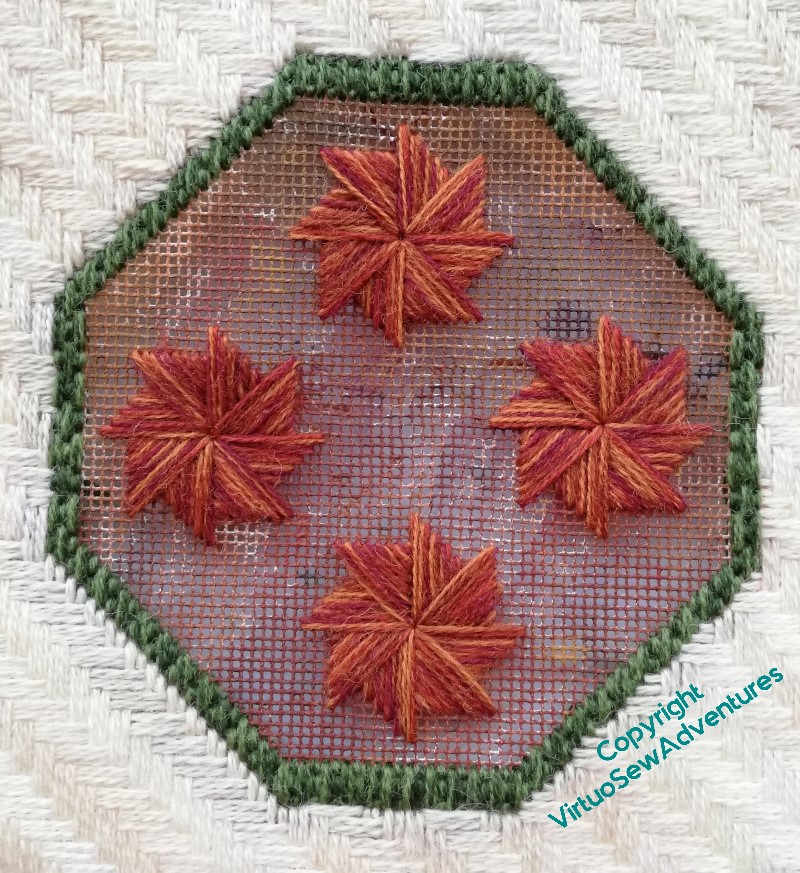
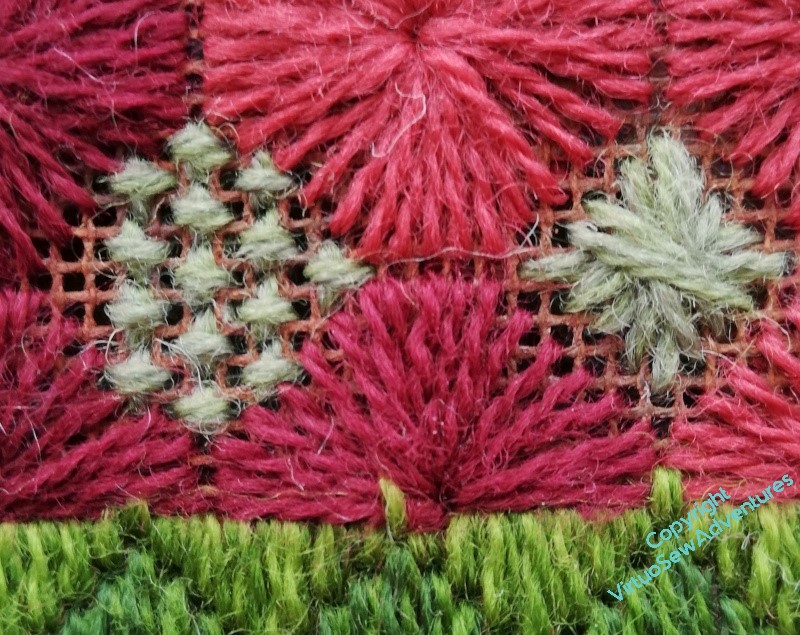
Once I put my “hero” stitches – the pinwheels – in the octagonal borders, I needed to find something to surround them. It needed to be much quieter, to allow the heroes to be truly heroic, but at the same time, I wanted something that would be visually interesting if you bothered to look.
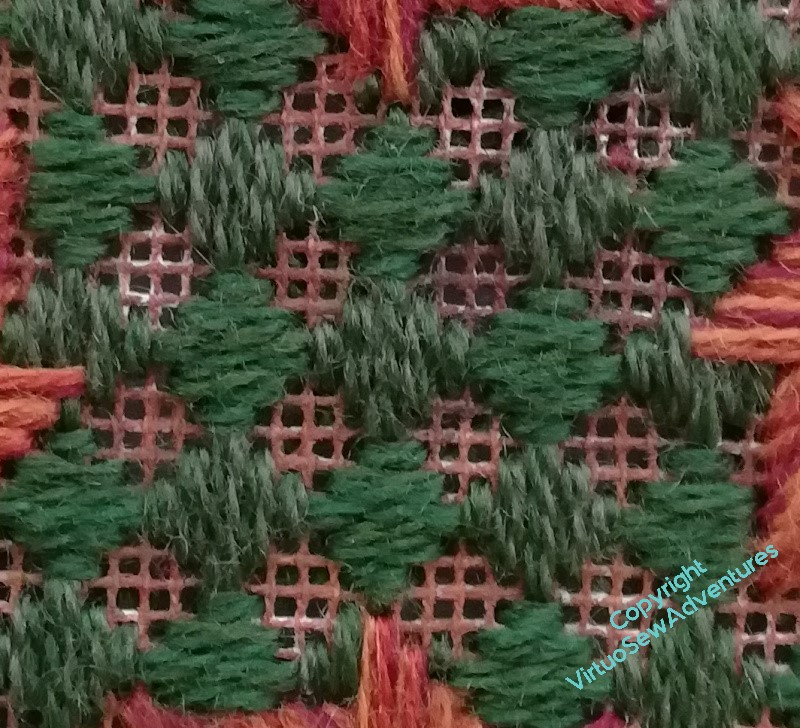
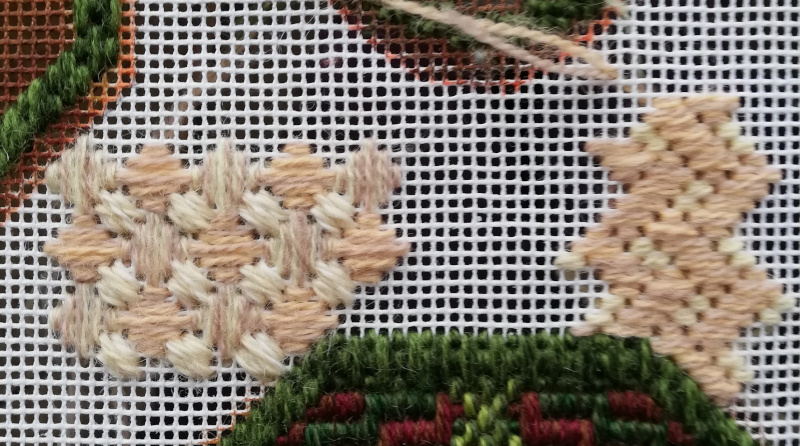
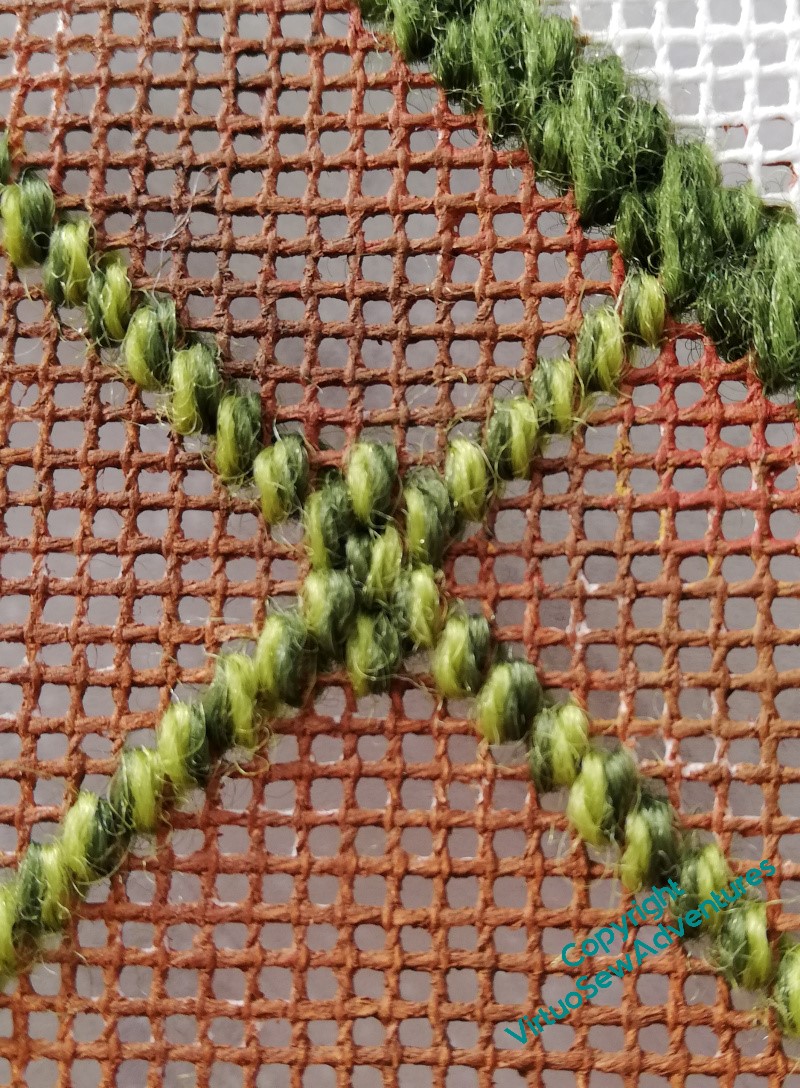
This is the first two stages of Palace Stitch, which was one of the stitches I interviewed for the limestone pavement. Heathering the yarns means that even close up you have something to look at, and it helps me eke out my stash of Paternayan, too. It’s too beautiful not to use, but doing a large project is becoming something of an exercise in invention!
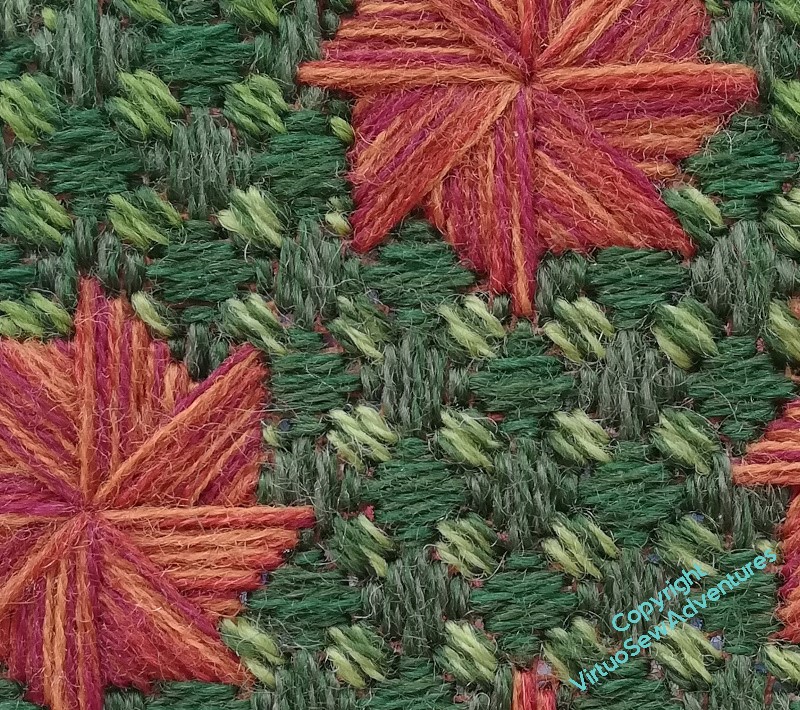
The final stage of Palace Stitch involves small squares of diagonal stitches. Again I have heathered yarns, this time using lighter, yellowy greens.
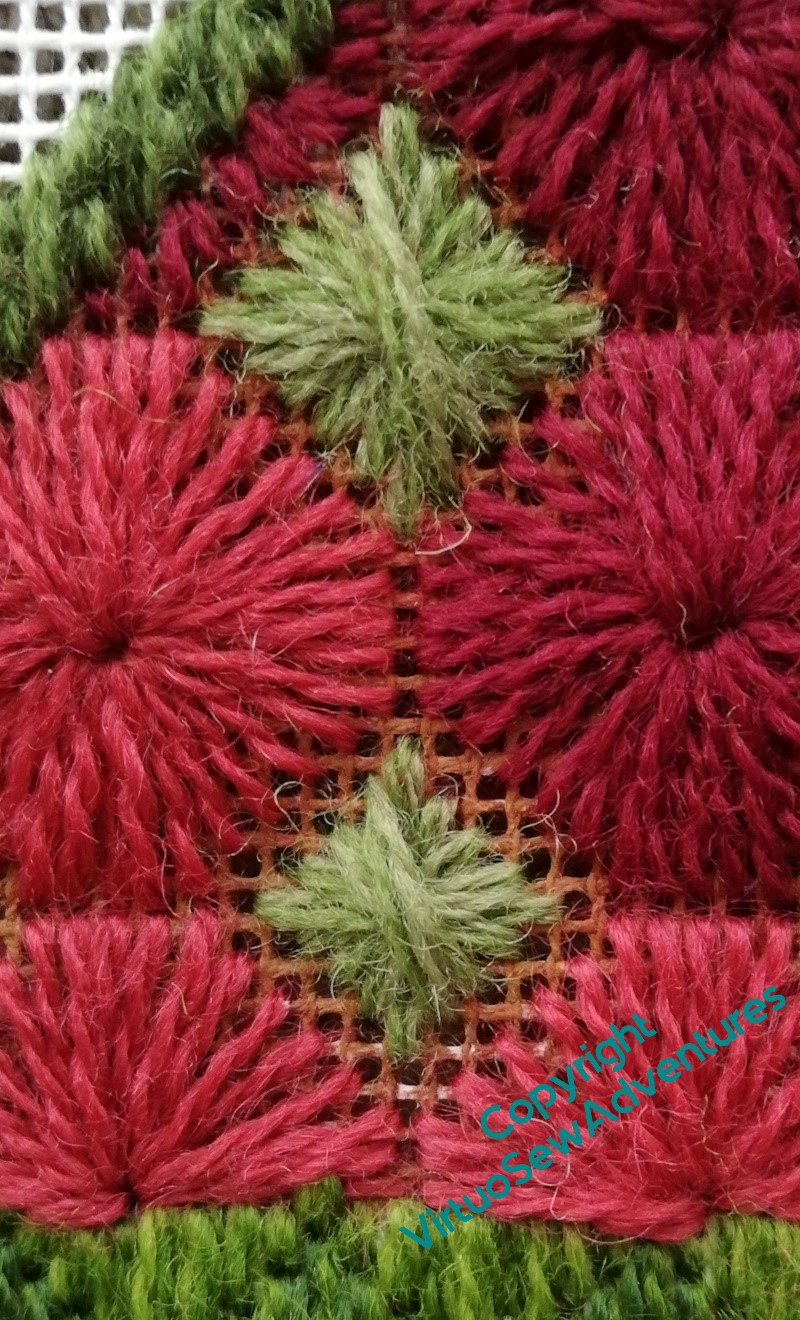
The placement of all my colouring variations isn’t quite exact, but I like it that way. Plants don’t grow identically, and a lot of the charm of knot gardens and parterres lies in the crisp shapes with the subtly varying colours of the plants filling them. I’ve been trying to paint hillsides and forests of late, and I never thought I’d say this, but the canvaswork is easier!
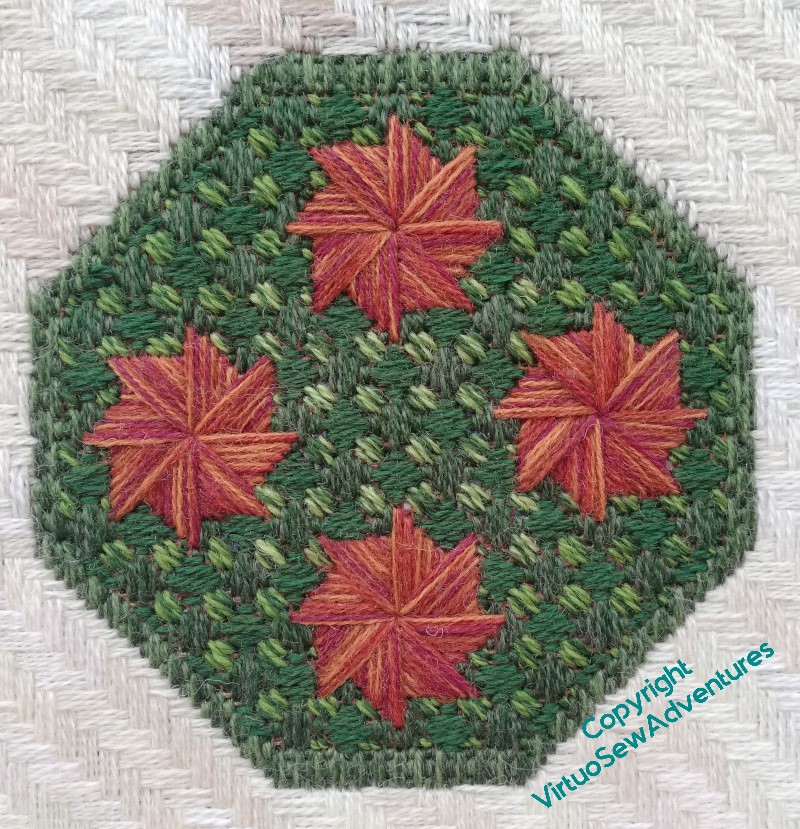
I think this is a success. The slightly lighter centre, the darker edges, and the varying colours of the pinwheels (four different shades of Appletons Crewel Wool held together) all create a varying effect which is properly geometrical and definitely canvaswork while still managing to be vaguely horticultural.
I do like it when a Plan comes together!
Octagonal Borders Taking Some Time To Resolve!

I felt that the Octagonal borders needed to be less subdivided than the long borders, which in turn meant finding a large stitch pattern. After some to-ing and fro-ing, I decided that I like this one – Milanese Pinwheel (again from Jo Ippolito Christensen).
I’m not so keen on the fact that it doesn’t really tesselate neatly – there’s a peculiar shape left in the middle if you interlock the stitched in the obvious way, and it just didn’t look pleasing. So it was obvious to me that I had best space them out to create islands in an inner sea, as it were. Not like this, however – this was to be a set of five closely interlocked, leaving any partial pinwheels unstitched, to be replaced with some other stitch. But I think it’s already looking congested.

So, trying again.
This time, four, spaced out to form a square. I’m really not convinced by this, either. The slanting sides of the octagons push the pinwheels too close together, so again we have a slightly congested look. Furthermore, as I observed with the borders for William Marshall, the square form can look very static, and in this case, that’s not playing nicely with the swirling movement in the pinwheels.
I think this does, however.
Upending the square onto the diagonal makes it possible to push the pinwheels further away from one another, and while it may only be a couple of threads, I think it looks less congested. That leaves room for me to put another, smaller, pattern “behind” the pinwheels, as it were.
You may notice that while I was wrestling in thought with those pinwheels, I kept on at the path.. So, now I have to do the pinwheels in the other octagon, and decide what to run into the background…
Some Thoughts on the Path
While I’m thinking about the large octagonal borders (they’re proving very tricky to plan!), I’m also thinking about the “path” section. I really like both of these stitches, but they are both much too close in scale to the stitches in the border, and I think they’d be much too busy as well. The path is much the largest area, and I need to keep it from fighting with the borders. There needs to be some calm somewhere!
This is more promising, but the lower experiment with lots of different colour combinations and thicknesses is also too busy. I think if I can stretch out the variations to create larger sections and make the colour changes less strident, this might work. The stitch grows quite quickly, as well. I just hope my stash is equal to the task…
I wasn’t intending to start on the path yet, but given the already-referred-to difficulties I’m having with the octagonal borders , I wanted to be making progress somewhere!
The Octagonal Borders Are Giving Me Trouble
If the long borders were looking monolithic, the large octagonal ones looked like a huge outcrop in the middle of nowhere!
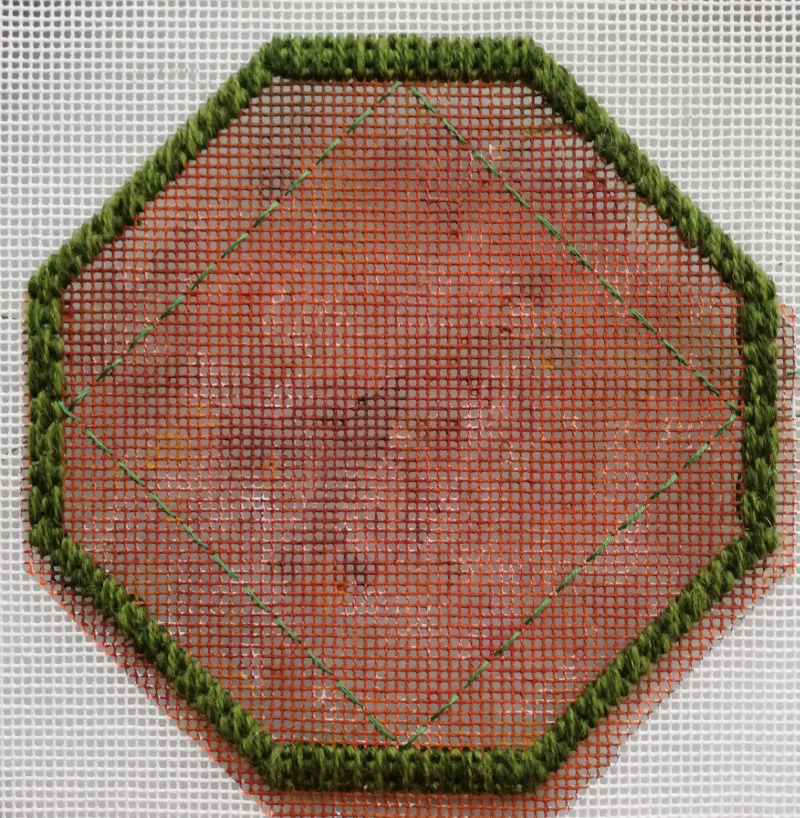
So, as before, I’m playing with tacking stitch divisions to see whether I can plan some shapes that will give me a start.
These borders are too narrow, I think. They are the size that works in the long borders, but the different outline shape makes a difference, I think.
And I don’t think this works, either. The broader border somehow seems to make the shape unbalanced, which is very peculiar when it seems closer to dividing the shape into thirds on the diagonal.
At this point, I started to think in different directions. Maybe, instead of geometric divisions, I should think of a large “hero” stitch or stitched motif, which has rivers of stitching around it, or even one single other pattern running around it. Hmmm….
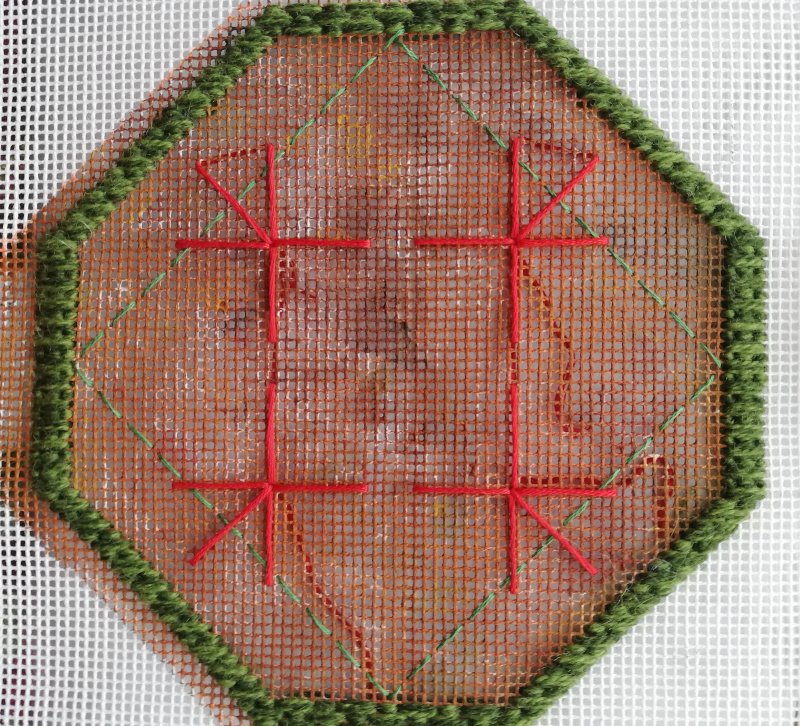
So this next picture, believe it or not, is playing with that idea.
The red stranded cotton is placing the main skeleton stitches for a stitch motif called Milanese Pinwheel (another one which looks a lot like a patchwork motif to me!). The visual effect is a bit square in comparison with the real thing, not as helpful as I hoped – I may just have to Be Brave and be ready for a lot of unpicking!
More on the Long Borders

When I found a stitch called “F-106 stitch” and notionally inspired by delta wing aircraft, I thought it would be a good one to include. The section looked a bit monolithic, so I faded the colours of the “background” stitches outwards from the centre. Although I have to say – I’m no flier, but that formation looks dangerously close to me!

I’m trying to balance the patterns and keep them from proliferating too much so when I’d done these sections (on both long borders), I thought it would be a good idea to continue the Victorian Step Stitch pattern through the second outer sections, only altering the colours slightly. I’ve even tried to keep in step with the first sections across the divider.
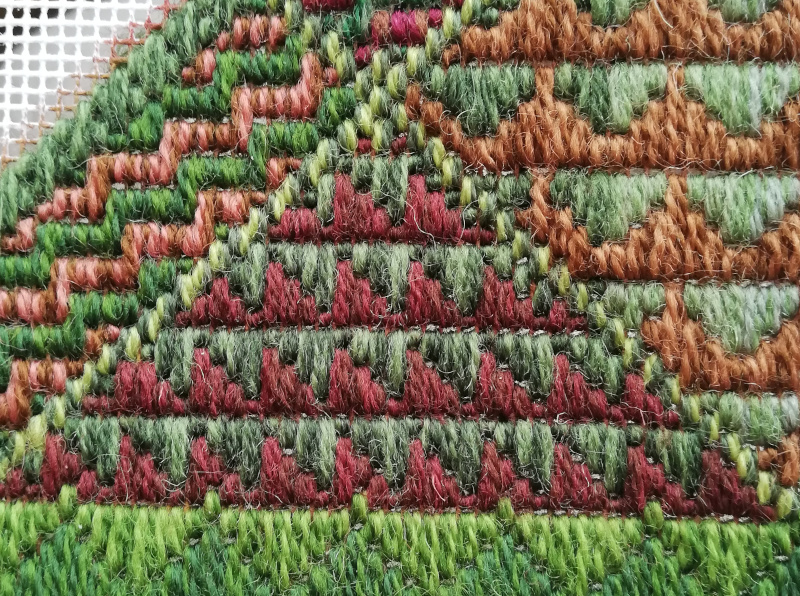
The triangles by the border required another pause, but in the end I kept with the aero theme, and picked a stitch called “Wild Goose Chase”, which I rather suspect may be inspired by a patchwork pattern. Trying to maintain a certain amount of echo and balance, I’ve used similar colours to the first blocks of Victorian Step Stitch, and also reflected the pattern on either side of the centre line.
Long Borders
There’s a good deal of trial and error with this one!
Once I’d divided up the long borders (both of them, so that it remains easy to keep track of) I started to experiment with stitches to fill in the various sections.
For a while I thought I might like to play with voiding some of the patterns, so I started with a sort of skip tent stitch. I wasn’t happy with that – it ended up combining stripes with a general appearance of not being there at all.
So, next trial – what about some large bosses, Diagonal Rhodes Stitch or something like that, which will be nicely reminiscent of the topiary experimentation that inspired the cushion?
I suppose this might have worked, maybe with a river of stitching in another colour to join the three diamonds, but when I looked at it in the context of the entire border, I wasn’t happy with it. Quite why, I’m not sure, but it felt like a false start. I’ve had quite a few of those with this project, and I’m beginning to recognise the sensation!
So, in the end, I settled for finding a smallish full coverage stitch, using vertical stitches like the borders, which isn’t on quite the same diagonal as the border edgings, but seems nevertheless to work. It’s called Victorian Step Stitch in Jo Ippolito Christensen’s book, and I’ve never seen it anywhere else (that goes for a lot of the stitches in that book!). A small advantage was that it mirrored relatively easily about the centre line, creating an arrowhead.
Planning the long borders
The long borders just looked too big, too monolithic, if you like, when I came to look at them with the corners in place. I don’t want the pattern looking too “bitty” and fragmented, but a certain amount of breaking up of the shape seemed to be a good idea.
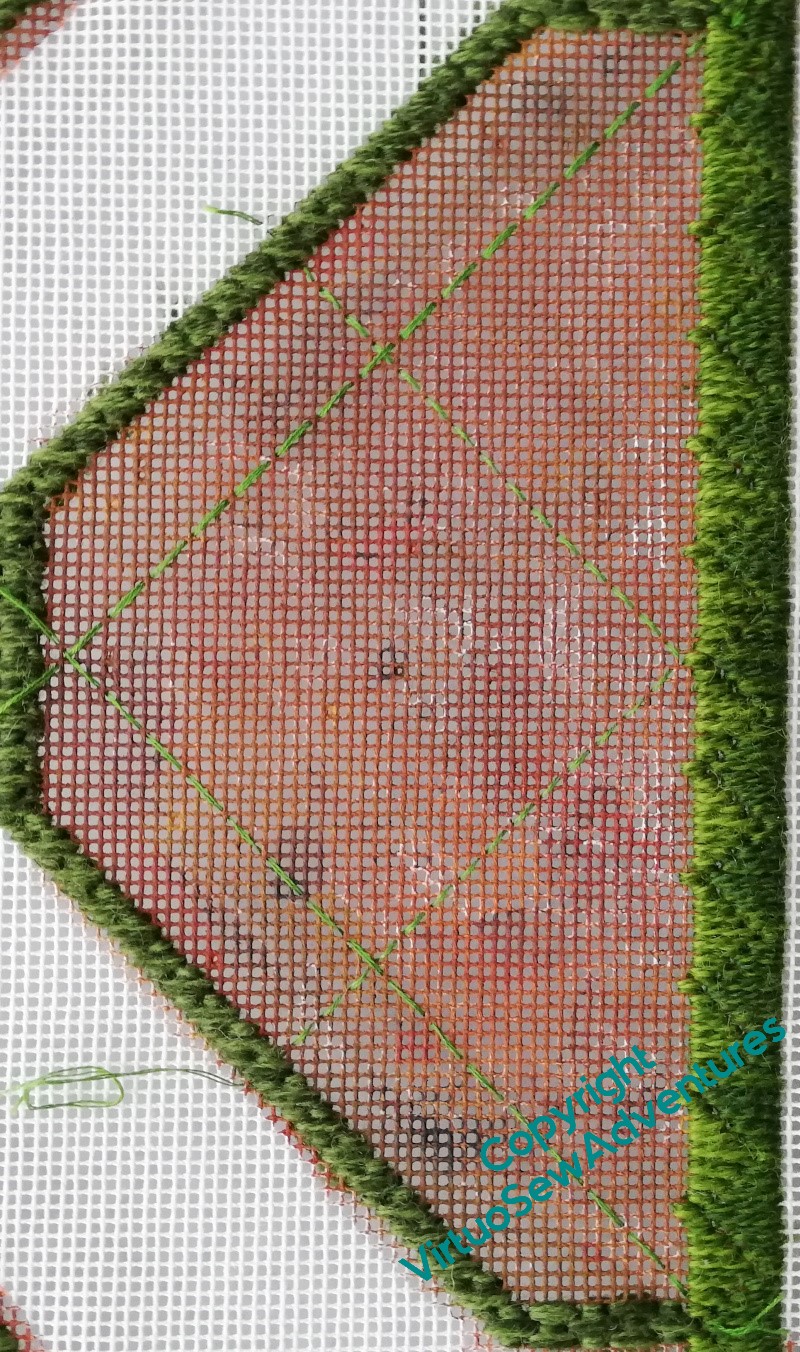
I started by running tacking stitches in stranded cotton so that I could look at the divisions they created and make decisions based on those, rather than using the wool. Tapestry canvas is a destroyer of thread, and it’s rare that you can reuse much of it if you have to take it out. I’ve plenty of stranded cotton, and I can reuse it a few times for experiments – just not for the final piece!
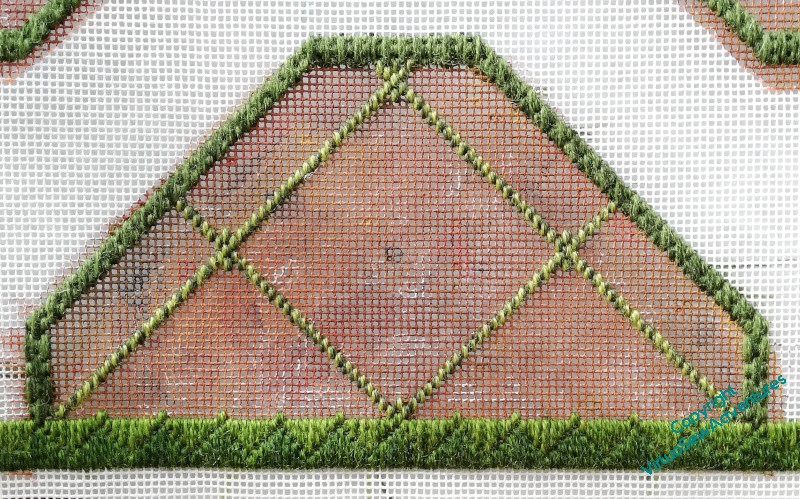
That seemed enough of a division, so I pulled out the stranded cotton and reinstated the new lines using short straight stitches in two shades of the Paterna.
I’m trying to use all the yarn in blends. It makes for a livelier effect, and given I’m not enamoured of Yarn Chicken, it will also eke out some of the yarns!
Once I’d looked at the first couple of intersections between lines, I decided to add a bit of subtle emphasis. At this point, I had no idea what stitches I would be using in the “beds” (to retain the link to gardening), but I somehow felt that I needed to blunt the apex of the diamond and triangle shapes.
I couldn’t tell you why – any ideas?
More progress on the corner borders
I wondered, once I’d done the large squared daisies and recovered from the experience of the one which kept going wrong, whether I should use Diagonal Rhodes Stitch again, or do something else, so here I was experimenting with a sort of fill pattern using upright cross stitch.
And no, both the thread (too pale) and the stitch pattern (somehow too incoherent, which is an odd thing for such a regimented stitch to look). Rhodes Stitch it is, then.
Ah, but what size of Rhodes Stitch?
The larger one, I decided in the end. This isn’t to be a cushion for leaning on, and although the “boss” created by the larger Rhodes Stitch had very long floats, it created a really lovely contrast with all those stitches going down in the middle of the Squared Daisies.

As you see here.
Now it’s done, I really like the look of this pairing. I think Jo Ippolito Christenson backstitches between her stitches, which I’m not going to do. I think this is a good enough recollection of the inspiration as it is, while staying true to itself as a piece of canvaswork.