
Tynemouth Priory, Second Installment
I began by transferring the outline of the headland and priory to a piece of linen, and then paused to puzzle over it.
Starting Headland And Priory
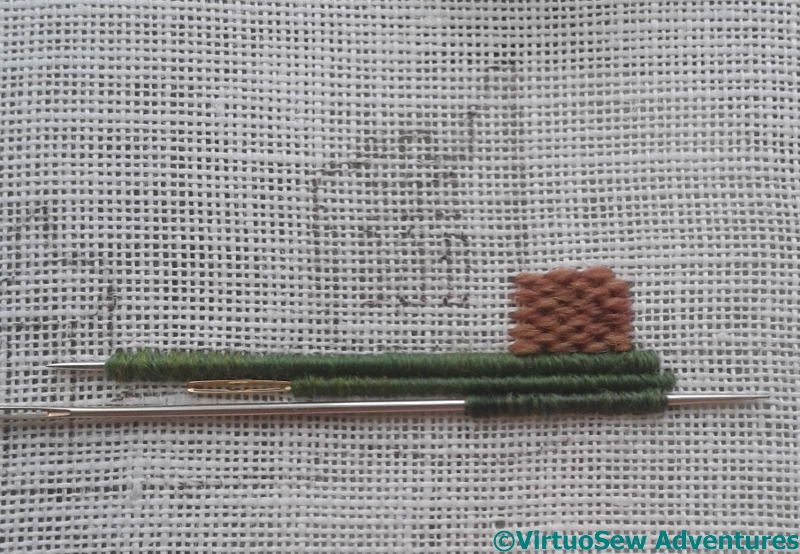
I want a slightly matte effect as the basis of this layer, so I’ve used crewel wool. For the base layer of the buildings, I’m using brick stitch. It won’t be quite even, because although it is a square fabric, the linen thread is quite slubby, making it a less-than-evenweave. That doesn’t matter, as the details aren’t going to be especially fine.
For the grass, I’m using the technique I learnt with the ground of “Eve in the Garden of Eden“, but using tapestry needles instead of knitting needles.

Comparing Photo And Embroidery
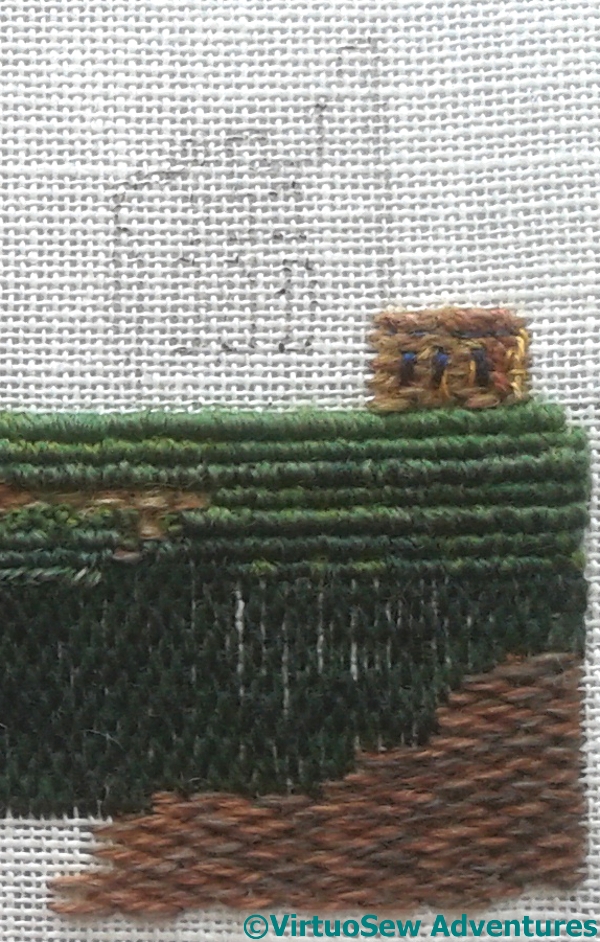
I am using one of the photos I took as the reference for my stitchery. If you click and zoom in on the embroidery, you will see that I have already begun to add more stitches in different threads and colours on top of the base layer of brick stitch, even before finishing the green of grass and slope or beginning work on the cliff.
You could say, I suppose, that I am using the oil painter’s technique of beginning very broadly, and gradually tightening up the details, modifying colour and shape, bringing the whole thing gradually into focus. This means that as I make more and more progress, the effort involved will become more concentrated as well – fewer stitches, but more looking before I stitch. When I was watching the BBC One show “The Big Painting Challenge”, one of the judges, Lachlan Goudie, noted that the contestants weren’t really looking at what they were painting, and added that doing so is really much harder than people think. He’s right. What he’d think of doing the same, but with stitchery, I don’t know, but he’d probably think (correctly!) that it is adding substantially to the difficulties!
First Layers Thought Out
In the intervals of concentrating on the details, I continued to stitch the various levels of the headland. I used different types of needle to give different heights and thicknesses of ridge on the ground, and then used two different very dark greens for the shadowed area of ground which is on a much sharper slope. I used a sort of random Bargello stitch here, which I hope will create the effect of slight changes in the shadow on the ground. It does when I get the lighting just right, but this area may need more work when I’ve assembled the whole thing, because I can’t rely on precise lighting in the various exhibitions that the Embroiderer’s Guild are planning.
Finally, there is a cliff section going down to the beach and the water. I’ve simplified this section substantially, because it mustn’t compete with the vessel when that is added, and also because my reference photos just don’t provide enough information for me to do a sensible job.
I like the effect you have achieved with wrapping the tapestry needles. I will squirrel that technique away for myself.
I think you are doing a FANTASTIC job! This piece has so much interesting structure.
Like, Carolyn, I’d like to copy your technique with the tapestry needles, may I?
This is looking great Rachel! And I agree with you and the judge on the tv-program that looking at your image or design is probably half the job.
The effect of the grass is wonderful! What a complex piece this is!
I love the curly grass! Perfect. The brick stitching works well, too. As for the dark stitches, I think your instincts are right here (and vertical stitches look darker than horizontal ones). Your fabric show-through sounds like a chance to get the Inktense out. Let some dull, dark green soak in from the back, with some sneaky touching up from the front if necessary. Or Indian ink from behind. That will reduce the contrast between fabric and thread and solve the problem.
Such special and unique skills of stitches. Great textures.
It’s coming along very nicely Rachel! Looking at the image or source really is important if you want to replicate it in any way. The problem I had is each time I looked at the image I saw something else! I love your different stitch combinations to get your different effects.
The stitch combinations work really well – you have a got a fabulous range of textures already!
Well, I must say I loved seeing what you were working from in the photograph. I did enlarge it and went back and forth between photo and stitching, and it’s amazing to me to see it coming to be. I would not ever have thought of using different needles to create different textures. I have favorite needles and stick with them, but I may play around with that a bit soon! Thanks for prompting me to think.
Love the different textures which are appearing. Good idea using different size needles. brilliant work.