
The Worktop bin – finished
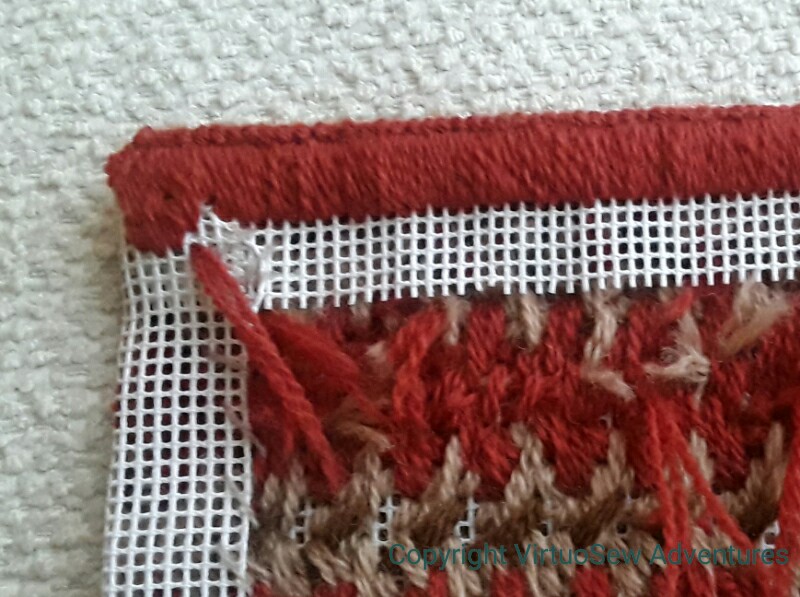
Edges turned in
There is always more “engineering” involved in these projects than you expect. Once I’d turned in the edges and done the herringbone stitch “piping”, I realised that the top of the bin was probably going to be on show on the inside. I found some felt to line it with, but since it was a spare offcut, I decided to run a line of straight stitches on the inside, just in case there wasn’t enough of it!
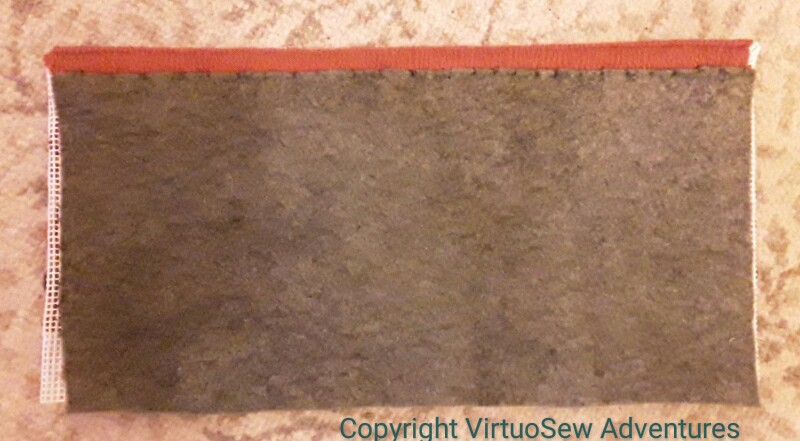
Felt lining attached
I attached the felt with small stitches, not too tightly, but just enough to make sure that it doesn’t move unless I want it too. It’s almost a pre-felt, not too dense, so it showed some adventurous tendencies. Some firm treatment, a tug or two, and it settled down nicely.
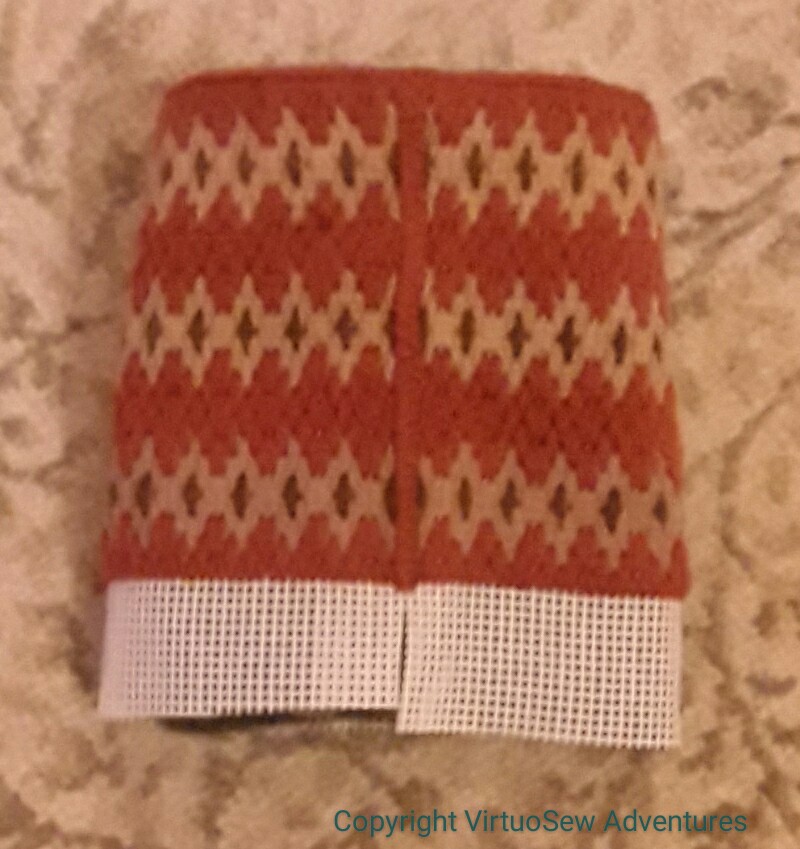
Vertical Seam
Which allowed me to consider tackling the seam turning it from a flat piece to a tube. After some of my usual thoughtful staring, it finally occurred to me that I already had the answer: Herringbone stitch, just like the edge finish at the top.
Obvious, really, isn’t it! It makes a sturdy seam which won’t permit much lateral movement, and since I’ve used it on the top edge, it doesn’t introduce yet another texture.
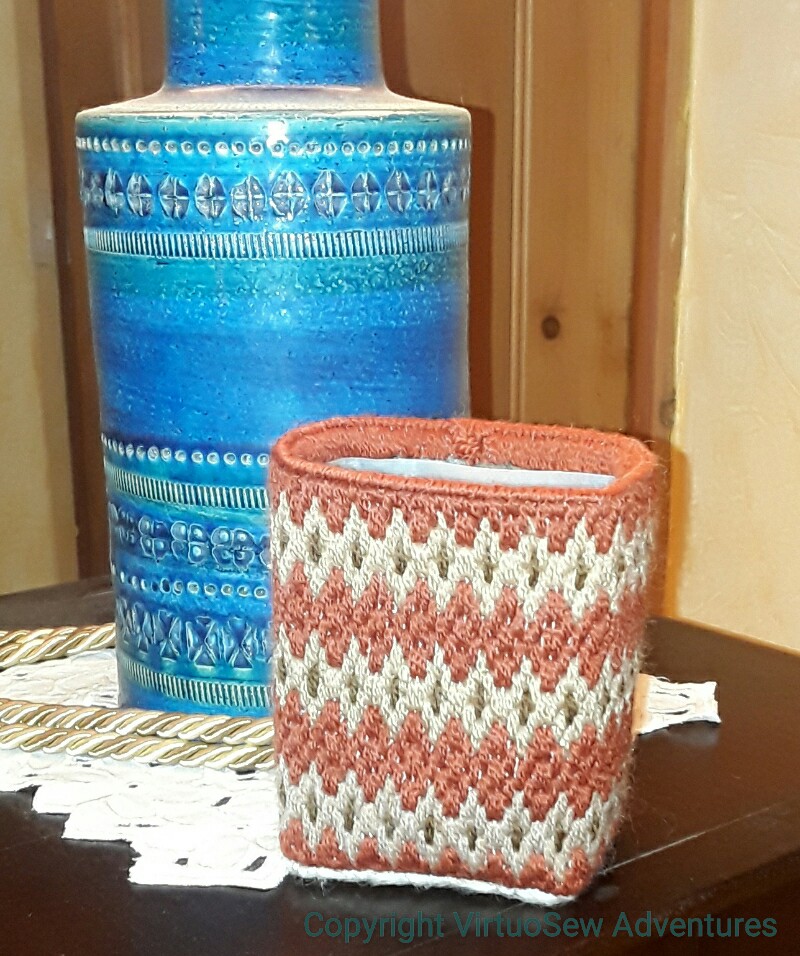
Finished and in service
When it came to sorting out the base, I put the sawn-off milk bottle inside to make sure I made everything fit, and folded in the canvas, holding it with a few rough stitches.
Finally I attached a piece of very dense felt to the bottom to hide all the canvas edges and make sure they don’t scratch any of the furniture. It is already in use, and you have to admit it’s very much better than an unclad sawn-off milk bottle would be!
Love it! Congratulations on a finish 🙂
Useful and beautiful. Wm Morris would definitely approve. And properly finished, which always wins bonus points. I think your edging is rather similar to what I use on my plastic canvas boxes – I call it ‘two steps forward, one step back’ – although mine is usually over two threads so looks less like piping. It pads itself, so covers well and wears well.
The lines of pattern echo those on the lamp base, so more bonus points there!
This is fabulous! I’ve really enjoyed watching you create this piece, and it just goes to show that if you really want to make something beautiful you can!
Great finish! That’s an area where I seriously lack. I embroider, but I don’t finish them to lovely pieces like these. I have to start doing that.
Great idea! I have a fabric “bag” with a fold over top that I use sometimes when I am sewing, but for crochet I just use a plastic bag, this would be far more attractive!
MUCH better than a bare milk-bottle! Well done.
That is a lovely finish and your description of the felt with ‘adventurous tendencies’ made me giggle!
Very clever engineering!!
Love it!! Sometimes its all in the finish and you’ve done a wonderful job.
I like the idea of “thoughtful staring”, so much better than “I haven’t a clue what to do next” …….
That looks great. (I’m get looking a a collection of plastic drink bottles that I could make into bins and cover like this.) As to the ‘engineering’. The difficulty with this is that many people forget about it when they strt stitching, get to the end and think, hell, and the piece goes in the bottom draw.
This turned out sooo pretty! It’s good to surround ourselves with pretty things that make us smile.
Thanks so much for linking up to last week’s Stitchery Link Party. Aloha hugs!
oh yes, the engineering. It’s the engineering that has smoke coming out of my ears. Perfectly executed though Rachel, as always.
I’m completely amazed! I’ve never done anything like, that but it does make a great little bin.