
Category: Camberwell Panel
The Camberwell Panel – Four
Cotton And Satin
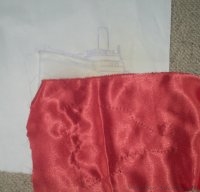
This shows the cotton twill with the basic outline transferred to it for embroidering. I decided that the whole ship would be made on this cotton twill and then the twill applied to the background fabric over the sky and sea fabrics, with some padding to raise it. I checked with my client (my cousin, remember!) to be sure that she was happy with raised and padded appliqué, rather than wanted something very flat, and on receiving an intrigued and enthusiastic “Go for it” started planning what would be padded and by how much.
The photo also shows the satin that I chose for the hull, with the design, again, outlined in running stitches.
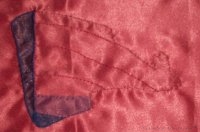
Progress on the hull
The next stage was to apply a layer of navy net and a layer of navy gauze to the satin where the hull was in shadow, and stitch over those edges in navy satin stitch. I built up several layers of net at the forefoot, with lines of stitching to add form.
Then I added a layer of tawny net to the light side of the hull to cloud the colour slightly and stitched along the main plating lines of the hull to help reveal the shape.
The next stage on this piece was to stitch over all the edges that will not be covered by other stitches and fabrics to ensure that no raw edges show. At various stages in the project I chose different stitches for this job, but in this particular case I used buttonhole stitch to make the edge crisp and clear.
The Camberwell Panel – Three
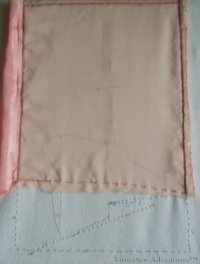
The Sky being sewn into place
I could have left the background until I had made some progress on the Camberwell herself, but I wanted to be sure I kept the design balanced, and having the background ready so I could lay the cut outs on it to think about seem the best way of achieving that.
The fabric for the sky is a pale apricot coloured georgette. At this stage I still had not decided whether there should be two layers, to create a deeper colour and more dramatic effect, but as I was going to be working on the ship herself on a separate piece of fabric and applying it later, that decision could be delayed. I used a zigzagged back stitch in rust coloured embroidery cotton to attach the georgette to the backing.
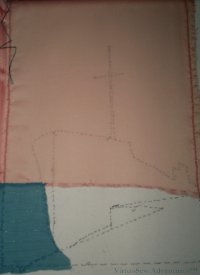
The Sea and Sky
The blue-green fabric I chose for the sea has a glittering thread running through it at intervals. I was hoping that this would create the effect of sunlight sparkling on the water, without drawing unnecessary attention to itself.
I also found a piece of white cotton twill – slightly lighter in weight than the material used in uniform “tropical whites” but very similar – which seems the perfect choice for the base fabric (for so many reasons). This fabric provided a sturdy basis for the superstructure and the hull, which would involve both fabric appliqué and embroidery.
The Camberwell Panel – Another Long Project
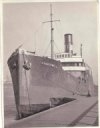
Photograph of the Camberwell
The Camberwell Panel was a commission from my cousin. I documented the design and progress of the work for her while I was doing it, and she has given me permission to share it with you as well.
The Camberwell was the ship her grandfather retired from in 1938, and when we found this photo in the family home, we thought it would make an ideal subject for an embroidered panel. Although the Camberwell was a merchant vessel (a collier, in fact), the looming prow in the picture reminded us of the liner posters of the 1930s, so that was to be the inspiration for the panel.
That idea in turn lead me to decide to use appliqué as the basic technique, embellished with embroidery. The flat blocks of colour used in the posters of the period would be most easily produced by appliqué, and it is a technique that I’ve never used seriously before. I thought it would be fun to try.

Camberwell "Sketch"
So I began by scanning the photo and then tweaking it digitally to get a sketch. With Master Mariners on both sides of my family tree, the last thing I wanted was to get the rigging wrong!
Once I knew what size the panel was to be (decided on the basis of where it was to hang) I could use a projector to project it at the appropriate size and create a basic pattern.
Then I spent some time playing with colour schemes. We settled on something vaguely reminiscent of the the Art Deco period …