Tag: Violets
More Experiments with a Parlour Dome
Once I had put together my coiled pot of cord, and, at the very least, I could feel I had something to play with, I had a look at how to assemble the parlour dome display.
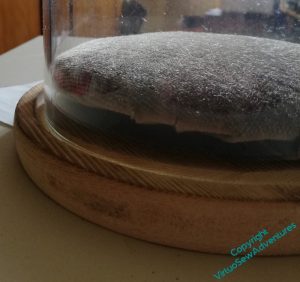
I intended to set the pot upon a little velvet cushion; that will give the sense of something “presented” rather than simply stashed away from the dust. Furthermore, I had some cotton velvet in a sort of inderminate brown, taken off a piano stool, which I thought would combine being unobtrusive with being sufficiently present. However, my first attempt to stretch the velvet over the padded card has left me with something that sticks a bit, and raises the card (and thus anything on it) rather further than I anticipated. More thought needed here, I feel.
While that thinking continued, I thought I might as well play with the whole display, to find any other difficulties so that I could think about those as well.
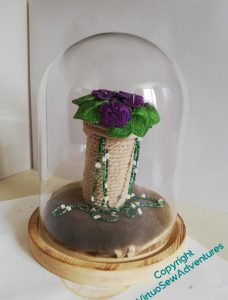
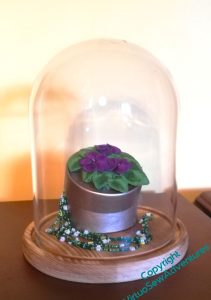
The tea-dyeing has worked, I think: the daisy beads stand out nicely, but it’s not the sort of high contrast that would overwhelm them.
And I think the beads flowing out of the pot and down onto the velvet work as well. The textures and scales seem to be properly in tune with one another.
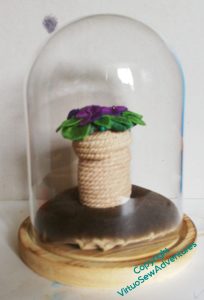
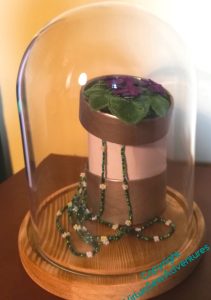
But I think the pot is too tall, and the violets stick out a bit too much. Violets are “mat forming”, apparently, so I would expect them to follow the contours of the lid a little more closely, shading the beads.. And somehow, with the pot so tall, I feel that the violets can’t breathe.
And indeed, although this photo is rather hurried (you can even see the pin holding the violets in place), I think it shows what I mean. The shorter pot gives the violets more air, and somethow that makes for a pleasanter display.
However, I do still need to find a solution for the Problem Of The Cushion!
Experiments with A Coiled Pot
You may recall that I had an idea to combine the Daisy Beads and the Stumpwork Violets into a little display under a parlour dome. The colours and scale don’t work with the main panels, and besides, both items are tied specifically to Mary in a way that nothing else is.
My first thought was a gold trinket pot, but so far I have entirely failed to find a pot of the right sort of dimensions. For some reason, everything I could find was too wide or too high, or not the right surface for gilding.
So after some frustration, I decided to tie the display back to the excavations by using a coiled pot made using braid or cord. It should be slightly reminiscent of the baskets used to carry away spoil from the excavations.
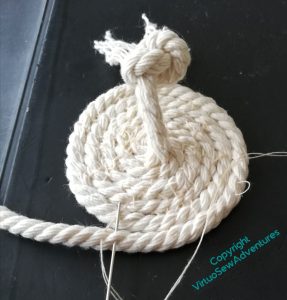
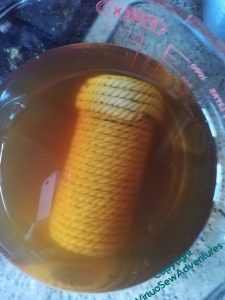
After some experimentation, I settled on piping cord, sewn together with ordinary sewing cotton as I wrapped the cord around a former (a spice jar, since you ask). Even that involved some unpicking and restitching.
When I’d done it, however, it was too white and stark, not a kindly background for the Daisy Beads. Hmmm…
So that is how I found myself tea dyeing a coiled pot made of piping cord!
More thoughts on display
Two elements that sprang into mind very early in my work on the Amarna panels were the Clump of Violets and the bead necklace. The violets are to call to mind Mary’s exasperating experience, familiar to any language learner, of having useful vocabulary and structure retained only with the greatest of efforts, while the entirely useless just sticks – in her case, the Arabic for “violets” stuck in her head with no difficulty, whereas the words for “bread”, “bath”, or “dig” proved recalcitrant. The bead necklace is my reinterpretation of one of hers, owned in childhood and subsequently lost, like the necklaces she helped to excavate.
These two pieces link directly to Mary, and not to Egypt itself, and because of that, and because of their colour, they don’t sit well with the main panels, and I was left somewhat perplexed about them. Until something brought parlour domes to my mind, and the lights went on!
I thought that maybe if I used the clump of violets to top a golden trinket box, and allowed the necklace to spill out, the two pieces might live together happily as my representation of Mary herself. I found a small round cardboard trinket box and sprayed it gold (a very pale, insipid gold, it turned out, too, not at all what I wanted!), and began to experiment.
I think the whole thing needs to sit on a cushion within the dome, and the trinket box should be between the tall experiment and the short one in height, and a little narrower to allow the leaves to droop over the edge.
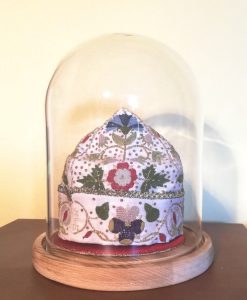
So while I work on achieving that, I have put away both violets and beads, and replaced them in the dome with the Glittering Nightcap.
Which is so happy that it is refusing to give it back, and I will have to buy another parlour dome for Mary’s trinket box!
The Stumpwork Violets Finally Planted
I wouldn’t care to do much real hand embroidery on a fabric “doped” (after the fashion of early aeroplane wings!), with the mixture of inktense and aloe gel. Once it had dried, the calico had something of the texture of a cheap printed furnishing fabric, and did not recover well from having holes poked in it. I suspect it would prove rather abrasive on more delicate threads, but in this case I was simply using stranded cotton.
And there were many holes poked in it – one for each of the elements. I turned back one of the two wires at the base of each, to help to support the curves I was trying to set into them, using the wires around the edge. The other wire I poked through a hole which was in turn poked through the fabric using a stiletto. Bending that wire back on itself should have kept the elements in the place, but as with all of my embroidery adventures – it wasn’t quite that easy!
When I fished out the packet of stamens from my second Frostings Box, I found that there were three strands of each of three types, and picked the most delicate gold ones, so as not to overpower the flowers. So that worked out nicely – one strand for each flower! – and caused three more holes in the calico..
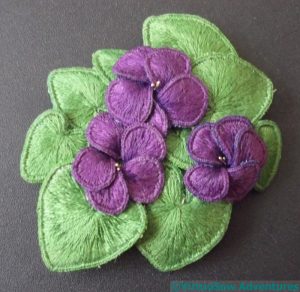
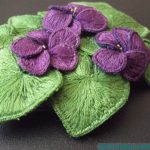
The elements were still wriggling a bit, though, so I decided to put some padding behind the clump to help to entrap the wires, and also to enhance the domed effect that I was hoping for. That meant that it made sense to trim the padding and enclose it with the calico, creating a single, “free-standing” clump of violets. The elements are held in place with minimal stitching, the curves nestling together, and the wires and threads entrapped in the padding. It wouldn’t stand up to much handling, but then it won’t get any!
Click on the pictures to see them at full size – I think they give a good sense of the dimension and “loft” I managed to achieve.
Can you tell that I’m rather pleased with my violets?
Returning to the Stumpwork Violets
I finally gave myself the necessary encouragement to get back to the Stumpwork Violets.
Er, that is to say, I spoke to myself very severely, and pointed out that it was looming over me and needed dealing with!
I used my new Inktense blocks to experiment with colouring the base fabric on the last few leaves, painting over the top with the aloe vera gel suggested by Deanna over at Eclectic Meanderings as a substitute for textile medium.
I also used the aloe gel on the spare piece of calico I painted as a background for the clump of violets. I don’t intend any of this to be visible. It will just provide some dark green depths underneath the clump, rather than leaving me worrying that the fabric underneath might grin through if the leaves move. As with the clothing on Loading The Felucca, I don’t want to stitch everything down too much, so this will relieve a certain anxiety.
In this context, the effect of painting over the marks with the aloe gel, deadening the marks and blending the colours, is not a problem. I’m not keen on the overly blended effect with ordinary pastels, as it looks a little mannered, but as all I want is that a sense of depth behind the violets, I’m content. Given how much dust those few strokes created, I certainly would not want to have an un-fixed piece of fabric anywhere near the finished Dreams of Amarna panels!
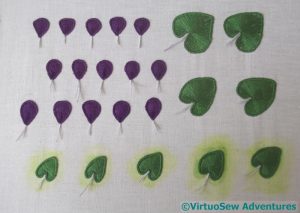
While the aloe-and-inktense blend was drying, I tackled cutting out the elements of the stumpwork.
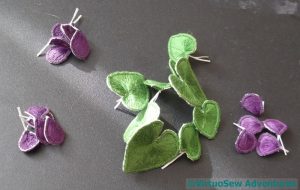
In spite of all my care – and they do look lovely in the sunlight, don’t they! – I ended up with little white edges on all the pieces.
So, out came the inktense blocks and the aloe gel again, and I spent some time colouring the little white edges and then painting gel on them.
I wonder whether I might be avoiding the assembly process…?
Banafsiga – Violets
In her book, Mary Chubb describes the sort of frustrating experience that many language learners will recognise, in which a word completely useless for present practical purposes somehow sticks in the mind, while the immediately useful and necessary words just don’t. In her case, she says that while the Arabic word for “bread” required constant effort to remember, for some reason the word for “violet”, transliterated in her book as “banafsiga”, in her words “perched, fragrantly and effortlessly in my brain from the start“.
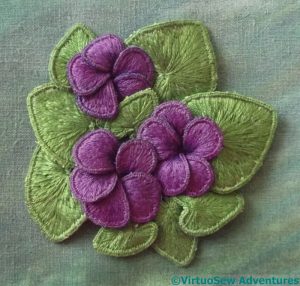
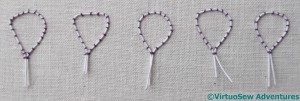
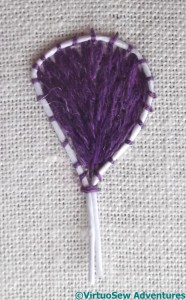
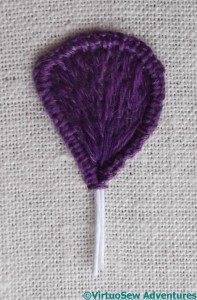
Naturally, I’m going to have to do some violets to represent the experience, and I’ve decided to do them in stumpwork. I’ve done a little raised embroidery – I suppose those fellows Loading The Felucca count, and there’s always the Kiwi – but wired stumpwork is new. I won’t claim to be approaching it full of trepidation, because no-one would believe me, but I certainly have no idea which bits I will find easy and which I will find hard.
Actually, as it turned out, the first difficulty lay in working out what a violet should look like. I wanted the simple, old-fashioned violets that Mary, brought up in the early twentieth century, might have known, and my image sources online kept on introducing African Violets, which apparently aren’t the same thing at all.
In the end, following a suggestion from a Twitter friend, I went rummaging on the RHS website, and found a complete rundown on viola odorata, which told me it has five petals, heart-shaped leaves, and is “mat-forming”, which I take to mean it spreads out rather than up. I don’t know how many flowers or leaves my bunch will have in it, so I’m expecting to do more than I need and pick the best.
I’m using ordinary stranded cotton on this occasion (“Gosh“, I hear you cry, “What happened to all the eccentric yarns you use?“, to which I reply, “There’s paper-covered wire in there – what more do you want?“), and in this first flower, I’m going to use two strands for the embroidery. If I think it looks a bit chunky, I can always move on to single strand for subsequent flowers.
Thus far, I’m rather enjoying it. I may yet move on from these violets to the wired needlelace rose I saw in a Needlecraft magazine twenty-five years ago, and never got around to…

