
Tag: apparel
Jacobean Coat – Large bloom

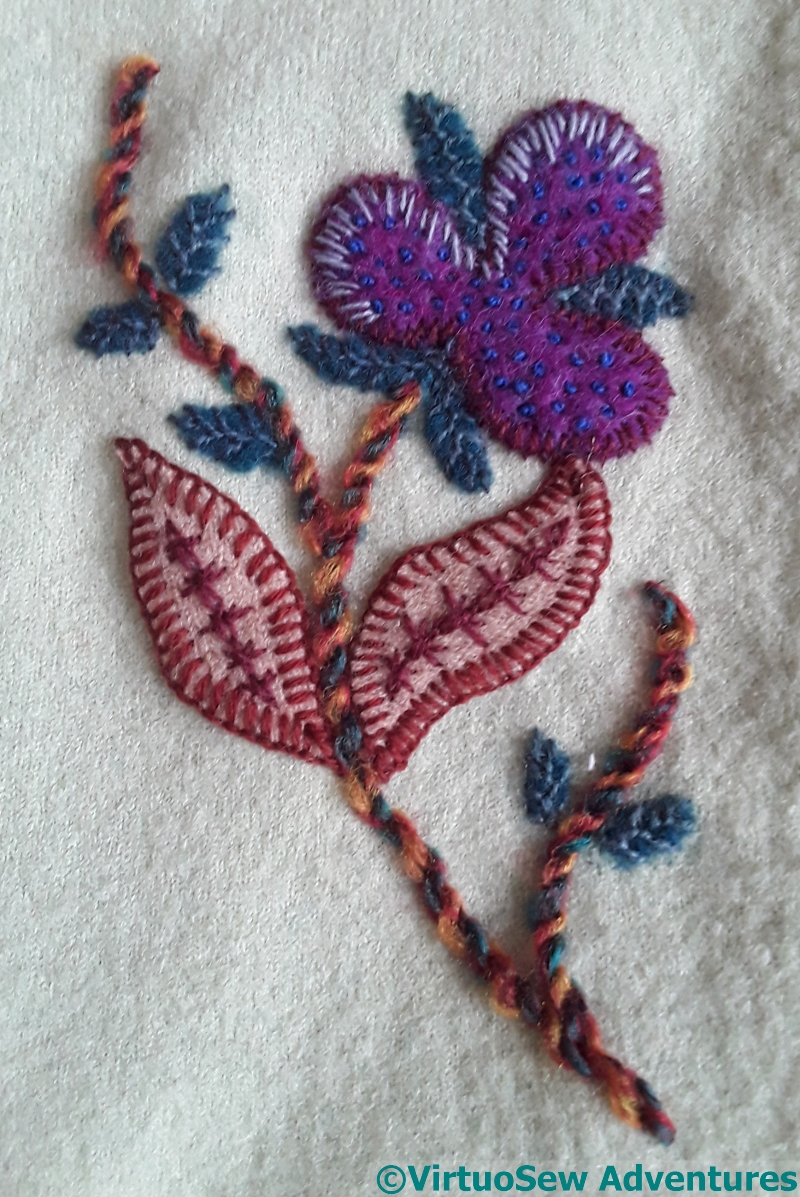
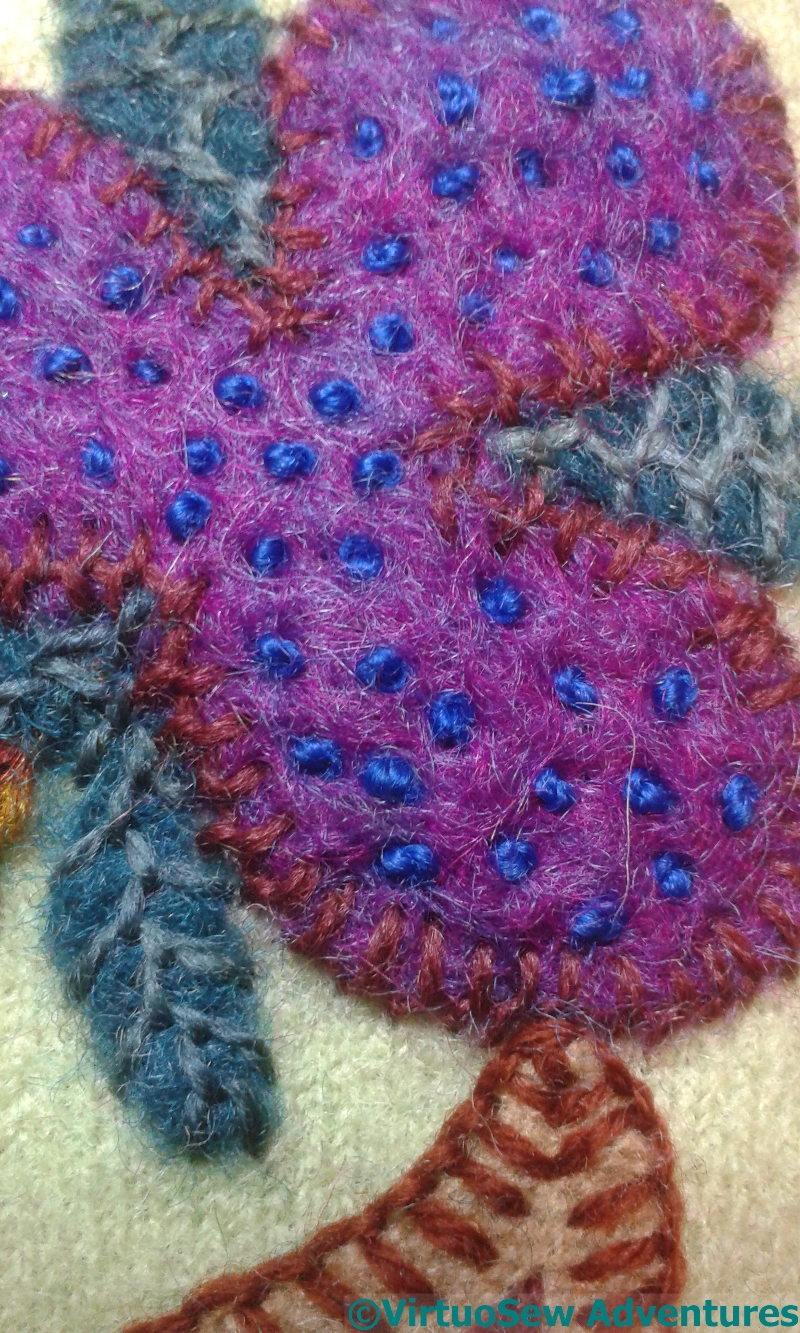
You can see here that I’ve reversed the colours of felt used for the same flower shape on the sleeve, and added tiny blue stitches as highlights.
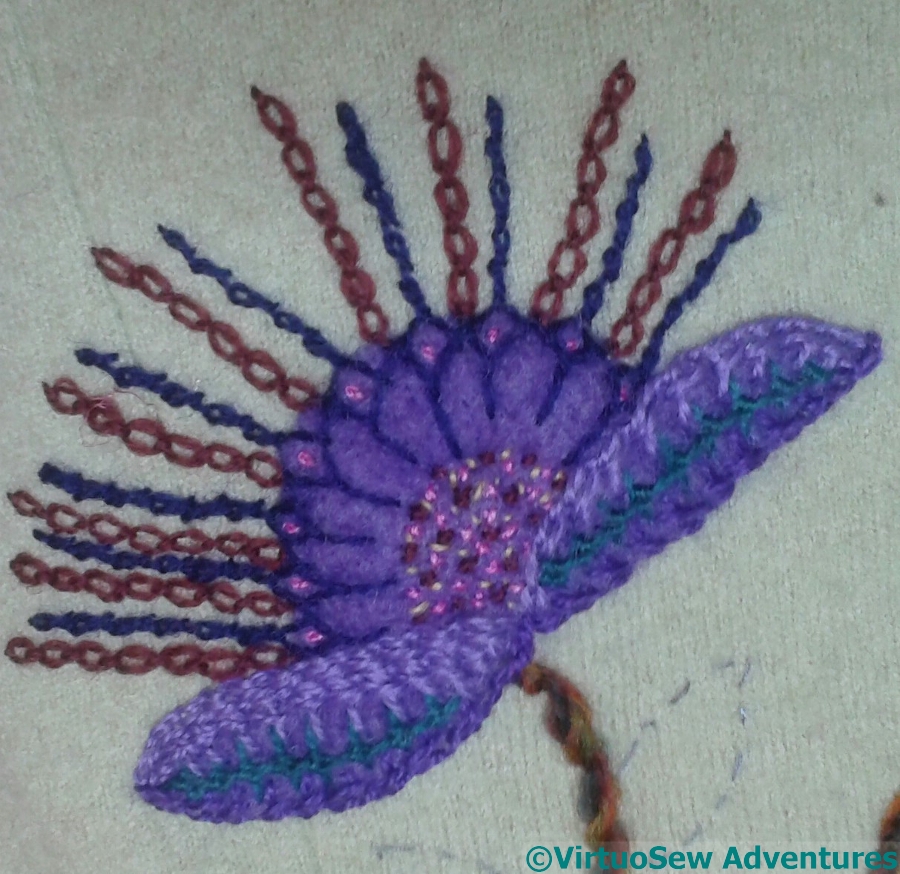
Chained blanket stitch, crested chain stitch, fern stitch, and a slightly freeform variant of feather stitch adorn the various petals. The light blue is used to tie down some trellis couching and for three tête-de-boeuf stitches to lighten the bowl of the flower.
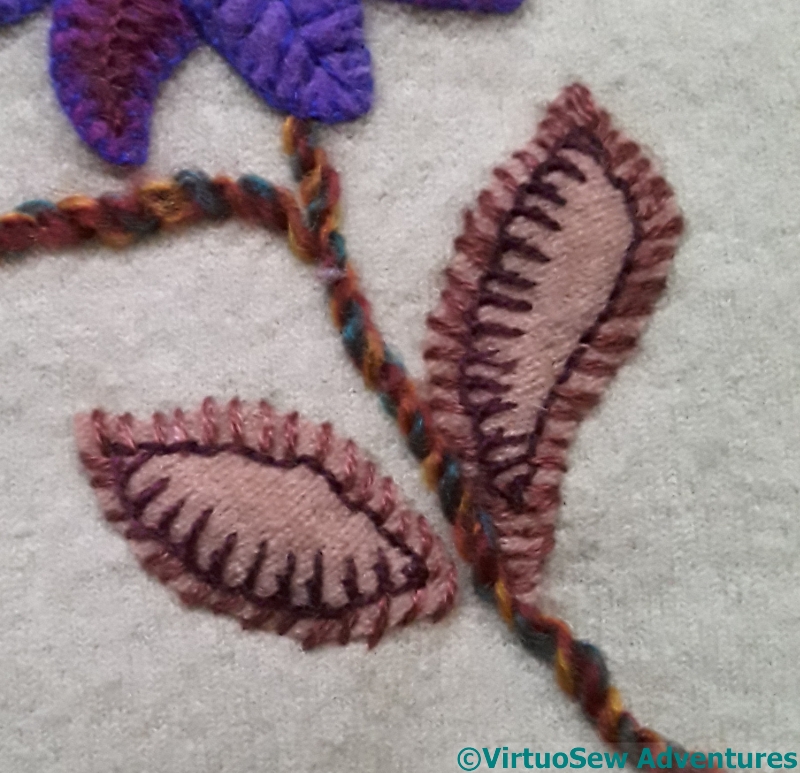
The edges of the fawn leaves are simply caught down with an overcast stitch, but the spines are worked in Siennese Stitch, found in one of my multitude of stitch dictionaries. The circle is one of several, edged with up-&-down blanket stitch, and speckled with what Barbara Snook describes as “Knotted Stitch – Danish origin”. At the extreme right there are two small brown leaves, with reverse chain stitch stems and long straight stitches creating veins. The fabric comes from some thick walking socks which felted in the wash!
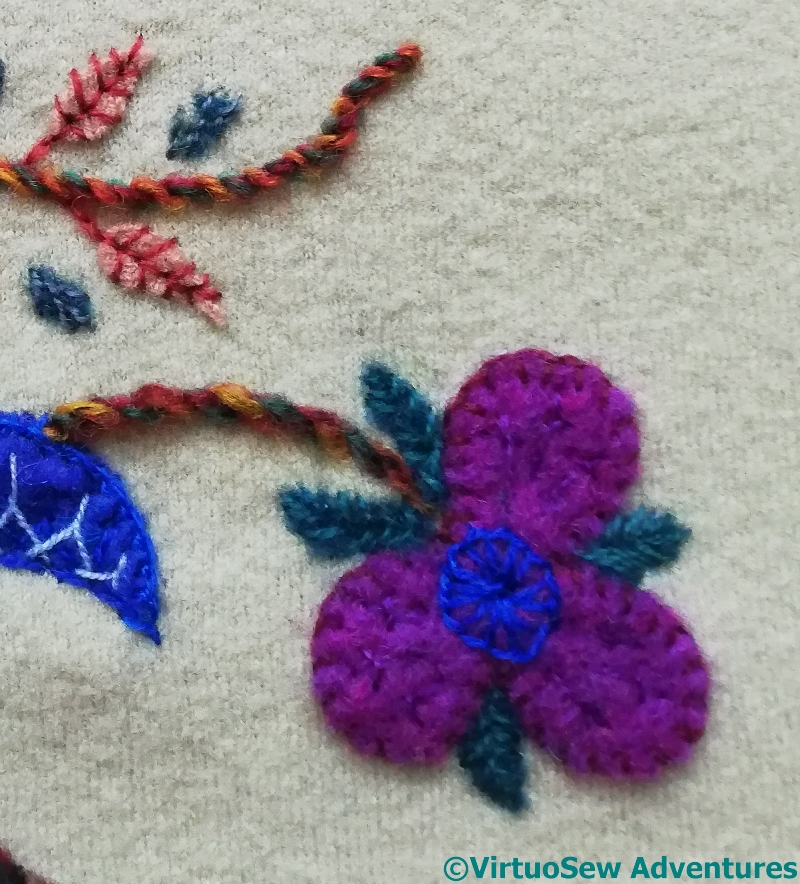
There were three of these three-petalled flowers (if that’s what they are!) and I worked each in the same way – blanket stitch edges, sword stitch for texture, blue central circle in buttonhole stitch, and teal leaves in fishbone stitch.
As you can see, deciding to keep some elements the same, or similar, has spread beyond the smallest leaves!
Jacobean Coat – Half-Circle Motifs
One of the exasperating elements of this project is that the lovely clear, delicate green of the fabric isn’t showing on any of the photos I am taking. This strange, rather disheartening cream fails to reflect one of the pleasures of working on it.
Here you see the side of the coat with the two lilac half-circle motifs. There are also three circle motifs, and two huge leaves, not to mention all the little teal leaves that I’ve not even applied yet.
The circles have been relatively easy, but both the fawn leaves and the two lilac motifs are giving trouble…
The first one of the two lilac motifs has rather lost the way home.
Somehow it is fussy, tired, and full of the wrong sort of detail. It’s also too dark. I need to reduce the dark blue and dark maroon stitching.
I’m not even sure that the felt will survive.
That said, I like the blanket stitch variation of the lilac stitches, and the green Reverse Palestrina Stitch.
This is a better version.
There aren’t as many colours, or as many stitches as in the version I’m not happy about. The fronds are in Cable Chain and Twisted Chain, and the purple trellis is couched with the blue.
Now I need to unpick the first one and come back to it, informed by the much better second version. I don’t want it to be entirely the same, but closer would certainly be better!
Jacobean Coat – the leaves at the base of the spray
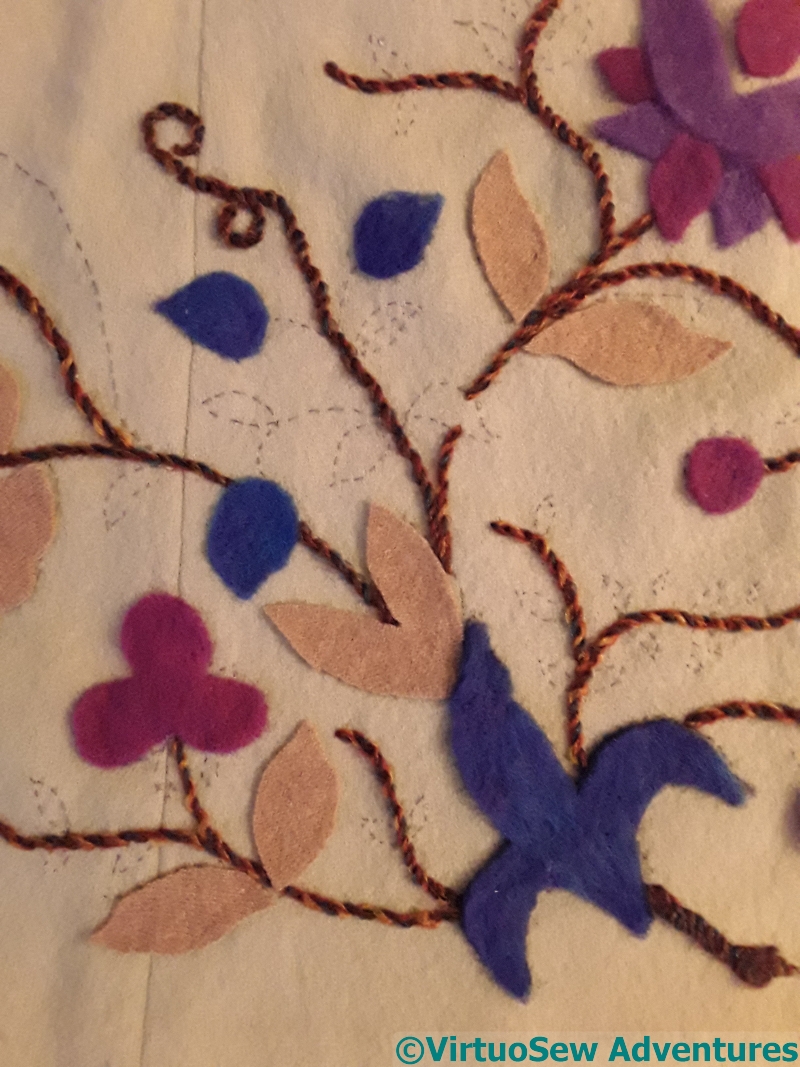
This photo shows the central section, with the major felt sections in place, and the minor ones left until later. That in turn means that the colour range is not quite right, because the greeny-teal is missing.
What it does show, however, is that the disheartening spotty effect I experienced with the Piano Shawl is entirely prevented by the couched stems!
Since my blue felt was made using layers of blended wool sliver it has some slight variation of colour, which I was hoping to pull out in my stitching. That may not quite work, but at least I can try.
I also want to make the fawn leaves much more varied, so although there are several successful treatments I could choose to use in all cases, I’m going to try to be more experimental.
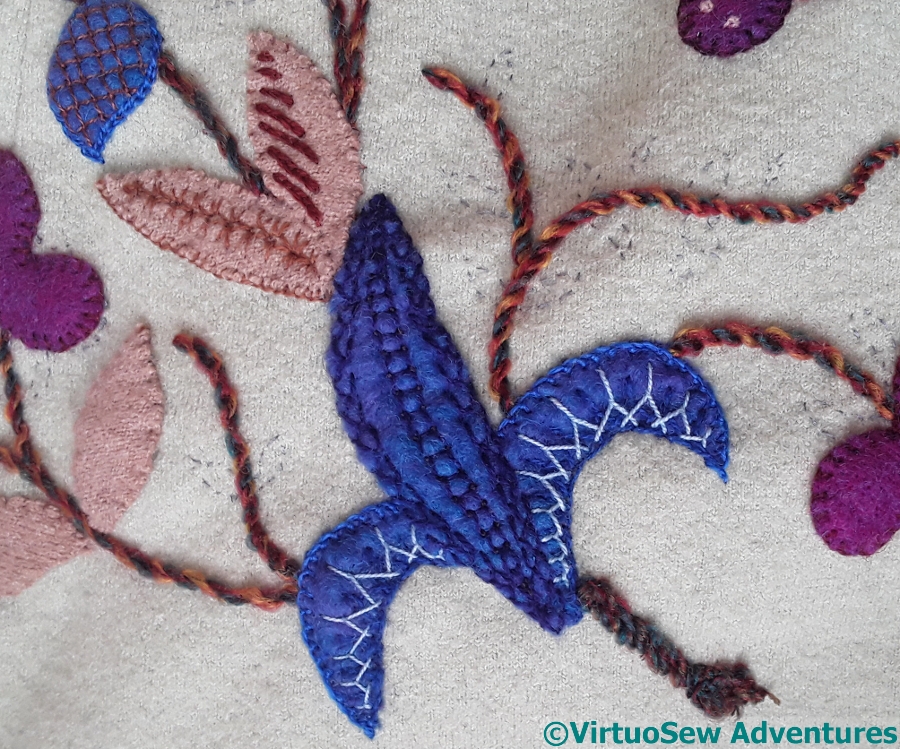
This photo is already out of date, because I’ve unpicked the fawn leaves once already, and I’m not entirely sure about some of the details on the large blue leaves. The light blue half-Cretan stitch may not survive to the finished garment!
There is a mid-blue knotted edging stitch on the top edge of the two outer blue leaves which I may have invented at the time, and certainly can’t reconstruct in the cold light of day. The spine of the central leaf is Square Chain, with the corners couched down with a darker thread, and the edge is closed feather stitch. There will probably be a lot of closed feather stitch – it is a useful stitch for the edges of these shapes.
Jacobean Coat – beginning on the felt
I haven’t put all the felt pieces all around the coat, because apart from anything else I have limited tolerance for cutting out bits of felt, but I have a good start made, and I can start playing with stitches, which is much more fun!
This is one of the most complex motifs.
The blue felt is one I made myself, because I didn’t already have a suitable one – which explains the thin patch at the top. Wet felting is not as easy in practise as it seems in theory!
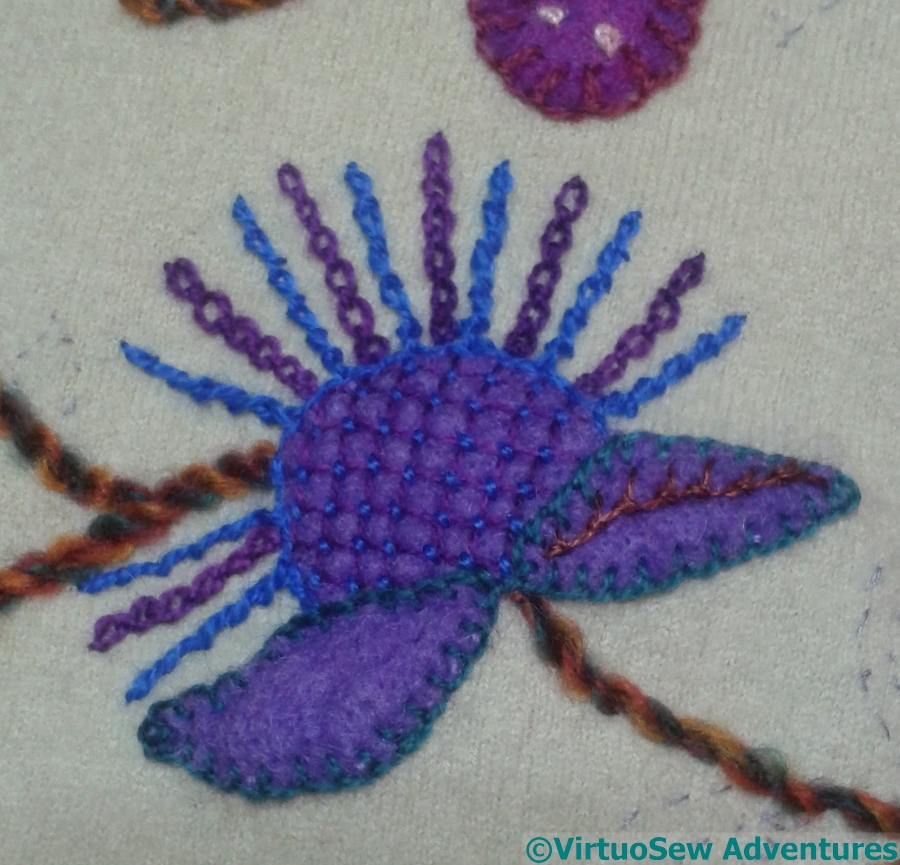
The teal leaves were easy, of course, because I have already decided to use feather stitch. After that, some thought was required..
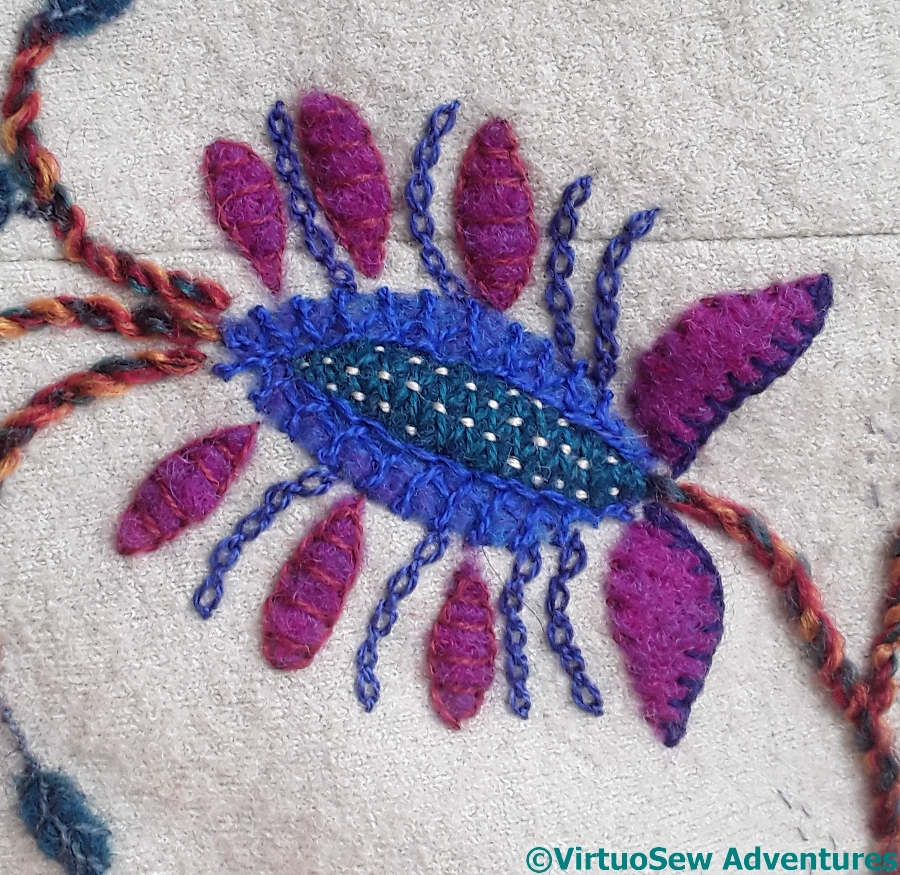
A teal trellis, couched with pale yellow, provides the “lift” here, and one of my favourite stitches, cable chain, provides the fronds. I’ve reduced the number of fronds – I think there were two between each petal – because I thought it would look fussy otherwise.
The blue stitching on the blue felt is Crested Chain. The colours are close enough to create texture, rather than contrast, rather as the slightly rusty pink square chain modifies the petal colour in a different direction to the dark blue chained blanket stitch of the leaves at the base.
As with all the elements of this design, when I have the whole piece more or less finished, I will expect to add further details and tweaks to balance it all across the piece. We’ll see…
Jacobean Coat – Sleeves – I was right!
When I finished the first set of embroidery on the sleeves of the coat I said I thought it might need Something More.
After some thought, I decided that the Something More in question was a bit of light. This required a little negotiation, as my client (my mother) had wanted rich colours, and had originally enacted a veto on the lighter ones I had picked out. But then, she’d not seen what I had in my mind, and once she did, my tentative suggestion of a few lighter bits was met with a definite “Yes”.
She also said that what I’m doing is not quite what she had in mind, but it’s better. Phew!
The first small, exploratory illumination was to add some pale blue stitches around two of the lobes of this bud (flower?). I didn’t want to add too much because, first, this isn’t meant to be actual illumination, and second, I felt that if I added these stitches all around, not only would I run into trouble in terms to angle and sense, but it would suddenly start looking a bit stiff and too “matchy-matchy”.
There’s a phrase I never used as a teen, even though I certainly had the concept…!

For the second sleeve, it was harder to settle on the best way to “lift” the motif. There was already the tiny tuft of pistil stitches stitched directly onto the fabric, which had done something a little similar.
For now, I’ve simply added a row of French knots highlighting the curves. The yarn is mohair, and has a lovely high shine which adds to the variation in the effect.
In case I needed to say so – I am really enjoying this project!
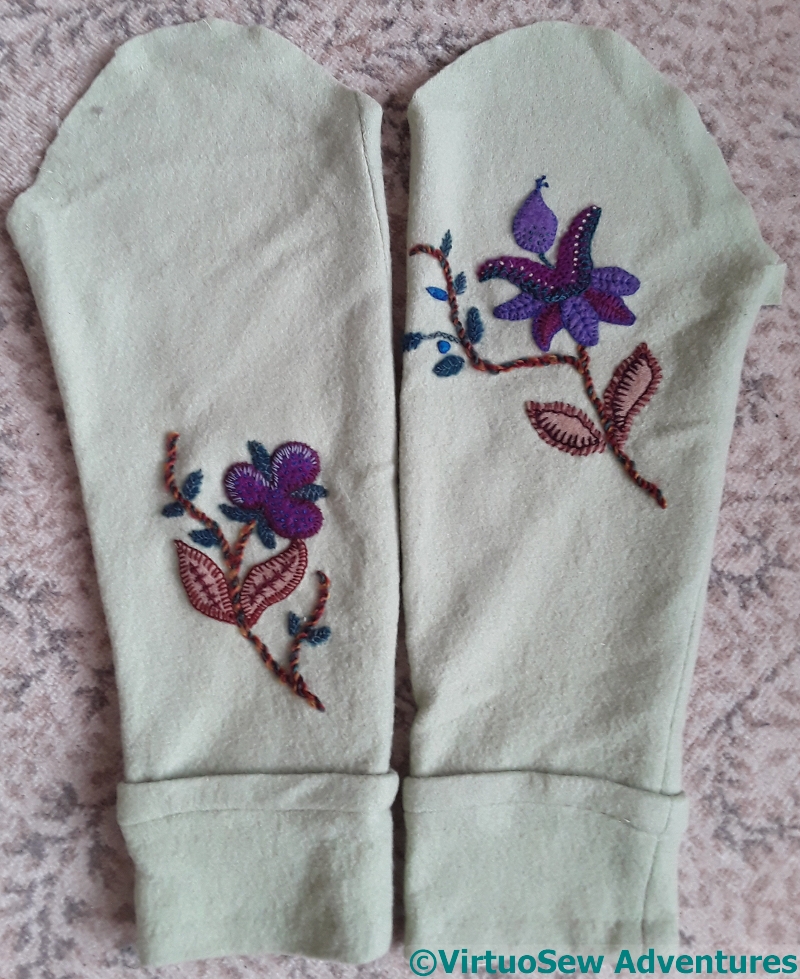
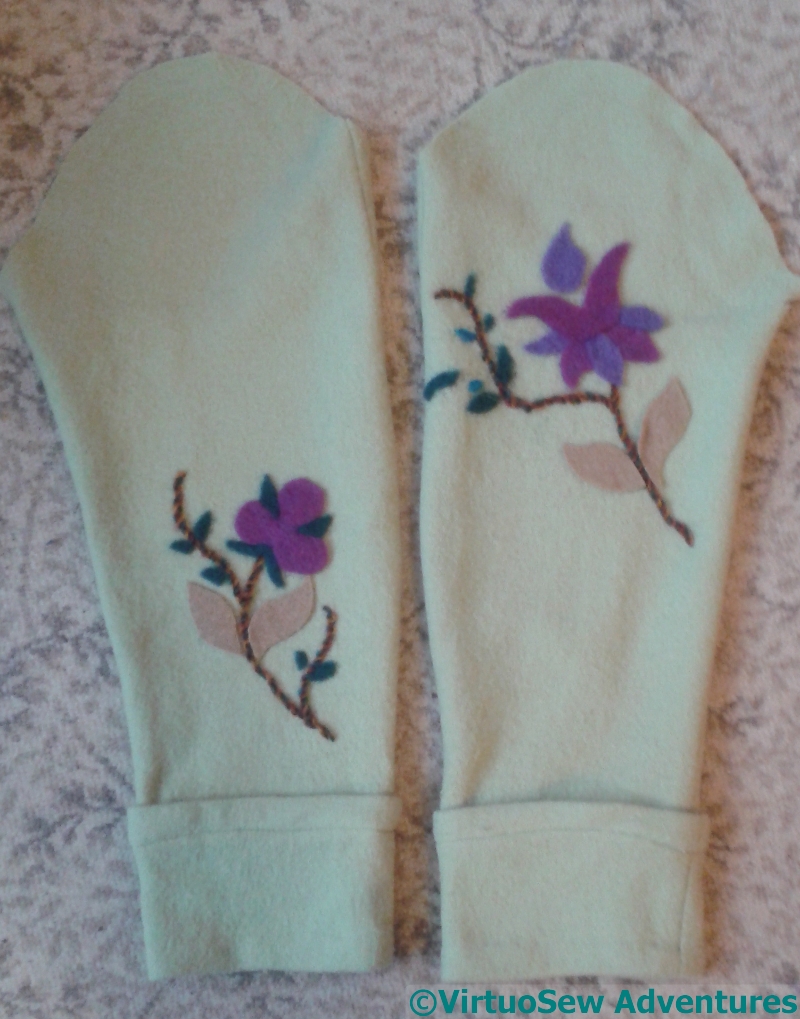
The Jacobean Coat – Sleeve Two Embroidery
The second sleeve began in the same way as the first, with felt motif elements lightly needlefelted into place. There is a similar motif on the body of the coat, but with the colours reversed. Whether I will use similar colours in embellishing it, I don’t know – wait and see!
I am removing the tacked design outlines as I go, at least where they show around the edges. It may not be entirely necessary, but it’s much more satisfying not to be spotting them as I work, and I know I would spot them in the finished coat, even if no-one else could do so.
The edges of the large leaves on the second sleeve began with straight stitches over the edges, using a wonderful mohair yarn from Gumnut Yarns. The different amounts of shine from the various threads I’m using will help to add another level of interest to the whole design.
The second level of detail is worked in Up and Down Blanket Stitch, which is a very old favourite. This time I’ve changed the relative heights of the two uprights to create a more varied effect.
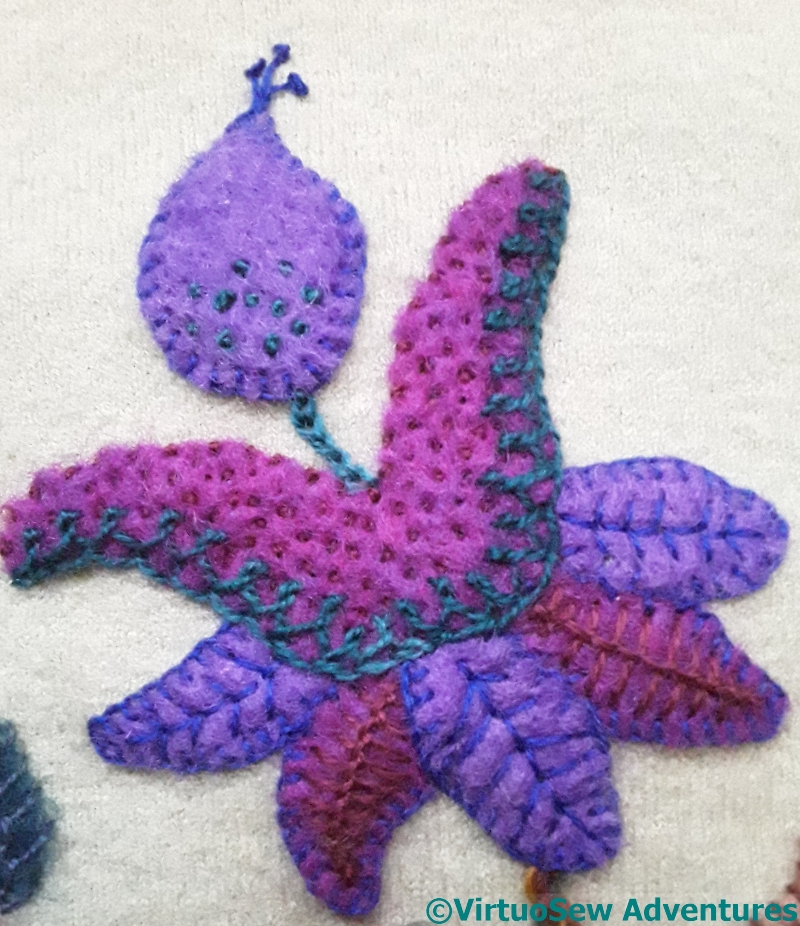
There’s a lot going on with the flower motif; Thorn Stitch on the lilac petals and a variant of Loop Stitch on the purple ones, using different thread colours to change the emphasis on the colours.
Crested Chain Stitch in teal edges the flower shape (given it’s a Jacobean style design, realism has nothing to do with it – I’ve not the vaguest idea what sort of flower it is supposed to be!) and I complicated matters for myself by working inward from the tips of the horn shapes to the centre. It is a directional stitch, so although most people won’t be able to notice that sort of detail, I think it is worth doing.
The Jacobean Coat – Sleeve One Embroidery
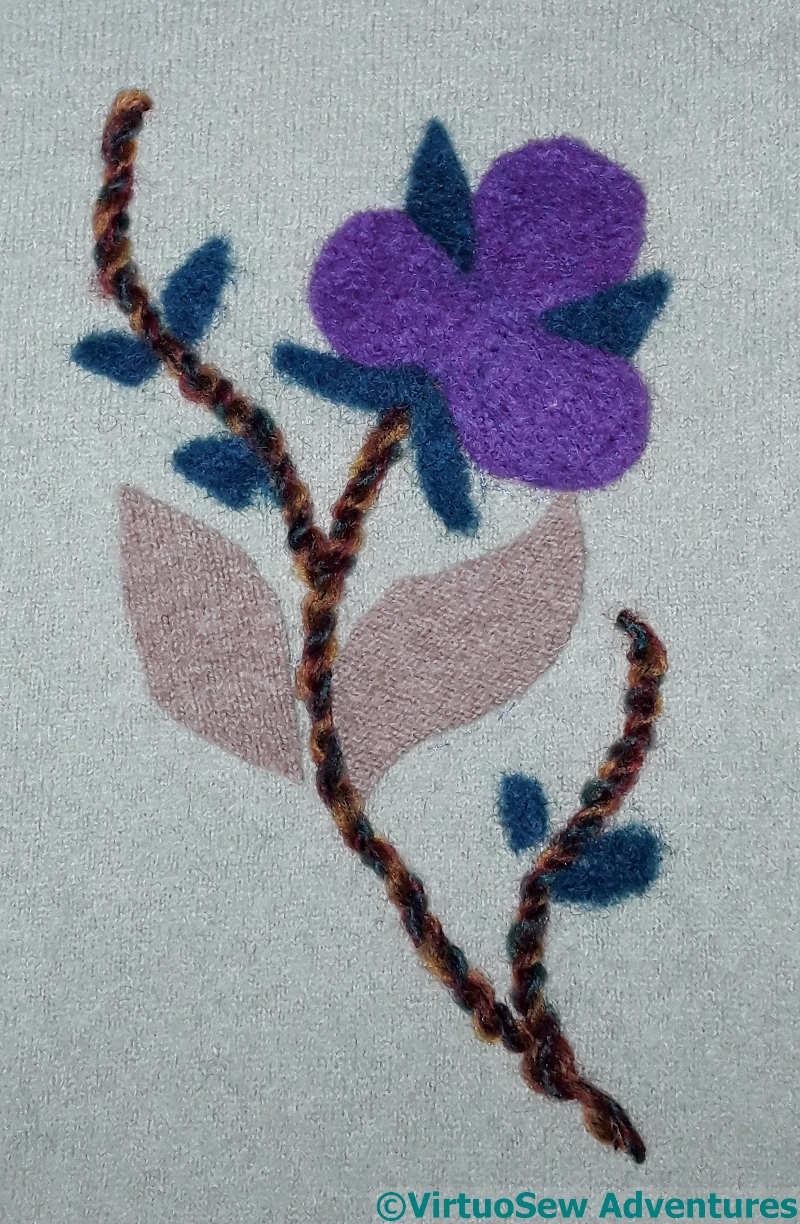
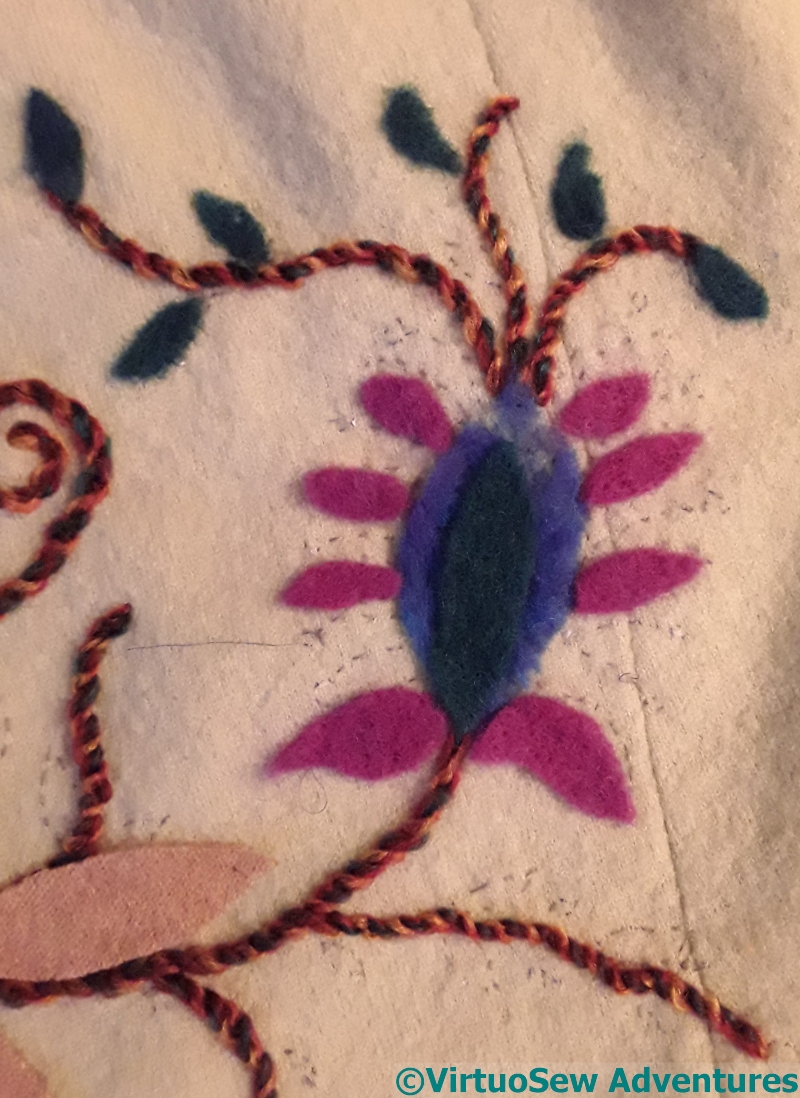
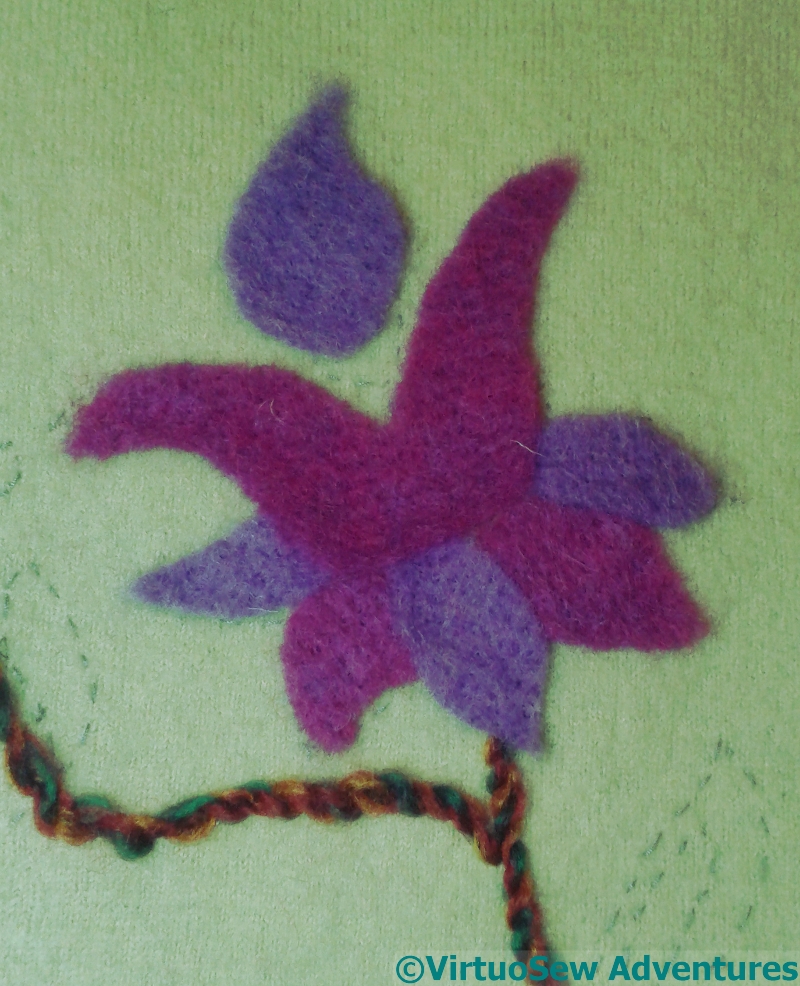
Having decided to start with the sleeves, and with stitch and thread choice for the small teal leaves in place, I could start to think about the other details. This picture shows the basic motif, with no stitching on it and really no idea where to start.
Incidentally, the coat fabric is a lovely clear pale green, and it doesn’t matter what I do, it just doesn’t photograph to advantage – or at least, not in winter daylight. I’m hoping Mam will be able to wear it in the spring, and we’ll be able to get some good photos for you to see!
I have decided that each of the motif elements will be stitched around the edge, or – as with the feather stitched leaves, stitched from edge to edge.
I think the stitch around the edge of the purple shape is called “Loop Stitch”. It creates a “spine” which can have arms of whatever length you want. In this case I wanted them neat and not too big, and they’ve almost disappeared into the felt in some cases.
When I’d added the outline, I felt something more was needed, and added the scattering of blue French Knots. They help to vary the colour and change the tones a little. This is not going to be an exercise in minimalism!
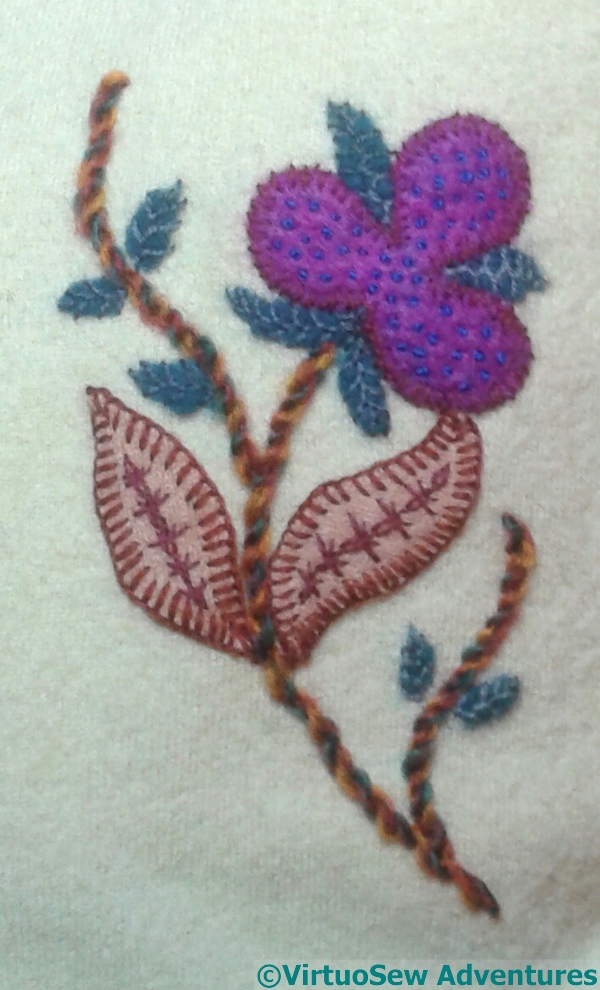
Here you see the – for now – finished motif on Sleeve One.
The large leaves have Blanket Stitch edges, and a large central vein made using one of the un-named stitch variations from my books by Edith John.
The reason I say “finished for now” is that I feel it may need a few light details to add a bit of sparkle, although I’m not sure of colour, or placement. I’m leaving the idea to sort itself out in my head as I continue to stitch.
The Jacobean Coat – colour and stitching begins!
The second stage, after all those stems, is to start adding colour. I’ve started with the sleeves because they are a bit more manageable than an entire coat, and it gives me a chance to feel my way towards the colour distribution of the stitches over the felt.
The purply colours and the teal are from sheets of that lofty felt I used for the princesses, while the beigy-brown was one of my grandfather’s sweaters, found in a box looking moth-eaten and thrown in a hot wash to felt it a bit. We’re a thrifty family…
The placement of the motifs is different for each sleeve, one above and one below the elbow, and it isn’t even the same motif. Repetition is overrated!

I think I will probably settle on using feather stitch over the felt for these tiny leaves, which are scattered throughout the design.
The rest of it is going to be a riot of stitches and stitch combinations, so this will provide a moment of rest in embroidery, a moment of reassuring similarity from which the exuberance can take flight.
It will also give me something to be doing if inspiration fails for any of the motifs!
One of the things I have learnt, over the years, about working on these large projects that involves making it up as I go along, is that there needs to be something useful to do while the next bit is being mulled over – it reduces the pressure and gives space for the mind to wander over new and interesting stitch choices.
Stems done!
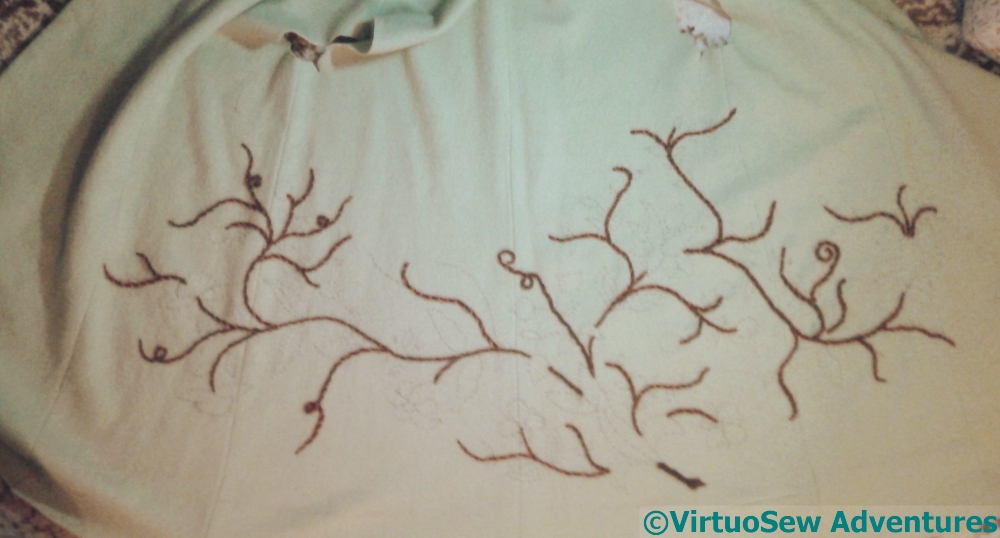
Stems Done!
I’ve got all the stems done on the Jacobean Coat!
Sleeve Motif 1
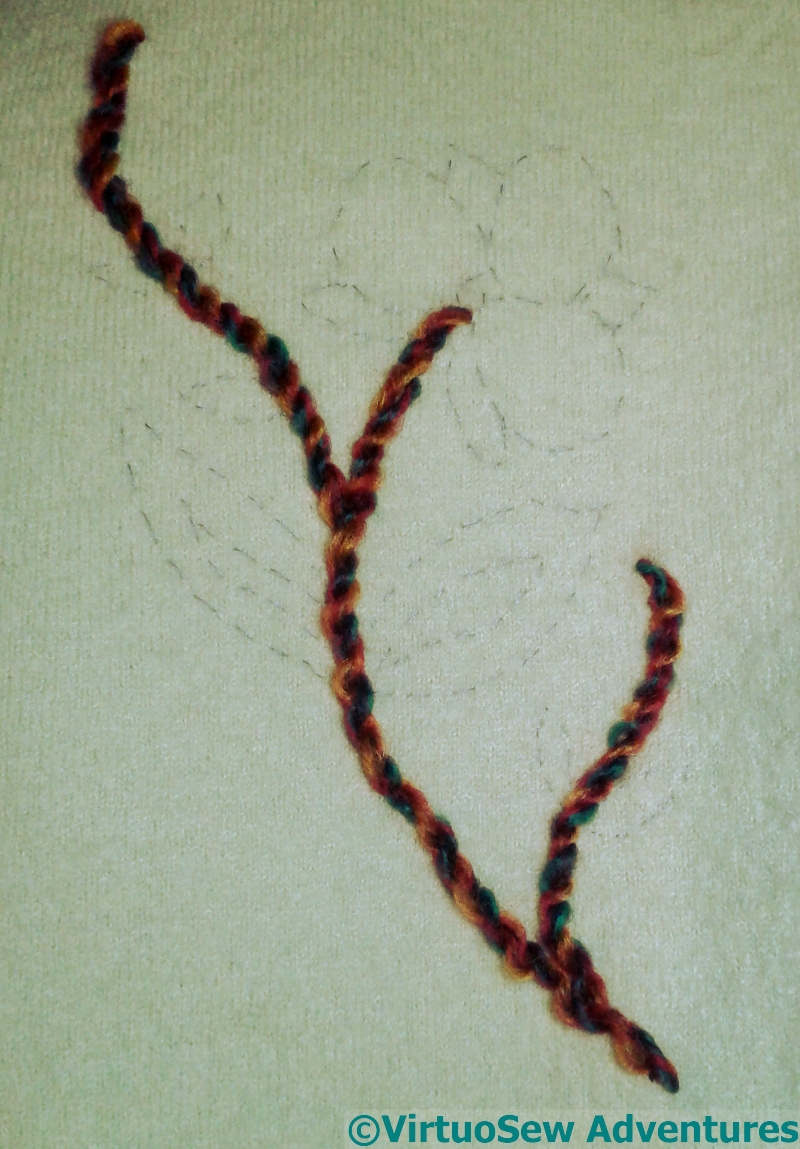
I’ve been quietly attaching the chunky knitting wool along the lines of the stems, and I’m quite pleased with progress so far. I’ve tweaked a couple of tendrils, and there are a few details I’m not quite sure about, but it’s a start.
In fact, it’s better than that, because I have started on the felt appliqué!
Sleeve Motif 2, Stage1
Both of the sleeves have motifs on them, one placed above the sleeve and the other below.
I decided to test the next stage on one of the sleeves, in case it didn’t work, but I rather think it will. I’m using the same lofty, fluffy felt I used for the Amarna Princesses, and I have lightly needlefelted it in place so that I can add the embroidered details without stabbing myself on a pin.
More thoughts on the Jacobean Coat
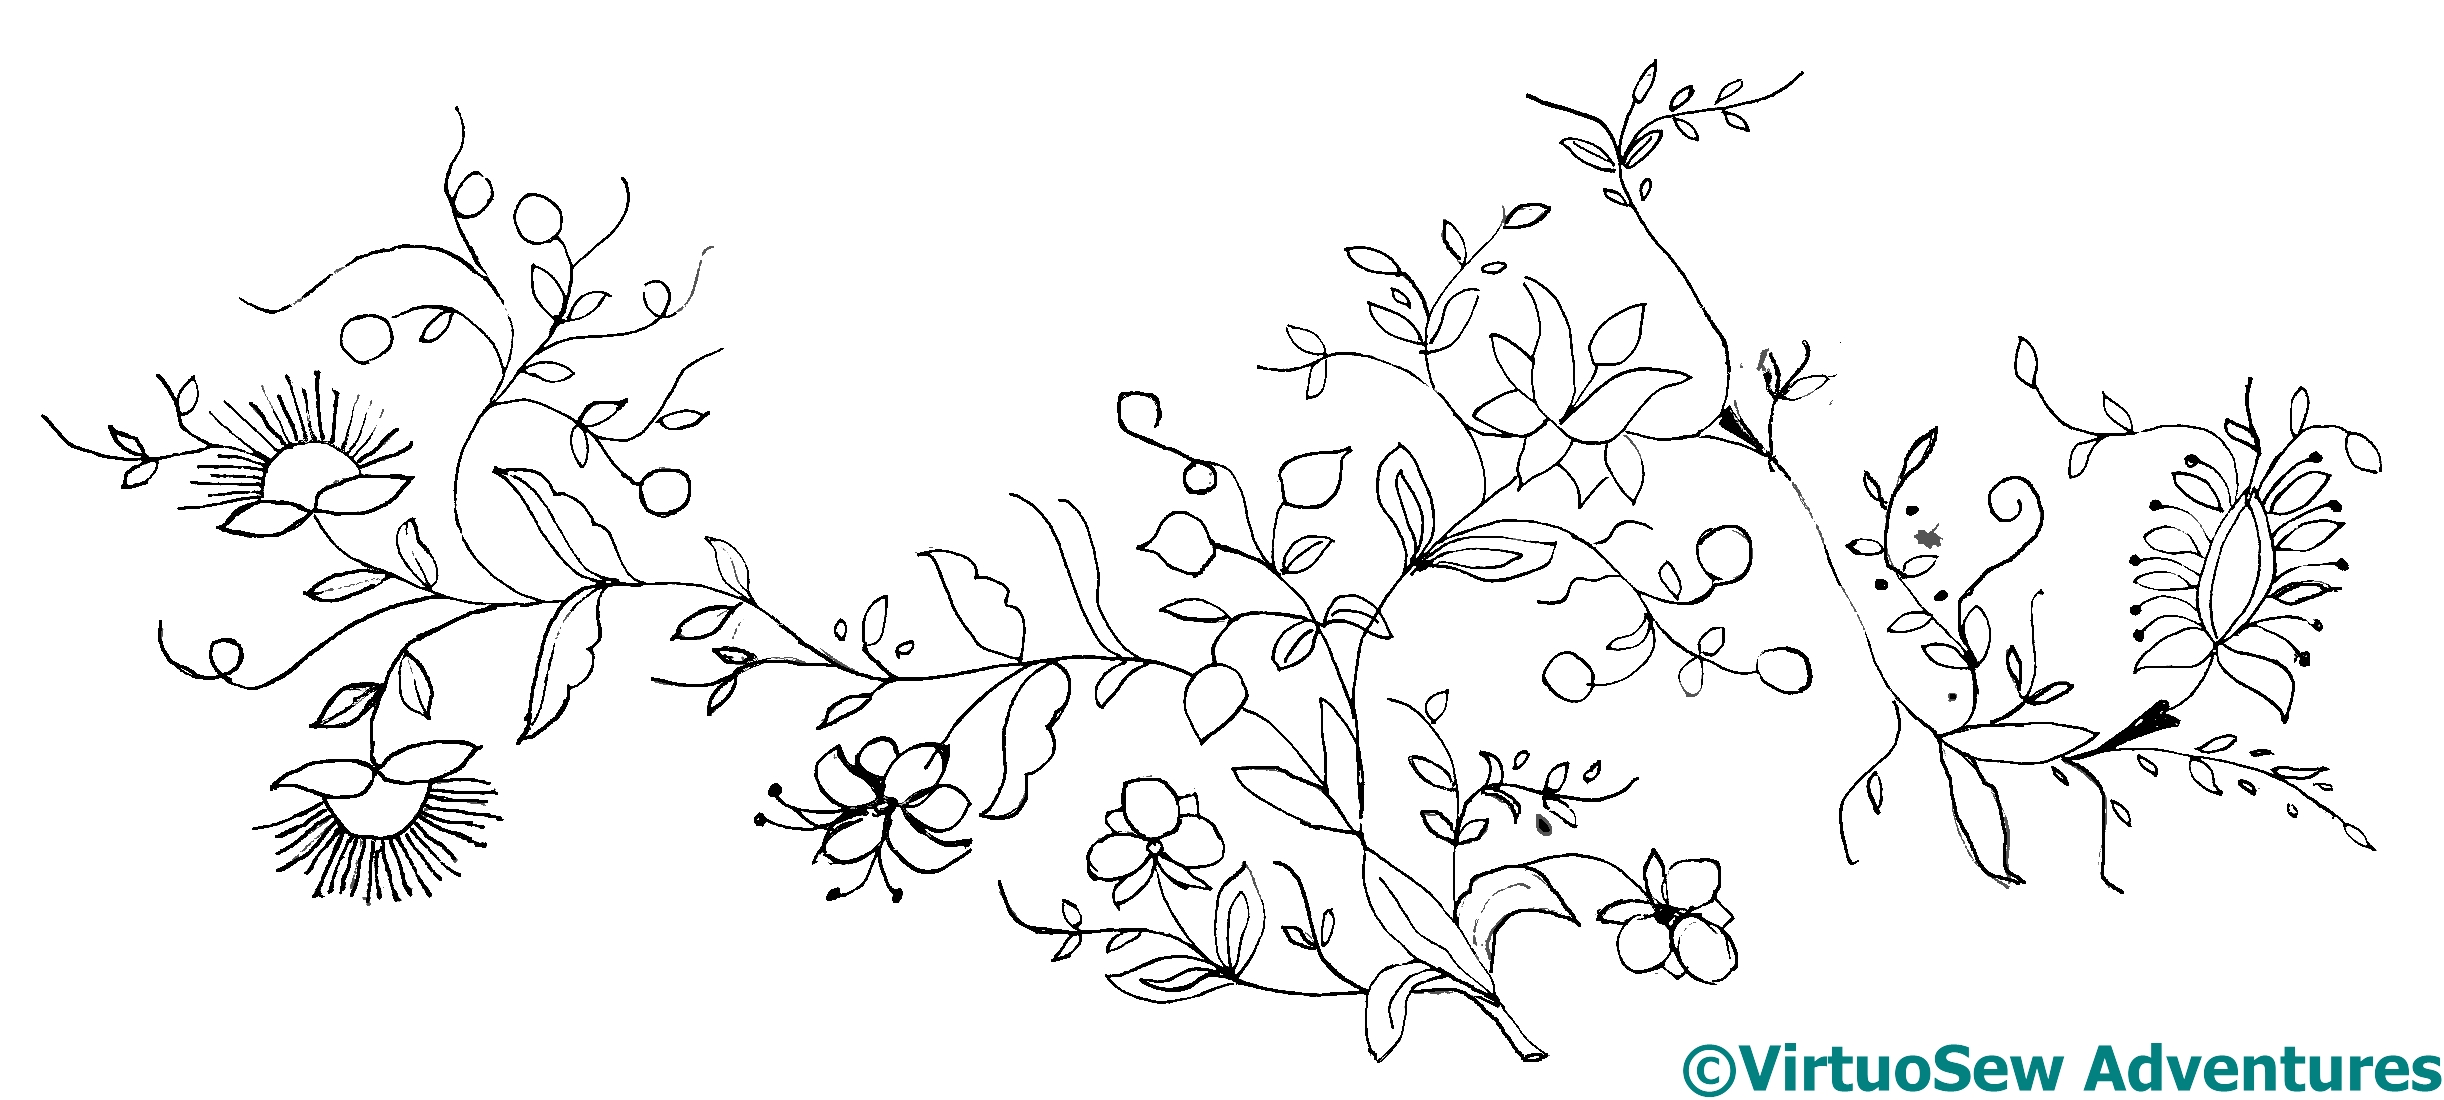
Coat Design
The design wraps around the back of the coat, leaving the front mostly unadorned. There are sprigs placed on the sleeves, too, one of them above the elbow, and the one on the opposite side below it. Remember the comments I’ve made in the past, about taking inspiration from Grinling Gibbons, and aiming for balance rather than symmetry? That goes for the placement of design elements in apparel as well as anything decorative.
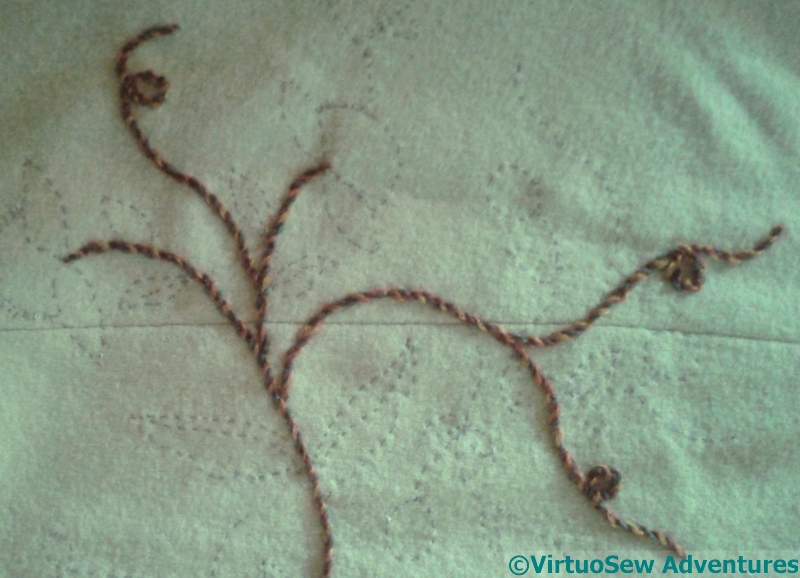
Starting Stems
My mother has commissioned the coat with various other garments and accessories in mind, and one of the ways we thought would help to tie the coat in with them would be to use a knitting wool which is involved in those accessories. Now, as it happens, I have experience with this sort of trailing design (remember the Piano Shawl?), and I remember that it can feel very disjointed and dispiriting as you work individual motifs, and however confident you are of the whole, it’s hard to be motivated when it keeps looking spotty and halfhearted.
However, the stems pull it together, so I thought this time I would start with the stems. It’s a big, chunky, variegated knitting yarn, so I will end up with the skeleton of the design, and all sorts of colours within it. I’m catching it in place with a fine woollen yarn, using small oblique stitches buried within the twist. They should be almost invisible.
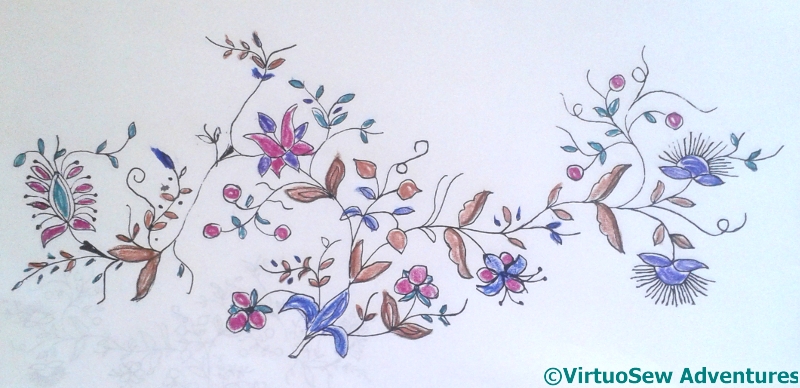
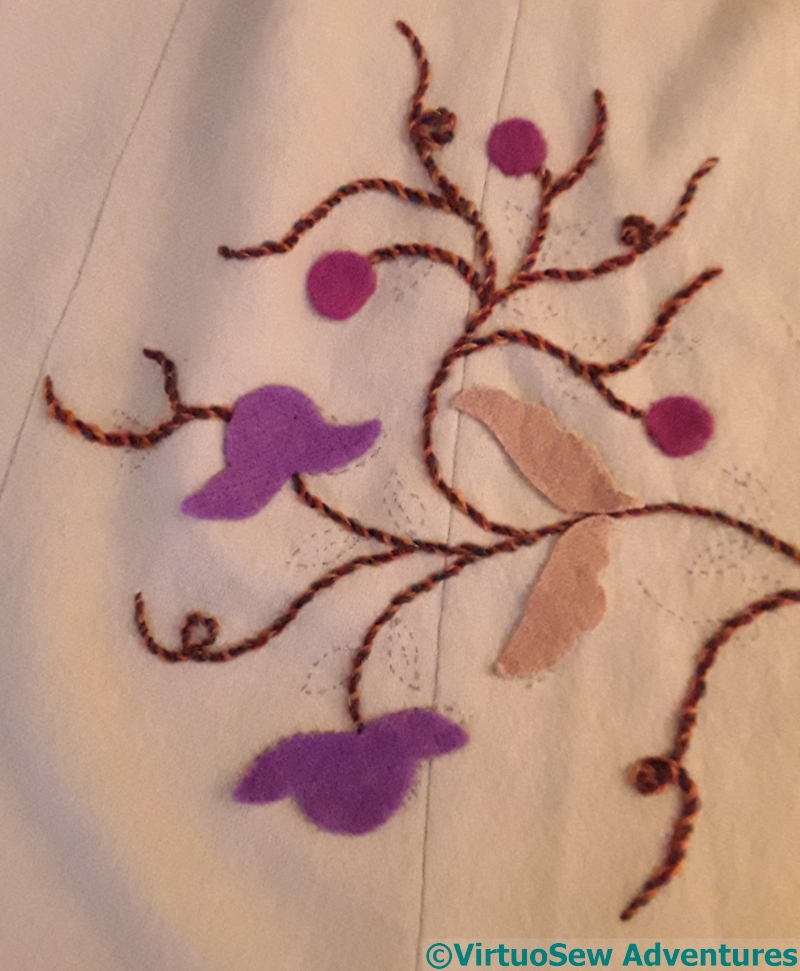
Trialling Colours
However, that too is going to take a while, so I can trial colour placement for the motifs themselves! As you can see, we aren’t aiming for a naturalistic colour scheme. This may not be the final arrangement, and there will be tweaks along the way, but I’m happy with this as a starting point.