
Tag: Akhenaten
Akhenaten – the next stage
BackStitch Details
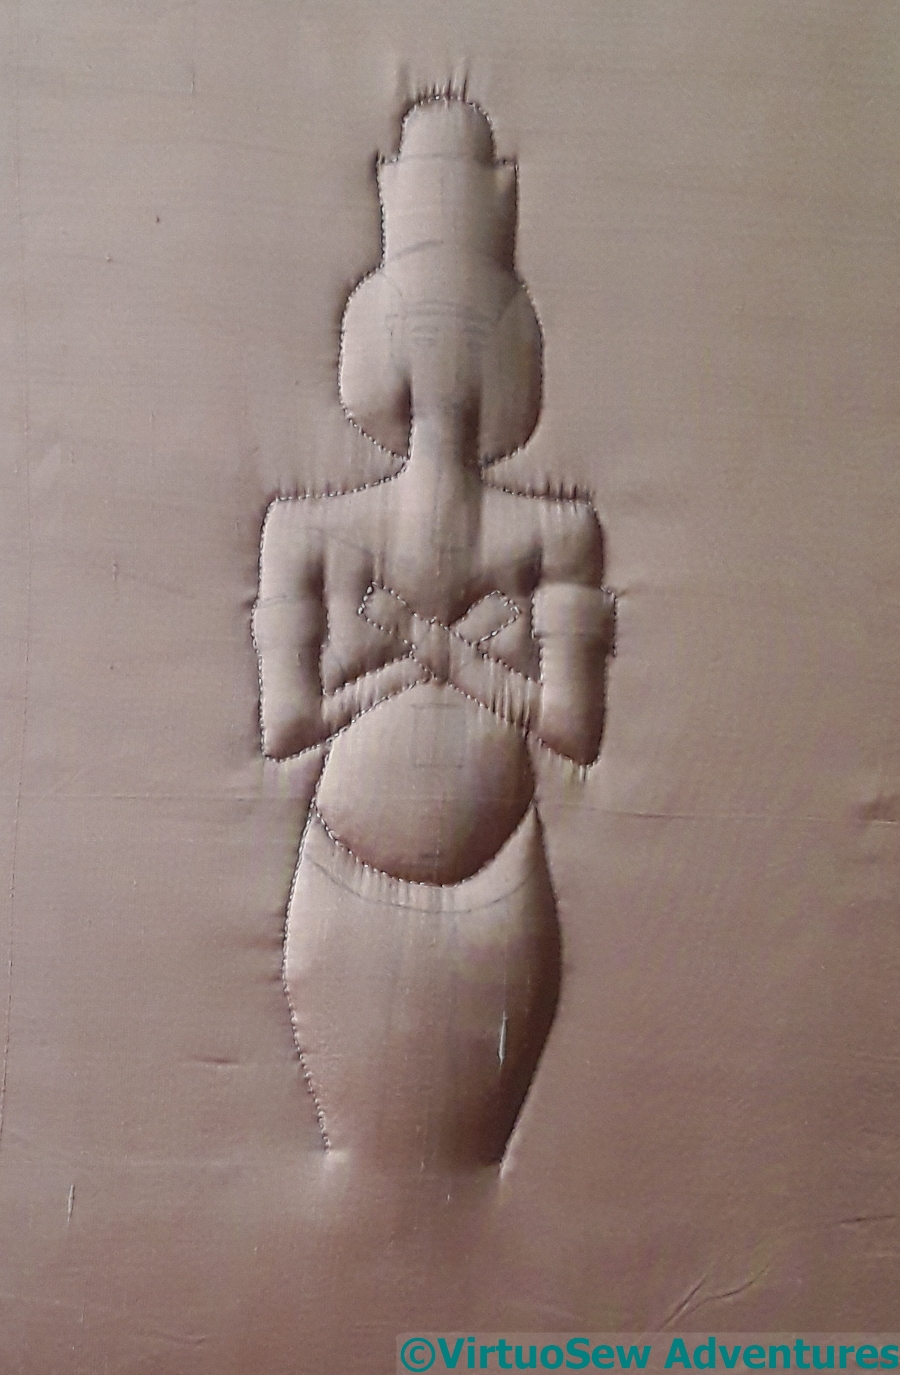
Once I had stuffed the figure from the back, I began to add to the backstitch outline with, for want of a better term, internal outlines.
I realise that the detail of the crossed arms has given him a hollow chest, but as the embroidered details are added I will be able to adjust the padding, if necessary removing some of it. Adding the stitching is going to be interesting. Some of it will need to balance over the curve of the padding, and some of it I will need to tighten a little through the padding – for example, his carefully-carved belly button.
At this point, I had to pause for thought. When the idea first came to me, it was the pleated loincloth that I could visualise, but the rest of the piece had yet to come into focus. I went rummaging on the web for polychrome representations of Akhenaten, and rummaging in my stash of threads for inspiration. And then suddenly, that inspiration duly arrived….
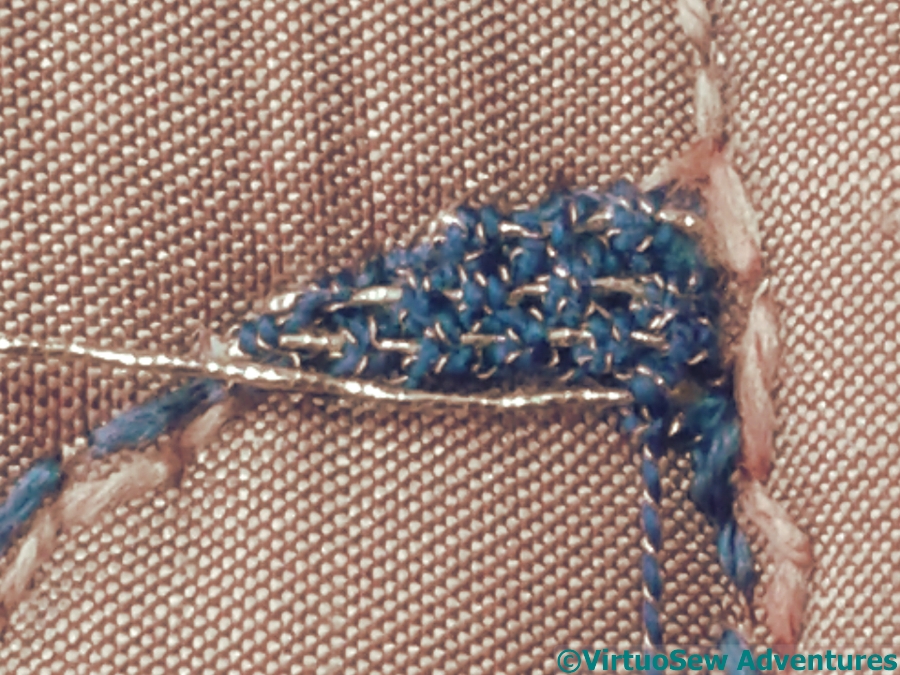
Detached Up And Down Buttonhole Stitch With Return
I remembered the ornamental stitches of the Tudor Rose Project, and fished out the Gold Special Tambour and Gilt Sylke Twist. Akhenaten’s wig is sometimes represented as black, and sometimes as blue. Black can be a somewhat problematic colour, often too dominating or simply “killing” other colours, so I decided I would go for blue, and the Indico Blewe Gilt Sylke Twist looked like it would produce just the right effect. Using the Gold Special Tambour as the thread for the return of the Detached Up And Down Buttonhole Stitch With Return helps to give a little more emphasis to the glint of the gold in the Gilt Sylke Twist.
But it’s not a quick stitch. This is going to take a while….
Akhenaten – the scary bit!
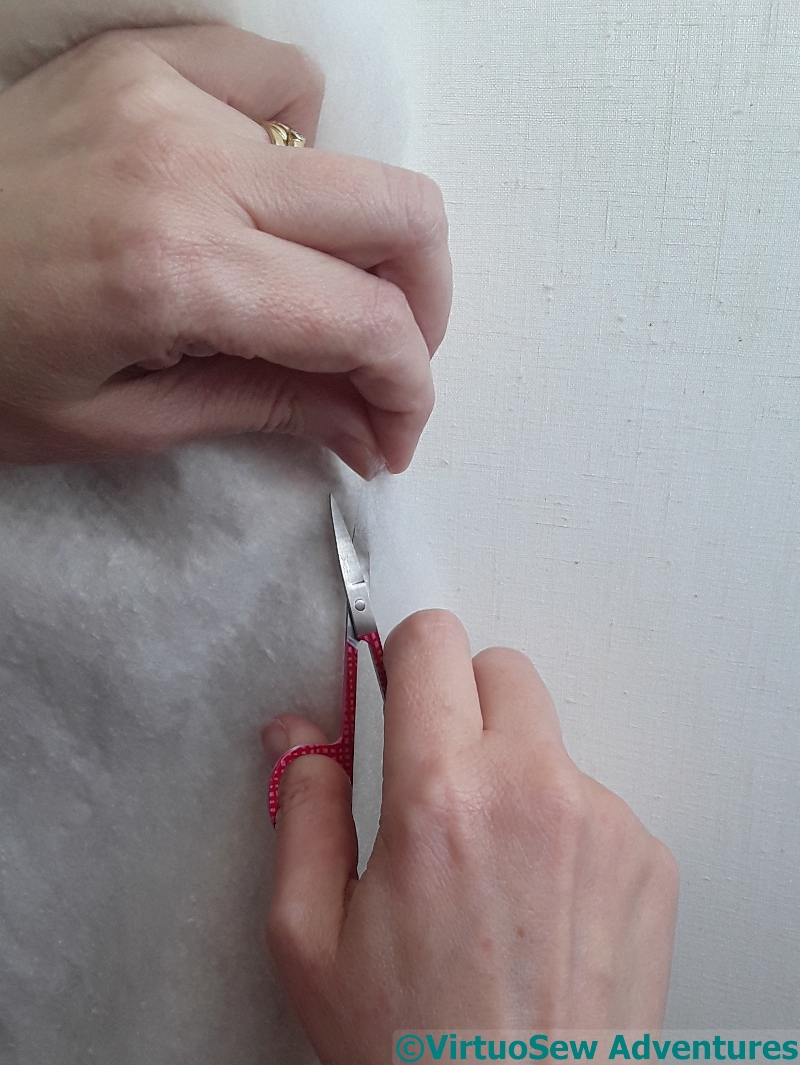
Trimming Excess Padding
I did say the next bit was scary!
I undid the stitches holding the silk and top layer of wadding to the calico backing, and cut away the polyester wadding close to the back stitches outlining the figure. Quite apart from the fact that I had to tie myself in knots to follow the edge around, particularly around the neck and shoulders, and beneath the arms, I was terrified of cutting through the backing, or the padding I didn’t want to cut, or, worst of all, cutting through the silk.
If you are of a nervous disposition, do not attempt this technique. Try something soothing instead. Like base-jumping.
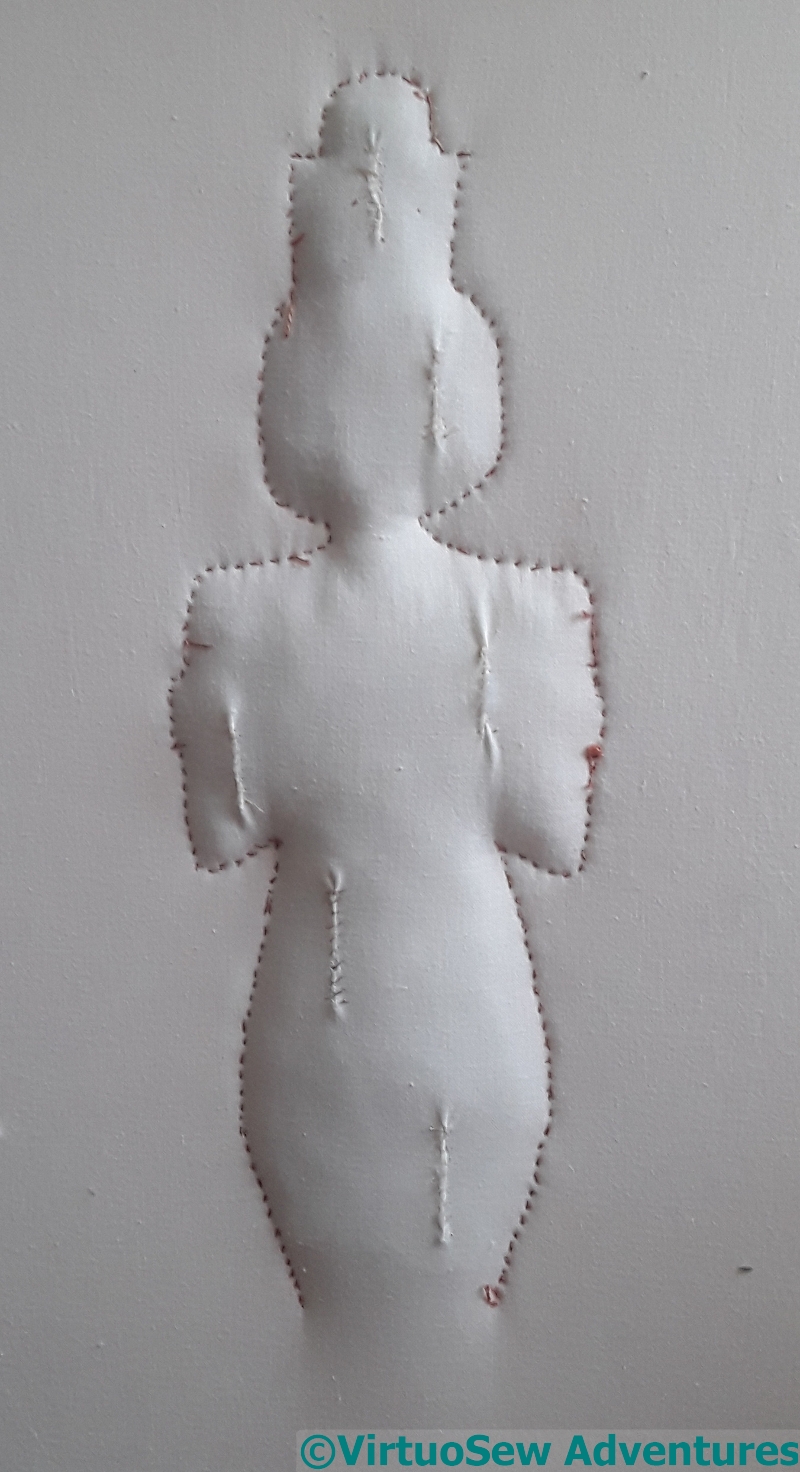
View From The Back
The next bit was hardly less scary.
Having been terrified of the prospect of cutting any of the layers, I then had to cut slits in the calico at the back, in order to stuff the figure more firmly.
I’ve had occasion in the past to express my conviction that holes into items to be stuffed actually open into the Fourth Dimension or something. The capacity of the item to be stuffed always seems to be higher than is suggested by the measurements.
And guess what, it happened again. I’ve done my best to stuff evenly, using small pieces of stuffing, but I won’t be at all surprised to find that after the next stage (whatever that turns out to be!) I will be doing more of it.
Starting On Akhenaten
Starting Akhenaten
Naturally, once I’d done the Head of Nefertiti, I wanted to do something of Akhenaten. The question was, what?
But I needn’t have worried. Almost before I have posed myself the question, an idea had sprung, fully formed, into my mind, rather as Nefertiti had done. It’s going to be a sort of unholy, but with any luck, truly gorgeous, combination of trapunto and goldwork.
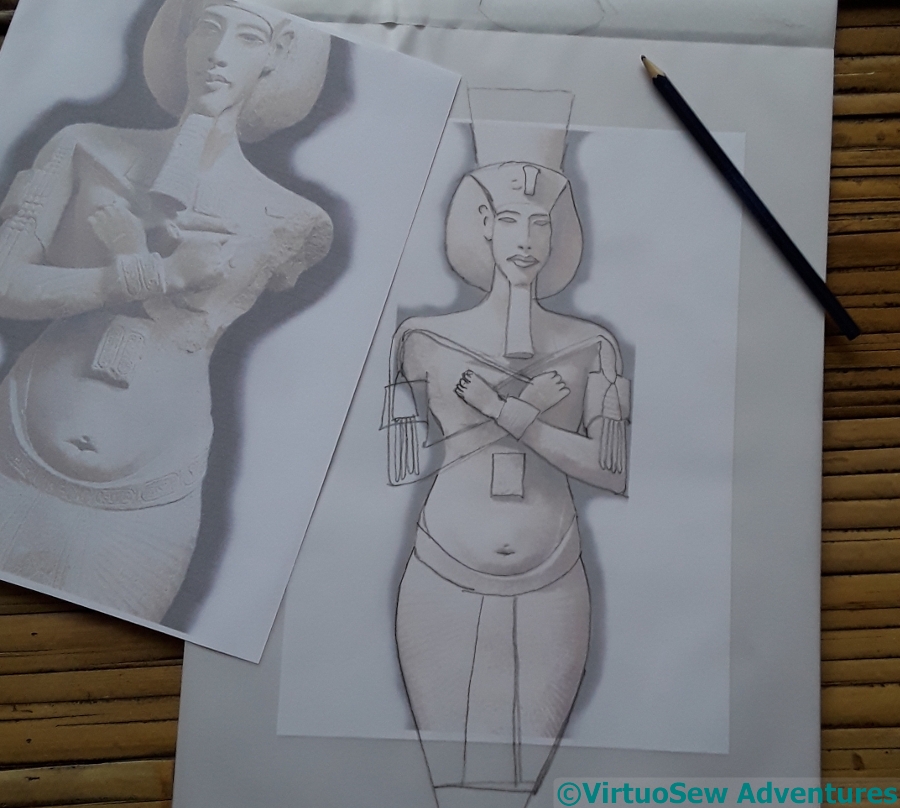
I’m basing the design on the four colossi of Akhenaten, all of which are damaged in different ways, allowing me to put together something that should resemble an undamaged one. Then I started to forage among my silk fabrics to find something suitable, finally choosing a sort of pinkish orangey-brown which reminds me a bit of pink granite. The colossi aren’t made of pink granite, but the Egyptians did use it, and besides, this is a work of artistic interpretation!

Outline Stitched
Since the idea is such a mash-up of techniques, I’m not at all sure whether it will work, or what order to do what in (if you follow me!). I’ve started by stretching the calico backing fabric in the frame, overlaying it with two layers of a fairly lofty synthetic wadding and a denser layer of cotton, and then stretching the silk over the top.
Then I stitched the outline, using close back stitches. It doesn’t look very good at this point, because there is extra wadding where I don’t want it.
But the next stage is a bit scary, so I had to clutch my courage in both hands…