
Search Results for: Tudor Rose
Adventures with a screen print
It occurred to me recently that when I finally finish the Dreams of Amarna panels I will probably want to exhibit them somewhere – displaying them at home would require a complete redesign, including moving walls! – and that, however large or intricate they may be, two panels do not an exhibition make.
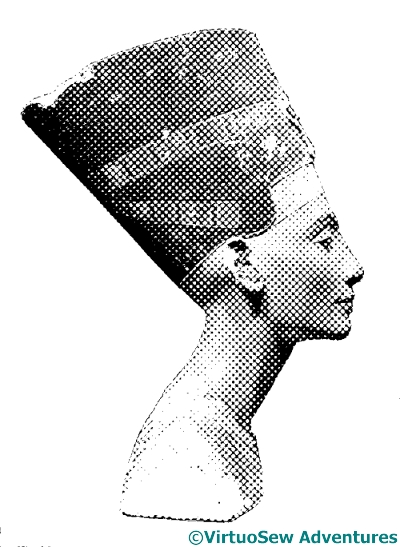
Nefertiti rendered in “newsprint”
At the same time, however, I’d had an idea for a design for which I could apply the combined silk and gold stitches of the Tudor Rose, and furthermore, that might allow me scope, later, to play with some of the mixed media techniques that are available…
So I went rummaging among the assorted copyright-free and Creative Commons images on the web (my goodness, there are thousands!) and found a photo of the famous painted head of Nefertiti which is in the Berlin Museum. Then with some cropping and processing, from a photo of the bust in its case it became a plain headshot with no background, rendered in the style of an old-fashioned newsprint picture. An email conversation and a payment later, that image had been turned into a custom-made Thermofax screen…
At which point, all the simplicity fell over. I’ve actually done four screen prints on the faience-coloured linen, and about three on sandy coloured linen, and none of them was good enough for my purposes. I’m not sure whether the screen is too detailed for the fabric or whether it is simply my technique that is faulty.
So I guess I just need to try harder!
More Kumihimo
There were so many intrigued comments about my Marudai and the braids it made, that I thought I would show you some more of the braids I’ve made.
Kumihimo is a traditional Japanese technique. The braids have a lot of traditional uses in Japan – in fact, an opera singer friend of mine tells me his Samurai costume for his part in a brand-new opera about a crucial part of Japanese history was correct down to properly made kumihimo braids in all the right places!
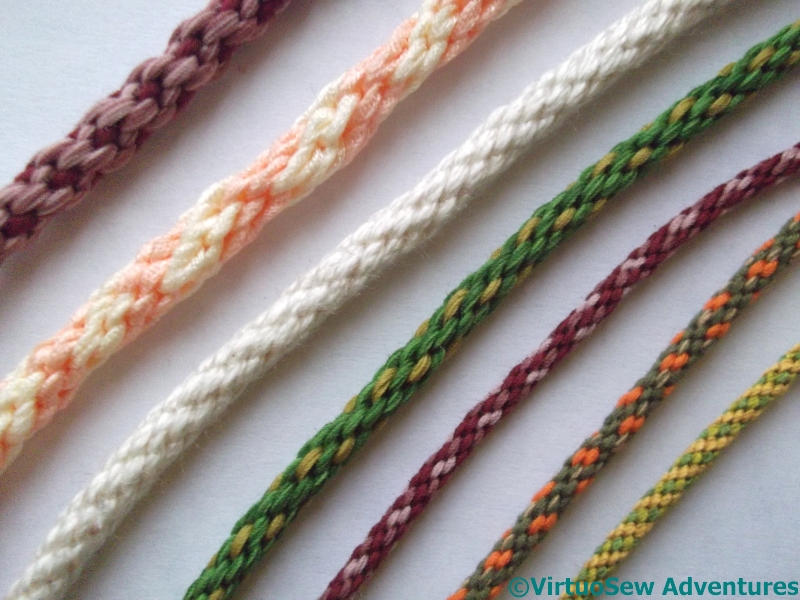
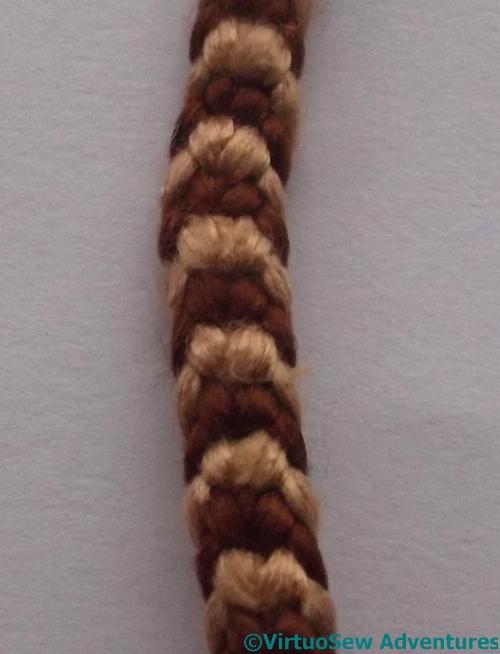
Kumihimo Braids
If you search for Kumihimo on eBay, what you will find, by and large, are bracelets. Now, I’m really not a bracelet sort of girl. I have a few chunky, “statement” bangles, which are worn specifically, explicitly and only when I’m planning nothing more strenuous than lifting a knife and fork. Cord bracelets – no.
However, I do have a lot of heavy, dramatic pendants, and the idea of making cords to point up the colours in the pendants – yes, definitely. I’ve found that sewing machine thread makes a wonderful material for these purposes – it comes in a huge range of colours, and it’s fine, supple and strong. It also lends itself well to heathering – combining several colours in a single strand – and best of all, it’s relatively inexpensive.
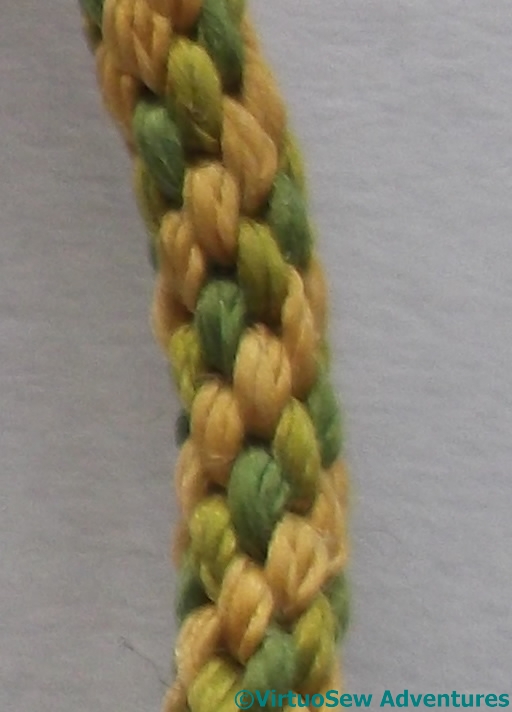
Yellow and Green Silk
The fine green and gold cord is silk, made using some of the thread from the Tudor Rose kit – I used it to trim the Tudor Rose panel.
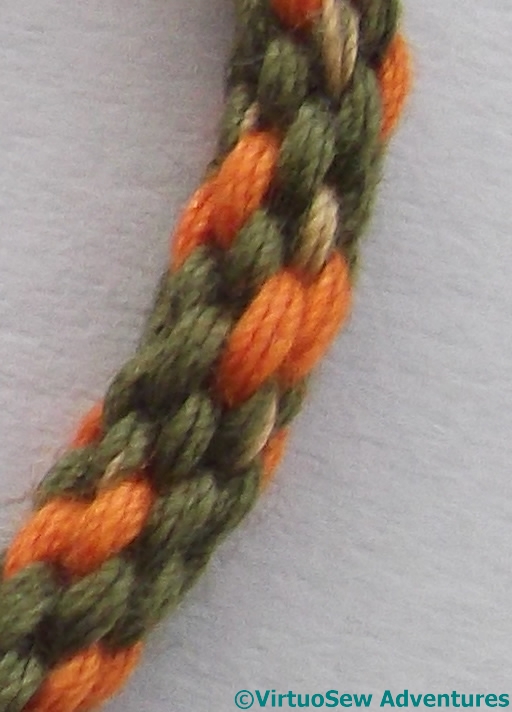
Orange and Green Cotton
The next three, and the top, chunky pinky-maroon, are all necklace cords made using sewing machine cotton, although the maroon mookaite pendant I made the two maroon ones for has spurned both of them with scorn. I’ll try again, because I enjoy kumihimo.

Greens (cotton)
The white one is silk, to go with a pearl-mounted enamelled cross pendant given to me by an old family friend, and which I wore on my wedding day. The cord I used then has become grubby over the years, so this one will see me through a few more. The cream and peach usually carries a glass pendant. It’s one of two I’ve tried for that pendant, in fact – but this “making things match” is never quite as easy as we hope, is it!

Apricot Cotton
Two Colour Silk
The round apricot rope is huge – about for or five times the size of the other round cords I’ve done. I might mount it with cord ends and turn it into a choker one of these days..
The stripy one is a fairly fine flat braid in filament silk. I worked this one as an experiment, changing the tension (more or less weight on the end) to see what effect it would have. In the end I came to the conclusion I wasn’t being dramatic enough with my experiments!

Flat Teal and Green
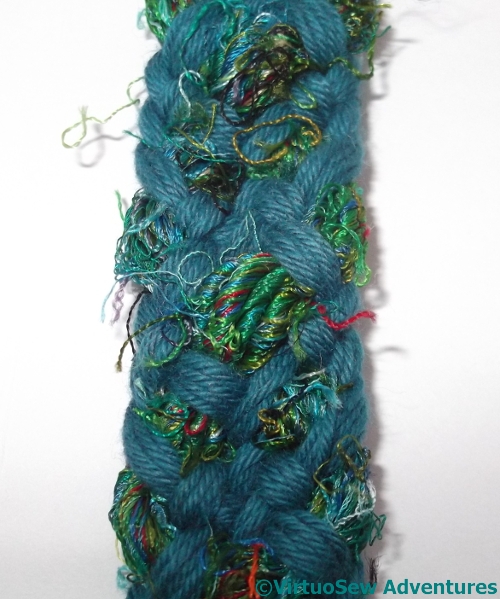
Textured Teal
These flat braids were given extra texture with saree silk knitting yarns. Again, they tell me that some of my experimentation needs to be a bit more dramatic. I was hoping to emphasize the different textures, but used too many strands of the cotton yarn, so there wasn’t enough difference between the strands.
There’s scope for endless experimentation here – and I haven’t shown you the miles of gold braid I’ve made…
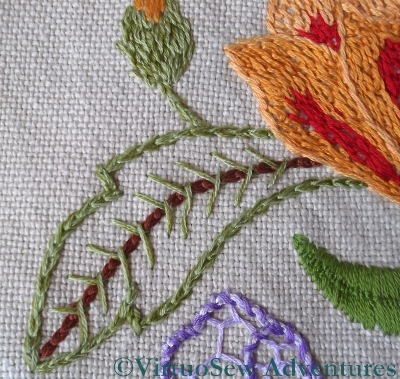
Dreams of Amarna – The Antelope Panel
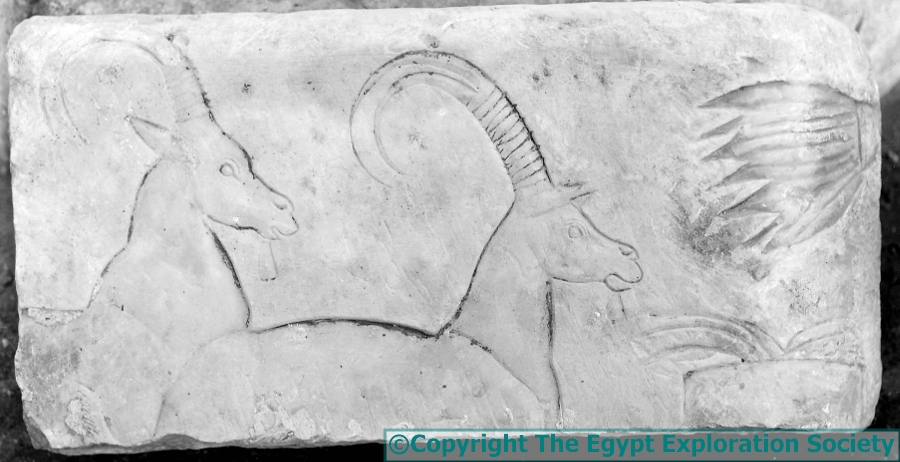
Antelope Carving – Photo copyright The Egypt Exploration Society
When I finished the Hittite Amulet, I didn’t have another piece ready to go, but feeling a little jaded with metal threads, I didn’t want to move straight back to the Tudor Rose… So I went rummaging in the wonderful selection of photographs that the Egypt Exploration Society allowed me to have copies of to use as reference, and found a photograph of a small piece of stone, carved with part of a frieze of antelope.
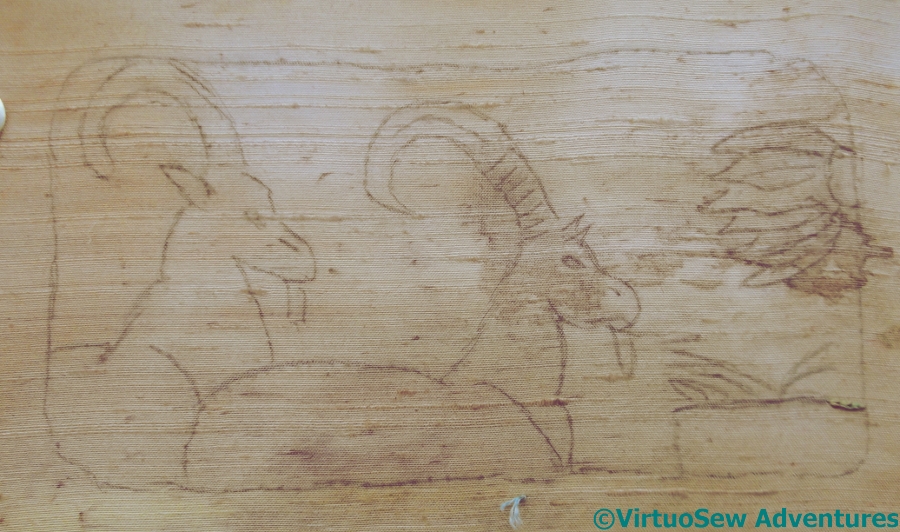
AntelopeFrieze
I transferred the design onto some handpainted silk using the prick-and-pounce method, and went over the lines with a pencil, then framed it up over a calico backing, picked out a skein of hand-dyed twelve strand silk and thought about stitches.
In the end I decided that what had attracted me to the photograph was the simplicity of the lines against the slightly uneven texture of the stone, and so I should make my version absolutely simple too.
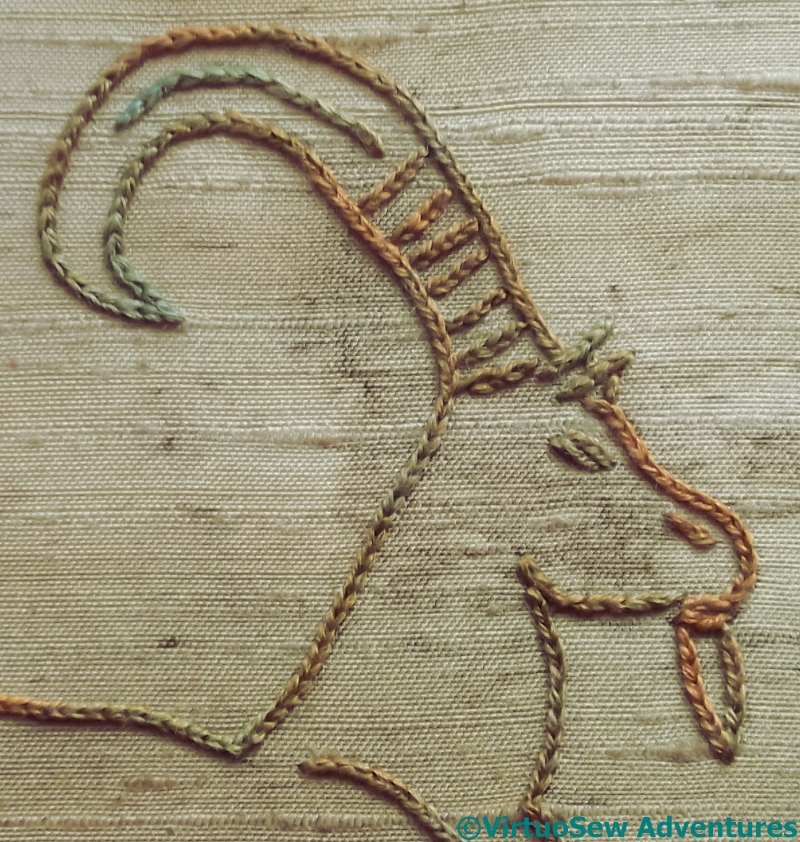
Antelope Close Up
With that in mind, all the lines will be in reverse chain stitch, worked as small and as evenly as I can manage without using a magnifier, for all the lines. Reverse chain stitch is so much easier than ordinary chain stitch when the fabric is in a frame!
I am thinking of using Hungarian Braided Chain, which I worked on the Crane Pot, for the edge, but I am also considering the possibility of not stitching a frame at all, but instead stretching the silk over a piece of skirtex cut to the shape of the stone.
This is a real contrast with the Glittering Nightcap – very simple and very “minimal”. Almost like a palate cleanser after a heavy meal!
Another Course From Thistle Threads!
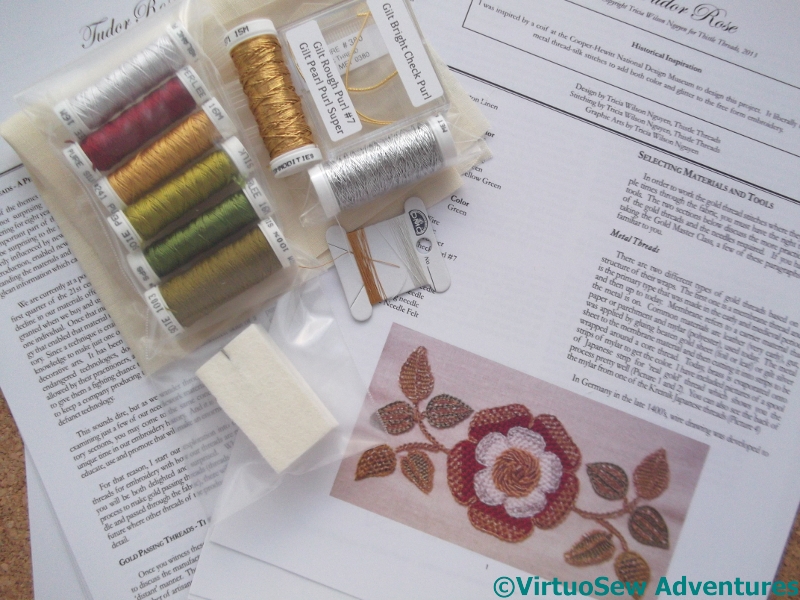
Tudor Rose Kit
There was another clatter of the letterbox and a gentle thunk on the carpet recently. It was soon followed by some excited squeaks and a dash upstairs to print out Month 1 of the History and Instructions.
This time, instead of a clear distinction between metal thread stitching and silkwork, as in the Floral Glove Needlecase, the Tudor and Stuart Goldwork Masterclass, or the Glittering Gentleman’s Nightcap, the aim of the course is to show how the metal and silk threads were combined within stitches and motifs.
I’m hoping that this will give me some new ideas and techniques to apply to my Dreams of Amarna panels. However, I intend to be a good girl. I won’t actually start this until I’ve done the Glittering Gentleman’s Nightcap, which is still “going slow” owing to a combination of end-of-year exhaustion and fugitive winter light. With a bit of luck, I may be able to get started in the spring.
The Latest on the Glittering Nightcap

Progress Report
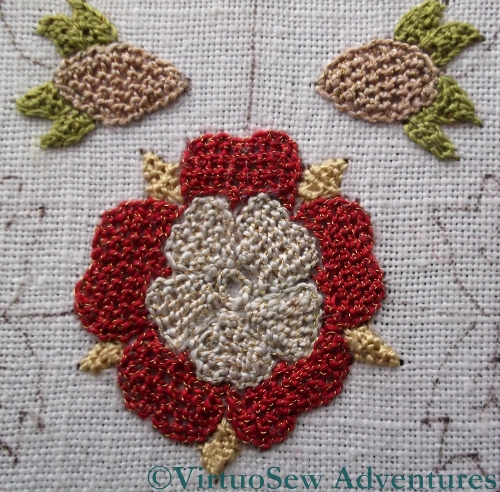
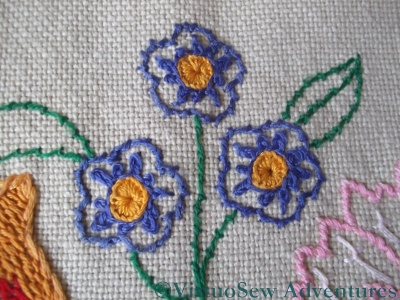
It’s been very difficult to get back to the Glittering Nightcap, but I must, because in December the Tudor Rose course is starting. There are, I think, four pomegranates, two carnations, and two pansies to do, as well as all the leaves.
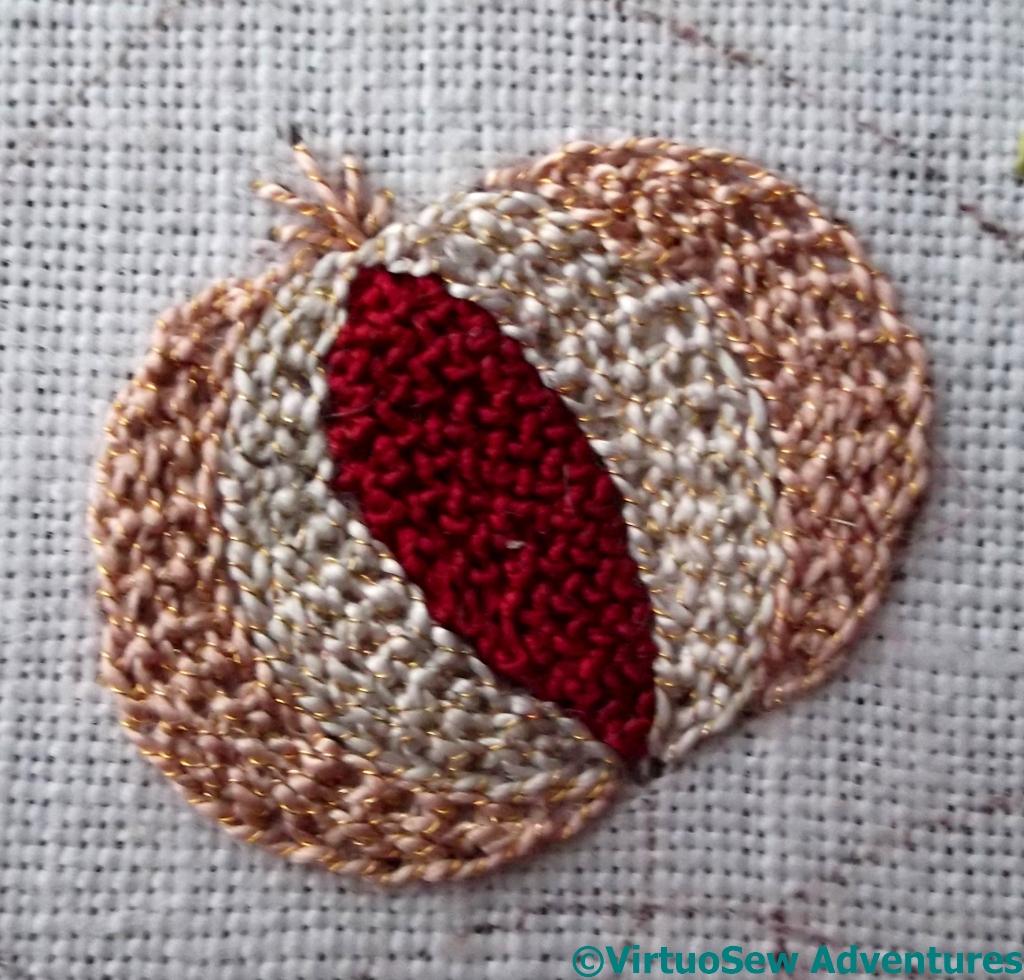
First Pomegranate On Brim
The pomegranates are going to be quite a trial. The central section is worked in Trellis Stitch, using the Soie Perlee. I seem to have begun with the one section that was easy to work, because the central section of the next pomegranate – still unfinished – took me several sessions to do, purely because of the angles at which I was attempting to work.
Of course, fugitive winter light isn’t helping, either. Sometimes I finish the other stuff I need to do, sit down at my frame, decide after about three stitches that there isn’t enough light to see what I’m doing, and get up again, muttering discontentedly!
I’ve continued to make changes in the working, as well. I’ve used the Bordered Corded Brussels stitch for both the white and pink sections of the pomegranate, and rather than working the white in a “vertical” alignment, I’ve worked it all “horizontally” – relative to the body of the motif, not to the weave of the fabric, of course.
First Carnation On Brim
If you look at the top right hand corner of this carnation, you will see one of the hazards of working with Gilt Sylke Twist. The gold wire has scrunched itself up into a single length that looks almost like a bullion knot. What must have happened was that the wire snapped, and then for one reason or another caught on the right side of the fabric instead of continuing through with the needle to make the stitch.
I’ve decided that I definitely prefer Bordered Corded Brussels Stitch to working Corded Brussels stitch into a Chain Stitch border. It is much easier to work, because there’s no fighting through the stitching of the border, and it looks very clean and crisp – at least when I get it right.
I’ve done the buds, the pansies, and one carnation, so now I have three pomegranates and one carnation to do before I move on to the leaves.
Update on Month Four of Glittering Gentleman’s Nightcap
First Tudor Rose
My last post about the Glittering Gentleman’s Nightcap was in September, but I’m afraid it has not made much progress over the winter. This is because I only work on it when I have good natural light, and that means sitting in a bay window, which can be very cold indeed!

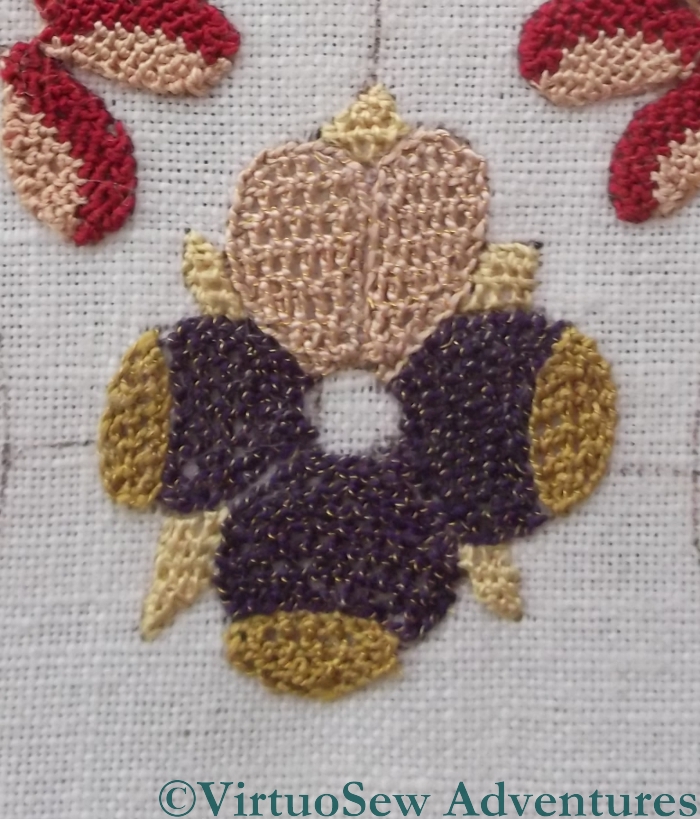
Second Tudor Rose
I managed to get one of the Tudor Roses done and then there was a long, chilly hiatus. Each petal is worked in Gilt Sylke Twist, outlined in reverse chain stitch and filled in with detached buttonhole with return. I think that is the same as “corded Brussels Stitch” in needle-lace, or if it is not, I have yet to work out the difference. The sepals are worked, again in detached buttonhole with return, using straw coloured silk.
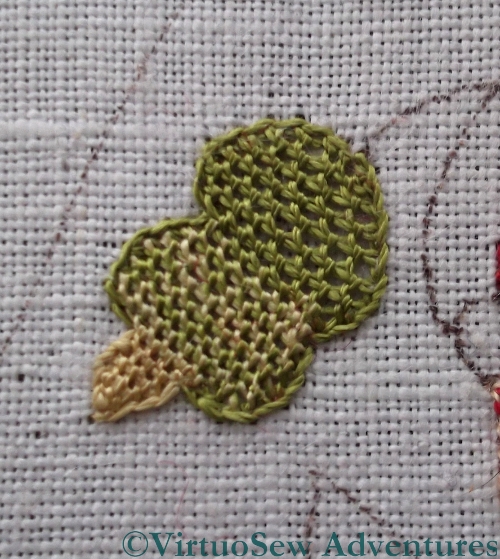
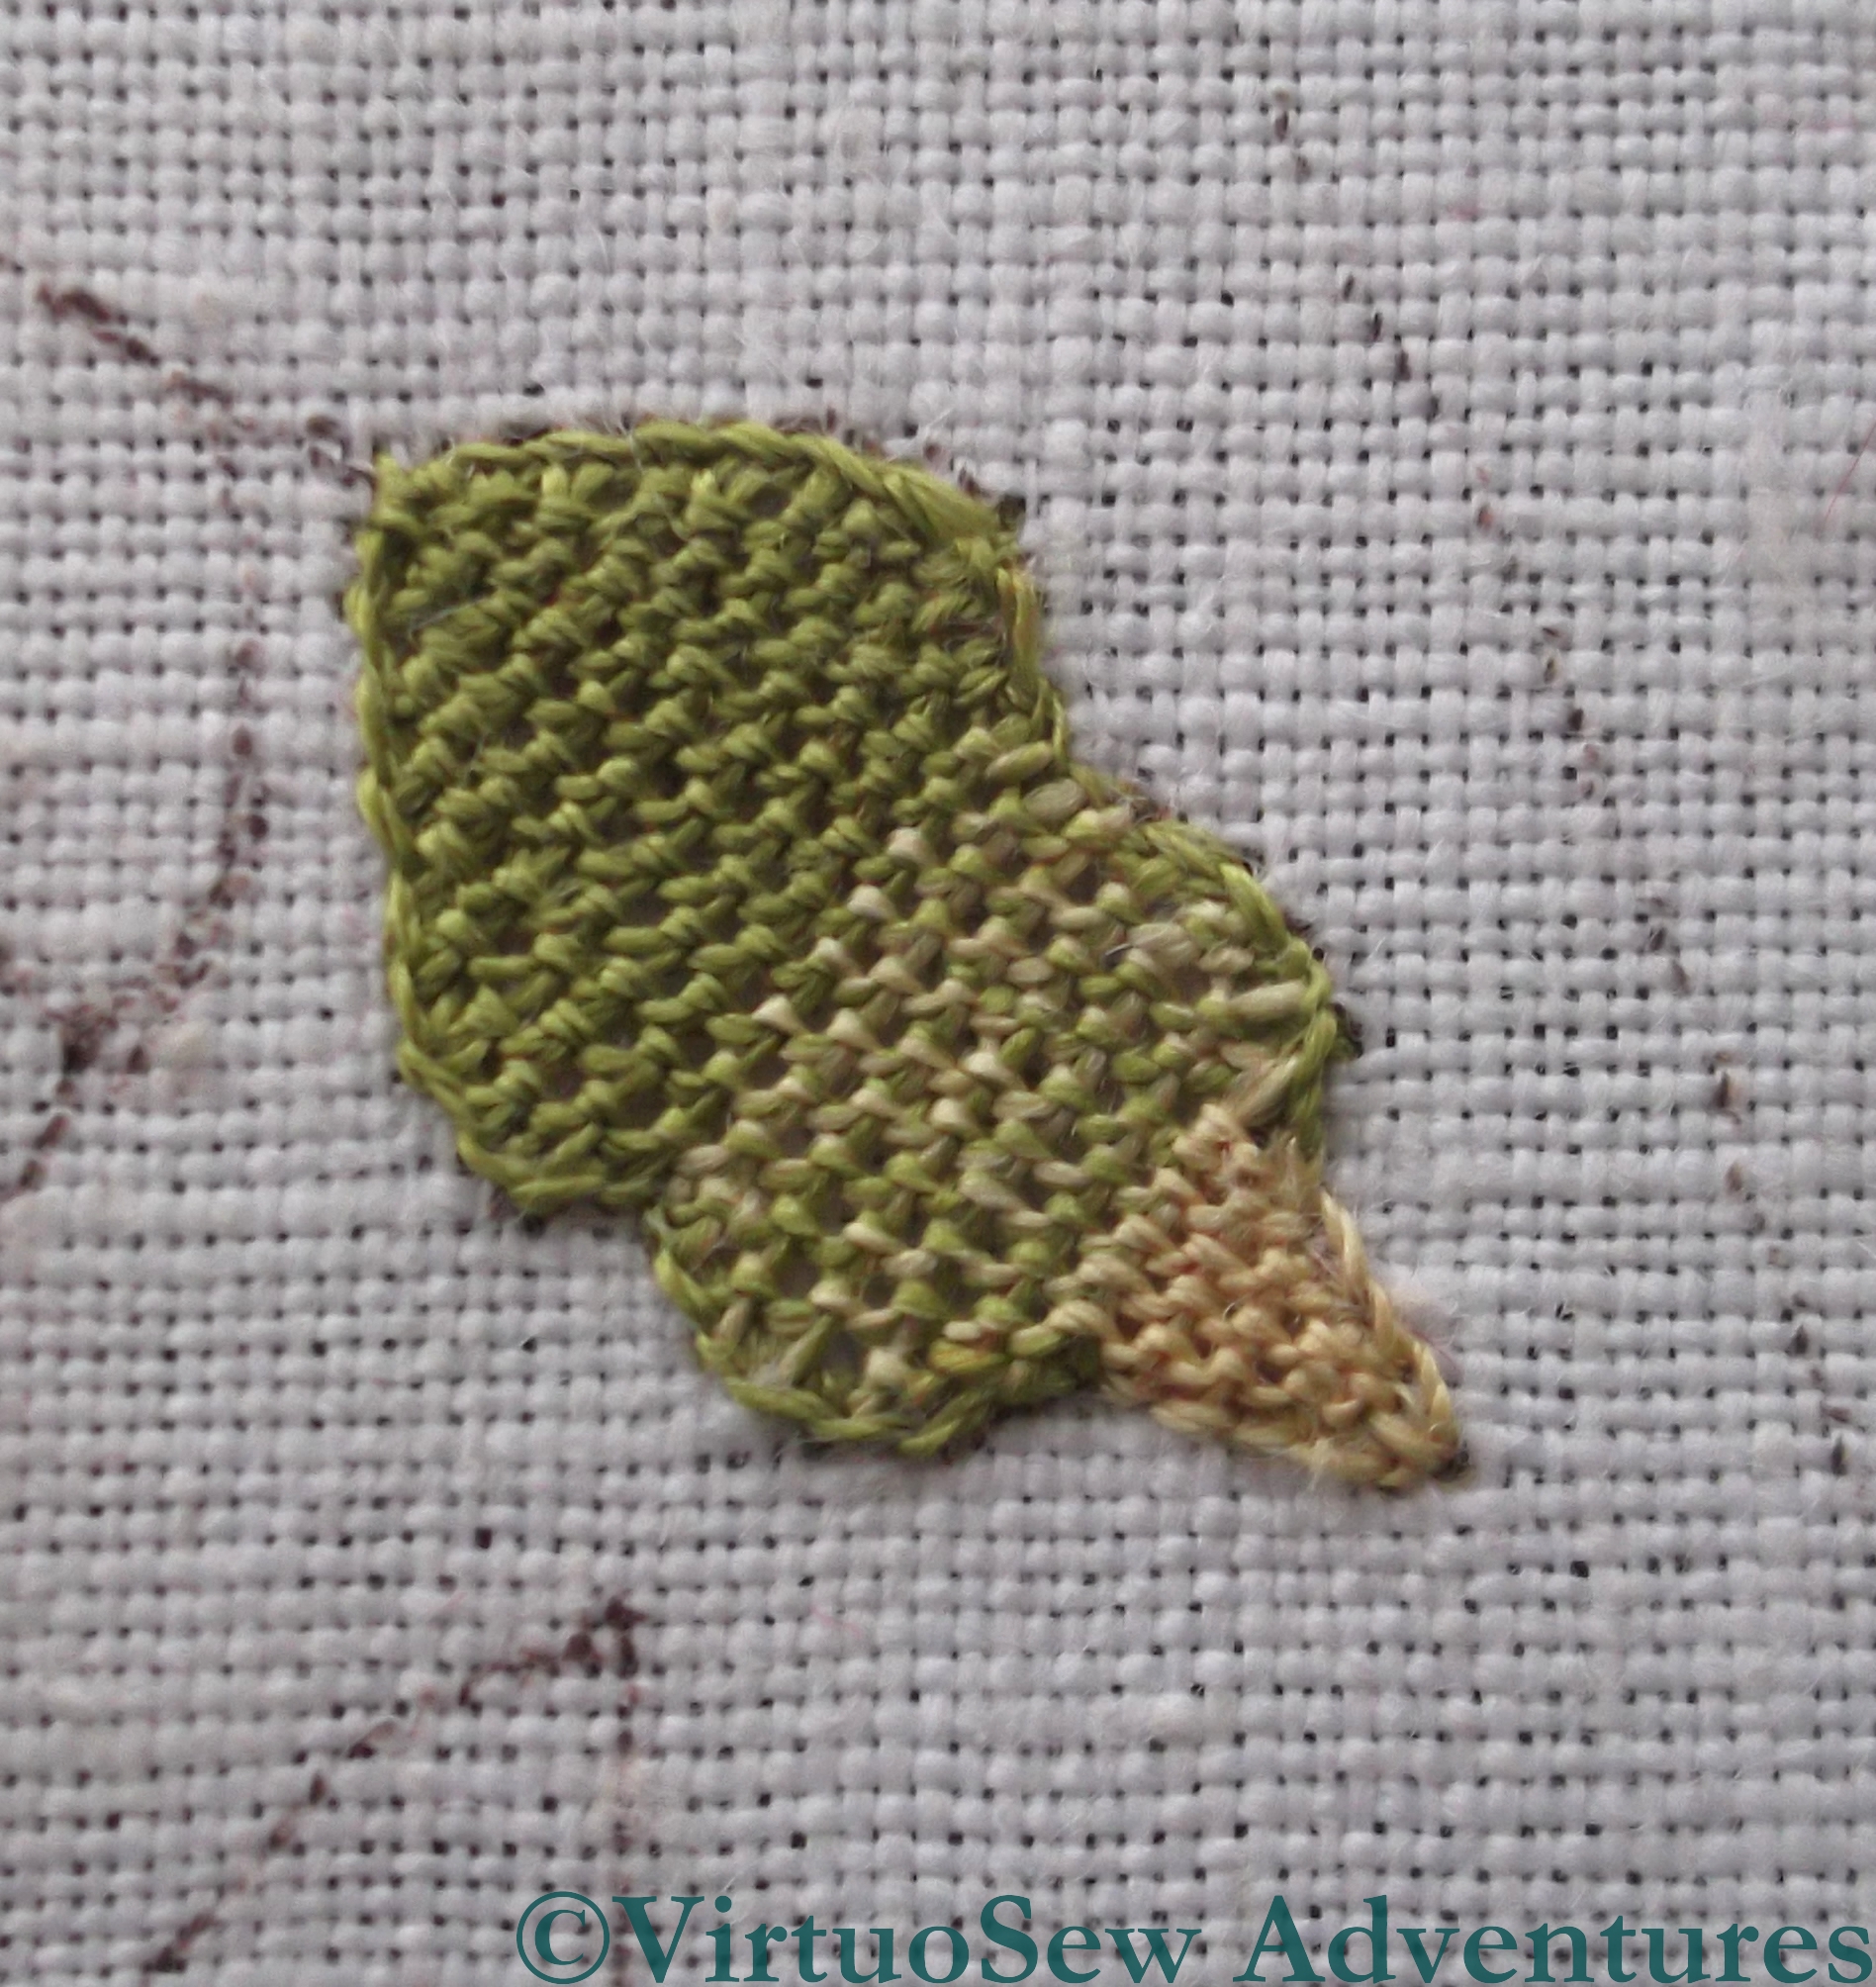
First Blended Leaf
As I mentioned in my previous post, Month Four consisted of the Tudor Roses and a plethora of leaves in a variety of combinations of colours. It was not uncommon for embroiderers of the period to blend colours in the needle, and Tricia suggested that we might choose to do the same. This is not quite as straightforward as one might hope, since of course the Soie Perlee is not intended to be plied and recombined, unlike the stranded cotton I used when I did something similar with Tracy Franklin in Durham.
Second Blended Leaf
It produces an interesting effect, and it does allow for a smoother colour change than using the threads in their normal state. What interested me, however, was that without being aware of changing my technique in any way, the coverage of the second leaf was markedly denser than that of the first.
Each leaf took about three-quarters of an hour to work, which tells me that I’ve some considerable time to go before I can get on to the goldwork or turn over to work the brim – there are about 28 more leaves to work!
Glittering Nightcap – Month Three Done
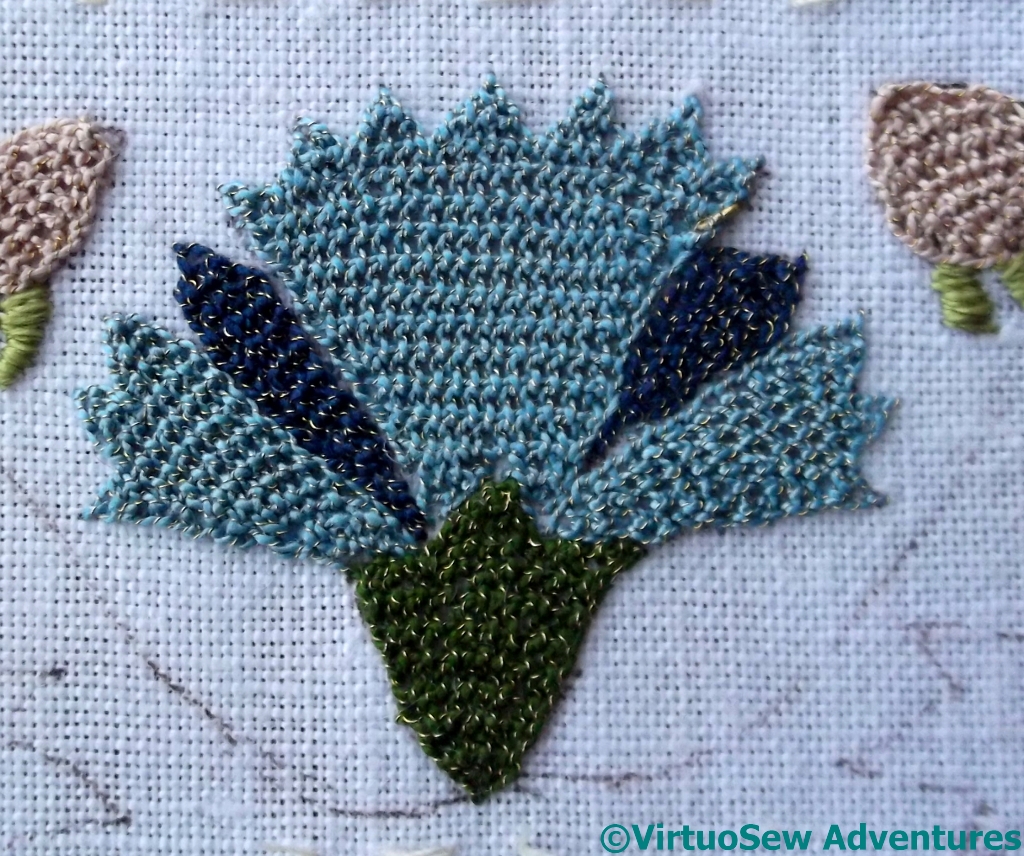
Pansy From Month Three
This month, because I’m working the main body of the cap first and then intend to turn over and work the rim, has been a little thin of activity. I’ve really no excuse for it taking so long except that I’ve become very taken up with the Dreams of Amarna. The work on the main part of the cap this month has been only two pansies, worked in detached buttonhole stitch using the Gilt Sylke Twist, with straw-coloured calyxes worked in Soie Perlee.
The other half of Month Three – two pomegranates on the rim – will have to wait until I turn the fabric over. Next month’s activity involves two Tudor Roses and a positive plethora of different leaves in various combinations of Soie Perlee.

Month Three Done
This picture shows one of the two pairs of sections that will make up the finished Nightcap. As you can see, there are still large gaps in the pattern, but it is gradually filling in, and Month Four actually completes the embroidery. Months Five and Six concern the finishing of the embroidery to create the nightcap and the silk-brocaded stand for it.
A real treat

Last week, not less than three of my assorted interests combined to give me a real treat.
The Queen’s Gallery in London is holding an exhibition called “In Fine Style“. The exhibition uses portraits of the Tudor and Stuart period to show the changes in fashion during the period, and there was a lot of embroidery and passementerie used, so the painters had a lot of scope. I’m interested in painting, too, so I’m always intrigued to see how a painter depicts texture, structure, and colour. Furthermore, major exhibitions these days often have additional events – not just a Private View on opening, but outreach events for schoolchildren, evening openings, tie-in events with other artists. An additional event caught my eye – an evening opening, followed by a recital of the music of John Dowland (contemporaneous with the paintings) given by the lutanist Jakob Lindberg.
Now, I’m an early music girl, so what with the chance to be nose-to-nose with some famous paintings and then to listen to music of the period surrounded by paintings of the composer’s assorted patrons…
I had a great time. There were some very familiar paintings – Elizabeth I as a princess, in a rose-red gown, with sleeves dripping gold embroidery, and a couple of pearl pendants you could swear you could pick off the canvas, van Dyck’s triple portrait of Charles I, Frances Stuart looking seductive in satin, with an entirely superfluous billow of fabric behind her. Familiar in reproduction, and fabulous. But, my goodness, the painting is even better when you can see it for real! Fur, gold thread, damask figured weaves, embroidery, gleaming pearls, glinting gems.
Then there were some unfamiliar ones. Edward IV, who I’ve read described as a blond beautiful giant, six foot tall, charismatic and something of a party animal. The portrait showed me a thin-faced, introspective man with dark red hair and a marked resemblance to the famous portrait of his brother Richard III – I suppose sitting for a portrait encourages introspection. Frances Stuart, in a buff coat like a man’s, her hair dressed to look like a man’s wig. Various unnamed men and women in the fashions of their time, in masque dress, fashionable clothes, clothes to make a statement. One lady wore a beautiful embroidered gown with a silvery gauze overdress set with crystals – imagine how many tiny brushstrokes you would need to bring a single crystal to life!
There were also some real examples – an embroidered jacket (not the Margaret Laton jacket, but very like it), a nightcap, and some gloves. And a Casket. And what a casket. It had a whole grove of needlelace-leaved trees planted on its’ lid, not to mention a horde of people frolicking around the side. And if I’ve learnt anything it’s that my detached buttonhole stitch is nothing like fine enough or tight enough. Sigh.
And the evening wasn’t over yet – after gloating over all that fabulous painted and embroidered finery, the recital! Jakob Lindberg is a great lutanist and a charming and knowledgeable man, so his introductions illuminated the music, and entertained the audience as much as his playing did. Though I did find myself wondering whether the composer had so attentive an audience when he played in the courts of England and Denmark!
First Voluntary Project – Third Installment
Heathered Thread
Since I was working with leftover threads from other people’s projects, I was “forced to become inventive” – as Joseph Haydn said in another context!
The leaf and bud shown here use Chain Stitch, but I combined single strands of two or three colours in the needle. This is a technique that I don’t necessarily use very often, but it is always one I consider, because heathering is such a good way to create subtle variations in colour and tone. There’s a nice example of this on The Floss Box blog, where the thread for the water is blended in the needle.
The veins are marked in Thorn Stitch, although I’ve just noticed that the central vein is in Chain Stitch!
Forget-Me-Nots
The forget-me-knots and attached leaves and stems are almost a sampler all by themselves. The leaves and stems are worked in Coral Stitch, which also outlines the flowers. Inside the flowers, there are tiny circles of Rosette Chain Stitches, worked around a Buttonhole Wheel in golden yellow. Rosette chain looks better worked rather bigger than this – I’ve used it since in several projects – and those who followed my posts on the Goldwork Masterclass will know by now that I have since developed a positive obsession with stitch and fabric scale!
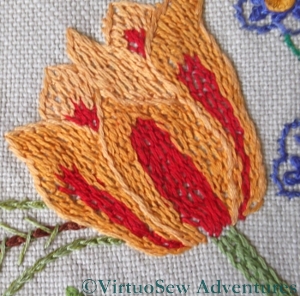
Feather Stitch Tulip
The Tulip is filled with close rows of Feather Stitch in red and golden yellow, outlined with stem stitch. It creates a slightly odd texture that I’m not entirely unhappy with, although it would balance the other flowers better if the filling were not so closely packed, and the colours were rather paler.
The stem is worked in a single row of chain stitch with a row of stem stitch on each side. I was gaining enough of a grip on embroidery by this stage that I made an effort to keep the stitch lengths comparable, which gives a nice regular rhythm to the stem.
Quick update on the Spot Sampler
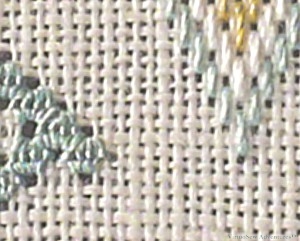
Spot Sampler Fabric
I miscounted some of the stitching on the central motif of the Spot Sampler we are doing in the Tudor and Stuart Goldwork Masterclass – cue much muttering and swearing – so when I had convinced myself that I really did need to unpick it and re-stitch it, I was rather anxious. Some fabrics never recover from the first stitching, and I felt that there was a very good chance that the pulled Queen stitches would be pretty much impossible to recover. Furthermore, Queen stitch is the most difficult to unpick that I have ever had to wrestle with. Especially at this scale. I ended up using a laying tool and a seam ripper, with my heart in my mouth in case I cut something I shouldn’t.
And yet look at it. It’s hard to tell where the stitching was, and even unpicking with the laying tool hasn’t done much harm. I’m very impressed, and greatly relieved.
Same Thread, Different Stitch
I also noticed something in stitching the beginning of the bargello section I started while I was thinking about restitching the central motif. The lowest row of the bargello section and the Queen stitches just beside it are worked with the same colour. The differing light reflectance on a straight and uninterrupted stitch, in comparison with an angled stitch which is interrupted by a tyeing stitch has actually made about two or three tones difference in the colour as it appears. I knew about this effect, but it is the first time I’ve seen it demonstrated quite so clearly.
This sampler is teaching me a good many things in addition to the stitches!