
Category: General Posts
Transferring Designs
Any book on embroidery will usually tell you about methods for transferring designs to the fabric. In fact, I think some of them are guilty of plagiarism – although from whom, in the best traditions of the circular firing squad, it would be hard to know.
Last week there was a discussion on Twitter relating to the Great Lady’s Magazine Stitch Off and particularly concerned with transferring the design once you’d chosen it, and I suddenly realised that not one of my shelf (ahem, shelves!) of embroidery books actually suggested which method might be most appropriate when, or what hazards or difficulties they present.
So I thought I would pull together what I’ve picked up and found out over the years…
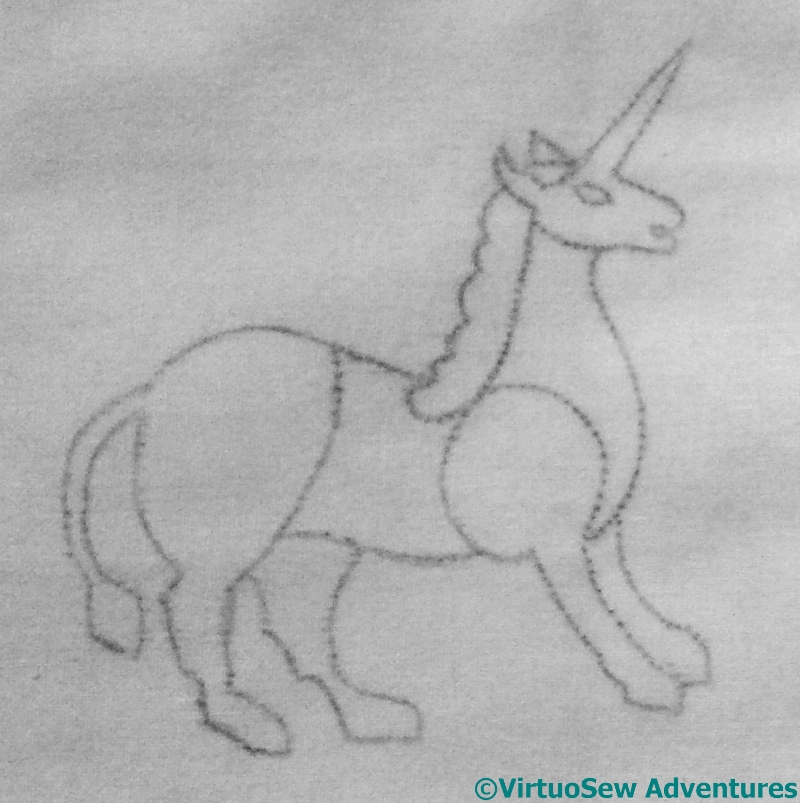
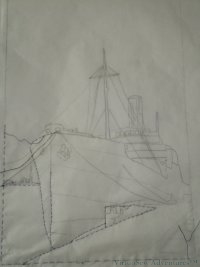
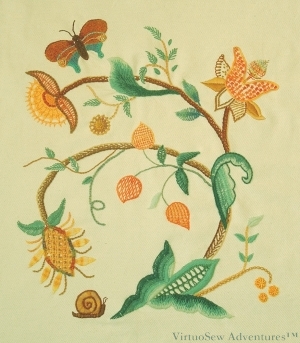
The Unicorn
First, Prick and Pounce. This is one of the oldest methods – almost certainly the only one available to the Lady’s Magazine subscribers. I’ve come to it relatively recently, but I use it a lot. It’s not good when my tennis elbow flares up, because pricking holes in the pattern is a slow and repetitive business, perfectly designed to produce a repetitive strain injury. It’s also not good – as I discovered with the pashmina for the Stitch Off – with a mobile fabric which is a little widely sett for the thickness of the constituent yarns. I had to reinstate the lines with a dressmaker’s chalk, which wasn’t nearly as precise as I would have liked!
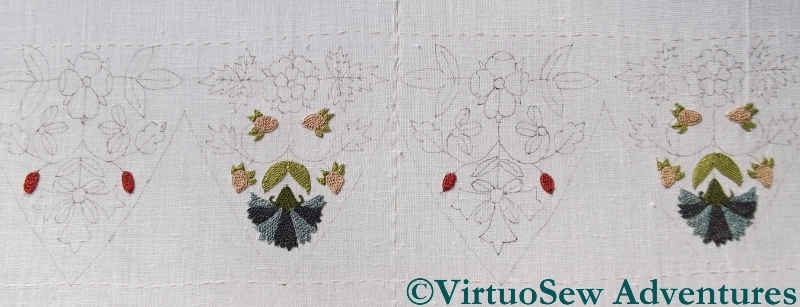
Glittering Gentleman’s Nightcap – Month One
Next, the Light Box method. Actually, not having a light box, it’s a “tape it to the window and do your best” method. I did this with the Gentleman’s Glittering Nightcap, and it worked fairly well, but it’s limited to the size of your window or lightbox, whereas Prick and Pounce is limited by the size of your table! I also become nervous when using indelible ink such as the (recommended and provided) Pigma pen. I’m always terrified of inadvertently drawing a line somewhere I can’t cover it.
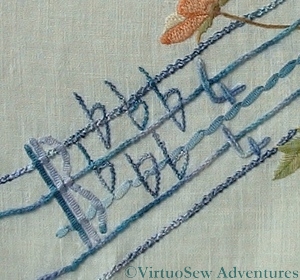
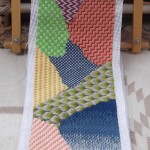
Five Flats on the Piano Shawl
Which leads me on to a caution. I’ve used quilter’s “disappearing” felt pens instead in the past, and had one of the scariest embroidery experiences I’ve ever had. First of all, the lines didn’t last quite long enough for a hand stitcher, and then…
When I washed the piece, the lines reappeared, and what’s more, they kept coming back. I can’t remember what it took to be rid of them, but certainly some prolonged soaking in detergent was involved.
Hair-raising doesn’t begin to describe it, and as mine is nearly a yard long, that’s no joke!
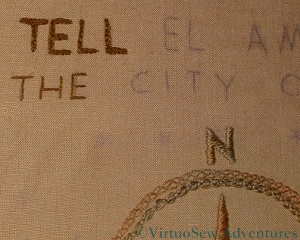
A Corner Of The Map Of Amarna
I used a Transfer Pencil for the Map of Amarna. This works nicely – provided you remember to reverse the pattern if it needs it! – if the fabric is a natural fibre. However, it can be hard to keep the transfer clean as you make it, and then there is a risk that you will transfer indelible smudges to the fabric.
I’ve also found that the lines sometimes spread as they transfer, which may or may not be a problem, depending on how detailed the design, and how much unembroidered fabric may be showing. As it always says on the packaging – test the whole process on your fabric before using it for anything important!
Transferring the Design
In the case of a really tricky fabric, such as the velvet for the Camberwell Panel, Running Stitch through tissue paper works really well. It’s rather time consuming, but then, I don’t think any method is especially swift.
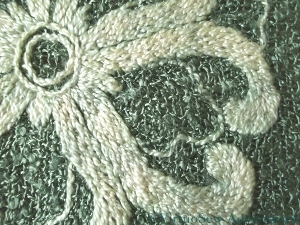
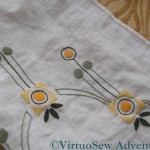
Scarf Motif – CloseUp
There are soluble fabrics which I know many stitchers recommend, but I’ve only worked one piece using it, and the design drawn on the soluble film was hard to see, so I can’t describe it as an unalloyed success.
In truth, a stable natural fabric such as linen will probably happily accept anything thing you do, and the fragile, “difficult” ones will each require a different response. The trick is to remember to pause before starting, to make sure you pick a sensible method for the fabric and the design!
Spinning
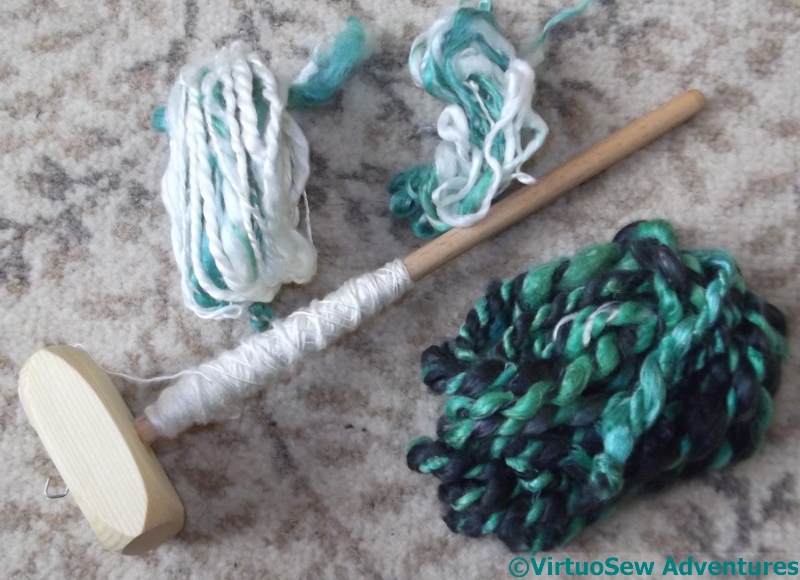
Drop Spindle And Yarns
I don’t usually go to workshops at the Knitting and Stitching Show, but since I’ve taken to going to the Thursday evening opening as well, I thought I would have time this year.
And I did. I went to a workshop on Spinning Silk Mawata with Ruth MacGregor, and came back with my very own drop spindle to play with.
First of all I’ve never been to any fibre related workshop at which there were tubes of handcream on the table! Secondly, although I have – literally! – written a book about spinning, I’ve never held a drop spindle in my life and I had no idea what to expect. My book is about industrial spinning, and the machines always did the difficult stuff…
It turns out that silk mawata is a web of filament that can be drafted (stretched) and spun fairly easily – it’s a forgiving material, and because silk is so strong and the filaments are so long, it’s easy to draft and create fine threads. Of course, that means that spinning heavier threads is going to take a bit more thought and care.
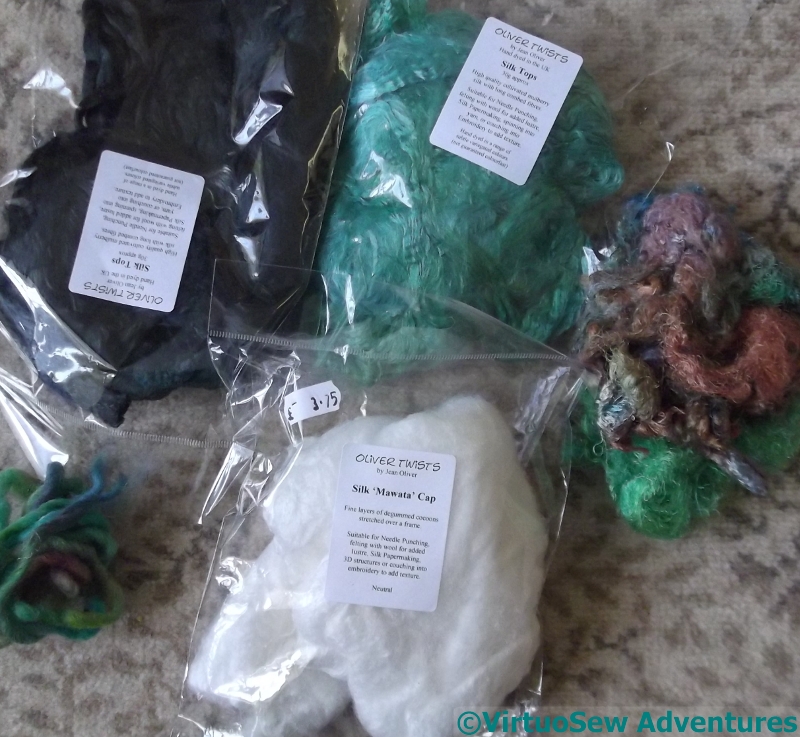
Spinning Supplies
Or – since Ruth taught us how – there is always the possibility of twisting two threads together to make one. In the photo above you can see my early efforts. The two light ones are both fairly simple plied yarns, but speaking as a fancy yarn specialist, the dark one is a slubbed gimp yarn. I just wish I could claim that that was exactly as I designed it to be!
So I came home with a packet of silk mawata caps and some silk tops, so I can play and learn to make the thread I want to make.
Eventually I want to be able to spin in both wool and silk, and use some of my yarns in the Vision of Placidus panel…
Tiger Lilies
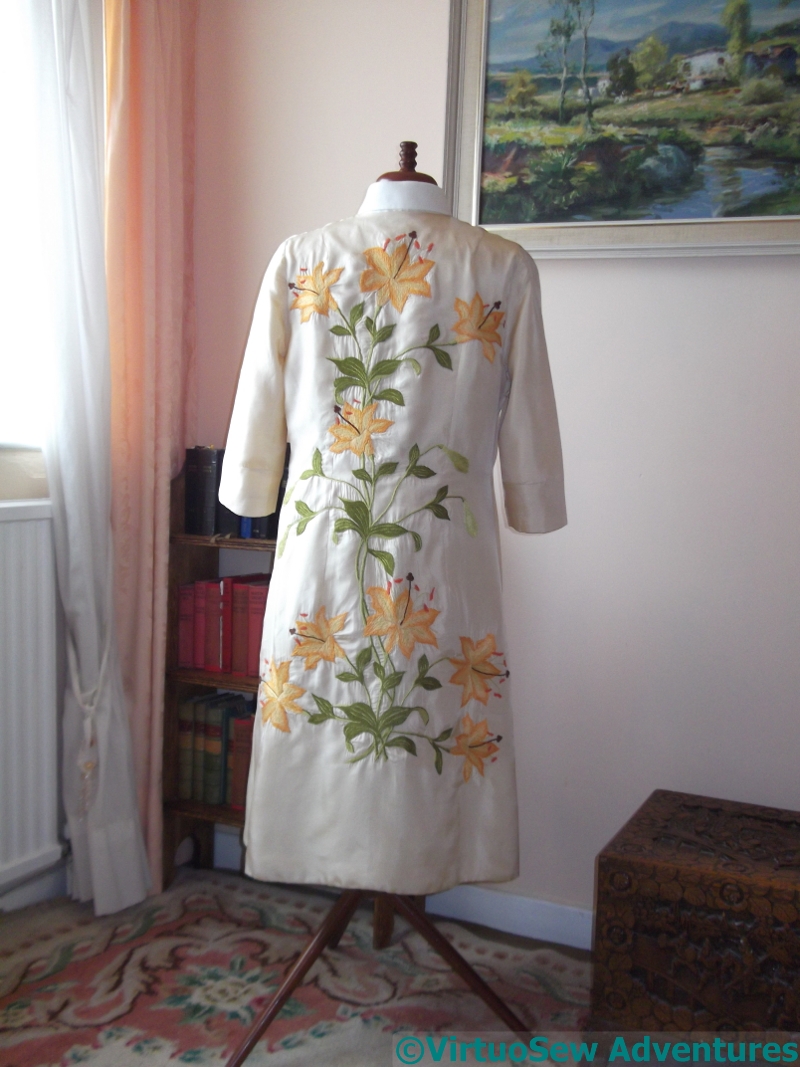
Tiger Lilies – Long View
This rather fabulous coat was a collaboration. My mother made it for herself to wear at a friend’s wedding in the early nineteen-sixties, and when she began to run out of time, Grandmama stepped in and stitched like a whirlwind to get it finished!
The original outfit was a silk dress and coat combination, a very simple sheath dress, and this edge-to-edge, three-quarter sleeve coat. The front is completely unadorned, because, after all, at a Church wedding people will mostly see each other from the back!
The design of Tiger Lilies is from a transfer. Actually, we think it was three of the same transfer, cut and put together to create a design that fit the coat back. After the darts had been put in…

Tiger Lilies – A Flower
I’ve seen a few cream running stitches which suggest to me that, rather than using the transfers as transfers, the design was stitched through the paper. Given the sensitivities of silk, that was probably very sensible!
The embroidery is worked in stranded cotton. It’s all very simple stitchery, long and short stitch, stem stitch, French Knots, and a few buttonhole wheels.
It relies for its effect not on complexity of stitching, but on the colour and pattern combination.
If I’m going to be picky, the silk was a bit light for the stitching – although the puckers may be a result of years and cleaning, as I can’t imagine Grandmama, after Miss Hunter’s training, would have stitched with such tension, and no more would my mother, after Grandmama’s training!
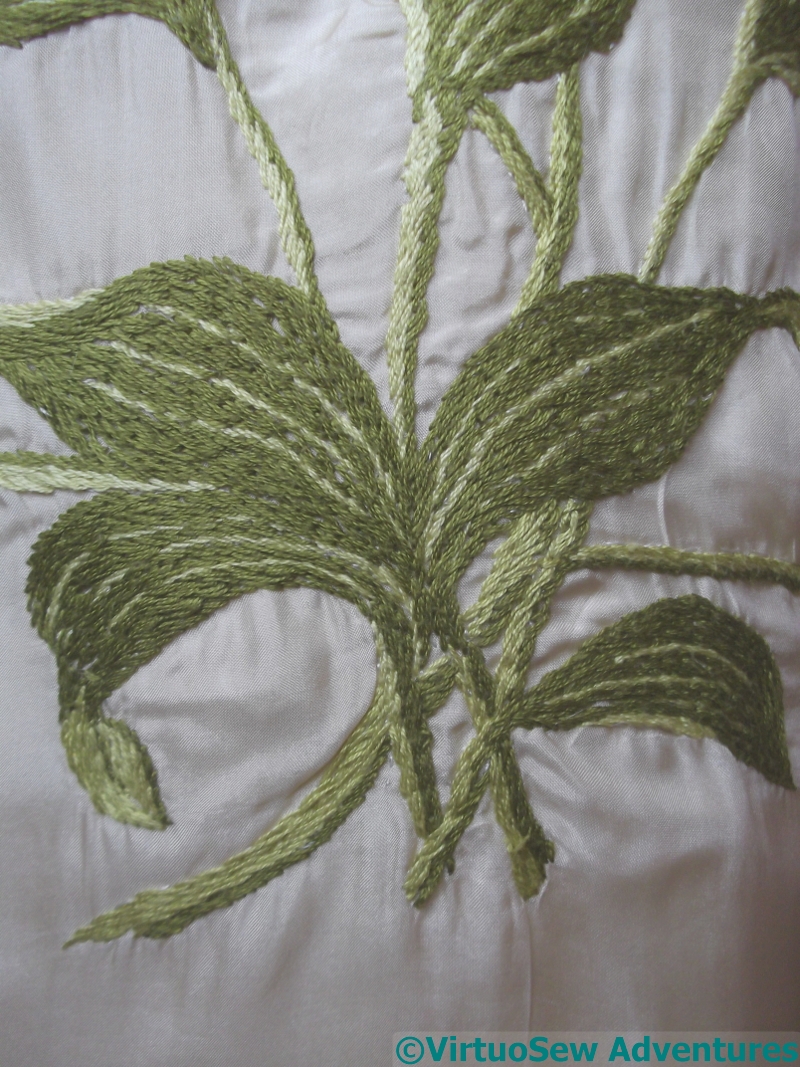
Tiger Lilies – Leaves
Grandmama also contributed assistance in making a pillbox hat, ornamented with swirls of gauze to match the colours, and then they painted a pair of shoes (Rayne, no less!) and a handbag (Marks and Spencer, alas) to match the green gloves which were bought new. A three-strand green stone bead necklace completed the outfit, and my mother remembers receiving a lot of compliments, at that occasion, and several others later.
Many years later still, when I was in the Upper Sixth, with a pale orange sheath dress underneath, I wore this for the Founders Day Service at school. We went into town afterwards, and my goodness, how people jumped to serve us!
Regrettably the coat fits neither my mother nor myself these days, and we’re wondering what to do with it…
More to play with..
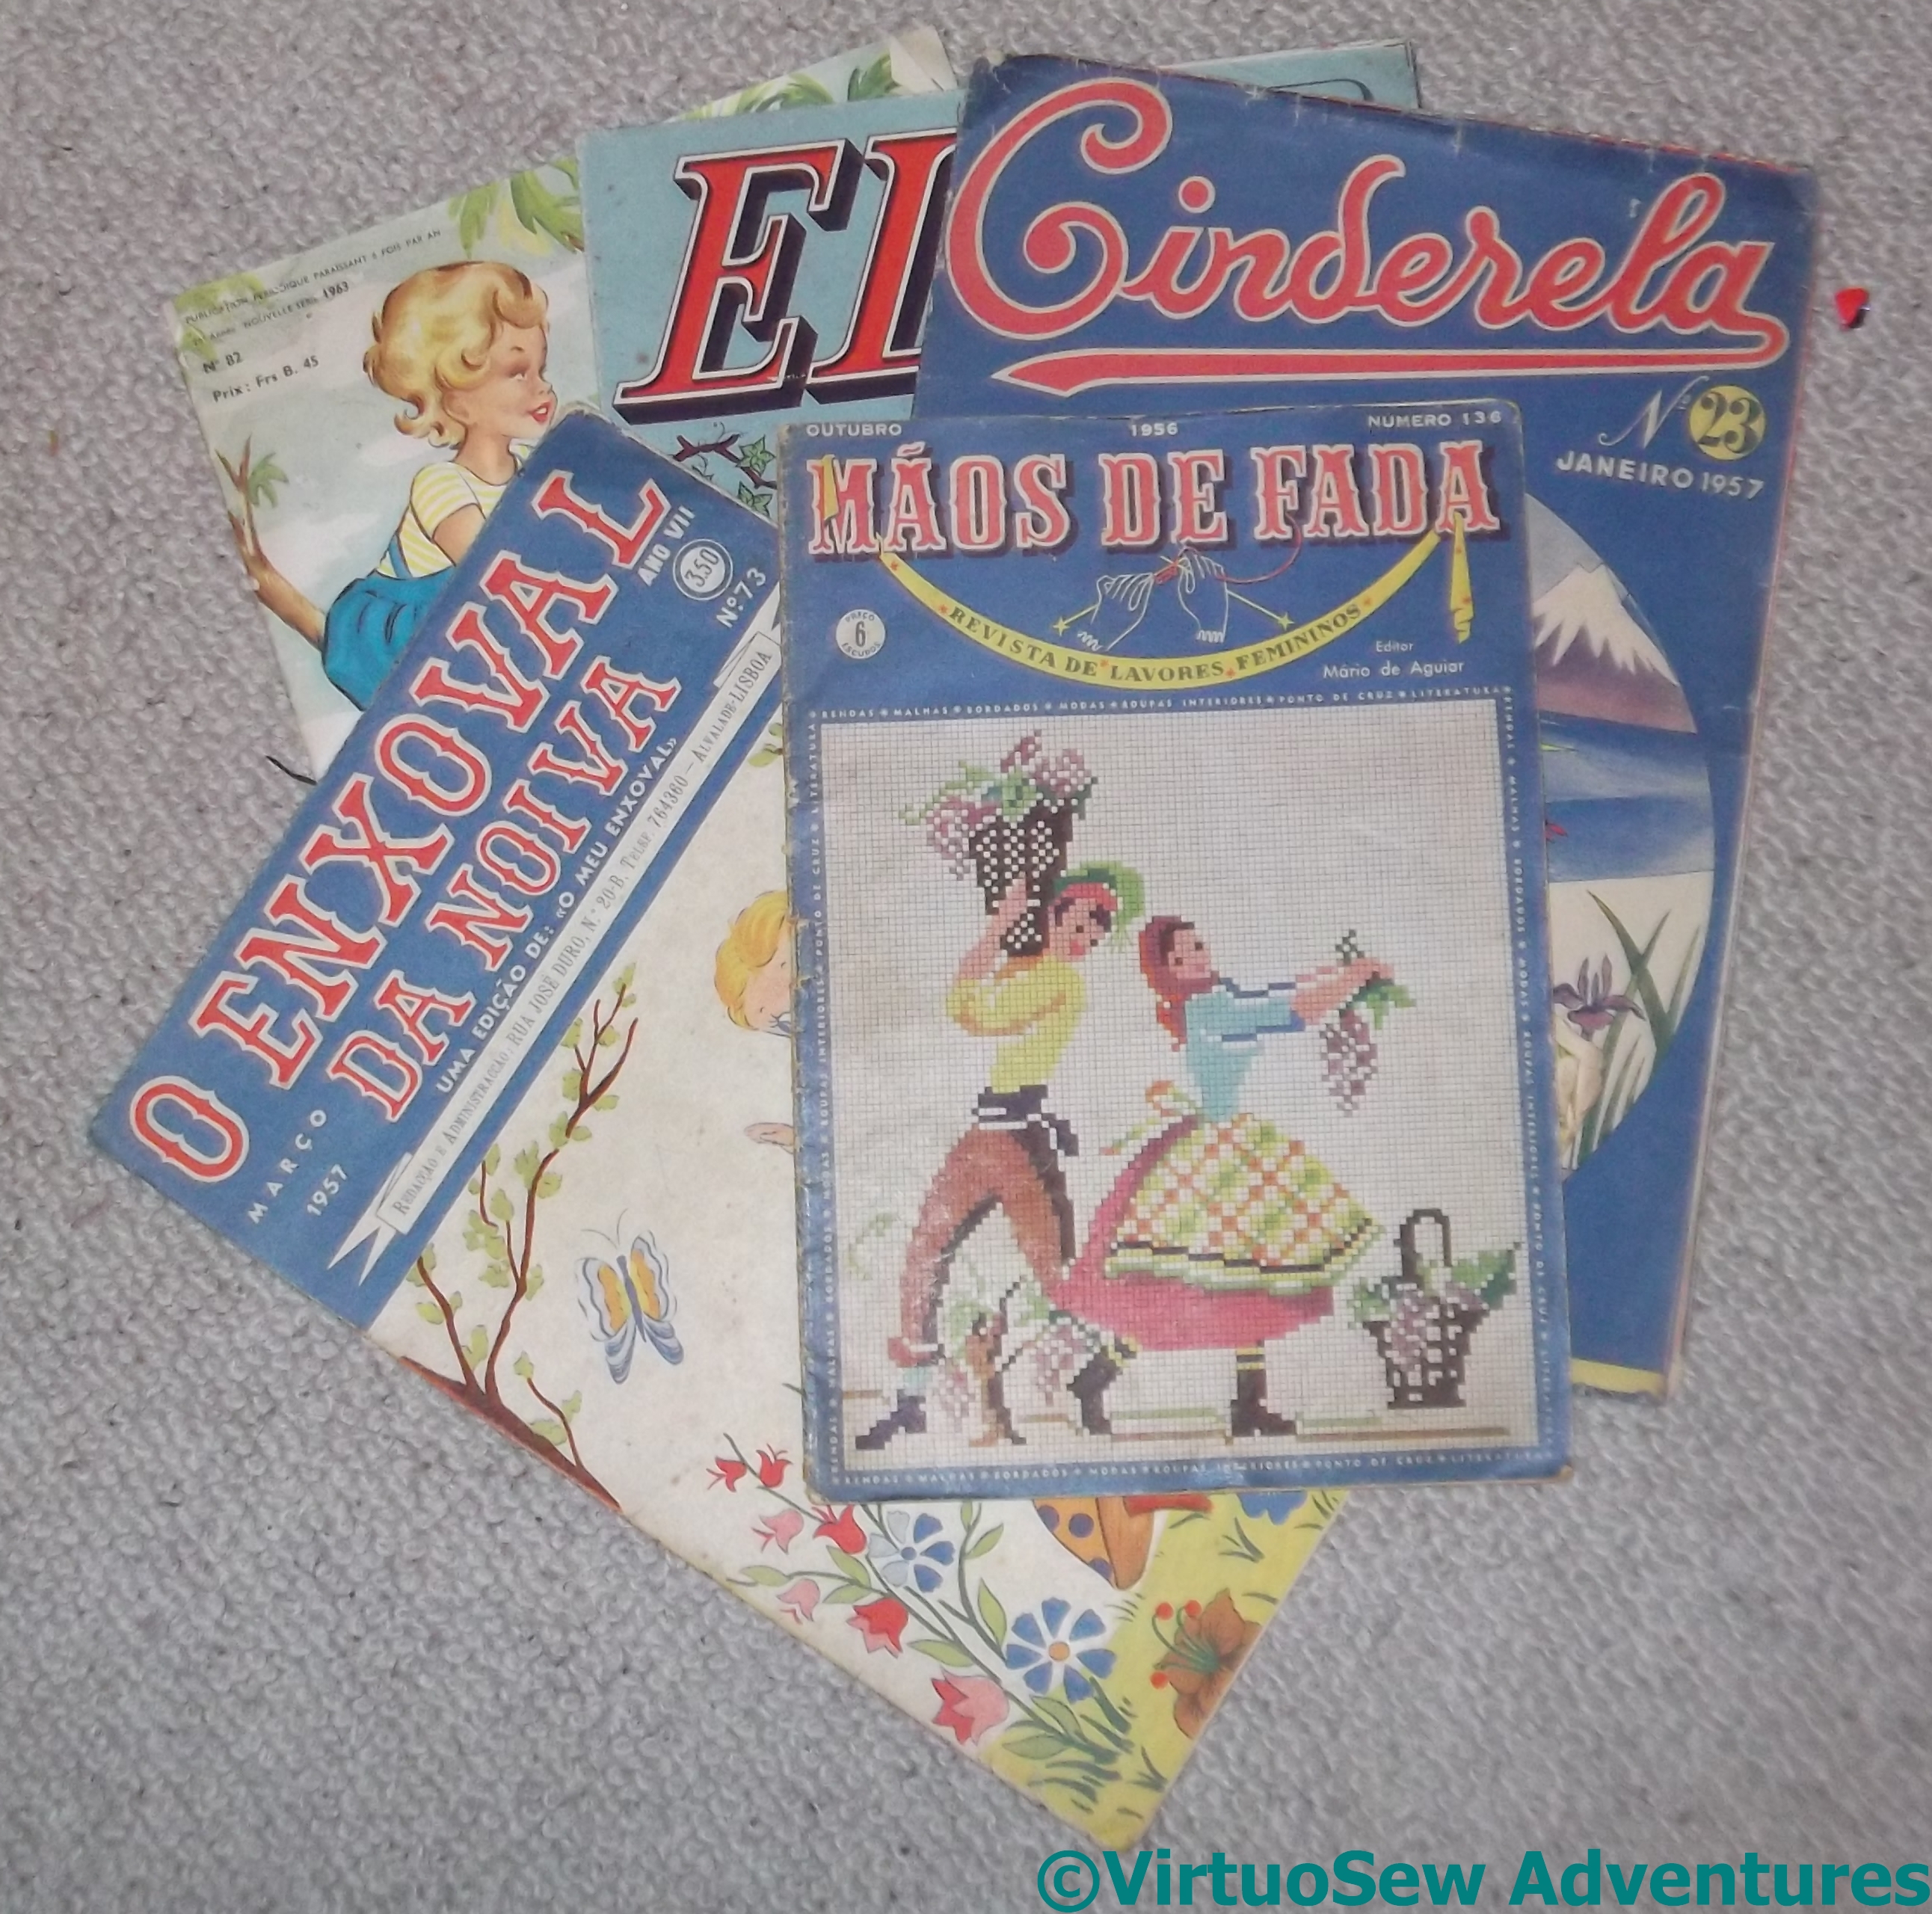
Portuguese Patterns
Recently we had a visit from some Portuguese friends, who we last saw when we were in the Azores. They had obviously remembered my delight when I found the embroidery shop in the main square at Punta Delgarda, because for their hostess gift, as well as bringing some coffee and olive oil, they brought a set of vintage Portuguese sewing and embroidery patterns!
Although they look like magazines, each one is in fact a large sheet that unfolds to provide drawn-out patterns for a multitude of types of embroidery, including surface embroidery, appliqué, cutwork and drawn thread work, some of it crisp and simple, some of it bright, colourful and really quite ornate. Suggested applications for the designs appear as well, so next time my inspiration flags (er, and I’ve finished the Azorean Cutwork!), I will be able to leaf through these to refresh it!
Another Pattern
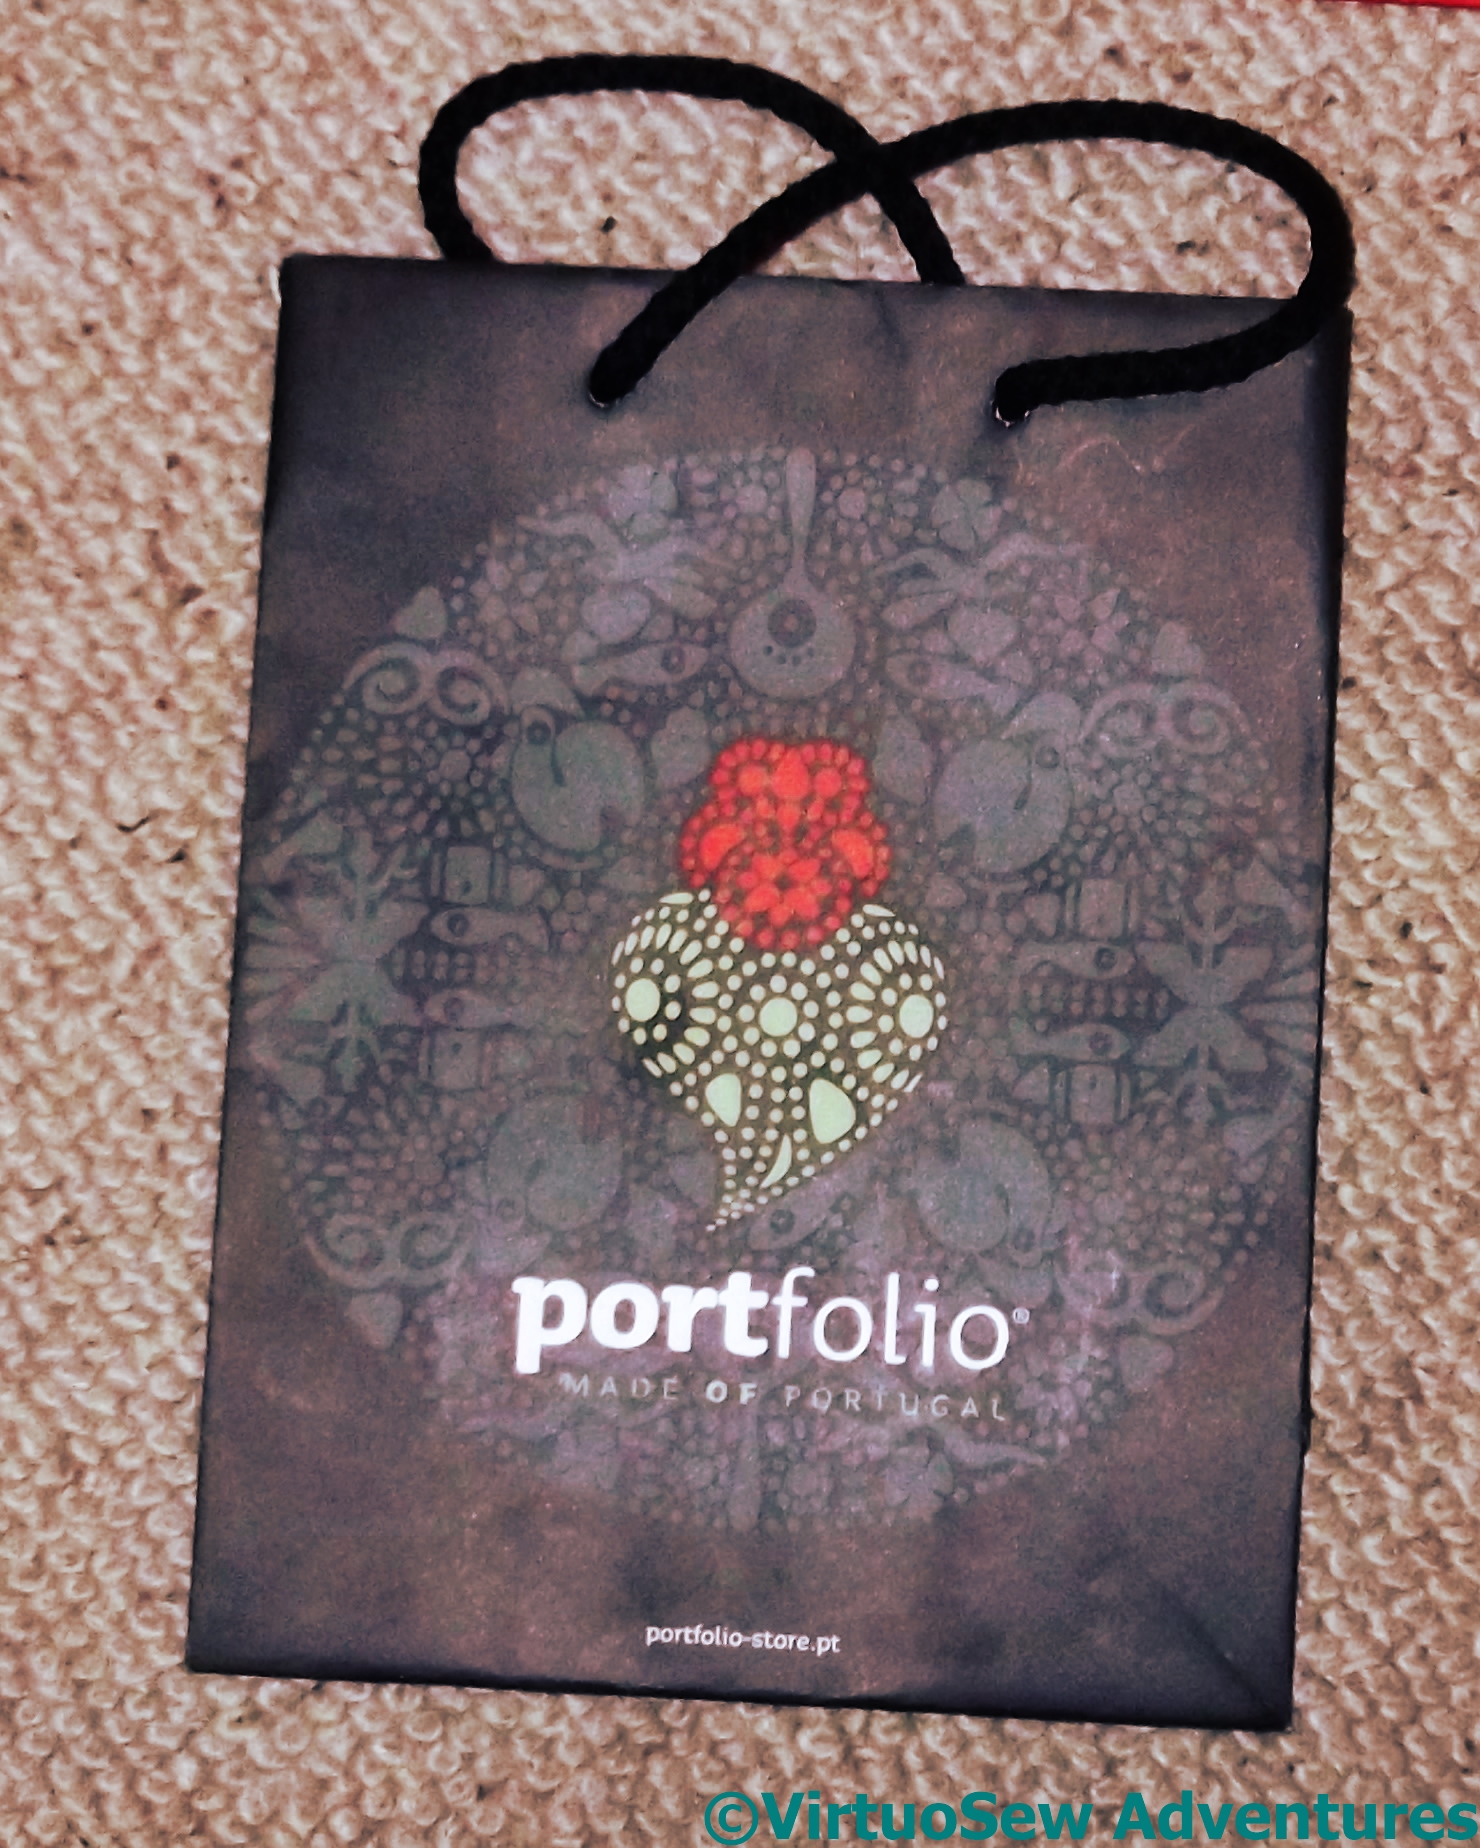
The coffee was presented in this paper bag, which is printed with a design that our friends told us is inspired by a traditional embroidery pattern from northern Portugal. They said they were disappointed not to have found some embroidery for me, but in some ways, I think this is even better.
One of these days I will be able to play with this design, and maybe reinterpret this traditional style in my own way.
I’m looking forward to that!
Housekeeping
An Extensive Collection
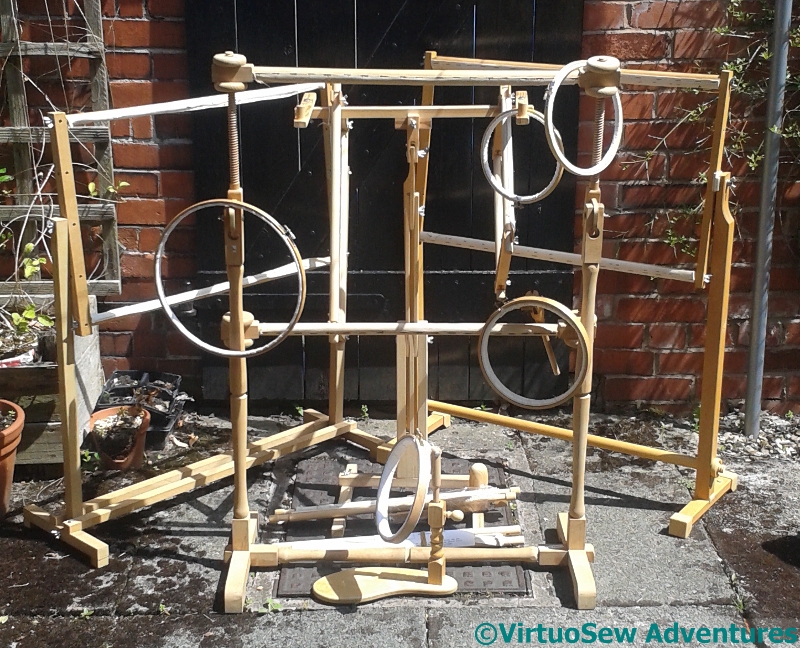
My mother and I are planning a panel for next year’s Christmas Cards, and I went in the loft recently in search of an embroidery frame of a suitable size.
I brought down every bit of wood that looked vaguely embroidery-frame-like, and spent a puzzled hour or so putting them together.
And got a very nasty shock. I’m quite sure I didn’t buy all of these.
Do they breed?
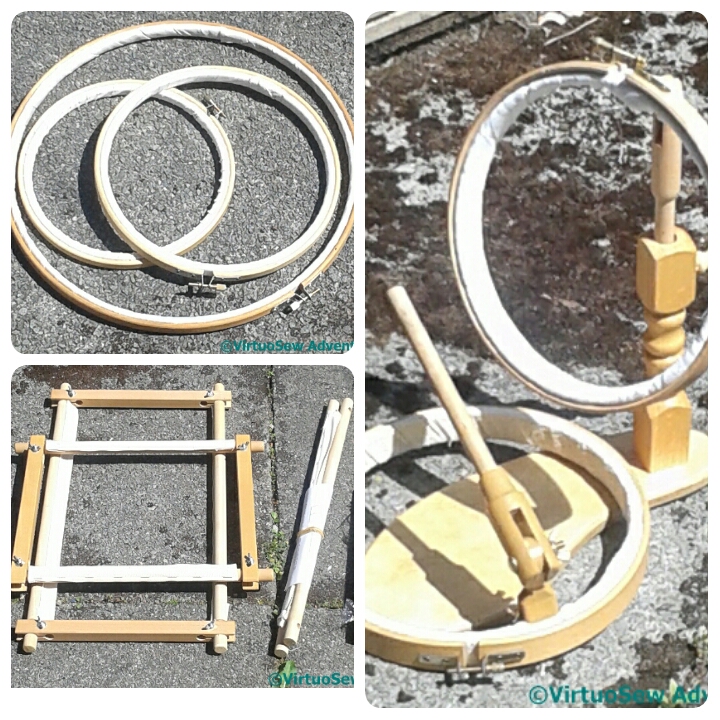
An assortment of frames
Actually, in my own defence – some years ago a local embroideress died, and her daughter wanted to give away all of her stash and equipment. Preferably all at once, to one person.
So I toddled off, burdened with I-didn’t-know-quite-what, and – not needing any of it at the time – put it in the loft. Then life got very busy and I didn’t get around to doing the stocktake I’d intended.
Until now.
And the most galling thing of all is that not one of those frames is big enough for the project we have in mind!
More Kumihimo
There were so many intrigued comments about my Marudai and the braids it made, that I thought I would show you some more of the braids I’ve made.
Kumihimo is a traditional Japanese technique. The braids have a lot of traditional uses in Japan – in fact, an opera singer friend of mine tells me his Samurai costume for his part in a brand-new opera about a crucial part of Japanese history was correct down to properly made kumihimo braids in all the right places!
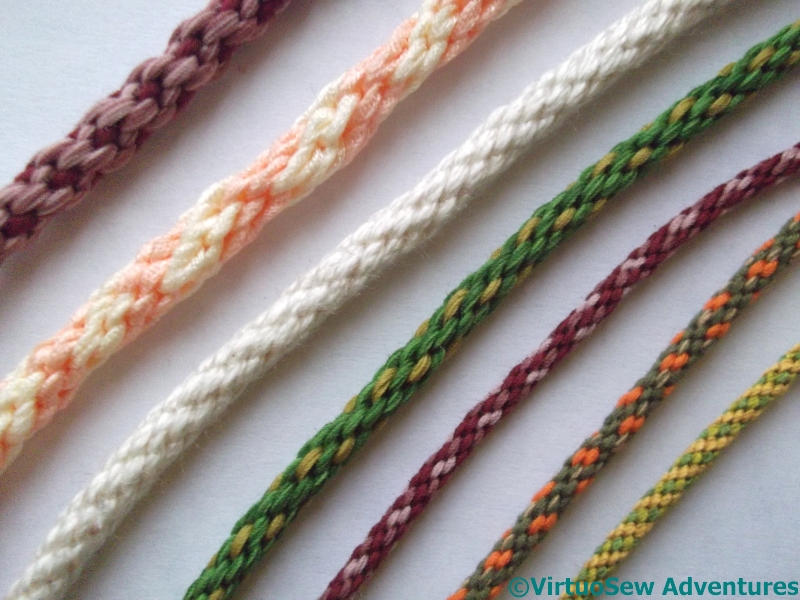
Kumihimo Braids
If you search for Kumihimo on eBay, what you will find, by and large, are bracelets. Now, I’m really not a bracelet sort of girl. I have a few chunky, “statement” bangles, which are worn specifically, explicitly and only when I’m planning nothing more strenuous than lifting a knife and fork. Cord bracelets – no.
However, I do have a lot of heavy, dramatic pendants, and the idea of making cords to point up the colours in the pendants – yes, definitely. I’ve found that sewing machine thread makes a wonderful material for these purposes – it comes in a huge range of colours, and it’s fine, supple and strong. It also lends itself well to heathering – combining several colours in a single strand – and best of all, it’s relatively inexpensive.
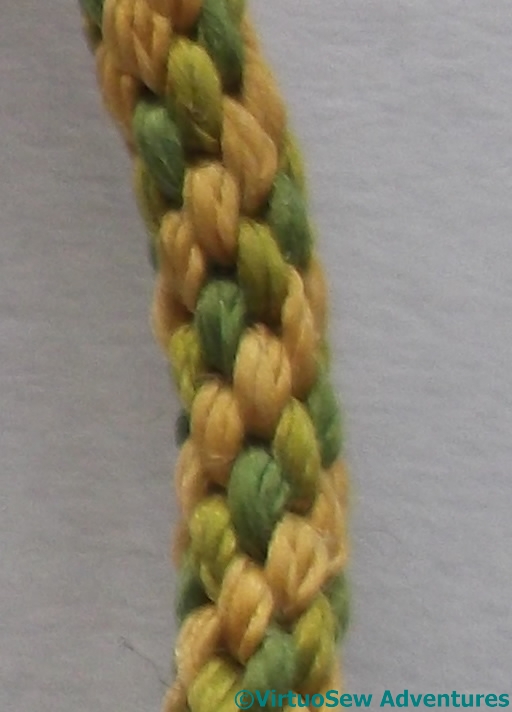
Yellow and Green Silk
The fine green and gold cord is silk, made using some of the thread from the Tudor Rose kit – I used it to trim the Tudor Rose panel.
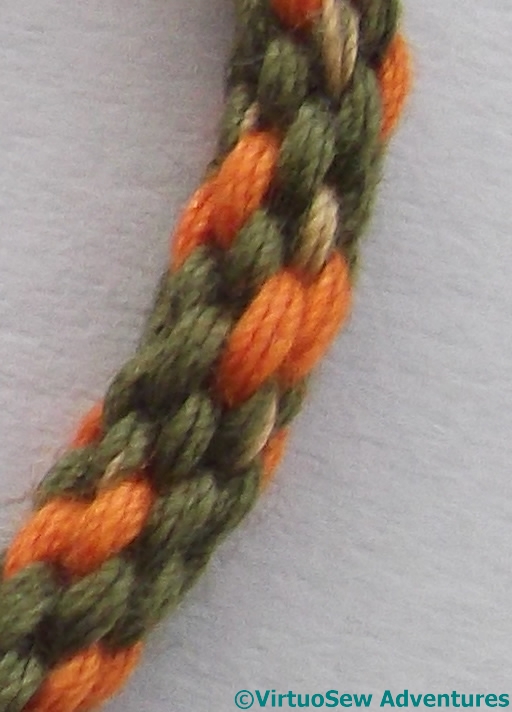
Orange and Green Cotton
The next three, and the top, chunky pinky-maroon, are all necklace cords made using sewing machine cotton, although the maroon mookaite pendant I made the two maroon ones for has spurned both of them with scorn. I’ll try again, because I enjoy kumihimo.

Greens (cotton)
The white one is silk, to go with a pearl-mounted enamelled cross pendant given to me by an old family friend, and which I wore on my wedding day. The cord I used then has become grubby over the years, so this one will see me through a few more. The cream and peach usually carries a glass pendant. It’s one of two I’ve tried for that pendant, in fact – but this “making things match” is never quite as easy as we hope, is it!

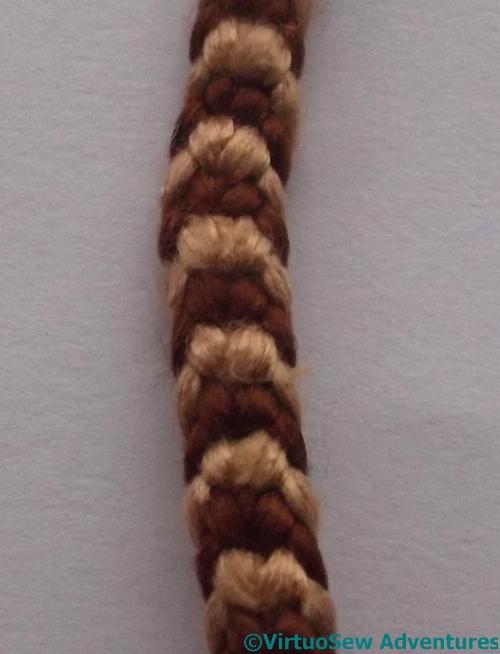
Apricot Cotton
Two Colour Silk
The round apricot rope is huge – about for or five times the size of the other round cords I’ve done. I might mount it with cord ends and turn it into a choker one of these days..
The stripy one is a fairly fine flat braid in filament silk. I worked this one as an experiment, changing the tension (more or less weight on the end) to see what effect it would have. In the end I came to the conclusion I wasn’t being dramatic enough with my experiments!

Flat Teal and Green
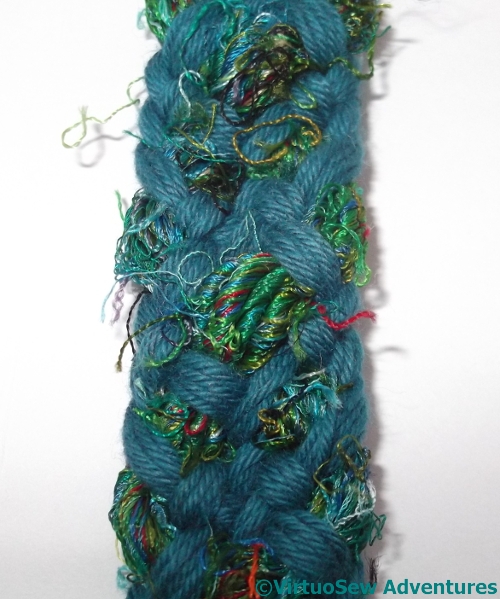
Textured Teal
These flat braids were given extra texture with saree silk knitting yarns. Again, they tell me that some of my experimentation needs to be a bit more dramatic. I was hoping to emphasize the different textures, but used too many strands of the cotton yarn, so there wasn’t enough difference between the strands.
There’s scope for endless experimentation here – and I haven’t shown you the miles of gold braid I’ve made…
Blog Hop
I’ve been tagged in a round the world blog hop by Penny of ArtJourney, and while this post is a lot more “abstract” than my usual posts, it is always interesting to think about your own work in a different way. So thank you Penny, for giving me the opportunity!
1. What am I working on?
Er.. How long have you got? My long term project is the Dreams of Amarna, but at the moment I’m also following the Opus Anglicanum Stitch A Long, and now the weather is closing in, I will soon be back to the Crazy Canvaswork Cushion. That doesn’t include, of course, random little projects that I pick up and put down occasionally, or new techniques I try, but don’t find an immediate use for..
-
- Rough Layout of the first panel
-

- Wings In Laidwork
-
- Two Thirds Done
2. How does my work differ from others of its genre?
I tend not to stick to a single type of embroidery, so there is a lot of cross-fertilisation between the styles of embroidery I use, and the way in which I use them. However, unlike a lot of similarly eclectic embroiderers, I rarely work anything truly abstract: there’s usually a story somewhere at the back of any piece I work. Two more long term projects I have plans for when Dreams of Amarna is done are panels relating to The Golden Fleece and The Conversion of Placidus. In fact, the Conversion of Placidus is bubbling at the back of my mind at the moment; I had a tour of Flag Fan with Francis Pryor a couple of weeks ago (fabulous, by the way, for anyone with any interest in prehistory!), and I’m desperate to include the kingfisher I saw there…
-

- Jason bringing the Fleece to Pelias. Photo by Jastrow (2006) Public Domain Licence
-

- Pisanello “Vision of St. Eustace” in The National Gallery, London
3. Why do I write/create what I do?
Because I love it. Embroidery is the medium in which I choose to respond to stories, ideas – or domestic opportunities. Many of my “non-literary” projects are worked with our house in mind – like the Firescreen, the chair seats, or the Finnish table runner.
-
- Jacobean Style Fire Screen
-

- Finished Chairs
-
- Table Runner Hemmed
4. How does my writing/creating process work?
It varies very much with the project in question. For the Dreams of Amarna, I have read and re-read the book “Nefertiti Lived Here” by Mary Chubb, I have visited the Egypt Exploration Society and the Petrie Museum, the Treasures of Tutankhamun exhibition and Discovering Tutankhamun at the Ashmolean and I have taken a course in working with metal threads. In fact, the idea was bubbling in the back of my mind for ten years before I even set a stitch!
In contrast, projects like the Elephant Doorstop, the Stones of Venice Footstool, or the Knot Garden are much more improvisatory!
-
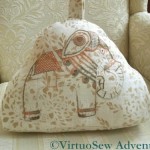
- Finished Doorstop
-
- Finished Footstool
-
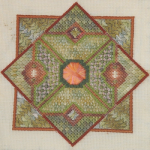
- The Canvaswork Knot Garden
- Janice, who blogs at Dancing With Sunflowers, was one of the first people to encourage me to start to a blog, and to welcome me to the world of blogging. She crafts thoughtfully using a range of techniques, many of which I know I wouldn’t be good at, so I have the greatest admiration for her.
- Jules has recently started a new blog, Needle and Pen, since she felt that her earlier blog no longer allowed space for her changing interests in craft and art. I’m going to be very interested to follow the development of her new adventure.
Harrogate Knitting and Stitching Show
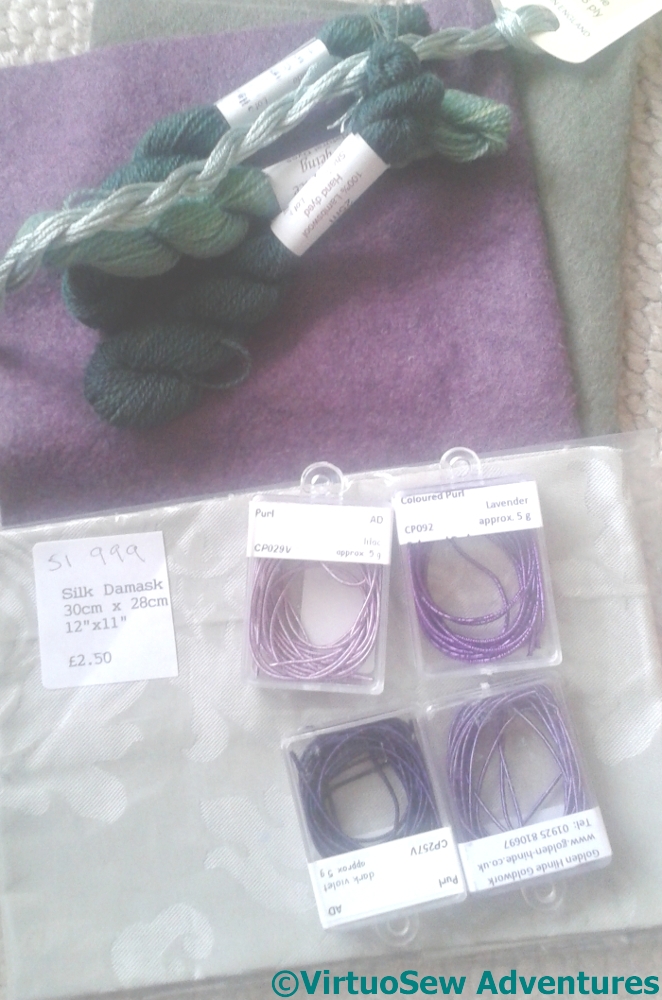
For The Thistle
The Knitting and Stitching Show in Harrogate is always great fun, if totally shattering – imagine what it’s like for the stallholders, who get four days of it! – but since I have no local needlework shop, it’s my one chance to stock up.
I admit that sometimes I don’t get around to all the projects I stock up for as quickly as I might like – I bought the threads for the Hittite Amulet at Harrogate in 2010! – but as we all know, sometimes a project undergoes considerable modification in the period from first concept to finished piece.
When I visited Elmsley Rose in the summer, she gave me some silk wrapped purl – three shades of purple. I’ve decided I want to work a thistle – more or less heraldic in style – so I’ve bought some wool felt, some coloured purl, and some lovely wool thread. Thank you to Lizzy Lansbury and to The Golden Hinde for comment, advice, and encouragement. The chance to talk to people with knowledge and experience is the real advantage of the Knitting and Stitching Show, after all. Even when I had a local embroidery shop, no-one who worked there had ever worked with metal threads, for instance!
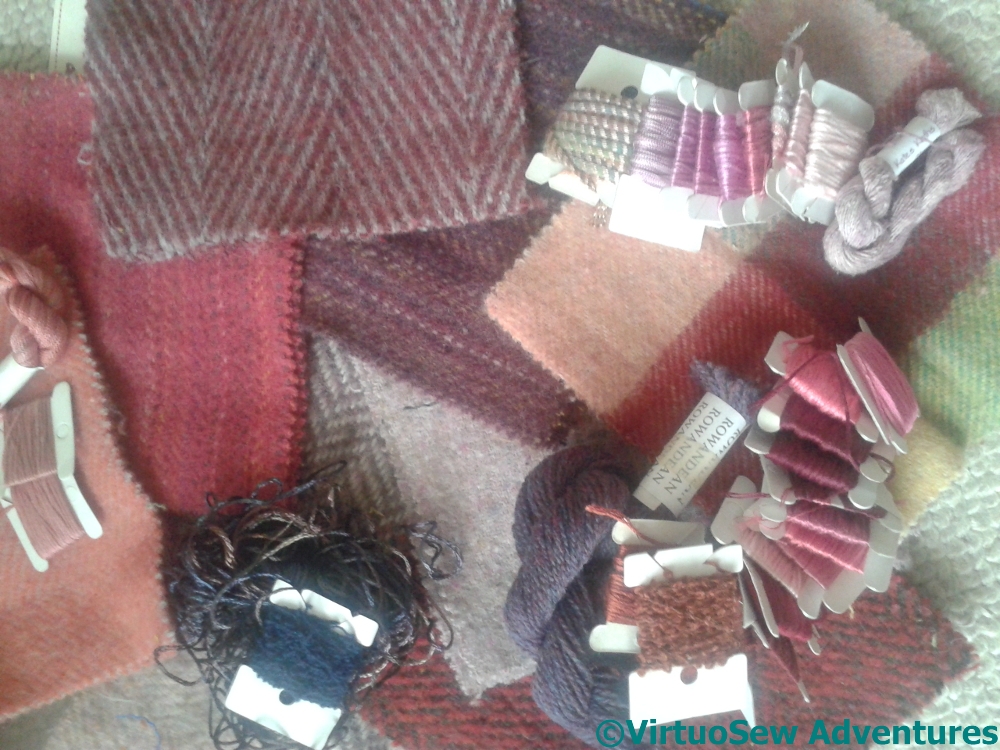
Tweed For Skirt
I usually wear my Autumn Leaves Skirt for the Show – what better time to wear it than among people who will enjoy it as much as I do! – but next year I may have another possibility. I’ve bought some lovely swatches of Donegal tweed to appliqué to a different skirt. The scatters of thread – wool, stranded cotton, and exotics – all come from my (extensive!) stash. My current thought is that the appliqué will be circles of different sizes. I only hope I bought enough tweed to do the job!
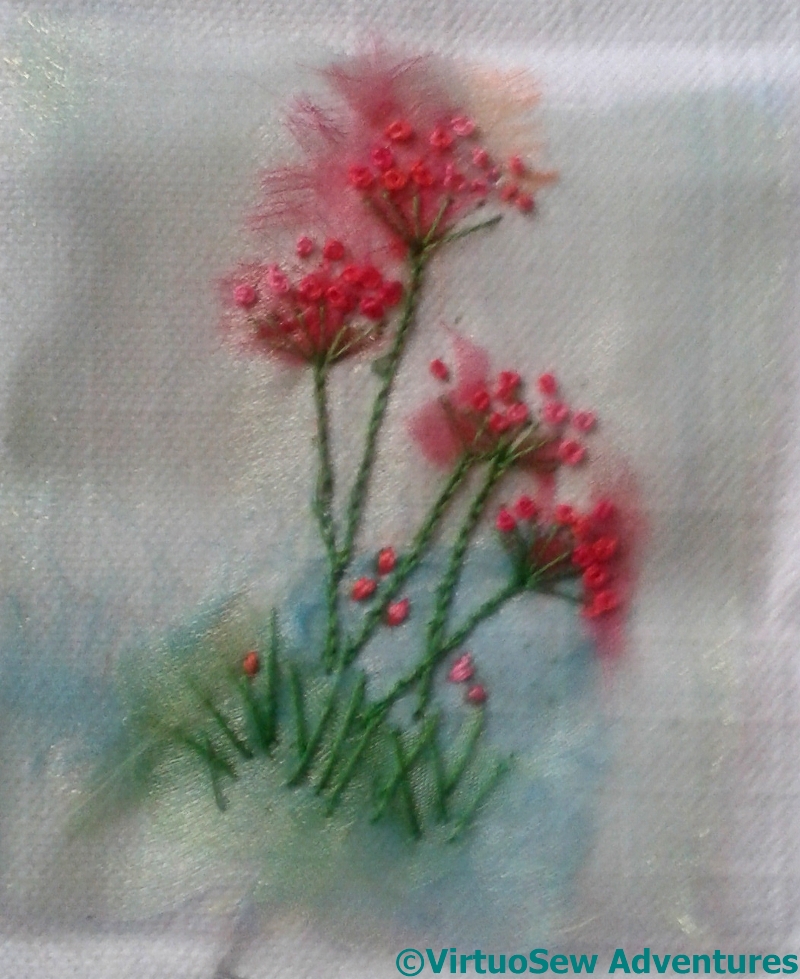
Stitching With Rowandean
And finally… I’ve known Ted and Katrina of Rowandean Embroidery, on and off, for about twenty years, since the days when I was making counted cross stitch kits. I’ve always admired the verve and invention of Katrina’s designs, and I love talking to them. But this is the first time I’ve been able to sit down with Katrina – I joined in on a Make and Take, playing with layers of sheers and a few bits of stranded cotton. It was a lovely break in all the trotting around of the show, to be able to sit down and stitch, instead of simply taking about it.
And on top of all that, I had lunch with Elizabeth of Sew-In-Love, who is the fourth blogger I’ve met in real life this year. We had a lovely time, although, in what seems to be a pattern, I don’t think we spoke very much about embroidery!
I wonder what happened next . . .
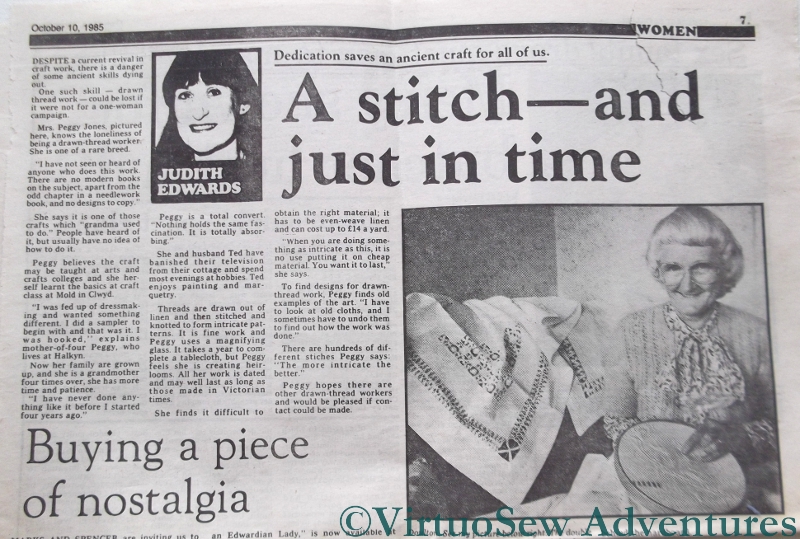
I Wonder What Happened
I’ve been rummaging in the archives of late, in particular in a pile of papers left by my Grandmama. I don’t know which newpaper this was cut out of, but it describes Mrs Peggy Jones’ passion for drawn thread work. I’ve done a little googling, and I’ve not found any reference to either the journalist or Mrs Jones in relation to drawn thread work. She mentions unpicking it to work out the stitches, and taking a year to work a tablecloth – all of which I think we can all relate to!
Grandmama didn’t do any drawn thread work that I’m aware of, so I don’t know why she cut it out, unless it was surprise and delight to find any form of needlework in a newspaper.
I’ve scanned the article so that you should be able to read it – maybe if we all keep asking, we can find out what happened to Mrs Jones and her stitchery?
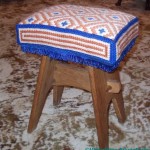
Dressing Cécile
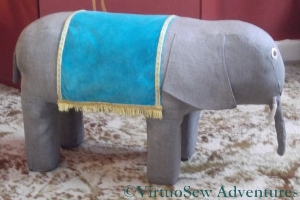
Cécile’s Saddlecloth
Once she was fully reassembled, with a neat patch across her tummy to hide the joins of the sides and ends, I was very keen to put back Cécile’s glorious turquoise velvet saddlecloth. I started sewing it on in the centre of each long edge – roughly where her spine would be – and worked outwards, to make sure that the saddlecloth didn’t end up squiffy. I’ve also not stitched too closely, because I want the fabrics to be able to move a little when I put my feet on the finished footstool and the padding “gives” a little.
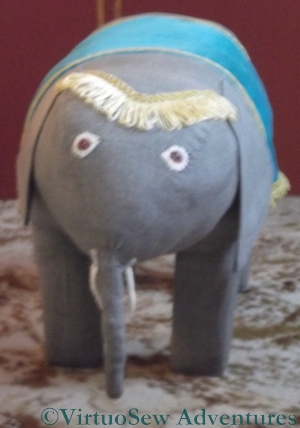
Cécile’s Browband
I should note in passing that while Cécile is unquestionably a darling, she’s been the most preposterously obstreperous pachyderm I’ve ever encountered. Getting her legs re-covered was hair-raising, getting the body attached suitably was a challenge and tidying up the undercarriage so that Cécile stayed in one piece involved the sort of contortions that make me wish I’d been doing yoga all my life!
Grandmama gave Cécile a browband of upholstery fringe – probably left over from one of the many lampshades she made – and that was the only real casualty of her years in the loft. Even a run through the washing machine didn’t revive it, so it was abandoned and replaced with a similar piece left over from a lampshade recovered by either my mother or myself. The tradition of keeping and reusing scraps is very strong in our family!

Cécile Finished!
So here she is, refurbished and back to her former glory. I was very fond of Cécile when I was a child, and I’ve enjoyed bringing her back to life.
Even it she was occasionally obstreperous!