
Progress on the Tulip Slip
Tulip Stitched
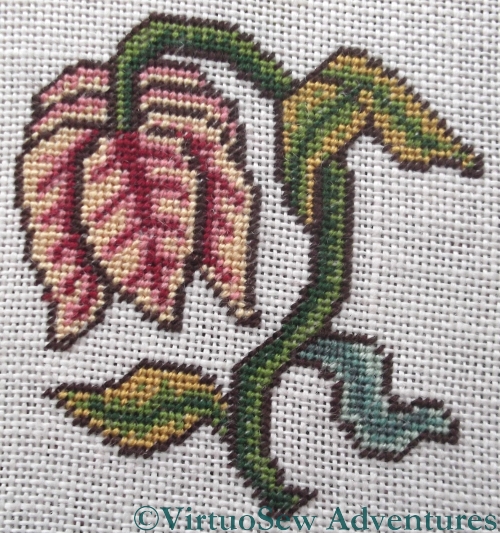
I’ve now finished the tent stitch on the Tulip Slip Needlework Nibble.
I had a minor epiphany about halfway through, when I realised that in this particular case, absolute accuracy in colour placement isn’t really necessary. I’m not trying to create a picture which will look all wrong if every stitch isn’t exactly as charted. Tricia has created a stylised design which we are then going to use to learn the technique of working with tent stitch slips. So in minor details, the Tulip is not exactly as charted, but I doubt anyone will notice!
Tulip Applied
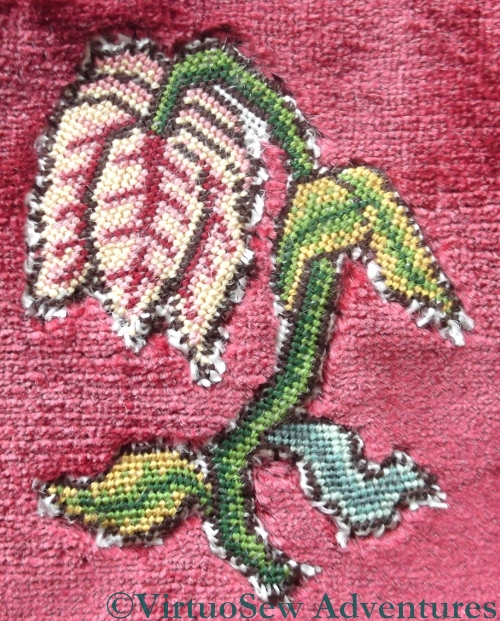
The next stage was to cut out the slip, and attach it to the velvet, turning the edges under as far as possible. I didn’t think this would be easy, and it wasn’t. Since linen for counted work is quite widely-sett (that is, the set up of the warp and weft allows a little air between the threads), it’s also rather prone to fray, and rolling the threads under with a needle turned out to be a slightly hairy experience.
On top of that – we all know that velvet “creeps”, don’t we? I unpicked and re-positioned the slip twice, and ended up pinning it firmly in place, regardless of the risk to my stitchery. I’m pleased to report that there seems to be no lasting damage…
Tulip Edged
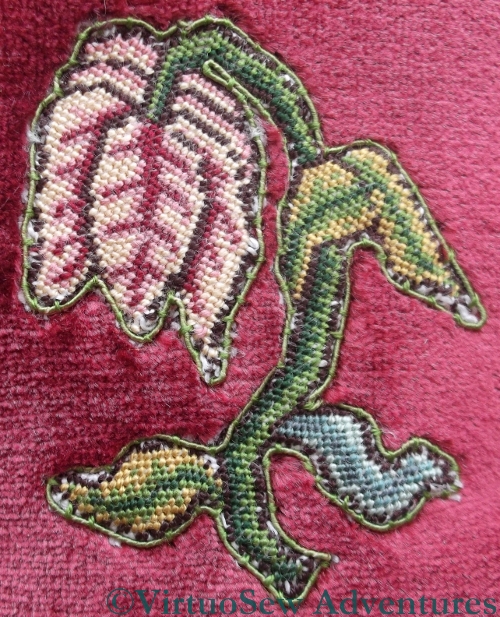
The final stage before assembling the pincushion (that will be another post!) was to edge the slip with silk gimp. The green gimp matched one of the green silk threads, so I used a single strand to couch it down. Except that the various fabrics were sturdy enough to make it quite an effort to stitch through them, this enterprise proceeded as planned. The instructions showed the slip simply outlined as a single piece, rather than having any details of outlining each separate section.
In real life, the slip doesn’t look as ragged around the edges as it does in close up!
I’m sure the 18th stitch from the left on the 9th row down is the wrong shade of pink 😉
Seriously, it looks lovely. I have done something similar to this before (but not on velvet) and recall that turning the edges was very fiddlesome. You have done a great job with it.
It’s looking great! Love the velvety background.
Oh I hate edges that can fray and velvet, though it looks devine, has a mind of it’s own. You have done a beautiful job with it.
Wow! That looks wonderful. I’ve not even started it yet.
Another neat job. I sympathise over the battle with the velvet. I recently squared up to a piece of velvet for a cushion cover. It eventually gave in but not without leaving me with aching fingers.
Oh I don’t envy you trying to tuck those troublesome edges in! Its a beautiful flower — and I’ll be looking forward to seeing the whole pin cushion – hope the design doesn’t call for actually sticking pins into the flower design. *smile*
A masterful job of taming unruly fabrics! It looks terrific.
The colours are gorgeous, Rachel. The green silk gimp (whatever that is!) really makes a difference to the finished look. yes, I agree about the Tulip Slip Epithany: there are some designs that MUST be followed and others that you can afford to make the odd error of placement without it being of any consequence.
Well done! That must have been a real experience trying to roll fraying linen under on wandering velvet! The silk gimp edges the slip beautifully though.